AH-1W Super Cobra
Hi everyone, first of all thank you for all the kind comments and feedback during the work in progress, much appreciated.
This kit is an old out of production kit from Italeri in 1/35. After building the Huey Cobra in the same scale some time back, I was over the moon to find this kit on Ebay. I haven't seen another one for sale since, so the pressure was on not to mess it up!
The heli is based on an AH-1W that served in the first Gulf conflict back in 1990. It is armed with a M197 20mm cannon, rocket pods and TOW missile launchers.
I wanted to add some extra detail to this old kit, so I used a Big Ed full photo etch kit. Well I used the majority of it anyway, some bits just looked ridiculously fiddly and unnecessary! The cannon is after-market and the decals came from the states from a company called Two Bit Bobs. I added some extra wiring and scratch-built the rotor ties from ribbon.
I painted it with Tamiya acrylics and finished the model with Vallejo varnishes. I wanted to give the model a well used combat feel so added some washes from Flory models.
The kit itself was quite good for a kit of it's age. Attatching the two halves of the fusalage together was hard work and required a lot of filling and sanding, and the thick canopy glass was difficult to remove from the sprues. Apart from that though, there was no other issues. The mouldings look quite accurate when compared to reference photographs.
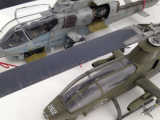
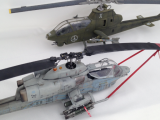
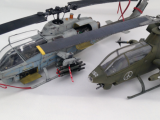
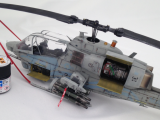
I've added some photo's of it with the Huey Cobra for a comparison, as well as a photo with a Tamiya paint pot for an idea of size. Thanks again to those who followed the work in progress and thank you for looking.
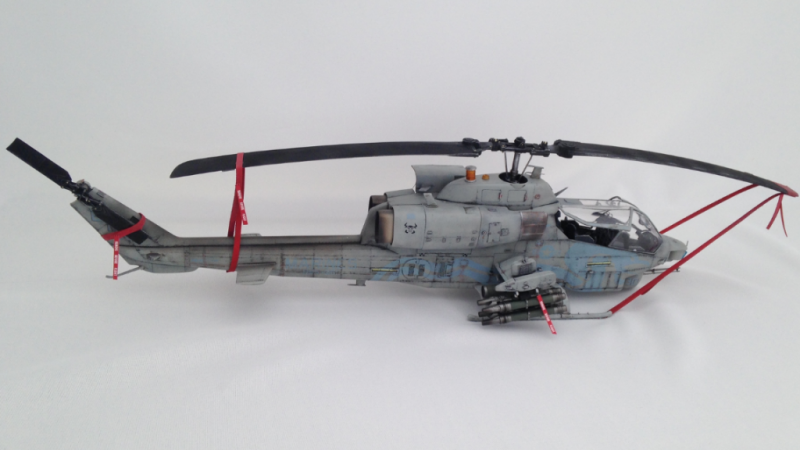
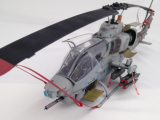
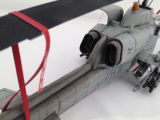
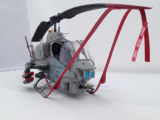
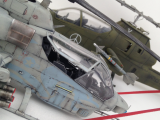

Richard, absolutely marvellous. I touched base a couple of times in WIP and the results don't disappoint. You MUST get it into a scenic display to 'bring it all back home'.
Thanks very much Rob. I was actually thinking about turning one of my shelves into an airbase! Still just a thought though. Maybe a portable display which doubles as a photobooth, the lighting inside the house isn't the best.
Now that is a thing of beauty, one of the best helo i have seen, well executed mate, very impressive.
Danny
That means a lot from you Danny! Thanks very much really appreciate it!
Outstanding work and attention to detail, Richard...a great job and a big thumbs up!
Thanks very much Craig, cheers!
dude, that looks really cool! nice weathering and i especially like the treatment of the exhaust - very nice burnt metal effect!
Cheers Ramon, thank you very much. Just a bit of Alclad on the exhausts, I forgot to mention that in the article.
You forgot th brown oil down the tail from the number one engine. She had a leak within acceptance, I believe it was 6 to 7 drops within 60 seconds. The blue for the cobra and numbering was darker than you used. This cobra was painted on aircraft 30 in I believe it was 1997, with HMLA 167 WARRIORS. Your set up was when we went to 261 Raging Bulls on M.U.E. 1999-2000. I was searching the internet to se if there were any pictures of bird and I found his model. I am the plane captain (mechanic) for this aircraft. Beautiful job friend. I have a few photos and more info for this. As I know info is very hard to find. If you want to know more just ask. The pilot alone is worth a sit down with a few beers. A frickin legend in the cobra huey comunity. Anyways AWSOME job. Oh the FLIR covers on the nose should be red.
1 attached image. Click to enlarge.
Cheers for the info!
The decals did come out a lot lighter than I expected for the artwork and numbers.
Thanks very much though.
The photo was from on board the USS Bataan. 99-2000 (maiden voyage) The pilot was, at the time Major Steven R. Rudder. Who is currently Lt. General, Deputy Commandant for Aviation.
Love the paint and weathering detail - nicely done!
Thanks Greg, much appreciated!
I have followed this one through Richard and it has not disappointed me mate.
Excellent work, the blades tied down makes it easier to display as well.
Well done mate.
Thanks Simon, cheers! Only having the two rotors is great for the display shelf! The Apache takes up a fair bit of space with its four rotors all over the place! Thanks very much mate.
Excellent! Love it. The detail is awesome. A true winner!
Thanks Morne! Really appreciate that mate, cheers.
A Big California WOW! And a Wholly Molly! for good measure.
Richard, as they say in Baseball, you hit this one out of the park.
Superb modeling.
California Steve
Cheers Steve! Glad you like it! Thanks very much!
Richard,
Thi is absolutely gorgeous. Great job.
Cheers Frank, much appreciated!
Incredible build, Richard with a great paint and weathering job ! The detail work is second to none, really awesome. The best Cobra i have seen, the other one is very nice too.
Its also the most creative way, to recycle the ugly € as weight.
Well done my friend, can t wait, that you put your Chinook on the bench.
Thanks Bernd, much appreciated! I worked out that it's probably the cheapest way to do it as it's literally pennies! Even cheaper than blue tac.
I've got no idea when the Chinook will be done, it looks like a big job and I still need to stockpile after market parts from the states. Plus I've got three holidays coming up! It would be realistic to say about Xmas time.
It will maybe take its time, Richard but it will be without doubt a stunning build with an excellent result !
Thanks mate, hopefully but I never get too confident!
This ROCKS Richard. Great build and finish. Really well done.
Thank you very much Gregor, much appreciated.
Sweet. I am working on one of these shortly and yours has come out very nicely indeed.
One question though; how did you go about putting the sag in the rotors? Was it using some form of gently heat?
Thanks very much mate. I dip them into a kettle of hot water, hold them in about five seconds then give them a bit of gentle persuasion. Any bits of thin plastic will distort really quickly though, I would do it well before any detail has been added.
It was pointed out to me though that the rotors on the cobra's don't actually sag... by which time it was a bit too late!
I see, well that's a good bit of info! In which case I might rotate mine around the axis instead then.