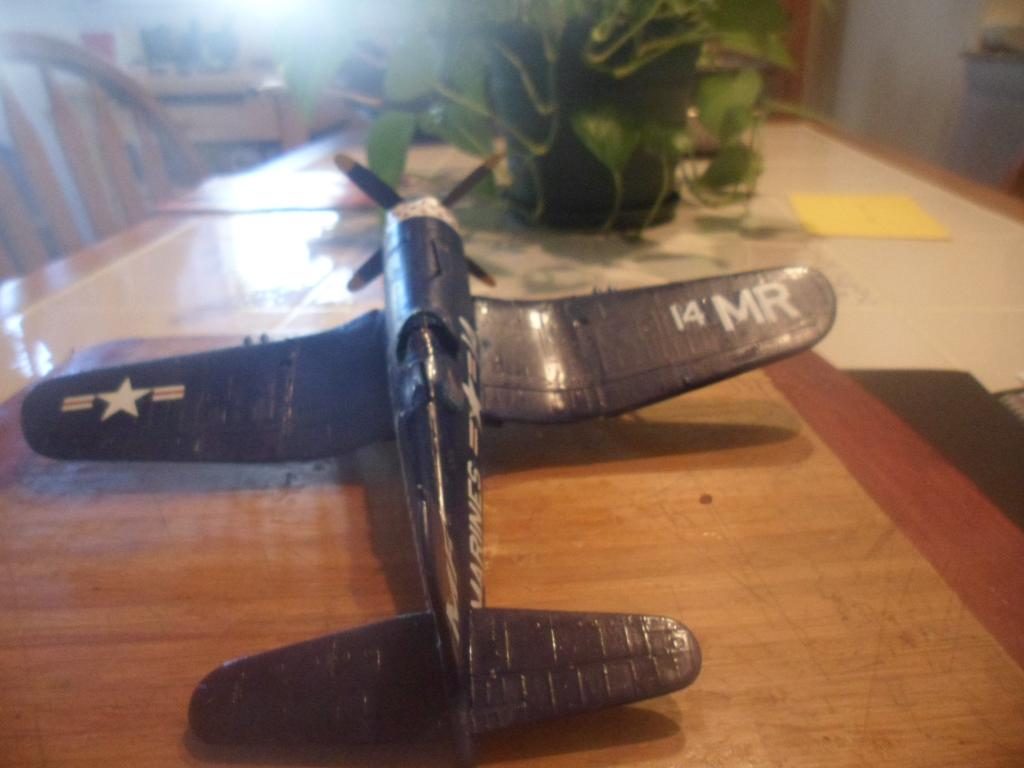
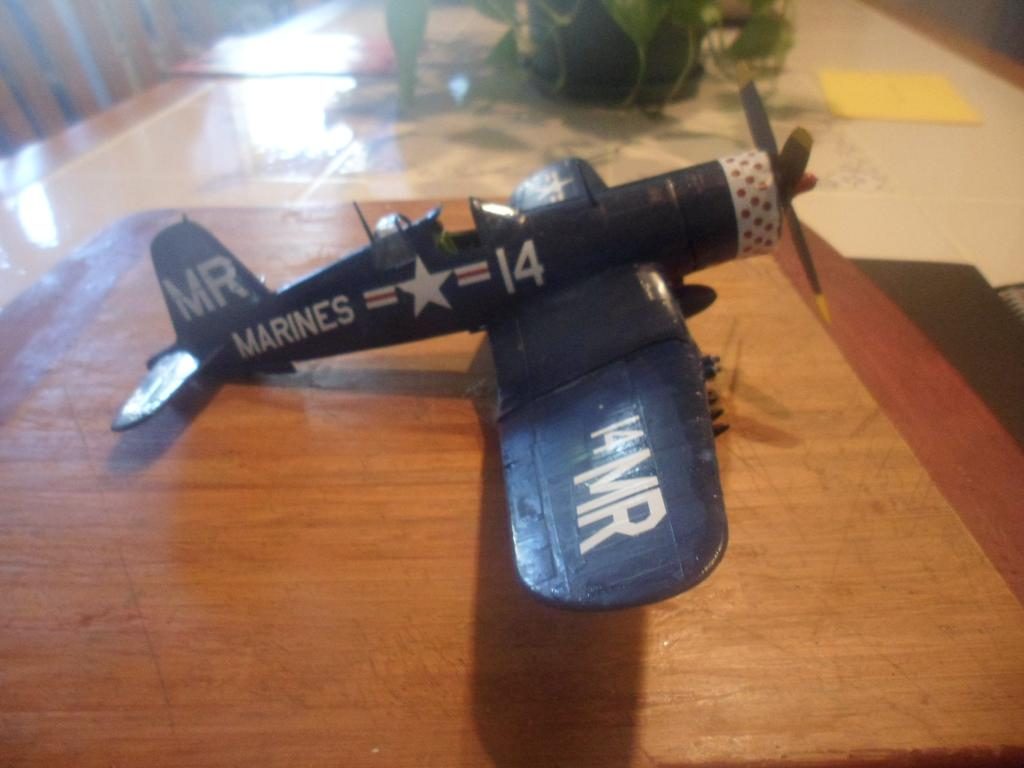
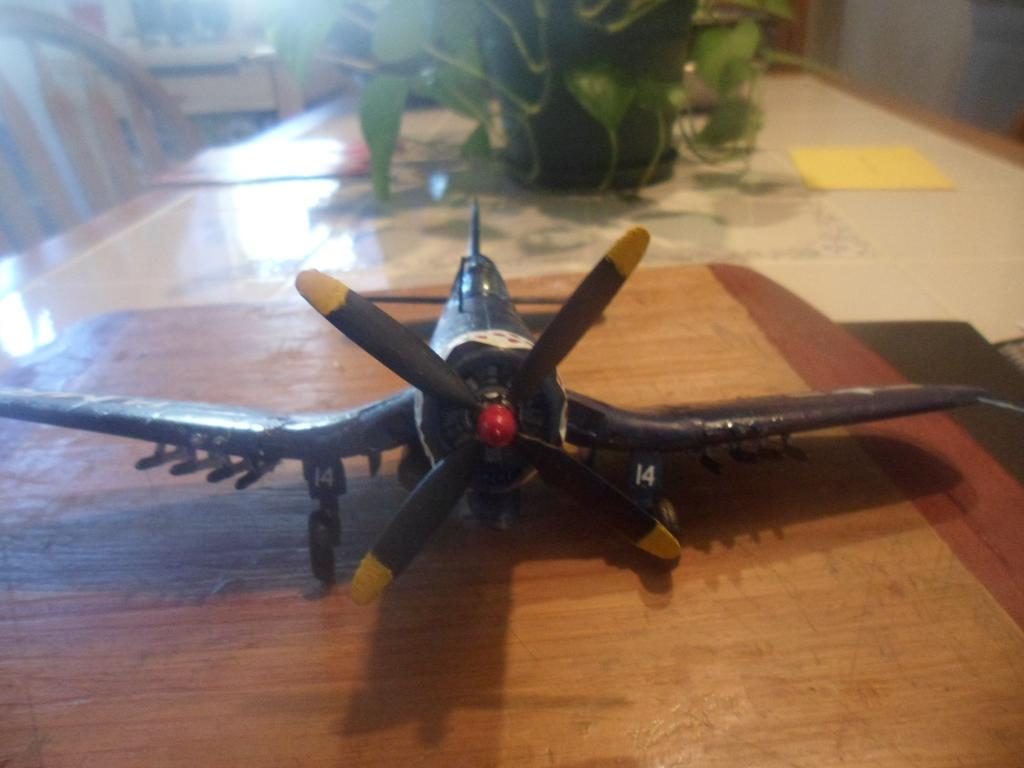
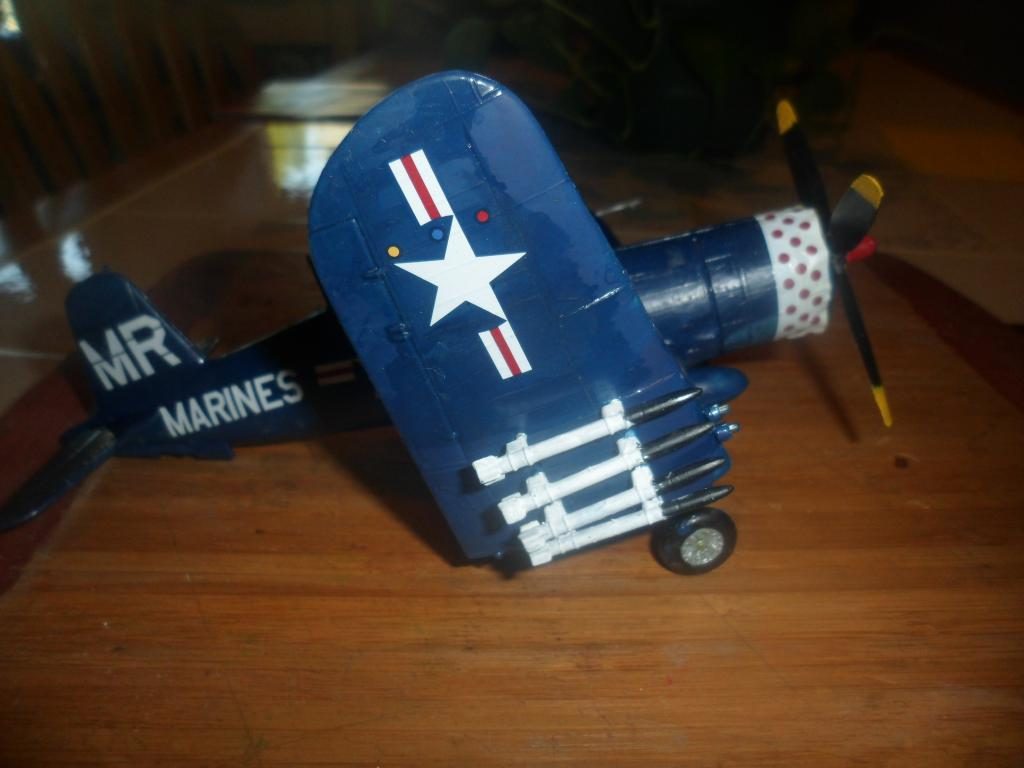
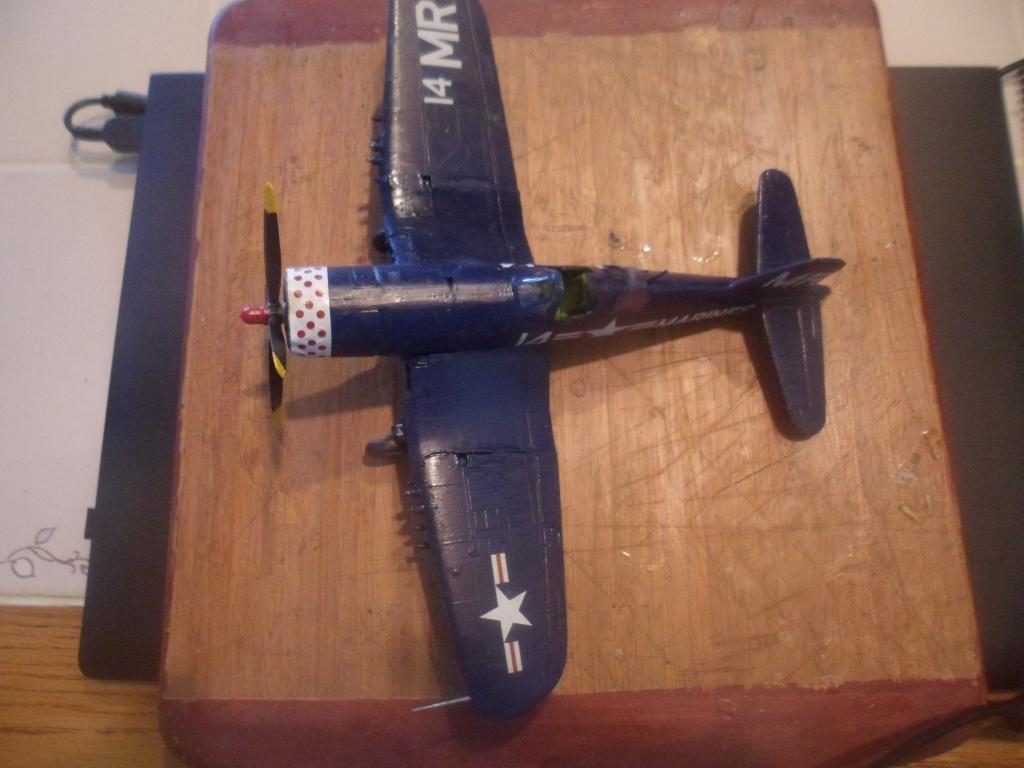
Corsair Korea
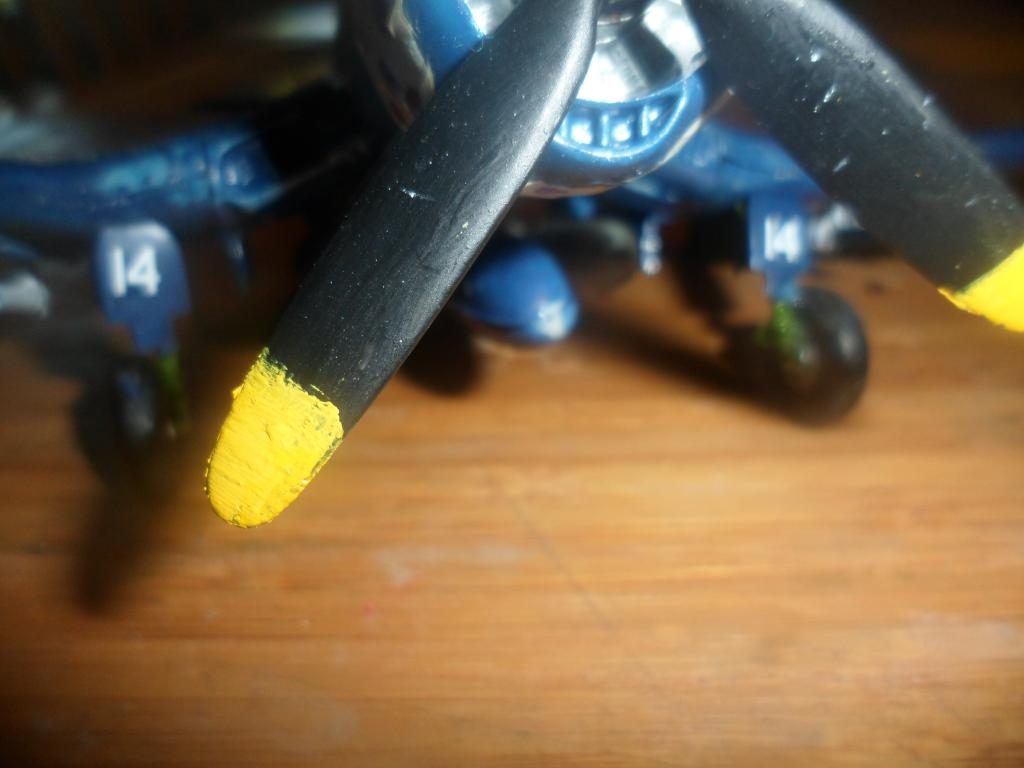
This is another attempt at making a aircraft model I keeep trying hopefully this one turned out correct if not then I quit. I had some problems putting on the nose decal
Tom

This is another attempt at making a aircraft model I keeep trying hopefully this one turned out correct if not then I quit. I had some problems putting on the nose decal
Tom

You must be logged in to post a comment.

Tom, whose Corsair? Compound curves are tough! Nice Polkadots F4U.
Hello Tom...Always good to see a Corsair build on this forum. I'm guessing your model is the classic old 1/48th Monogram F4U-4 kit and I think many modelers have built it a number of times over the years...I know I sure have. Noting that you served in the USMC I think it's neat that you opted to build your model in the Marine markings of VMF-332. Should you decide to build another F4U-4 kit somewhere down the line. I would suggest you try the 1/48th Hasegawa Corsair as it goes together well and does not suffer from some of the issues designed into that older Monogram kit. I encourage you to keep on building as experience is truly the best teacher. I think we all learn from each build and commit to ourselves to do even better next time. Thanks again for sharing that Corsair with us.
Nice build.
Hey, Tom...I think I've done that very kit (at least once - lol). I, however, knew better than to try that cowling decal...they can indeed be a PITA. When I painted the yellow prop tips (I don't like those "tip decals", either), I masked off the area with Tamiya tape and sprayed 'em on (over white first)...makes for a sharper line - I'm usually terrible with a brush.
p.s. To answer your question via 'private message' - yes, denim. 🙂
Tom if that's the old Monogram/Revell kit, and I believe it is, I applaud you for completing it. I gave up on mine and gave it to my grandson to trash. The more you build the better you get ,believe me, as my grandson has a fair share of my earlier attempts. Before I bought an air brush I used a lot of rattle can paint, still do. and If used correctly you can achieve a nice finish. Hang in there Marine, BTW, love the dio's you have posted.
This hobby like any other is a learning curve don't give up,that's an order soldier !, I would redo the prop by smoothing your paint down then do it in black,once dry place a piece of Tamiya 6mm tape on the prop with the edge right against the tip next wrap a small strip around the prop using your first piece as a guide making sure you are tight around the corners so your paint doesn't bleed through then remove your first piece and there you have a perfectly spaced prop tip ready for painting ,like Craig said White first then Yellow ,easy peezy ,N.
I'll join the others to encourage you to keep at it! You'll get better with each project - I know mine have made a dramatic improvement just over the last couple of years, and much of that has come from observing the posts and comments here!
Those compound decals can be difficult, especially on older kits, and sometimes I just ditch 'em. Just pull/sand off and touch up the paint if need be. I'm not a stickler for having to have all of the markings match the unit, or sometimes even the "model" of the model! I'm just after a nice representation of the subject, in a believable final form.
Perhaps a way around the compound curve decal challenge would be to cut the decal up into smaller pieces, and do it along panel lines. In this case, the actual cowling is several pieces, so each bit on the corresponding panel, just like on the real thing. You avoid the decal folding up, or under itself, and the usual cursing and blaspheming, like the old days in the squad bay.
Question for the illuminatti plasticatti: just what is the measurement for them prop yellow tips? Does it vary from service to service, or prop/aircraft type or is there (i hope) some standard? I've been using TLAR since I started out doing this, and I've always wondered. Same for the white-red-white tips of recent memory.
Greg, your last sentence is beautifully put! Much plastic despair could be avoided by considering that. Make a nice poster.
Corsairs seem to be one of the favourites on this site, and you've got lots of encouragement and helpful tips from this posting, which is, I think, what iModeler is all about. Keep at it!
Hi, Thomas - to add to what others have already said, don't give up. You started with an ancient, poor-fitting kit and turned it into a nice model. That's quite an accomplishment. And don't worry about mistakes - as long as you had fun and were abe to relax and enjoy yourself, then it was a success. Try selecting one thing on your Corsair that you aren't satisfied with, and make it your goal to correct that on your next build. Sooner or later, you'll notice that your skills are improving, and you'll se etheresults in youyr models. And don't be shy about asking other modelers on here how they were able to do certain techniqies. You'll find a host of other modelers ready and eager to lend their expertise. It's easy to get discouraged sometimes, especially when you look at the spectacular work that many on this site can produce, but hang in there. It's a hobby, and the goal - as I see it - is to be able to take your mind off the pressures and stress of everyday life and decompress. Just keep building, and eventually you'll get to the skill level you desire.