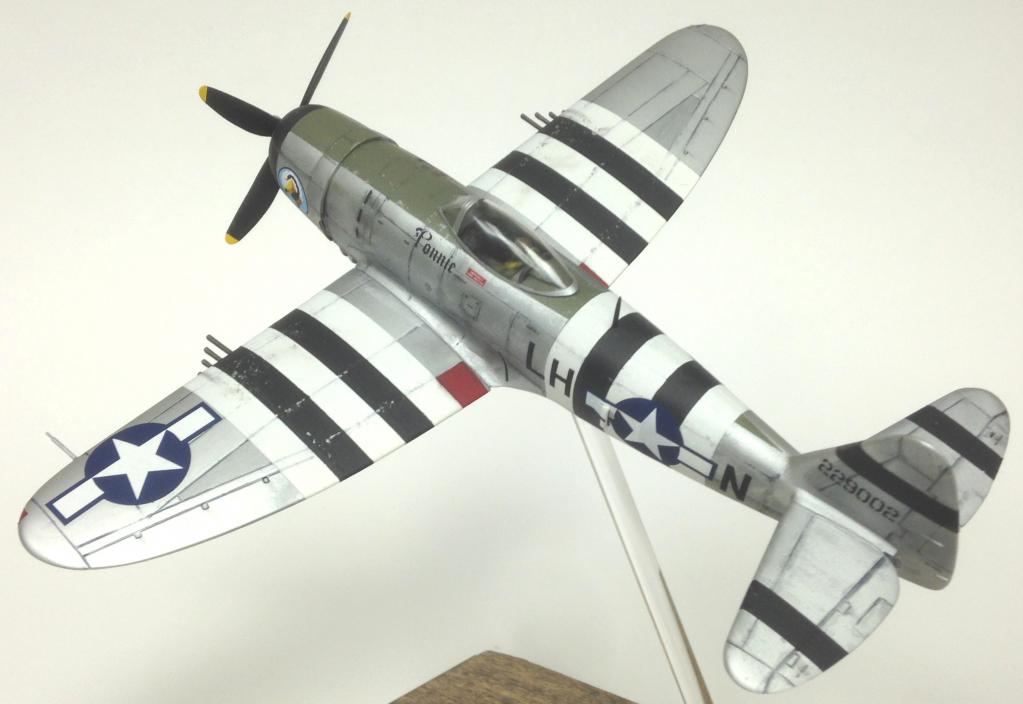
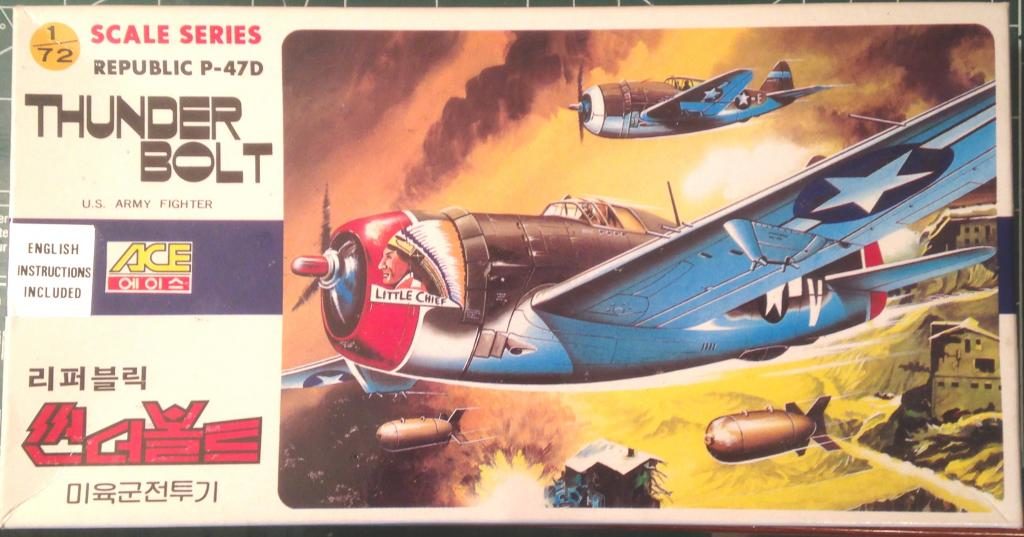
ACE 1/72 P-47D Thunderbolt
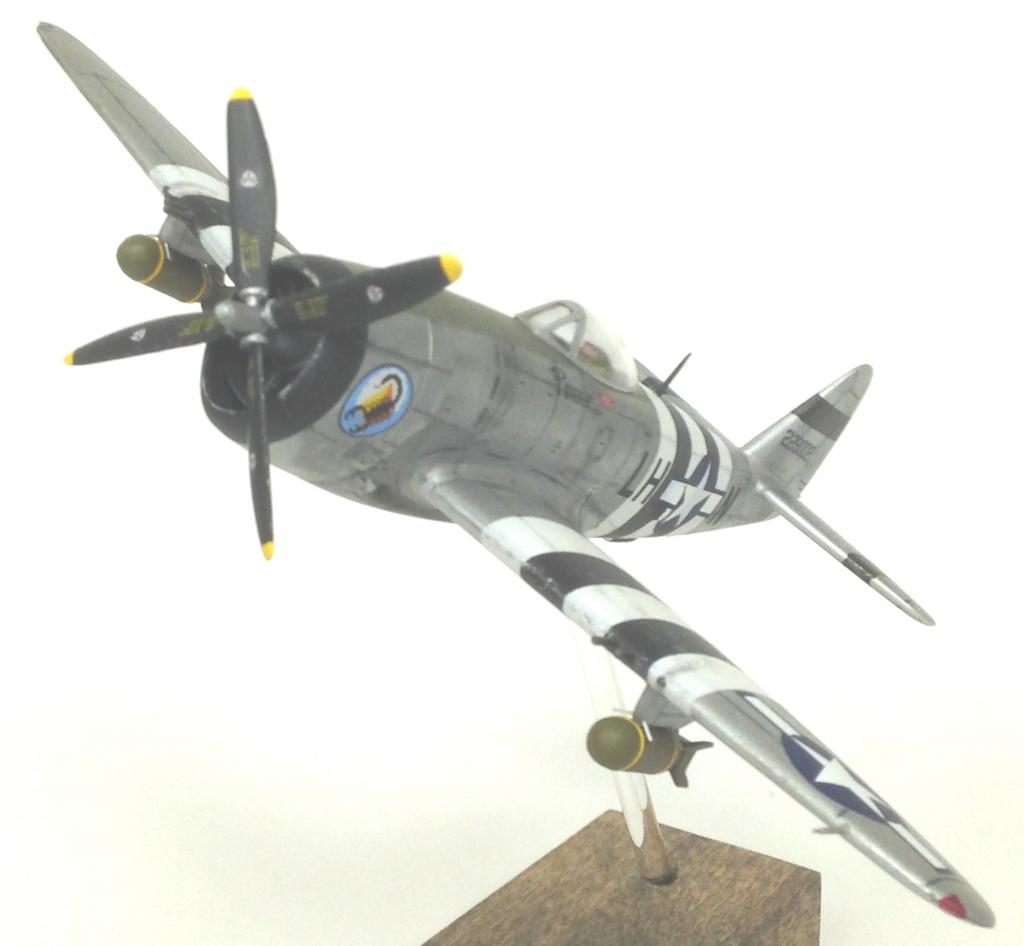
A few months ago, I was thinking I wanted to build my first t-bolt, and knew I had 3 in the stash - a Tamiya D, a Revell razorback, and one other kit I couldn't remember. My eye landed on this one - an old ACE kit, so I took it out of the closet and opened the box. Looking at the box, I thought it would be a razorback, but not so! I almost threw it away when I looked at the canopy and tried to test fit - it sat on top with huge gaps and looked like a toy! With nothing to lose I got out my sanding sticks and attempted to see if I could improve the shape enough to sit properly on the fuselage without destroying it altogether. Needless to say, I got it "good enough," and since I wanted to try some new techniques on it for NMF finish, decided to use it as an experiment for that no matter what.
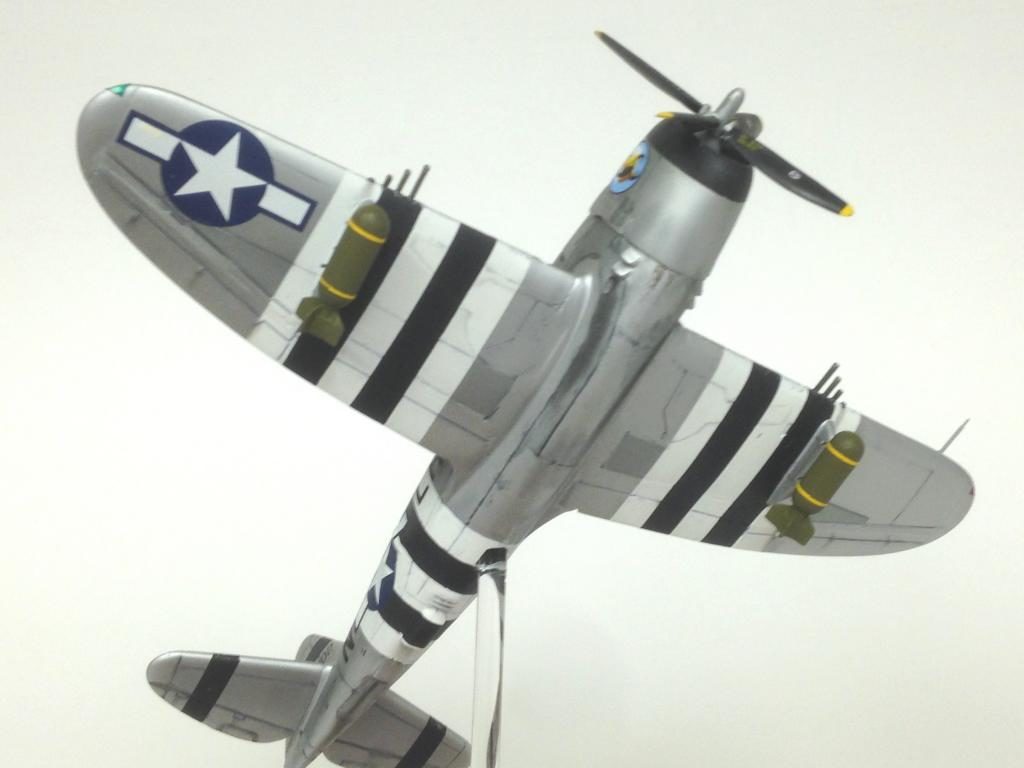
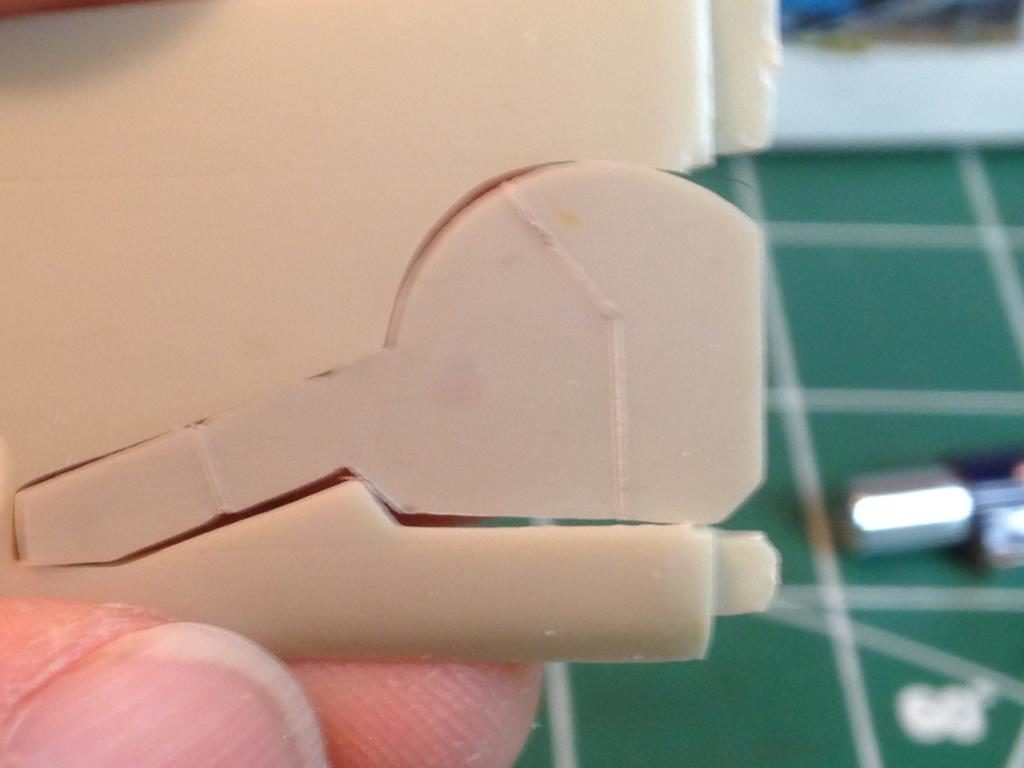
It was an interesting offering. As you can see from the pic of the landing gear door, it took a lot of effort to hide the horrible fit, as it obviously wasn't made to be built wheels up. Lots of putty and styrene to close things up. Same with the way the top and bottom sections of the wing joined. However, it did have recessed panel lines, allowing for a panel wash - not usually the case with old 1/72 kits.
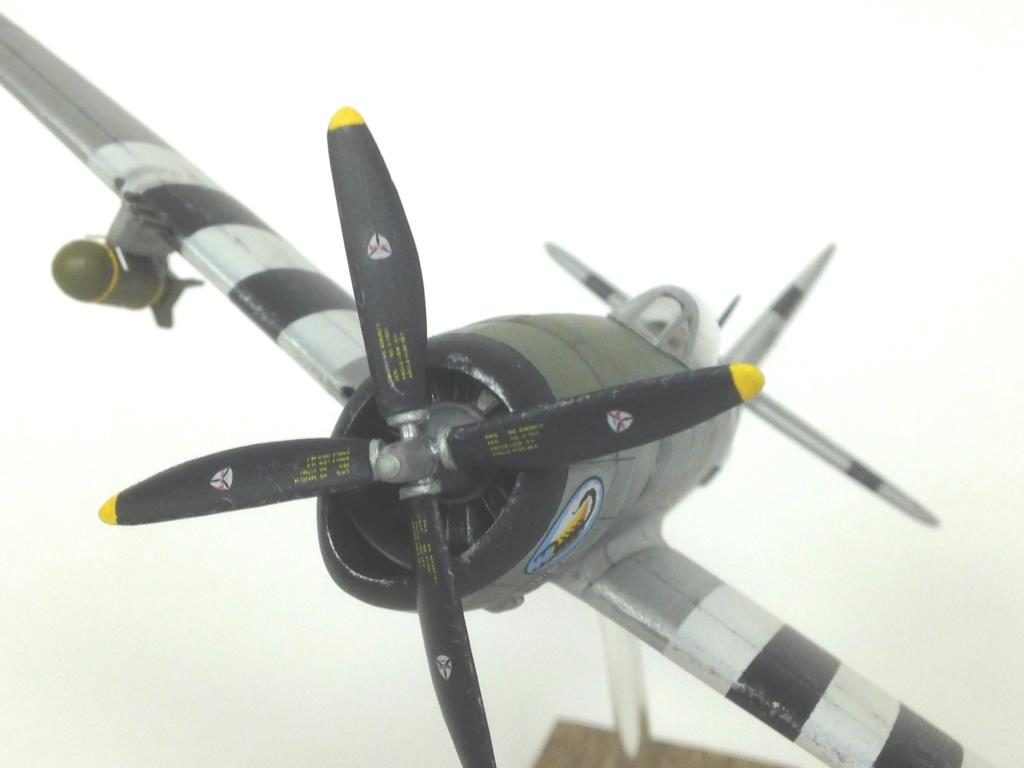
I used MM metalizer in spray cans in two shades to get the base finish. I had intended to try out a new panel wash as I wasn't satisfied with the one I had been using for a couple of years. Whew - big mistake! It was an acrylic game wash, but not water based. I hadn't sealed the metalizer thinking I'd just wipe the excess wash off with damp cloth, but had to use alcohol. Totally took the original wash off, and did some really funky things to the metal finish, which in the end, I decided actually helped disrupt the NMF look. Because of this, I ended up NOT attempting the technique I had read about recently to dirty up the NMF!
Once I cleaned up that mess, I went back to my water based wash and got a good enough result.
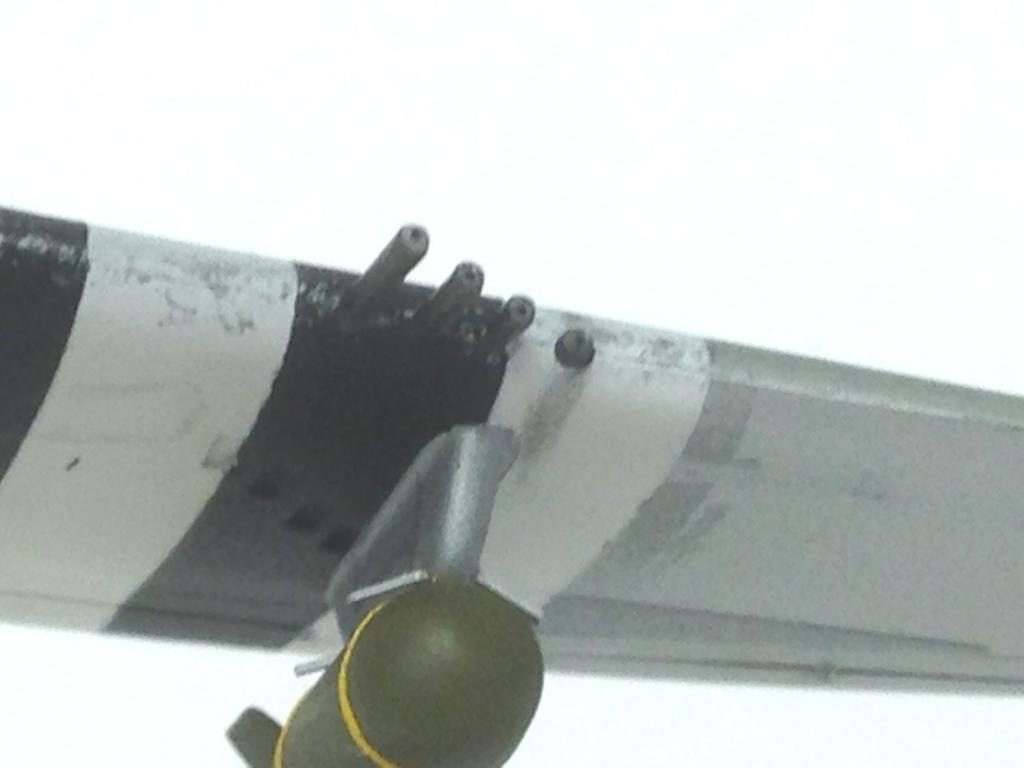
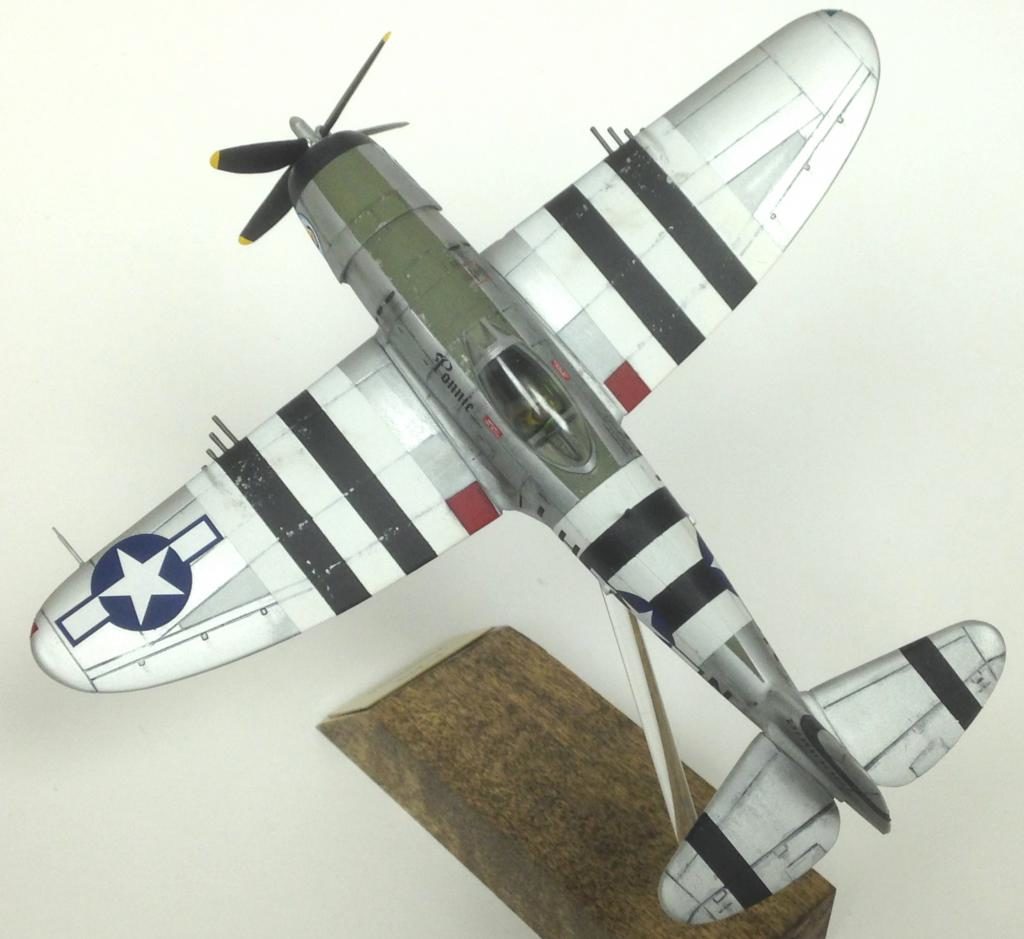
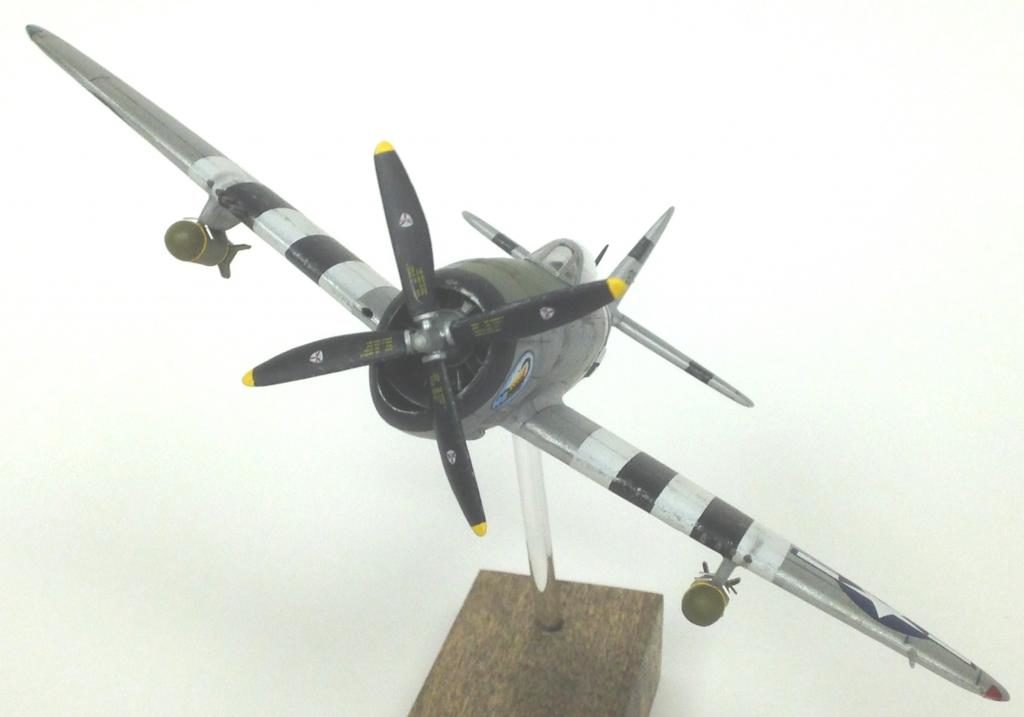
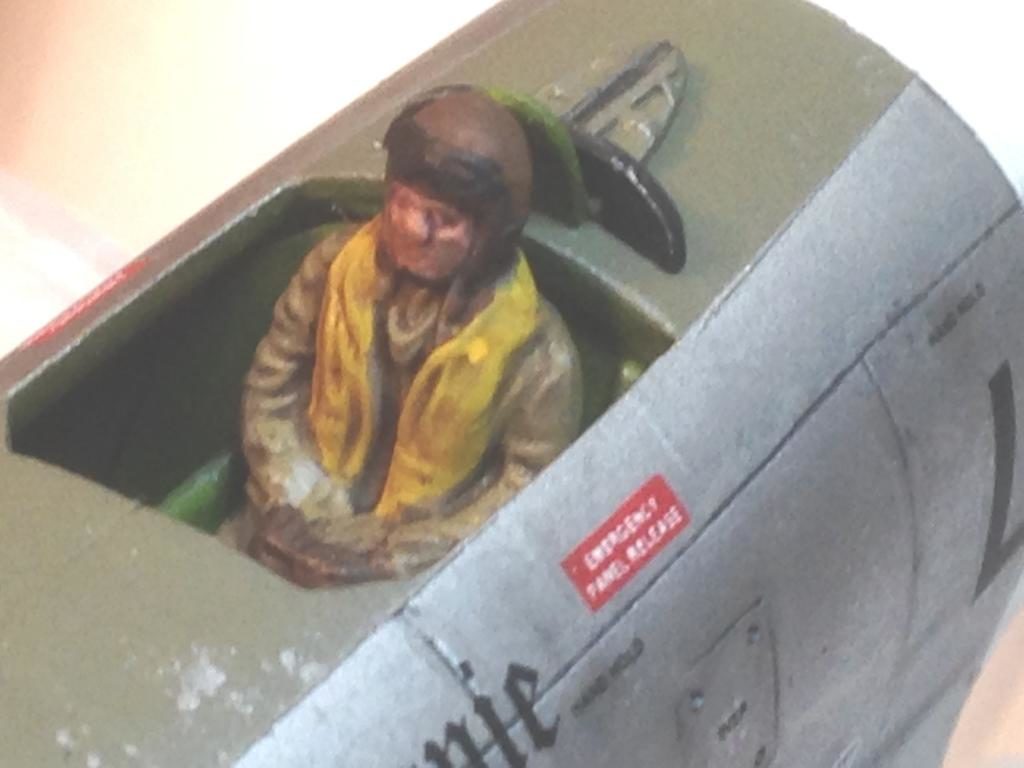
I did try some wiring of the engine to add some detail, but won't do that again for an engine unless it's more exposed, as you can't see any of that effort! The only other detailing I did was to drill out the gun barrels, add some sway braces to the pylons to try to make it more realistic, and scratch built the deck details behind the pilot, which include the pilot armor and what I suppose is the canopy sliding mechanism, from what I could see on reference photos. I also added the pitot tube on the wing from the spares box (wasn't included in the kit) and replaced the ariel (it was broken off in the box, but was really square anyway).
Glare panel was MM faded olive, and I used my own mix of "scale black" for all of the black. Used rattle can to lay down the white, then hand painted the black stripes. Further weathering was done with pastel powders and Tamiya weathering oil pastels, and some Tensocrom for the oil stains on the bottom. Also a few highlights from a sliver pencil on the read deck details, seat and inside canopy rim, etc. Chipping with drybrushed MM aluminum and silver pencil.
Decals were from an old Superscale sheet.
All in all, I'm please to have it in my collection! It turned out well enough that it makes me nervous now about tackling the Tamiya kit and goofing it up!


Looks very good, Greg, good work on the stripes. Paint chipping and weathering also well done. Your right about not wiring the engine. Its so tucked back in there you can't hardly see it any way. I like it !
nice one to add to your growing collection. Grand job.
Nice T-Bolt, Greg...(can't have too many of 'em). I like it.
Great Jug. Looks like you got the canopy to fit like a glove. How do you anchor the model to the pole part of the stand?
drill a hole with a dremel, and then use epoxy. Put some epoxy on the top of the acrylic rod (where it will mate to the inside of the fuselage) and also around the rim of the hole, then insert and hold in place for about 15 min. while it sets.
Canopy still had a small gap at the rear, but I tried to hide it using some Gator Grip glue. If you look real close (live) it is still evident, but hard to see in photos! Best I could do...
Looks quite good after all of the issues you had with this kit Greg. Interesting art work for a P-47D model, obviously something got lost in the translation.
I'm sure you are very pleased with how this one turned out in the end, Greg, she looks good from here, especially the pictures from underneath. I would have thought this has given you confidence in tackling the Tamiya kit.
There's kind of "nothing to lose" when you start with a rather dingy kit, whereas if you mess up on a "shake and bake" kit it is more apparent! 🙂
Nice work - I know that feeling!
You certainly had your work cut out with this one!
Great build Greg, nice weathering as well, great job mate, well done.
Yes nicely done Greg, looks good.
Finally P-47! Sharp D-Day stripes give nice extra boost to this fine weathered Jug. Brave large closeup photos - I like. These old models requires a lot of work and You have handled this one really nicely. Thank you for the story, too.
Well done Greg, battered an old dog into submission.
Nice work Greg the Tamiya will be a breeze after this - nice stripes, scale black looks right, chipping is superb particularly on the anti glare panel
Absolutely Stunning Work, I like this Jug!
Great build and well presented. Building kits like this can be a real challenge but you have turned it into a beauty !
Uff! for a vintage model like this, I would swear it was some modern wonder, you did a great job!