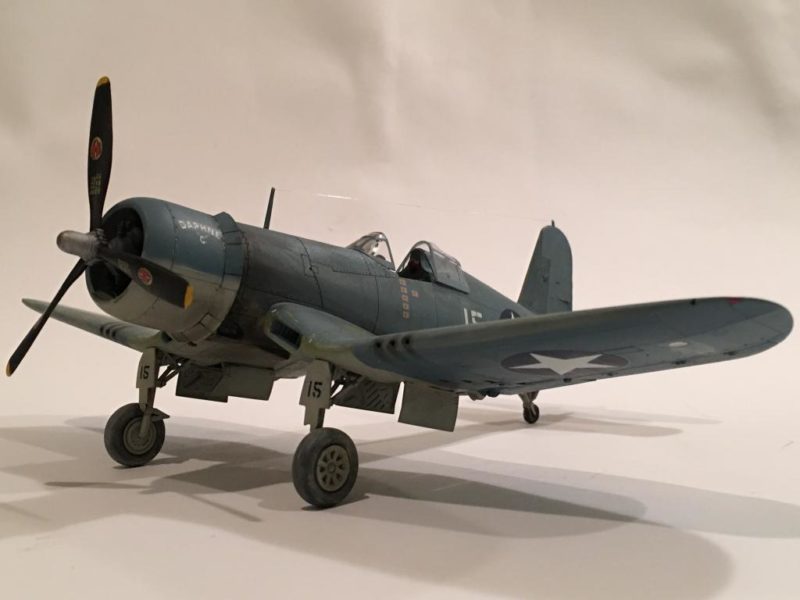
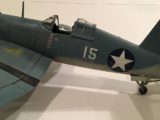
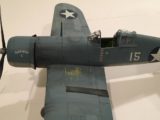
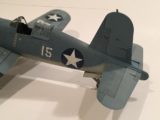
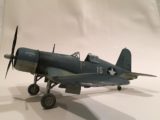
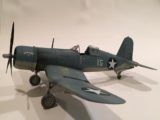
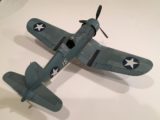
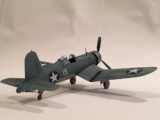
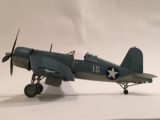
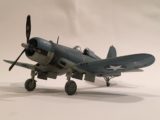
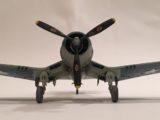
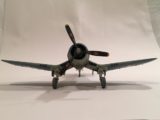
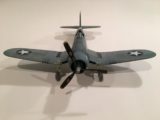
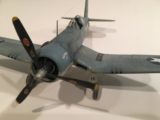
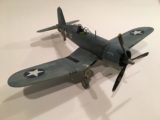
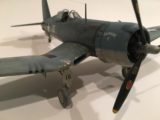
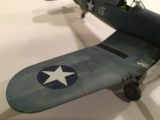
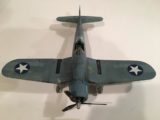
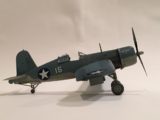
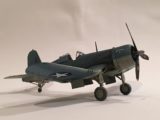
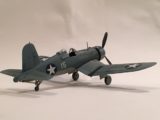
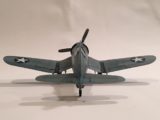
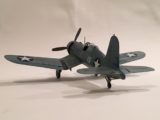
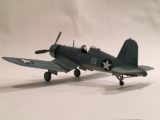
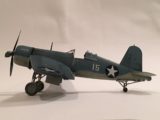
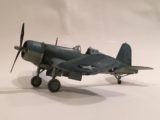
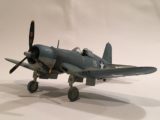
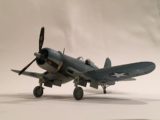
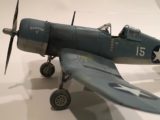
1/48 Tamiya F4U-1 Birdcage Corsair “Daphne C” Bureau number 03829, VMF-213, Captain James Cupp
Tonight's article is about the second F4U from my very first article here on Imodeller. This one is hot off the work bench. It's one of 3 early Corsair builds that I had going on at the same time. Two were by Tamiya and one was from Hobby Boss. (I recently posted an article about the Hobby Boss F4U-1).
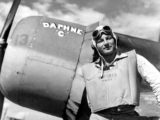
Daphne C is named after the "then" Captain James N. Cupp's wife, Daphne. The plane and pilot were assigned to VMF-213 the "Hell Hawks".
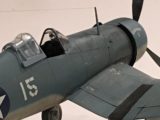
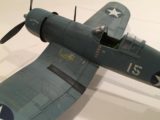
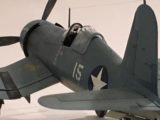
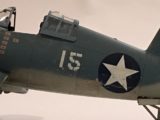
This F4U is modelled after a Vought F4U-1, bureau number 3829, ( side number 15 ), which is the second "Daphne C" that was flown by USMC Ace James Cupp.
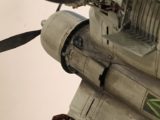
The name on the cowling side panels were taken from his first plane, which was bureau number 02350. Cupp's first plane was a "hand me down" well used F4U that was previously flown by Marine Ace Ken Walsh. That's why if you look close on the second to last photo you can see the remnants of a number #13 that was over painted. (However when Cupp flew Walsh's old plane it was renumbered to #7.) He scored his first victories on July 15th, 1943, and was an "ACE" only 3 days later.
Captain Cupp used this plane #15, to gain his 5th and 6th aerial victories on September 11th, 1943. On this date he shot down what was claimed to be an A6M Zero and a Ki-61 Tony. On the very next day, Sept 12th, he used this plane to strafe the Japanese airfield at Kahili, where he destroyed ten enemy planes on the ground and succeeded in sinking two barges offshore.
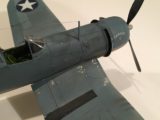
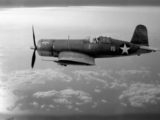
The last picture I included is a rather poor photo of F4U number 15, that presumably shows Cupp flying with the canopy open and wearing an oxygen mask. If you look close, you can see small 100 pound wing mounted bomb racks. I will probably add these to my model soon, when I add the pitot tube, which I simply overlooked.
Capt. Cupp was eventually credited with 13 1/2 (or 13) as his wing men reported, or 12.5 "official" confirmed aerial victories. He was shot down in flames while attempting to shoot down his last victim, which was a Mitsubishi G4M-1 "Betty" on September 20th, 1943.
At 0500 hours (5AM for you civilians), Captain James Cupp went airborne in another F4U bureau number 03803, to intercept a "Washing Machine Charlie" early that morning. The Japanese were sending out single nuisance bombers every hour on the hour in an attempt to keep our troops and pilots from getting any sleep. These bombers would drop one or two bombs, sometimes more, just to keep things "interesting" and keep everyone on their toes. Our troops called these flights "Washing Machine Charlie's".
As Cupp neared 10,000 feet, he could see the silhouette of the bomber. In an effort to escape the defensive fire from the tail mounted cannon, Cupp made a high speed pass (in excess of 300 knots) from underneath the bomber. As he pulled up to shoot into the belly of the plane, the bomb bay doors unexpectedly opened up. Inside the bomb bay of the Betty was a single machine gun that was manned by a very good shot... In a matter of seconds, at least 3 rounds hit the lower cockpit area of Cupp's F4U. This set a small fire ablaze inside the plane. The high speed of the Corsair fanned the flames which by now had grown considerably. The flames were by now burning Cupps legs...
Cupp attempted to bail out but was flying too fast and the slip stream pinned him in the cockpit ! To quote Cupp verbatim, he said "My plane was pushing air through the cockpit at more than 300 knots and the stream over my cockpit was like a steel wall holding me in. I could not get out ! ".
He stood up in the cockpit, unplugged his radio harness, loosened his safety belt and his shoulder straps were undone.
To again quote Cupp as it's written in my book called "The Blue Devils, US Navy and Marine Corps Aces of World War II ", by Barrett Tillman and Mark Styling. This is an AWESOME book if you're into Naval Aviation History on the F4U, F6F, and F4F.
Here goes:
"The air whipping into the cockpit had fanned the spark into a blow torch that swept up my legs as I sat back in the seat. The throttle arms next to my left leg were still on full, but I could not make that hand move to pull it back. I brought my left arm over to my right and hooked on to it. I watched as my right arm was dragged through the flames and deposited on the throttle which I slammed closed. I tried to get out again, but again was forced back. One thought mounted until it excluded all others - "How simple it would be to just ride her in." At that time the pain stopped in my legs and the mental turmoil subsided. Complete satisfaction and contentment engulfed me. It seems that the feeling was with me for hours to account for the vivid picture it left me, but I know it was actually over in a split second. I had been straining for freedom with my legs braced against the rudder bars, and then the tail was coming at me. I raised my legs to clear the elevators and then I was on my own. The plane was gone."
Captain Cupp's Squadron mates successfully shot down the "Washing Machine Charlie" that shot down James Cupp. He survived bailing out of his burning Corsair, and stayed in the afloat in the water until around 1430 hours, (2:30 PM for you civilians). He was badly burned on his arms, face, hands and legs. He stayed in the hospital for 18 months. During his hospital stay he underwent 14 surgeries for his injuries. When he was finally returned to flying status, he was assigned as a Naval Aviator Instructor.
Before he could return to the Pacific, the War was over.
Captain Cupp remained in the US Marine Corps after the War. In fact he went on to serve in the Korean War where he received his 4th Distinguished Flying Cross as a Ground Control Officer directing close air support strikes during the Battle of the Chosin Reservoir. (where my Dad also served, but dad was in the Army on the East side of the reservoir initially, re joining with the Marines after a few days... ) Who knows ? Cupp could possibly have saved my Dad's life during the "attack in a different direction".
He eventually rose to the rank of Colonel and retired in 1968. He was earned the Navy Cross among other awards. The Navy Cross is the USMC and Navy's second highest award following the Congressional Medal of Honor. It is awarded for valor in combat.
Colonel Cupp died in Manassas Virginia on June 2nd, 2004.
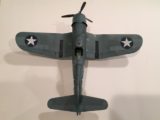
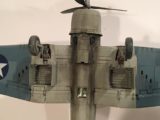
This model is a typical Tamiya build. Very trouble free. The one thing that is very inaccurate is the step cut out that is present in the starboard side inboard flap. It should not be present on these early Corsairs and didn't show up until the dash -1D model. However they could have been retro fitted to an earlier plane during a field repair or rebuild. I replaced the kit flaps with resin ones from Ultra Cast resin. They not only get rid of the hole in the step, they also allow you to model the plane with the flaps in the raised position.
I wanted to try something a little different with this plane. Vought used a yellow zinc chromate along with the "Salmon" color under the final paint. As the top color wore off the yellow would be present next. Once the yellow wore away, you would have bare metal. So I adapted my tape peeling method a little... Here's how.
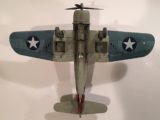
I initially sprayed some Model Master "metallizer" on portions the airframe where I wanted to chip the paint. Then I sprayed Tamiya "Yellow Green" XF-4 next over the "metallizer". The Corsair was then sprayed in the final colors of Navy Blue Gray up top, and Flat Gull Gray FS 36440 on the undersides.
Once everything dried, I simply sanded away the top colors until I exposed the colors I wanted to be seen in the various locations. I did this in high traffic areas that were commonly walked on by the ground crew as they serviced the plane. These planes were in a very harsh environment. The landing strips were often made of crushed coral which is very sharp. The coral wore away paint on the leading edges and rear faces of the propellers (and various other places too). I tried to duplicate this with my model.
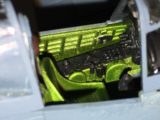
In the spring of 1943, Vought was authorized to mix aluminum paste in their green zinc chromate and this is referred to as "Candy Apply Green". It was for use in the cockpit areas. I tried to duplicate this as well since it's not a common color and thought it would look cool. It would have been possibly used during the construction of this bureau number. There are no records as to which planes were finished in this "Candy Apple" shade that have been found so far...
I replicated Candy Apply Green by first spraying the cockpit in a metallizer aluminum plate color. Then I mixed Tamiya clear blue and clear yellow to get a green color that was also clear. I sprayed my mixture on top of the aluminum. There is a picture showing the results near the end of the pictures.
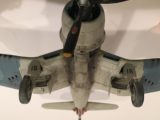
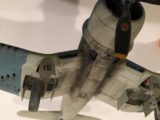
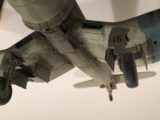
I sprayed the inside of the cowling in light gray which is what Vought did during this time frame. I sprayed my home brew mix of Salmon color inside the rear fuselage tail wheel area of the fuselage and on the inside portion of the tail wheel doors. I sprayed Salmon ahead of the main wing spar in the area where the main landing gear attach to the wing. You can see this if you look close at the pictures of the under sides.
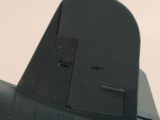
I used chalks, artists oils and washes to weather this Corsair. These planes got filthy really quick. I also tried out something new to me, called "Vallejo Splash Mud". If you look close at the photos of the rear sides of the fuselage, and underneath views, you will see this color. I used "Light Brown" slash mud since it's more accurately a light tan.
I hope you enjoyed the article and photos of my most recent model. The white glue hadn't dried just yet on the windscreen front canopy and it's pushed up a little, which can be seen if you look close... I'll have to fix that too.
I hope you all had a wonderful Christmas Holiday.
Happy New Year to all !
As usual, comments are welcomed and encouraged.
Stay tuned for the last of the 3 Corsair builds from my first Imodeler posting... It's getting closer to completion and is a Tamiya dash -1A "raised cabin" version...

Another outstanding Birdcage, Louis (but...it IS a Tamiya after all) 🙂
I have a few of those in the stable myself - none as good as this one, though. And your series of photographs (and narrative) is excellent as well. I'd like to see a pic of your display area(s) sometime.
Thanks Craig. I have 3 big display cases. Maybe on day you can come on over and check them out. I could post a few photos if you wanted me to. I really like the Tamiya F4U's. They simply build into a great model. Take care buddy. Hope you had a great Christmas. Happy New year too...
You can always post the pics in the appropriate 'Groups' forum - that way we can ALL enjoy your work. Jus' sayin'... 🙂
I may just do that... The newest case is one I just finished rebuilding. I added a bunch of glass shelves, some mirrors and replaced all of the wood in it. It only has 2 models in it so far.
The other 3 display cases I have are jam packed full...
I've had to rebuild all of my display cases since they were damaged when I got them. They look pretty nice now compared to how they DID look...
Hello Louis...Wow, another fine Corsair build. Like your previous post, this Corsair is very nicely done with good weathering and a fine choice of markings. I look forward to seeing the third one in the group of three you were working on.
Thanks Jim. I'm going to be using the reference photos you sent me. I'll send you a PM. Thanks again for your help.
NICE!
Thanks Rob. I may end up revisiting this article once I fix the windshield and add the pitot tube. The lighting isn't the greatest in our kitchen for photography. I have another "improvised" idea that I'm going to try out to see if it will get the pictures a little brighter.
Another one to the stable. Yes I agree with Craig, hope to see that display. Well done, to be honest I have never seen that Candy Apple Green shade in the Corsair cockpit, probably a variation of it on other builds. When I get to building a Corsair of that particular variant I will sure to check what the interior color will be. It ain't always interior or zinc chromate Green. Thanks for another great model. Fly Navy
I have made an educated guess that this Candy Apple Green color "could" have been possible sometime after the approximate bureau number of 02625.
The way I came up with this was this: I took the approximate date of the Bureau of Aeronautics approval that allowed Vought to add the aluminum paste to interior green (allowing a little time for the process to be implemented). Then I compared that to the time frame when these particular machines would have been built. I picked a bureau number that would have corresponded between the two. So based on this approach anything built after the approximate number 02625 "may" have had this color, but most birdcage and dash -1A's / early dash 1D's "probably" had "Dull Dark Green". I hope this will help you with picking the color.
I'll go ahead and post up a few pictures of the display cases soon. Thanks for the compliments buddy. I'm glad you enjoyed the show...
Dana Bell (Hyperscale 12/31/16)
Cockpits were now to be Interior Green, with a notable exception - Vought found a stock of aluminized zinc chromate (that Candy Apple Green we all loved as kids) and received permission to use that as a final cockpit coat until all stocks were exhausted. There's no written indication of when that cockpit primer was replaced by Interior Green, but photos suggest it was before the end of 1943. Note that many components (seats, rudder pedals, etc) were delivered by subcontractors in DDG, so you could still find evidence of that older cockpit well into -1D production. Also, black cockpit sides were added to the FG-1D in March 1945, after Vought had switched to the F4U-4 and Brewster was Tango.
Thanks for sharing this additional information. I used both of Dana Bell's latest F4U Corsair books as a reference for the colors. He packed a lot of great information and photos in volumes 1 and 2. The story line in his books was that Vought received permission from the Bureau of Aeronautics to add the remaining stocks of aluminum powder mixed in with the interior green to show that the aluminum surfaces had received a second top coat. Thanks again.
I love the finish on this, Louis, can you tell me about the chalks, artists oils and washes? I know such things have been posted on U Tube, but, it's not available in China...
thanks a lot
After I am satisfied with the results of the colors on the finish, and the decals have been applied, I spray the model in Testors Dullcoat to give it a lusterless finish.
Then I have a few artists chalks (black and brown) that I simply scrape some material from "very carefully" with a razor blade. I take the dust scrapings and apply them with a clean dry paint brush. Since the paint is not shiny, it gives the chalk dust something to bite into and it stains the surface, especially if the base color is lighter.
Then I use the Tamiya "weathering master" pastel kits. They make 3 of them. They are item number 87079 for the A kit which includes the colors sand, light sand and mud. Item number 87080 for the B set, which includes snow, soot, and rust. The C set is item number 87085 and includes orange rust, gun metal and silver. Each one contains three different colors inside them sort of like in a ladies make up case. The sets include a brush and sponge pad that are used to apply the pastel colors. these can be wiped away using a dampened paper if you're not happy with the results. The dark colors also tend to stain lighter colors.
The final thing is Windsor and Newton artists oils in the colors of "Lamp Black", Payne's Grey, and Burnt Umber. I take a small mixing container and add a little color to the container using a paint brush. I add some turpentine to the colors until it will flow like water. Then its a matter of brushing it on the surface and wiping away the excess before it dries. If it's really wet and is an oil color near the engine I use my air brush to blow the mixture back like prop wash or natural airflow would do. This gives the appearance of leaking motor oil.
Practice these steps on an old model until you get the hang of it. Then it comes quite easy to you.
I hope these things will help you in your builds.
The most recent addition to this was using the Vallejo splash mud on the sides of my Corsair. Once it dries this stuff looks real ! They offer a variety of weathering colors and environmental shades. I use these now on some of my Armor builds as well. Take care.
Thanks for taking the time to answer my query, Louis, I really appreciate it, and, I'm sure some other people will as well.
I hope this information has been helpful. Thanks again my friend.
A solid build and article of a Marine classic and war hero. I might add that the article is positive and up beat in its approach to modeling. Is informative with the painting techniques and weathering and is just well thought out. A good template for those wanting to do the same. Furthermore, the photos of the completed model are complimented by photos of the real aircraft and Captain Cupp. Any time I read a article more than once I know my time is not being wasted. Two thumbs up Louis.
That's probably the best compliment I have ever received. Thanks Stephen ! I try to keep my stories interesting and informative at the same time. When I can I also like to include photos of the real person and plane as well.
Thanks again friend...
Great model and story
Thanks George. I'm happy that you have enjoyed the model and the story line of the man and his machine.
As usual a great build, and helpful tips.
Thanks Bob. I'm going to take new photos of the plane with better lighting and hopefully they will come out better than the original ones that I posted here. Glad you liked my build. I have a soft spot for the Corsair.
Once I get finished with the new pictures I will edit this article and include the new photos.
nice
Thanks PK ! Have a Happy New Year.
Another fine and interesting post, Louis. Well done !
Have a great and peaceful 2017 ! Including some good modelling for sure 🙂
Thanks Bernd. I really hope that our New Year is a great one indeed. Happiness, healthy and peacefulness is an excellent wish. Thanks again friend for the compliments. I'm looking forward to seeing some new photos and articles from you too. Take care buddy.
Outstanding work on your F4U, Louis! The finish and weathering are superb. Well done, sir!
Thanks Drew. I'm glad you enjoyed the article and photos. Thanks for the compliments my friend.
WoW! Great work & outstanding photos. The real photos at the end are a real bonus! I wish I could do as well.
Thanks Jeff. I try to include photos of the real man and machine if it's at all possible. like you I think they help to bring the model into perspective. I have a few more on the work bench that need to be finished.
I have one in particular that I think you will enjoy... It's a model of one of my old M-60A1's that I was a crew member in. I used some old pictures that I took "back in the day" for the desert camo scheme. Please stay tuned and I will get it done and posted.
Thanks again.
"White 6 out. "