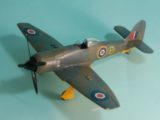
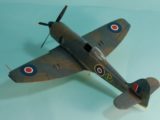
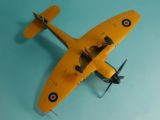
1/48 AMG Hawker Sea Fury prototype
Following up on the previous article, the Sea Hawk's predecessor:
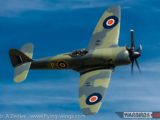
Had the Hawker Sea Fury arrived on the scene one year earlier than it did, its place in history would not be assured by its technical excellence but rather by the outstanding combat record it would undoubtedly have achieved with the British Pacific Fleet in the final struggles of 1945. As it is, the Sea Fury - designed for air superiority - is known for shooting down only one opponent, a MiG -15, shot down on August 2, 1952, by Lt. Peter "Hoagy" Carmichael of 802 Squadron. Given that in the intervening five years between its appearance in squadron strength and that day in 1952, technological development had rendered the Sea Fury obsolete, its victory over the MiG-15 is even more remarkable. Regardless, the Sea Fury is the penultimate result of Sir Sidney Camm's philosophy of piston-engine fighter design and one of the most beautiful piston-engined fighters ever flown.
The Sea Fury began life in 1942 with a request by the Air Ministry that Hawker Aircraft design a long -range fighter for operations in the Far East. While a radial -engine version of the Tempest was under development at the time, it was thought that the relatively high wing -loading of the Tempest would be ill -suited for combat with the lightly -loaded Japanese fighters, and thus the Sea Fury started out as the "Tempest Light Fighter (Centaurus).”
In January 1943, the Air Ministry issued Specification F.2/42 around the "Tempest Light Fighter" proposal. This was followed by Specification F.2/43, issued in May 1943, which required a high rate of climb of not less than 4,500 ft/min from ground level to 20,000 feet, good maneuverability and a maximum speed of at least 450 mph at 22,000 feet. The armament was set at four 20mm Hispano V cannon with a total capacity of 600 rounds, plus two bombs each up to 1,000 pounds. In April 1943, Hawker also received Specification N.7/43 from the Admiralty for a navalized version of the aircraft. Sidney Camm proposed the consolidation of both service's requirements under Specification F.2/43, with the alterations required for naval operations issued on a supplemental basis. In early 1944, the aircraft finally received its name: the Royal Air Force's version becoming known as the Fury and the Fleet Air Arm's version as the Sea Fury.
The Tempest wing was used, with the center section removed and the wings brought together on the centerline. The fuselage itself was broadly similar in form to that of the Tempest, but was a fully monocoque structure, while the cockpit level was higher, which gave the pilot better all round visibility.
Six prototypes were ordered. Two were to be powered by Rolls- Royce Griffon engines, two with Centaurus XXIIs, one with a Centaurus XII and one as a test structure. Hawker used the internal designations P.1019 and P.1020 respectively for the Griffon and Centaurus versions, while P.1018 was also used for a Fury prototype which was to use a Napier Sabre IV.
The first Fury prototype was NX798 with a Centaurus XII with rigid engine mounts, powering a Rotol four-blade propeller; it flew on 1 September 1944. Tests revealed a need for an increase in vertical fin and rudder size to counter the swing on take-off.
The second was LA610, which had a Griffon 85 and Rotol six-blade contra-rotating propeller; it first flew on 27 November 1944 . Next was the first Sea Fury, SR661. NX802, which first flew on 25 July 1945 was the last Fury prototype and was powered by a Centaurus XV. Eventually, LA610 was fitted with a Napier Sabre VII, which developed 3,400–4,000 hp. It reached a sped of 485 mph, making it the fastest piston- engined Hawker aircraft ever.
While the RAF's order for the Fury was cancelled before any production examples were built due to the coming end of the war, development of the type continued as the Sea Fury, which was seen as superior to any other British carrier-based fighter and a suitable replacement for U.S. Lend-Lease aircraft that would be returned after the war.
The first Sea Fury prototype, SR661,flew at Langley, Berkshire, on 21 February 1945, powered by a Centaurus XII engine. This prototype had a "stinger"-type tailhook for arrested carrier landings, but lacked folding wings for storage. It also had the more rigid engine mounts of the earlier prototypes and a 4-bladed propeller. SR666, the second prototype, flew on 12 October 1945, powered by a Centaurus XV that turned a new, five-bladed Rotol propeller and did feature folding wings. Specification N.7/43 was modified to N.22/43, now representing an order for 200 aircraft.
Flight testing of the two prototypes revealed that the early Centaurus engine suffered frequent crankshaft failure due to a poorly designed lubrication system, which led to incidents of the engine seizing while in mid-flight. The problem was resolved when Bristol's improved Centaurus 18 engine replaced the earlier engine variant. Additionally, the rigid engine mounts created vibration difficulty until they were replaced with dynafocal-base mounts which completely eliminated the vibration at lower speeds which had hampered the airplane's ability to land aboard ship. SR661 soon received a 5-bladed Rotol prop, since tests with SR666 had shown adequate power for landing and takeoff could be achieved at lower revs with the 5-bladed prop, which eliminated the tendency to swing when power was applied due to torque.
The first production model, the Sea Fury F Mk X, flew in September 1946. With the completion of flight testing at Boscombe Down in 1946, shipboard trials began aboard HMS Victorious. Carrier testing revealed directional stability issues related to rudder effectiveness during landing, which was resolved by the adoption of a tail wheel lock that also improved wheel retraction. Hawker re-designed the rudder assembly to increase rudder effectiveness, and improved the undercarriage with greater flexibility, all of which greatly improved the Sea fury's deck landing characteristics. Arrestor hook trials initially revealed the Sea Fury to be prone to missing the wires, which was rapidly resolved by adoption of a longer, stiffer arrester hook.
The Sea Fury entered production in March 1947. Fifty Mk X Sea Furies were produced. These were identical to the SR666 prototype except for the Centaurus 18 engine and use of a 4-bladed propeller. Twenty of the 50 were used in the intensive trials program. Following the successful completion of weapons trials at the A&AEE Boscombe Down, the Sea Fury was cleared for operational use on 31 July 1947.
Hawker Aircraft continued to develop and refine the Sea Fury, resulting in the more capable Sea Fury Mk 11, which became the Sea Fury FB 11 in recognition of its primary role as a fighter-bomber. Among several improvements, most notable was the hydraulically powered wing folding mechanism which eased flight deck operations and the adoption of rockets for the fighter-bomber role.
This Sea Fury by Arsenal Model Group (AMG) is the third injection-molded Sea Fury kit to be released, after the Hobbycraft kit released some 30 years ago and the Trumpeter kit released in 2008. Unlike the previous kits, this kit is limited-run in nature. AMG has released essentially the same kit as the F.Mk.10, and F.B.11, with different decals.
The kit has the most accurate outline of any Sea Fury other than the Falcon Vacuform released back in 1985. Surface detail is very good and includes rivet detail that is as petite as that found in the Eduard Spitfire and Bf-109 kits. No underwing ordnance is provided other than drop tanks, which are the correct size and shape (unlike the Trumpeter kit). The kit includes both the early 4-blade and later 5-blade Rotol props, and the spinner is finally both the right size and correct shape.
The cockpit is obviously copied from the Hobbycraft kit, which at least means that it has the correct dimensions. Instrument panel and side panel detail is provided for with photo-etch parts, which also include the seat padding and seat belts. Given that Sea Fury cockpits are black, the lack of extensive detail is not so apparent. The cockpit canopy is the right shape, but is relatively thick with resultant distortion. As with the Trumpeter kit, the Falcon vacuform canopy designed for the Hobbycraft kit fits without problem. If you have the Cooper Details resin cockpit later re-released by Meteor, this should fit without much modification.
Decals include markings for four F.Mk.10 Sea Furies, with Type C roundels in the right wartime colors, and an extensive sheet of very small stencil detail.
AMG has also released the kit as the two-seat trainer in both T.20 FAA version and T.61 export version. I'll be reviewing it later.
This is a limited-run kit, which requires that you clean up the parts and test-fit extensively before committing to gluing parts into position. If you do this carefully, the model goes together well without an extensive use of putty.
I built both kits simultaneously, and thus was able to use the lessons learned from mistakes made on the first to provide a better construction method on the second.
The main point in the assembly is not to assemble the wing as a separate sub-assembly. You want to attach the upper wings to the fuselage individually, to get the proper alignment of the wing-fuselage joint. The lower wing can then be attached and get the proper alignment of the forward and aft wing-fuselage joins. There is a mold flaw in the upper left wing just at the area of the line that defines the wingfold. You can bend this up from inside to get a proper flat surface there without problem.
The very nice resin wheel well needs to be Dremeled down on top until you can see light through the paper-thin resin roof, in order to insure it will fit inside the wing assembly correctly.
I found that the best way to assemble the fuselage was to attach the pieces immediately aft of the exhaust on either side first, carefully test fitting them and modifying them to fit correctly. I then attached the very nice resin exhaust stacks (which have open ends) in position - these should stick out about 1/32 inch from inside the cowling. I then attached the tail wheel well, and glued the engine face to the forward end of the cowling. The instructions say to attach this to the cowling ring, but if you do it this way you will get a better fit of the cowling ring to the cowling.
I discovered from the first kit that it is better to assemble the fuselage before trying to fit the cockpit assembly, since that needs some modification to fit correctly. Before glueing the fuselage together, it's a good idea to thin down the cockpit opening to open it wider. I also found I needed to make a new rear bulkhead for the cockpit from Evergreen sheet to get one that fits inside correctly. The side panels need to be sanded down to fit inside. Additionally, the area behind the cockpit is open, which is incorrect. I was able to use the fairly-thick part that is supposed to go in there, bend it to increase the curvature, and then fill around it with Mr. Surfacer 500 after installation in order to get that area to match the surrounding fuselage. Be careful sanding this out because you can lose the very petite surface detail, which will have to be rescribed with an Xacto blade and a pounce wheel otherwise.
The proper position for the assembled cockpit is with the side wall panels glued into position just below the molded-in attachment area. The plastic backing for the instrument panel should be modified for shape to conform with the photoetch panel, and glued into position inside the fuselage before further assembly of the cockpit into the fuselage.
The separate ailerons and rudder should be sanded down on the mating surfaces before assembly to get them thin enough to match the wing and rear fuselage when they are attached. The left horizontal stabilizer has its assembly tab in the wrong position; cutting it off and butt-joining the part to the fuselage is an easy solution.
Once all this assembly was done, it was merely a matter of using Mr. Surfacer along the fuselage centerline, the join of the cowling ring to the cowling, and the fore and aft fuselage-wing joins on the lower surfaces. I rescribed detail lose sanding down the seams and fixed the lost rivet detail with a pounce wheel.
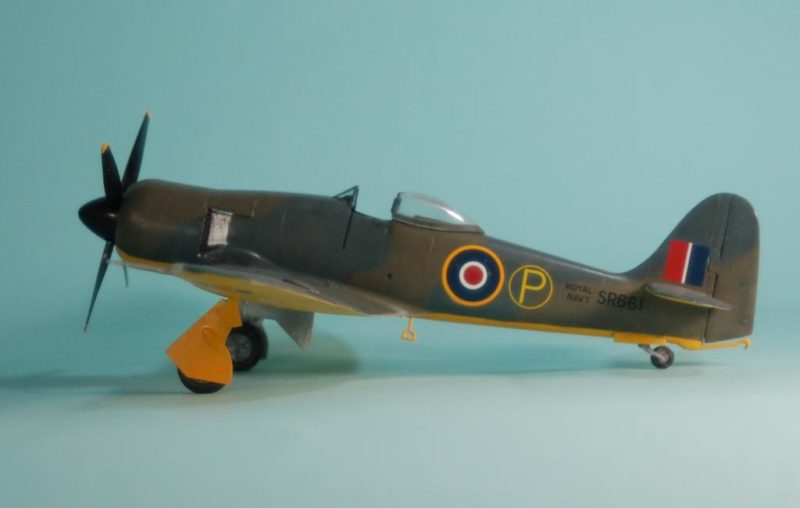
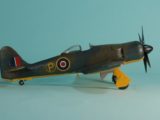
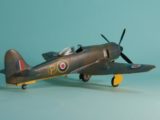
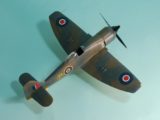
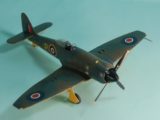
I had decided to build this as a model of SR661, the first Sea Fury prototype, so I assembled the 4-bladed prop.
I painted the model as the prototype, with the lower surfaces painted Trainer Yellow, and the upper surfaces painted in an “A-Scheme” disruptive pattern of Extra-Dark Sea Grey and Dark Slate Grey, using Xtracrylix paints.
I sourced the markings for the prototype from several Xtradecal and Aeromaster decal sheets in the dungeon, using photos of the prototype for a guide.
I gave the model an overall coat of MicroCoat Flat, then attached the landing gear and prop, and unmasking the cockpit canopy and attaching the navigation lights. I needed to scrape out the interior of the thick canopy to thin it down so it could be positioned open. The vacuform Falcon/Squadron canopy would solve this problem easily.
This is the most accurate Sea Fury kit currently available in 1/48 scale, and when completed its surface detail creates a model that can sit next to any uberkit. It is not a kit for a beginner, and requires a lot of work by an experienced modeler to get things right. Hopefully I have provided a map past the minefields with this review. I rather suspect that this kit will suffer when the Airfix Sea Fury is released this summer, which should be much more user-friendly with assembly and will also provide all the underwing ordnance ever carried by a Sea Fury.
Nice finished product on an apparently not-so-nice or "user-friendly" kit. Good work.
Bravo, Tom! Perseverence and skill!
Beautiful work ! You can see it's ancestry with the Tempest and Typhoon ...
What a great review of a great plane. I like your excellent instructions & hints.
The Sea Fury is easily recognized of its' heritage to the Tempest & Typhoon.
I live a few miles down the road from where they hanger "Sawbones" a Sea Fury that regularly attends Reno. There not a small plane, this one has a 3350 for an engine and has a Sky Raider prop. The plane reminds me of that scene "On the Water Front" where Brando say's " I could have been a contender." The plane looks lethal sitting on the ground. Neat article and build as always TC.
Another great build! I haven't used the prototype scheme on anything yet, but it definitely makes it a standout! I've got the new MB.5 kit, so guess I'll get to apply it to that.
What kit is that of the MB.5?
like nice build
Great article Tom & a first class built as well. The prototype scheme looks really good too & I especially like the XDSG & dark slate on the topsides !
Thanks for the history Tom. Love the looks of this aircraft in those colors