1:48 scale Eduard F6F-5 Hellcat
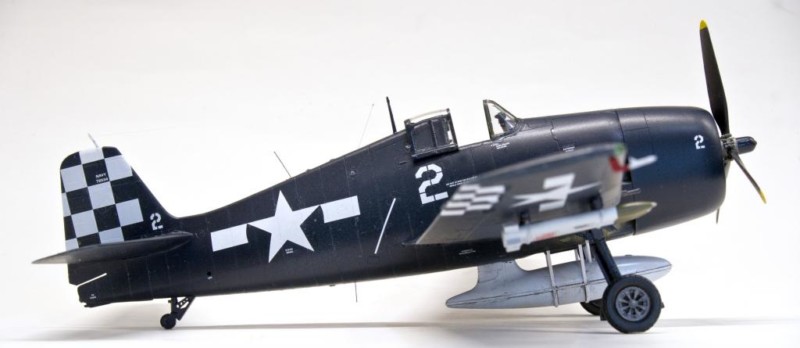
Here's my latest effort, Eduard's 1:48 scale F6F-5 Hellcat 'Weekend Edition' (which, ironically, took me six months to complete.) The Eduard series of 1:48 scale Hellcats were hailed as the best in scale when they were released in 2008. They are great kits, but after building one, I'm not convinced it's the best - but more on that later.
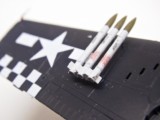
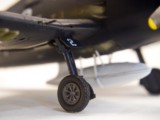
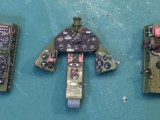
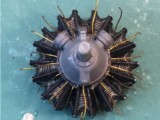
The kit features excellent surface detail and good-to-average parts fit. The wings and horizontal stabilizers are basically butt-joined to the fuselage, leading to some gaps along the left wing root, which I filled with Mr Surfacer 500. The kit has separate flaps and control surfaces, but has no provision to display them in any position but neutral. This just complicates the build, and creates extra seams that have to be filled and sanded. The Weekend Edition doesn't have the photo-etched and resin parts that come in the standard kits, so I bought a photo-etched cockpit set from Eduard, and a replacement seat and wheels from Ultracast. The kit wheels are way too thin. Unlike Hasegawa Hellcats, The Eduard kits come with two canopies, one designed to fit open, and another for a closed canopy - something all kit makers should do. The engine is good, but needs a wiring harness, which I added from thin wire. The kit prop is really poor, with soft or missing details, and blades that are too wide at the base. I replaced it with the excellent prop from an Arii Hellcat. The drop tank in the Weekend Edition is poor as well, with no representation of the prominent vertical or horizontal seam, and without the bracing straps provided in the standard kit. The fit of the forward tank brace piece was really bad, needing filling and sanding. I used thin strip styrene to replicate bracing straps and the horizontal seam seen on the early version of the tank. I added a small round photo-etched piece from the spare parts box to represent the fuel tank filler cap. You get two sets of HVAR's - the earlier 2.5 inch rocket with a 5-inch warhead, and the standard 5-inch rocket. Both sets are very well detailed, but the mounting pylons are molded with the rockets, and have little detail. I used the standard HVAR's on my kit, with the warheads painted olive drab, and the rocket bodies painted light grey.
I recently switched to acrylics, and boy, did I make a big mistake by not priming this kit before spraying the overall gloss sea blue paint scheme. While the Model Master paint sprayed beautifully once I arrived at the right thinning ratio, the finish was extremely delicate, and the paint would scratch off easily. I spent a few hours re-spraying scratches in the finish. Lesson learned - always use primer!
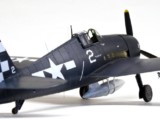
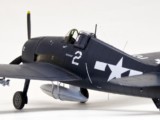
I kept weathering to a minimum, since the VF-27 aircraft I was modeling had been aboard Independence just a few months before the war ended. To recreate the ever-present exhaust stains, I used Tamiya Weathering Master sets, made for armor modelers.
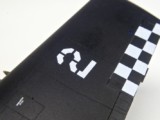
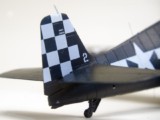
The Eduard kit decals are outstanding, with walkways and full stenciling, and features a Hellcat from VF-20 deployed aboard USS Enterprise in October of 1944. I wanted something a little more eye-catching, so I chose the flamboyant checkerboard markings of VF-27 deployed aboard USS Independence in the final months of the war. VF-27 was famous for their earlier 'cat-mouth' squadron markings that adorned the cowls of their Hellcats. After their carrier, USS Princeton, was sunk, the squadron was sent stateside for a while, then re-deployed aboard USS Independence from June to August of 1945. The checkerboard tail and wing markings came from SuperScale sheet #481239. My main reference for the markings is an outstanding little booklet, 'Markings of The Aces, Part 2, U.S. Navy, Book 1, by Richard Hill. It was published by Kookaburra Technical Publications in 1969, and provides a detailed look at the markings and combat record of VF-2, VF-9, VF-17, and VF-27. Once everything was decaled, I airbrushed a coat of Testor semigloss clear coat over the model, which I think has more scale accuracy than a gloss coat.
Back to which is the 'best' 1:48 scale Hellcat:
Of the readily available 1:48 Hellcat kits, there are only two choices, if accuracy is a concern - the Eduard and Hasegawa Hellcat series. The Arii/Otaki kit, while still very good, lacks a decent engine and cockpit, and the Hobby Boss F6F suffers from a fuselage that is about 2 or 3 scale feet too wide, throwing off the accuracy of the canopy and everything in the cockpit. The old Monogram Hellcat, while accurate in outline, has no cockpit at all, and working landing gear and folding wings that are inaccurate and toy-like. Here is my breakdown on the plusses and minuses of the Hasegawa and Eduard kits.
Surface detail - both kits have very finely recessed and accurate panel lines, with counter-sunk rivet detail. Eduard does represent the 'lapped panel' effect on the fuselage, but you have to run a fingernail across it to tell it's there. I think both kits are even here.
Cockpit - Hasegawa's instrument panel accurately represents that the main panel is not attached to the central pedestal. The Eduard cockpit has soft detail, and does not accurately portray the left side panel. The gunsight on the Hasegawa kits are well done, but is represented very poorly in the Eduard kits. Overall, the Hasegawa kit cockpit is quite good, and includes a frame for the seat, and the hydraulic pump handle on the cockpit floor. Advantage Hasegawa.
Propeller - the Hasegawa prop is better, by a wide margin. The Eduard prop is very crude and inaccurate. Advantage Hasegawa.
Cowl - Eduard captures the subtle 'grin' of the chin scoop more accurately, and also provides parts for different versions. Advantage Eduard.
Landing gear and wells - The main gear struts of both kits are very good, but Eduard has a few more details, including small retraction struts and the lock-up hooks for the main gear struts. But Hasegawa's gear wells are deeper and more accurate. The wheels of both kits look a little thin, but Hasegawa's have a nice diamond tread pattern. Very slight advantage Hasegawa.
Canopy/clear parts - Eduard provides separate canopies for opened or closed versions. The Hasegawa kit canopy cannot be posed open. Advantage Eduard.
Drop tank - Hasegawa's tank is outstanding - accurate, well-detailed, with great fit. Eduard's tank is marginal to awful, depending in which kit you get. The Eduard tank has the curved mounting pylon of earlier versions, but no representation of the very prominent vertical or horizontal seam. The fit is poor, especially for the forward braces. The standard edition does come with photo-etched mounting straps, but these are absent in the Weekend Edition. Advantage Hasegawa.
Weapons - Hasegawa actually provides weapons in their Hellcat kits: early and late versions of the HVAR (high velocity aircraft rocket). The rockets are good, but the nozzles lack detail. The rocket pylons, on the other hand, are molded seperately and are very accurate and beautifully molded with petite detail. Eduard's rockets are by far better, especially the accurately presented nozzles. The pylons are molded to the rockets, and lack the detail of Hasegawa's. Eduard also provides stenciling for the rockets. Advantage Eduard.
Fit/parts engineering - Overall, both kits fit well, but Hasegawa has a better and more secure attachment of the wings and stabilizers. Eduard has separate control surfaces and flaps, but they cannot be posed deflected without modifying the parts. Extra work is needed here to get everything smooth and seamless. Advantage Hasegawa.
Decals - Hasegawa's decals are thick, though they do settle down with setting solution. But Hasegawa simply cannot seem to print the color white on their decal sheets. Everything white is a light cream color. Eduard's decals are terrific. Their standard Hellcat kits feature five sets of markings, and one set in the Weekend edition. Advantage Eduard.
To me, there is no clear winner of 'best' 1:48 Hellcat. Hasegawa and Eduard kits have different strong and weak points - you just have to decide which good points you like best, and which weak areas you can live with. After building both, I lean toward the Hasegawa kit as the easier build, and better-fitting overall. I hope my observations are helpful if you decide to build a 1:48 scale Hellcat.


Excelent buld and thanks so much for a comparative review Hasegawa-Eduard. I took a liberty of moving the first picture to the very top to ad extra interest. Hope OK 🙂
Please, do as you wish with the article and photos. I know it's rather long, so if you want to trim it down, please feel free to do so. Thanks!
Oh, I can see that you've been into the same idea... sorry. Will fix.
Nice to see that you have changed to uploading the pics rather than linking them from Photobucket, as this allows iM to auto-format the picture content. Definitely no need to trim the writeup, especially a good one! 🙂 Cheers /m
Thank you! I really like this site, and the format. . None of the drama and name-calling here that unfortunately happens on other sites.
Hi, nice build! I bulit hasegawa and Eduards Hellcat and for me there is a big difference - Hasegawa overal look is far more thickset and solid, while Eduard looks like racing horse... I would prefer Hasegawa for far better impression, but Eduard for easier assembly and a variety of camouflages... I scratchbuilt flaps dropped down for Hasegawa and must say it is fully worth it, the result is stunning... Even if you spend few days on it. And there is CMK resin on the market, if you want to use it.
Thanks, Martin. The last kit I built before finishing this one was a Hasegawa Hellcat. I used a resin flap set to drop the flaps, and also used a True Details cockpit. Like you, I think I prefer the look of the Hasegawa kit over Eduard's.
Drew, Great looking F6F-5, even though theoretically it seems easier to do an over all one color paint scheme, it always seems to have its own unique difficulties. This appears to have turned our very good. I really like the scheme. Well done !
I have noticed the same difficulties at times with acrylic paint. I think it could either be an oily surface or just a really slick, smooth surface. I have had good results by washing off the model with dishwashing soap and/or slightly sanding the surface with 4000 grit prior to painting, thus giving the paint something to grab on to. hope that helps !
Thank you, Terry! I didn't wash the parts, either - another thing I should have done! Thanks for the tip on lightly sanding the parts. I think that would really help give the paint something to 'bite'.
This Review is from a real buyer/builder perspective, which I really respect. For someone trying to decide on a kit this really helps. Lovely photos, too.
Thanks, David! I appreciate your thoughts. I started the build assuming the Eduard kit would be far superior to the Hasegawa Hellcat, but ended up thinking they are pretty evenly matched, but with different strong points.
I've built both...and I liked 'em both (for different reasons) - and I like this one, too. Attention to detail is nicely done, sir...and I, too, like this site for the same reasons you stated - much more "user-friendly" I think. 🙂
Thanks for your comments, Craig! And I agree - this site is much more user-friendly. Folks here seem much more tolerant and respectful than other places on the web.
Drew, thanks for the comprehensive review of both of the frontrunner Hellcats. The "latest and greatest" isn't always. Looks to me like a crosskit would be the way to go, if you wanted to be strictly accurate and had both kits.
I really like the look of the checkers on this. It makes for a visually more interesting Hellcat, given they were GSB at this point, and for some time to come, other than drones or controllers.
I remember the old Lindberg Hellcat, I had one, and thought at the time it was just marvelous. How far we've come!
Thanks for the comments, Bernard. I agree with you - combining the best parts of an Eduard an Hasegawa kit would probably result in the 'best available' Hellcat. I've been tempted to do just that.
Really nice Hellcat Drew! And thanks for the review/comparison, great work! 🙂
You're welcome, Gary! And thank you!
Excellent article about the two kits and how they compare to each other. Your photos of your F6F are really nice too. I like everything about this one... Great work my friend.
Your plane has given me a kick start to build up another F6F. Probably right after the Midway Group build is completed. I have been tossing around an idea about building one as a tribute for a F6F pilot that I met about 10 years ago. His name was Payne Whiteway and he flew a Hellcat during the Marianna's Turkey Shoot, scoring a Zero. His plane was #13, and he flew with VF-16 the Flying Aerdales. Great job with your plane. It really looks fantastic. Thanks again.
If you get around to building Whiteway's aircraft, I hope you post photos here. That would be an amazing tribute to him.
That's what I was thinking too. I will make sure to do this. I may even do a build log on it. If my next Hellcat turns out half as nice as yours has I will be very happy.
Thanks, very much, Louis!
Very nice Hellcat! The finish work is well done, and the checkerboard work really sets off the GSB scheme nicely. You're extra detailed work is a nice addition as well.
Thanks for your comments, Greg - much appreciated!
Nice job, Drew! I've built both kits and prefer the Eduard kit. My Eduard kit was the BPF Hellcat II boxing. I thought the wings fit better then Hasegawa's method and I like Eduard's glass a lot better. There is no excuse for Eduards simplified drop tank. I scratch built the straps. Fragile Acrylics are the reason I use enamels and lacquers.
Thank you, John! And you're right - at that price, Eduard really should provide a better drop tank.
Excellent detail, right down to the rockets!
Thanks, Robert! I think Eduard makes the best 1:48 scale HVAR's. Wish they would sell them seperately!
Hello Drew...Let me add my voice to those who have complimented your excellent Hellcat build...very nicely done. Also thanks for the comparative evaluation between the Eduard and Hasegawa versions. Personally I lean toward the Hasegawa kit.
Thanks, Jim, for your comments. Like you, I think the Hasegawa F6F is the better option overall (though I'd rob an Eduard kit of the canopy, main gear struts, cowl, decals and rockets!
I really enjoyed reading this article, Drew, thank you very much.
You're welcome, George - and thank you!
Thanks for all the comments Drew & the excellent build photos. You've done a beautiful job here. I have built two Hasegawa Hellcats & enjoyed both, albeit with a resin cowling for one & a raid on an old Arii kit for the other; then I built the Arii kit using a spare Eduard cowling. I still have the Eduard kit to build & your comparison will help a great deal.
Thank you, Tony. I used a resin cowling on my Hasegawa Hellcat, too. And with a new cockpit, the old Arii kit still holds up really well, even though the kit is pushing 40 years old!
Drew, this is a very interesting & comprehensive build comparison between Eduard & Hasegawa. I have one of the old Monogram kits to build but seeing these might give me a reason to get a better & more complete version. I like Hellcats, especially since my Dad flew some a few times during WWII. Sadly, I have no idea what ship he was on or I'd try to make one like his. Thanks for the clearly written & detailed review!
You're welcome, Jeffry, and thanks for the comments. The Eduard and Hasegawa kits offer the best route to a good Hellcat, But don't overlook the old Arii kit, especially if you're on a budget. With a True Details cockpit (usually available online for $10 or less), you can build a very accurate Hellcat with nice surface detail and recessed panel lines.