1/72 Airfix Fairey Swordfish Mk.1
Despite being busy (like a long tailed cat in a rocking chair factory) I got another one finished ! It's OOB with some scratch built items and general repairs, mostly the result of brittle plastic. Rigged with pre-blackened 2 lb test fishing line, I used a short piece of 6 lb line to separate the double strand rudder controls, keeping them in one #80 hole. I also replaced / repaired the poorly molded edge guarding around the cockpit.
This build represents an aircraft from No. 820 Naval Air Squadron, HMS Courageous, 1939.
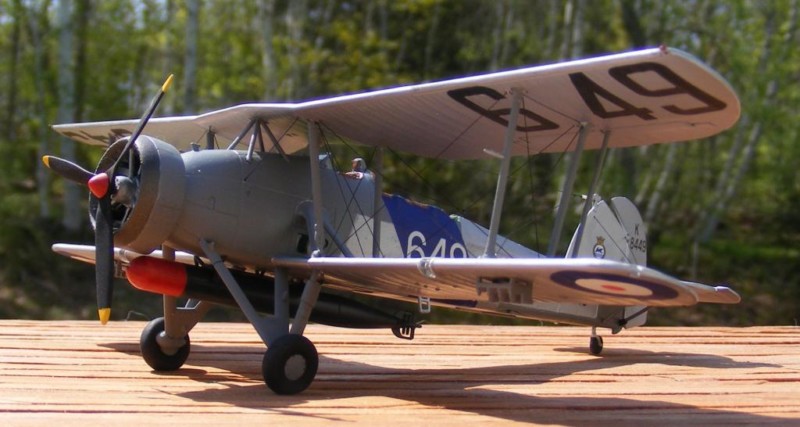
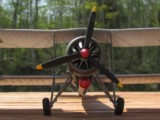

Two wings...struts...rigging...? You're a better man than I, sir - I steer clear of this kind of stuff. I have a hard enough time getting the EASY ones right. 🙁
This one did shiver me timbers a bit. Thanks Craig !
Phil. is this the latest Airfix Swordfish? I remember its predesessor, and the Frog. Looks really good, also nice to see one in prewar msrkings.
It is the Airfix retool kit. It had its draw backs none the less. It seemed to have a few parts missing in the design. The markings are the other decal set supplied and went on fine, except for the blue band, which caused difficulties in the fuel sight glass area. The blue and white X for the upper center wing didn't survive the application attempt. Thanks Bernard !
Looks very nice, Phil. I've built the Tamiya version in the past but never this one. As Bernard said, pre-War markings offer something a little different.
Thanks Rob !
Phil, looks great, I really had to take another look at beings its 1/72 scale !
Thanks Terry !
Hello Phil,
great model. Could you supply me (us) with some more detail on the registration. In other words, what does it represent. Ship, shore based and time frame.
Regards, Dirk / The Netherlands.
Thanks Dirk ! I've updated the description info.
It looks fantastic. You did a great job bearing in mind that this 1/72 scale. Just wonderful!
Thanks Ferry !
That rigging on a 1/72 kit is exceptional, Phil! Beautiful work!
Thanks Paul ! It took some planing and layout, my tried and true methods work every time.
Nice
Thanks P.k !
Phil, you did a great job on a great aircraft. I'm still amazed that you got BOTH strands of fish line in one #80 hole! You must have had your ultra- high magnification glasses on!
A slip of the mouse. See my next comment.
Thanks Jeffry ! There was actually plenty of clearance to run both strands and the separator piece thru the available .0135 inches. I used a pair of 3.25X reading classes and an X5 eye loop to set things up.
Excellent! My attempts at rigging in 1/72 don't quite come up to your standard... That's probably why I've shied away from a Stringbag!
Thanks Greg ! as I said earlier, it just takes some planning.
Fantastic! Ditto on the rigging, great job.
Thanks Robert ! Glad you like it.
Gret job, I agree with the others, expecialli the rigging.
Thanks Roberto !
Yes good looking model Phil, nicely done.
Thanks Allan ! Glad you like it.
It's nice to see a Swordfish in pre war markings. You did a fantastic job with this one Phil ! It's hard to believe that so much detail is packed into a little plane. The rigging must have been interesting to do.
I really like it.
The rigging is fun, and when it comes out "good" it just adds to the satisfaction. This build required 50 or so #80 holes to be layed out an drilled : reasonable. The wing bracing appeared to be larger gauge aerodynamic cable on some of the ref. photos, which I didn't try to replicate, and it looks good.
FYI The Nova Scotia Shearwater Aviation Museum has a Mk.IV on display.
Thanks Louis !
It looks very nice photographed in the natural light.
Thanks George ! The back yard it getting green, finally ! I actually finished this model two weeks ago, but the weather was Les Miserable. Natural light has a definite effect on detail. Colors and sharp shadow edges blend nicely and produce a scale appearance.