Review: Miniart 1/35 T-54B Early Production – Build Review, Part 2
This article is part of a series:
After we took a look at what's in the box it is time to start building. But before you dive into the maze of sprues, I would suggest some preparatory work:
- Take your Tamiya Tape and stick some of it to every sprue, labeling it with the according sprue letter. This will save you a lot of time when searching for the right sprue.
- As already mentioned, color call-outs are by index numbers, referring to a color conversion chart at the beginning of the instructions. I printed out a spreadsheet with the index numbers and corresponding paints I intended to use, and stuck it to the wall above my workbench. This spared me the hassle of having to skip back and forth in the instructions.
- Carefully go through the instructions and decide in which order to tackle the build. For example I decided to leave all the exterior hull fittings off until the interior is finished. Lots of small details need to be added to the hull tub, and I was afraid of breaking stuff when handling the hull too much.
- With all this beautiful interior, you will want to come up with a way to display it somehow. Do you want to show the tank partially disassembled? Destroyed? I opted for leaving the engine covers and the whole turret shell loose, not gluing these parts and having the option of displaying the interior whenever I feel like it.
The Engine
This is a kit by itself, consisting of 55 parts and a construction sequence spread over nine steps. The construction sequence makes perfect sense, but you will have to work in subassemblies in order to facilitate painting. If you want to you can really go to town on the weathering, trying out all the hairspray, chipping and pastel work you can think of.
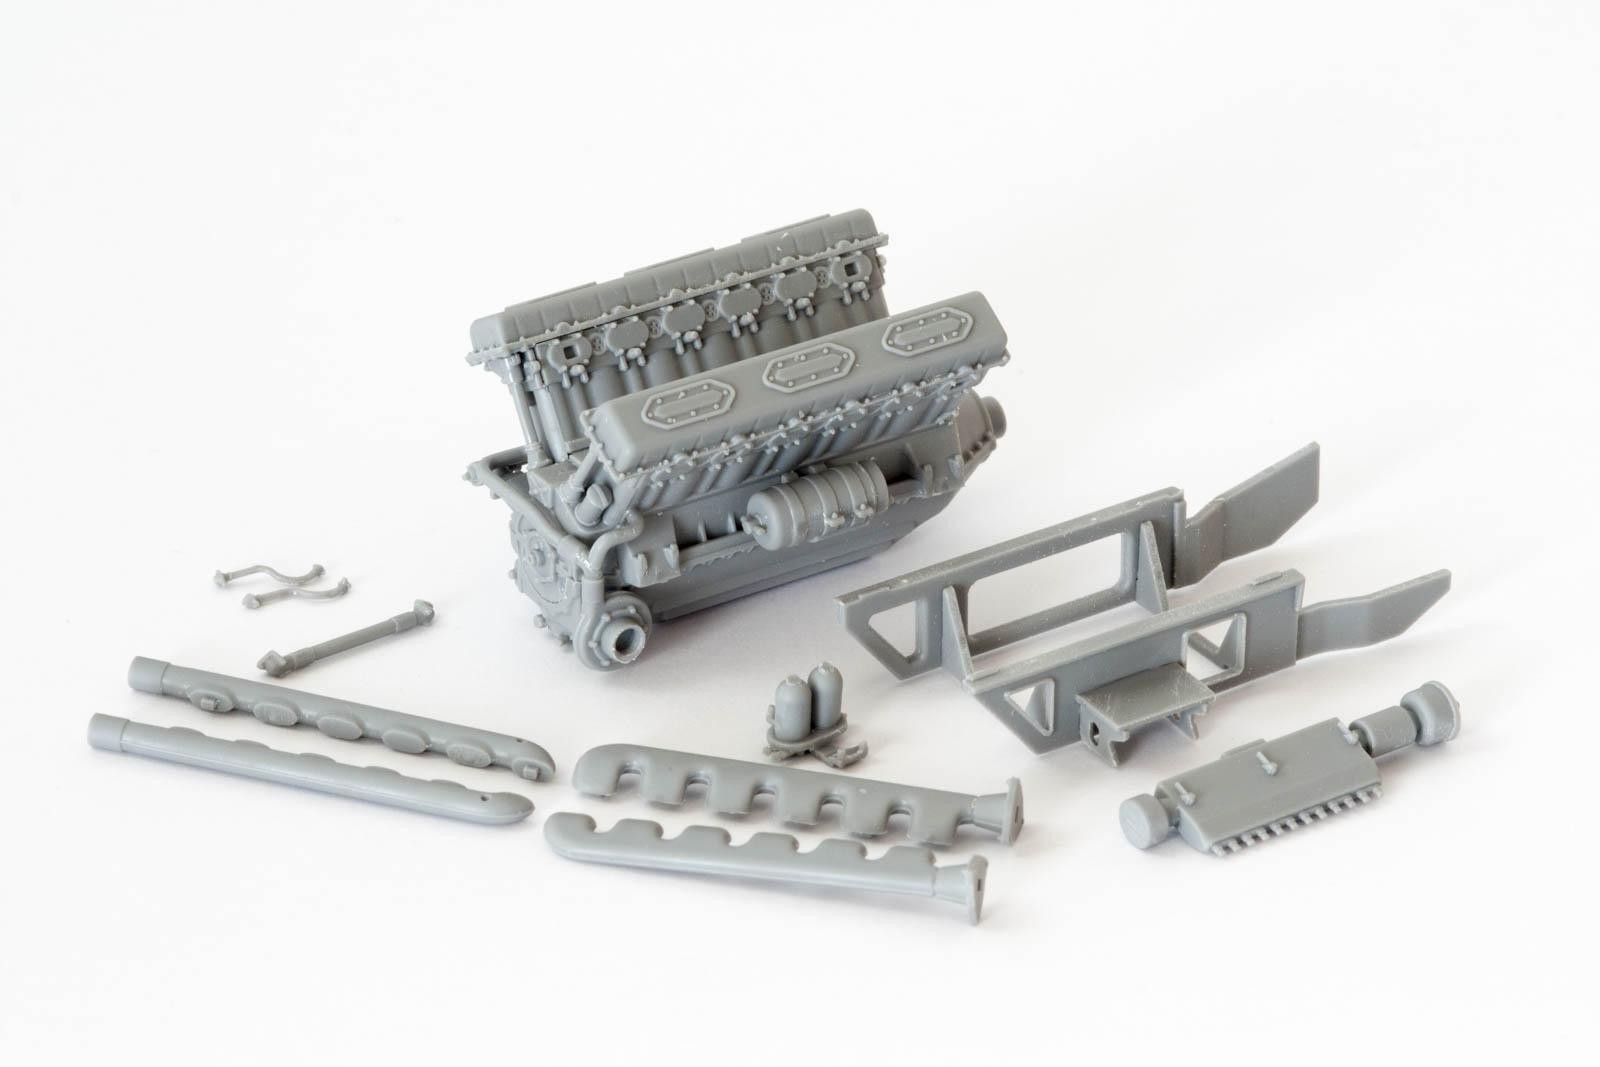
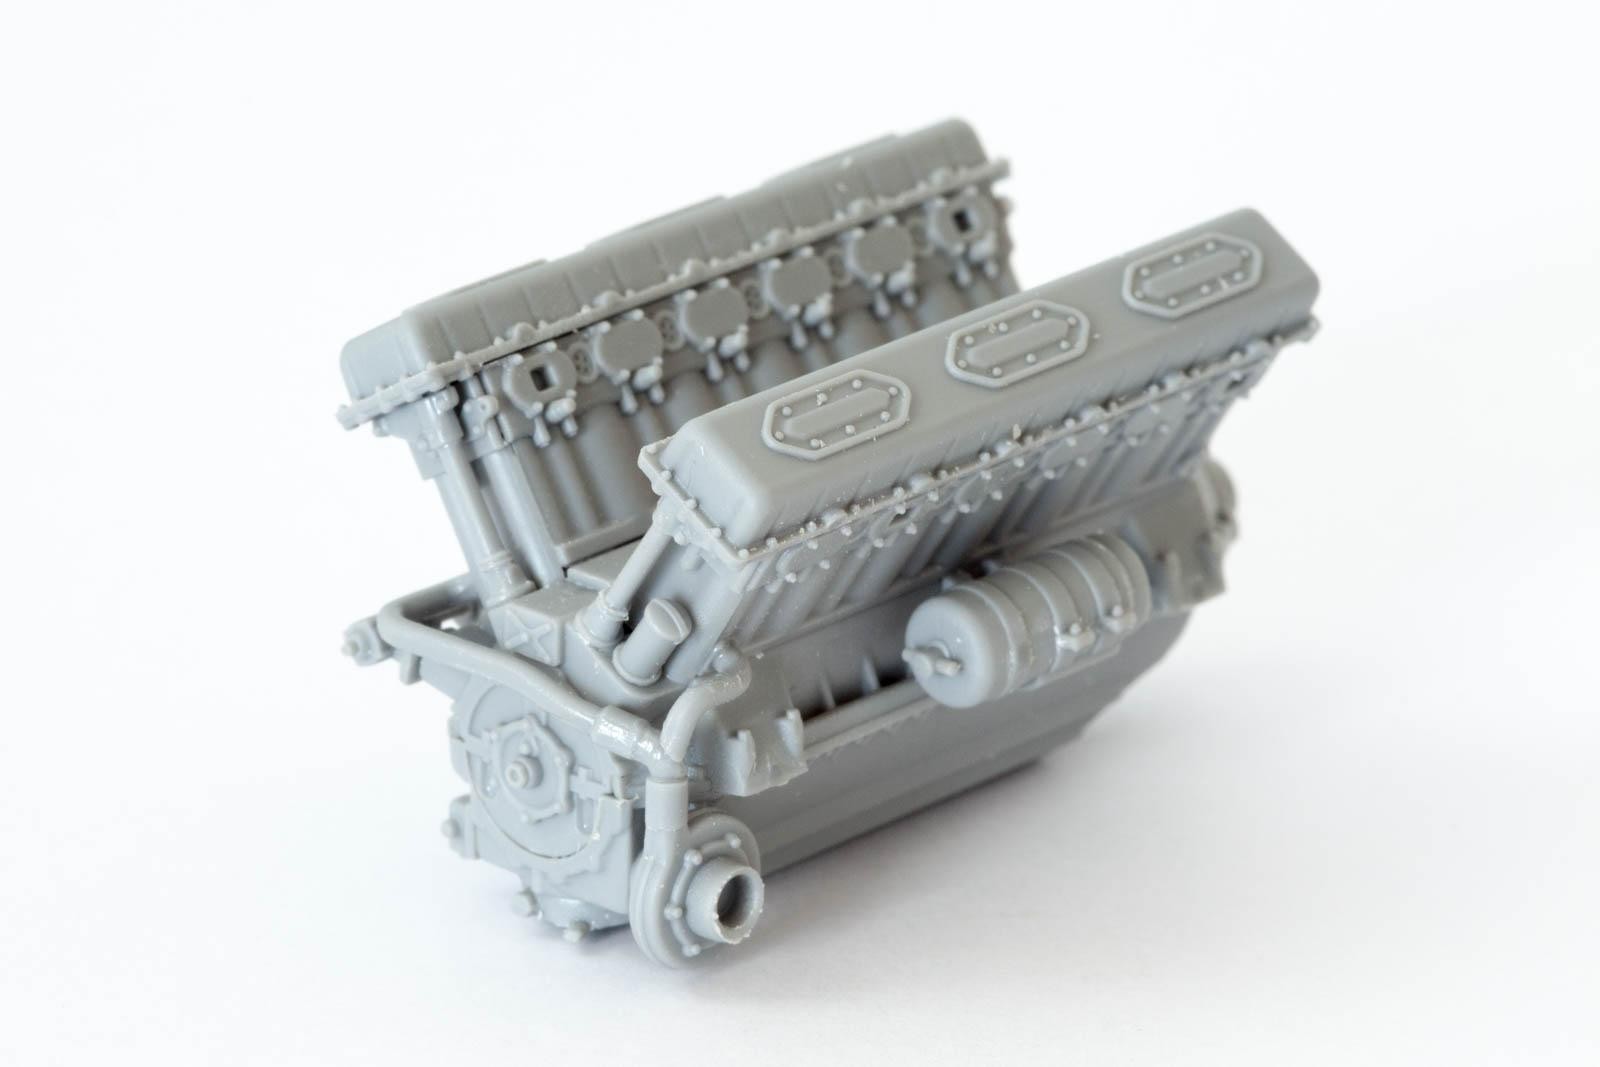
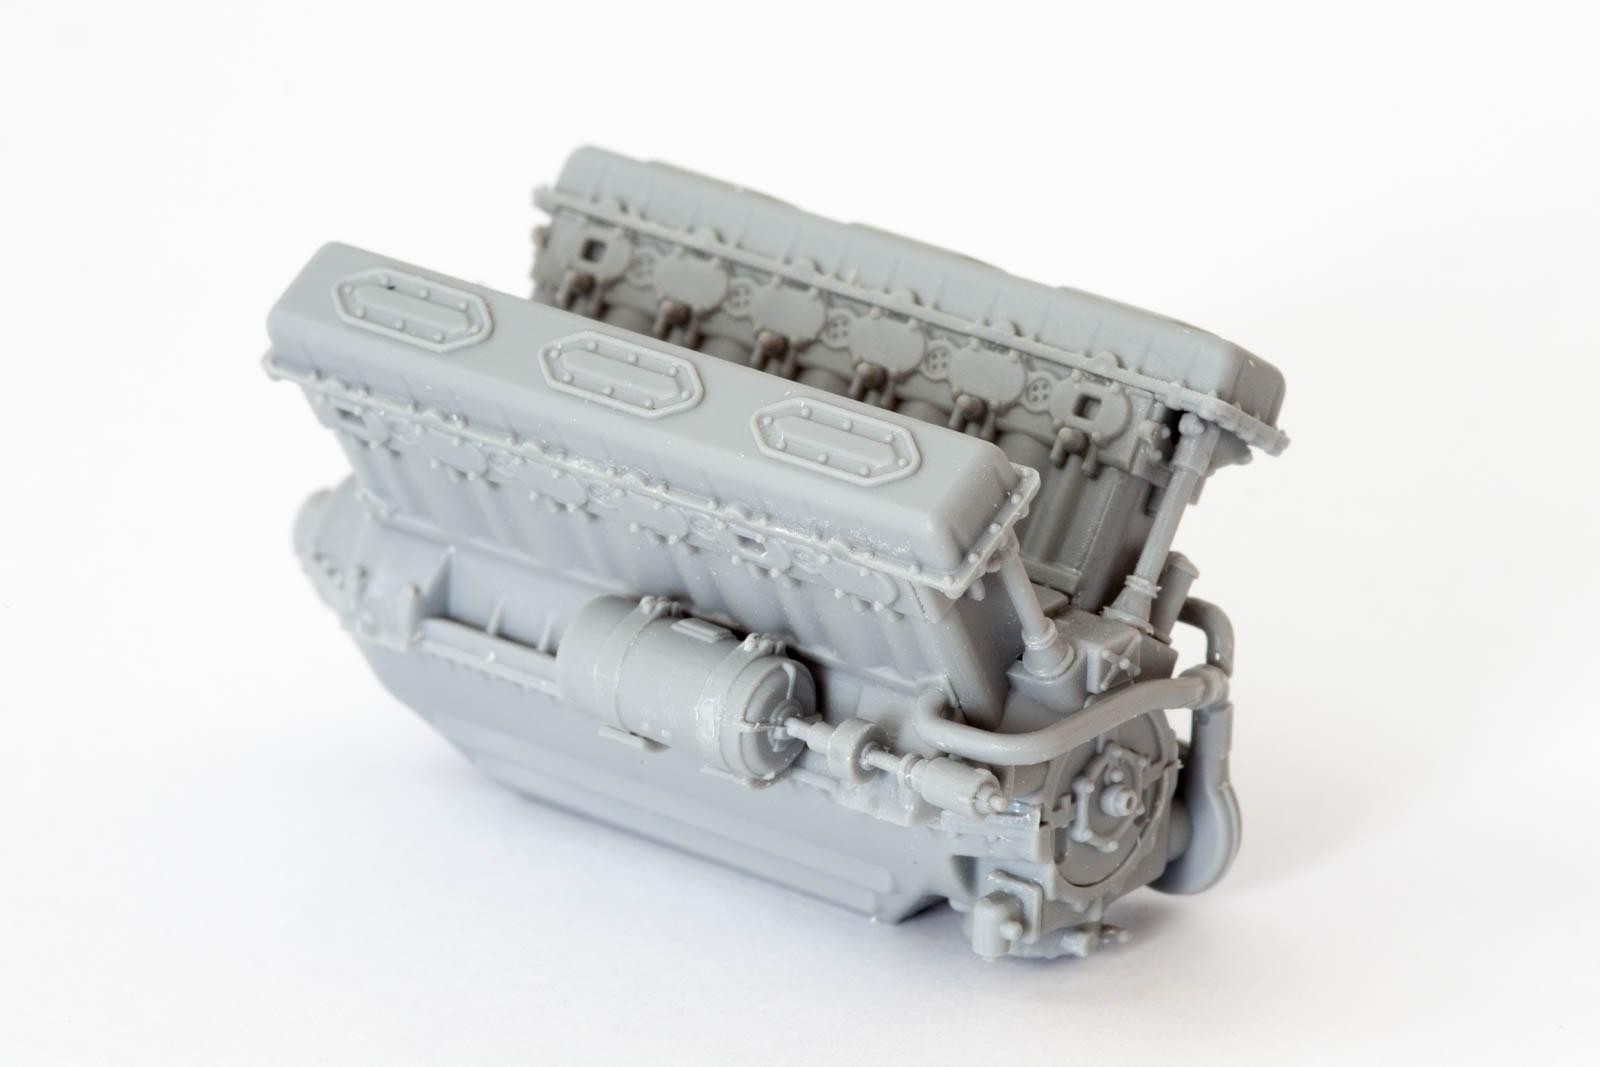
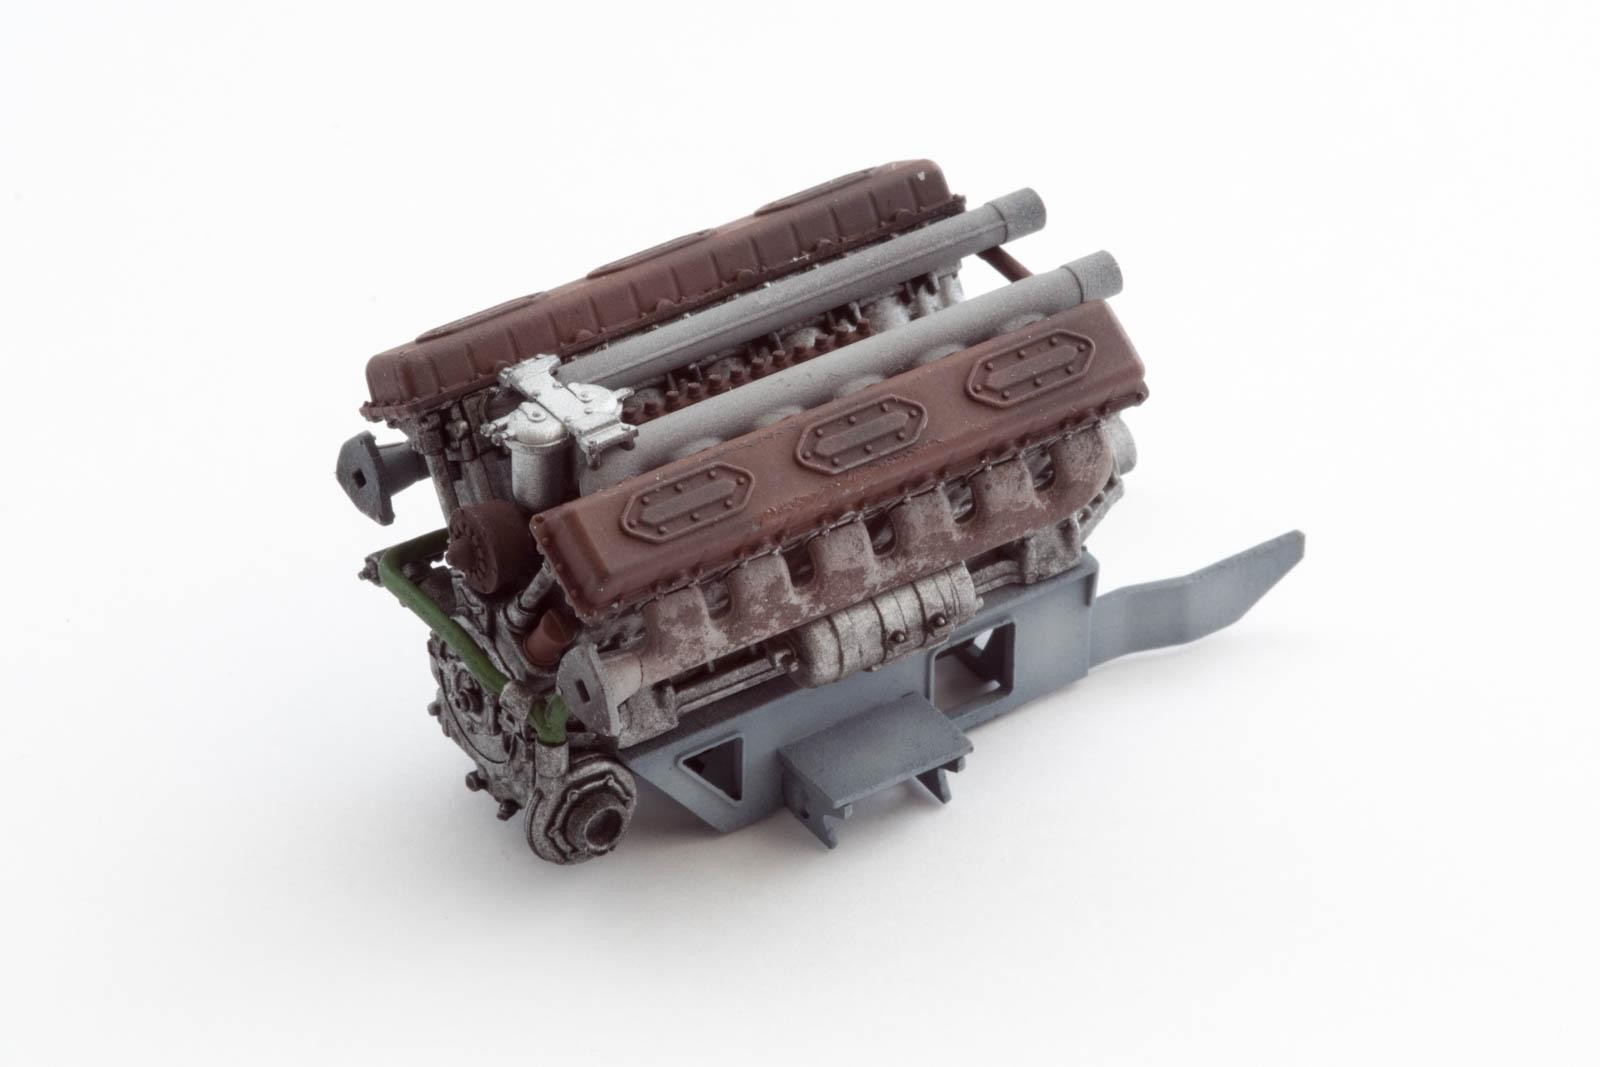
The only thing missing from the engine is the wiring, which I think is a good thing. Replicating these wires in injection molded plastic usually looks a tad stupid, instead Miniart provides you with a canvas to add wires yourself. I went for some basic wiring using 0.2mm lead wire from Plusmodel.
The Hull Interior
Before getting to the internals of the lower hull, there is some external work to be done. Parts of the tank's running gear need to be installed, including the torsion bars which run through the crew compartment.
The parts which hold the torsion bars and the stub axles for the running gear are a tight fit – so tight in fact that simply pushing them where they should go results in a bent hull!

The issue here is some flash on the lower hull tub, which makes everything tighter than it should be. Be careful, however, when removing the plastic material or you will end up with some gaps. Test fitting is the name of the game here. As the lower hull tub is a rather flimsy part, I would suggest adding the parts for the rotating turret base now, to give the hull tub more rigidity.

Building up the hull interior is not complicated in itself, but again you will have to decide how to address painting all the different parts. If you have a very steady hand you might get away with building everything up and painting the various fittings afterwards – being a coffee addict I didn't trust my hands and opted for painting separately and attaching afterwards.
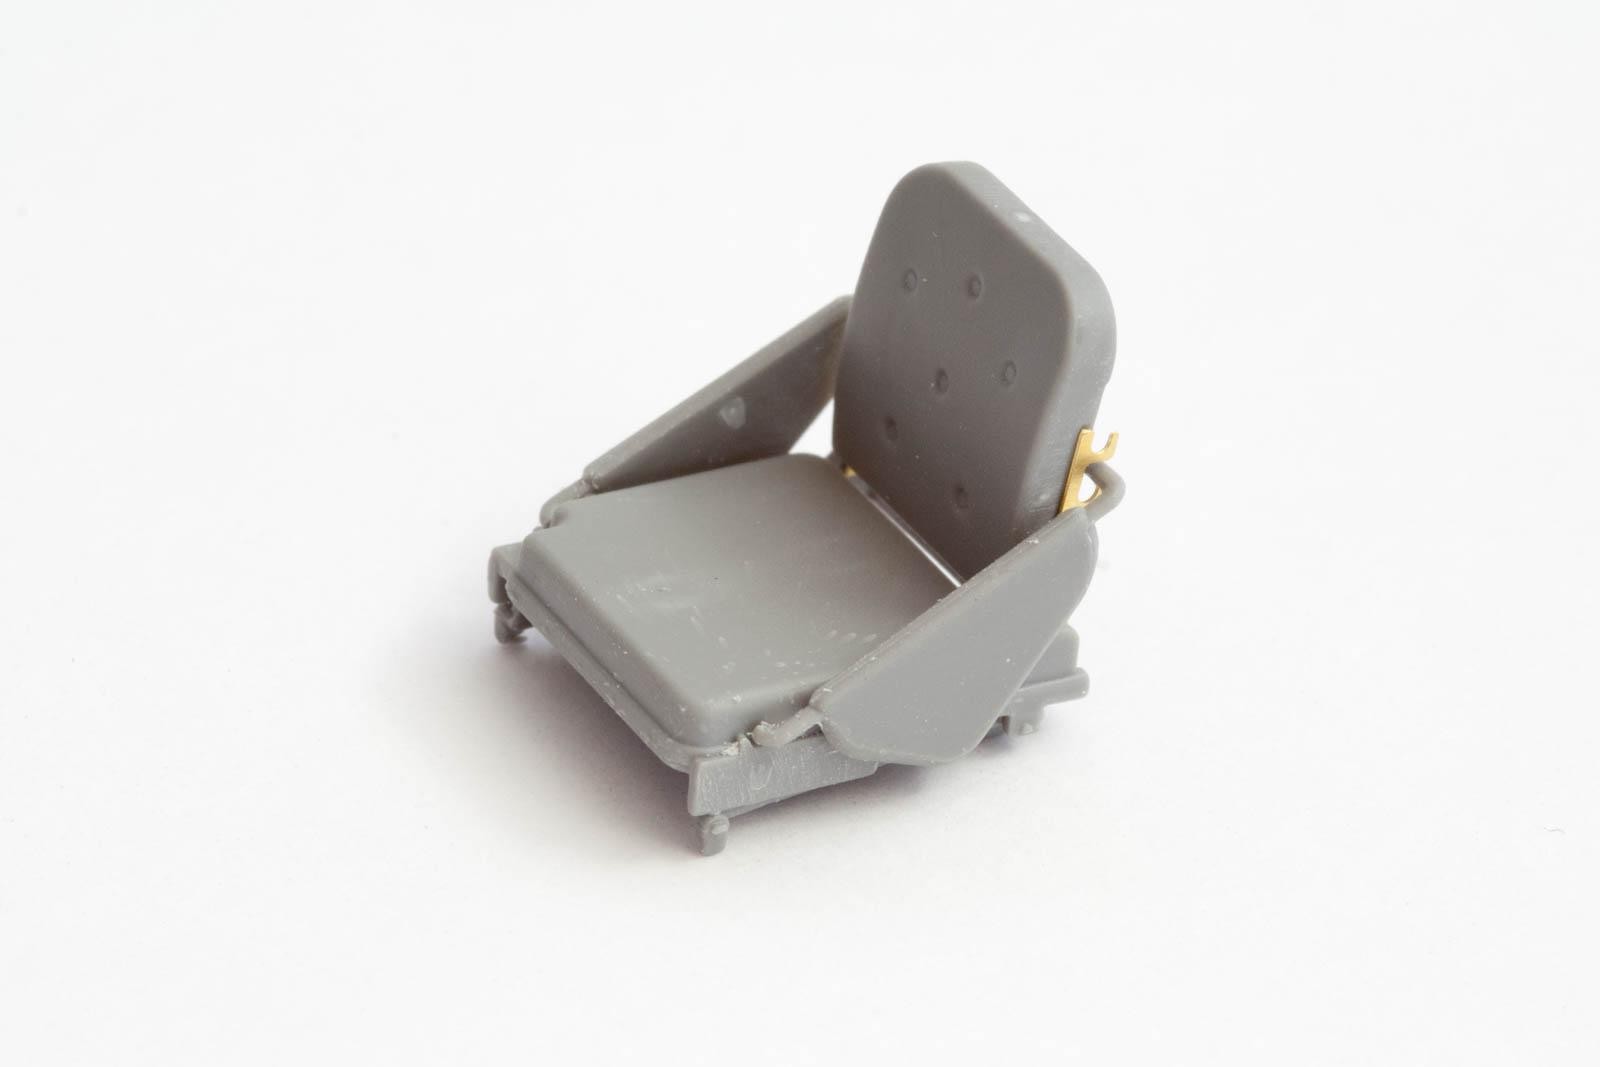
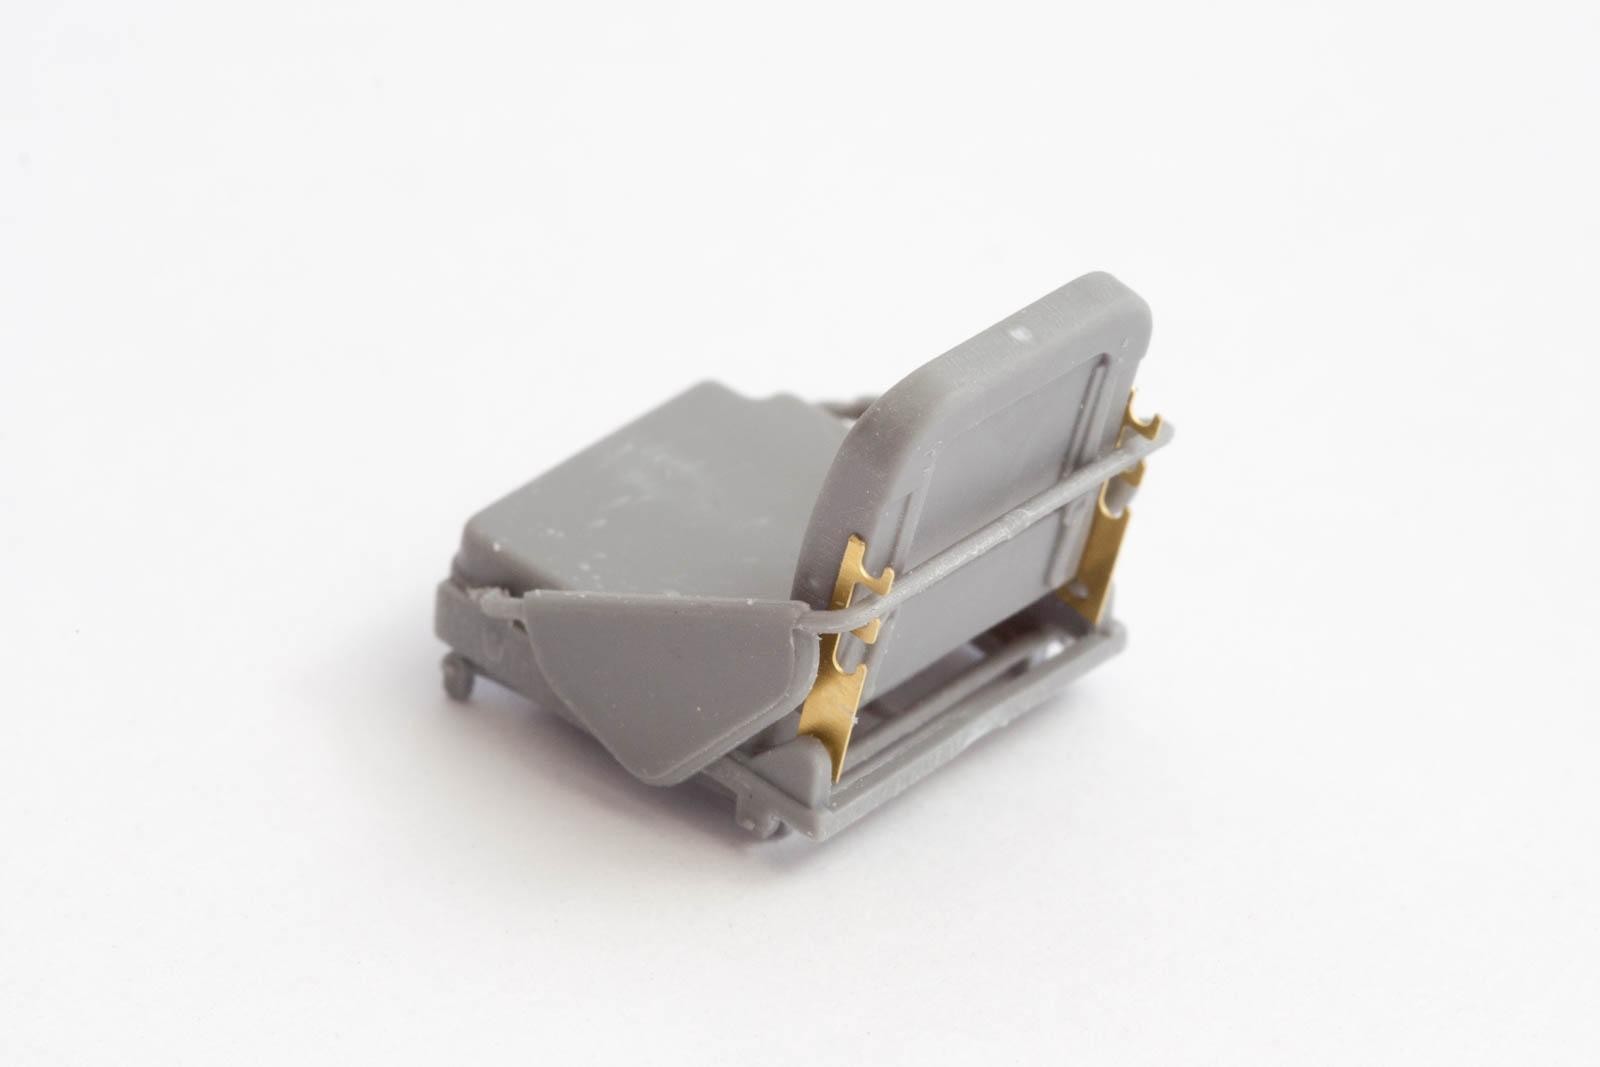
The three main subassemblies in the hull are the driver's seat, the ammo storage bin, and the pre-heater. The seat consists of six parts, including some PE, and looks quite comfortable once finished.

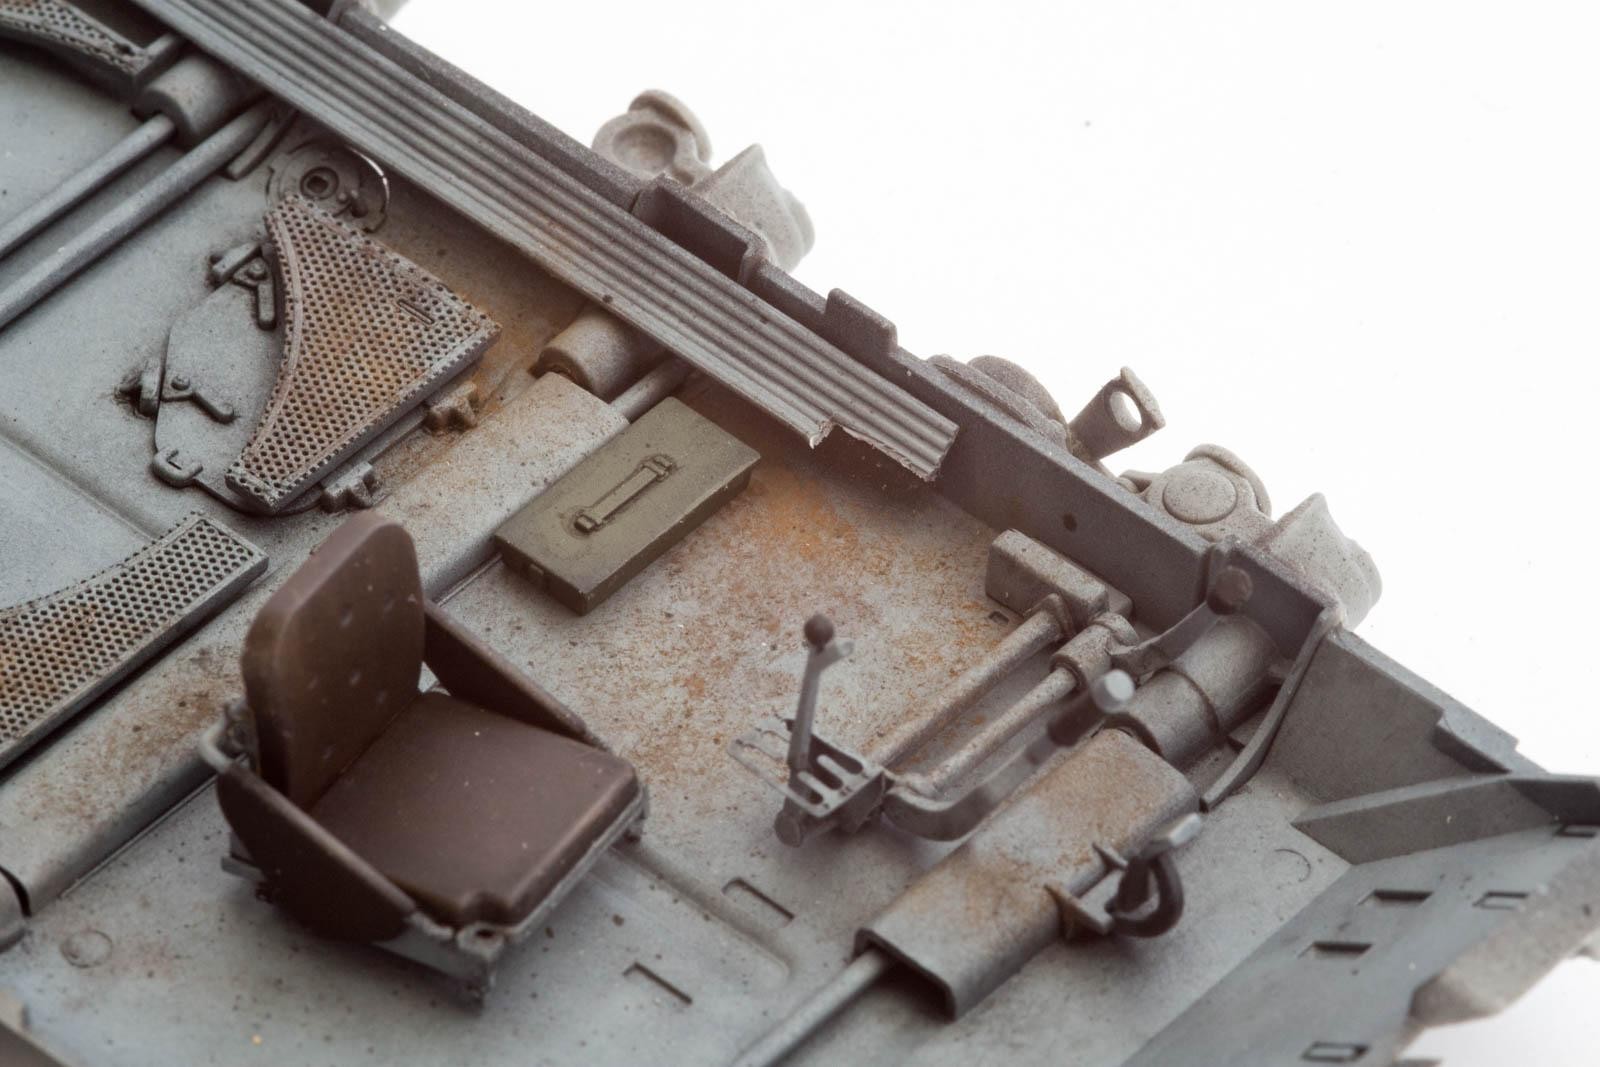
When installing the seat, I ran into a fit issue – the bars on the left side of the hull interfered with the seat's position, so I had to chop some of them off.
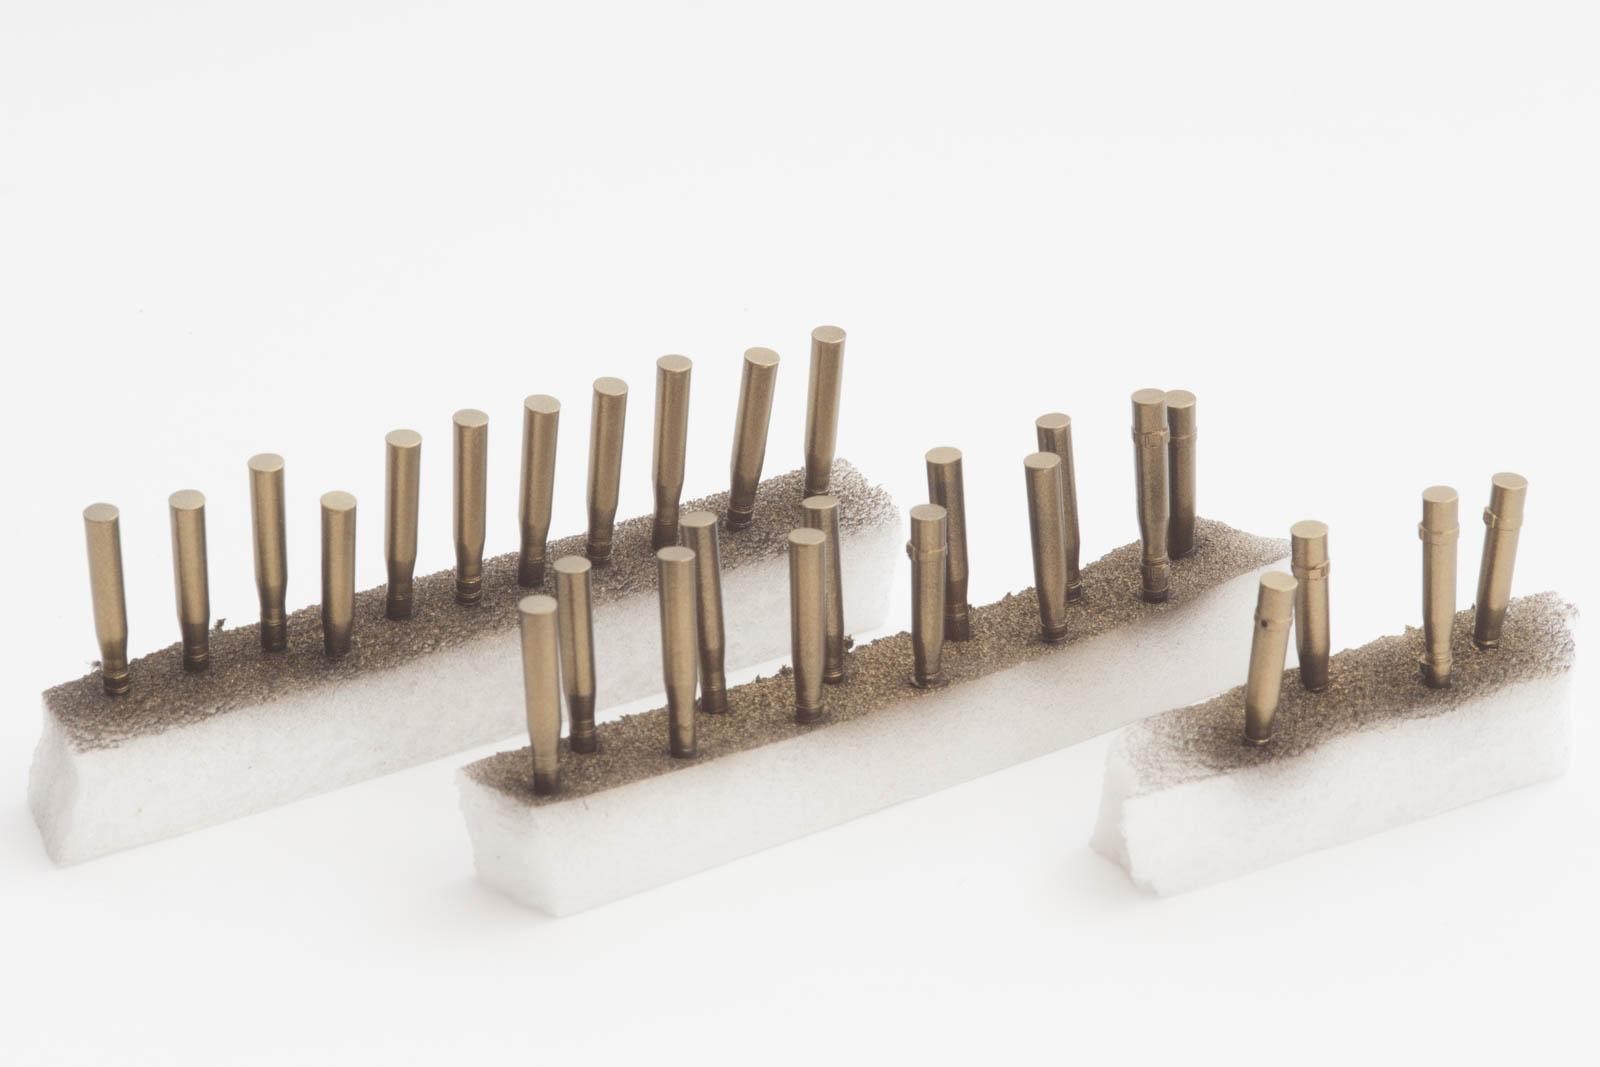
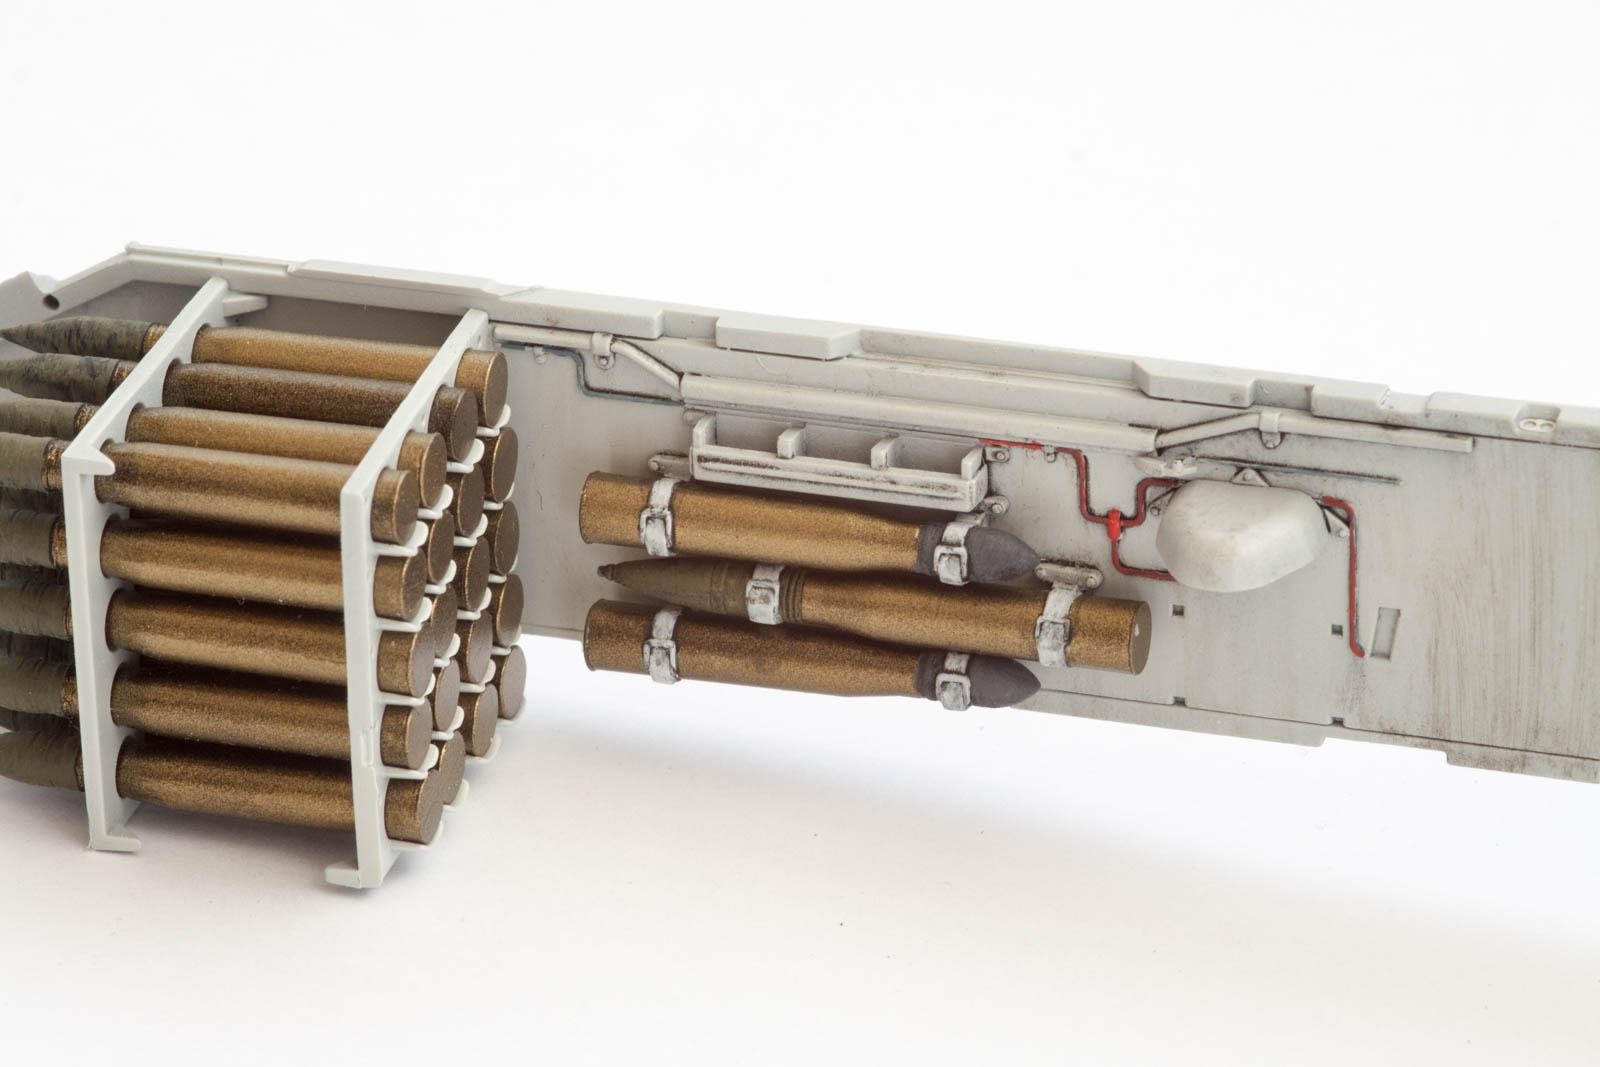
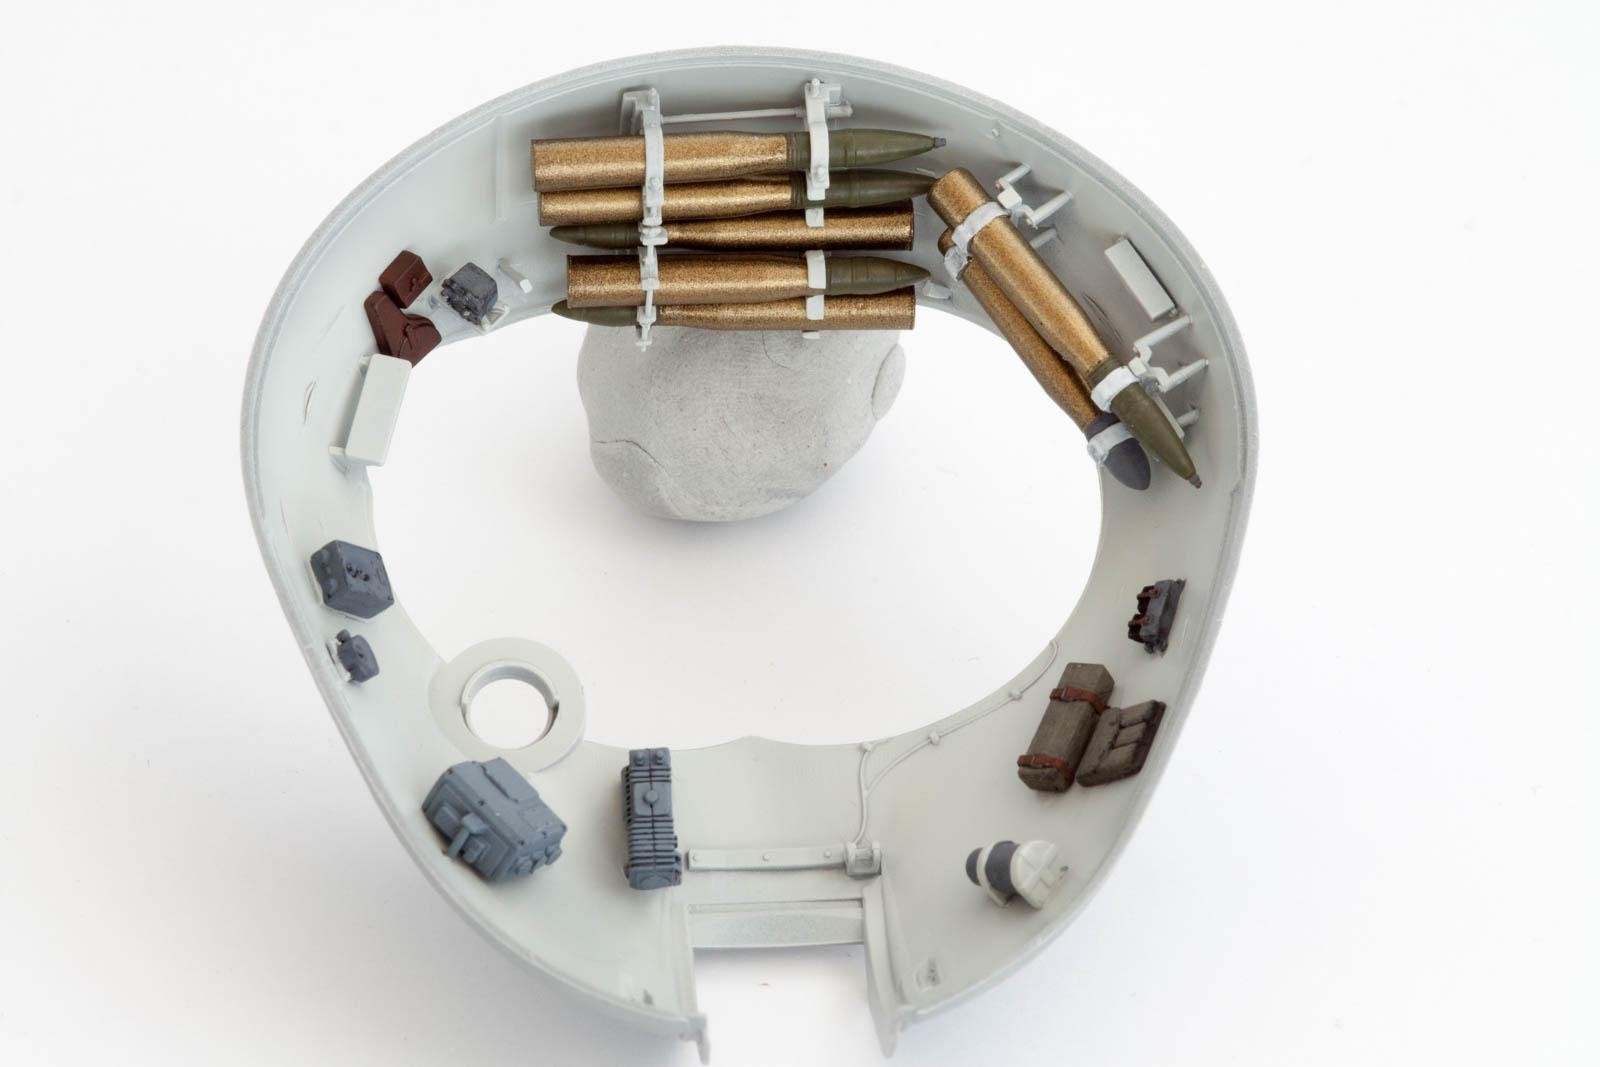
The ammo bin itself is easy to assemble, just make sure to keep it straight and perpendicular to the hull sides. Getting the ammunition ready, however, is a tedious process. We are talking about 20 shells which need to be cleaned up and painted. If you want to be super accurate, you will have to mask off the paint separation between shell and projectile – as nothing of the projectiles will be seen once everything is built up, I didn't bother and painted them freestyle, coffee and all.

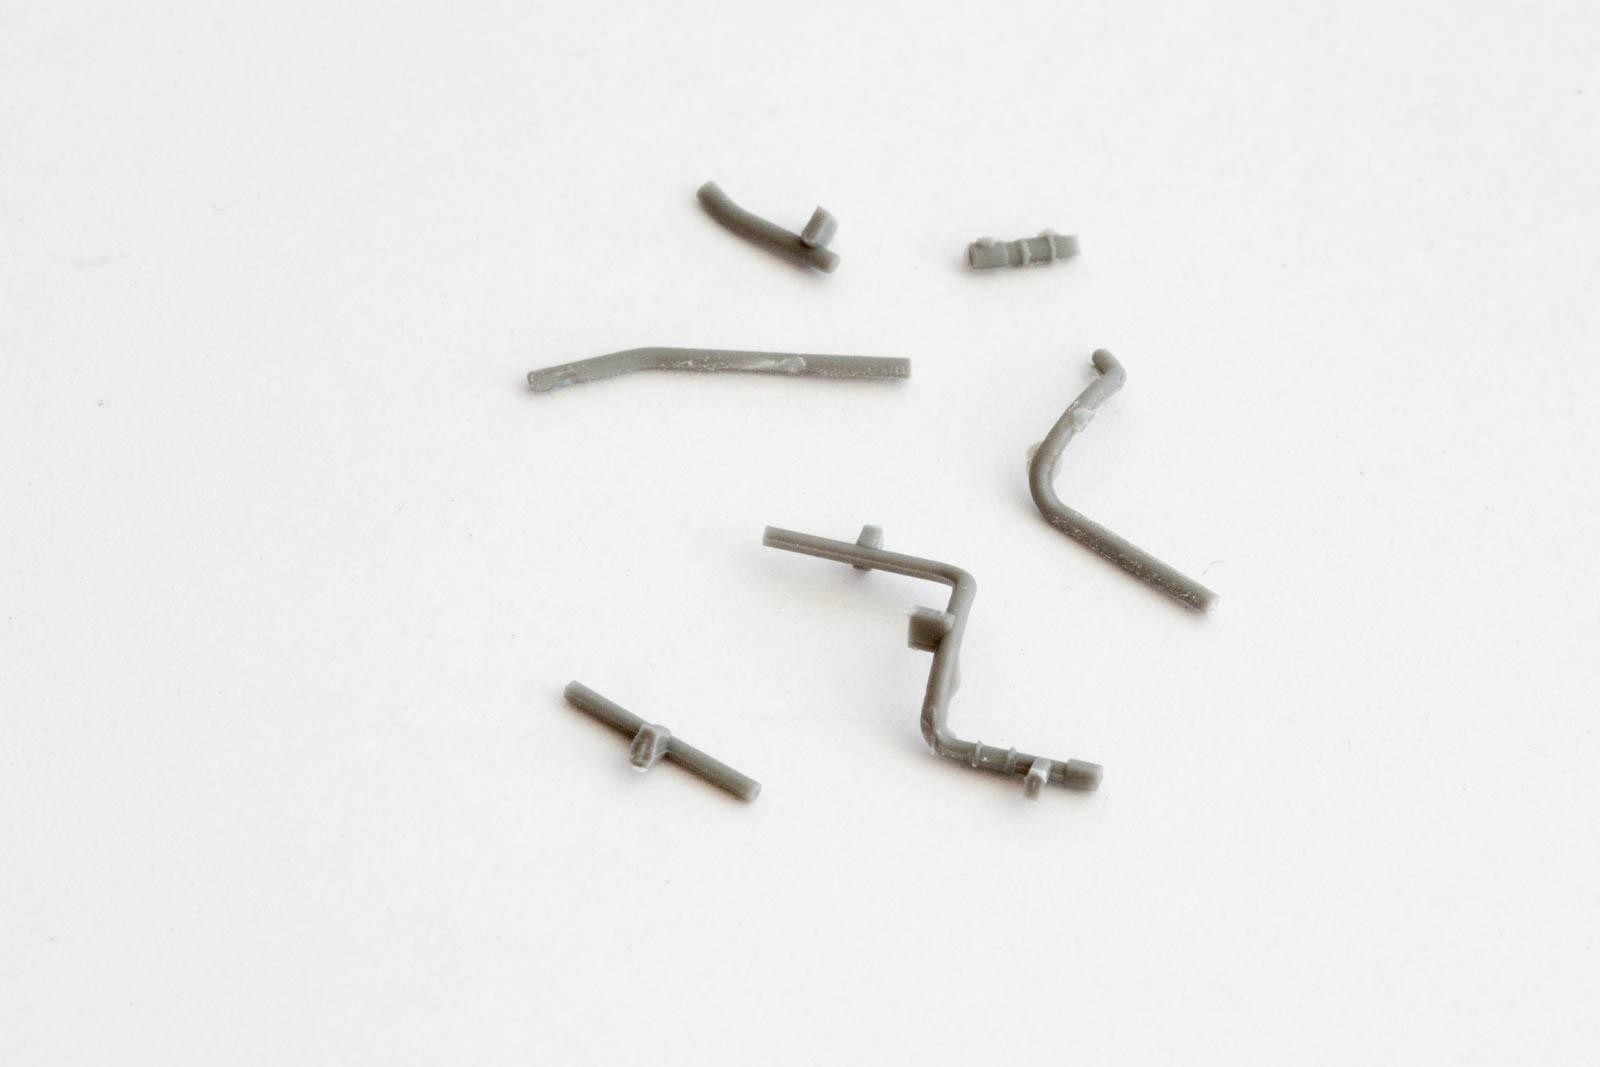
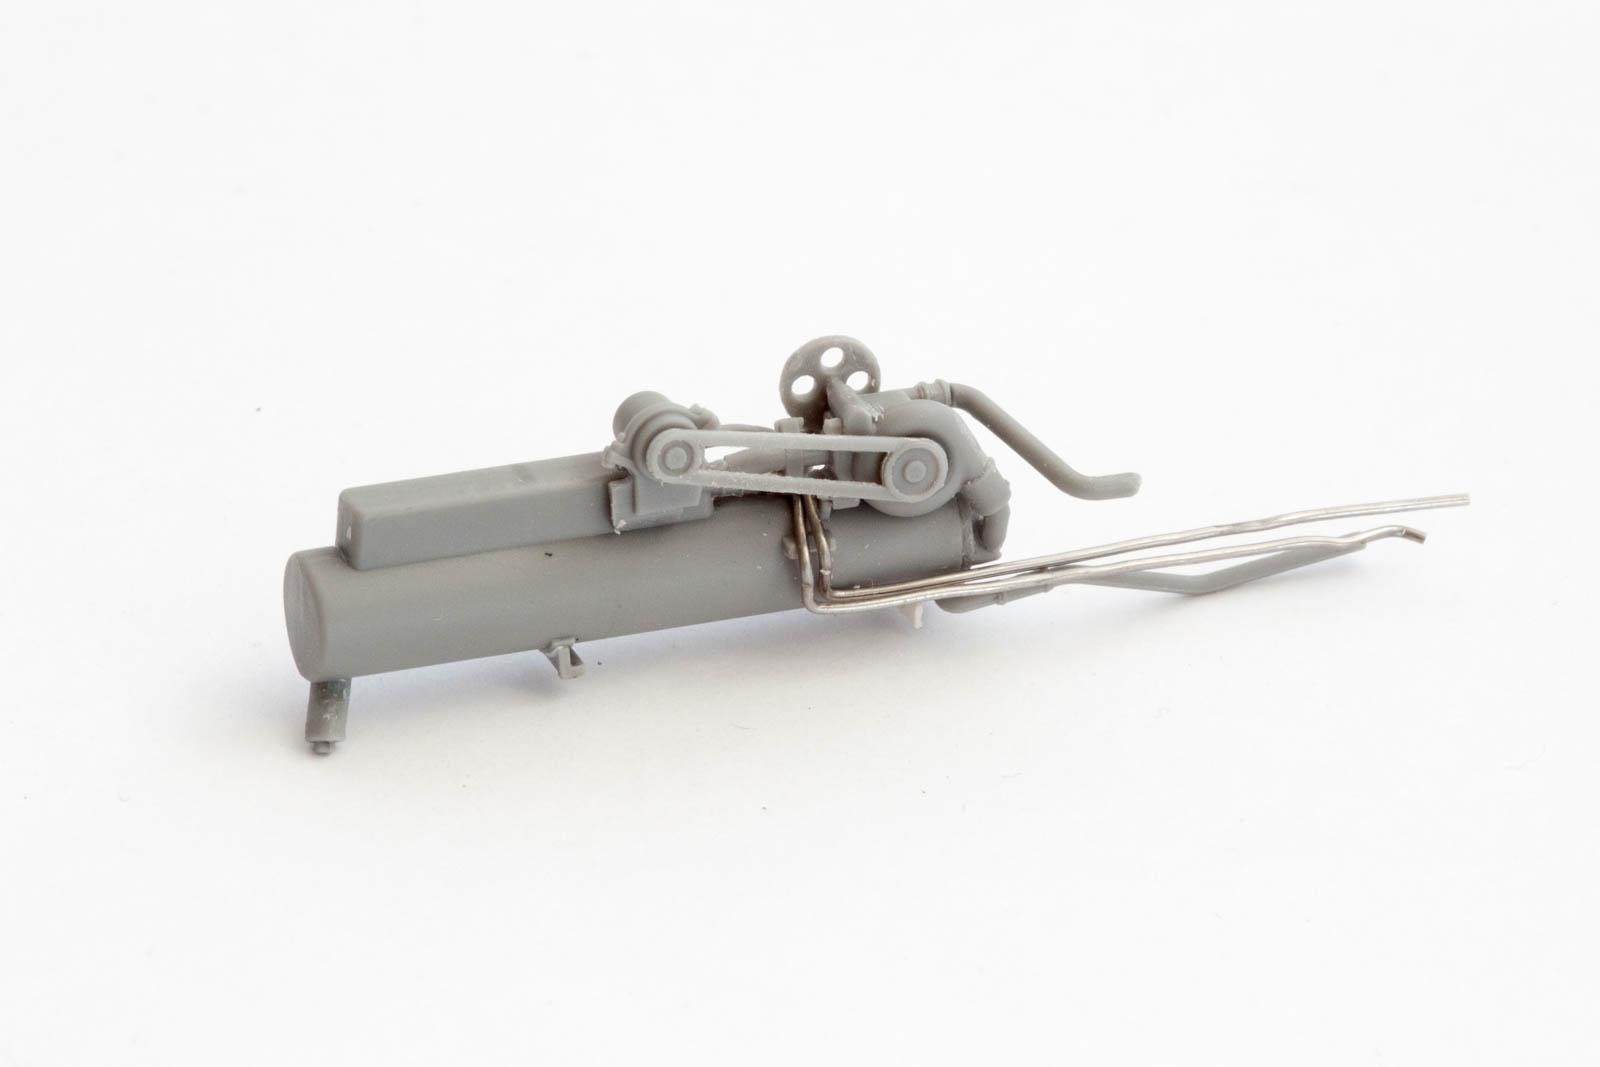
Finally, the pre-heater gave me some issues. Consisting of 14 parts, it is a very well detailed assembly, but the piping just wouldn't come off the sprues without breaking. In the end, I had to make my own with some lead wire.
Bringing the Hull Together.
This is where things start getting funny. The general idea is to attach the right hull side to the bottom first, then install the engine and the engine compartment bulkhead, and finally attach the left hull side. So far, so good, but without any strong attachment points this whole assembly can end up pretty weak and wobbly.


In order to make my life easier, I prepared the front glacis plate as well as the rear hull plates, so I could bring all these parts together at the same time, giving me proper alignment without everything being skewed and nasty. I could have done with an extra set of hands, but in the end everything went together as it should.


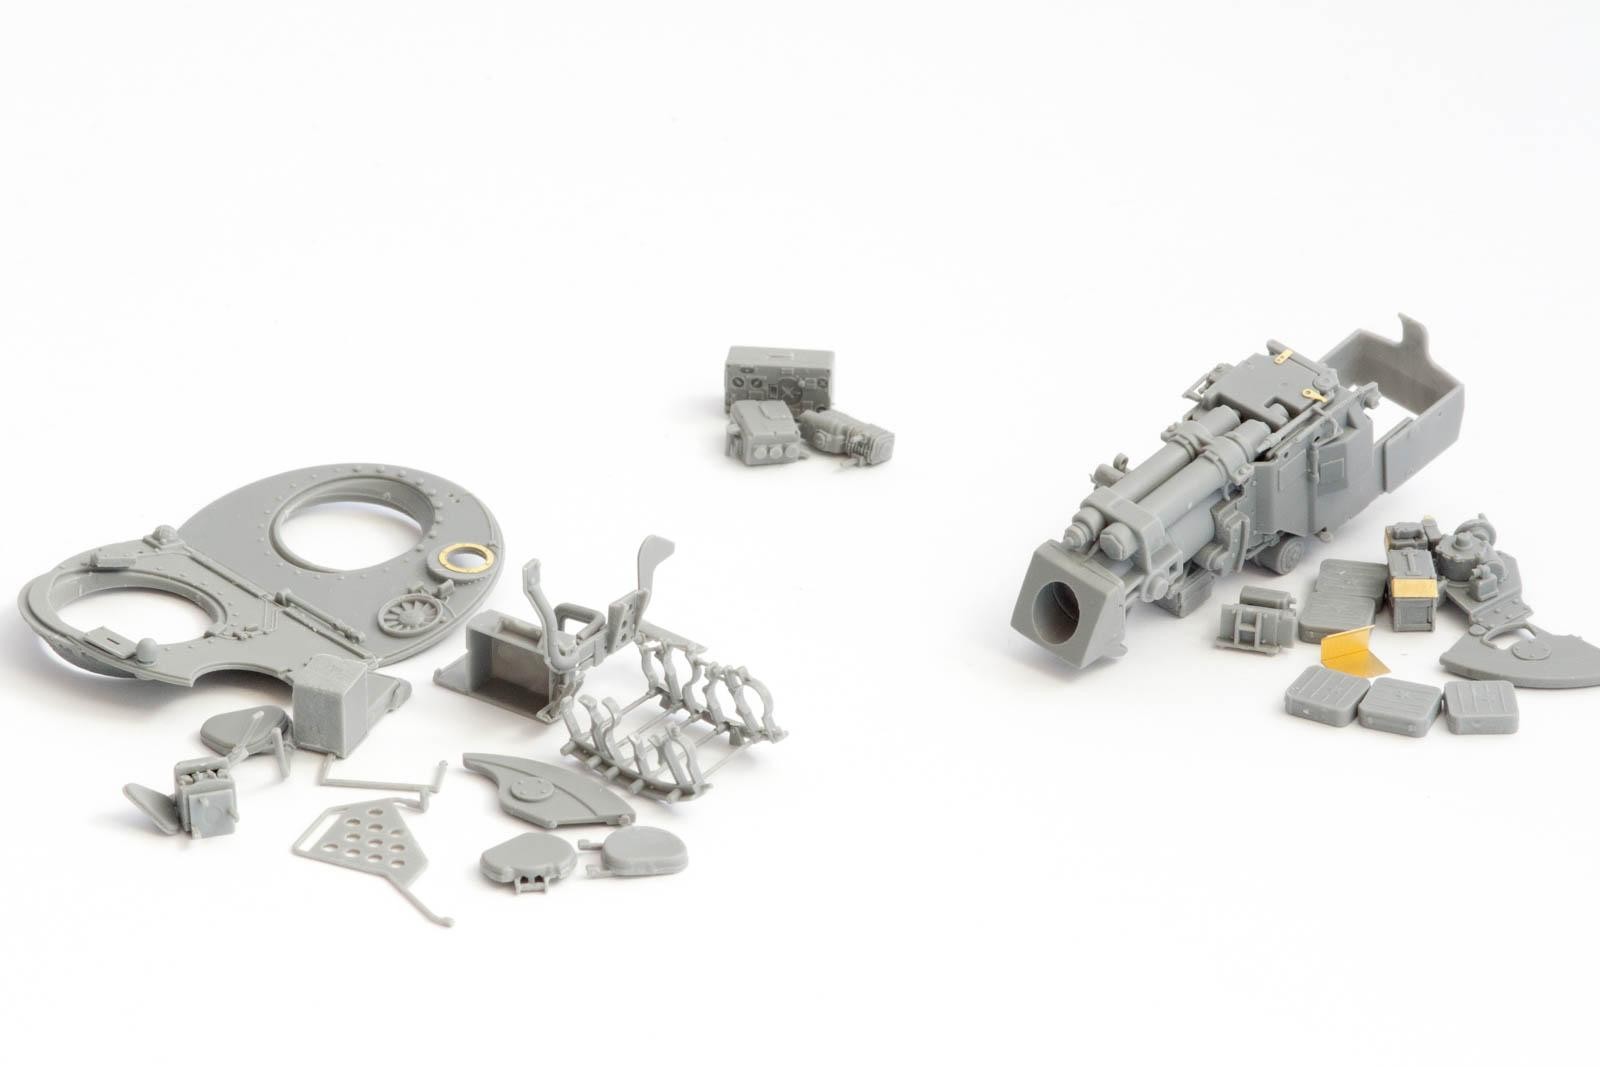
The Turret. Only Small People Welcome.
Here again, you will have to decide on your approach to painting all the bits. I went for these subassemblies:
- Turret shell and bottom,
- Turret ammo stowage,
- Gun,
- Gunner's seat and machine gun ammo storage,
- Co-axial machine gun,
- Telescopic sight.
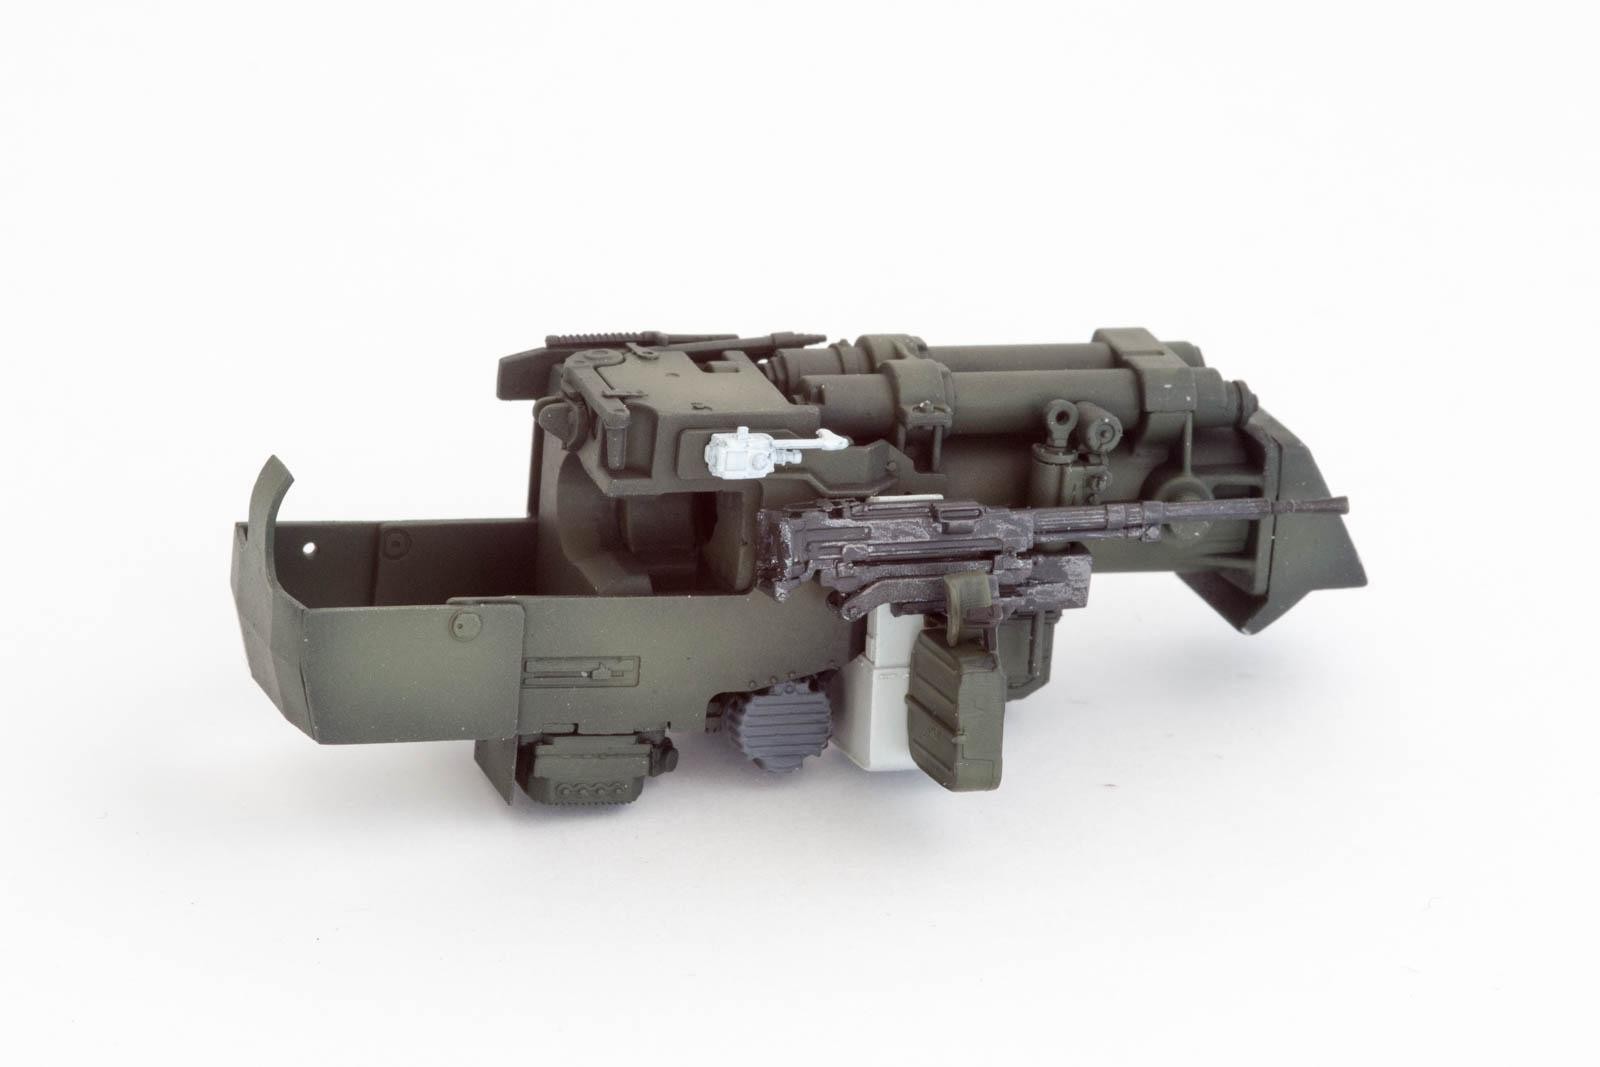
Construction is way fiddlier than with the hull interior, and is not really helped by the fact that the instructions are wrong in a couple of places. There is an array of mislabeled parts, and an instance of the instructions just not making sense. The following picture shows the gun control box being attached to part P29. Notice the thingie sticking out from the box, with the small locating tab?

And here's what the actual part looks like:
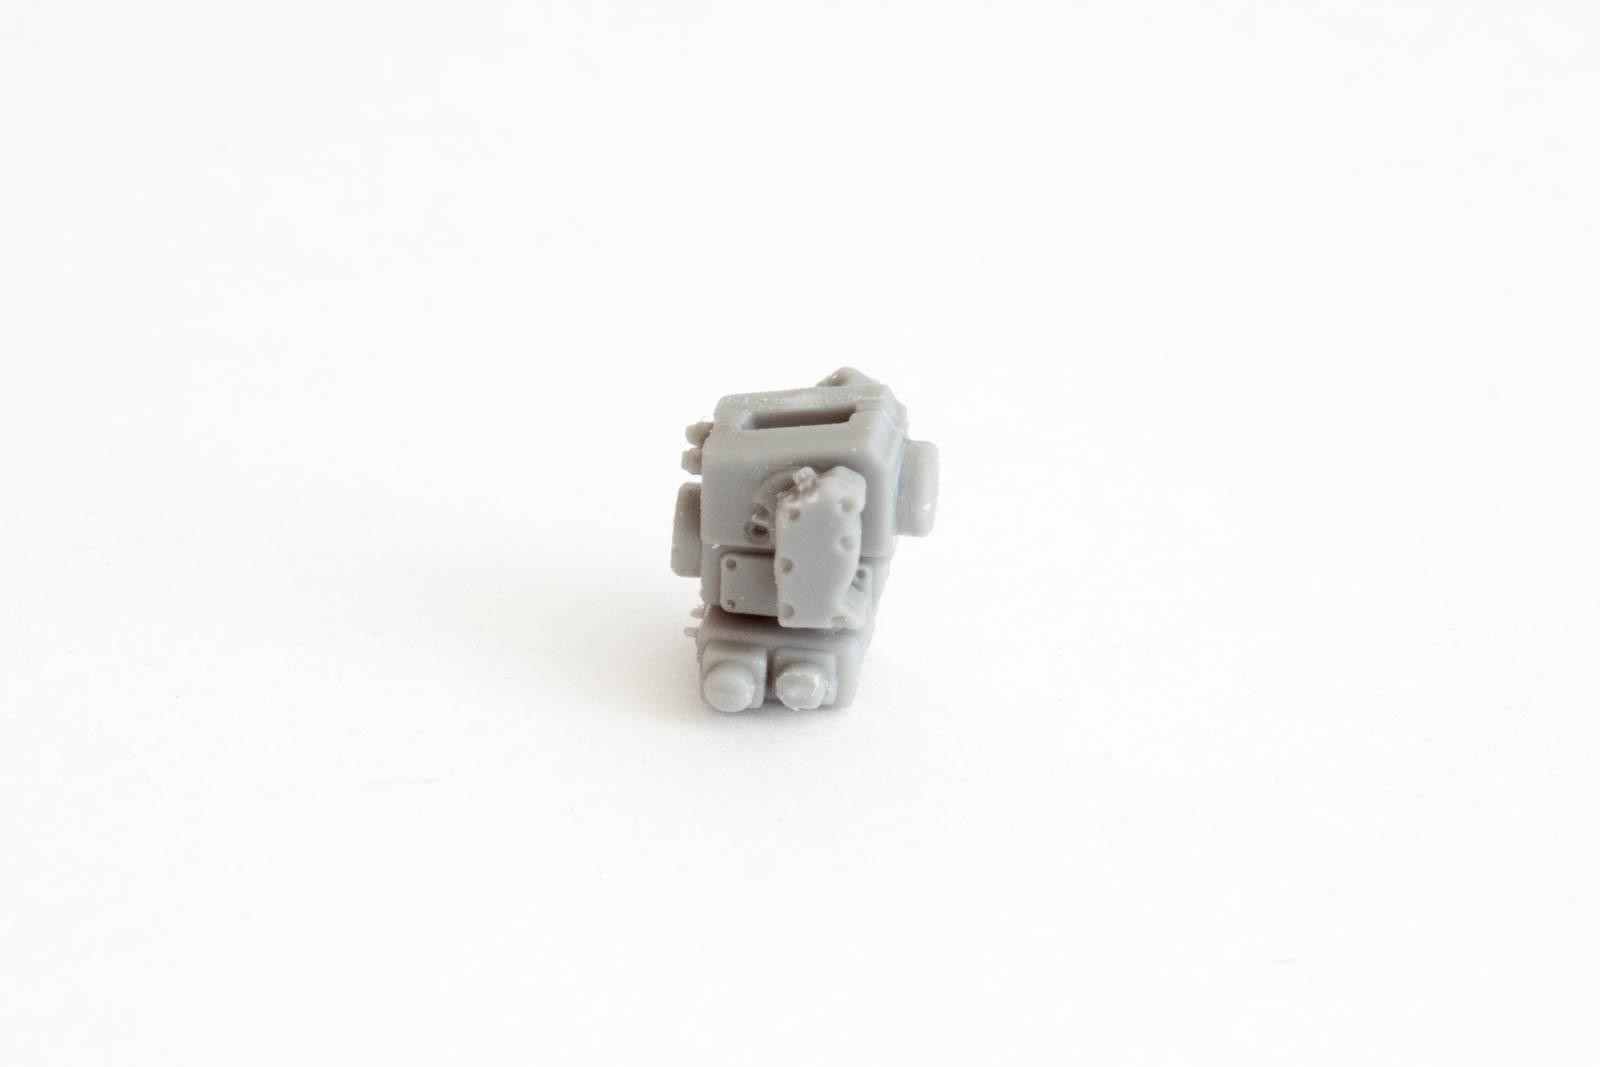
Yep, no thingie sticking out… Ok, it is not a big deal and can be solved with some bits of styrene, but it is still a bit annoying. Apart from that, the gun breech needs some filler, otherwise you ill end up with some ugly gaps.

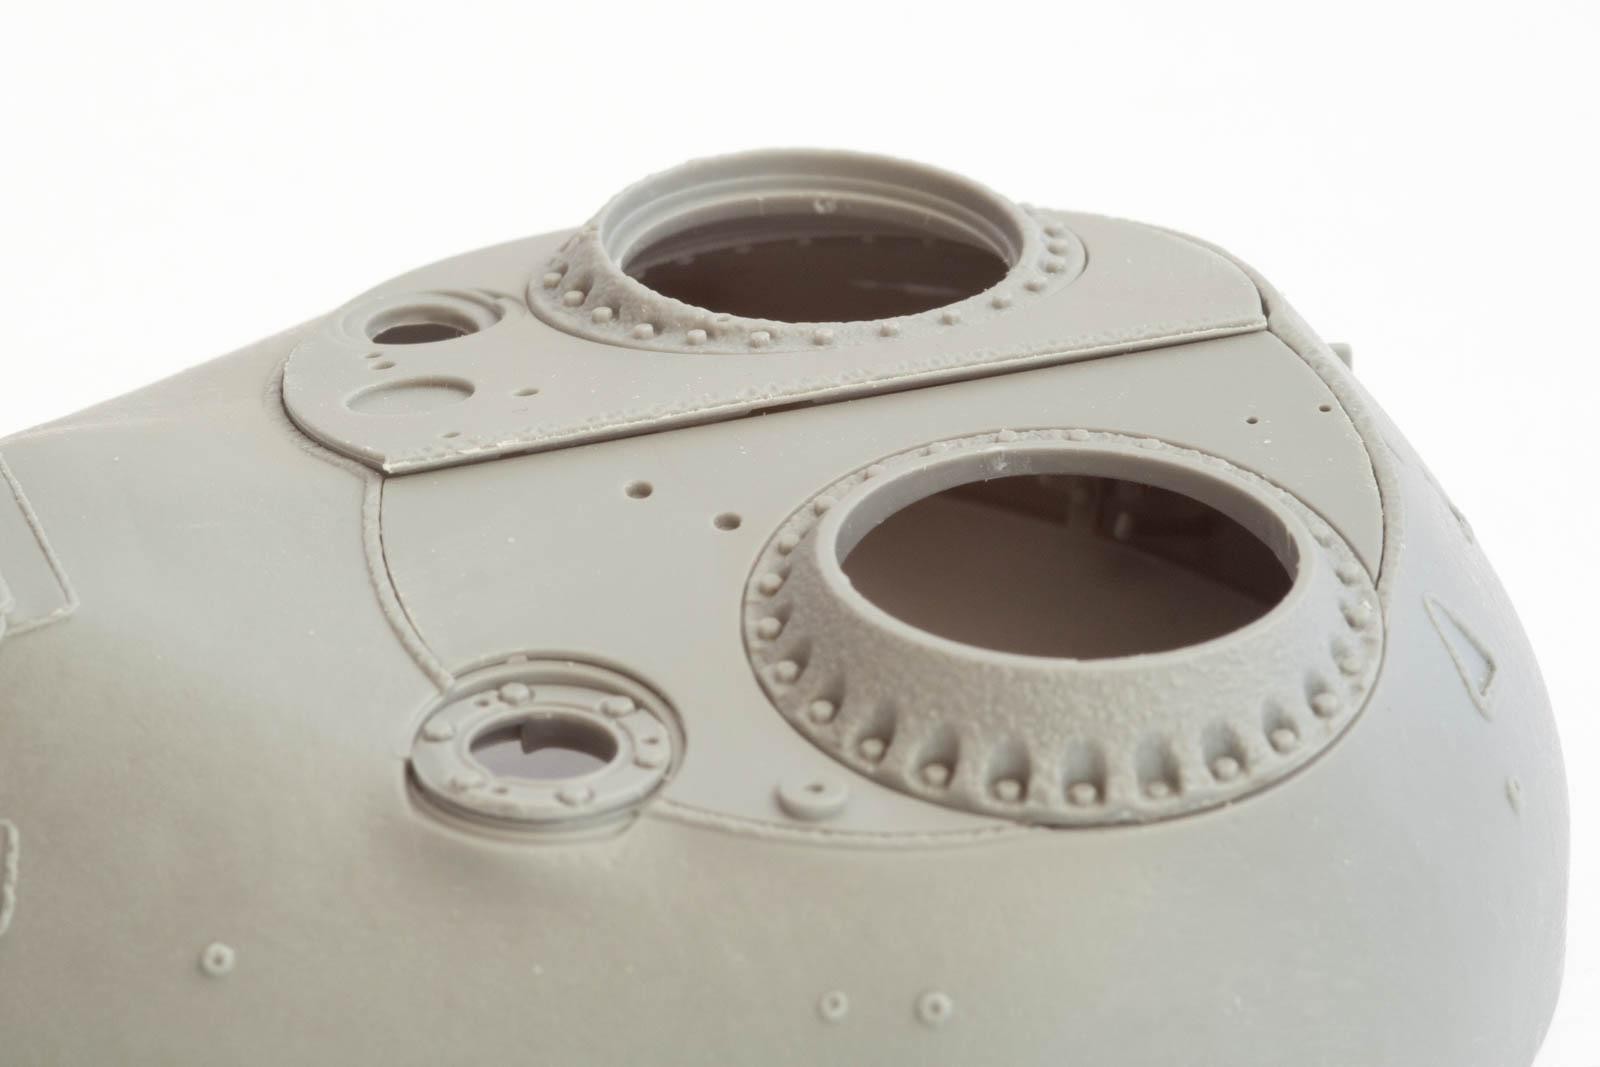
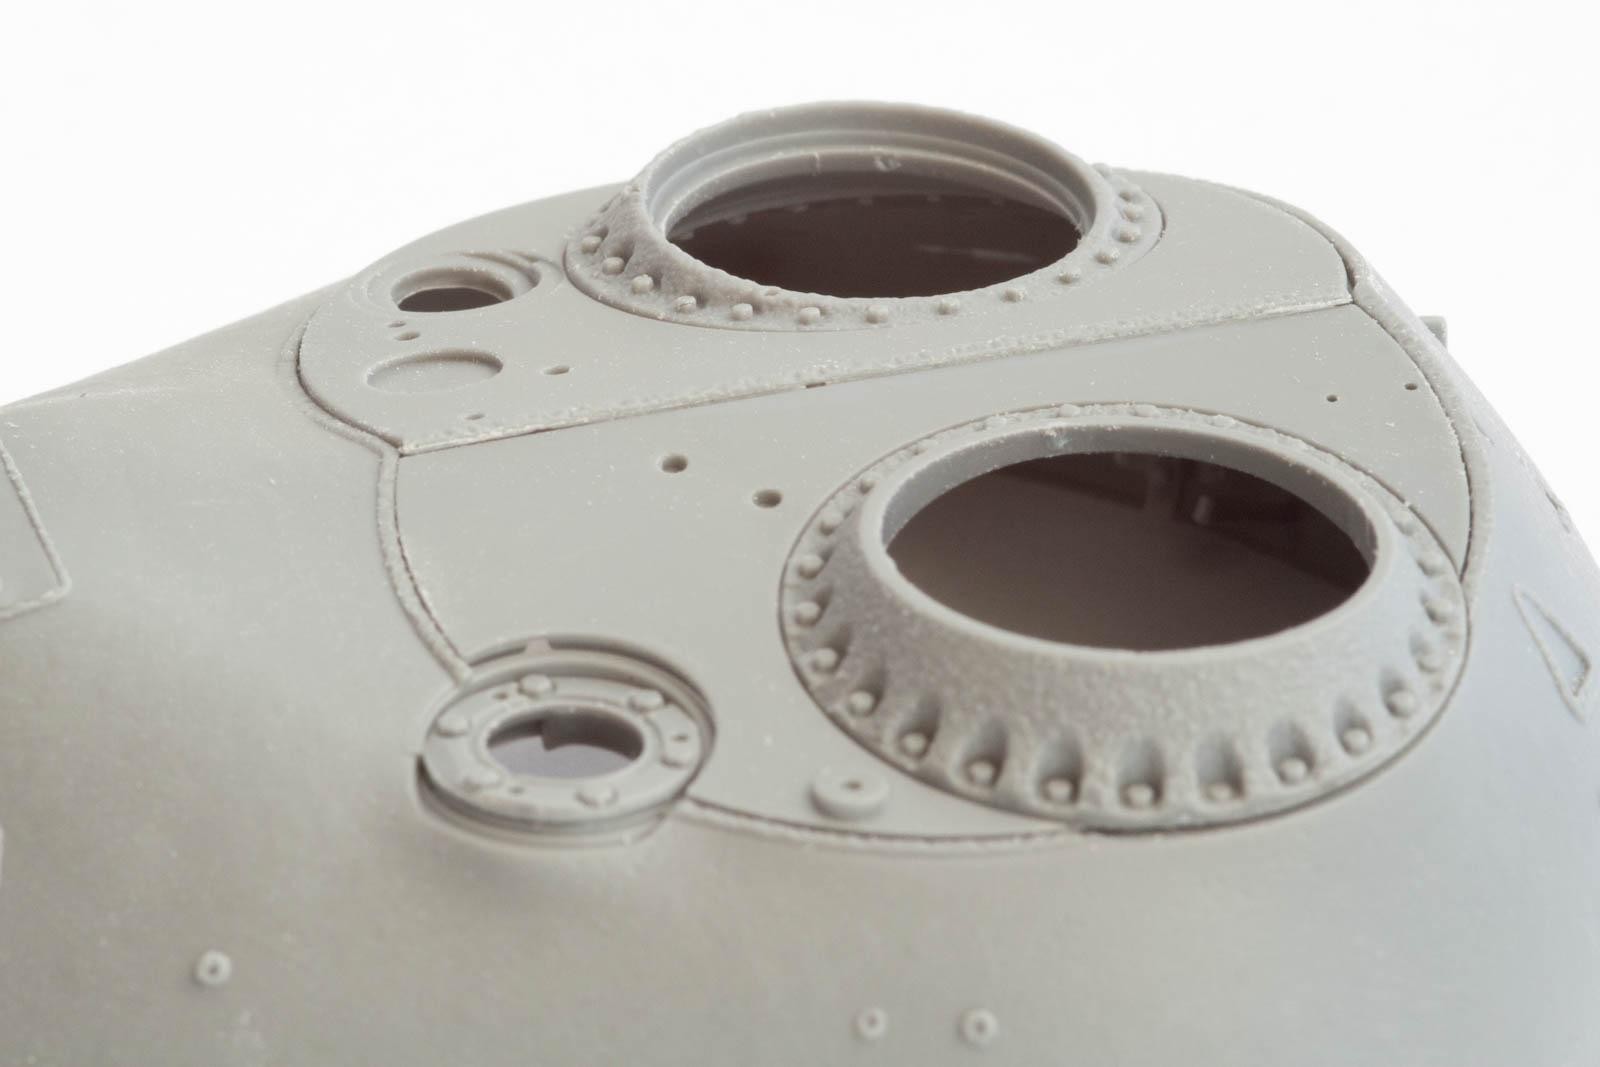
One area that will require some care is the turret roof. It consists of two parts which need to be joined along a weld seam. Without cleanup, this does not look too nice, so I spent some time cleaning everything up and test fitting – I might not glue the roof to the turret in the end, so I wanted to make sure the whole thing is a drop-fit.
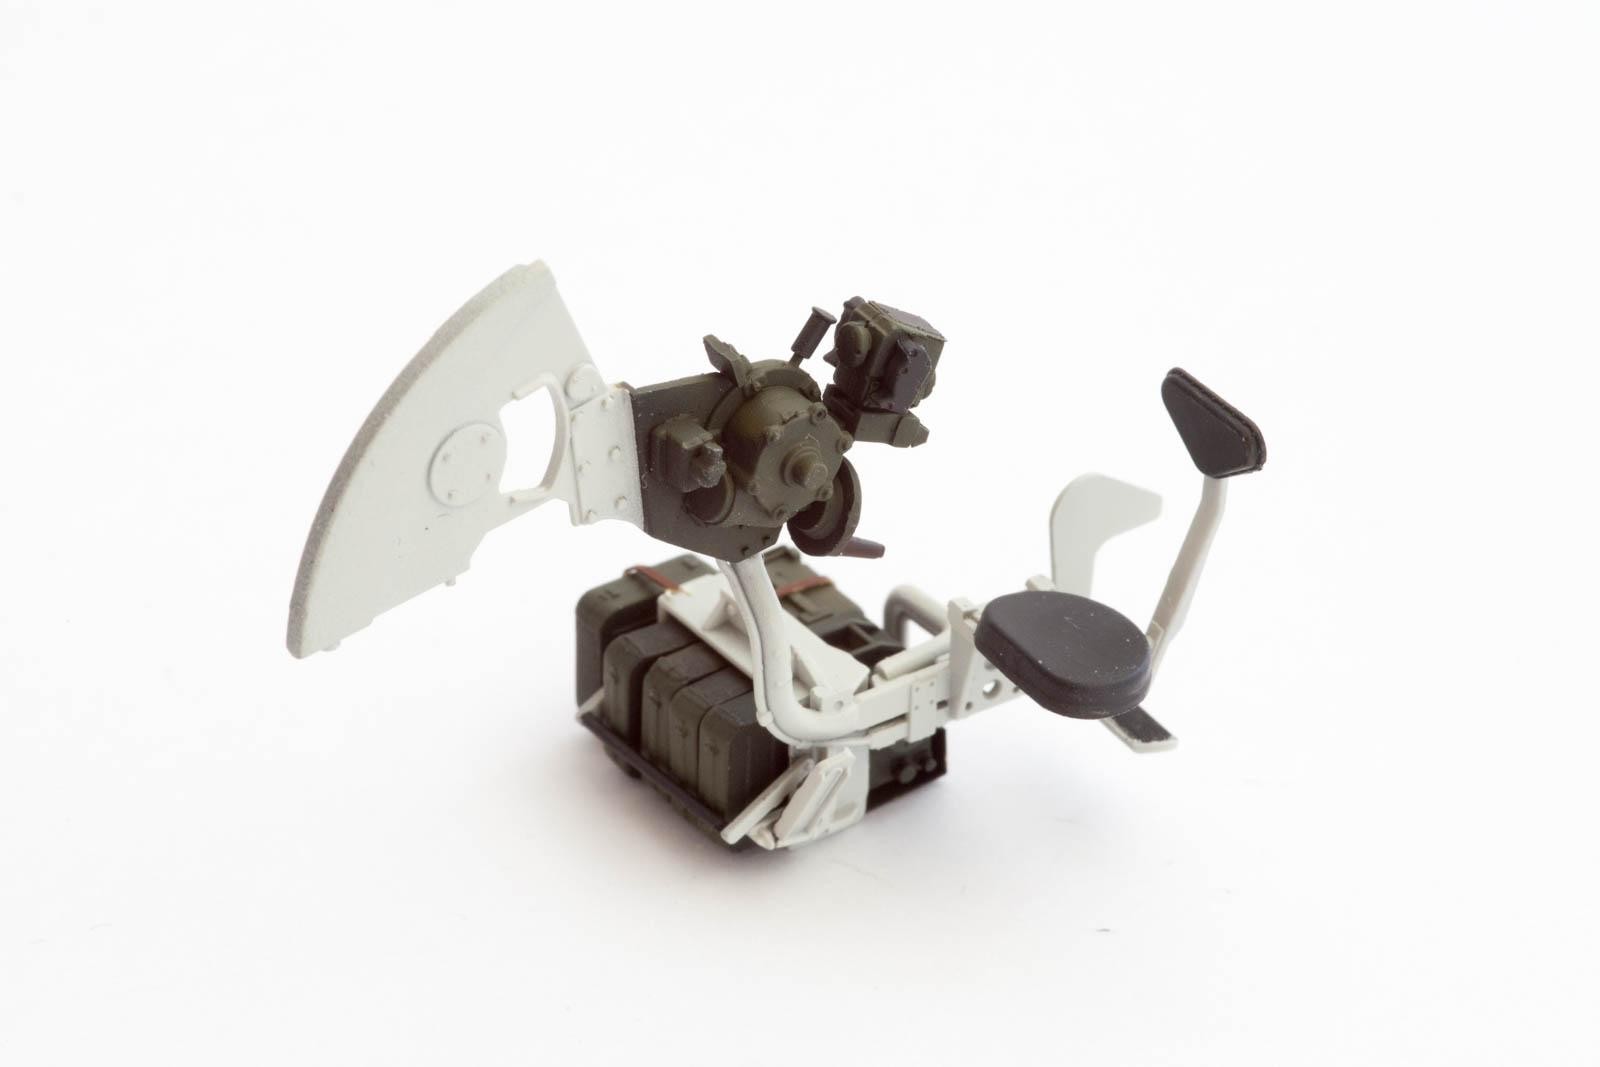
After having built the various subassemblies, it is time to put some paint on everything – mostly white, green and gray.
With the initial painting done, detail really starts to come out, especially with the gun and the gunner's seat.
Final assembly again requires you to do multiple things at once. I suggest using Tamiya Extra Thin and waiting for the glue to set a bit before proceeding to the next part – this gives you the opportunity to tweak the parts' positions if needed and bend everything to shape.
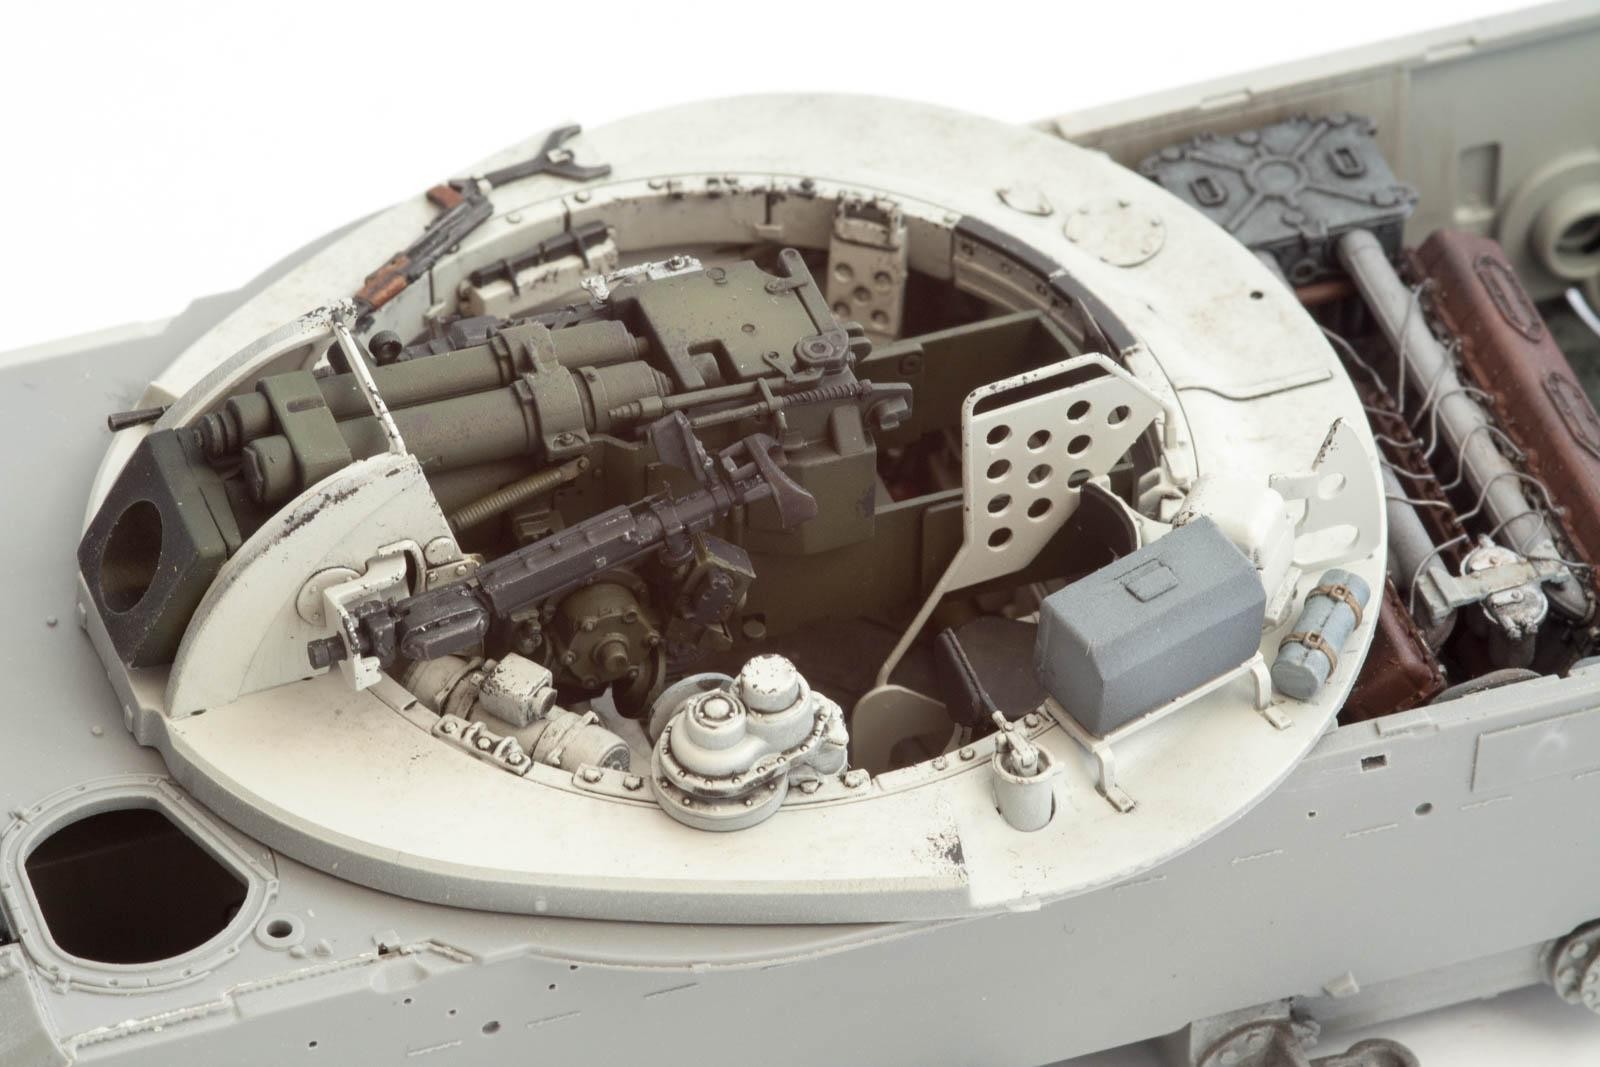
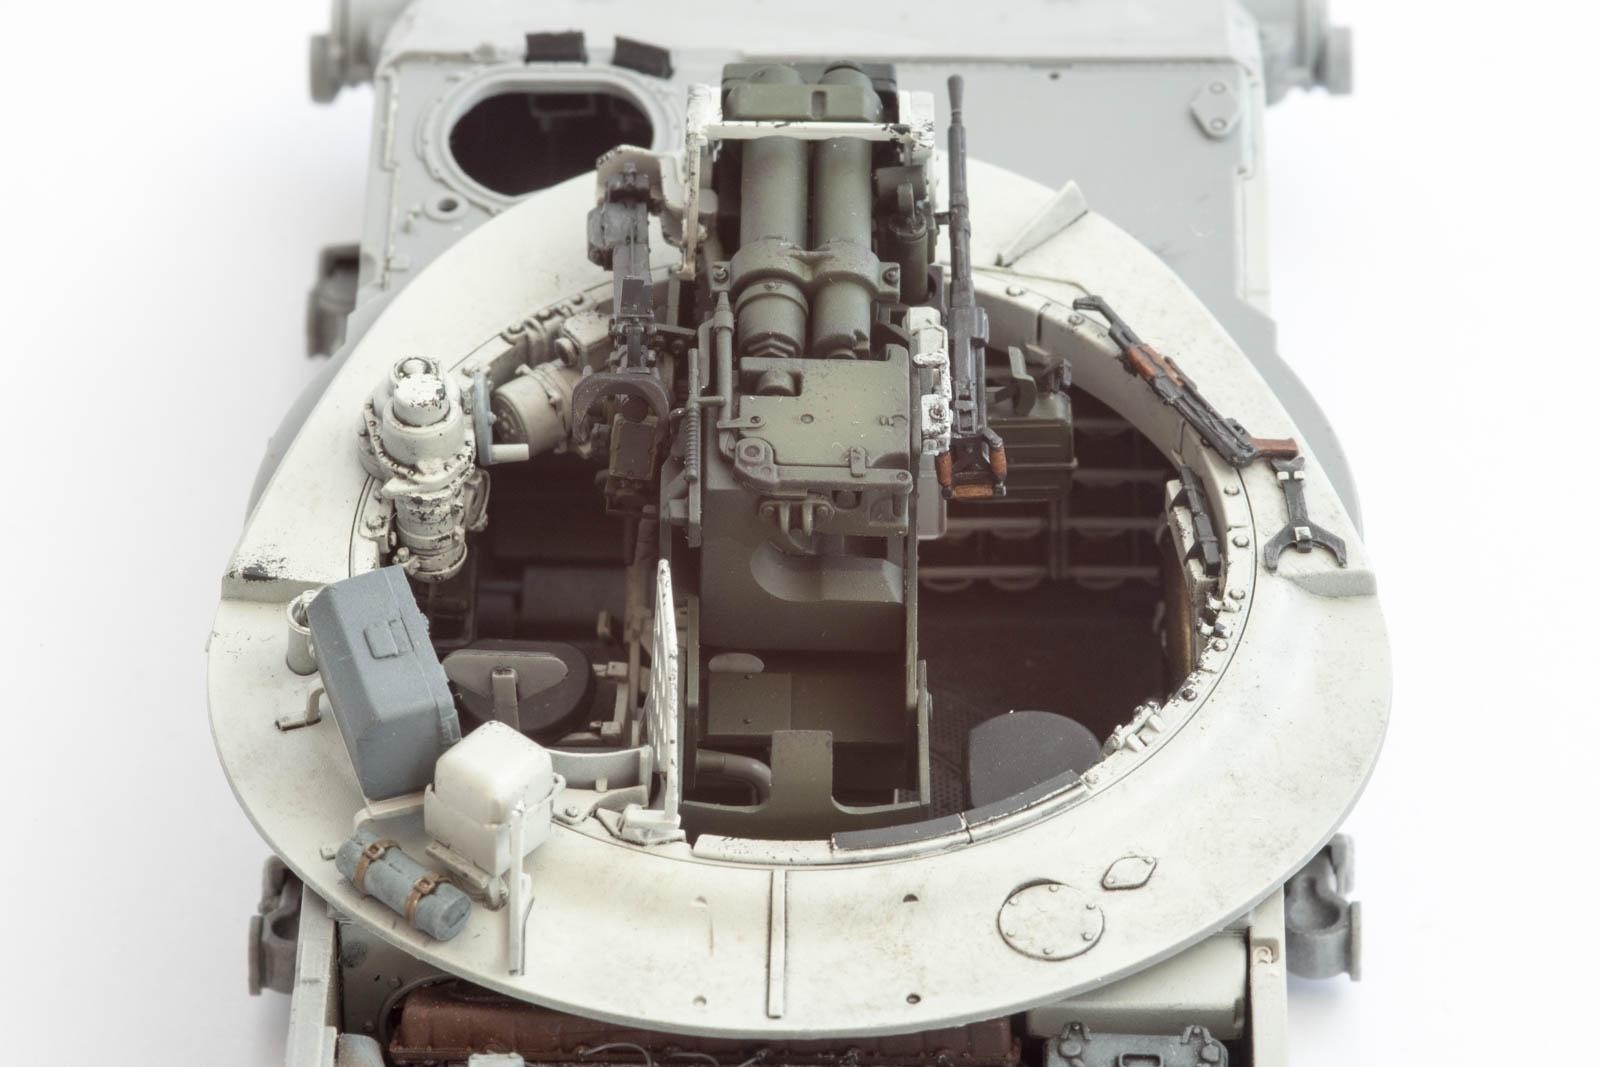
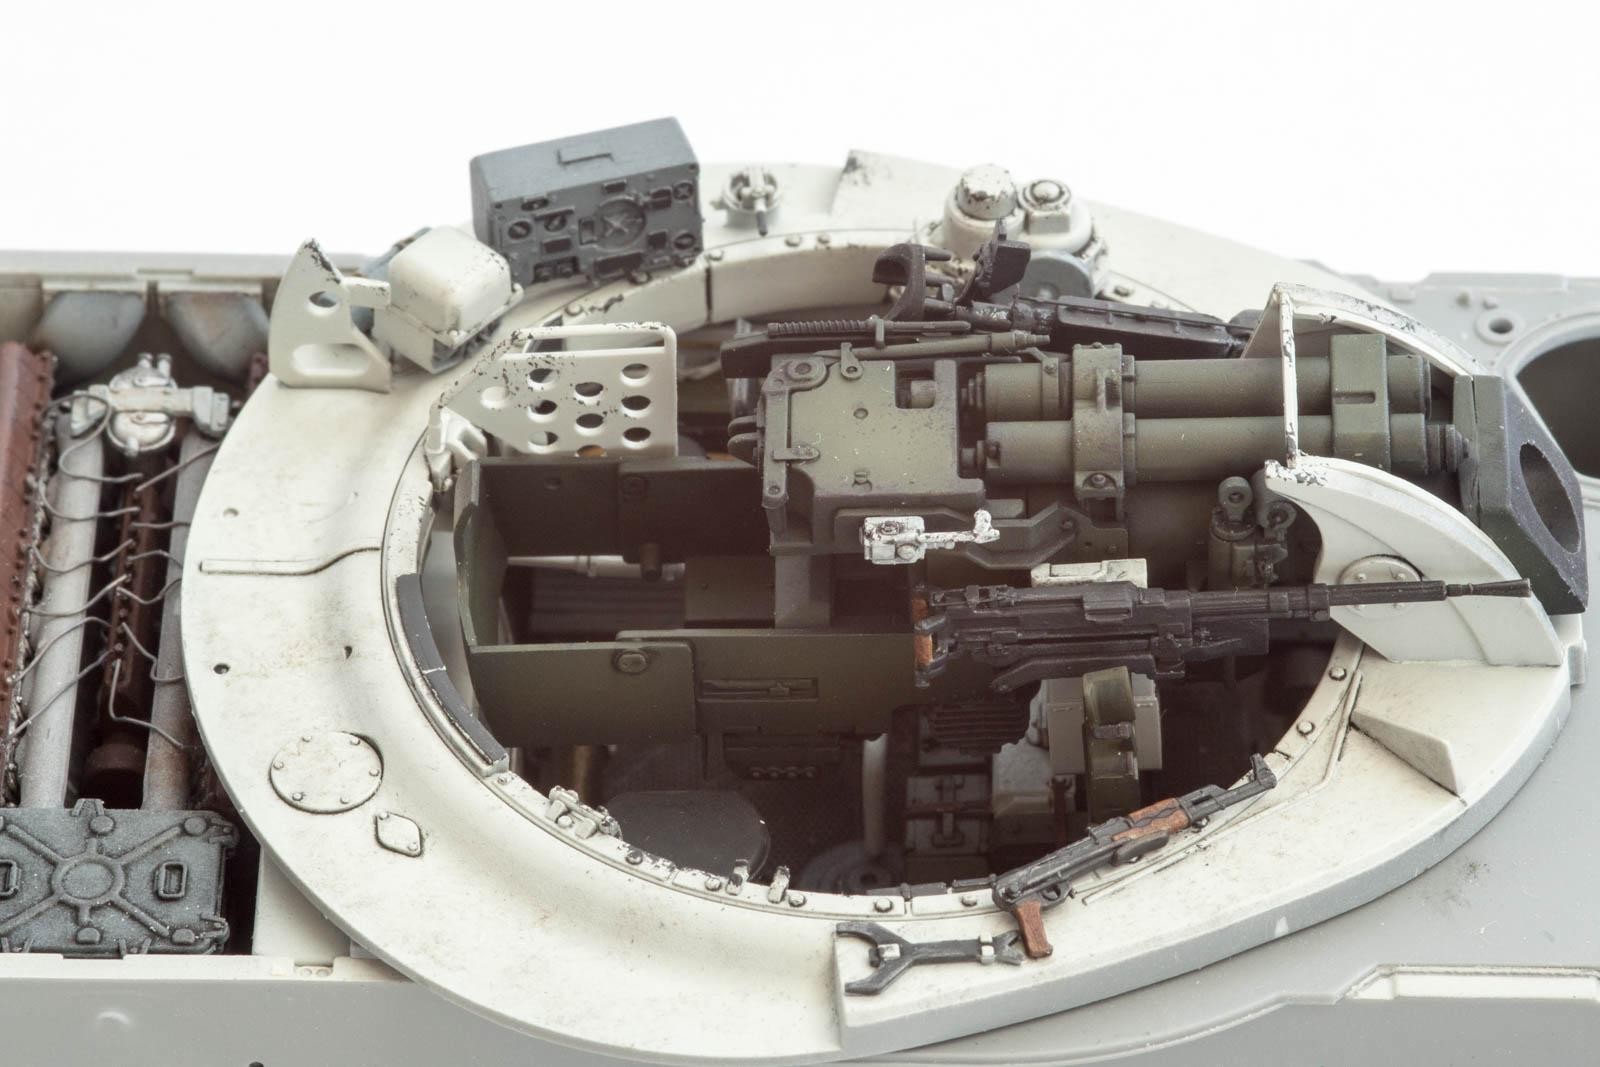
Finally, the turret is carefully placed in position, sliding the co-axial gun's barrel through its port and making sure not to break anything in the process. Looking inside the turret with its roof off, you can't help but notice how crammed this area is. No wonder the Soviets had a height limit for their tankers…

Now we have finished the interior, it is time to move outside. Part three will deal with the running gear, the exterior fittings, and getting ready for some snowy camouflage.

Boris,that is quite a comprehensive kit you've taken on. Thanks for the tip about the tape to I/D the different sprues, great idea, for frustration avoidance and a real time saver. Just a beautiful job on it, i was wondering how you'd display that interior and all your careful work and marvelous painting. It would be a shame not to show it off, and to give an idea what it's like to fight in close quarters. Thanks for letting us see your work and what the kit is like. I'm a plane guy, and I'm seriously tempted.
Thanks Bernard! I think I will stick to my plan of not gluing certain sections together - so I can display the interior if I want to, and if not it keeps the dust out 🙂
Happy to hear you are tempted. I can only recommend building such a kit to anyone who is interested in military technology of any kind. As you said, it makes you aware of certain things...
Bernard already said all the things I was gonna say, darn it. 🙂
😀 Much appreciated, Craig!
Superb work
Thanks Julian!
You are really cracking on with this Boris and making an excellent job.
Would you consider displaying the turret removed and resting on a couple of trestles?
Be a great shame to hide even a small part of that interior.
Thanks Robert! Yes, I have been thinking about that, but I would need to find some reference pics to give me at least a rough idea what these trestles could look like.
Miniart must be the Wingnut Wings of the tank world! This is SO detailed and apart from a few snags looks like it goes together rather well. I really like your technique on the exhaust manifolds, they look just like one of our big diesel generators after an hours worth of testing!
Thanks Josh! I had some fun with the manifolds, trying hairspray chipping together with pigments. Went better than expected!
How does the hairspray chipping work?
Boris,
I get claustrophobic just looking at the turret...they must have poured the crew into the tank like sardines. Some strong work on the assembly,painting and comments. Definitely a contender for model and article of the month. Two thumbs up.
Thanks Stephen! Yeah, the lack of space is just incredible. And I can't even imagine what it must have been like in full winter gear for hours on end.
🙂 ... Greetings ... 🙂 :
Boris ... I am amazed by this model alone ( of course your work is very exceptional ) , as a REVIEW I keep in mind THE MODEL ... and that one is a very, very good one. The engine alone speaks words, and yet as one sees all the details one can only imagine the real one and the crew inside.
This is one I will have to look out for.
Thank you for the pictures and the fine work.
This is a great build review, Boris! As mentioned before, Bernie said all the important comments. Having been a Tank Crewman myself, I surely appreciate the "compact" nature of this tank. I believe the height limit you mention was 5'6" or a little less than 1.7 metres. Child size, almost! I have Grandchildren who could meet the height requirement! Ha!
This is kit is really well detailed and your review must surely help anyone interested in buying it, looking forward to seeing the finished model.