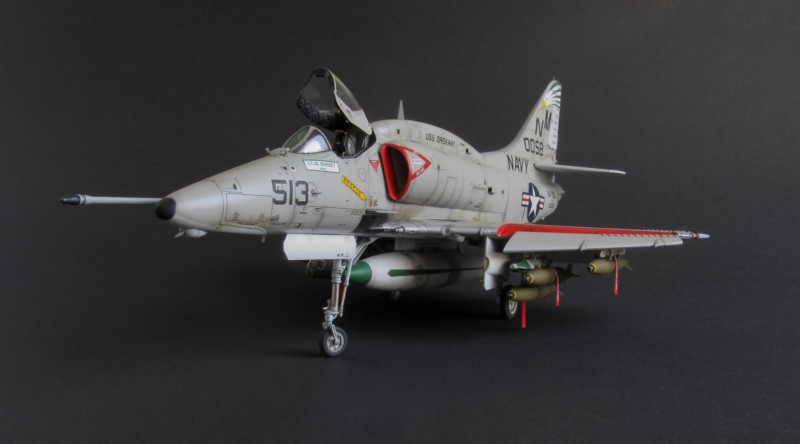
Chippy 513 – A-4E Skyhawk (1/48)
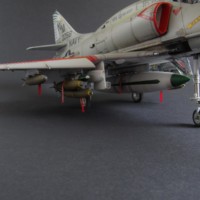
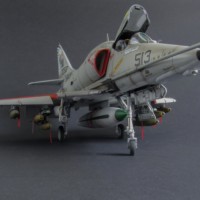
I've always been interested in Vietnam War aviation, so when Eduard issued Vietnam Scooters limited edition kit, I knew I have to build one as soon as possible. The kit contains Hasegawa plastic, Furball Aero-Design decals for five marking options and some resin add-ons from Eduard Brassin range.
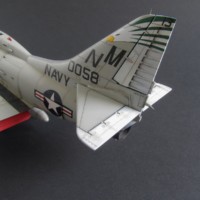
Initial idea was to build this nice little jet with Iron Hand type ordnance - the term coined by US Navy for suppression of enemy air defense sorties - and one of the less prominent schemes. That ruled out Lady Jessie and commanding officer's markings provided in the box. I've decided to build Dambusters scheme with then first issued emblem of bald eagle on the tail.
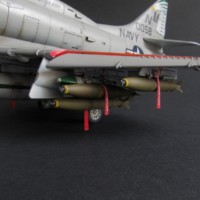
Vietnam War is really interesting topic, especially because the veterans are still around here and if you're lucky, they can answer some of questions related to the equipment and the tactics. I managed to learn that the Skyhawk I was about to build probably did not carry any Iron Hand ordnance because it was deployed in 1969, when there was moratorium in effect at that time and no air strikes were conducted in areas with strong air defense. I then decided to load typical iron bombs instead.
I've started with PE parts application. Eduard issued rather large upgrade set with details for gear bays, gear legs, slats and air brakes. When this was done, I was warned about the only mistake in the Hasegawa kit, which is the step on the wing where leading slat is placed. I decided to correct this mistake by cutting the slat well out and repositioning of the whole part.
With these upgrades and repairs done, I could start to work according to instructions - this usually means cockpit and other interior subassemblies. I've planned to use Eduard Brassin nozzle, but the outer part was too small to fit which was very noticeable so I had to use original kit part instead. After painting compressor first stage and cockpit, I was able to seal the fuselage.
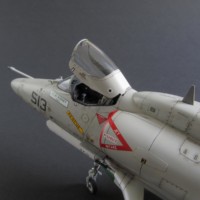
Since there is a lot of going on around the fuselage, I was trying to do as much as possible before wing assembly. I've drilled out majority of vents and added all the modification parts, intakes, the hump and the wind shield. There are small reinforcement plates over the intakes in the box, but they are of the wrong size and shape. I've replaced these with vinyl sheet and rescribed the recessed lines along the seams of the fuselage. A lot of people is asking about the parallel line on the nose - it is supposed to be there as on the real aircraft.
When the fuselage was ready, I had to finish the wing. I've drilled some holes in the bottom part in order to attach hardpoints and ordnance. With the experience from previous project, I wanted to make these joints as strong as possible. In order to achieve extra strenght, I've drilled holes into hardpoints and ordnance so I can place a copper wire inside and fix it in place.
The fit of the wing against the fuselage was exceptional and almost drop fit. I only had to sand a little bit in the lower back area and that was it. Instead of using common putty, I've used clear epoxy HpH glue which can be wiped with damp q-tip. That was because I wanted to hide seam line and it worked pretty awesome.
The most challenging part of this kit is the root of the wing, where various parts are supposed to be used. This small triangular area gave me hard times given the fact the room is hard to reach because of the arc of the air intakes and poor fit. I had to use plasticard of various thickness to fill the gaps and my new favorite epoxy glue. There was a lot of sanding and repairs in that area, but the hard work paid off in the end.
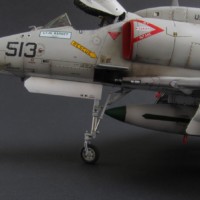
I then attached stabilators and most of the small details such as aerials and refuelling probe. I've also started to work on fiddly bits which usually stalls me towards the end of the build. Nose gear was updated from Eduard Brassin set with proper fork and wheel, I've worked on the ordnance, also from Brassin range and I also decided to replace seat provided in the box.
With all parts ready for painting, I've laid the primer surfacer first in order to check the surface and mitigate possible blemishes. When everything was smooth and clear, I've applied Gunze black finishing surfacer, which I like to use because I can easily control the opacity of the base color. Mr. Paint US Navy White was applied first on the bottom surfaces and majority of small parts. It actually never occurred to me how much white paint was used on USN aircrafts in this era. After white paint application, I've applied custom die-cut masks in order to avoid large decals. Roundels, tail code, modex numbers, red warning areas - all that was ready for painting.
Light gull grey base paint was next step, obviously. There's nothing challenging on this scheme, so the process was pretty straightforward - no mottling, no preshading - just layer after layer to achieve nice even look. I've started to work on painting of the small parts and ordnance instead of usual weathering of the airframe which also kept me motivated for the late stages of the build progress. Since there's a lot of whites, as mentioned above, it was pretty fast process, except the ordnance, which was the most challenging from all of the fiddly bits.
When everything was painted and decaled on, it was time to weather every single subassembly and put everything together. I've started with slats and airbrakes, which I attached to the model along with the tail hook. I've used my own mixture of pin wash for recessed lines and some oil paints to depict staining on the most weary areas such as upper surface of the wing, gun muzzles and engine service hatches. Some extra effort was dedicated to ordnance and fuel tank, where I added chipping and scratches with crayons and additional oils.
I was happy enough with the look of the airframe and the small parts so I could finally put everything together. I've attached ordnance to adaptors and to the hardpoints first and made sure everything will drop fit on the wing. Correct positioning of the gear legs was the most important at this stage, so I've used clear epoxy glue, which needs 24 hours to cure. This way I had plenty of time to correct any disproportions. I've left it cure for six hours and then I could place the aircraft on it's legs with some slight support and correct the angles. Wheel bay covers were pretty easy on this kit, so there was no issue at all. Ordnance was prepared beforehand and the extra effort to make it fit really paid off. Adding canopy was the cherry on the top.
Compared to the previous project this one was pretty easy, but it still took me 18 months from start to finish. I hope you like the result and provided insight. Feel free to share your thoughts in the comment section.


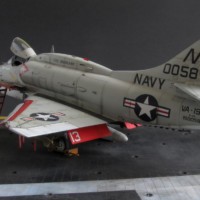
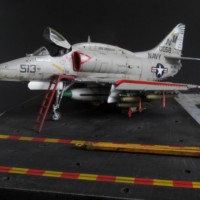
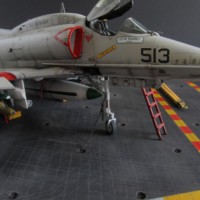
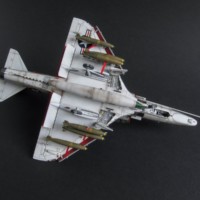
Nicely presented in all aspects, my friend...the comprehensive narrative, the photography and, of course, the excellent build itself.
I've built a couple of the "old" Monogram kits (which are STILL a good kit for the money, IMO), but now I think I may wanna 'upgrade' after seeing yours. Again, nice all around job, sir.
Excellent Scooter, nice flight deck and tow bar.
Hi David, welcome to iModelerer
Scooter is really beautiful, I've had the honor of seeing him with my own eyes. Beautiful work
Welcome aboard, David! Very nice build, and good to see no heavy pre-shading 🙂 May I ask you where the flight deck is from? Looks vey convincing.
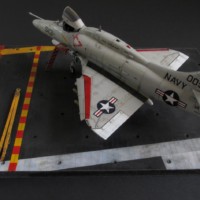
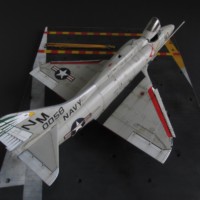
Thanks mate. The display base is made from dense polyethylene sheet which is used for padding on conveyor belt chutes. My friend @Tomas Pelej above sent me this sheet with drilled holes and I've attached Infini Model tie-down points and did some planking and painting. It was quite rushed job, but it will do it.
Thanks for the info! I have enough of this stuff lying around, using it for sea dioramas. Wouldn't have thought of using it for this kind of base. Every day's a school day...
Cheers,
Boris
Beautifully done! Appreciate the rundown on the potentially problem ares on the kit. Best Skyhawk kit, period.
Excellent! Very convincing paint and weathering work, and a beautiful A-4. Welcome to iModeler - looking forward to seeing more!
One of the finest grey jets model I’ve seen, sharp detail and subtle but realistic weathering makes it an excepcional piece. Well done sir
Fine and impressive, congratulations !
Very nice work on this with a very realistic-looking result. Scoots are cool.
Excellent build David. Welcome aboard !
Your photographs of your "Scooter" look great and the base is a very nice touch. Very professional indeed.
As Greg stated above, I'll be looking for more of your work too...
David, its always nice to see one of these nicely built up, well done !
Nicely presented. Attention to detail and weathering makes this one a WINNER. Well done!
Very, very nice Scooter, I like it a lot.
Great model 🙂
Eric
Looks great
This looks absolutely wonderful, David. Your panel line weathering and the surface finish are truly first-class. Welcome onboard at iModeler!
Hello David,
Excellent representation of this famous Scooter. I like the setting on the flightdeck. Regards, Dirk / The Netherlands.
Beautiful Skyhawk, David! Your painting and weathering are exceptionally well done.