Working jackstands
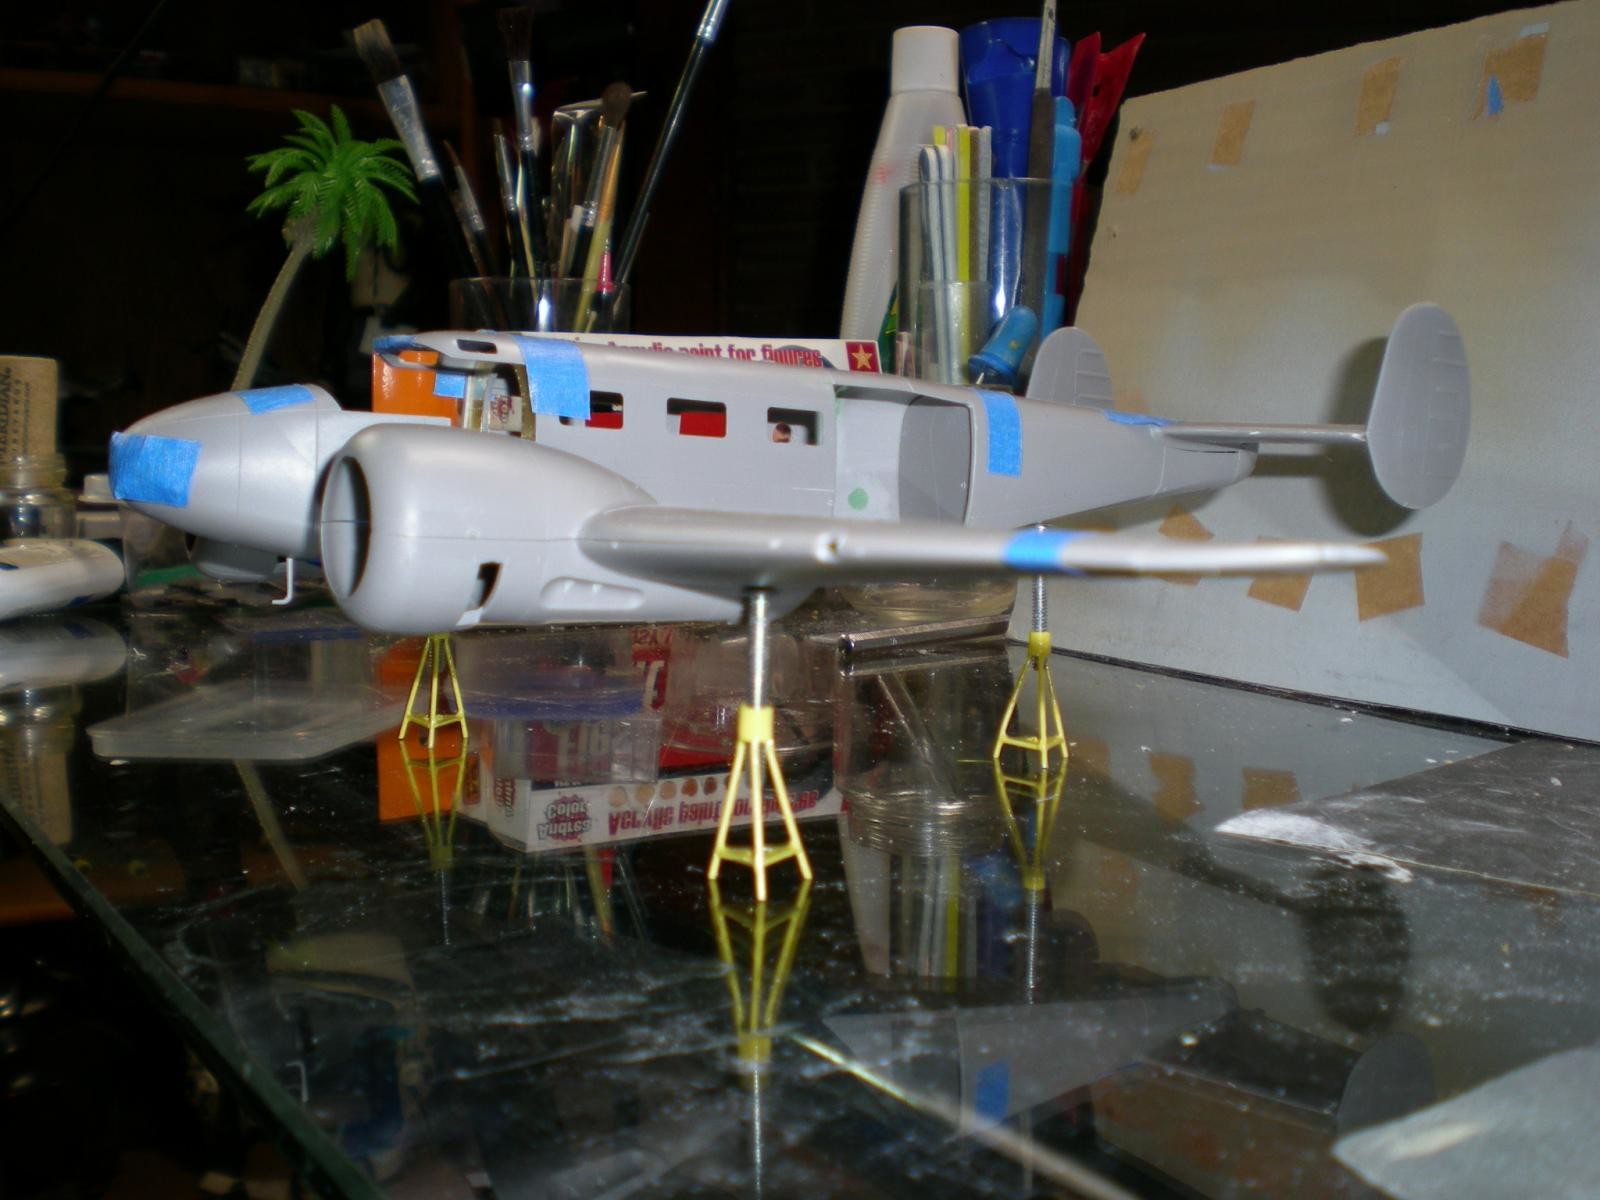
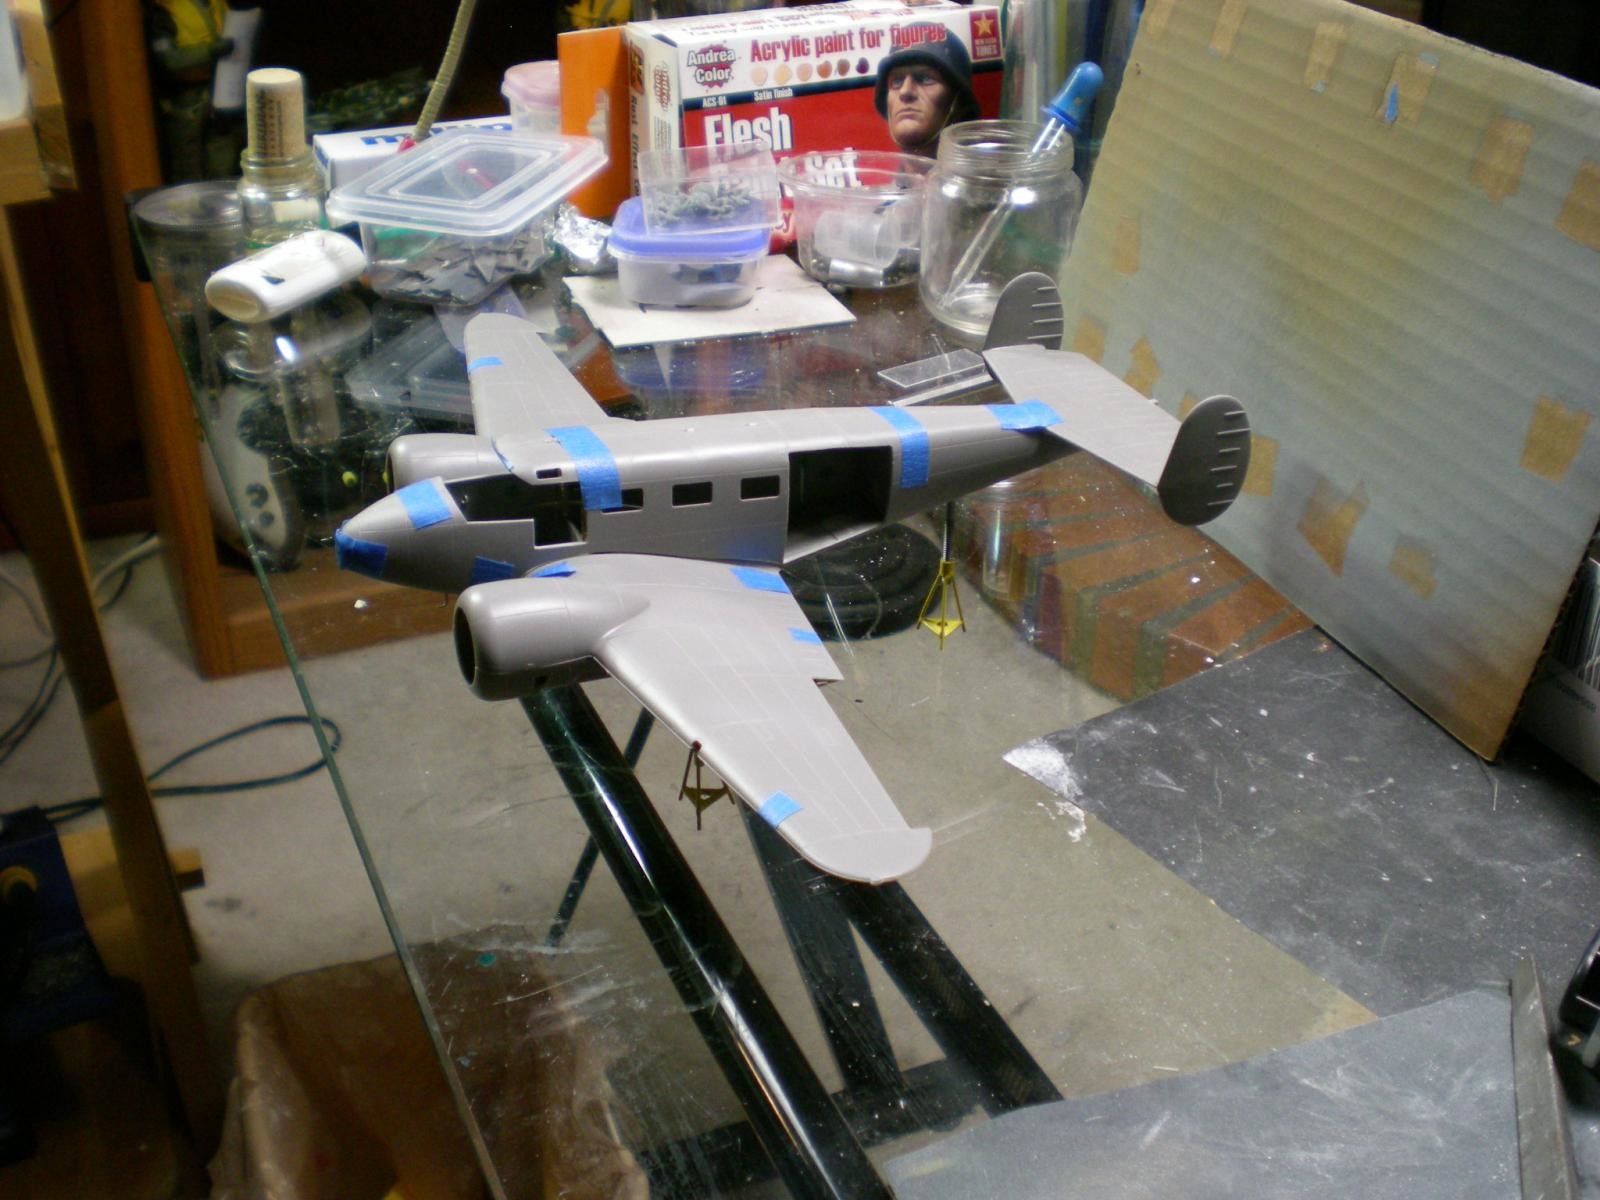
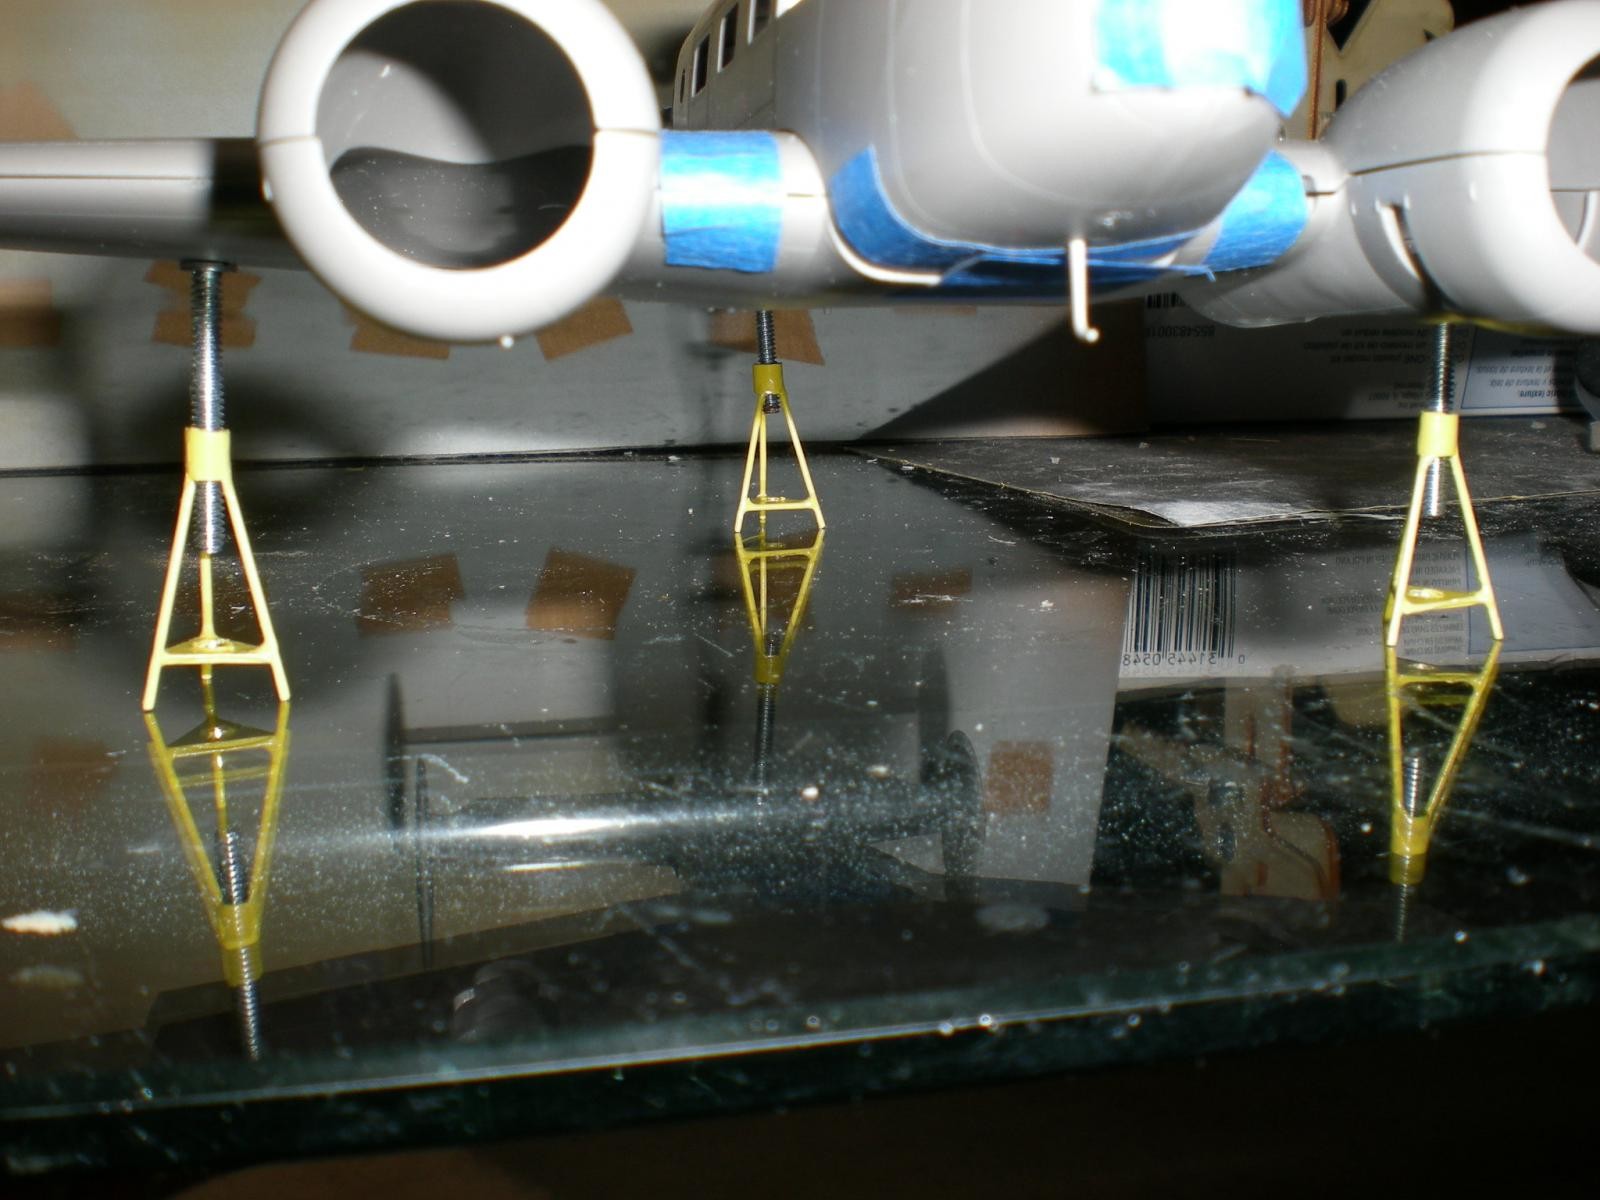
How many of us have asked ourselves, “just how am I going to put that gear retraction test in my diorama? What am I going to do for jackstands?” That was the very question I faced while planning my 1/48 scale Caribbean air cargo diorama featuring a hanger maintenance scene.
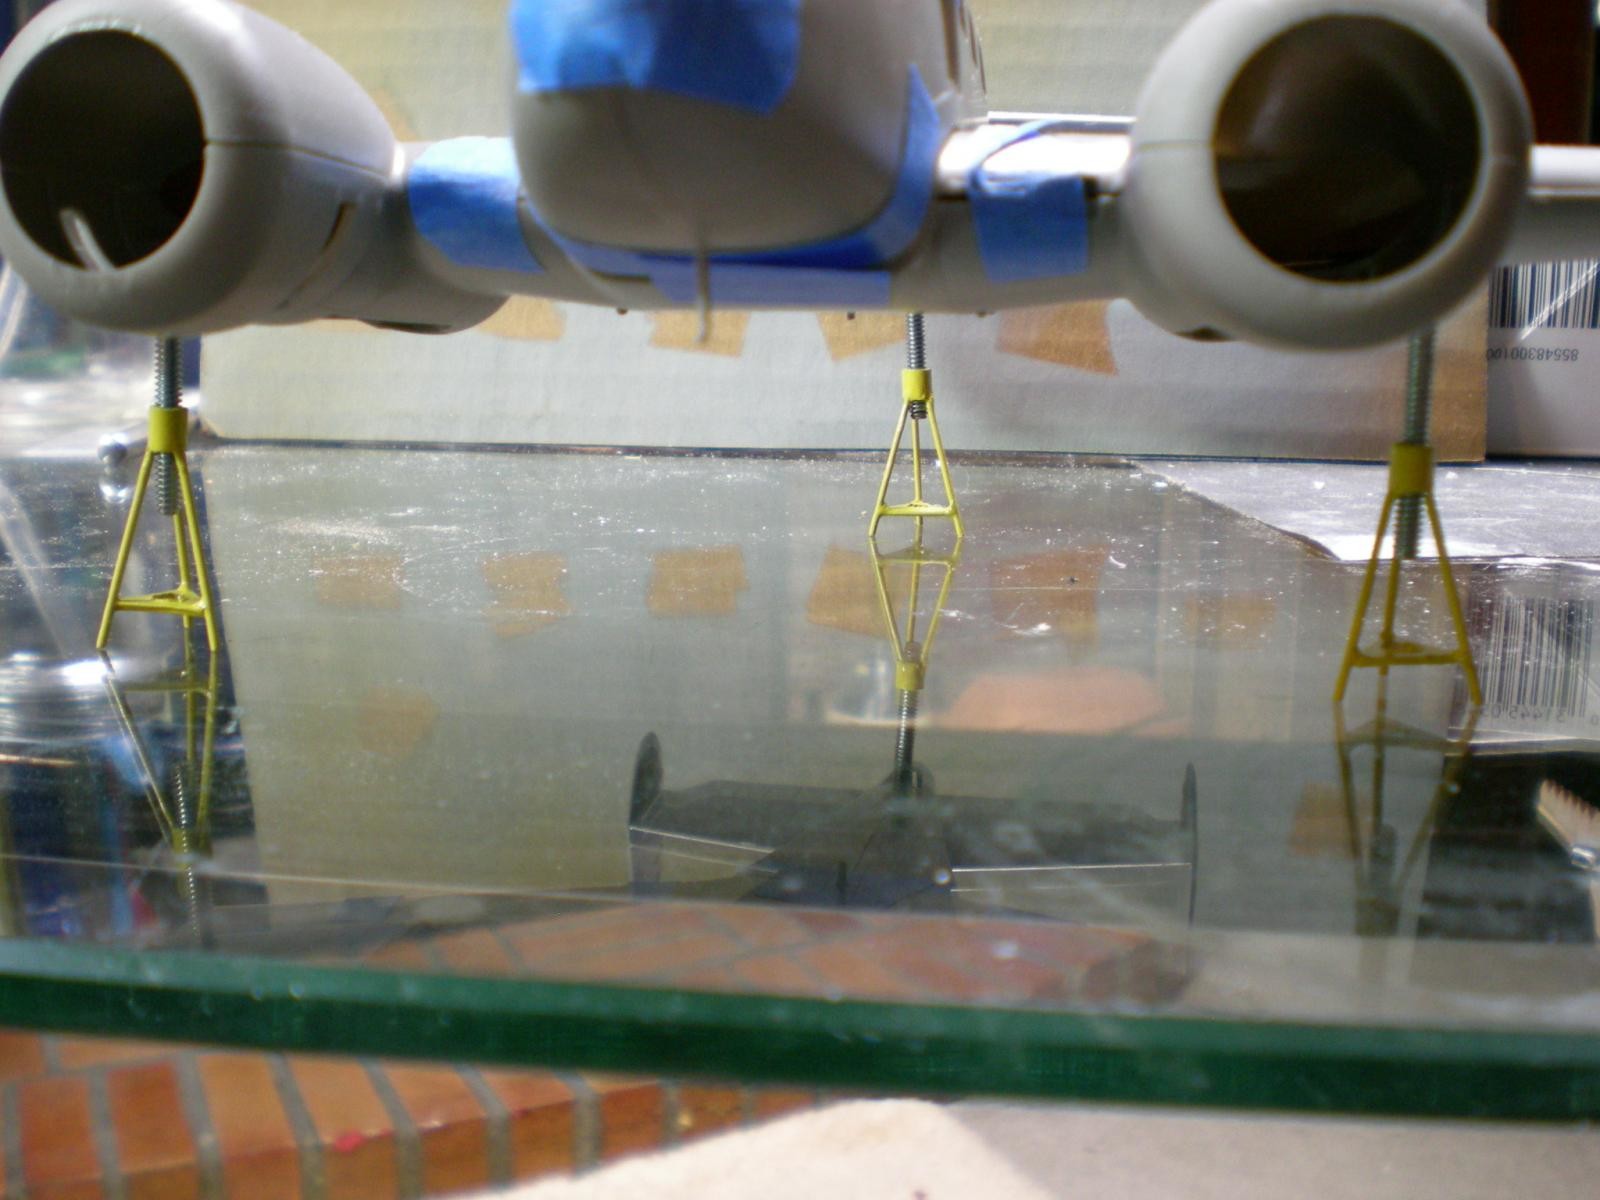
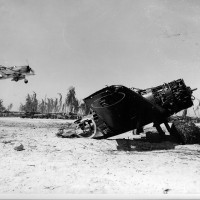
I well remember lugging and positioning those weighty, yellow tripods we used for such tests. These were nothing but huge four to five foot tall, tripod mounted jackscrews one had to screw in and out by hand. Jack up the aircraft, position the tripods under the designated jackpoints, screw them out until snug, then release and remove the hydraulic jacks. Although the aircraft would shake and buck as the gear retracted, I never saw a properly positioned jackstand fail to support the load.
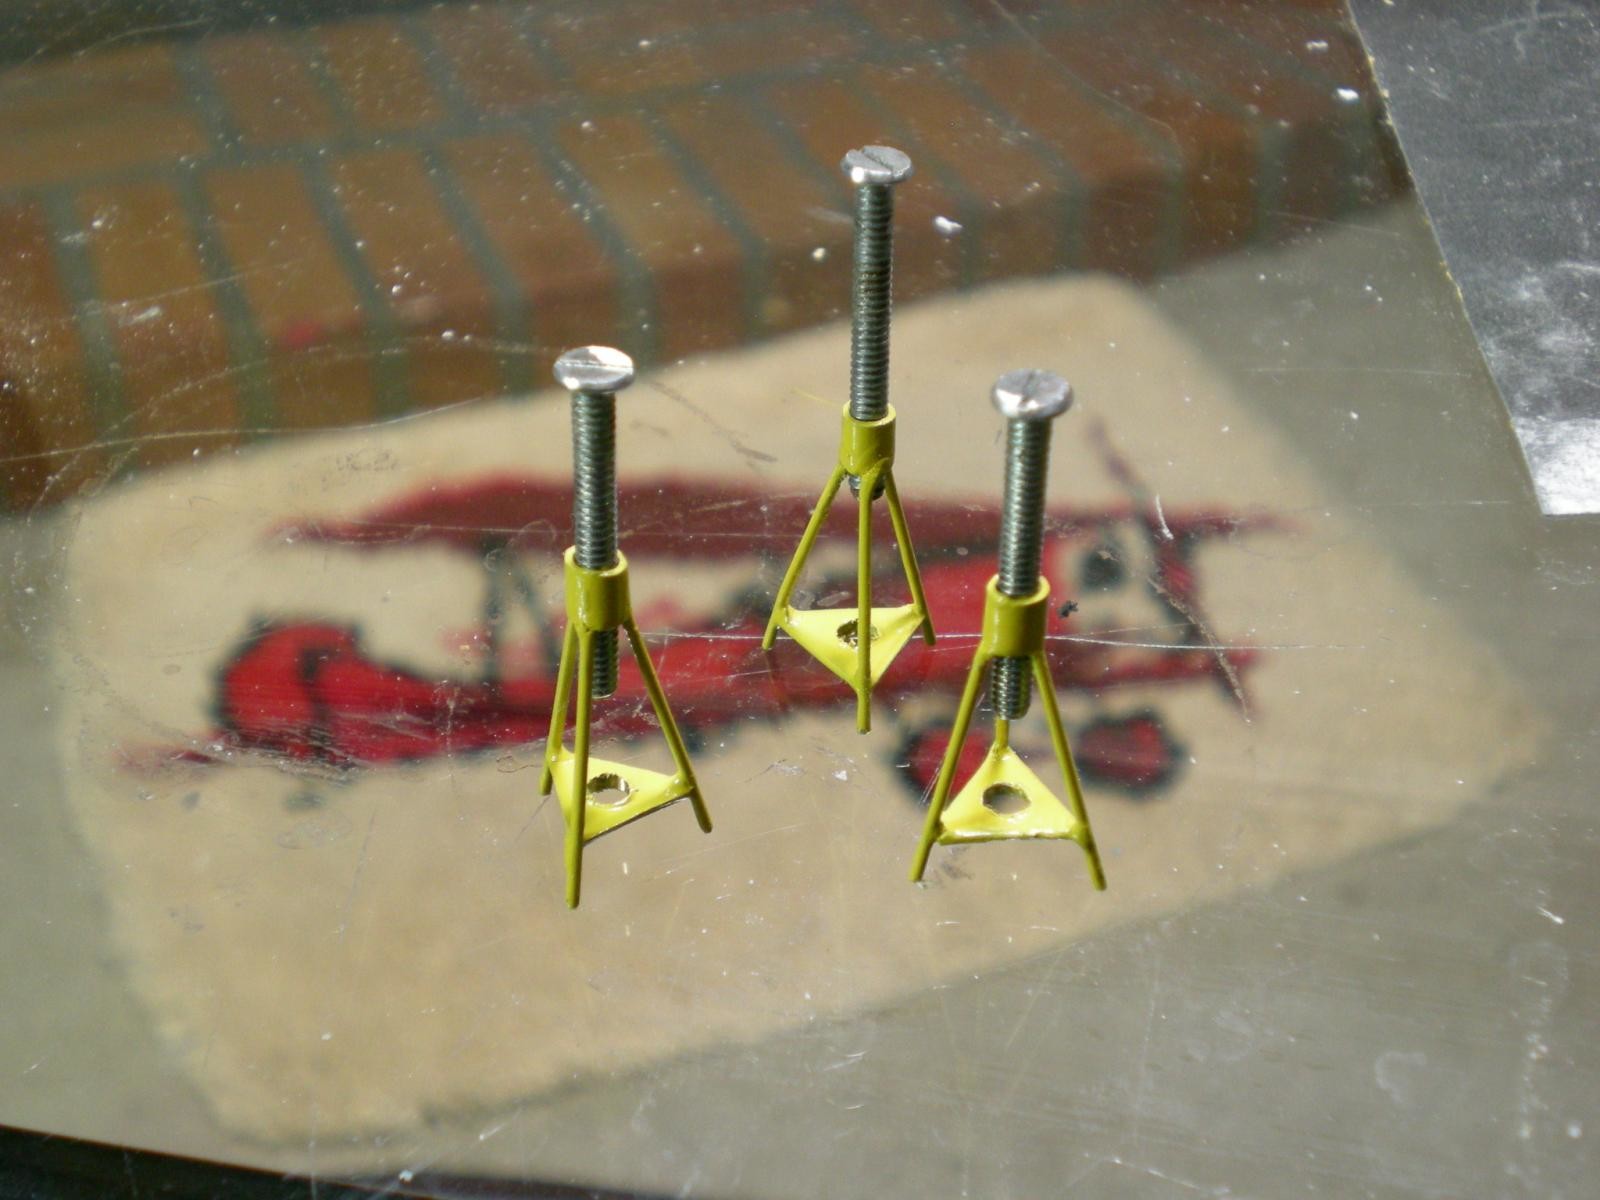
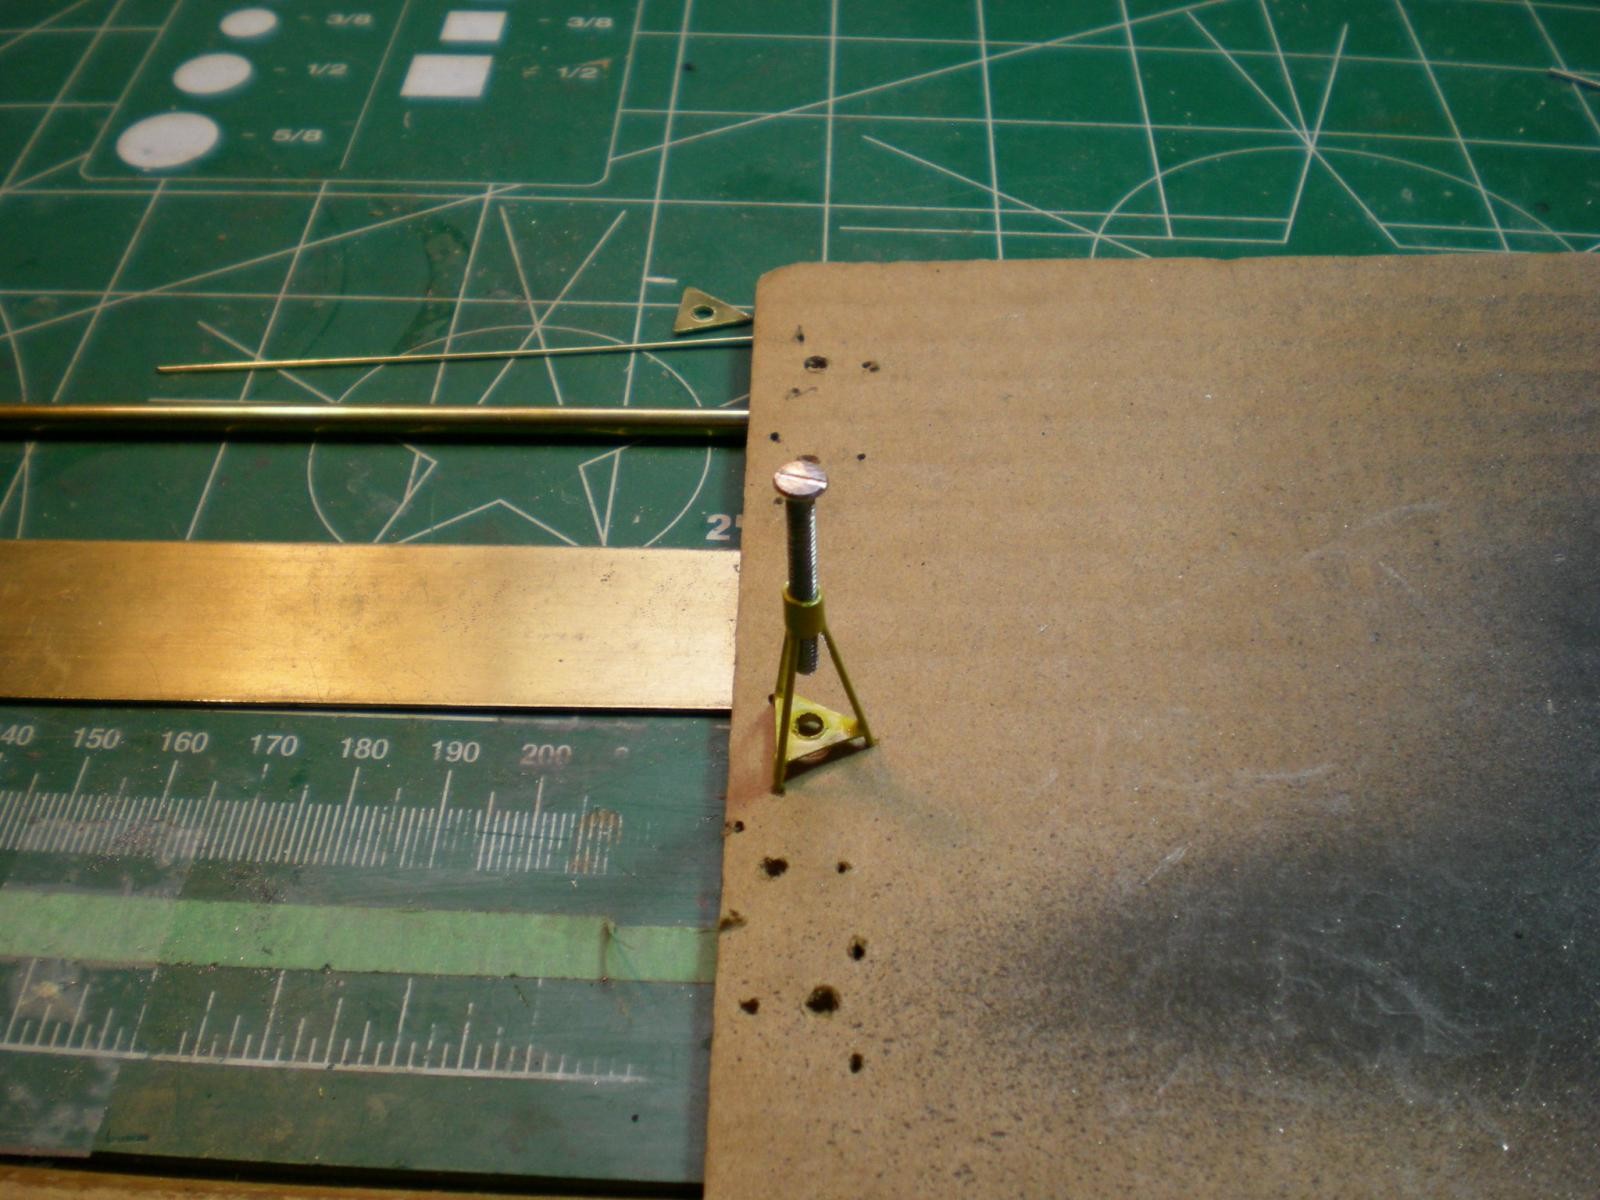
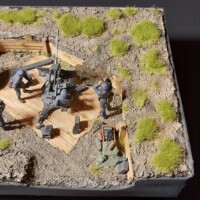
It just so happened I had inherited some very fine 3mm screws and this is what brought to mind working aircraft jackstands. I figured these would make perfect 1/48 A/C jackstands. I took a piece of sheet brass and laid out the 60 degree triangles, then drilled a 3mm hole in the center of each triangle before cutting them out with large dykes and a Dremel tool.
I then cut a piece of 3 mm brass tubing for the top collar and made three legs of thin brass rod. The trick was the jig for soldering the unit together, as the heat from each joint would result in the melting of the other nearby joints, so the unit had to be soldered in the assembled position. The jig was a simple piece of corrugated cardboard with corresponding punched holes. I put the screw through the brass tubing and triangular piece to hold the two pieces in alignment, notching the corners of the triangular brass piece to accommodate the rod. I put the screw into the cardboard hole and aligned the three brass rod legs and then soldered the rods in place.
To make the screw work, I took a pair of small pliers and squeezed the tubing collar snug around the screw, Presto! Adjustable jackscrews!
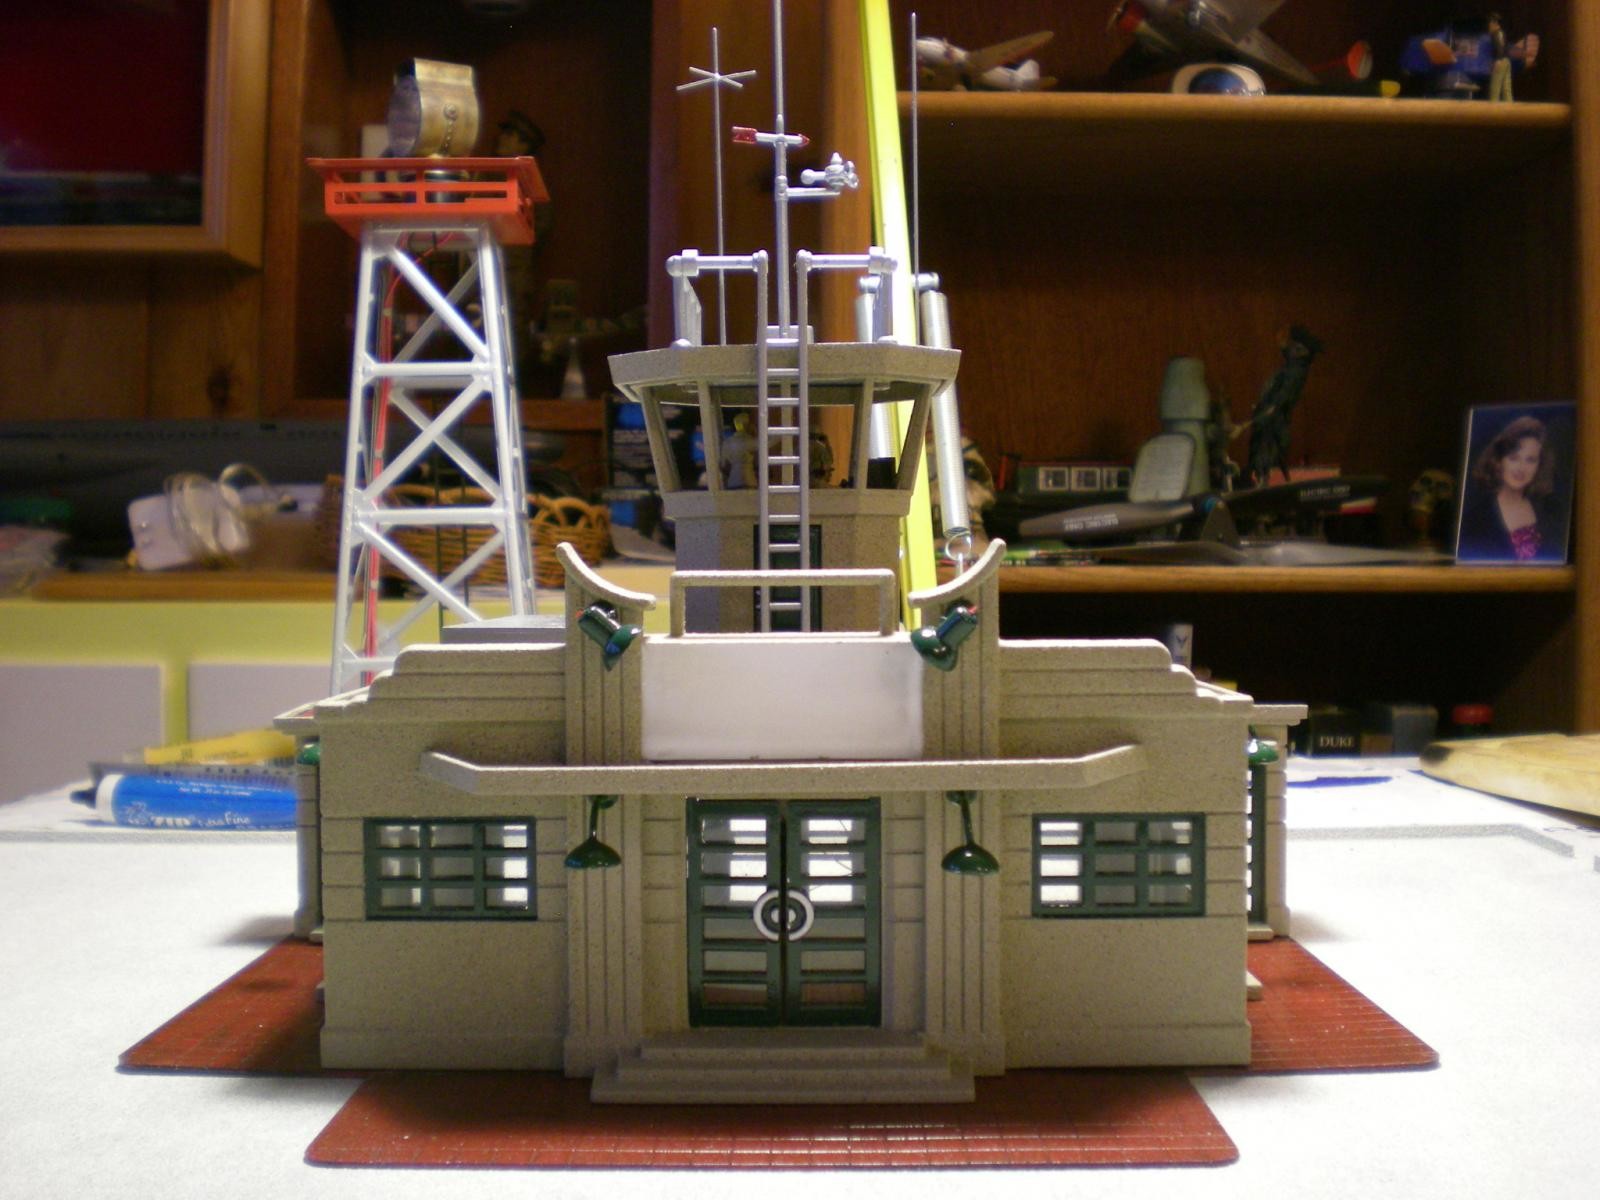
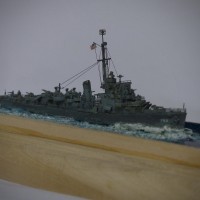
I have included a few shots of my fully lit, "O" scale, Plasticville tower/admin building that has moved from a train layout addition to my more scale Caribbean airfield. More on this later.


That...is very awesome
Now this is a very cool idea ! I'm going to have to make a set ... Thanks for the inspiration.
Quite the innovative design process you have there. Thanks for sharing.
Very nice! I like the dio upcoming! Congrats, Michel.
I have to say, I think mechanics and modelers are among the most creative lot I know! Excellent display of ingenuity!
That is awesome! We called them drop checks in the Navy, very convincing!
Very creative scratchbuilding.
Extremely creative!
Cool! Been there, done that. Did you ever have the pleasure of jacking a retractable single engine Cessna? Talk about shaking and bucking...!
Worse, damaged my my back lifting a C-177 retract with my shoulders while it had the wheel changed.
That is simply outstanding. Great work G.
BTY, what kit is that?
The aircraft is a modified Revell Beech 18 with cargo and crew door, like the one I used to tear my uniform on.
The terminal building is by "Plasticville" - https://www.ebay.com/itm/GBPV-NRMT-COMPLETE-UNBROKEN-ALL-ORIG-AD4PLASTICVILLE-AIRPORT-ADMIN-BLDG/332497772926?hash=item4d6a69617e:g:E3YAAOSw~0paP-4c
Those looking for a jackstand kit, here is the German version - https://www.scalemates.com/kits/1097229-das-werk-dw4802-german-luftwaffe-jack-stand-set.
Great idea, Mr. Ley! You could sell those. Thanks for sharing!
This is looking great. Always wanted to build the Beech. Would love to see more! Have you finished this diorama as of today 4/15/18?
Hardly. This is a major project. I just finished three days work on the electrics.
The control box for the control tower's signal lamps can be seen mounted on top of the terminal/tower building.
Next are details. Photos show a portion of the details.
By the way, the hearse
The details of this project seem overwhelming, but I have learned to take it one small step at a time, while ignoring the immensity of the overall project. In other words I concentrate on the individual tree while ignoring the forest - more to come.
*Actually the bodies were delivered in cardboard boxes without fanfare. But were I to put it in that format, no one would recognize what is being portrayed. When I saw the curtained LaSalle hearse, I knew it had to be in the diorama.
3 additional images. Click to enlarge.