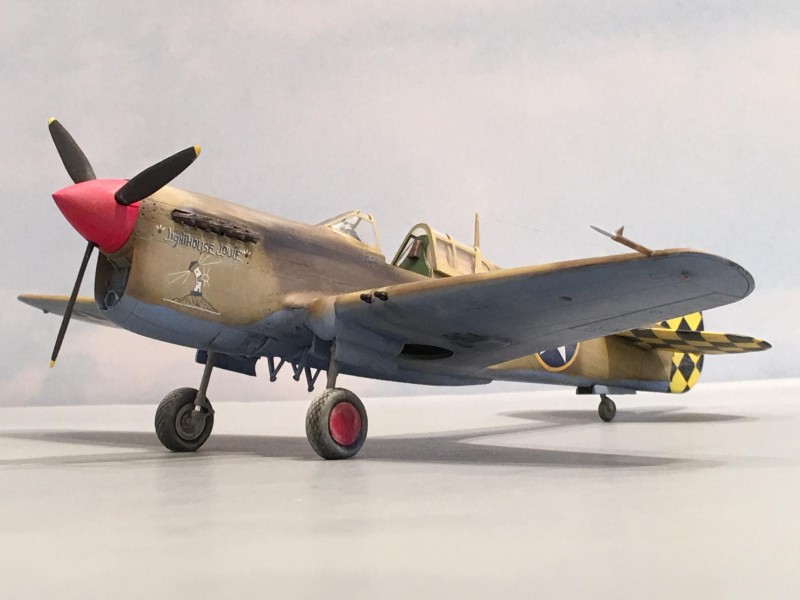
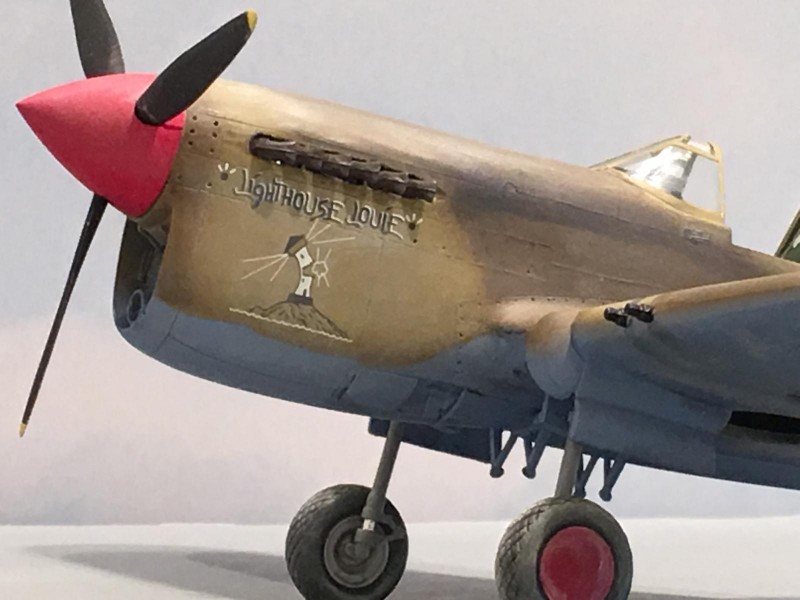
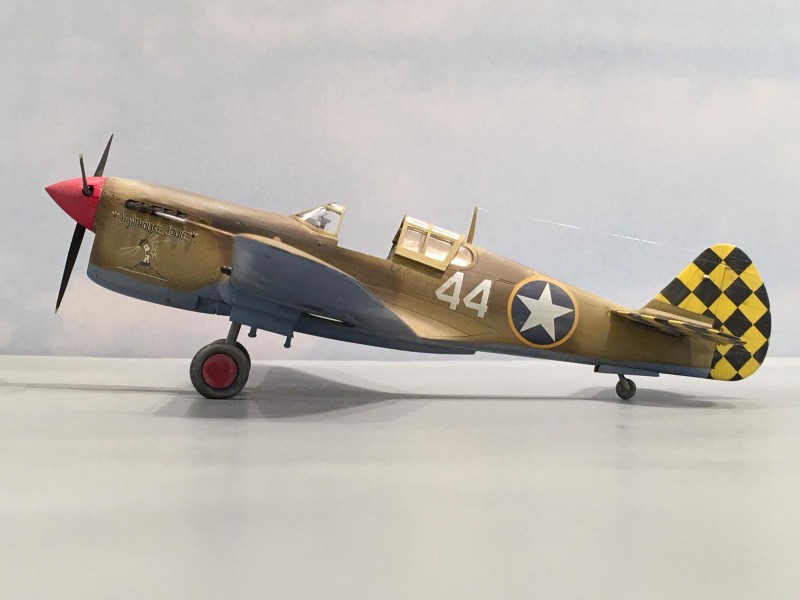
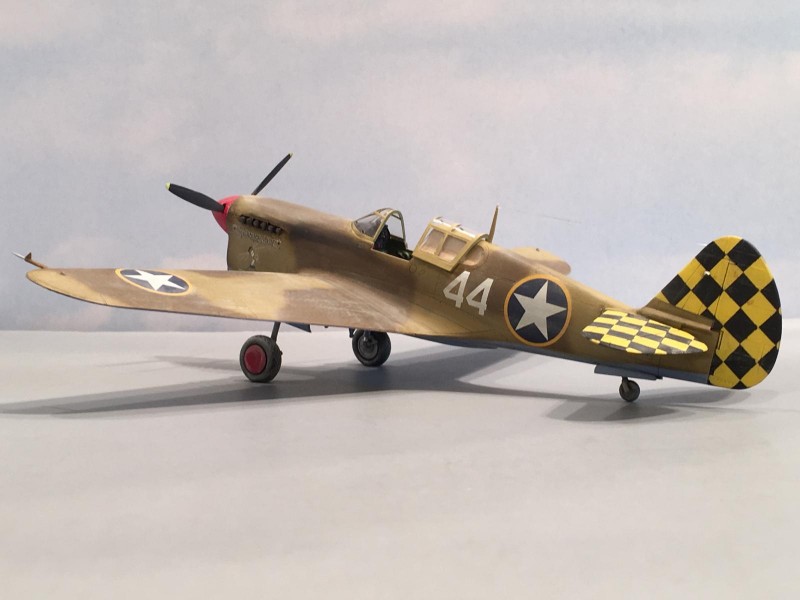
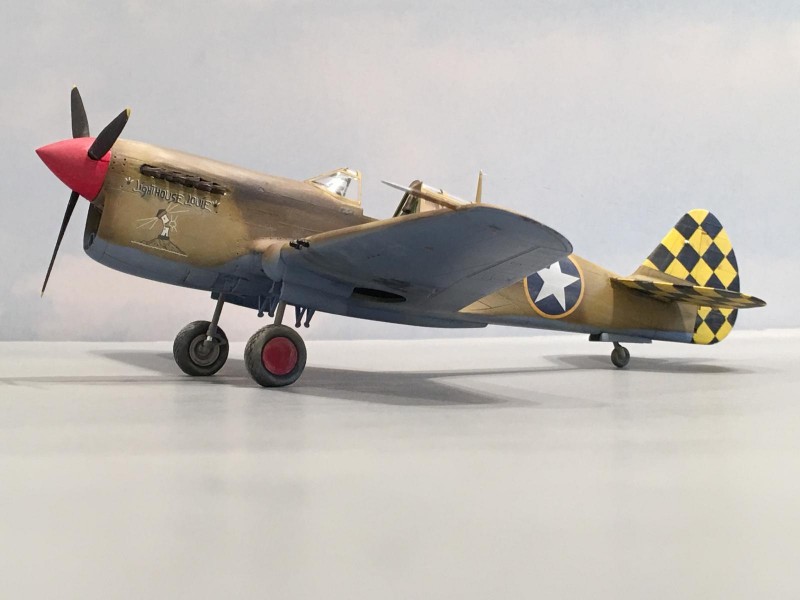
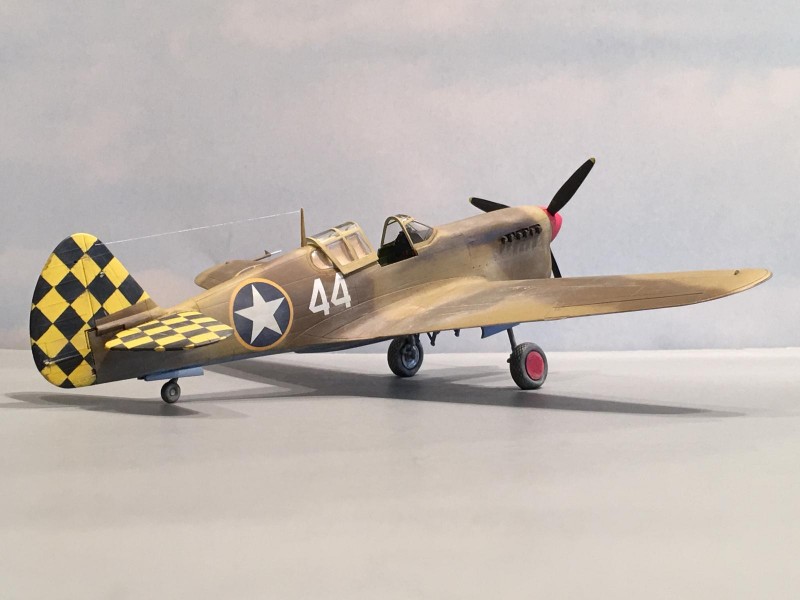
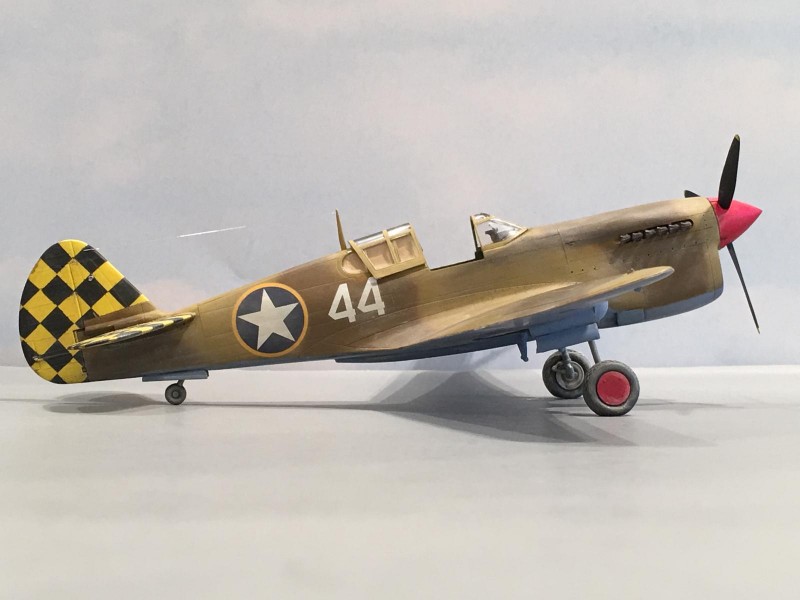
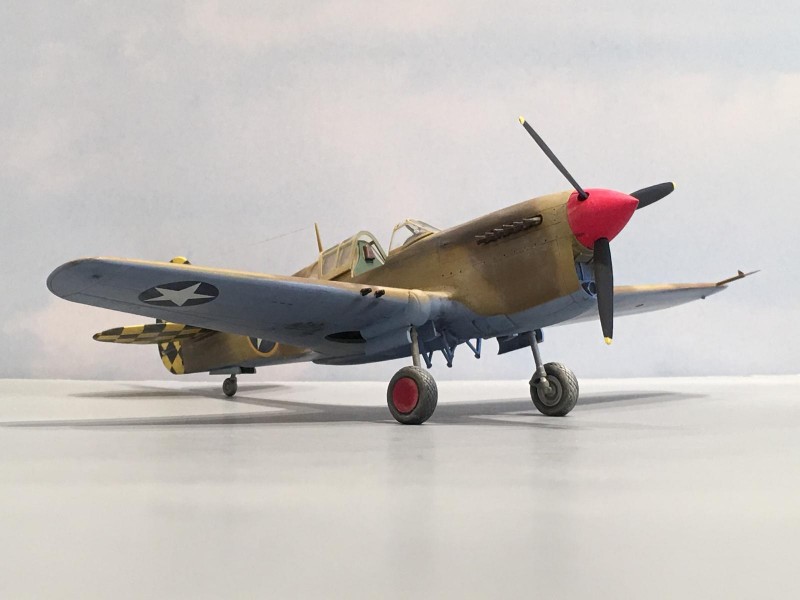
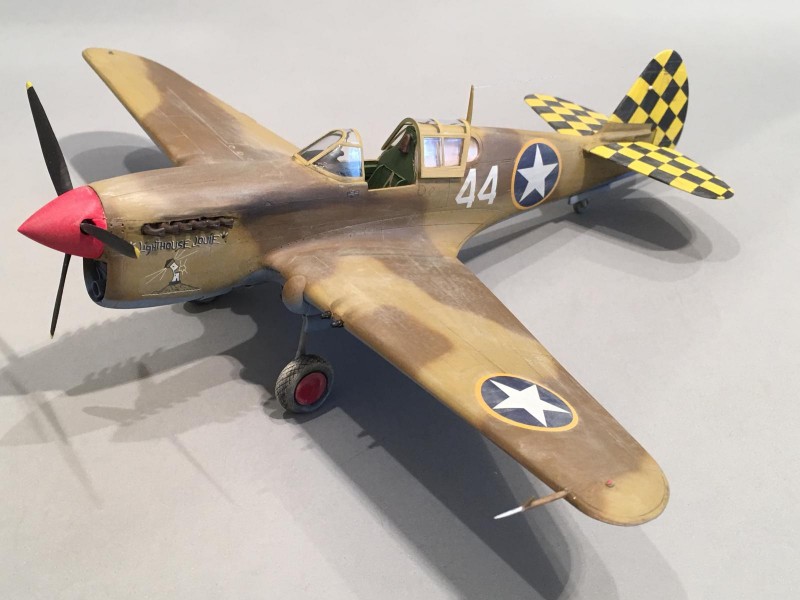
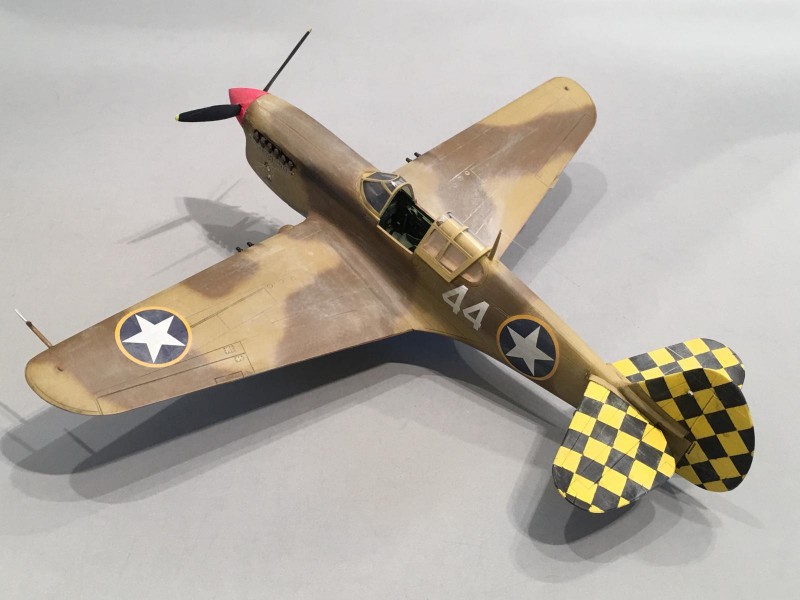
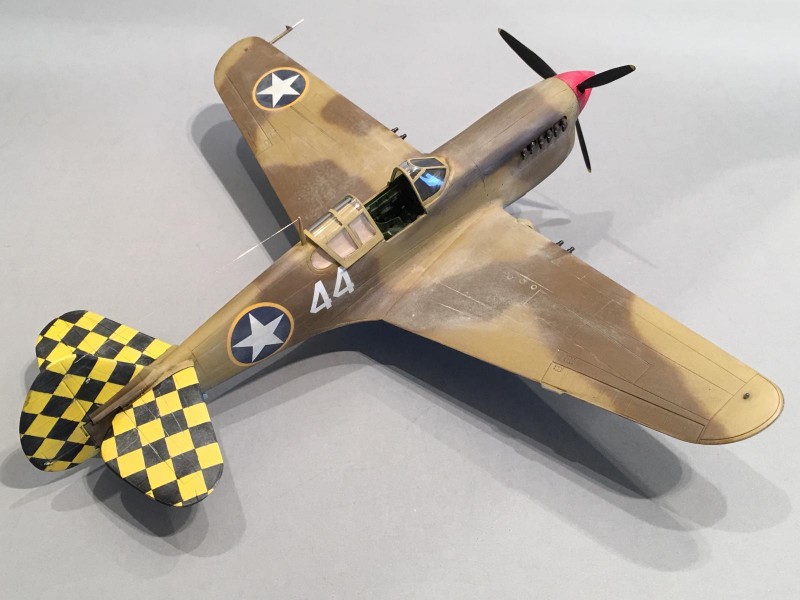
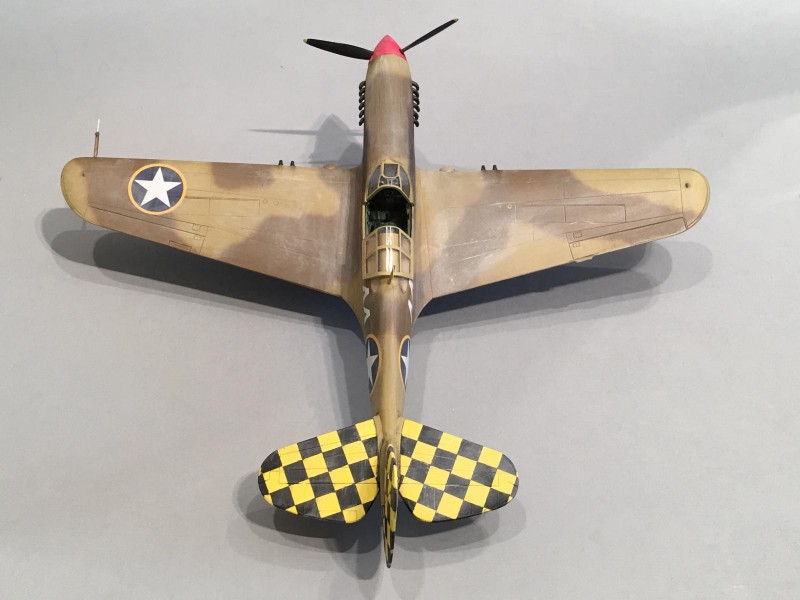
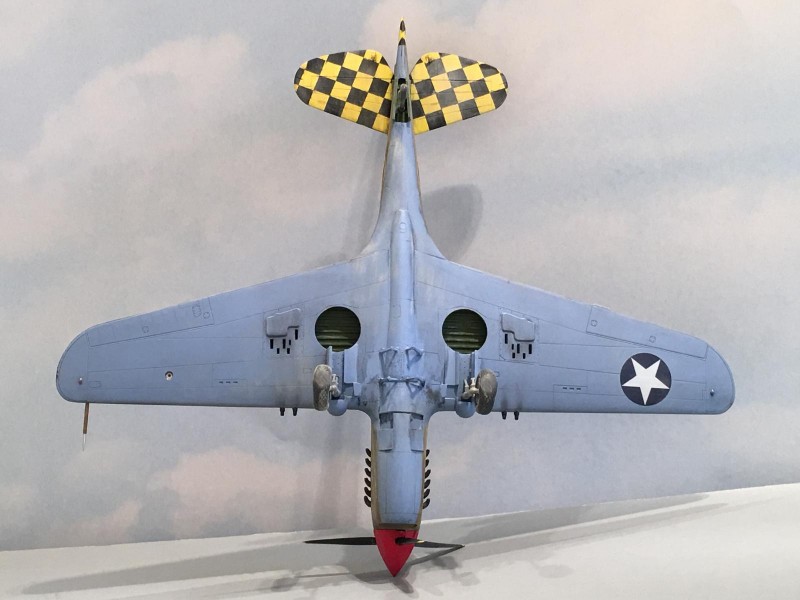
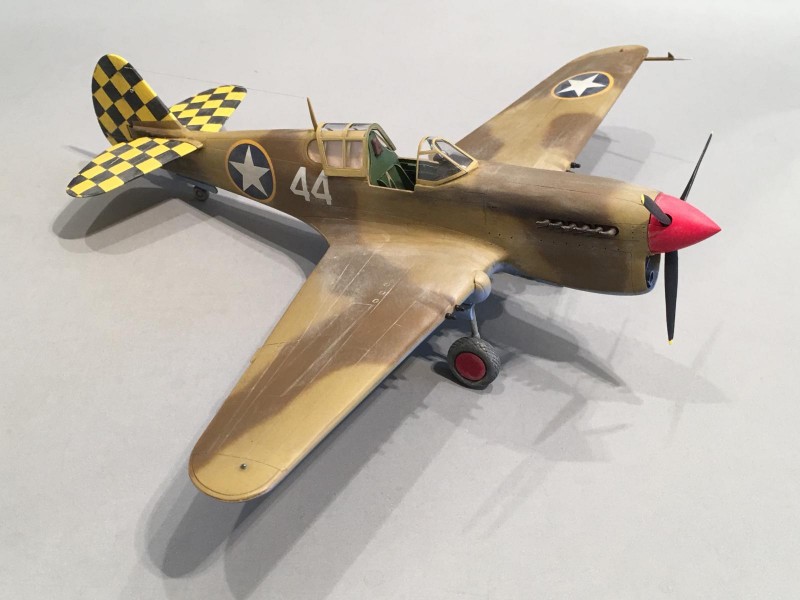
Battle of Kasserine Pass GB, Amtech 1/48 scale P-40 L-5 CU, long tail version, “Lighthouse Louie” 325th Fighter Group “Checkertail Clan”, North Africa
Here is another one of the planes I built for the Kasserine Pass Group Build.
Again I wish to thank David Thomas for starting and hosting the Kasserine Pass Group Build. His untiring efforts have helped this GB become the success it is. Not only has Dave been coaching all of us along during our building process, but he too has completed a fine example of an AMT 1/48 scale A-20 Havoc.
If you haven't looked at what is happening over in the Kasserine Pass GB, I strongly urge you to do so. You don't know what you are missing if you don't, as there have been some fine builds happening over there...
My plane is the Amtech version of the AMT P-40 "long tail" kit, which came with a replacement resin nose, and an outstanding set of decals. I picked this kit up many years ago when it was first released. Right around this same time I found a set of decals for "Lighthouse Louie" and eventually planned on building that plane, since we share the same name... kind of. 🙂
The 325th Fighter Group became known as the "checker tail clan" for obvious reasons. One look at the tail with the black and yellow checkers and it becomes apparent. However in the early days the unit didn't have these markings. Once the checkers were used on the P-40's, they continued to be painted on replacement aircraft, as they received new P-47 Thunderbolt's and eventually P-51 Mustangs.
I was really pleased when I found this picture below, which shows the Unit Commander Lt. Col. Gordon H. Austin sitting in the cockpit of his plane. This particular P-40 was serial number 42-10664, indicating it is in fact a long tail P-40.
According to Dana Bell, these planes were delivered to the 325th wearing the US Equivalent paints to the RAF colors of Dark Earth, Middle Stone over Azure Blue. It is a striking color combination, and is one of my favorites.
I have been told the plane was named "Lighthouse Louie" after shooting up a lighthouse. In this photo you will see the original plane had a checkered tire pattern. The kit provided me with a smooth tread version. I located an aftermarket resin replacement set of weighted wheels to make it look more accurate.
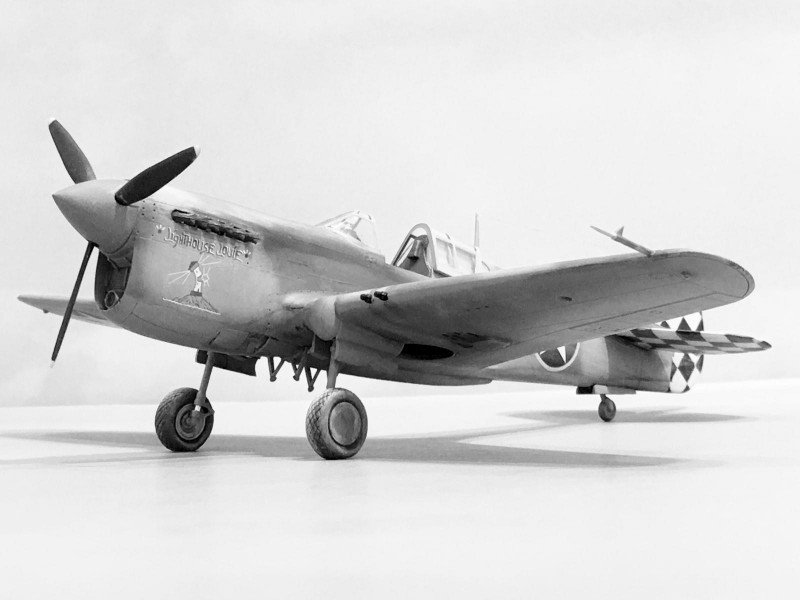
I used this photo which I took from a similar angle as the original picture was, to use as a comparison...
Here's the same picture when I converted it to black and white...
I think it came pretty close to the real P-40.
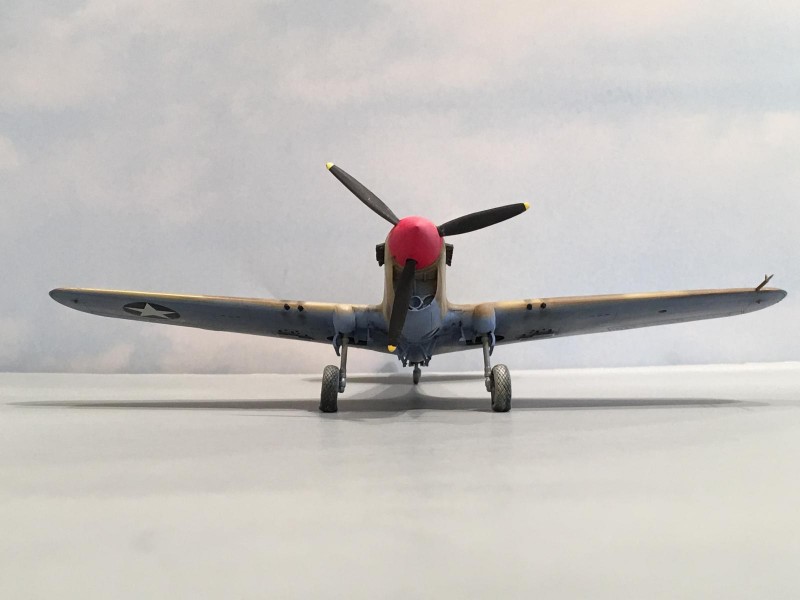
This Amtech kit is basically an AMT kit that has a replacement resin nose and a superb set of decals that have been accurately researched. The resin nose is intended to replace the kit nose, which is inaccurate to a degree. Some have stated the outline is incorrect, but I know for certain the main flaw is the twin air intakes located in the nose just below the spinner. These planes had a single air intake located in this position for the carburetor for the Packard built Merlin engine. The Curtiss "L" model P-40 was built as a light weight version of the "F". As such, it had two wing guns instead of the usual three in each wing.
The F and the L versions look very similar in appearance. The both have the "fish tail" style exhaust. The "L" version also had reduced armor plating, and a reduced fuel capacity. The long tail "F" version looks almost identical to the long tail "L" version. The primary difference that is most visible is the wing gun arrangement. The "F' model has a total of six .050 caliber MG's, while the "L" model has four.
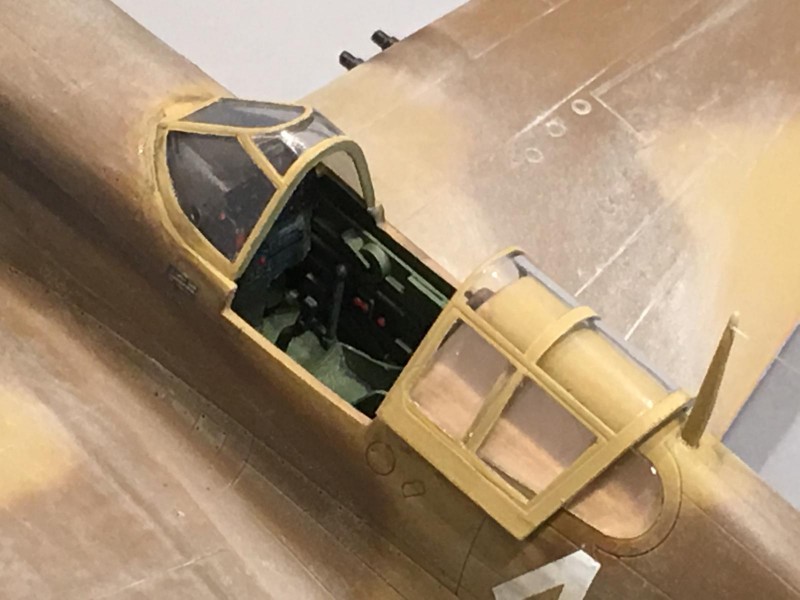
Ironically, in the field these outer two machine guns were often re installed, making it even harder to distinguish the two types apart. When this happens, it is best to refer to the serial number if you have it available. The kit supplied cockpit looks OK to me, but it would definitely be worthwhile to replace the kit seat with a resin one... The clear parts look rather nice too.
The resin nose is rather heavy. In fact it is so heavy that initially I was concerned that this plane would be a "Nose" sitter and that I may have to add weight to the tail ! I mocked everything up, and to my relief it worked out just fine. It does seem to strain the main landing gear legs though.
Speaking of the landing gear, I used Bare Metal Foil on the oleo shock portion of the landing gear. This part was chrome plated on the real plane to keep the seals from being damaged. the chrome was an ultra smooth surface and id not wear into the seals. I also used clear stretched plastic to make the antennae lead in cable.
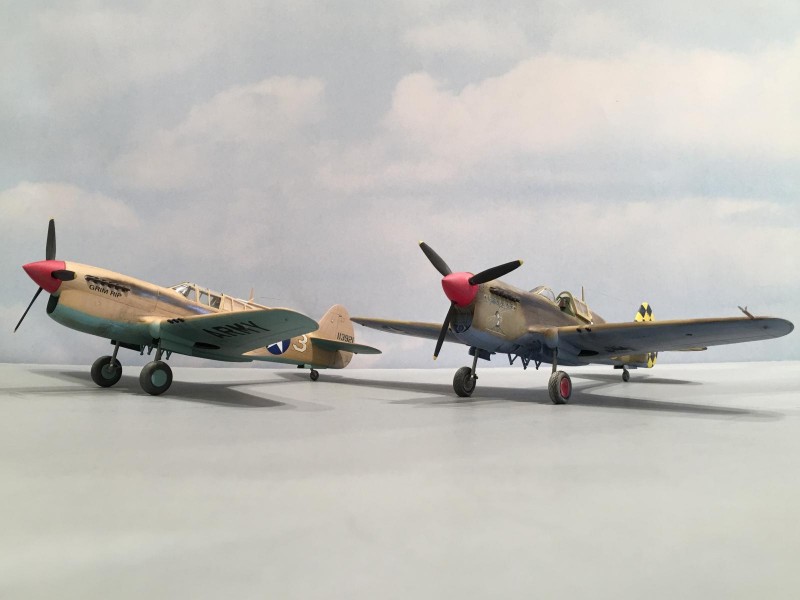
I built this plane at the same time as I was building another P-40, using my assembly line method of building. Here is a picture below of the two P-40's sitting side by side.
Followed by a link to the build log:
http://imodeler.com/groups/battle-of-kasserine-passtunisia-campaign-build-group/forum/topic/148-amtech-p-40-l-lighthouse-louie-325th-fg-tunisia/
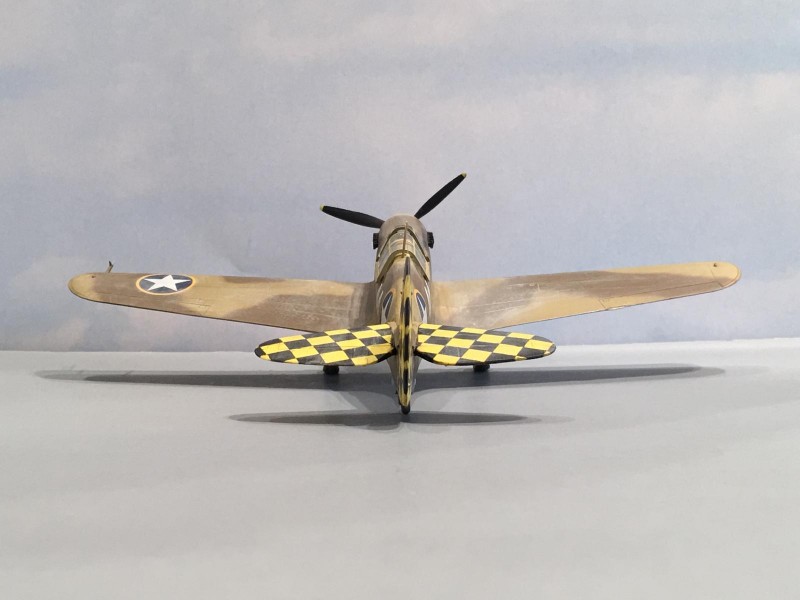
Rather than use the decals for the checkers on the tail, I opted to try something new for me. I masked off the checkers and sprayed them on. I think it turned out OK, probably better than using the decals, which often do not cover the edges of the tail surfaces.
Once the plane was painted and decaled , I sealed the finish using Testor's Dull Coat from a rattle can. Then I proceeded to weather it and add some dust and dirt using the Tamiya weathering decks.
The exhaust was done using ground up black chalk and a cotton tipped swab. The gun powder residue was done using the same method.
If I had the opportunity to build this kit over again I would do something different with the resin nose. There was a problem with how the sides of the fuselage lined up to the resin nose. There was a noticeable step where the plastic meets the resin.
What I would do differently is this: I would test fit the nose and add plastic card shims of varying thickness to the fitment plugs cast into the resin nose. This would push the outer sides of the fuselage farther, and the resin would fit much better. Since I did not do this, it took me quite some time to fill in the stepped areas, and then re scribe the panel lines.
Overall I was very pleased with how this one turned out. Other than using filler to blend in the areas surrounding the resin nose, no filler was needed. I alleviated any possibilities of a wing root to fuselage gap by gluing the upper wing surface to the fuselage assembly first. Once this dried, I installed the lower half of the wing. This method ensured there were no gaps which can occasionally happen during a build.
I painted the area behind the rear side glass in a lighter shade of tan. I did this, as in many pictures you see of P-40's this area appears to be a different shade than the surrounding colors. This could be caused by several reasons. First it could be due to the light reflecting through the plexi glass and giving it an optical illusion of being a different color. The other reason is the glass may have intensifies the sun's rays, thereby fading the paint faster than the surrounding areas. It could be a combination of both ... Here in this picture below, you can see what I am talking about. Notice the difference between the tan colors next the and behind the rear side glass.
Going back to the history of the 325th, the 317th Squadron flew it's first mission on May 19th, 1943. This was an escort mission as they protected B-26 bombers over the Decimonannu Airfield in Sardinia. The unit claimed six kills and lost one P-40.
It was on this first mission that a pilot (who was to become famous later), claimed his first kill. Captain Herschel H. Green claimed a Bf-109 destroyed. It was his first kill of many more that would follow.
The 317th Fighter Squadron also pioneered the use of carrying a single 1,000 pound bomb located on the center line fuselage rack that can be seen in this photo below. You also get a good look at the Azure Blue color in this picture.
The 325th continued to fly P-40's until they received P-47's and started the transition into the newer type. They flew their last mission in P-40's on September 22nd, 1943.
Overall I enjoyed this build, and thanks again go out to David Thomas. If not for his ambition to start this GB, I probably wouldn't have decided to build this kit.
Now I am glad that I did...
As usual,
Comments are encouraged.


Another winner, LouiS.
Thanks John ! I'm in the process of writing the article as we speak, and just uploaded some more photos. Please check back in a few... and I hope you like what you see.
Great build, Louis!
I'm a s****r for desert schemes, being a west Texas desert rat. You've got me thinking about pulling mine out and getting started on it!
Thanks Jaime for the kind words. I like the desert scheme P-40's too, and we shared the same stomping grounds for a while when I was stationed at Ft. Bliss.
I say go for it and build yours. It's a nice kit. The resin nose took some putty to install however. If you are going to replace the kit nose I would suggest adding thin plastic card stock shims to get the fuselage sides to line up better with the resin part. If I would have done this during my build, it would have been much easier.
PS: I just happen to know a guy (me) who just picked up a new Tamiya 1/35 scale Korean War "Easy Eight" Sherman with the whole front slope painted as a Tiger Face. If I have time, I would like to build it as part of your Nose Art Group build.
Sounds good to me. I have the funny feeling you'll find time!
Cool buddy. I just picked the kit up. It looks pretty sweet too ...
When I get a few current projects off the desk I'll post it up in your GB. Thanks !
Another sweet build ,Louis! Well done.
Thanks Robert for the compliments.
Right next to speechless, Louis, which is saying something for a verbose college professor who earns his keep talking for hours on end. You ought to enter this into a contest, because its a real winner. You have every right to be proud of it. This is the kind of model building that I wish to aspire to: an apparently simple airplane that is not known for glamour (like some of the flashier planes that replaced it), ennobled by a loving, careful, expert treatment. Really nice touch with the B/W conversion of the photos!
You are too gracious with your words on the GB. If not for you, and Tom, and Paul, and Neil, and Robert, and Ferry, and Andreas, and Michel, and John, and Chuck, and George, and so many others, it would've been a bust. It was you guys' dedication that made it work. What fun!
Thank you David very much for this compliment. Coming from you it sincerely means a lot to me. If there ever is a local contest, I just might enter this one. I'm very pleased with how it turned out.
As far as your wishing to aspire to this level... You have surpassed this level. I have seen photos of your A-20 Havoc that you built for the Kasserine Pass GB, all while coaching the rest of us along the way. It's a masterpiece.
I'm glad you liked the B&W conversion photos. It's something I have occasionally done when I want to see if my color selections were close.
On a personal note, I want to thank you again for coming up with the idea and hosting this GB. If you had not done so, chances are several of these kits I built would still be sitting in the stash.
I have had a blast so far. Luckily we still have some time left, so I can finish up the current projects on the work bench...
Thanks again my friend !
What a great build. In fact what I found most challenging about this plane it is were you excelled my friend, painting those checkers sounds daunting but you work there is flawless. Overall a very solid build indeed, and not making a pun about the resin nose 🙂
Just one point: looking at the photo of the real plane it seems the wheels spoke had a thin white (or at least some light colour) rim.
Hello my friend. Thank you for the kind words on my build. You are absolutely correct on the wheels. The P-40 used a cover for the center of the wheels. This cover did not extend to the outside edge of the wheel.
I took these pictures of a real P-40 that was actually at Pearl Harbor during the attack. If you look closely you can see the wheel cover. I may have a better close up picture but I will have to search for it.
Unfortunately this cover wasn't molded into the resin parts. I tried to paint them like the real planes but was unsuccessful. So I finally gave it up and decided to paint the entire wheel red.
Good eyes !
These pictures are fantastic Louis, thanks for sharing them and thanks for pointing the wheel detail. Good to know some resin replacements lack it
Thanks for the compliments on my photos of the real 1 : 1 scale P-40 B. The center cover details were missing on my resin wheel set, but it's possible they may be present on other sets made by other companies. Had I realized this before I installed them, I could have fixed this...
Ah the patent pending Iron Works produces another outstanding product. Gotta love those checker board tails, and you're much braver than me to use paint versus decals Louis. Both examples of F/L P-40's turned out exceptionally well. Furthermore, they are excellent additions to the group build and your history behind their pilots enhances the story of the Battle of Kasserine Pass. Well done Louis! Now on to those tanks buddy.
Thank you very much Tom for the compliments !
The "Iron Werks" hasn't had much as far as productivity lately. I have been busy writing a lot of kit reviews and not much building has been happening. In the near future I'm going to write some more reviews, of these planes shown here. I got on a 1/32 scale kick about a year ago... Some of these are in the current build pile, so please stay tuned...
It was my first time at spraying on a set of checkers... I was worried they may not turn out that well. Luckily they turned out better than I anticipated. Believe it or not, on the real planes these checkers were brush painted on some of the planes, sprayed on others. Because of this, they didn't have perfect lines...
I'm very pleased with these additions to the Kasserine Pass GB. I have a few more in store. I was fortunate to find a lot of information on the 57th FG, so I wanted to share it with others.
Your builds have turned out excellent ! It's hard for me to pick a favorite of yours so far, but I'm leaning towards your Spitfire. You have made an exceptional contribution to the GB.
Now you need to confirm what type of sauce with David... 🙂
WOW ! That's a SWEET group of future builds! I especially like the P-51. That's MY favorite P-51 livery of all time. I'm not alone in that, either. The photo of Lou Intravenous and the others is one of the most widely seen photos ever taken of a WWII aircraft. It was after seeing that photo so many decades ago that began my (continuing) love affair with the Mustang !
(Sorry for the bloody medical pun - I can't help myself, sometimes ! Oh - oh ... If you see a man holding up two fingers, who is he and what is he doing?
He's a Roman and he is ordering 5 beers !)
I picked up on the IV joke right away... Good one ! 🙂
I had to think about the Roman one for a few seconds... Then it hit me, sort of like a joke grenade... 🙂
Lovely "Lighthouse Louie," Louis ! It's the perfect companion to your first P-40, the "Grim Rip." A peach of a pair !
Thanks Jeff, my fellow DAT brother from another mother ... 🙂
Good to hear from you buddy.
😉
Also, the B&W comparison shot to the original turned out about as perfect as possible !
You have many, MANY skills, Brother DAT - not the least being an ace checkerboard artiste' ... or chequerboard for our British friends.
Great write-up, too !
Thanks again for the kind words... 🙂
Really nice work on this Louis, and a great result.
Thank you Tom !
After P-47's, P-40's are next favourite and you have have inspired me to get one or two out for builds myself in the next 12 months! Excellent work on both P-40's. Wouldn't it be nice if Tamiya choose to add the P-40 to their 1/48 lineup...especially the Merlin engine variants.
Hello Darren,
The P-40 is one of my favorite planes too. It's probably because my very first model was the original tooling of the old Revell 1/32 P-40 E "Flying Tigers" plane. I am very pleased that my builds have inspired you to build a few P-40's. This is the ultimate compliment.
If your P-40 builds turn out half as nice as your recent string of P-47's have, then you will have some show stoppers on hand ! You really do some nice work...
That would be fantastic if Tamiya did a new tool 1/48 P-40... Icing on the cake if it was a Merlin powered version...
Thanks again.
Hi Louis. Quite aside from the skills in modeling (more of that in a second) I love the whole content and tone of this post. The photos are gorgeous. The black and white comparison for me is the 'money shot' - as near perfection as is possible.
I don't want this to sound like a 'Louis love-in', but then we get to the history lesson, which was fascinating, clear and thoughtful. And we get some real reference sources.
The banter and wit (if Jeff's jokes can count as wit...) is terrific. All the things that separate this site from others are right here.
Ah, then there's the actual build. The caliber of modelerrs who have complimented you stands on its own. A 'who's who' of 'iModeler royalty'.
A fabulous, post, Louis. Like the model itself, flawless.
Bravo.
David, perhaps "Half"-wit would be more apropos ...
Jeff, you are killing me here. You are an institution here on iModeler. Talking of institutions, 17:30, its time for meds...
You guys always manage to make me laugh ! Good stuff indeed...
Hey David !
It's great to hear from you my friend... Sorry for the late reply. I have been busy working on the Sherman and just noticed these postings. So now I'm trying to get caught back up with my replies ...
I am very pleased to hear that you really enjoyed this article. Thank you very much !
I try to incorporate a little history lesson in each one of my articles.
When I found the photo of the "real" Light House Louie", I knew I had to try and take a photo of my plane in a similar pose. So when it was time to glue the propeller on the resin nose, I made sure I had the prop oriented as close to the original picture pose as possible. Since the nose is resin on this kit, the propeller had to be glued stationary... Unfortunately it's not moveable as in most planes.
My fellow tanker buddy Jeff can always be counted on to pass along some good humor. It's one of the things I appreciate here on this website too. The friendly atmosphere is what keeps me posting...
A real "Who's Who ?" That may be pushing it a little... It should probably be more like a "Who's Lou ?" OK more tanker humor. We are an odd lot. (and that's certifiable). 🙂
Thanks again my friend !
Wow, the thread on this beauty is buzzing - I'm exhausted having been through it! It has created so much interest, Louis - brilliant!
Firstly, I just love the unique nose art! Can you imagine shooting up a lighthouse?! Next, the weathering - I think that desert planes do come across as being well worn - this P40 I think was state of the art at the time - but on a day to day basis with winter weather followed by rains, and heavy mud, it must have aged quickly! Thirdly, that tail! Watching your WIP thread and seeing the tail take shape was a real thrill - stunning work! Next, the information - as ever some great research and technical details on the variants and their differences. But, for me the way you have begun to shoot photos to match the originals is the cherry on top - and shows just how your research plays out in really accurate builds! Fantastic stuff!
I am amazed at how well this article has been received. It's all due to my good friends posting here. Thanks again everyone !
I can only imagine shooting up a Light House... much less getting to fly a P-40 ! Yes the P-40 was what we had to work with at the time. (and the P-38's and P-39's). They were pretty much state of the art for the time, but were outclassed by some of their opponents. What really helped was the quality of the pilot training, and the sheer numbers of aircraft produced by the American War industry during the War years.
The Thunderbolts were just coming into service, and the Mustang would be too fairly soon.
Having spent some time in the desert, I had first hand experience with how things end up looking after exposure for a little while. I'm glad you have enjoyed this article and the work in progress thread. I had a lot of fun building these two kits... Researching is part of the fun for me. I enjoy it almost as much as I do building.
On occasion, if I can find a photo of the real subject that I am building, I try to take a picture or two of my model in a pose as close to the original as I can get. If it's a B & W photo, I convert my picture to B & W to see how close I came with the colors. Plus I think it just looks cool !
Anyhow, thank you very much for the compliments. It was my pleasure both building and posting.
Take care my friend...
Love this one too Louis! Excellent work on the checker tail by the way. At my scale (1/72) I usually do a "hybrid" method - I'll apply the decals, then do my best to match the paint colors for the edges! Masking that small drives me batty!
Thanks Greg ! Honestly, I don't see how you guys can build 1/72 scale planes... and it's probably because I can't see ! 🙂 (up close anyhow) 🙂
The checker tail was challenging, but I'm glad I decided to do it this way, looking back at it now. I don't like having to rely on a decal to wrap around the leading or trailing edges. Plus I hardly ever get a "perfect" match with colors when I try to touch up the areas that are missed by the decals.
Masking sometimes drives me batty at 1/48 scale. Your builds are truly inspiring my friend...
Brilliant outcome, Louis, all your research, masking and hardwork has really paid off.
Thank you George for the kind words ...
I am very pleased at how this one turned out. It's much better than I ever anticipated it could be.
These two are the first AMT P-40 kits that I have ever built. I can recommend them to anyone, as they really have a lot to offer, and are fun to build, (and not too complicated either).