1/32 Zoukei-Mura Ho 229
Normally, I would add this article to the Work-in-Progress section, but this this thing is coming along so nicely that I thought it would be appreciated more here. This has been-other than the addition of HGW seatbelts and wood panel decals- a completely out of the box build. It shows you how beautifully engineered this kit really is. The parts fit has been superb, and if you follow the instructions carefully (as it is quite complex), you can build a pretty nice model rather quickly.
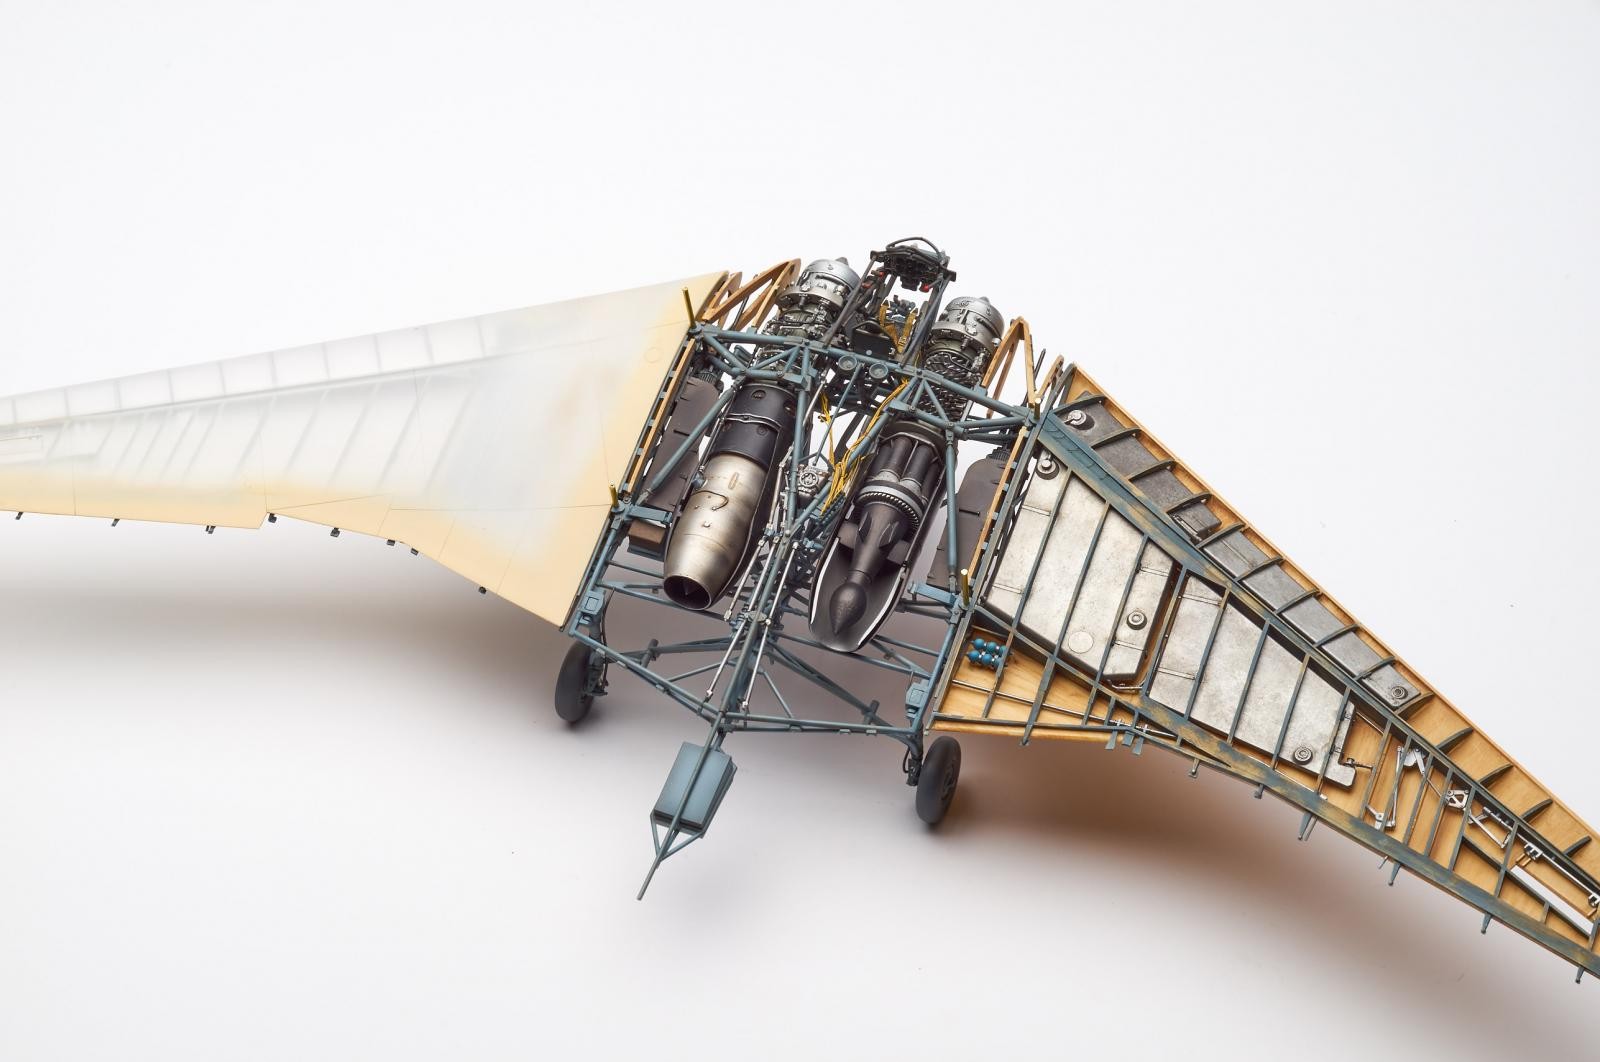
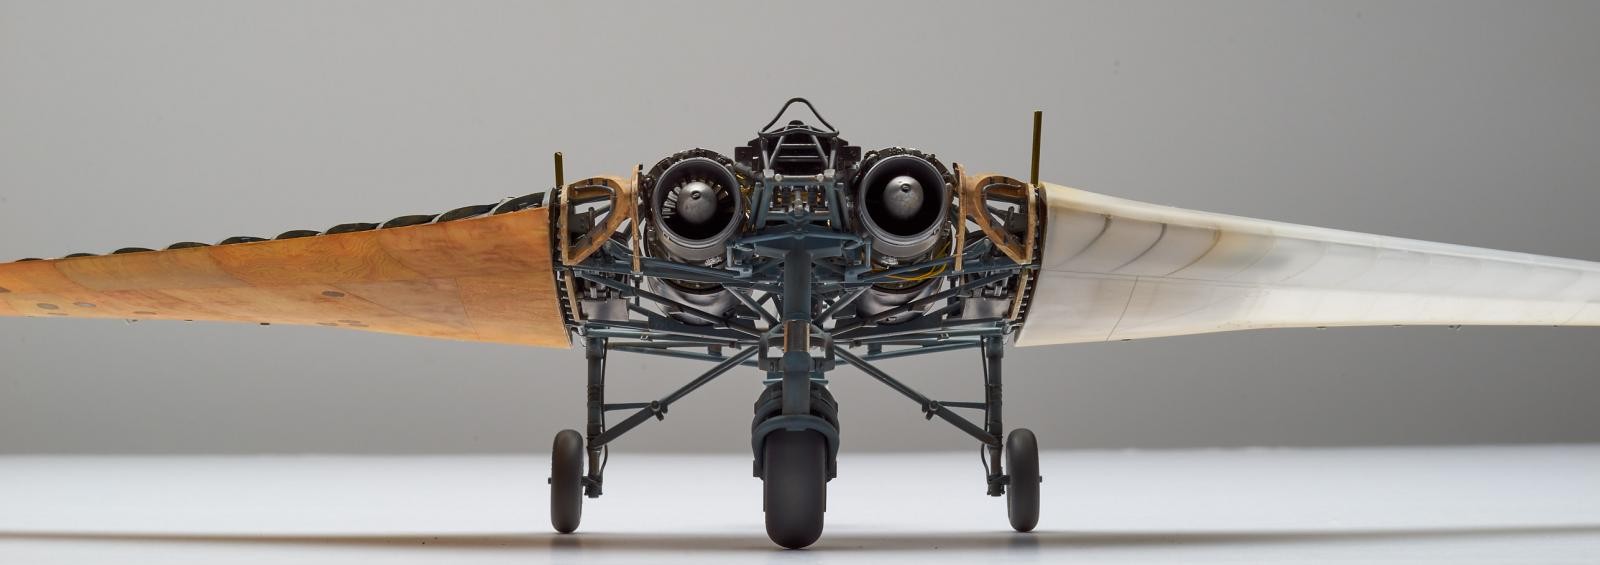
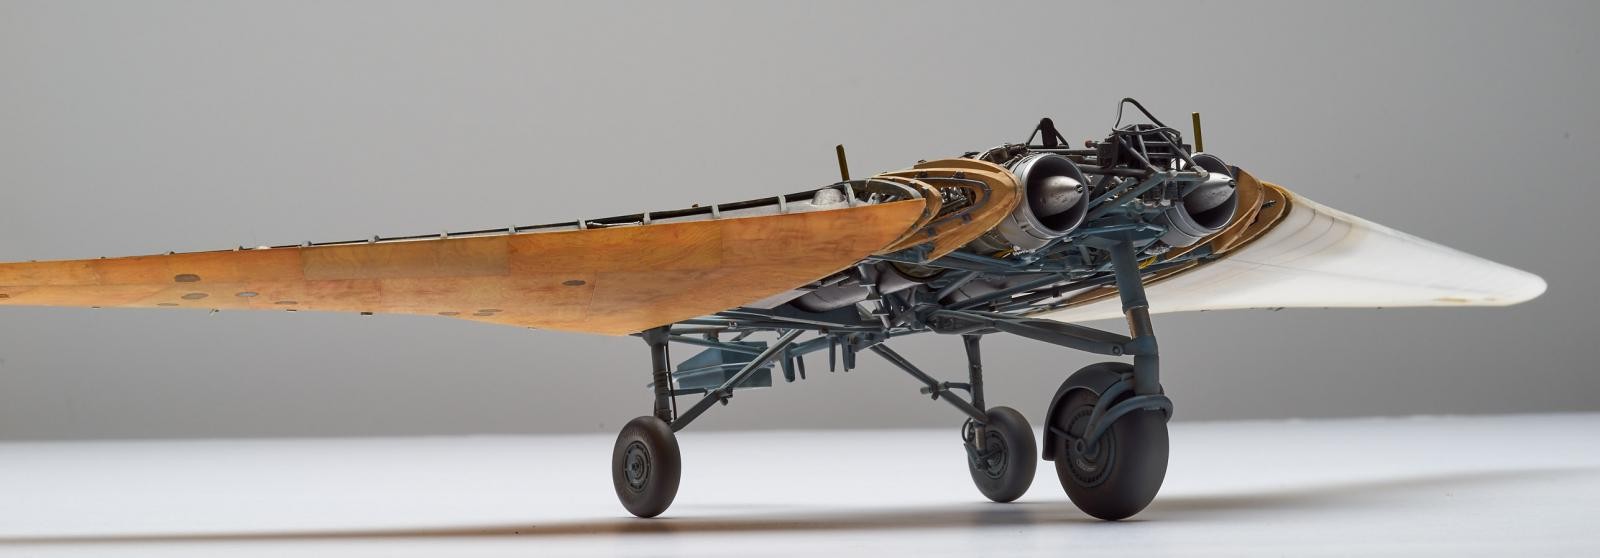
The wings are on temporarily at the moment. I've attached them with brass pins for now and the alignment in absolutely perfect. The port wing hasn't been completely painted yet and hopefully I'll get to that today. It will also be clad in plywood decals. There are still many parts left in the box that need to be added. The center section will also be bare plywood and it will rest on its own stand because I think it's the guts of the plane that really add interest.


What color did you use for the frame?
I mixed it from several colors so I can't say exactly what it is because I simply don't know.
Why I`m asking is because the go-to german color for interior structure is RLM02(greenish grey), so not sure what color you were aiming for. On my monitor this looks quite bluish
I go for colors I like and not necessarily what might be considered accurate. You're correct- the color is a bit on the blue side. I based it on a couple of things- 1, reference photos that show a bluish-gray and 2, the blue tones compliment the wood tones. Historical accuracy makes no difference to me. I build what I see in my mind's eye.
Absolutely fab George, indeed I would not cover everything, would be a shame to hide this fine work on the interior!
Thanks, Michel. I was just thinking about that and I think I'll add only the bottom "fuselage" panel. It was also plywood so that will add some interest much like the right wing.
Lookin' better each time I see it...great work!
Good progress, George.
Again, a real fantastic build. I love how u used the wood decals to recreate the wood grain on plywood covering. The painting job is top notch. Painting it all inside and out much of been a huge task. The overall approach to this build must of been different then with a normal, non-cutout model. Really have enjoyed the updates and these pictures as well.
Thanks, Paul. I've treated this a little differently. I've been looking at all the sub-assemblies as little individual models, then incorporating them into larger and larger assemblies. The engines took the longest, but were well worth the extra effort I put into them. This is going to be a hybrid of sorts. They only built a couple of these things as far as I know, and one crashed due to an engine failure. The other one is at the Smithsonian in D.C. in pretty bad shape even after restoration. So I'm building this as part what-if, part it's been sitting in a warehouse collecting dust for a long time, part the war ended before they could assemble and paint it, and part whatever. Nothing really historically accurate- the Ho according to George.
Hey George, can we get a shot of your bench? I'm pretty sure looking at the precision and detail of this you are making it in laboratory conditions! She's a lovely, lovely piece of work. Love these 'Wunderwaffe' projects; this looks like it belongs in a hangar in Area 51.
Hey David- Sure, man. Here's my workshop. Thanks for the nice words. I appreciate them very much.
2 attached images. Click to enlarge.
Ah. I knew it. Just knew it. What a beautiful workshop, George, and a just setting to produce such a jewel as your Horten.
Thanks, David. The workshop is also a work in-progress. It's amazing how much I've been able to cram into a small space. It's only 12 x 16" I added a Paasche paint booth last year and an HD TV a couple of weeks ago.
2 attached images. Click to enlarge.
Fantasmigorical! Wunderbar! Ausgeseischnet! Hot Damn!
All manner of other "made up"adjectives! This is truly stunning work, George! Plus, your Work Room / Play Room / Man Cave / Favorite place in the house looks awesome. A place for everything and everything in its' place. I wish ...
Thanks, Jeff. It's all that and more!
those Z-M kits are really cool. Awesome work!
Hello George !
I have been watching this come to like during your work log. It's a masterpiece... and I like it a LOT !
You have a great work shop too... Very nice indeed, and well organized to boot.
Thanks, Louis. Glad you like it. I'm usually not that well organized. By the end of each evening, there is c**p everywhere.
George,This is not only very well done, but its fun to see the ingenuity that went into the actual aircraft design. I'm anxious to see the competed project ! Keep up the good work !
Thanks, Terry!
All I got is one big Wow! and an amazing.
AWESOME! Can't wait to see the final product. This looks so realistic !
Thanks, Morne.
Everything you say is true, last year I built one of these and it was really amazing, the level of detail, the finishes, the fit of all the pieces, an impressive quality, I can only wish you to enjoy it as it seems you are doing it
REGARDS
Thanks, Carmelo. I am enjoying it very much.
That’s looking pretty special mate!
Thanks, Richard. Sorry to respond so late, but I just got back from vacation/holiday.
Hello, George. I recently purchased my 1/48 edition SWS HO-229. I was looking forward to do wiring similar to what you did with your kit. Could you please tell me where all the wiring went? I've been trying to figure it out for quite some time with no result. Thanks. -Aaron
Hi Aaron, I really couldn't find many references for the wiring so I had to make some of it up. I ran the wires from the box near the engine to a box in the cockpit. I ran the remainder under the port engine. I attached some photos for you.
3 attached images. Click to enlarge.
Thanks!
Another question, do i need to add weight to the nose?
No. It is perfectly balanced.