Review: Hobby Boss 1/35 M911 C-HET, Part 2 – The Tractor
This article is part of a series:
When building such a massive kit, I usually start with some preparation. Labeling the sprue bags and sprues with large letters to make it easier to find them, and going over the instructions to identify parts and subassemblies which need filler is my standard process.
With the tractor, the list of things I needed to do looked as follows:
- Filling the pin marks on the inside of the chassis and the front fenders,
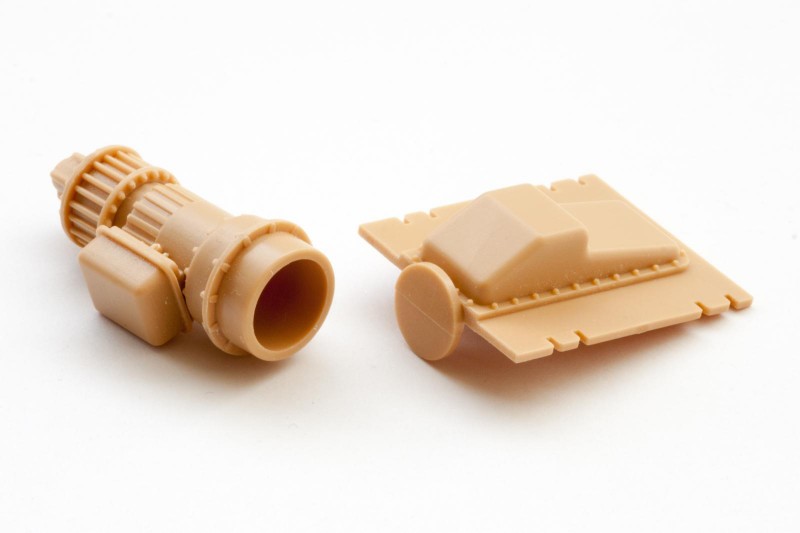
- get the multi-part assemblies for the rear axles and the air filter done early on,
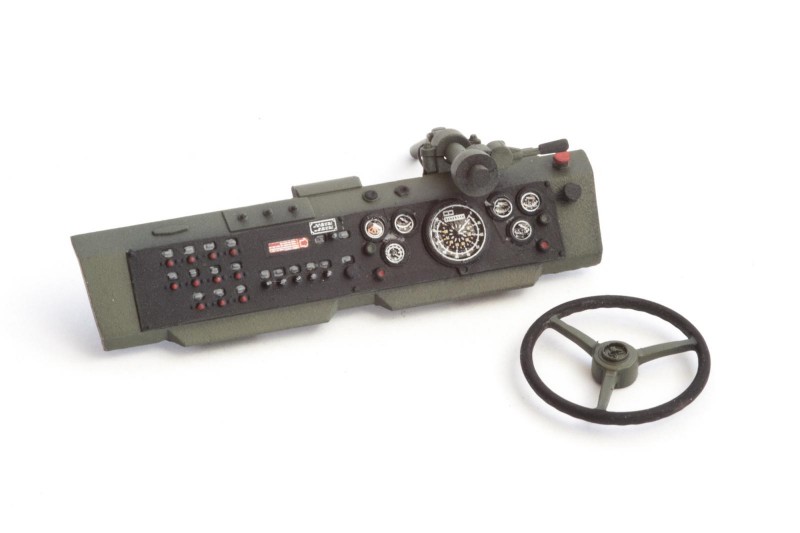
- detail the inside of the cab and the spare wheel crane,
- add fuel lines,
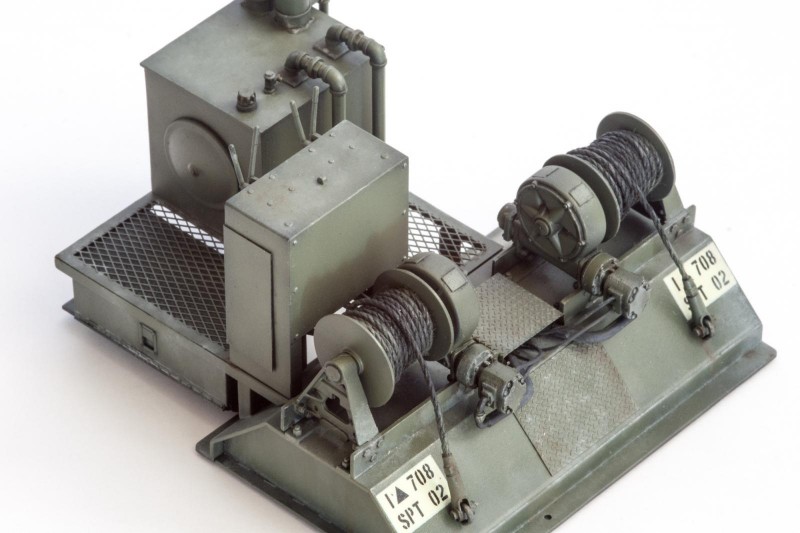
- detail the winch platform with cables and anti-slip surfaces missing from the kit.
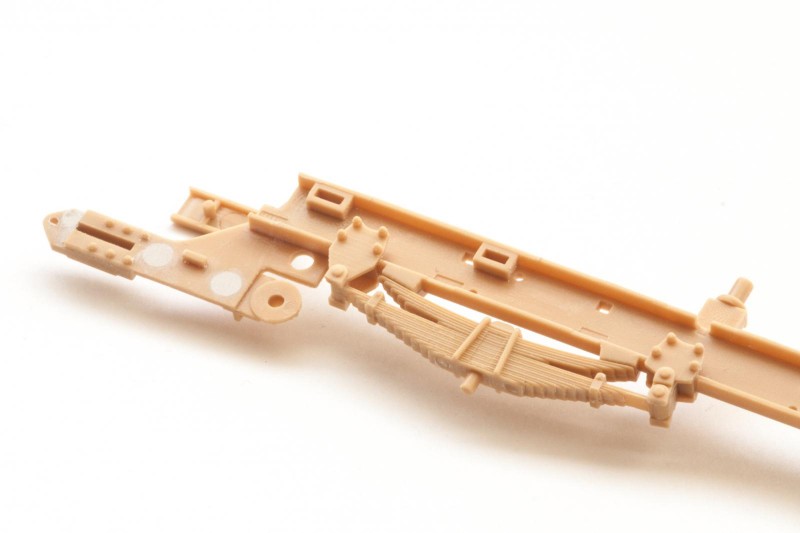
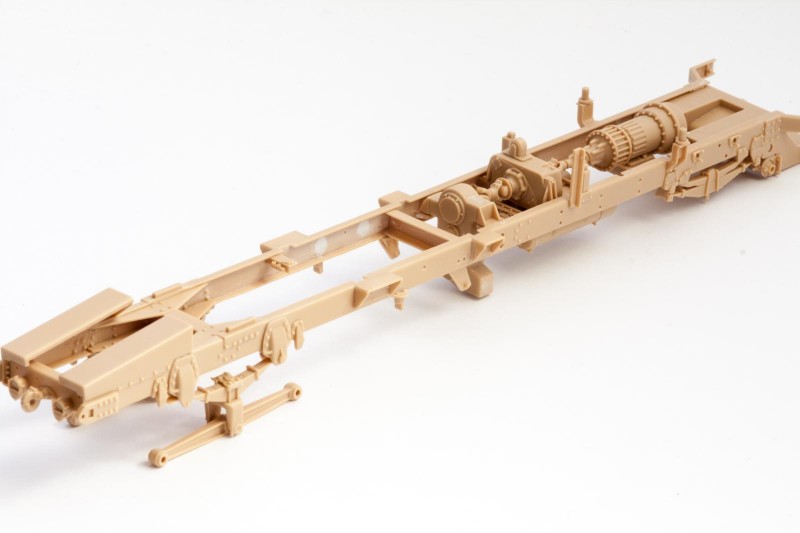
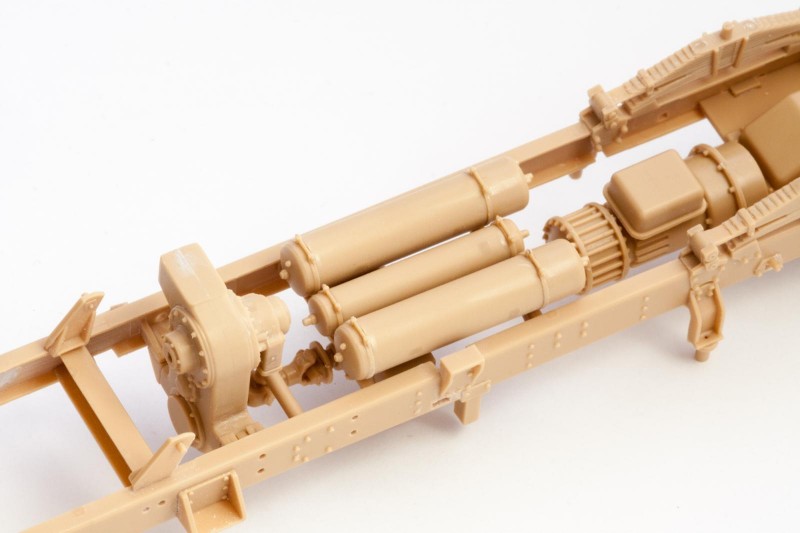
After the filler job is out of the way, the cassis goes together pretty easily. The two long beams are connected by cross members and various other parts, and I basically started from the front by gluing in the engine part and working my way back. I find this approach easier than gluing all the parts to one of the beams and then trying to align everything to the other one.
One thing I found questionable was the connection between the engine part and the transmission. There is no key provided for proper fit, and the parts need to be aligned by eye. Easy task, sure, but it feels a bit sloppy.
However, with everything glued into place, the chassis already starts looking rather impressive and busy. A good engineering choice is Hobby Boss' way of designing the air tanks. The whole assembly consists of five parts – two parts for the end sections including the clamps, and three slide-molded cylinders which are sandwiched between the end caps. No seam filling required, which is nice.
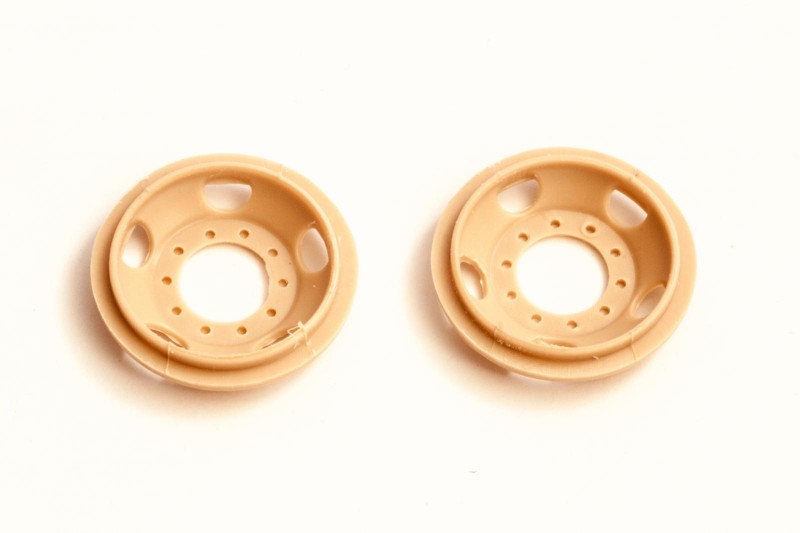
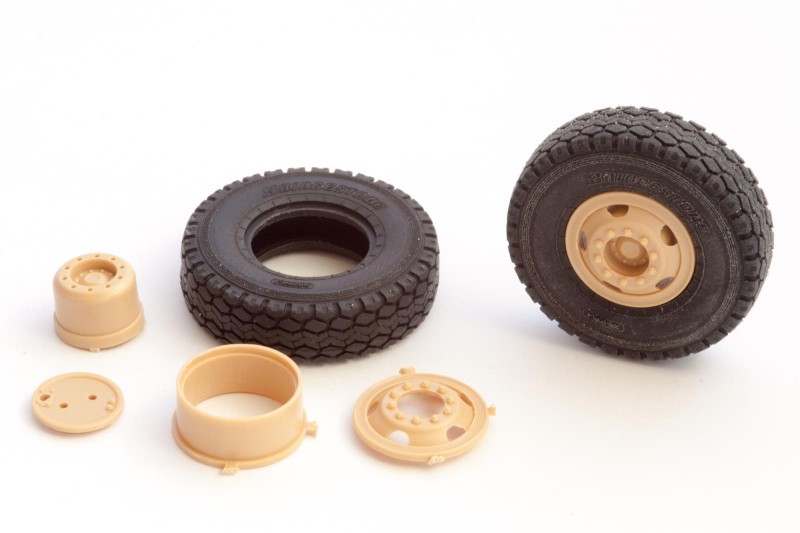
Next up are the wheels, with each rim consisting of two parts. These need a surprising amount of cleanup, as they show some flash especially inside the lightening holes.
Each of the hubs gets its own air brake chamber, and here's a slight omission in the kit: According to the Technical Manual, the wheels on the lift axle should have two chambers each, but only one is provided.
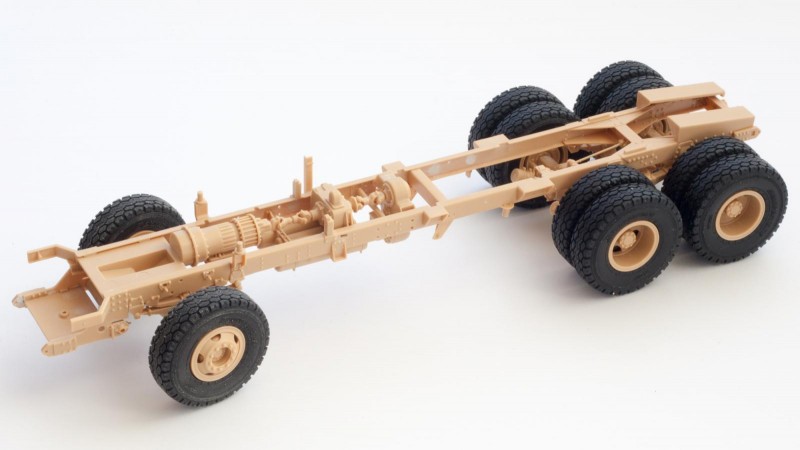
The rubber tires fit over the rims easily – if anything they might be too lose a fit, so you will have to take care not to end up with gaps.
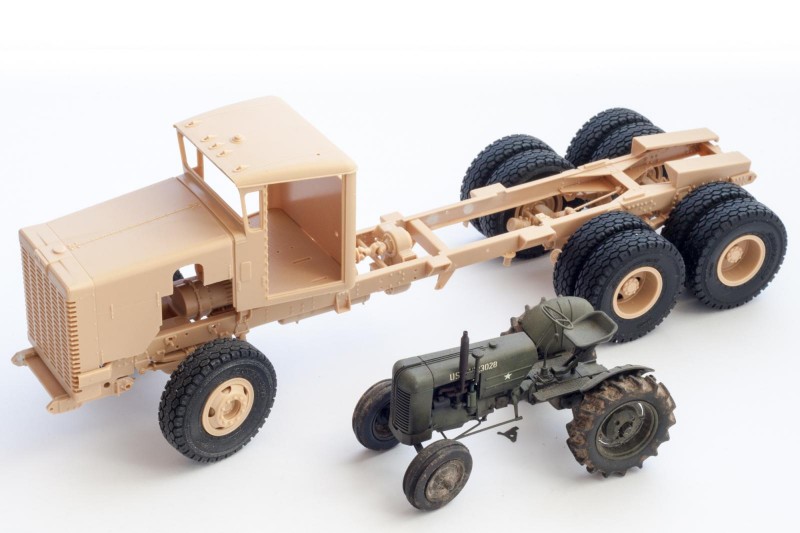
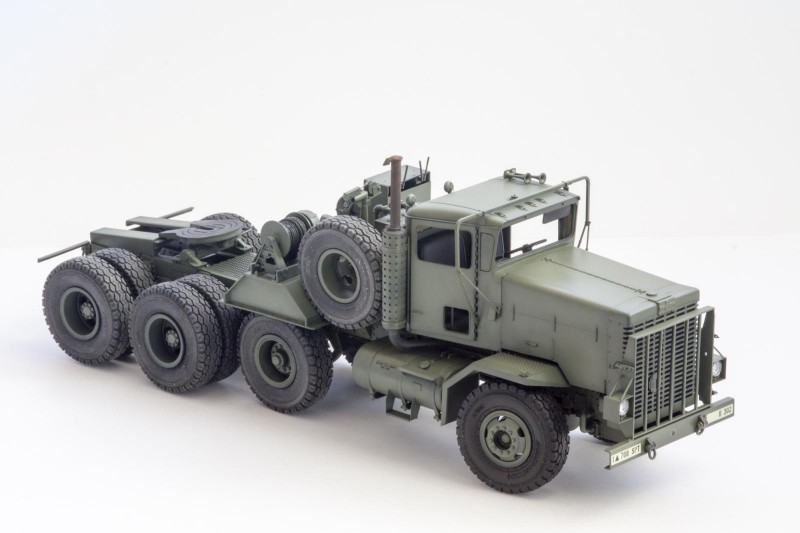
A quick mock-up at this point gives an idea of how huge this beat is going to be…
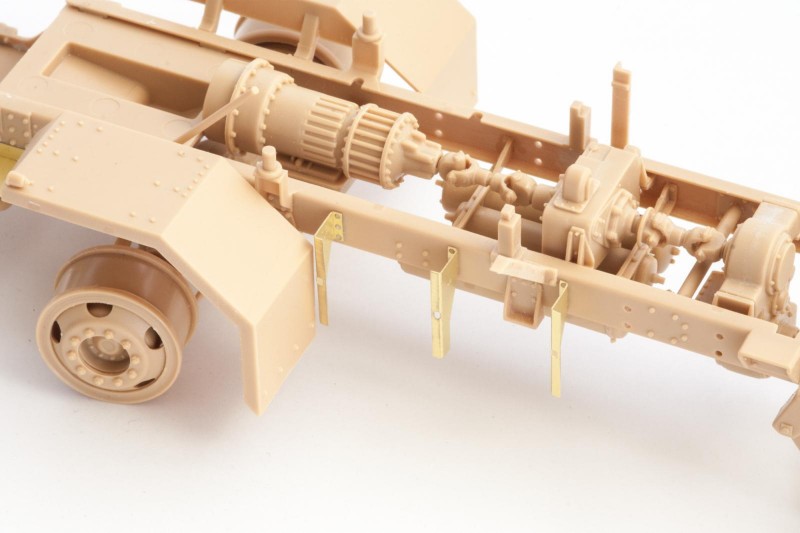
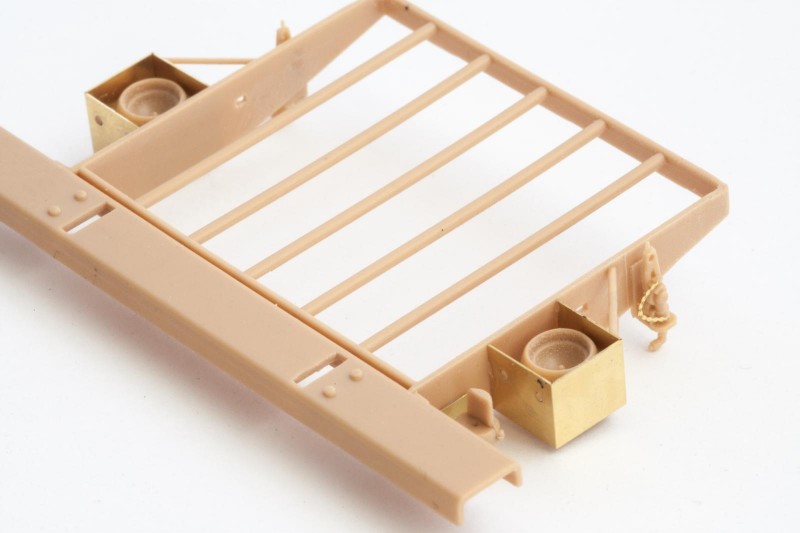
To facilitate painting later on I decided to attach the front fenders at this point, together with the PE attachments for the battery box. The PE parts fit very well, you just have to make sure to bend them at a correct 90° angle.
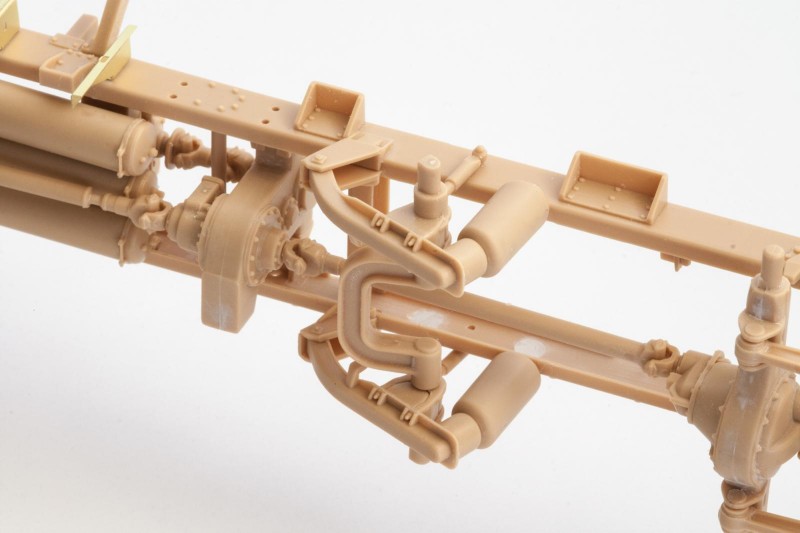
The lift axle can only be built in its deployed position without surgery. If you are inclined to do so, you will have to shorten the hydraulic cylinders and fabricate new and deflated air bags. In any case, the horseshoe-shaped part between the axles is not keyed to any position and I cannot tell you which position would be correct.
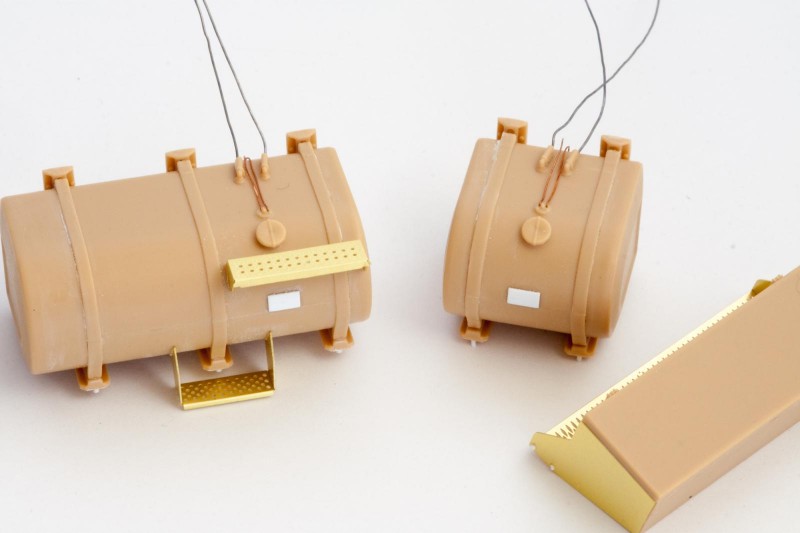
Building the fuel tanks requires a small amount of filler. Additionally, I added fuel gauge sensors and fuel lines, and some bolts to the bottoms of the tanks and the sides of the battery box. The raised rectangles on the tanks fell victim to my sanding and were added back with thin plastic sheet.
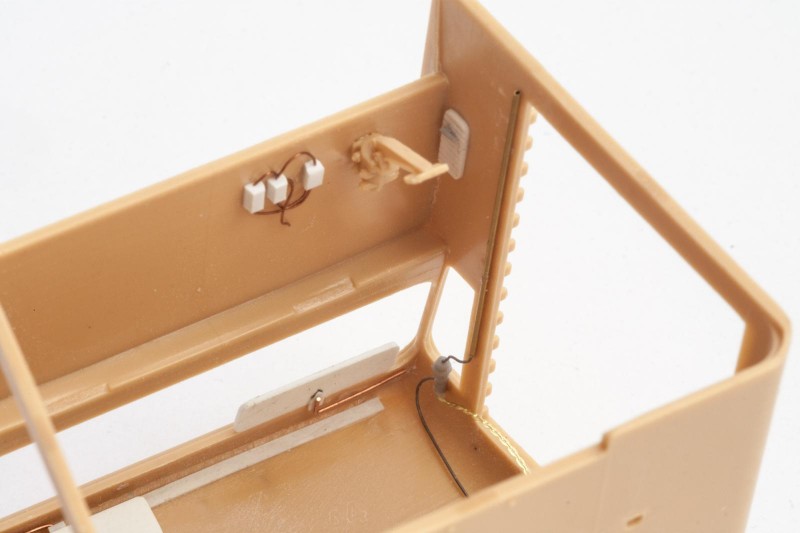
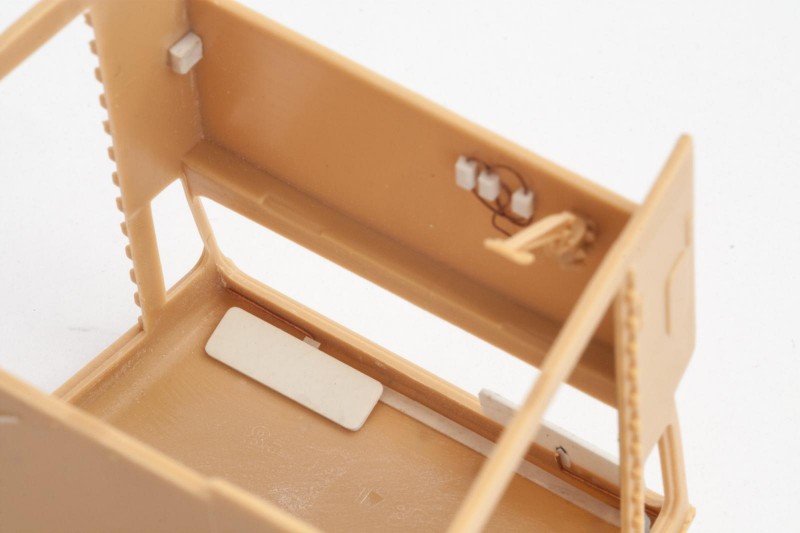
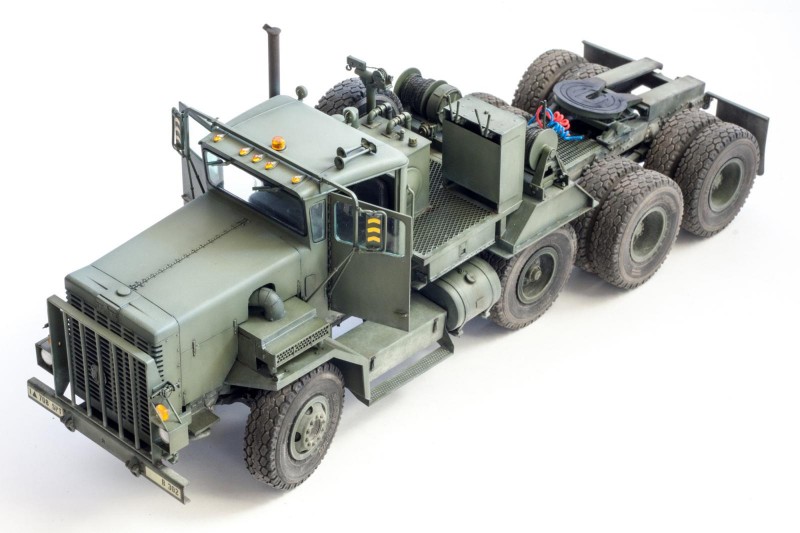
Moving on to the cab, I added various fixtures according to the TM – fuse boxes, the air horn mechanism, and sun screens. No American truck would be complete with out the air horn chain to go “honk honk”, so this was added using fine Aber PE chain.
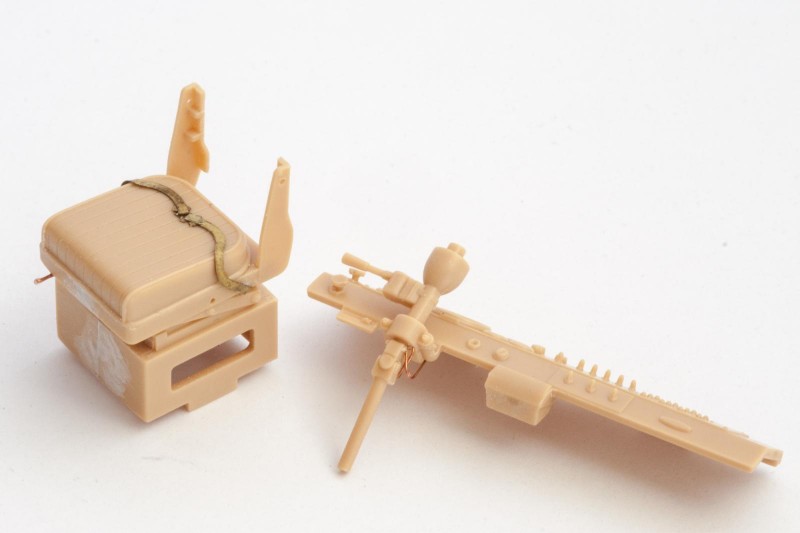
The driver's seat received some generic seat belts (I think they are from a Yak-3) and a lever for the height adjustment, the steering column was detailed with bits of thin wire.
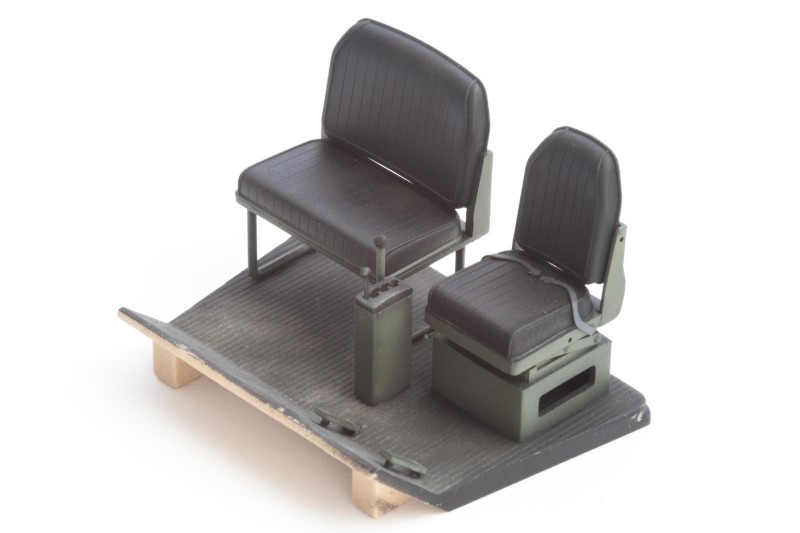
Before closing up the cab, the interior was airbrushed with Tamiya XF-85 Rubber Black for the floor and the seat cushions, and Hataka's lacquer FS34102 Green for basically everything else. Weathering was done with oils and pigments.
I cut out the bezels from the IP decal and painted the rest by hand, as trying to fit the whole decal over all the raised bits would be futile.
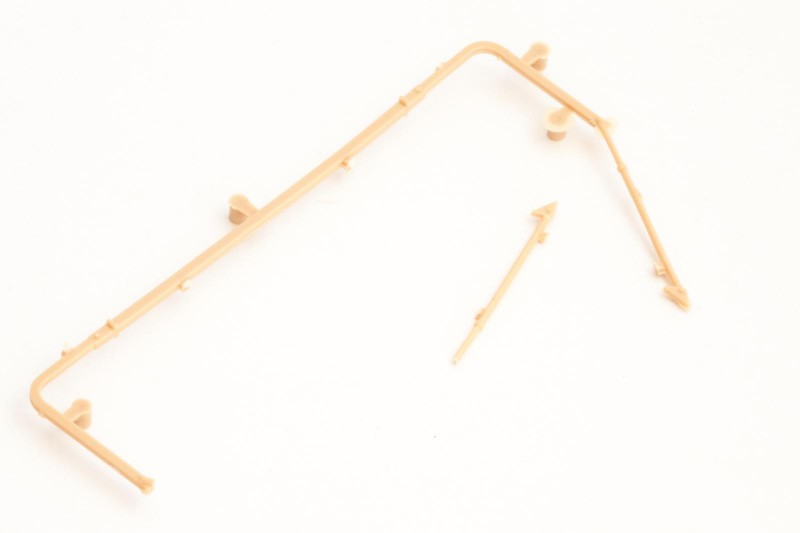
Assembling the cab's outside turned out to be the trickiest part of the build. First off, the large frame holding the rear view mirrors broke when removing it from the sprue…
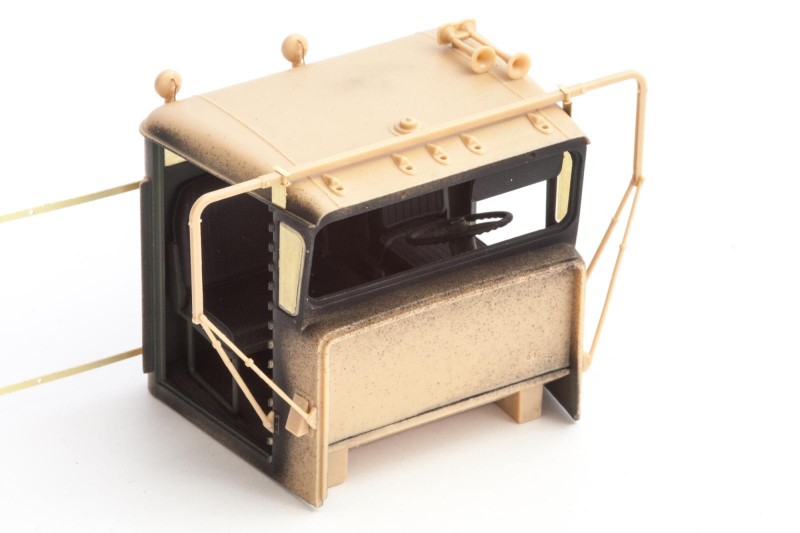
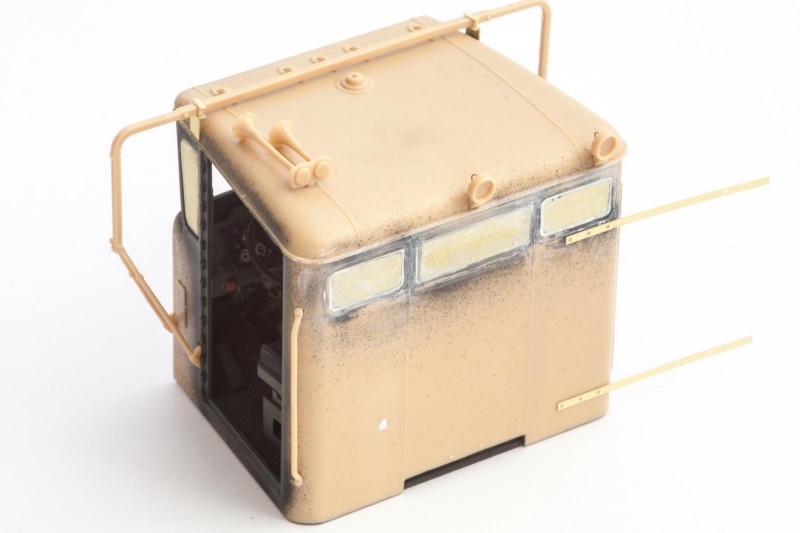
… and broke on the other side while cleaning it up. In order to align everything properly, I started by gluing the support struts to the cab (two parts provided in the kit and the two parts that had broken off the frame), and while the glue was still wet added the frame and its PE supports. That allowed me to tweak everything into place. And while I was at it, I added wires to the spotlights at the rear of the cab.
The small side and rear windows show prominent gaps when test fitted, on top of that the kit-provided masks are too large. The masks should leave a thin frame all around each window, so I cut my own masks, and the gaps were filled with AK Interactive White Putty.
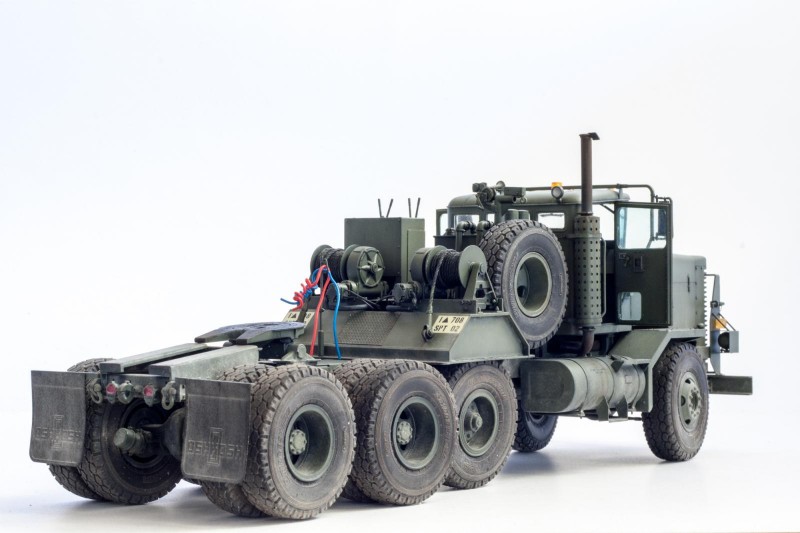
The PE strips at the back of the cab are supposed to wrap around the muffler later on. This will not work if you do not anneal them before installation, and even then barely so. Don't ask me how I know… In the end I decided to replace them with strips of lead foil, which is much easier to bend to shape.
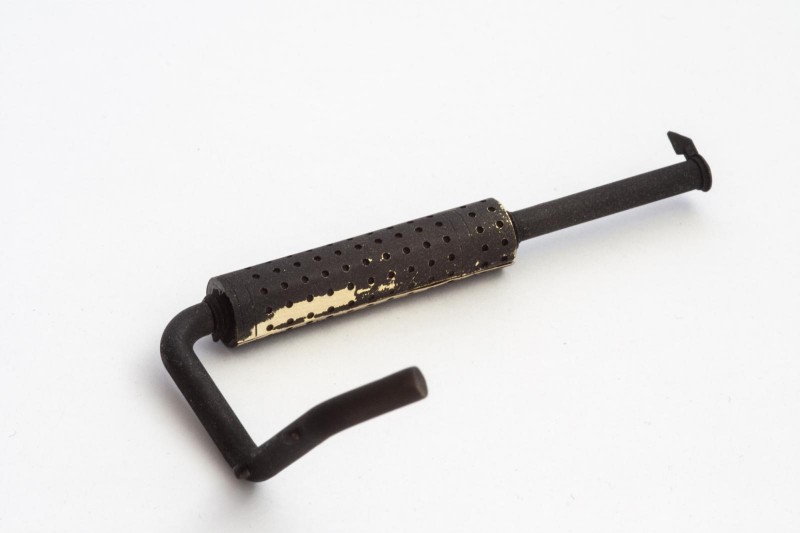
The muffler itself needs its PE sleeve bent as well. Do anneal, you pursuer of modeling happiness! I did not, could not get it to conform, had to remove it, strip off lacquer paint, anneal the living daylights out of it, and paint it all over again. Go me…
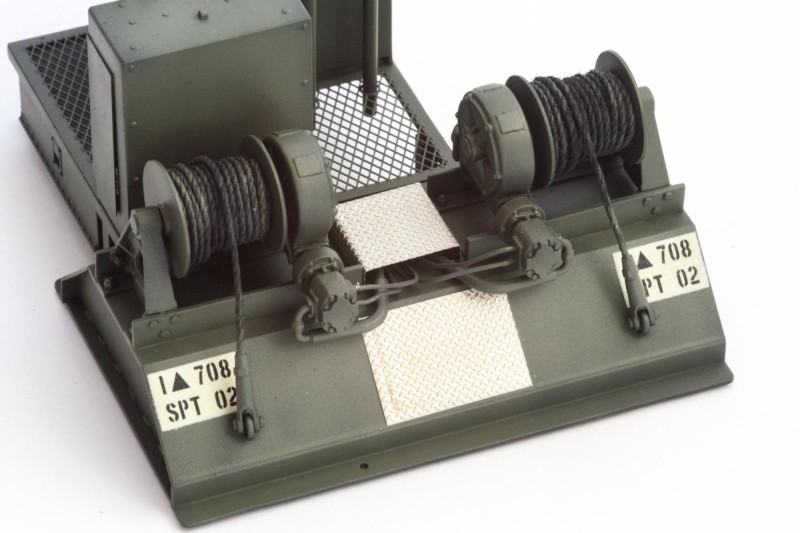
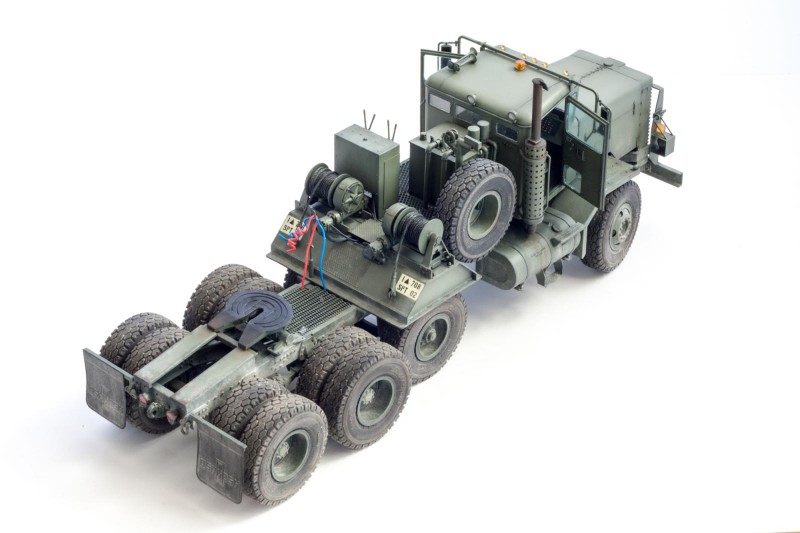
The whole winch assembly, on the other hand, is a breeze. I replaced the kit-provided string for the winch cables with another rope, as the original string is way too fuzzy. Some hoses were added connecting the winches to their control station, as were two anti-slip plates. As you can tell from the picture, I only found out about these parts after I had already painted and decaled the platform, but anyway. Using an anti-slip PE sheet from Lion Roar, I cut a 13x18mm plate for the sloped part, and an 18x18mm plate for the cover, with the outer 3mm on each side bent downwards, resulting in a 12x18mm platform 3mm high.
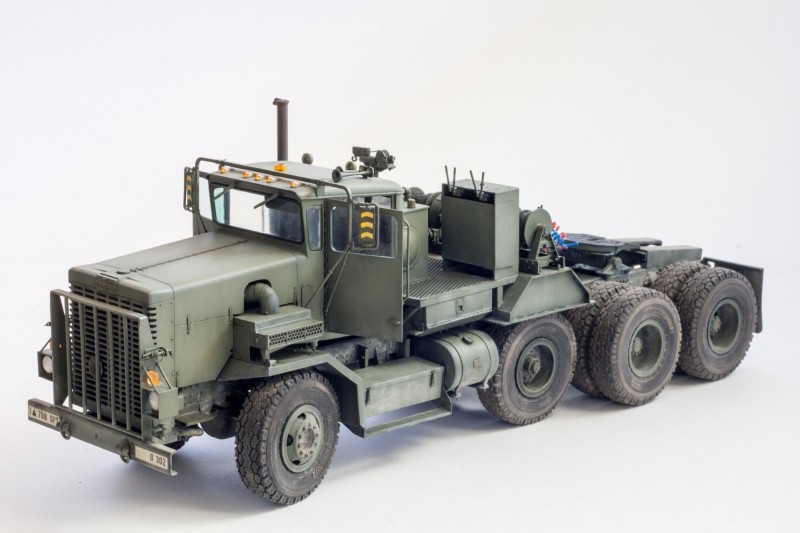
The front brush guard together with lights and air couplings goes together quite well, but you will have to take your time cleaning up the seam lines on the brush guard. Even the small chains for the air couplings come in the kit, ehich is a nice touch.
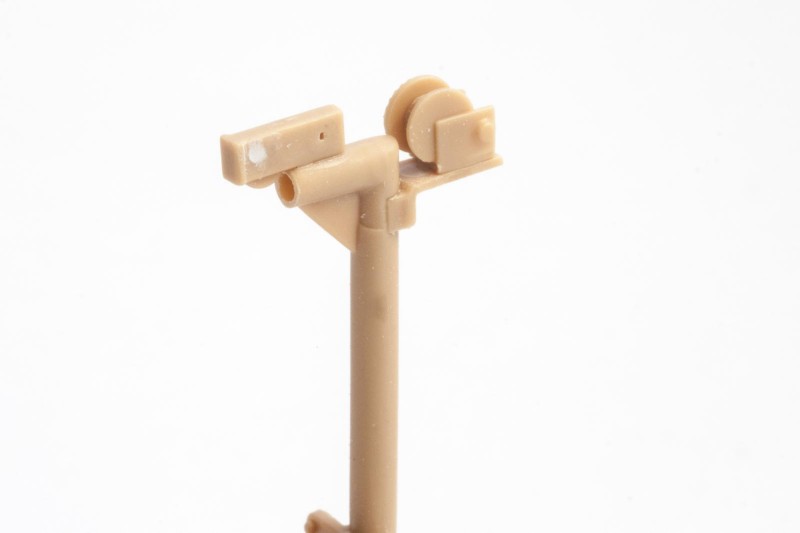
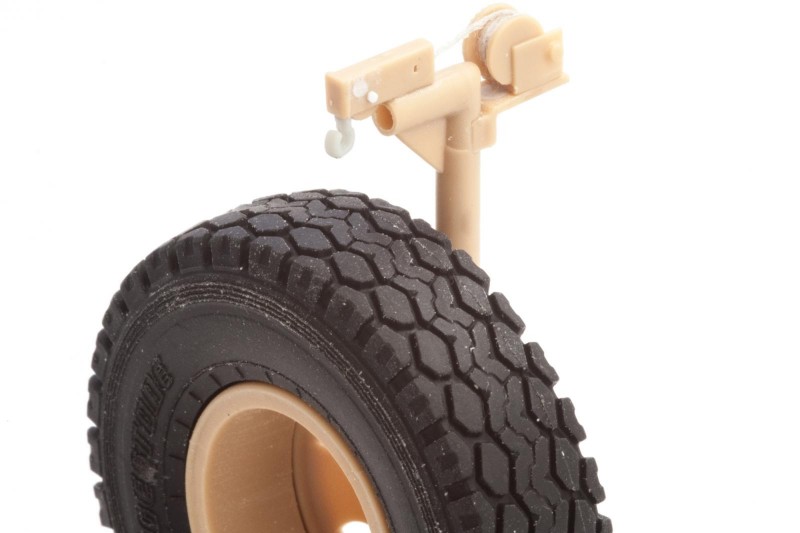
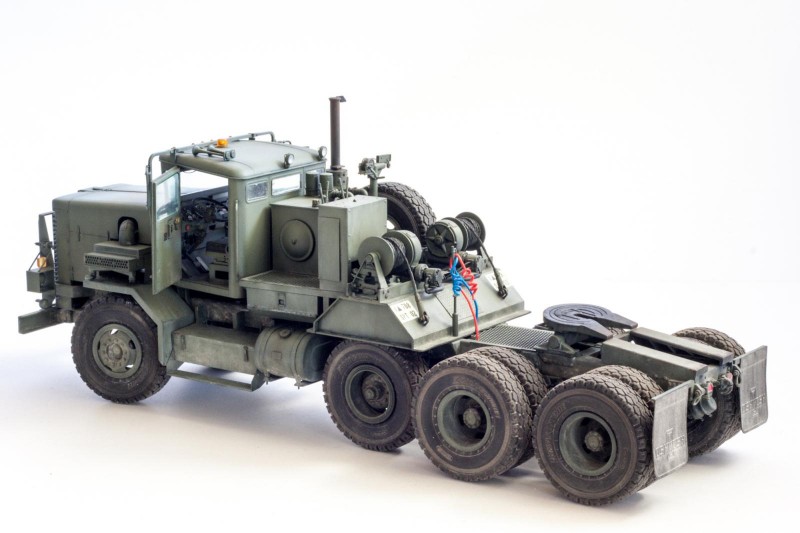
Finally, the spare wheel holder and crane need some love, as this part literally sticks out and looks a bit bland out of the box. After filling the pin marks, I added thin thread to the winch and a small hook to its end.
Painting. And Sanding. Because Stupid.
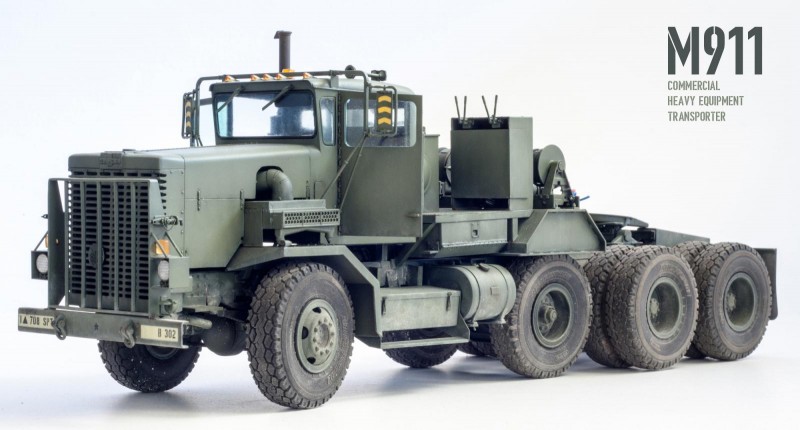
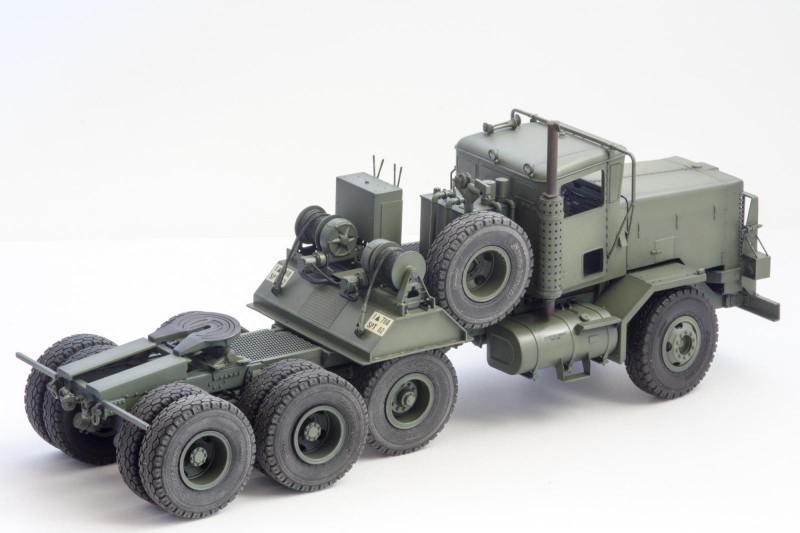
For painting purposes I left the truck in a couple of separate assemblies – chassis, cab, hood, winch platform, brush guard, wheels, spare wheel holder, and exhaust. After priming everything with Tamiya XF-1 Flat Black, the whole thing was given a couple of thin coats of Hataka FS34102, subsequently lightened with some Gunze Light Grey. When looking at pictures of Forest Green vehicles, it is noticeable how much the original color shifts to grey when it ages and fades, and I concentrated this fading on the large flat surfaces of the winch platform, hood, and cab roof.
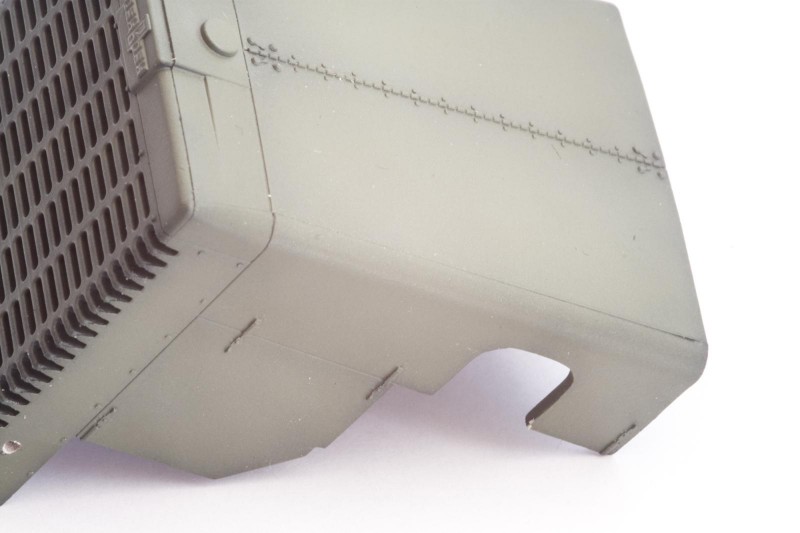
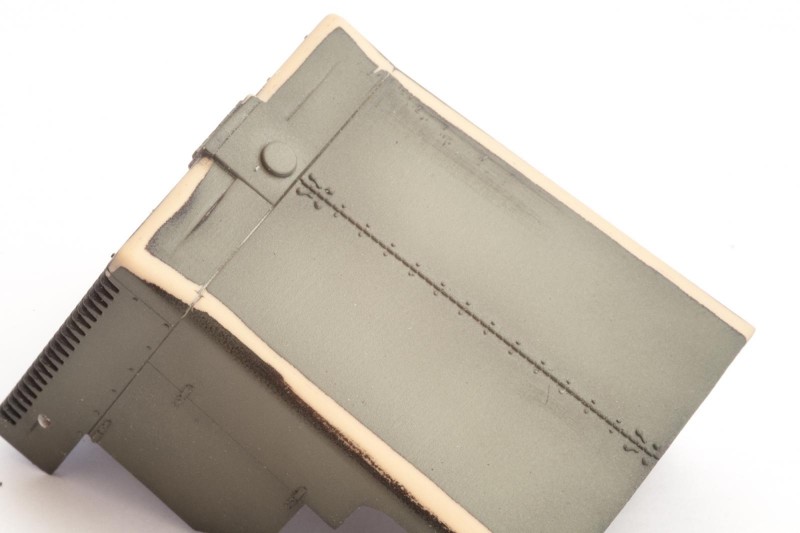
Concentrated on that so much that I completely overlooked the long mold line running all along both sides of the hood. Yeah…
And that's why I love lacquer paints. It is so easy to sand back errors and paint these sections again, whereas with water-based Acrylics you will always run into problems with either peeling paint or visible steps.
Decaling took only a couple of minutes, with the small amount of markings and some of the stencils not being used – they would not be visible anyway after weathering, so I did not bother with them.
Weathering and Final Assembly
Before the weathering process begins, it might be a good idea to think about your model's “story”. What is it you are trying to depict? Is it a new vehicle, or has it been in service for a long time? What are the conditions the vehicle was in? In our C-HET's case the idea is to depict a vehicle on REFORGER (Return of Forces to Germany) deployment, the huge exercises which practiced the shipping and deployment of large forces from mainland US to Germany. In the end, a new-ish M911 truck in its factory Green will have picked up an old and well-used M747 trailer and its load (right now I am thinking M88), both of which in MERDC Grey Desert scheme. There are lots of pictures of US vehicles coming off the huge Roll-On/Roll-Off ships in the Harbors of Antwerp or Rotterdam, in rain and cold temperatures, still sporting their sunny desert camo. Hillarious. (At this point a big Thank You to fellow iModeler Louis Gardner - @lgardner, who planted the seed for this idea!)
Anyway, the tractor would probably accumulate moderate amounts of dust, light rust in certain places, and a few chips here and there. Dust was achieved with a pin wash of Ammo by Mig's “Light Dust”, followed by pigments mainly on the chassis and the wheels. For rust effects I used Ammo's “US Modern Vehicles Wash” and oils of different colors. Finally, everything was dulled down with a coat of Vallejo Flat Clear.
Final assembly introduces a surprising amount of color to the kit. The orange lights were airbrushed with Tamiya X-26 Clear Orange, and the windows were given a thin coat of a 1:1 mix of X-23 Clear Blue and X-25 Clear Green. The air hoses which will eventually connect to the trailer are just test-fitted for now, and I think I will replace them with thin lead wire later on as they look a bit thick.
Thoughts So Far?
I really enjoyed this build so far – the subject is a gorgeous looking piece of equipment, and the build is without any significant issues. There are a few omissions in the kit, but as you have seen none are hard to fix. So let's see what the trailer has in store in the next part!

Fabulous article, so well written and helpful for future builders of this awesome truck. The Model is fabulous, expertly assembled, and flawlessly finished. I also enjoyed it b/c it was a unique subject. Awesome truck but rarely discussed as far as models go. Not just another P-51, or BF-109. Something different and and challenging. Hope to see more from you like this. Thank You!
Thanks Paul! I'm afraid I have been bitten by the truck bug 😀 After this one (and some other projects currently occupying the bench) I would like to take a look at the HEMTT family - lots of tasty looking stuff there!
Really good looking build! Looking forward to the final product. Well done.
Thanks James!
Yes, definately off the beaten track with this one, Boris. Good 'sit' on the tyres.
Thanks Rob! I was worried initially the tyres would look off, and there are no resin replacements available right now. But I think they came out ok.
Looks to be a really nice kit right there, my friend.
It is a very nice kit indeed, Craig - although (spoiler alert!) the trailer holds some surprises.
Wow Boris ! This is a fantastic build and an excellent review.
I'm fairly certain that I have some more pictures of my tank loading onto these trailers and possibly more pictures of the tractor. If I can find them I'll post them here or PM them to you if you would prefer that route.
I know I have some pictures of a M-88 retriever. We had one assigned to our unit as part of our HQ / maintenance platoon.
You were always happy to see those guys coming when you broke down. And I was really surprised at how much room they had inside of the 88 when compared to our tanks.
Our vehicles in Germany during REFORGER had the same camouflage pattern but used some different colors.
I'm fairly certain I have some pictures of them too.
I'm sure you will do a bang up job with the trailer. I think that you are going to really like how it looks with a mix and match tractor and trailer with the different camouflage colors.
Well done my friend. I like it a lot and this sure brings back some memories. It's almost like a trip back in time.
Thank you.
Thanks Louis! Really happy to hear it brought back memories - I hope they are good ones! If it is not too much of a hassle I would really like to see your pictures as I am sure they will be additional inspiration. Just post them here if you don't mind, and maybe we can infect other guys with the truck bug 🙂
Here you go my friend. I have been holding on to these pictures for many years. At one time I even was thinking about writing a book and using them in it. I have offered a few of these online before, but for the majority, this is the first time they have ever been offered online.
I hope you enjoy these and they may be of some inspiration for those who wish to build.
Here goes: 🙂
This picture was taken at another time when we were loading my tank onto the trailer. This was a different tank and from a different angle from the other picture I posted on your first article. If you look closely, you will see a mix of both aluminum and steel road wheels on this particular tank. The first one (#1) the last road wheel, (#6), and the #4 road wheels are steel. The rest are aluminum road wheels, including the compensating idler wheel.
You can also see more M-60's waiting in the back ground to be loaded up on these trailers. This just happens to be the very first M-60 tank I was assigned to. This is "L-18"
In this picture, I'm actually driving it onto the trailer.
I had a friend take the picture for me while I was driving...
It's an odd feeling driving a tank up onto a trailer. Just before this point, (here the front of the tank has already started to settle back downwards) with the nose sitting "High", all you can see is the sky... and only the hands of your ground guide as they are reaching overhead while giving you hand signals as to go left or right, or stop...
You have to place some serious trust in your ground guide, which is often another member of your crew. There is a very real possibility that you could drive the tank right off the edge of these trailers, since the tracks hang over the side. The same goes for loading on a rail car...
The recent movie "Fury" has portrayed the way a tank crew interacts with each other very well, even in peacetime. New guys (FNG's) are not well accepted at first, until they get a little experience under their belt. Then they become part of the family... We all became very close after a while.
This photo was taken of our HQ Platoon M-88 crew as they drove by us on a tank trail. Our vehicles were painted in the Gray Desert MERDC scheme during this era. At other times our vehicles were painted in an overall sand color. If you look closely at this picture, there is a support roller mounted on the side of the hull. It was not removed during painting, and was simply sprayed over with "desert Sand" color... The spare track blocks were given the same treatment, and were painted "Brown"...
You mentioned REFORGER in Germany. Here are some pictures I took when our unit participated in REFORGER '83. The colors were based on the same MERDC camouflage pattern, but different colors were used. Here we are Rail heading our tanks. On the back of the photo I have it listed as "Rail heading from Meisau to Fulda Sept. 1983"
On this next picture our tanks are road marching through Kassel Germany in September of 1983. If you look close through the diesel exhaust smoke, you can make out another tank ahead of us. Our searchlight is visible in the lower center of the picture...
This photo shows our tanks right up on the border between what was then "East Germany" and "West Germany". We were ordered to orient our gun tubes away from the border so as not to be considered and "Act of Aggression".
In this next photo, I don't remember where we were at. All I have written on the back of this pictures is "road marching through a small German town, September, 1983." You can see how close the tank intervals are, so you can see quite a few of them in this photo. These tanks in these photos are all M-60 A1's, Rise Passive, AOS vehicles. If you look closely at this picture, you will see two other tanks ahead of mine. Then directly ahead of them, there are 4 M-113 APC's. In the very far distance ahead of the M-113's, there are some more M-60 A1's.
Finally in this last photo, this is our tank as we were trying to conceal it with small tree branches after we parked "Somewhere in Germany, September, 1983" as it is written on the back of the picture. This reminds me of how you often saw both German and Allied armored vehicles in Europe after June 1944.
I hope that someone finds some inspiration after looking at these pictures. I know that you mentioned adding a M-88 on your trailer, but to me it would look even better with one of these older M-60's perched on the trailer... 🙂
I hope you enjoy these...
and I think my fellow US Army "Tanker" buddy Jeff Bailey will remember similar experiences when he looks at these pictures...
Yes, indeed, Louis! Generally, rail-loading was a bit of an ordeal, but after the first time you do it, the "ordeal" part becomes simpler.
Boris, Very nice. A real eye catcher. I like the shot with the tractor.
Thanks Gary! Yeah, couldn't resist doing that comparison...
Boris,
Been meaning to comment on this build for day or two. So well done! Just a work of art. Feels like one could jump in and hit the starter. Wonderful work.
Thanks Matt!
Hello Boris,
Thanks for sharing this build with us. Very impressive model that deserves a lot more attention from the truck modelers. Your photographs are also worth mentioning.
Regards, Dirk /The (tropical) Netherlands
Thanks Dirk! I hope manufacturers continue going this route, bringing more trucks and construction equipment into the mix. With lots of modelers experimenting with all kinds of weathering techniques these days, I think there is actually a large and mostly untapped market for this stuff.
Cheers, Boris / Austria (where we might start planting coconut trees soon)
That really is looking impressive!
Thanks Richard! And it requires quite a bit of real estate...
Ahhh. REFORGER '83 (REFORGER = REturn of FORces to GERmany)
That was my 1st deployment in Germany and my first REFORGER. Memories for sure. We started in Fulda, our home base for the 11th Armored Cavalry in our brand-new (early version) M1 Abrams tanks. Our Squadron Commander was (then) Lieutenant Colonel John N. Abrams, also known as "Son of Tank" since the M1 is named after Col (later Gen.) Creighton Abrams, his father.
Great photos, Louis! I have some similar pics, too. Somewhere.
Boris, your Hauler looks absolutely gorgeous. Well done, my friend!
Thanks Jeff! With your real-life experience on these tanks, have you considered taking a look at Panda Hobby's new early M1 Abrams kit?
Hello again, Boris @raikisan
Indeed, I have looked at the excellent M1 by Panda. Then I bought one. I have plans to make mine in the rather unique snow camo scheme we used during a winter REFORGER (1984, I think) while partnered with a platoon of German Bundeswehr Leopard 1A5 panzers. Pardon the poor photographic quality, but this is the only photo I have of my tank then. The reason I said the snow camo is "rather unique" is because we only did it because the Germans let us use the whitewash they regularly used on their vehicles during winter. We (the 11th Cav.) didn't use anything as camouflage during winter at that time. We were trendsetters, as it turned out. IF I ever get it done, the Panda M1 should make a really good memento of an interesting time. I added a photo from the same REFORGER of one of our Leopard 1A5 platoon partner tanks pulling another.
2 attached images. Click to enlarge.
This thread is becoming a treasure trove, with first Louis posting pics of his track and now your "exotic" Abrams! Thanks so much, Jeff @mikegolf!
Love it.
I made the hobby fan one a few years ago, cost a fortune at the time, but this is looking good
Thanks Malcom! I noticed the Sherman Crab in your intro article (nice work btw!). Can you tell me which kit you used? I suspect the Resicast conversion?
Cheers,
Boris
Masterful, Boris. I think Matt nailed it when he said it looks as though you could jump in and start her up. The fact you build has elicited such a response from our tanker fraternity shows you really hit the sweet spot.
Indeed he did, David!
Great build Boris. I like the way you have shaded the green with gray, and the weathering. Absolutely inspiring.
I look forward to reading Part 3, and how it all comes together.
Wow! Really stunning and very realistic. Can't say any more; i just love it!
Looks like a real awesome kit. Not cheap though.