Modelling Diorama Scenery – Step by Step
This step by step build was written for chapter Seven of my first book 'Modelling Railway Scenery Volume 1'. Some of the text refers to other pages in the book and should be ignored. There are also references to the photographs in the book - Figure 195, Figure 196 etc etc, these should be ignored too.
I hope you enjoy this demonstration
Waterfalls - 1/76 Scale
Water, naturally, through the effects of gravity, makes its way downhill towards lower ground. Here we look at the techniques used to model streams as they find their way downhill cutting their way through the landscape, forming waterfalls and white water.MATERIALS
Ply board
Kingspan
Cement
PVA glue
Scenic modelling materials
Paints/weathering powdersTOOLS
Steel rule
Jig saw
Sandpaper
Scalpel/Stanley knife
Large paintbrush
Small firm paint brushes
In this chapter we move downhill from the deep flowing mountain stream to a more dynamic body of water. A water fall is formed by water often from a river or stream dropping from a higher to a lower point, sometimes these falls are made up from a series of smaller waterfalls like the one modelled here but sometimes the water falls in a single drop from a great height making them a very dramatic feature on the landscape.
The streams that form waterfalls can eventually join up with other streams to form larger bodies of water, like rivers or inland lakes. There is even one waterfall, The Kinder Scout downfall in the Peak District National Park in Derbyshire, where on days when there is a strong South Westerly wind the water gets blown up instead of down, more of a water rise.
In this model the deep channels have been a long time in the making and the steep walls have been carved out by the action of flowing water for many years. Moss and other plant life clings to the rock walls that edge it.
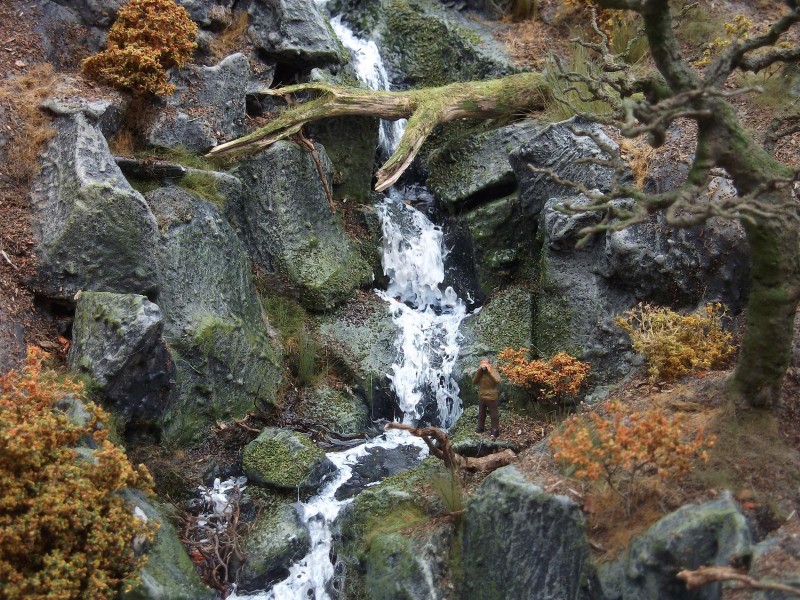
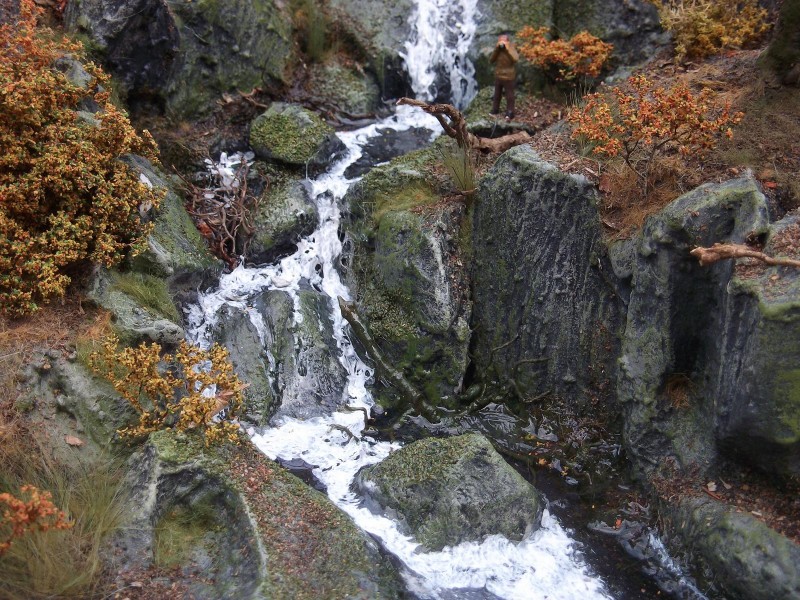
The motion of the water has been captured here to add some movement to the scene. White water foam builds up at the bottom of the waterfall and debris from winters past gathers around the rocks in this autumn scene. A fallen tree spans the gap creating a natural bridge from one side of the chasm to the other.
Adding A Waterfall
Assuming you are reading this book before embarking on your own scenic modelling journey it will have become clear that many of the features in the book can easily be seamlessly blended together. A waterfall feature is no exception. Whether you are using or have used chicken wire, polystyrene, Kingspan or card and newspaper or a mixture of all four methods to shape your landscape, it is a simple task to create a space where the waterfall or a series of waterfalls are to be placed. You simply have to cut out a section of the landscape and create a channel in which to build a rocky gorge for the water to fall down.
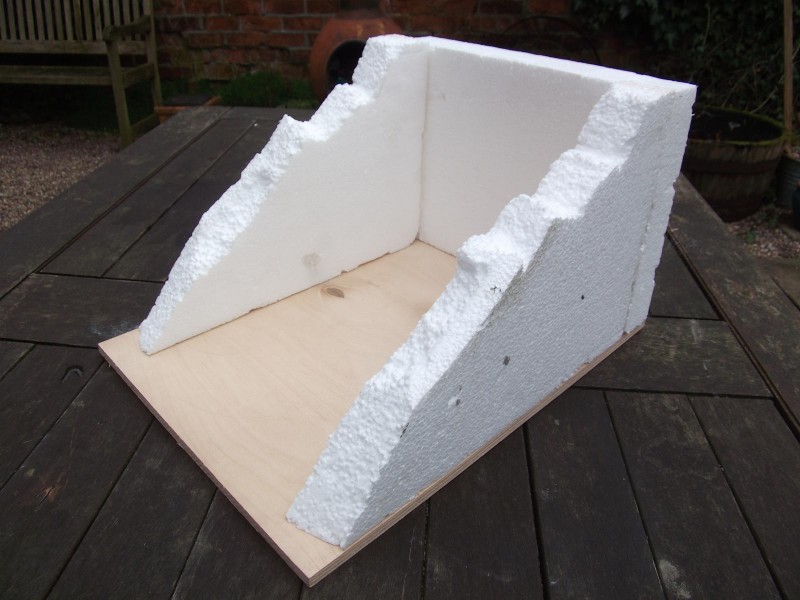
If the early stages of the terrain are planned correctly, the hard landscaping either side of the waterfall can be boxed off leaving a neat void in between. A box can be made to fit snugly inside the void, allowing the waterfall section to be constructed away from the layout which can be slipped into place after it is built (Fig. 194). This method can be applied to other features on the landscape, such as a copse of trees for example, which is much easier to fix to a section of polystyrene or Kingspan than into a chicken wire frame. This method is particularly useful for areas of the layout which may be difficult to reach.
After the landscape feature - the waterfall in this case - has been positioned on the layout, it is just a simple matter of blending the edges of the “box” into the landscape either side of it using one of the methods and materials shown in this book.
The method of creating the effects of moving water shown in this demonstration can be used to create vast falls of water on multiple levels or a small step in what is no more than a stream running its course downhill.
Measure, mark and cut the frame which will house the waterfall. Here I am using ply board for the base of the frame and polystyrene sheet for the back and sides but thick card or a similar lightweight sheet material will work as equally well. Be sure to shape the slope of the polystyrene either side of the waterfall feature to mirror the terrain either side of it so once it has been slipped into position on the layout there are no obvious joins. The sides and back of the frame can be glued in place using either PVA or grab adhesive and left to dry (Fig. 195).
The rocks over which the water flows, creating the waterfall, are made using Kingspan. Kingspan is used in Chapter Five and was covered with a plaster coating, this time however it will be coated in the cement mixture as used in Chapter Two.
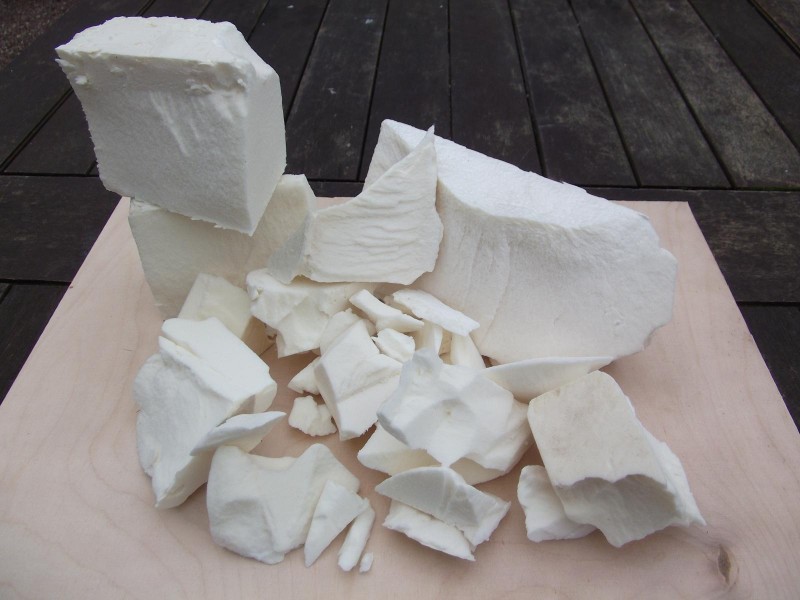
Take the block of Kingspan and hold it on a flat surface with one hand. With a sharp knife roughly chop chunks in a variety of sizes and shapes - some thick blocks and thin slithers give plenty of scope when it comes to putting the pieces together. Snapping some pieces off the sheet by hand can also result in realistic texture to the chunks (Fig. 196).
Picture in your mind how wide the waterfall should be and how deep you want the drops in the waterfall to be and chop accordingly. There is no need to be too critical with the sizes as the blocks will be refined as the waterfall is constructed. It is recommended that you make more than you actually need as this gives more scope when it comes to arranging them.
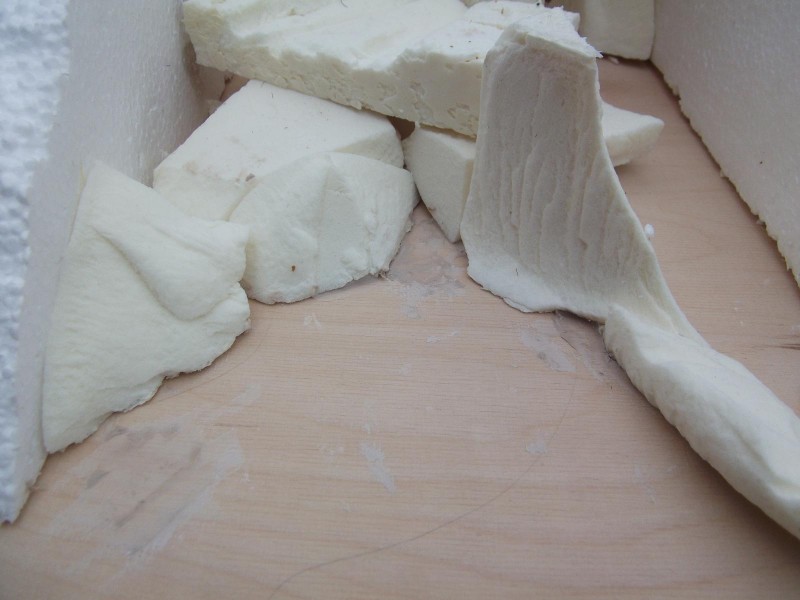
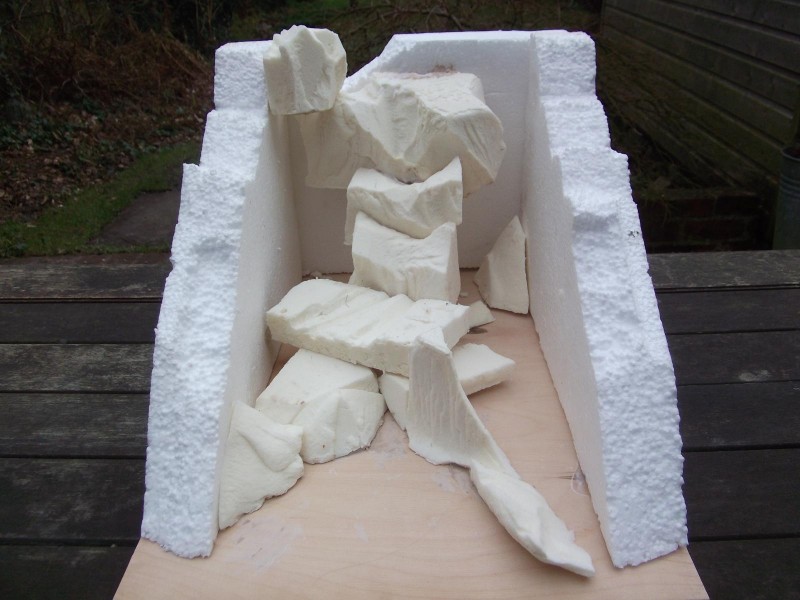
I start building the waterfall feature by arranging pieces of Kingspan at the point where the waterfall ends on the layout (Fig. 197). This is the point where the last fall becomes a pool of water and a flowing stream again. Adding this feature before the upper parts of the waterfall ensures the waterfall ends in the correct place on the layout.
This step is important and reference to photographs of waterfalls may help you here.
The first stage in creating the falls is to construct a number of steps, which get higher as they get further back, i.e. further up the waterfall. Remember waterfalls don't necessarily fall straight down slopes as they work their way around the rocks, indeed more character can be added to your model scenery if the waterfall has kinks in it. The drops, which the water falls over, are in position here (Fig. 198) and held in place with grab adhesive.
Note too that the rear of the polystyrene frame has had a section cut away where the waterfall joins the landscape.
Authors note
It is also worth considering disguising the point at which the waterfall enters the landscape either by using rocky outcrops or a mass of trees or foliage. This avoids the impression of a waterfall coming straight out from the back scene.
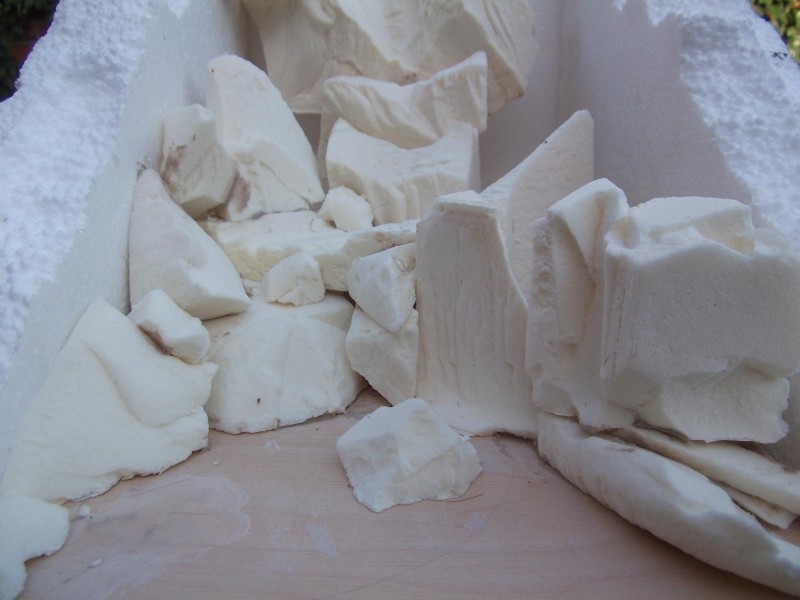
It is best to start the positioning of the rock walls around the waterfall at the bottom of the falls. Take some of the small pieces of Kingspan and arrange them in positions which look natural and realistic (Fig. 199). The great thing about using Kingspan for this type of work is that it is very easy to shape into pieces which are useful for constructing the falls and the walls around them and for filling small gaps as you work your way around the waterfall. Continue adding further pieces, working your way uphill as you go creating a channel for the water to run through.
Another feature of real waterfalls are plunge pools. Plunge pools are deep pools of water which form in the rock at the bottom of drops and are created by the action of the water eroding the rock. These can be created by carving out a little hollow at the foot of the falls, not too deep. 5-10mm will suffice.
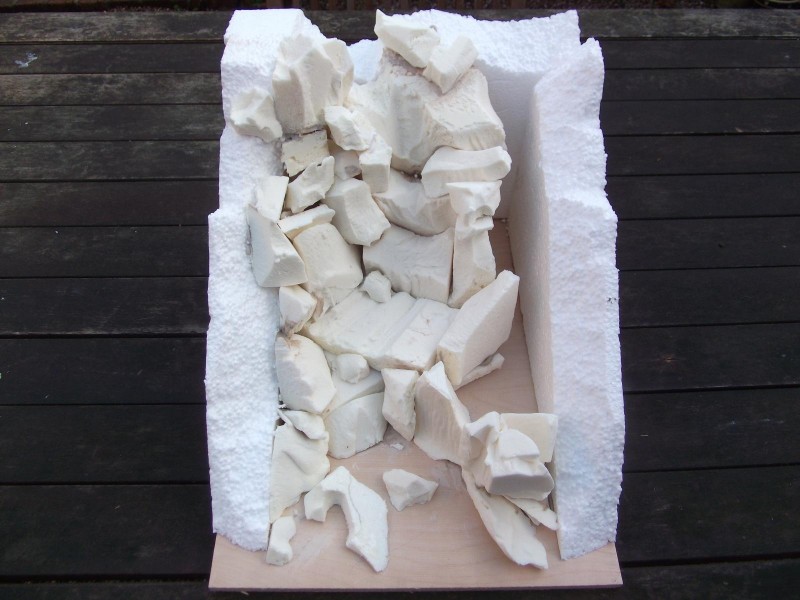
More Kingspan pieces are added to the groundwork and the feature can be seen taking shape. The channel is purposely made slightly narrower the further up the slope it gets (Fig. 200) - this adds a touch of perspective to the landscape. Grab adhesive or PVA glue is used to hold all the Kingspan in place. Allow the structure to dry.
The polystyrene sheet which forms the back and sides of the frame has been shaped using a sharp carving knife to slope down towards the rocks surrounding the waterfall.
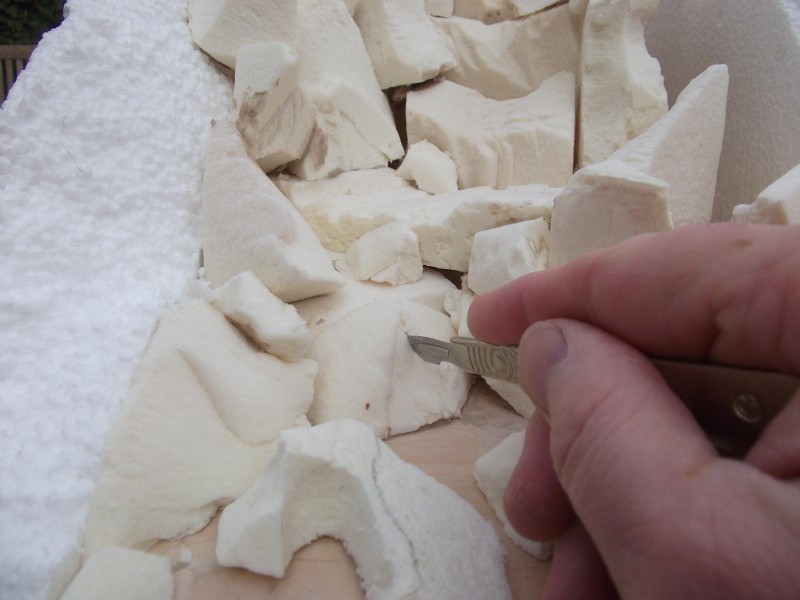
To add more detail to the surface of the Kingspan some of it is carved using a sharp blade (Fig. 201). In nature some rock faces are smoother than others, especially where the effect of running water has played a part in their history, and it is very much a personal choice as to the overall texture of the rocks and how many cracks and crevices appear in yours.
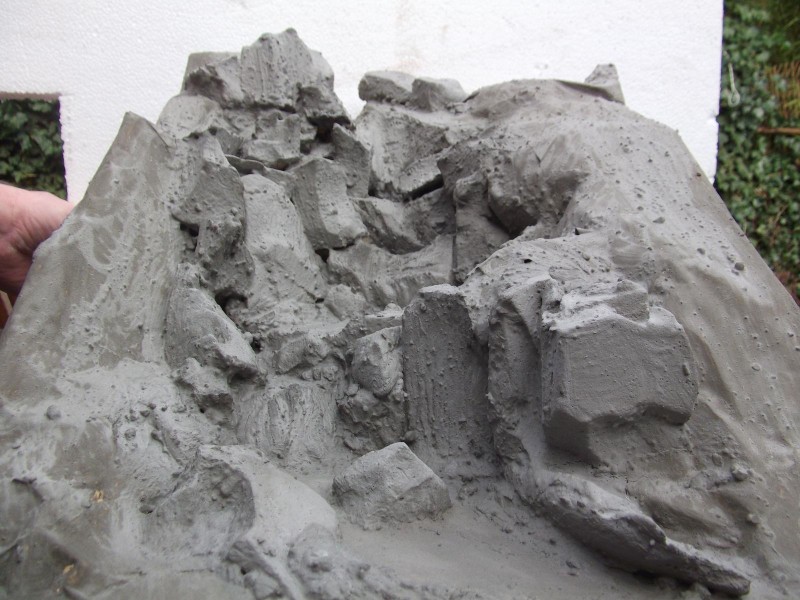
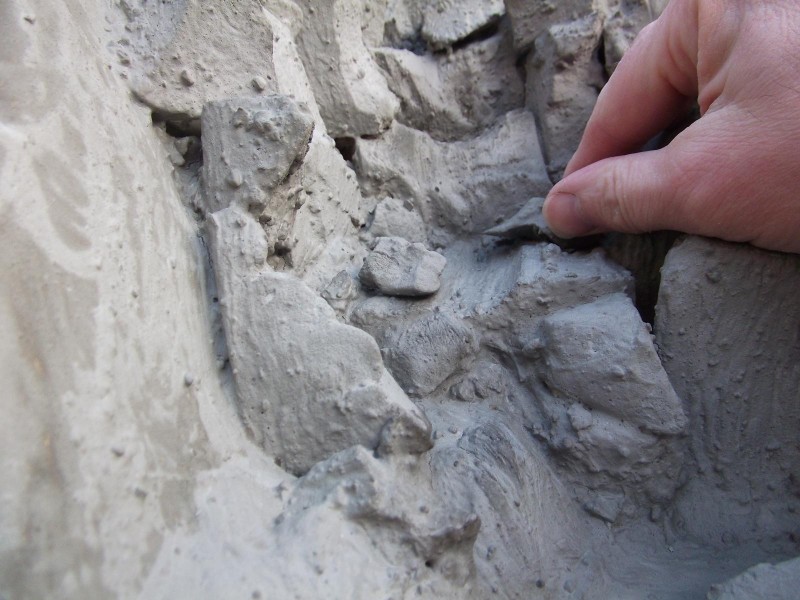
To enhance the look of the rock and to help seal any gaps that may be present in and around the floor of the waterfall a thin coat of cement mixed with diluted PVA is applied to the gaps and all over the surface of the Kingspan. Make sure this seals even the tiniest of gaps too as it is this coating which will stop the scenic water, which is added at a later stage, from seeping away.
Note too that a hard shell of flat terrain has been added to either side of the waterfall. This sits flush with the terrain either side of the waterfall when the frame is put in position on the layout. For the hard shell I used strips of paper coated with PVA glue which were laid over screwed up newspaper. The hard shell has also been given a thin coat of the cement mixture to help fill any of the gaps between the rocks and the paper. The waterfall is shown after the coating has dried (Fig. 202).
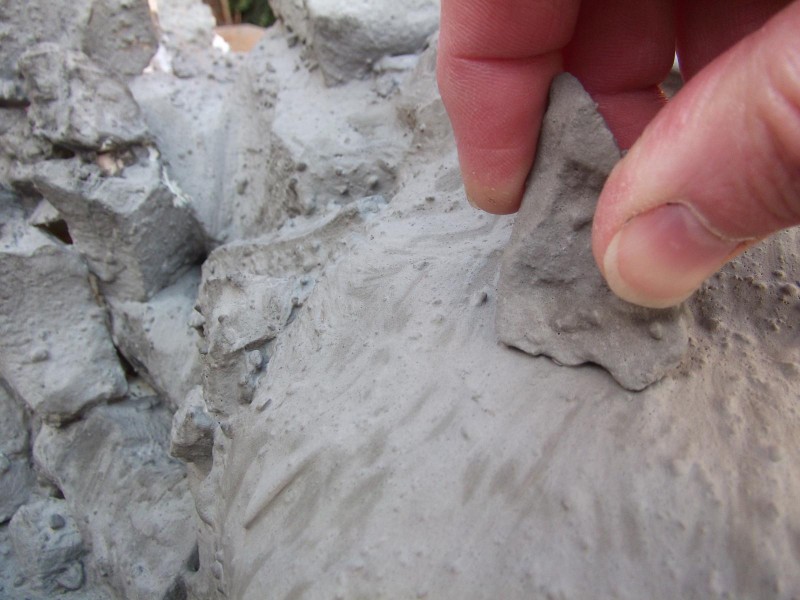
Waterfalls often have large boulders and small rocks in the middle of their water course. These rocks often fall from the ground surrounding waterfalls as the softer rock and earth around them are washed away. Here I am adding a couple of large boulders to the floor of my waterfall (Fig. 204). These are simply made using pieces of Kingspan coated with the cement mixture and are fixed in place with a spot of PVA glue.
The realism of features like waterfalls, quarries and railway cuttings can be enhanced if some of the rock used in their creation is also added nearby on the landscape, thus visually gelling the areas of groundwork together.
In (Fig. 203) Kingspan boulders are glued to the terrain on the right hand side of the waterfall. These can be positioned to overlap the join between this section and the static sections of terrain on the layout. It is a good practice at this point to make a few extra boulders which can be worked into the surrounding landscape and placed in the bottom of the channel where the water runs.
Painting, Weathering And Detailing The Waterfall's Rocky Surroundings
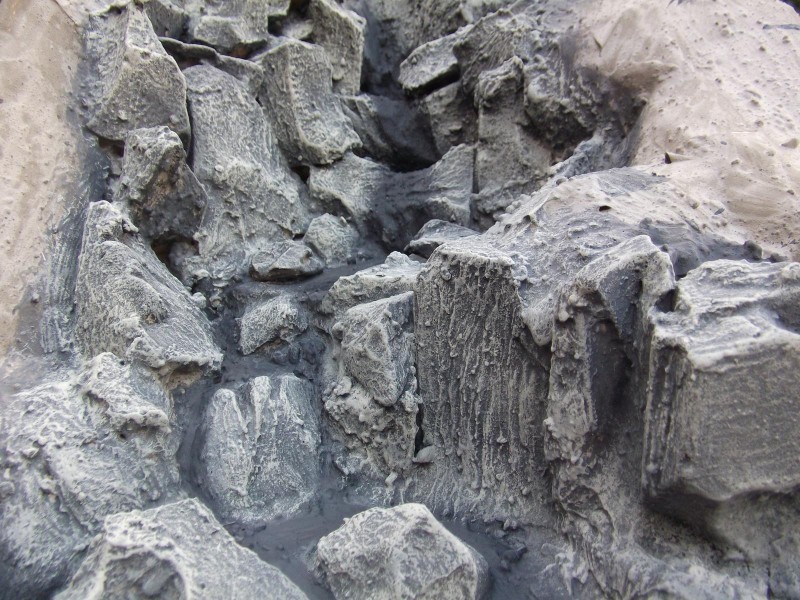
When the cement coating has dried the texture of the rock can be highlighted by dry brushing on assorted tones of paint which will add to the realism of the waterfall. For the first coat I have used black emulsion paint which has had a small dab of white emulsion paint added to it to lighten it a touch. This mix has been diluted to the ratio of one part paint to six parts water and the whole surface of the rock can be painted with it. This dark mix of paint is used to darken all the cracks and crevices among the rocks. Allow this coat of paint to dry before adding lighter tones to the surface.
The lighter shades, as with previous chapters, will be dry brushed. Again I am using matt white emulsion paint as the base colour for the mixes and again I mix three different shades based on the same paint colours. These mixes can be blended at random throughout the painting process.
Dry brushing paint mixesMix one – 8 parts matt white; 3 parts yellow; 2 parts black.
Mix two – 8 parts matt white; 2 parts yellow; 1 part black.
Mix three – 10 parts matt white; 1 part yellow; 0.5 parts black.
For the best results when dry brushing it is important to allow each tone of paint to dry before applying the next, lighter tone. When dry brushing dip the tips of the bristles of a firm brush into the paint. Next wipe the tip of the bristles on a dry cloth or tissue to remove most of the paint from the bristles and using the tips of the bristles just catch the edges and any tiny protrusions of the rock formations. This gives a great impression of weathered rock (Fig. 205).
Avoid using pure black or white on the rock as this may look unrealistic. Leave the undersides of any overhangs dark as this is an effective way of introducing shadows to the waterfall. I always recommend painting a test piece first, especially if dry brushing is a technique you haven't used before. The test piece should be left to dry to see if the colour of rock you want has been achieved. For a more in depth demonstration of dry brushing please refer to Chapter Two.
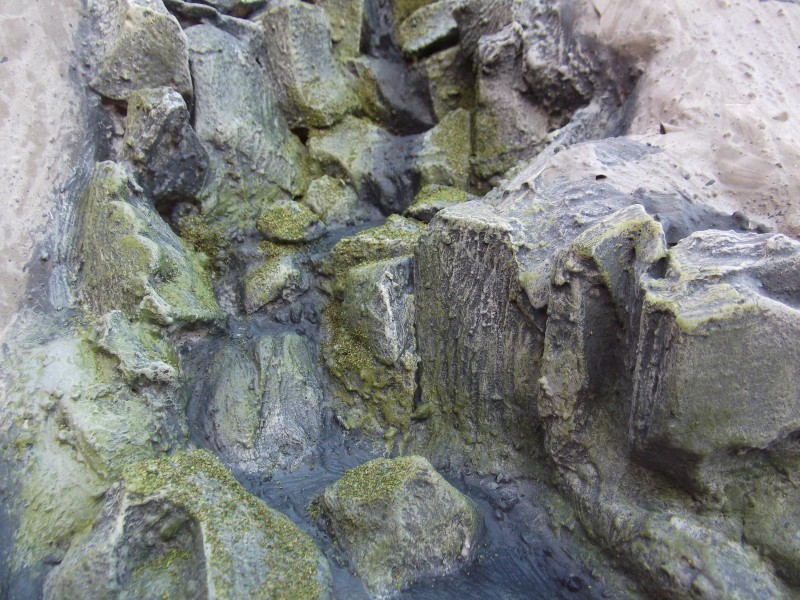
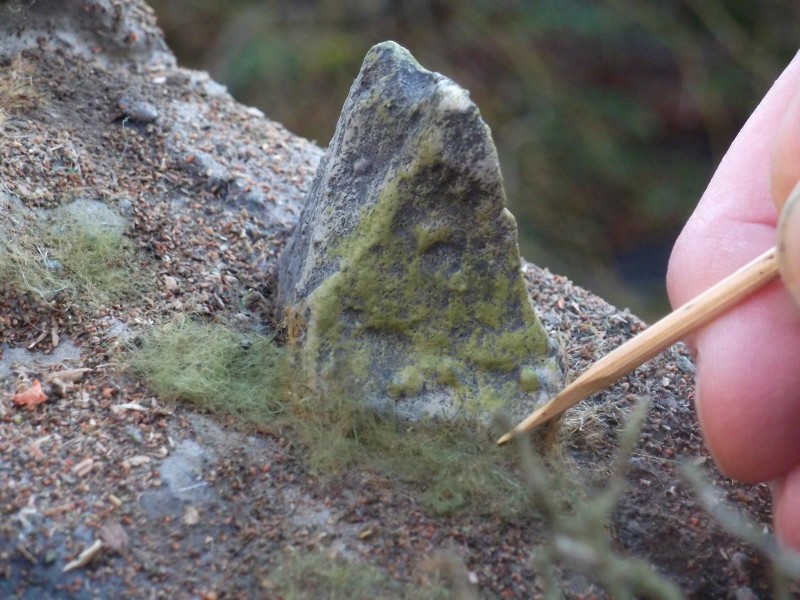
Obviously the rocks surrounding waterfalls can become incredibly wet and this allows algae and mosses to proliferate on the surface of them. In (Fig. 206) weathering pigments have been added to the rocks to represent algae. Treemendus Spring scatter (fine) has also added to some of the rocks surrounding the water. The scatter is fixed in place with Scenefix glue and a light spray of hairspray.
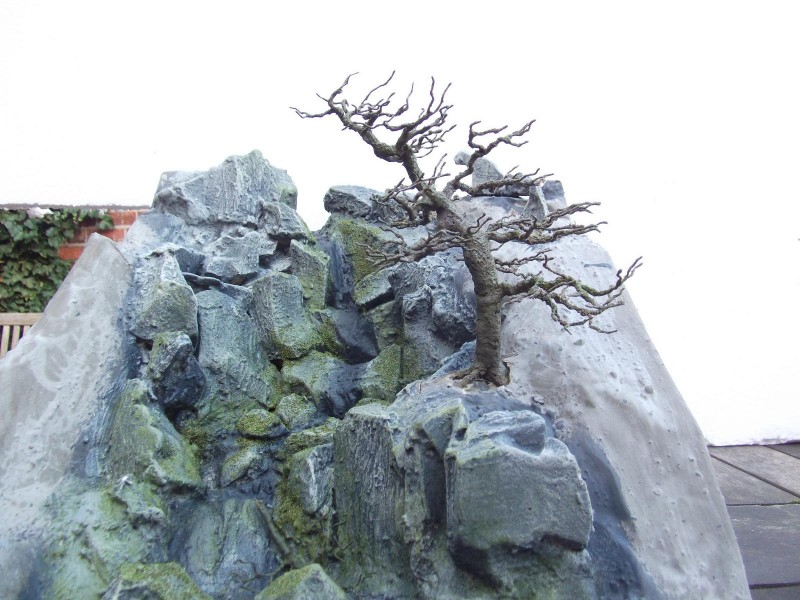
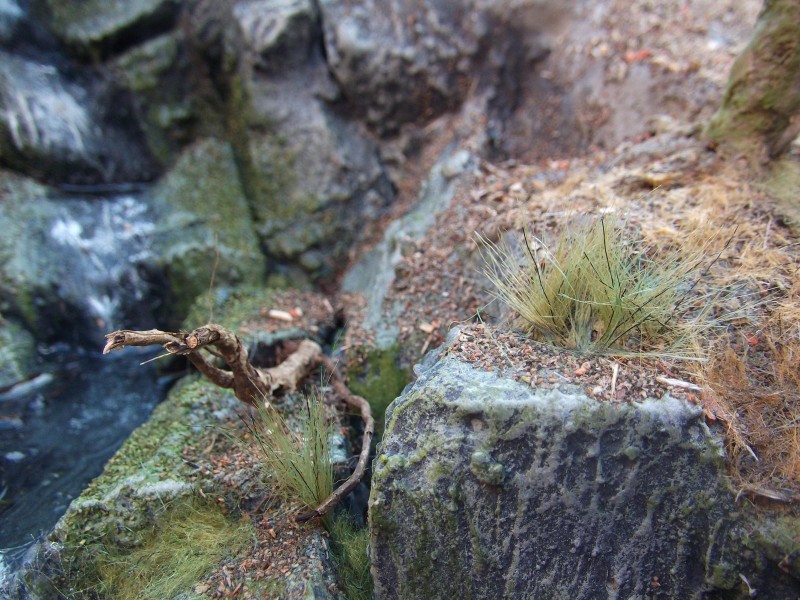
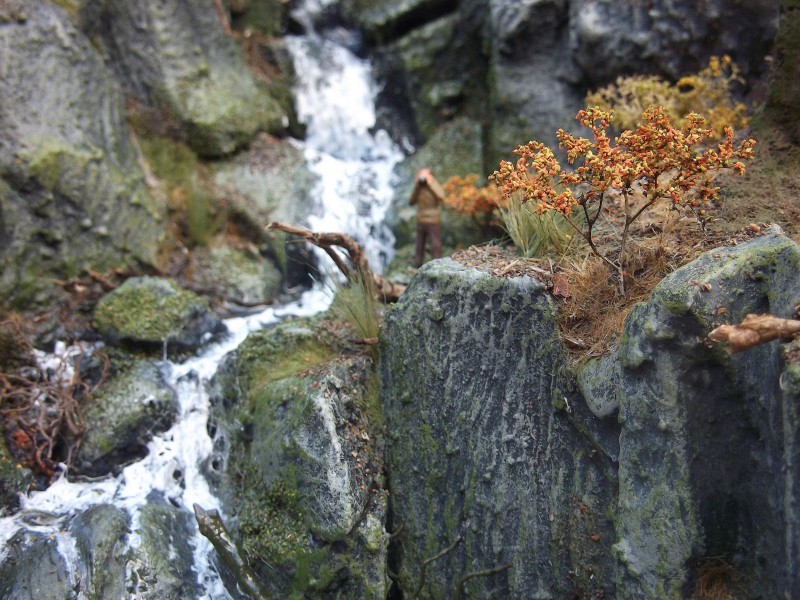
A slightly windswept tree has been introduced to the edge of the chasm (Fig. 207). The bends in the trunk compliment the bends of the waterfall. The tree is a handmade wire armature coated with Bark Powder. It has been made with a little planting pin which can be pushed directly into the groundwork and if necessary held in place with glue. Its root system has been blended into the existing surface using the cement mixture.
Autumn coloursTo add some variety to the styles of scenery modelled in this book I am setting this scene firmly in the midst of autumn. Obviously don't build your waterfall using autumnal colours if the rest of your scenics are based on summer colours, this is just to demonstrate how effective yet often overlooked model scenery based in the autumn months can be. Oranges, yellows and washed out greens look great together and compliment the dark greens of conifers.
Autumnal colours will reign supreme in the final photograph.
As with many of the techniques for creating ground cover shown in this book, scatters and scenic modelling materials are applied in layers.
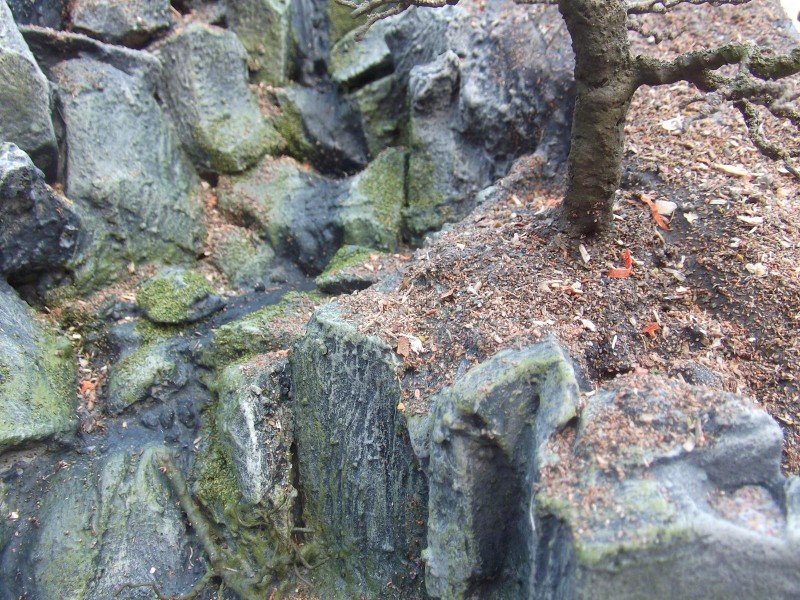
Treemendus Forest Floor is applied to the groundwork on and around the waterfall. It is sprinkled on a layer of Scenefix glue (Fig. 208). Forest Floor as its name implies contains all the detritus found on the ground underneath trees and bushes and in areas like this where it has been blown by the wind and come to rest on the ledges around the waterfall.
Another useful part of the Forest Floor material is the tiny roots and twigs included in the bag. Here they are being fixed in place on the bed of the stream and among the cracks and crevices along the side of the waterfall (Fig. 209). This gives the impression of branches which have been carried there by the water or fallen from the tree above the chasm. A spot of glue helps hold them in place.
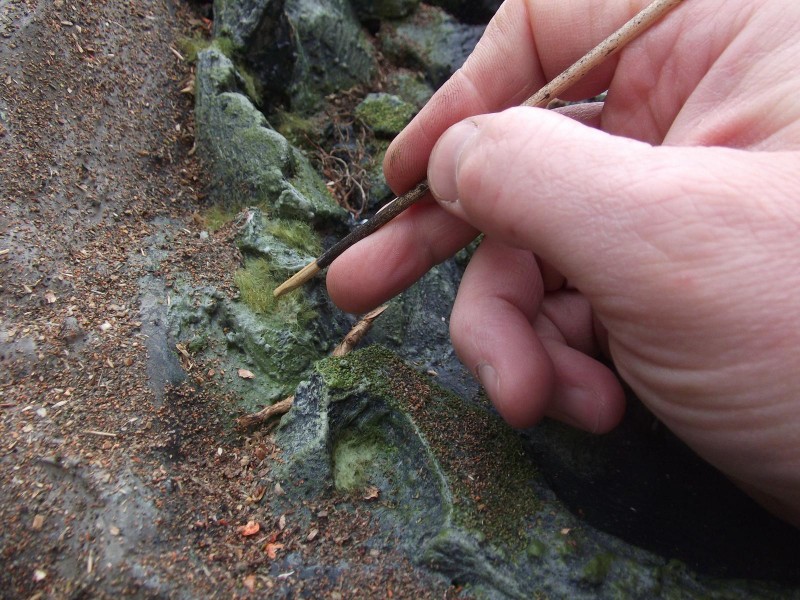
Raw Grass fibres are also useful for enhancing the walls of the waterfall. A thin coat of Scenefix glue to the rocky ledges is enough to hold the fibres in place. Here in (Fig. 210) the fibres are being worked into place with a wooden skewer.
Go With The Flow
The following steps deal with the introduction of the scenic water into the landscape. All the materials used in the production of the water for this demonstration are from Deluxe Materials.
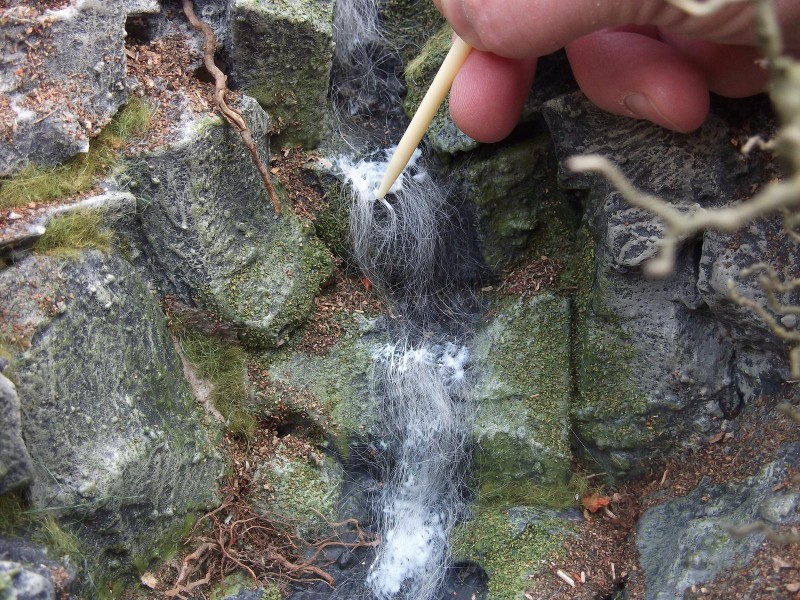
Scenic fibres are draped over the edges of the falls and trimmed with scissors to a length slightly longer than the falls. PVA glue is then applied to the edge of the fall with a paintbrush and the fibres are pushed into the glue making sure they are firmly attached (Fig. 211). The more fibres that are used, the thicker the fall of water will appear. Fibres can be used to create white water around the rocks, boulders and branches in and around the waterfall if necessary.
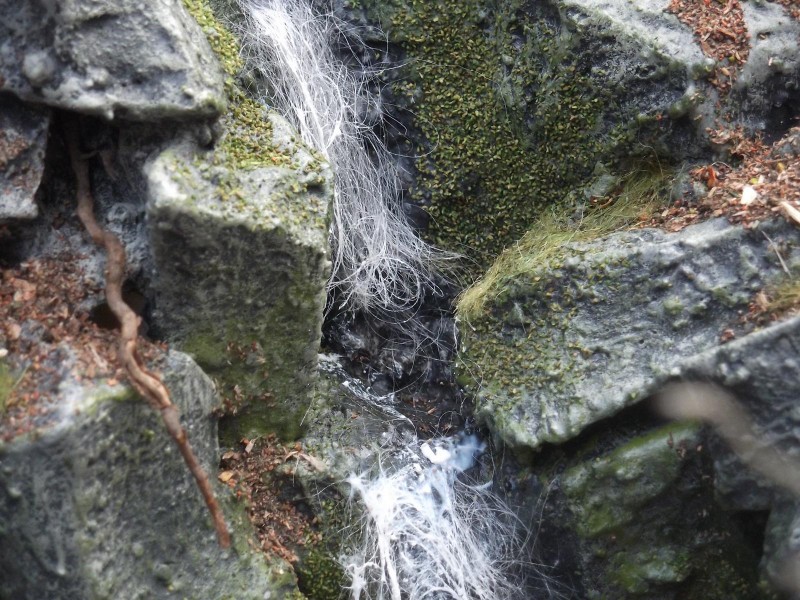
Spray the fibres with hairspray to make them a little more rigid. Next mix a little white acrylic paint with some pre prepared Scenic Water and carefully apply it with a paint brush onto the fibres. The fibres will set hard and form a rigid frame for the falling water (Fig. 212). Remove with scissors any fibres which look too thick and spoil the look of the water.
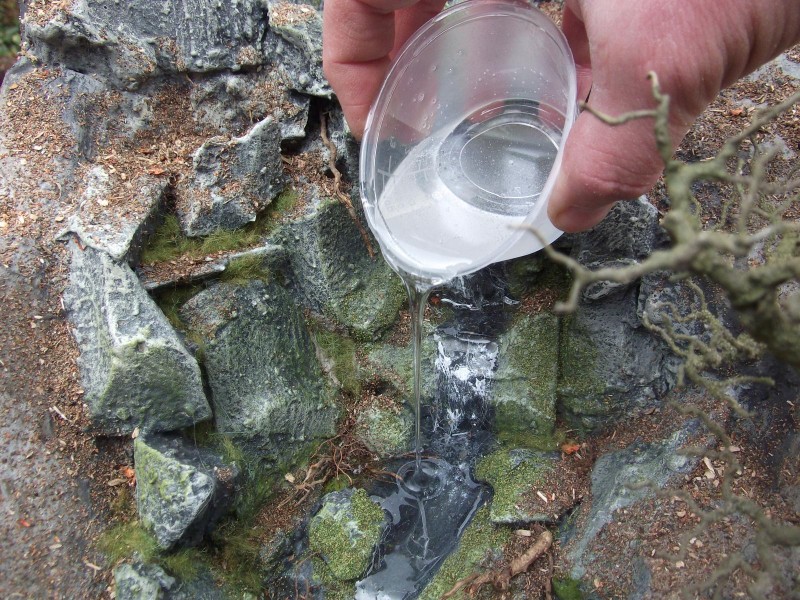
Scenic Water is prepared following the instructions and whilst it is still fluid it is poured into the “plunge pools” at the bottom of each of the falls. The bottoms of the plunge pools are painted using very dark paint and when the scenic water has dried they will appear to be very deep pools of water.
Solid Water, a two part resin, is mixed according to the manufacturer's instructions and poured into the bed of the water fall, over the front of the scenic fibres and worked around all the rocks and boulders on the bed (Fig. 213). Be sure to visualise how the water would move through the structure and position the fibres accordingly.
Authors note:
Do make sure you have sealed the bed of the waterfall and all the gaps in the surrounding walls with either a cement/PVA mix as I have in this case or with a clear varnish before pouring on any of the water materials you use. This stops the resin finding gaps to seep away through.
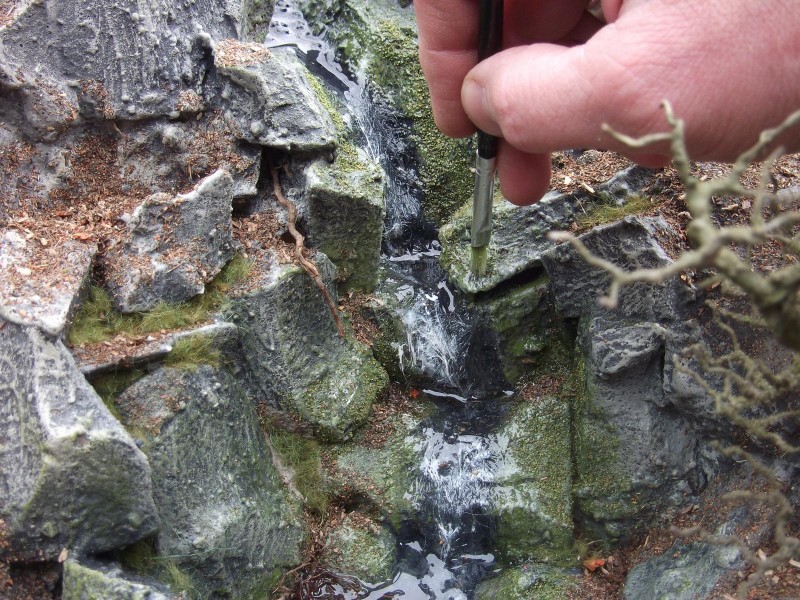
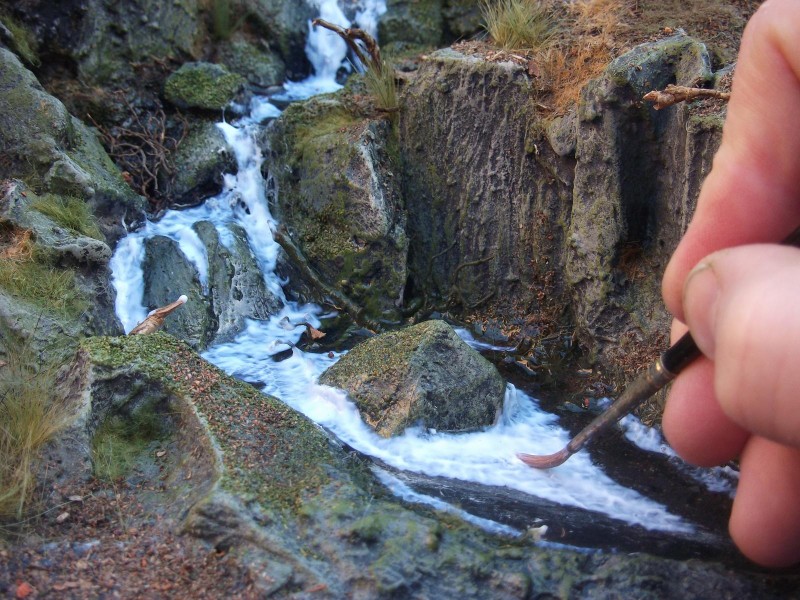
With the movement of the water comes splashing and it is effective to add some wetness to the rock surrounding the water. For this use a small amount of Solid Water which will be at the bottom of your mixing pot used in the previous step. Use a stiff paint brush to paint it on to the areas around the rock where you would expect to see splashing (Fig. 214). If you have any hollows on your surrounding rock it can be effective to add a small amount of the Solid Water into them to create small pockets of water among the mossy rocks. Allow the Solid Water to dry.
To add more movement to the surface of the water take some Making Waves product and using a small paintbrush apply it to the surface of the water already present in the waterfall. Use a stippling action to create small waves, swirls and splashes on the surface of the water. Making Waves is white when applied but dries to a clear finish (Fig. 215).
I find Making Waves can be used for small waterfalls without the need to use Scenic Fibres.
To add to the effect of even more movement in the water I mix a little making waves with a spot of white emulsion paint (acrylic paint will work just as well) and use a stiff, short bristled brush to apply it on and around the rocks, boulders and walls of the waterfall (Fig. 216). Be aware that this process dries white and not clear like the previous step so take care in where you put it and the quantity you use. In truth there is no right or wrong as some waterfalls have very little white water present whilst others are full of spray and froth.
Detailing The Groundwork
To help with the blending in of the waterfall feature with the terrain either side of it on the layout, the groundwork around the rocks surrounding the waterfall is given some attention.
Dilute PVA is carefully painted around the rocks using a small paint brush on to which Treemendus Earth Powder is sprinkled. Finely chopped Raw Grass fibres are then applied around the bases of the rocks and worked into place with a wooden skewer (Fig. 217).
Taller tufts of Raw Grass are added around the rocks either side of the waterfall. To achieve this effect take a sheet of Raw Grass material and colour it using Sap Green acrylic paint. For this I dilute the paint in a ratio of four water to one paint and rub it into the fibres by hand, making sure the paint is worked well into the sheet. I find it useful to add a small dab of neat Sap Green paint to a section of the sheet and rub this in too. Other small areas of the sheet may be coloured with a variety of different coloured paints, this results in a sheet of material that has various tones of fibres and can be used as a palette to add lots of variation to the groundwork around the waterfall.
To fix the tufts in place it is important to use neat PVA or a glue of similar viscosity. The tufts are trimmed from the sheet using sharp scissors and their flat bottoms are dipped in the thick glue and carefully placed onto the groundwork (Fig. 218). Having a palette of different but complimentary colours of tufts allows you to add lots of character to the landscape.
These tufts can be blended in with the surrounding landscape either side of the waterfall once it is in position on the layout. Static grass fibres can be used around the rocks instead or as well if the surrounding landscape is to be dressed with static grass.
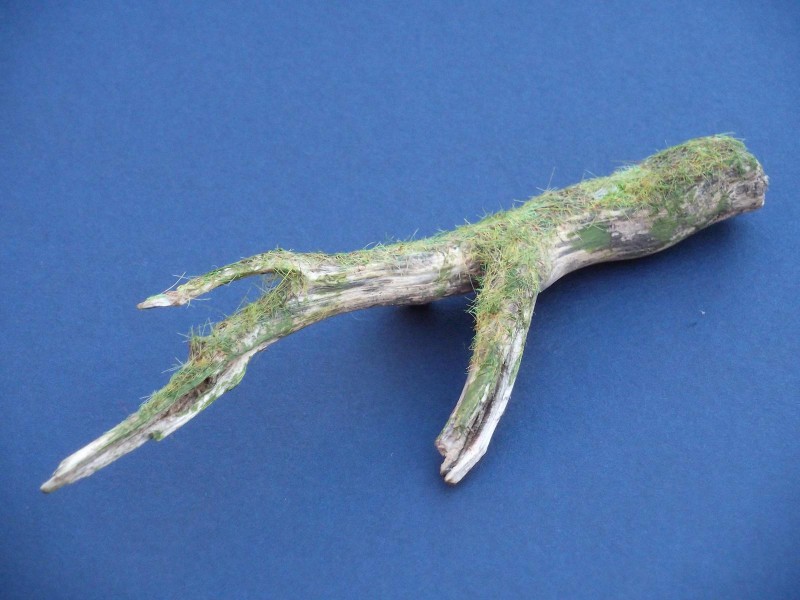
To compliment the windswept tree on the edge of the waterfall a fallen tree has been placed across the gap which spans the waterfall (Fig. 219). This tree is actually a piece of naturally weathered branch which has been enhanced with weathering pigments to match the windswept tree in appearance. A light covering of Raw Grass trimmings to represent the moss which grows on fallen trees like this one has also been applied to the upper side of it. The pre coloured Raw Grass (painted in the previous step) is trimmed with scissors into very fine, tiny fibres. The top of the fallen tree is coated with diluted PVA and the fibres are worked into the glue. It is best to do this away from the waterfall and fix it in place once it has dried.
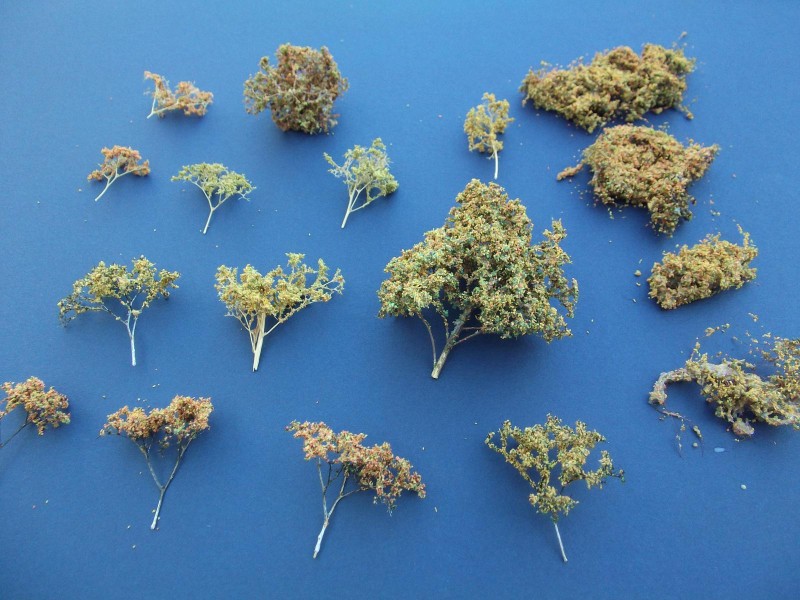
Seamoss, a natural product, is a useful material for creating small shrubs and bushes and lends itself perfectly to autumn and winter scenes where its fine “branches” can be appreciated due to the minimal amount of foliage that is added to them.
Suitably sized pieces of Seamoss are chosen and any leaves that may be present on the stalks are carefully removed. Seamoss is generally an unrealistic yellowish colour naturally and benefits from a spray of paint to give it a more pleasing bark colour, in this instance a mid brown, some of them have had a dry brush of white paint to mimic young Silver Birch. The Seamoss is then sprayed with hairspray and autumnal coloured scatters are applied sparingly. Here (Fig. 220) Treemendus Autumn Orange, Autumn Yellow and Late Summer fine scatters are being applied to the bushes. To fix the scatters permanently spray the Seamoss with Scenefix glue.
The Seamoss shrubs and bushes are fixed into the groundwork using a spot of super glue. A small hole may be created in the Kingspan into which the stalk of the Seamoss can be pushed.
A single figure is sometimes just enough to show the scale of model scenery to the best effect (Fig. 222).
The Completed Diorama
In the final photograph (Fig. 223) the movement of the water is very apparent as it makes its way downhill over rocky features. Debris from the passing of the seasons has collected in the bottom of the falls and on ledges around the chasm. Moss is prolific and adds a colourful addition to the rock. The autumn colours of the foliage are subtle but help to capture this little slice of autumnal countryside well.
Personally I would like to see more British railway modellers creating layouts which are set in autumn.
To recap:
Waterfalls don't have to be made in small scenic sections away from the layout but it can help in the construction of scenic features such as this, especially if room around its position on the layout is restricted.
Although there are other ways of constructing rock formations like this, Kingspan has been used here again as I do think it lends itself to this type of rock formation.
Waterfalls are fairly common throughout the British countryside in which our trains travel. They make an excellent feature on any model railway and don't take up any space at all, if you are building hills or even small slopes on your layout it is well worth considering even a small water feature.
One consideration that should be made is as to where the stream flows from the bottom of the waterfall in relation to the rest of your layout.






Stunning work, Anthony.
'liked'
Cheers
I agree with DL-S - stunning! Absolutely beautiful!
Thanks Jeff. What I like about step by step guides is that hopefully it may encourage others to try for themselves. You realise it's not rocket science when you actually see how the terrain is built up
Cheers
Really is beautiful work!
Thank you
Beautiful SbS! Anthony (@treemendus)! And an amazing work on this wonderful waterfall! Really inspirational!
The perfect diorama is an art I guess.
I miss doing dioramas, and your SbS kind of made me feel wishing to work on some project!
Cheers!
Dolf
Thanks Dolf!
Even a small base can be fun and challenging to build. Cheers
Great tutorial Anthony - water is one of the hardest things (for me anyway) to get right in a diorama, and you provided lots of helpful tips. Really enjoyed reading that and becoming motivated by it. thank you for posting it.
Paul