Kit Review: 1/32 scale P-51D-5NA Mustang, Revell of Germany, kit number 03944, Part 2
This is the second part of the kit review as promised earlier. This portion will cover the plastic parts of this big 1/32 scale "early" Mustang D model.
Writing up a kit review is surprisingly easy. Now that Martin and his staff have added the "pointer" feature, one can easily add comments to their photos that help to describe what's happening in the picture.
I'm surprised that we don't see more kit reviews here on Imodeler.
As many of you know, the parent company that owned Revell here in the US was called Hobbico. A little over a year ago, they declared bankruptcy, and as a result, all of their holdings were auctioned off. They were forced to sell by a court order.
-

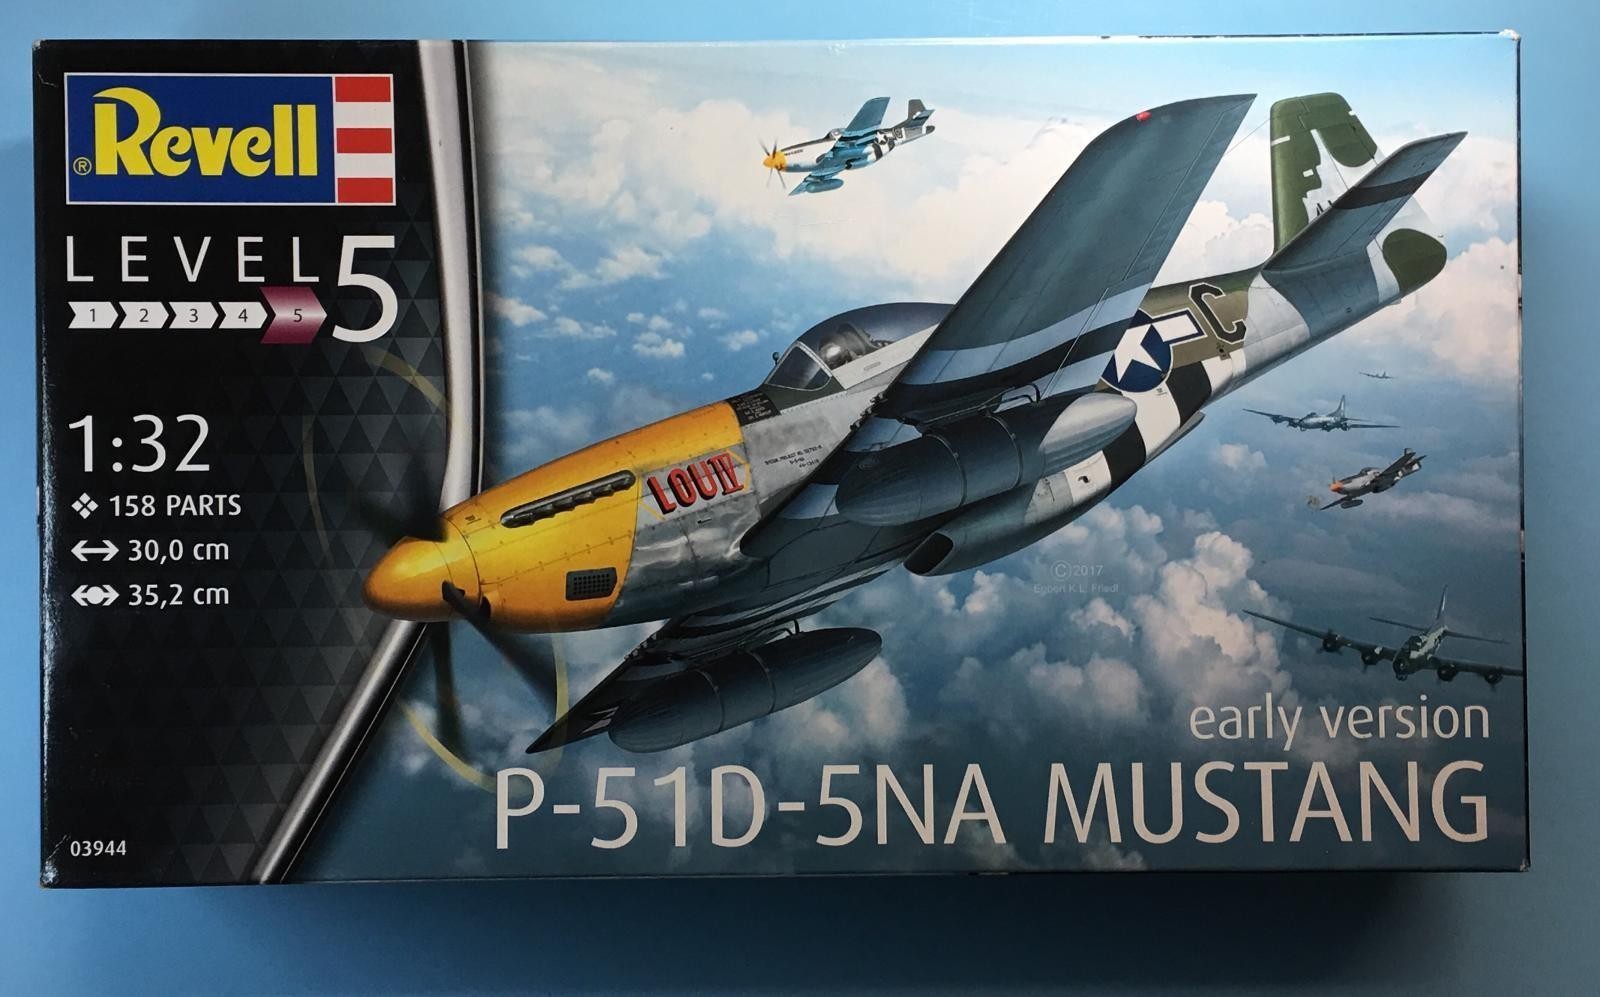
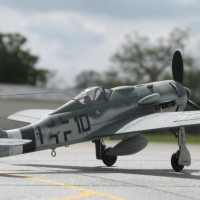
- 1. Very nice "Box Art"
The main thing that has affected us fellow model builders living here in the United States, is the ability to get anything restocked that is related to Revell, Revell of Germany, Estes Rockets, and even some Hasegawa stuff that was affiliated with Revell (meaning re-boxed Revell kits labeled as Hasegawa). There are some items still remaining in the supply line, but most of these items are "drying up", and are becoming harder and harder to find.
Now don't give up just yet. The molds were supposedly purchased by a company in Germany. Hopefully there will be a re emergence of the company in the future, but it might be under another name. Meanwhile, this particular kit is listed as still available at Revell of Germany's website. The catch is they don't ship their products to the US.
Revell of Germany will ONLY ship to the Continental Europe. Check out their website, and you will see this statement is true and not a rumor... 🙁
Because of this, if you want one of these models (and live in the US), they are becoming quite scarce. The original price of $26-29 has increased considerably. Our main options of getting these products is to find an online store that has any of these left in stock and making a purchase. Then you have to tack on additional shipping costs, so that increases the cost again.
Hopefully someone will start shipping these Revell and RoG items back to the US. Something has to change...
-
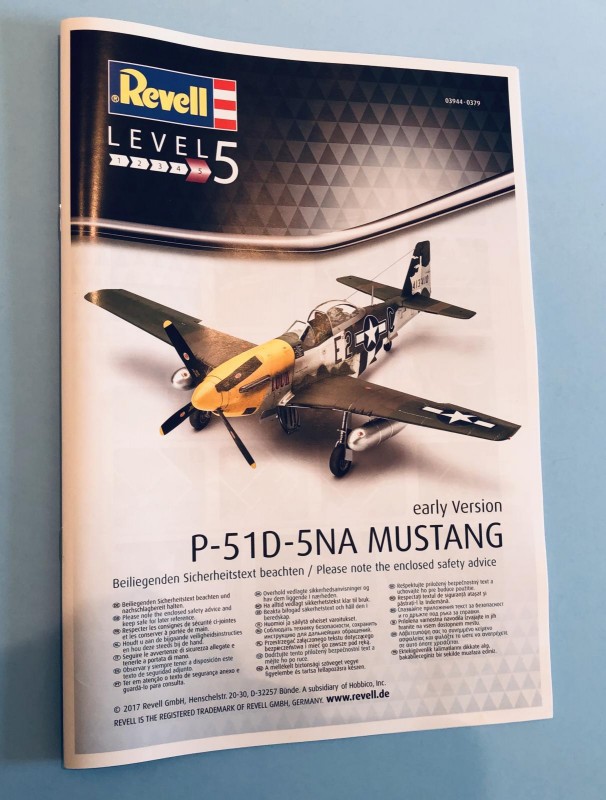
- 1. The instructions are printed in color.
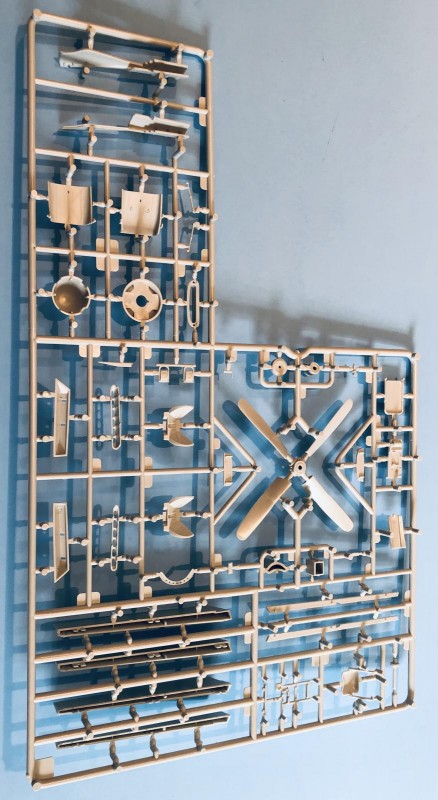
Enough about the back ground story on why this one is hard to get... and lets get on with the business of talking about the plastic inside the box. There's a lot of it... 🙂 and it looks good.
The plastic is molded in a light gray color and no flash is evident anywhere on my sample. Since this is a brand new tooling, there shouldn't be any.
-
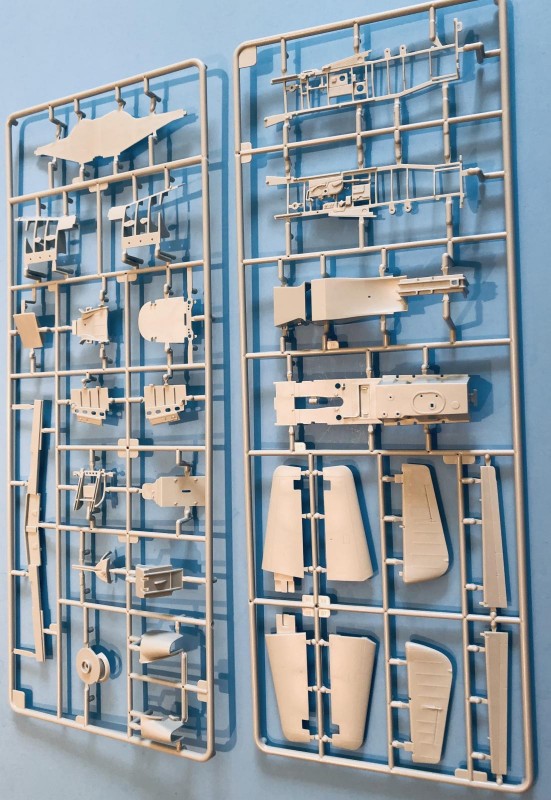
- 1. The parts are flash free.

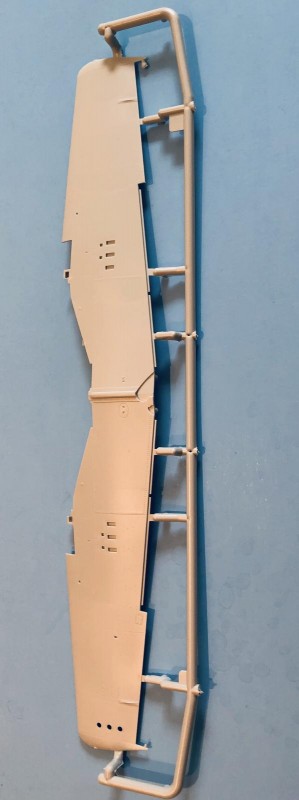
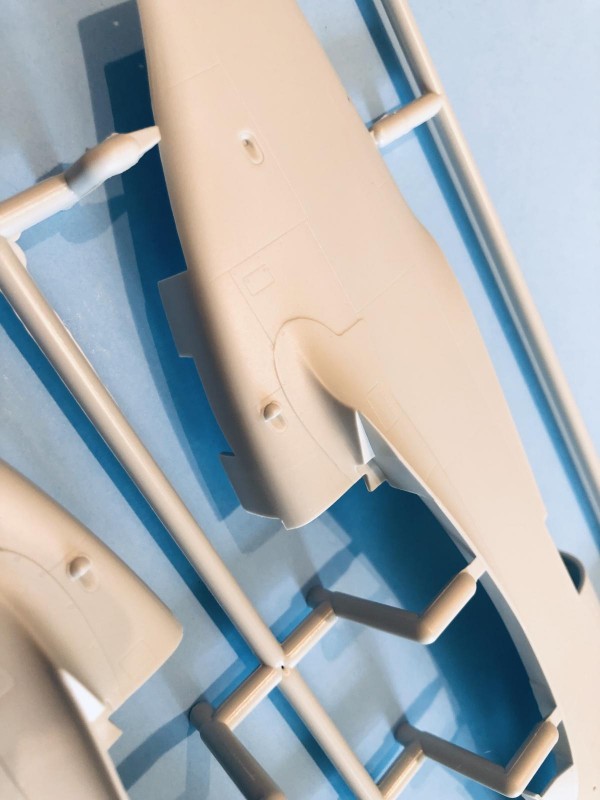
Lets start with the wings... They are molded in a one piece upper
-
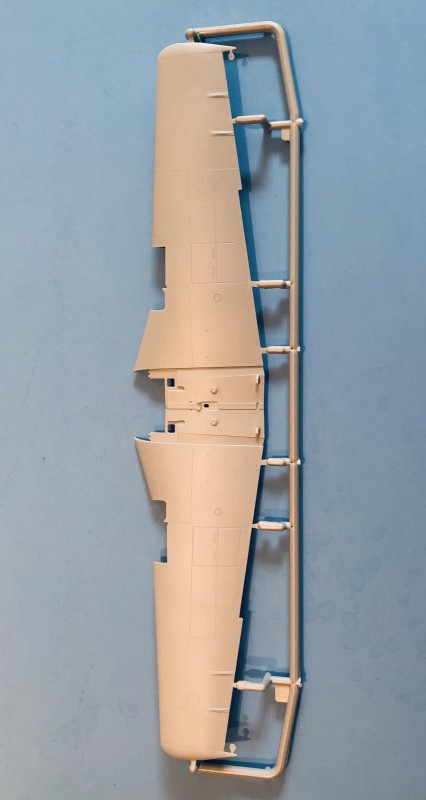
- 1. Notice the leading edge inserts.
- 2. Separate flaps and ailerons
and lower half... The quality of the molding looks to be very nice.
-
- 1. Inside the wings are provisions for future rocket mounts. These holes have to be drilled out.
- 2. One piece design ensures perfect dihedral.

Here's a close up showing some of the details molded into the wing tips. You can see the surface does not have a highly polished "shine" to it. It still appears to be smooth however.
-
- 1. recessed surface features

There's even a set of identification / signaling lights molded in clear that get inserted into the wing from the inside to fill these openings.
-

- 1. Notice the fine panel lines.
- 2. Wing tip details.
- 3. The clear Identification / Signaling lenses are inserted from the inside.
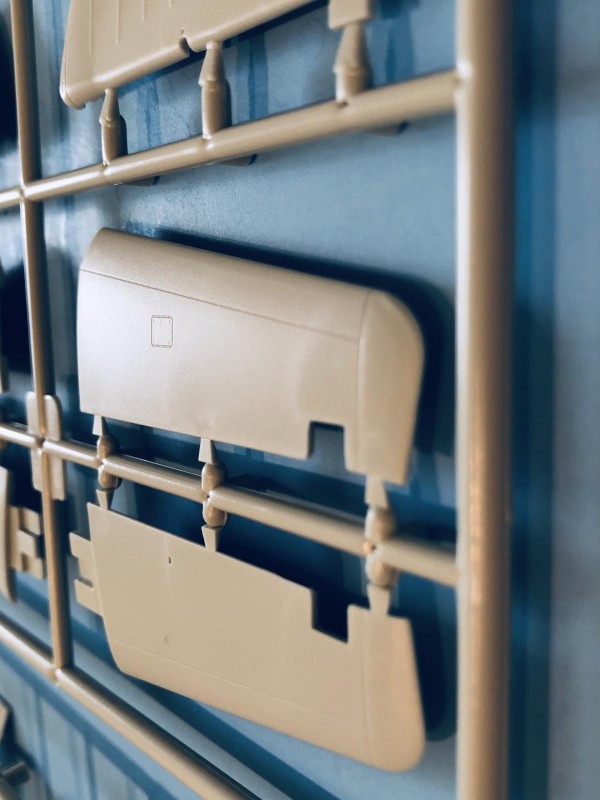
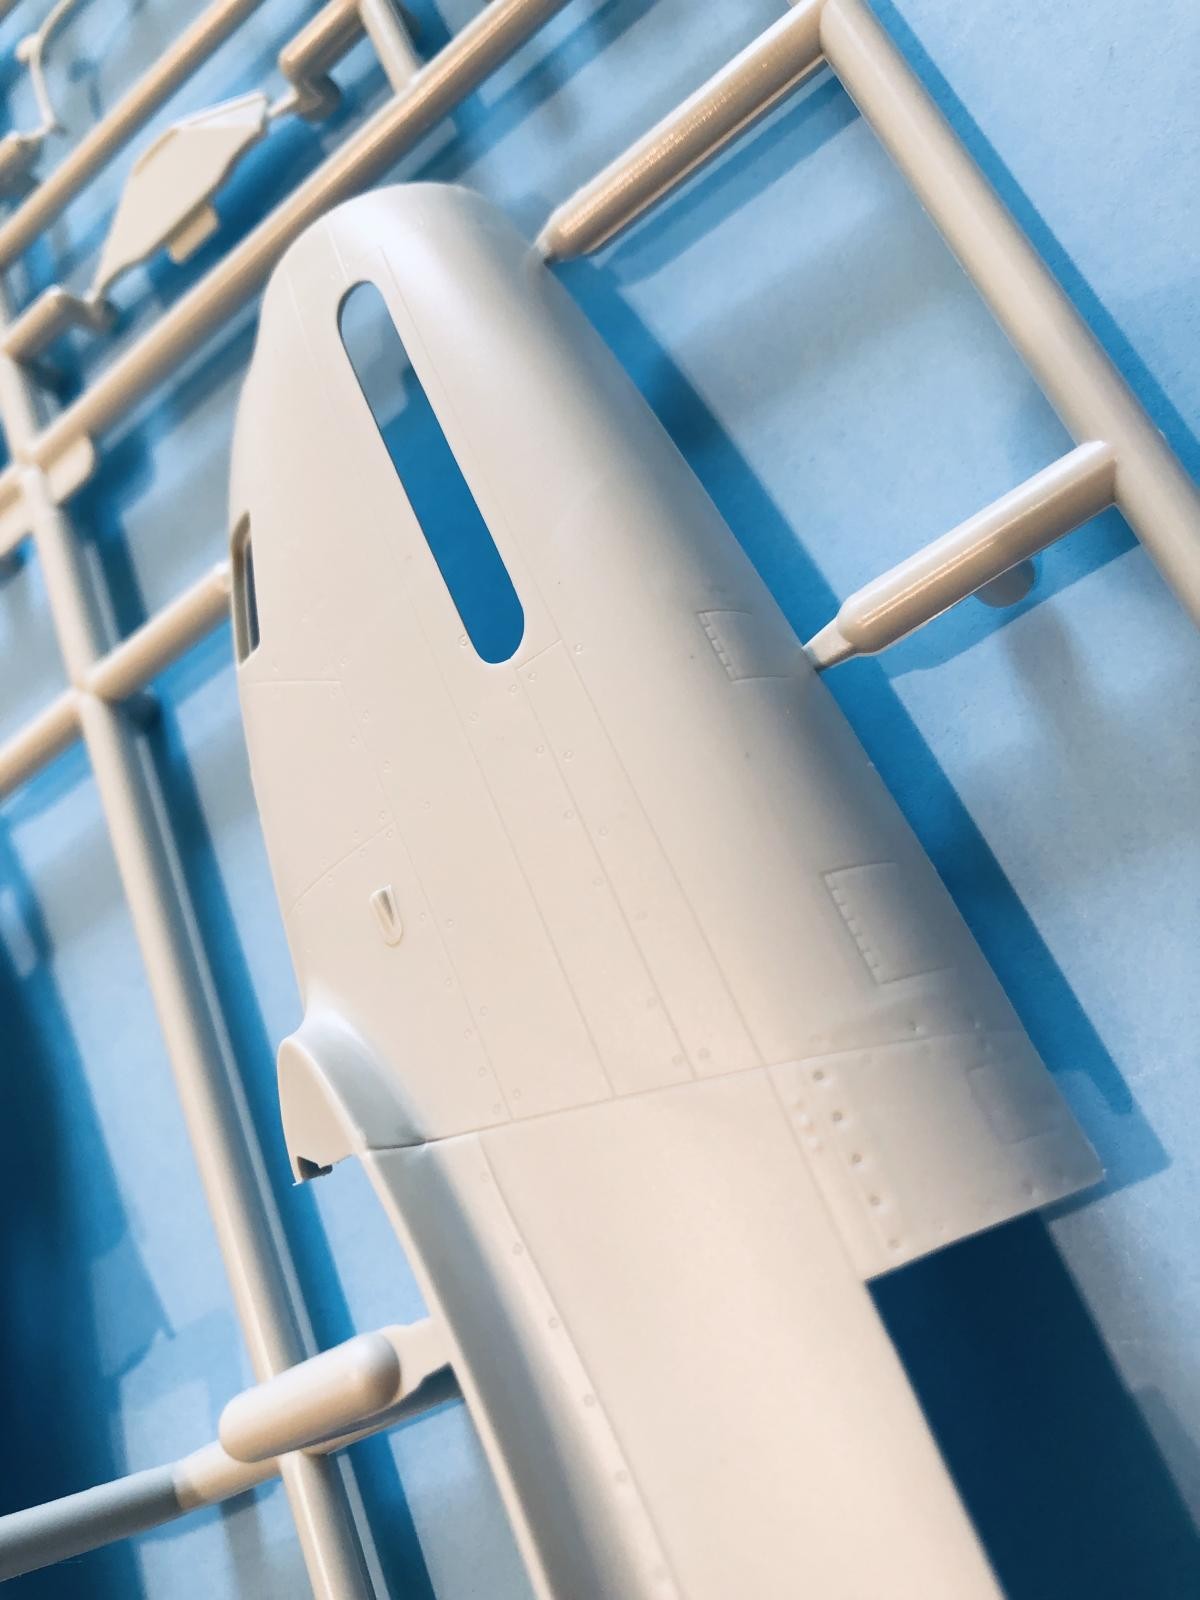
The rudder was fabric covered on this version of the Mustang. Here's how the fabric was depicted on the rudder...You can also see the horizontal stabilizer in this picture.
-
- 1. Subtle fabric effects on the rudder.
- 2. Notice how well the trim tab is represented.

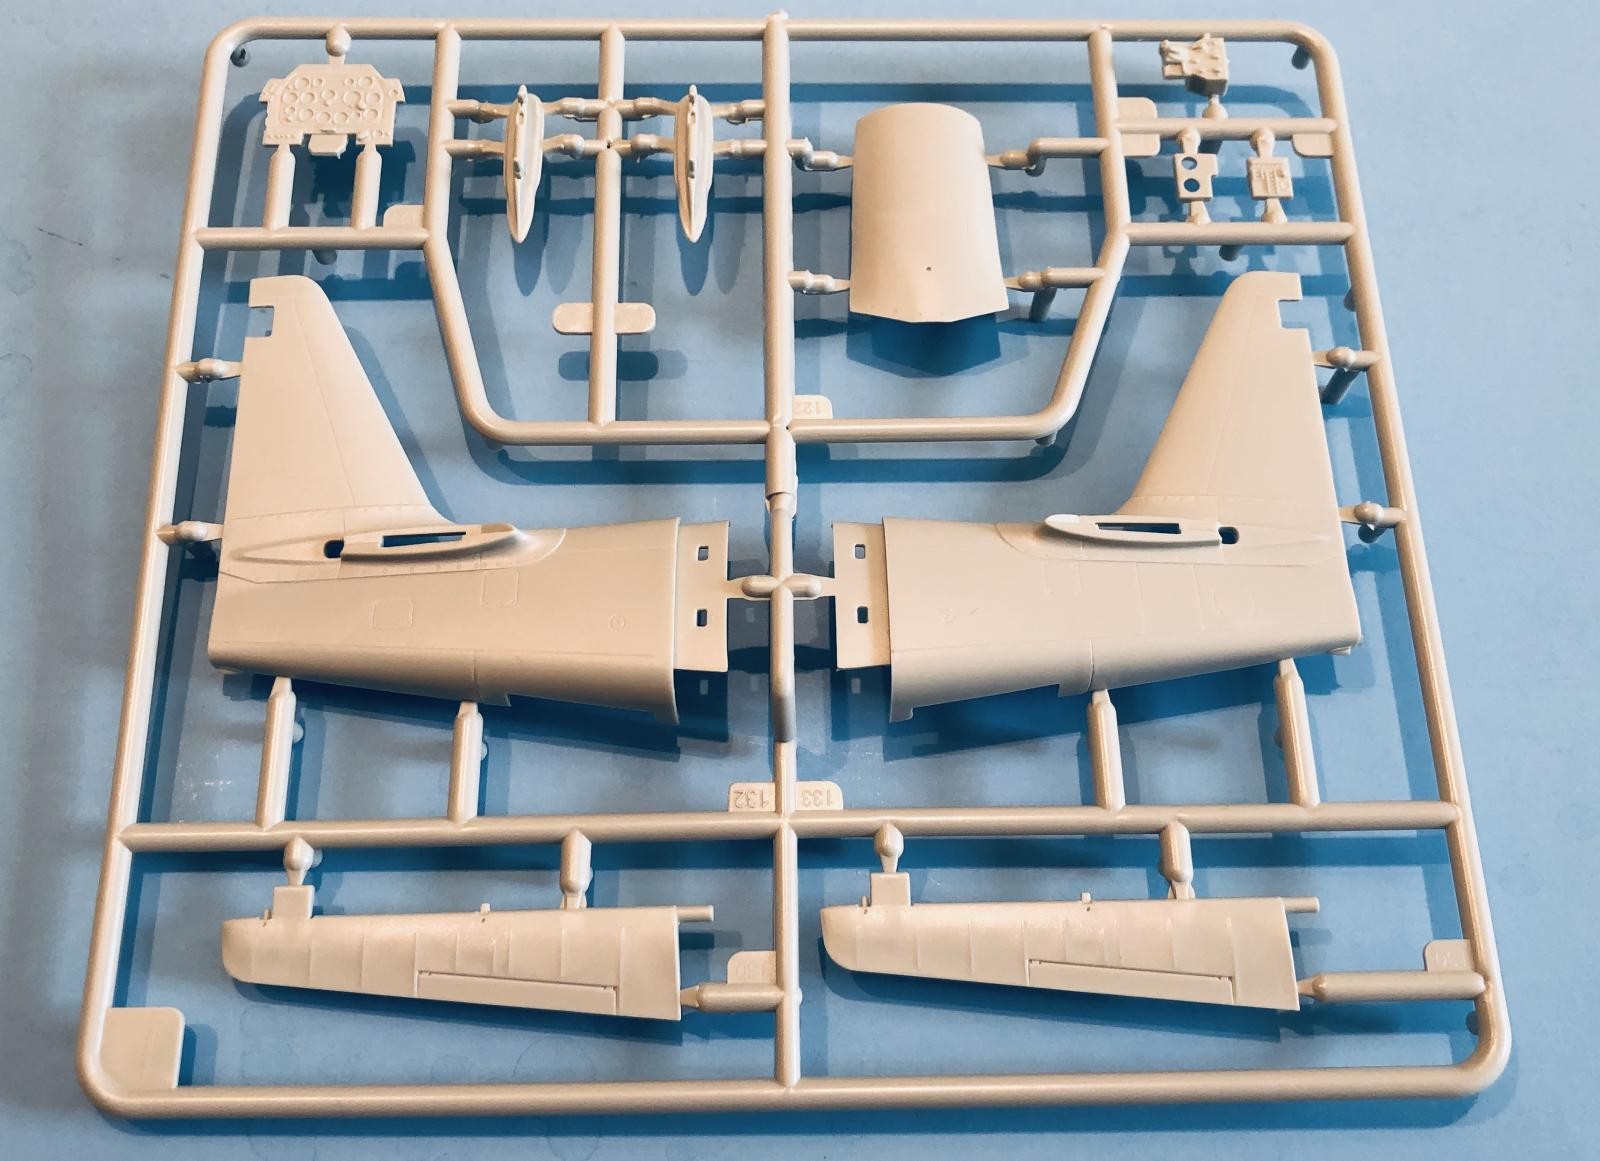
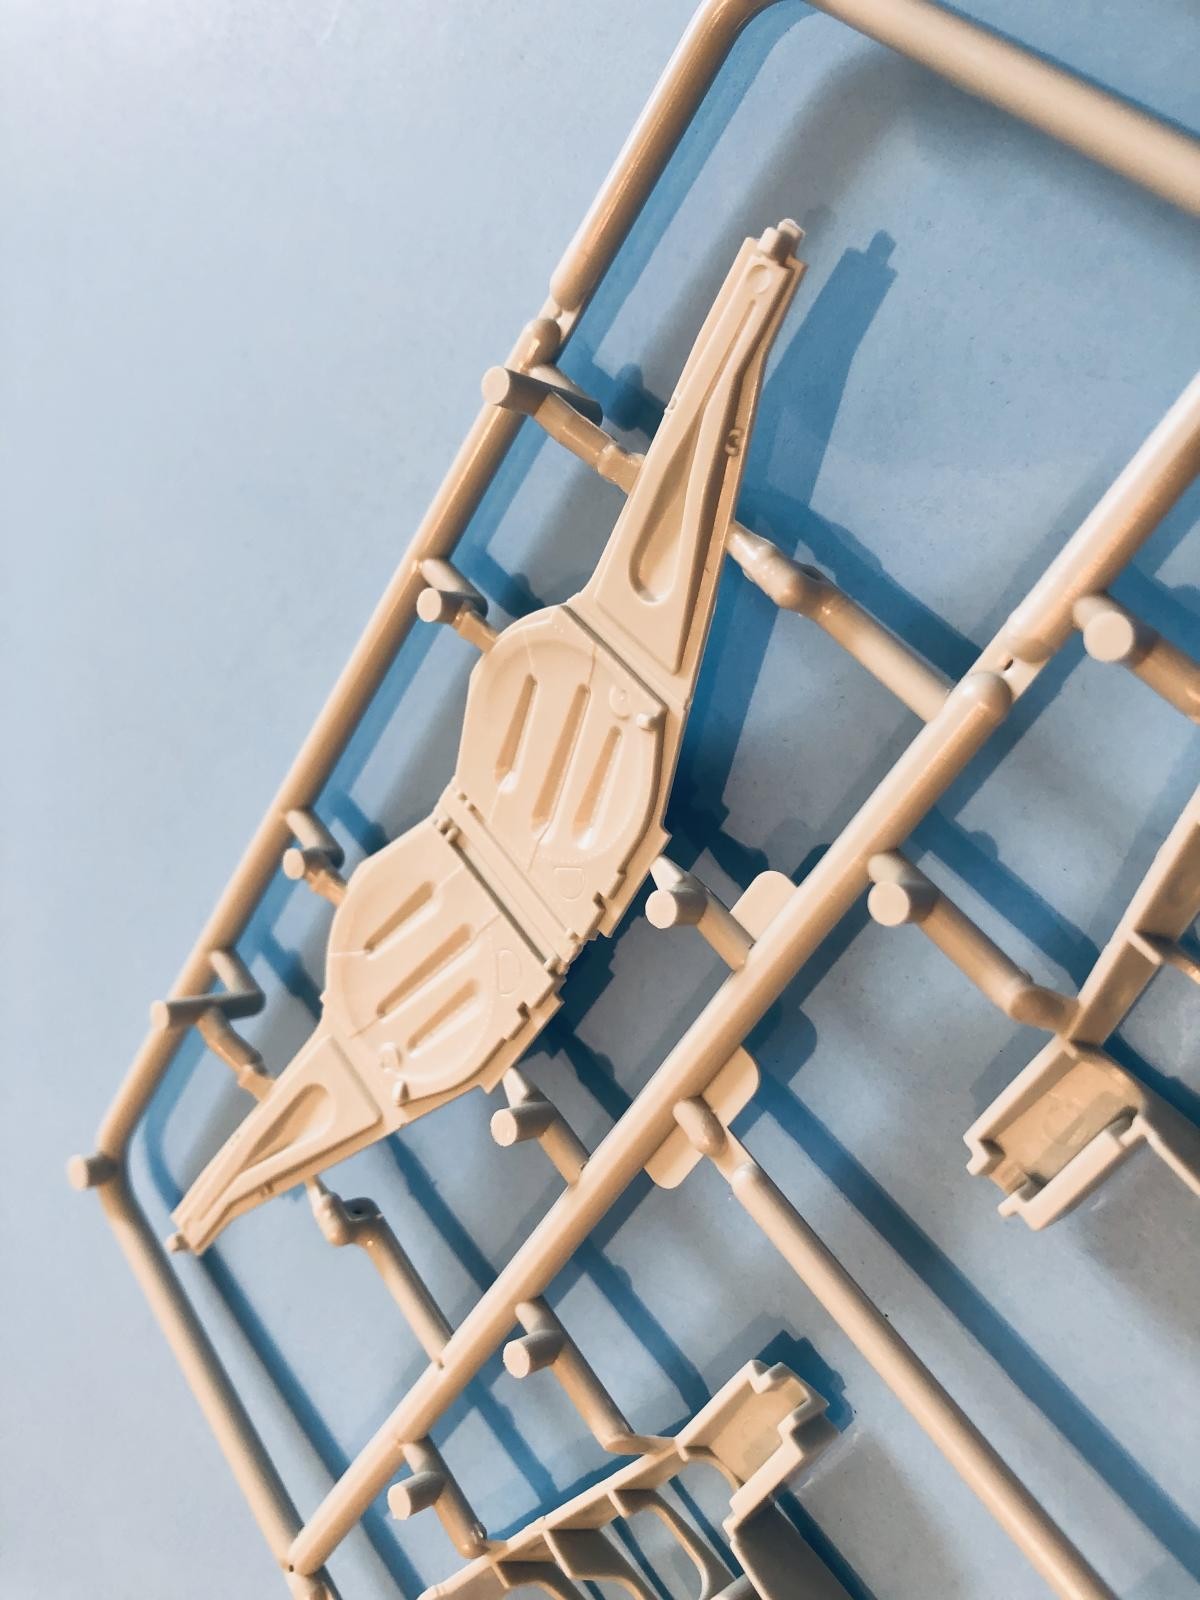
The stabilizers have the elevators separate. I don't know if the tail control surfaces are designed to be position able or not, but I'm sure it wouldn't be too hard to do since the parts are already separated.
-
- 1. Fine surface details are present on all external panels.

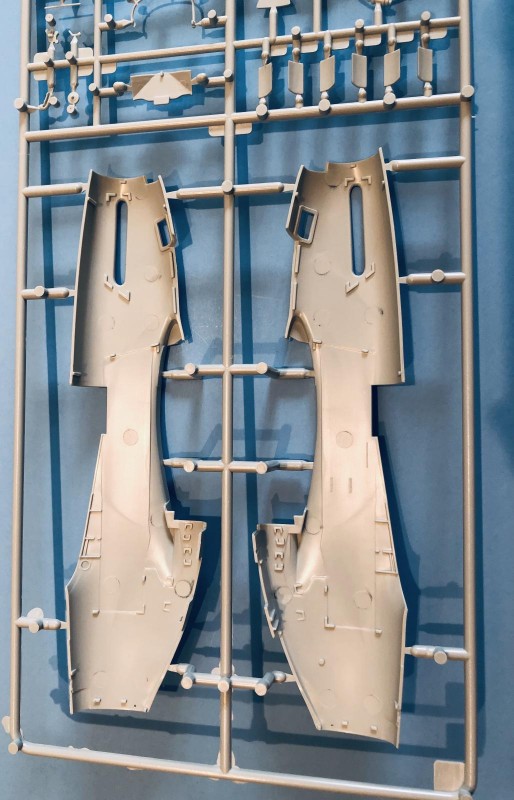
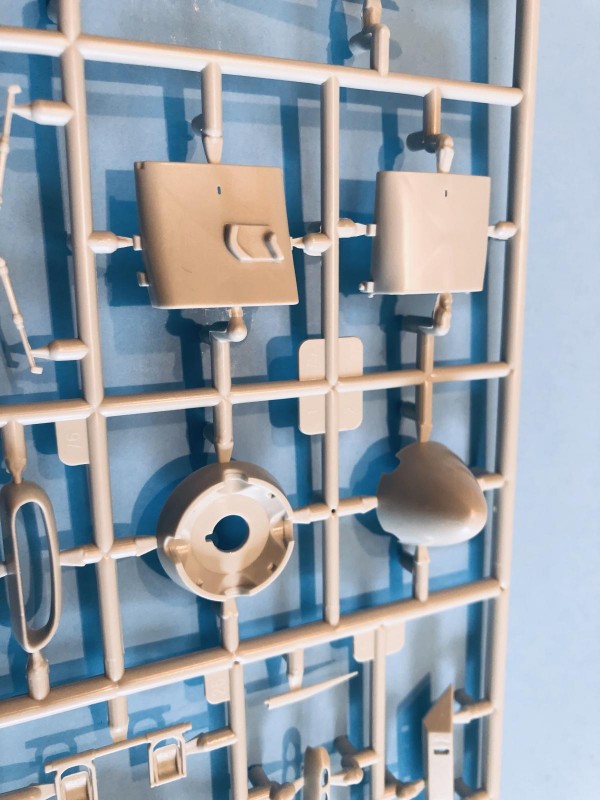
The cockpit has two larger side wall parts that depict the inner parts of the cockpit rather well. There is some good detail here, and anyone deciding to add more details by scratch building will have a very nice base to start with. From the online pictures I have seen of completed "offices" right out of the box they look very good.
-

- 1. The cockpit sidewalls are very detailed.
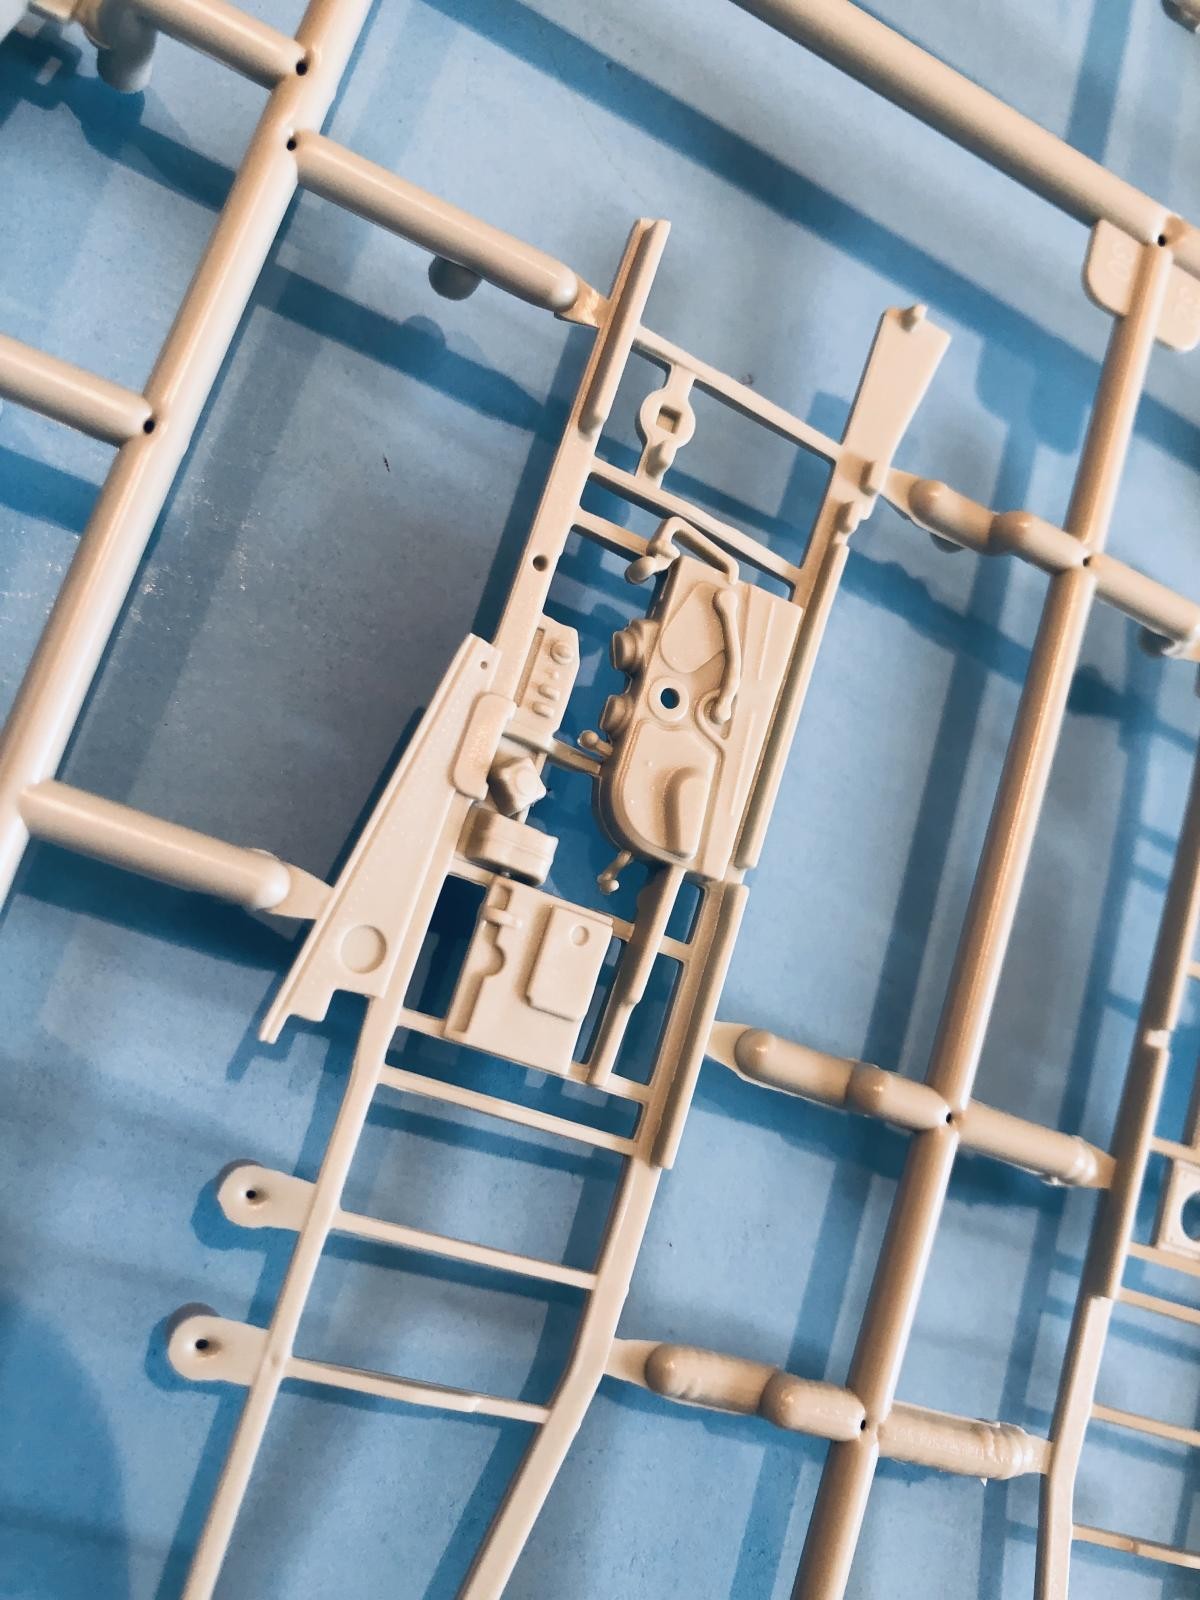
-
- 1. With some careful detail painting, these areas will look very nice.

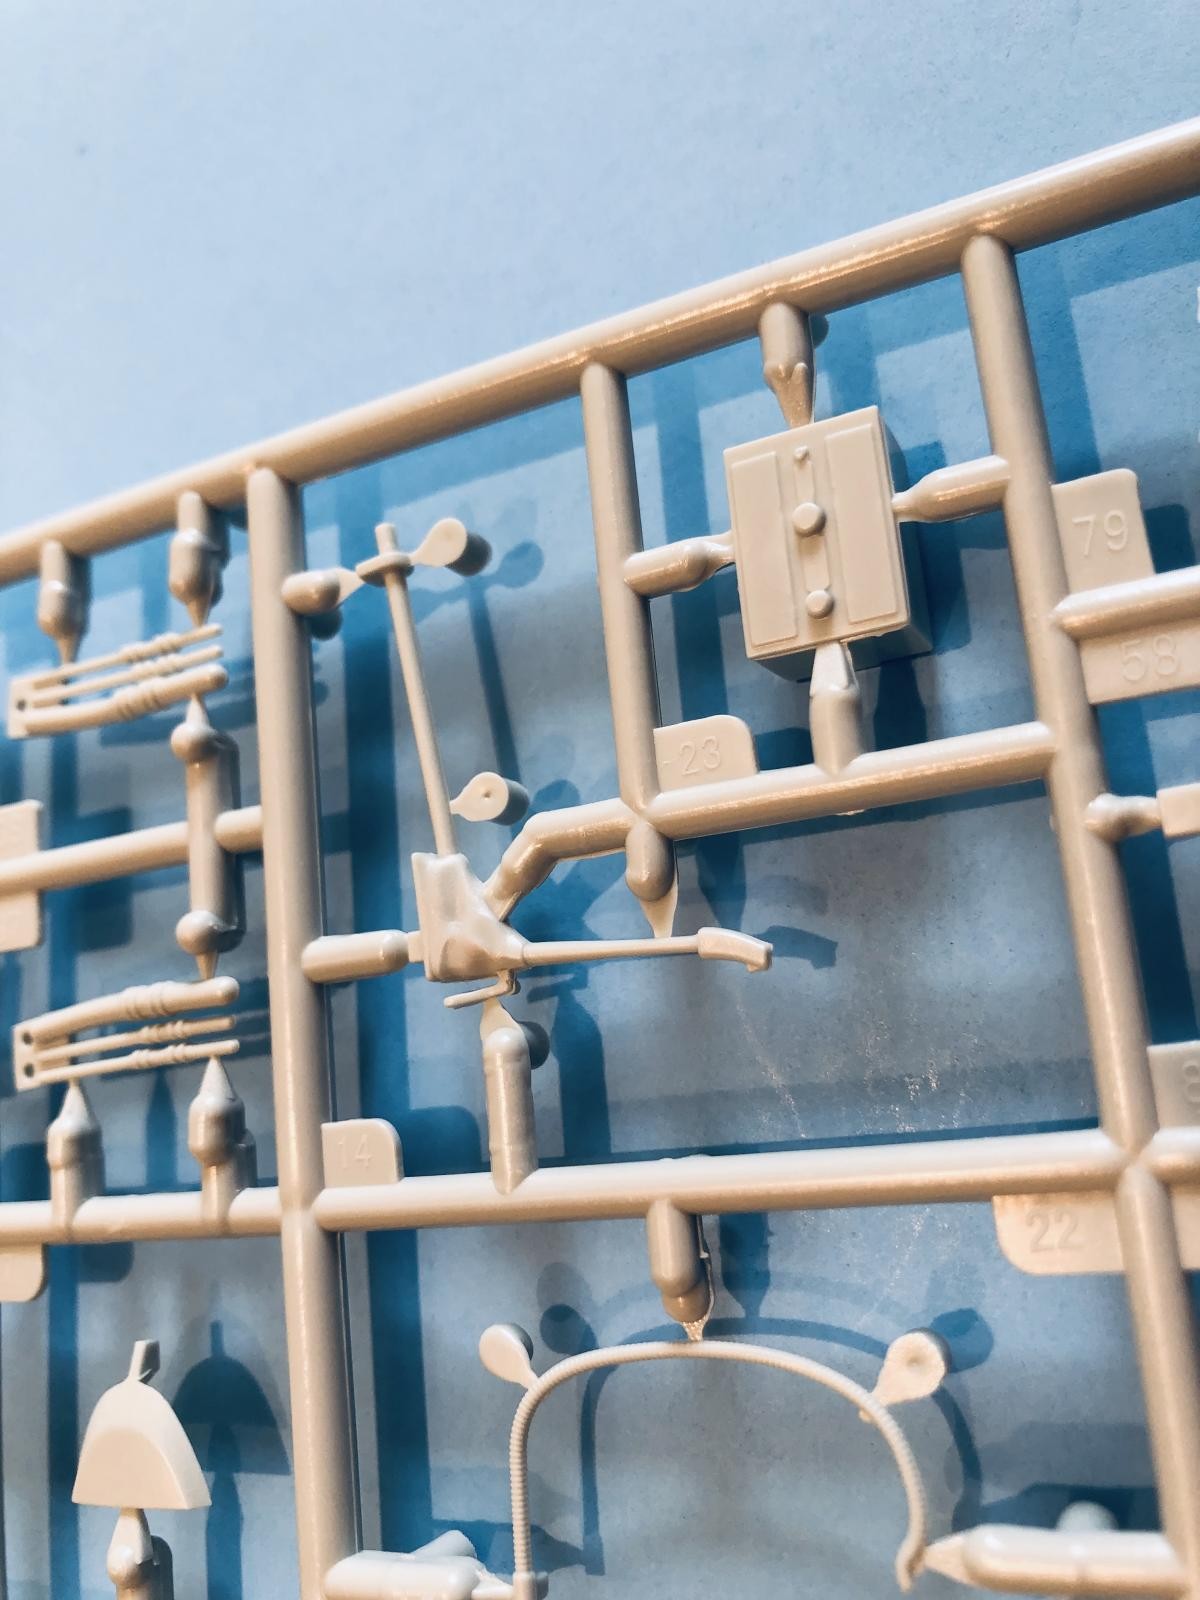
The Pilot's seat has the option of two different styles. There's this one:
-

- 1. This is one of the seat types provided in the kit. It is the "squared" type.
and this one that is comprised of several parts. Here's the seat bottom:
-
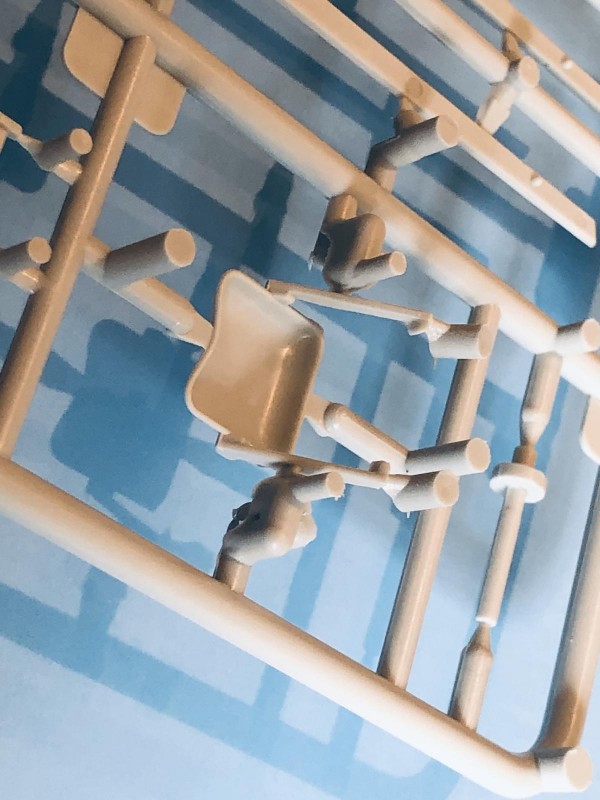
- 1. Pilots seat pan. This is part of an assembly offered as a second option.

and the back rest portion of the seat. You will need to get (or make) a seat harness to make it complete. One is not provided in the kit.
-
- 1. Pilot's seat back used with the seat pan. This is part of the second seat option.
- 2. Nose mounted chin scoop intake grille.
- 3. Here you can better see the propeller cuffs.

The seat back armor is also included as a separate part. The head rest is molded in place and looks good.
-

- 1. Pilot's seat armor.
- 2. The head rest is molded in place.
One of the things that made the Mustang so successful, is that it could do what the Spitfire did... for 8 plus hours at a time. The range is what made the Mustang work. In order to get that range, they had to stuff the plane full of fuel. There was a large fuel tank located right behind the pilot. They were instructed to use fuel from this tank first, as it affected the "Center of Gravity" when full. Several aircraft crashes and associated fatalities happened when this procedure was ignored.
The fuel tank is nicely depicted and is shown here in this next picture.
-
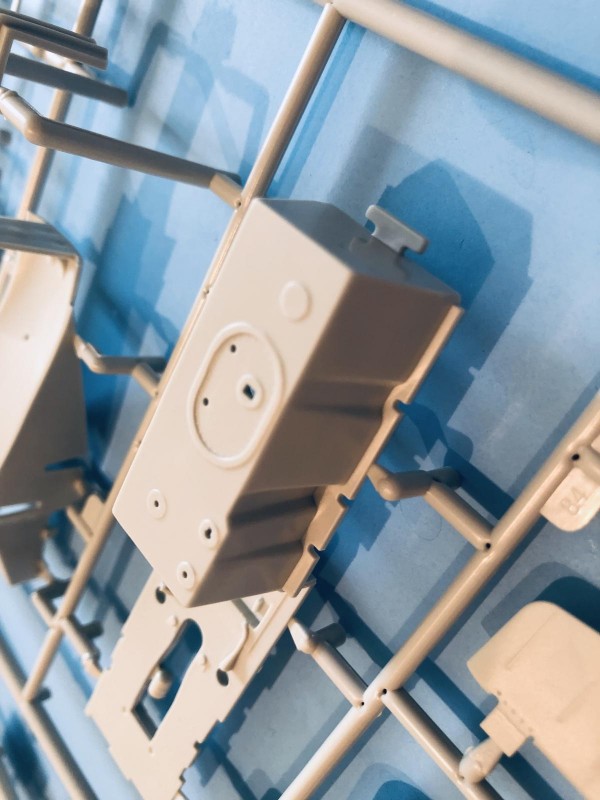
- 1. Look at this big beautiful fuel tank !!!! NO wonder it affected the center of gravity....

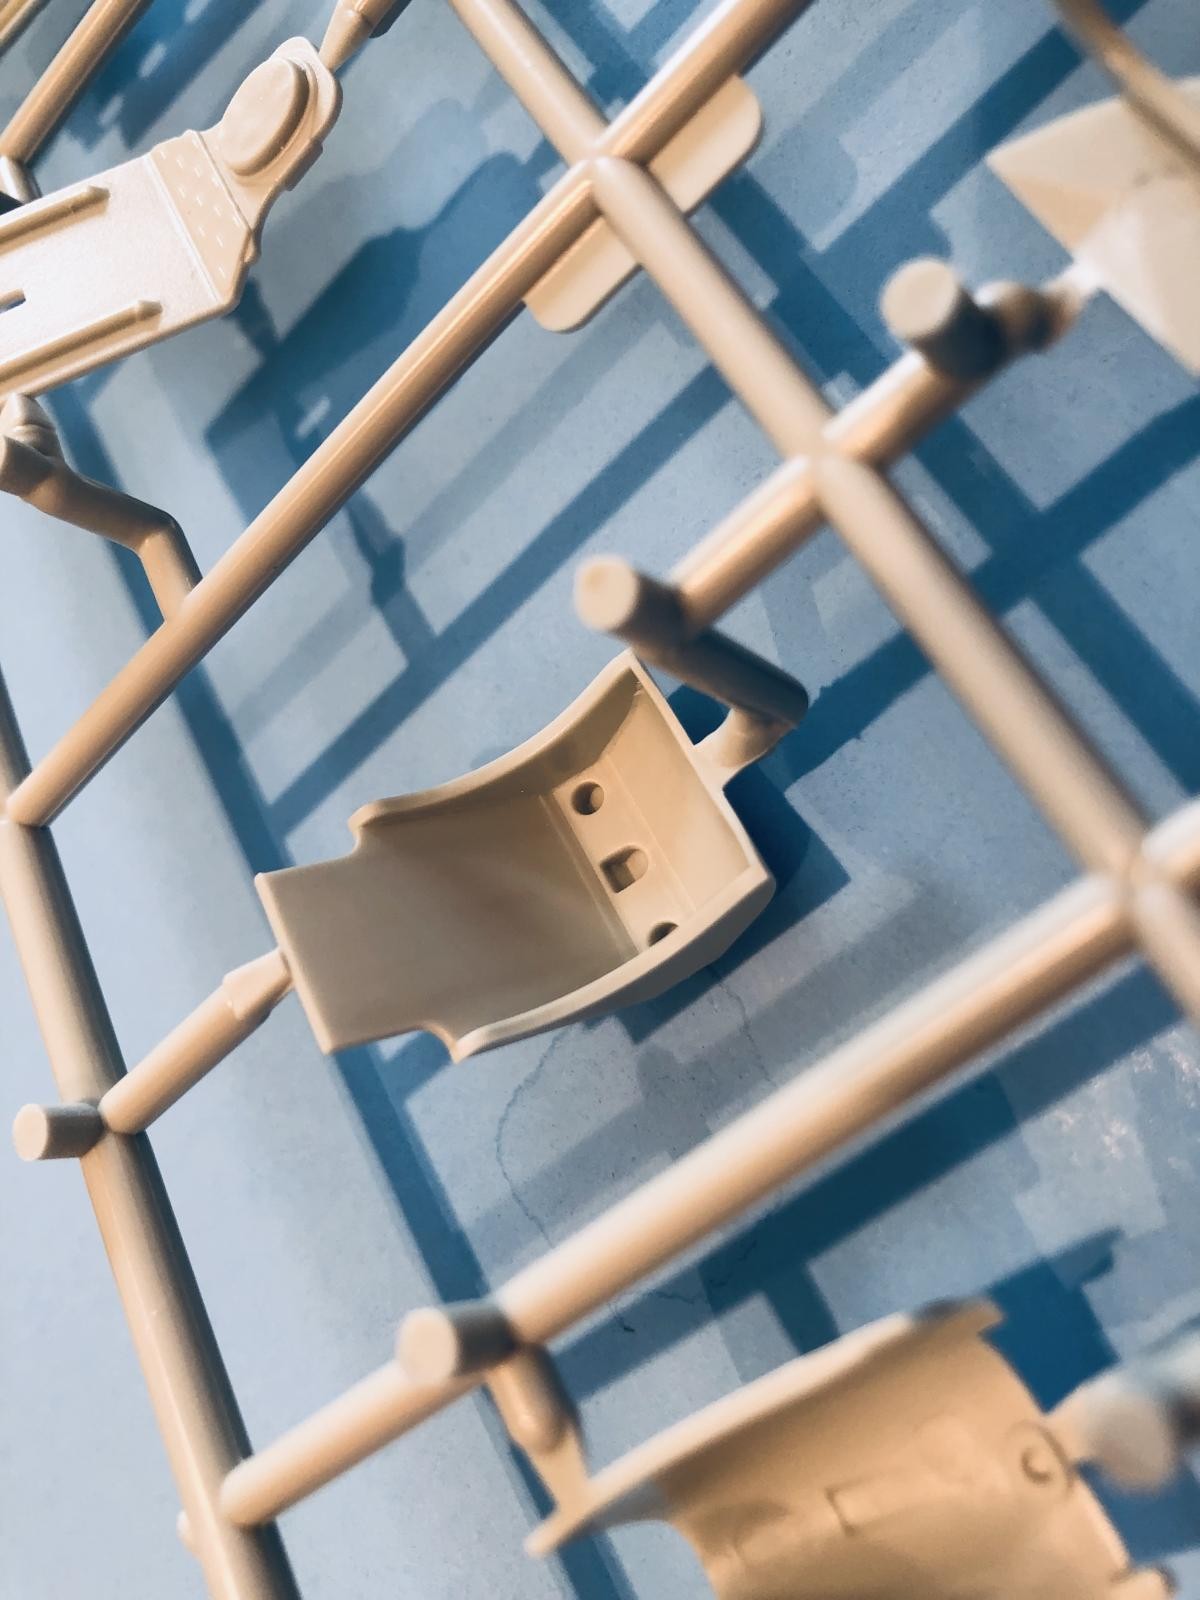
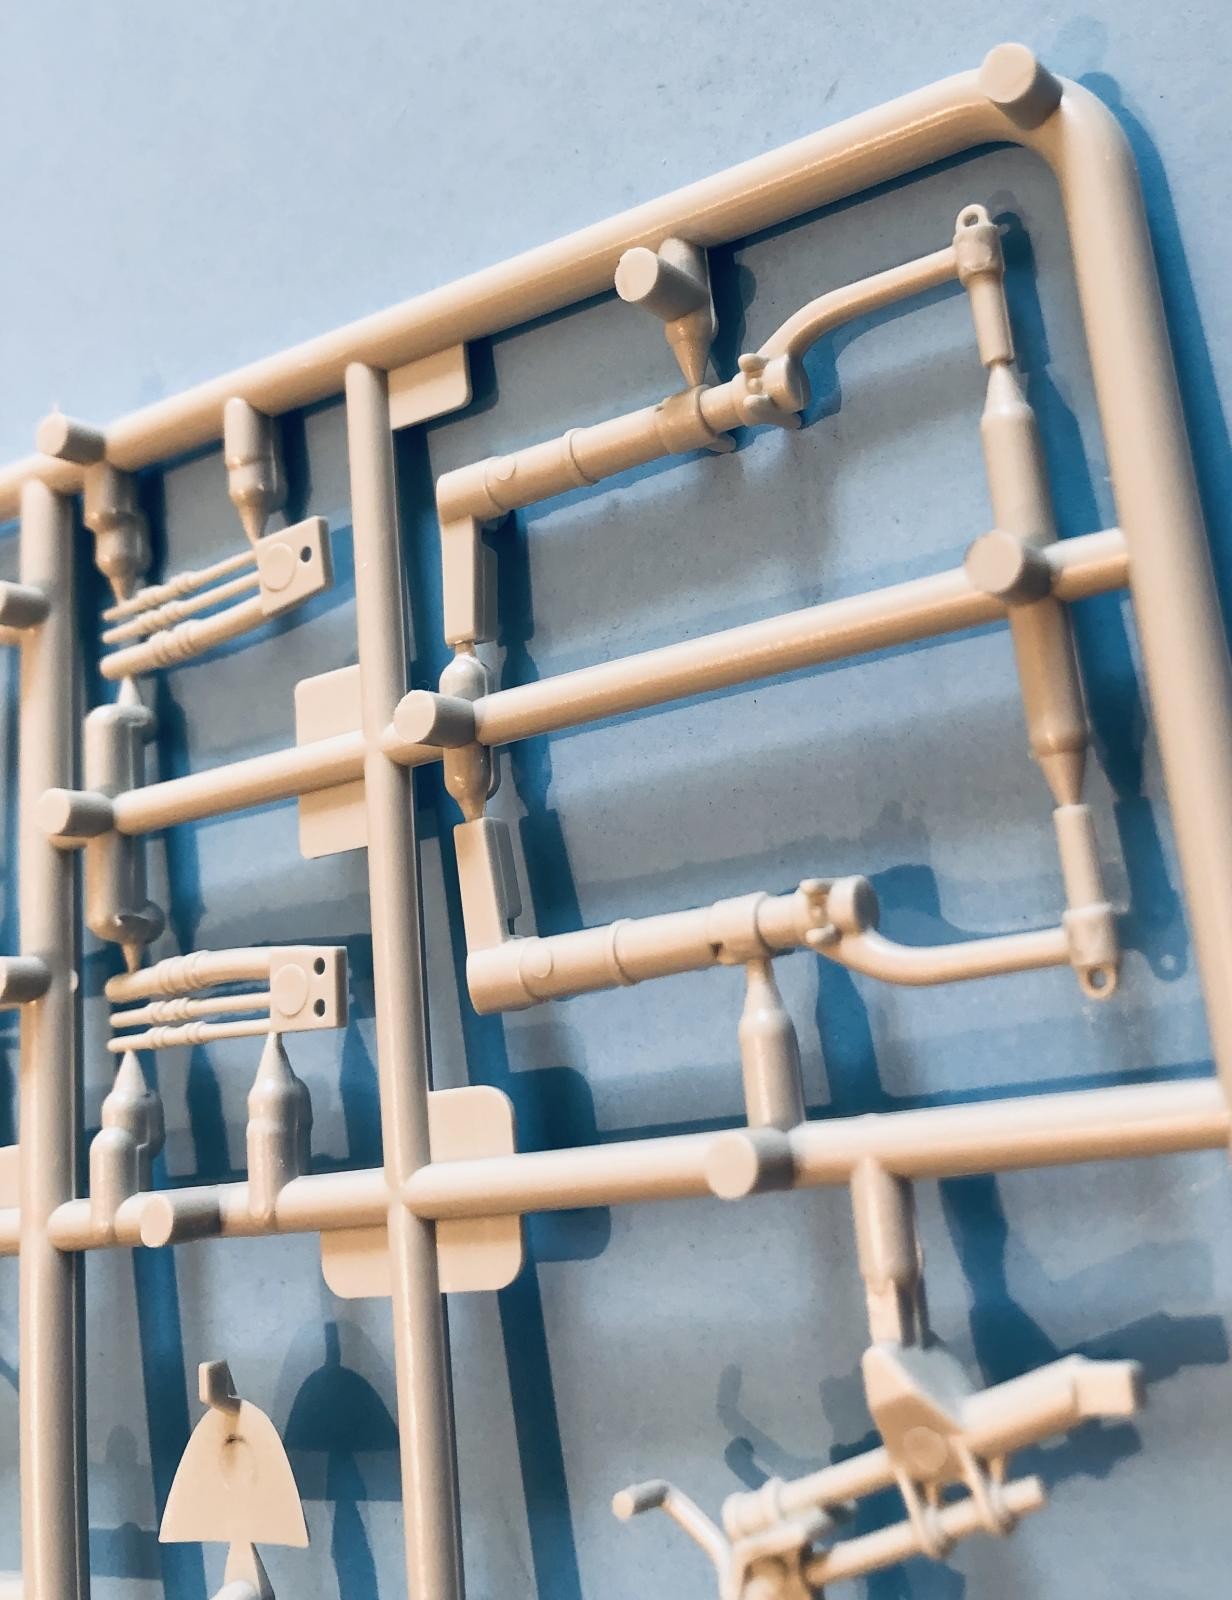
A nice pilot's joystick is included. This part will mount right on the cockpit floor. You can also see the pilot's oxygen hose in the lower portion of the picture.
-

- 1. Pilot's joystick.
- 2. Pilot oxygen mask tube.
- 3. Hydraulic lines and hoses.
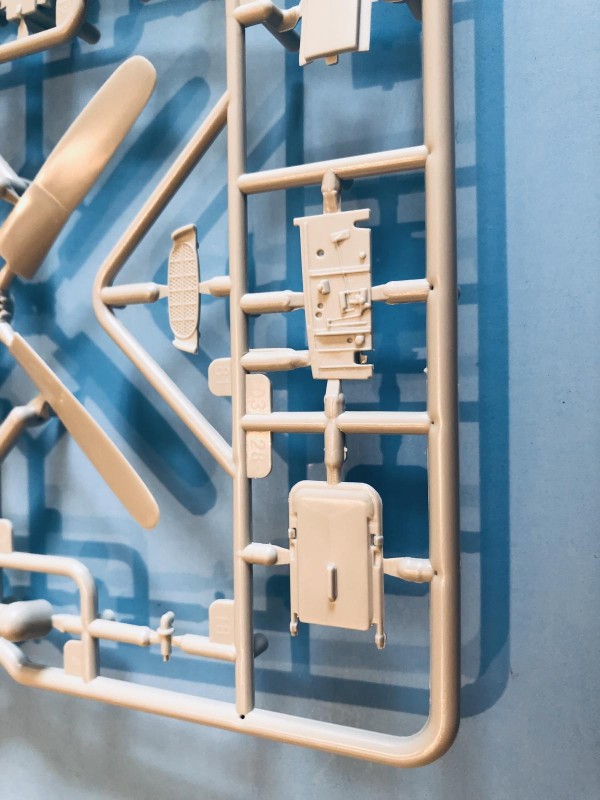
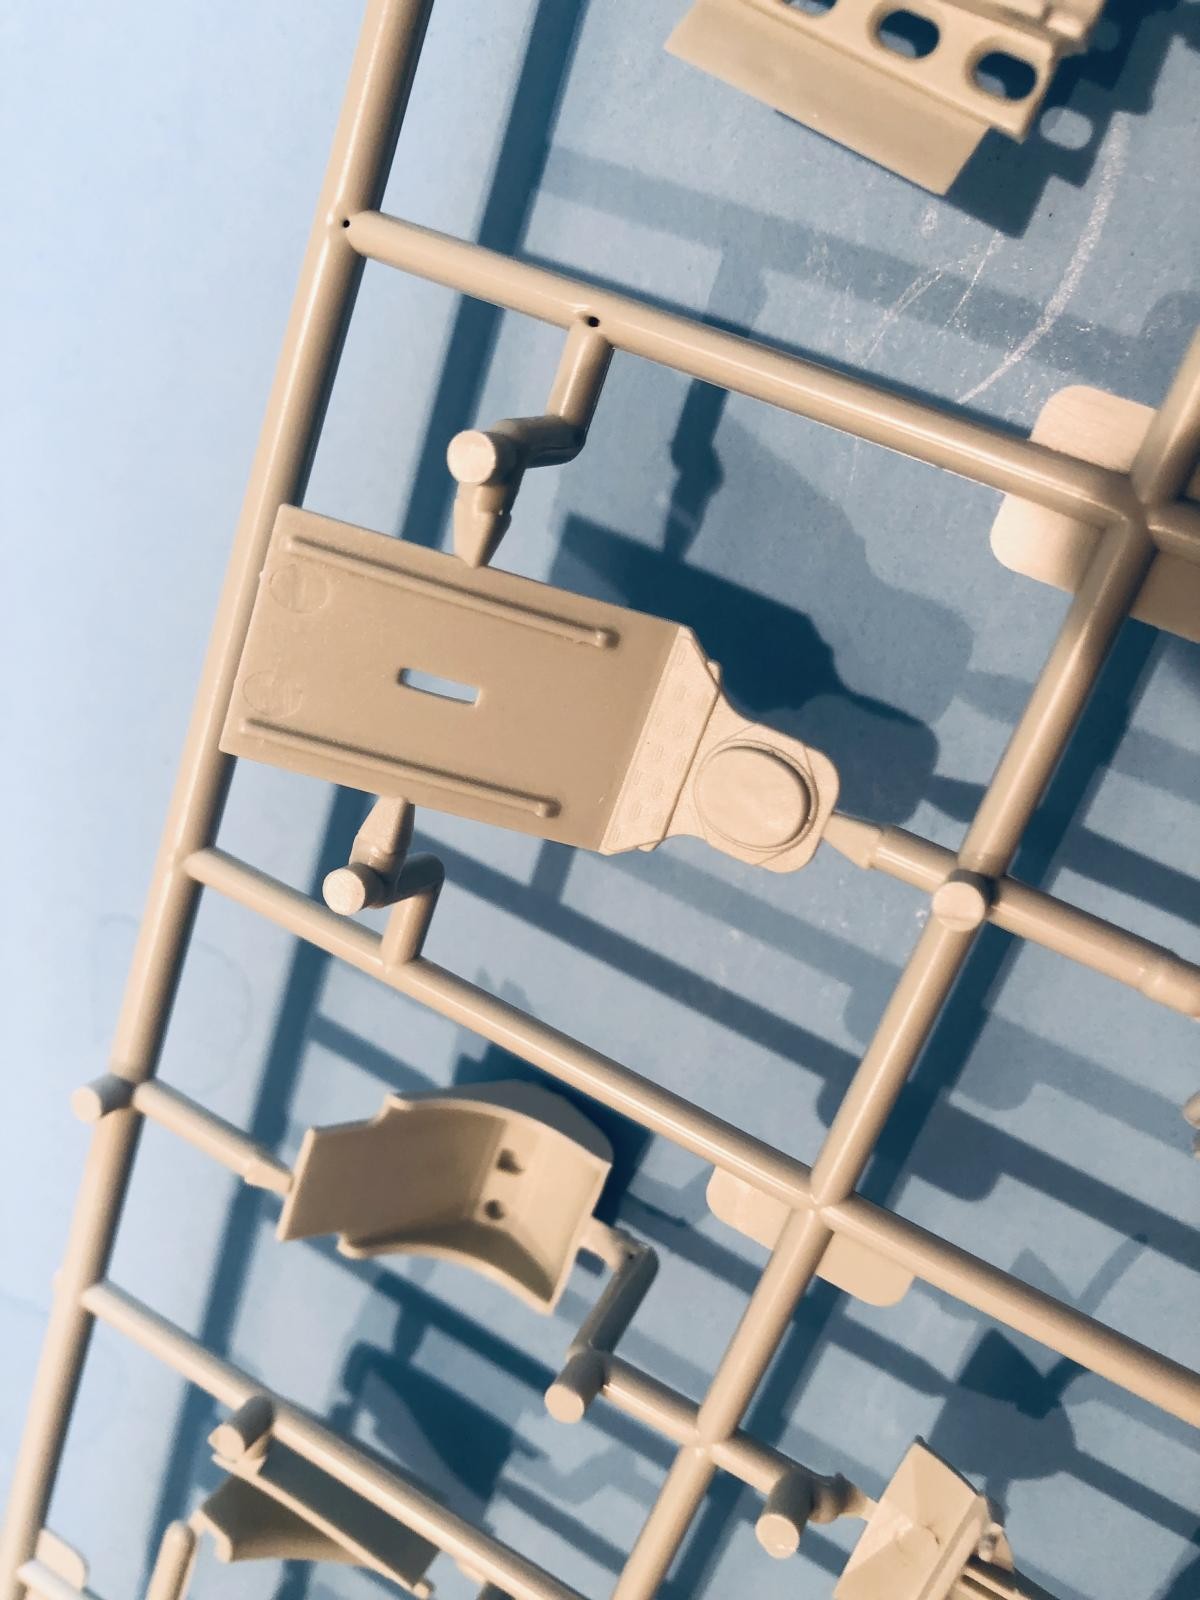
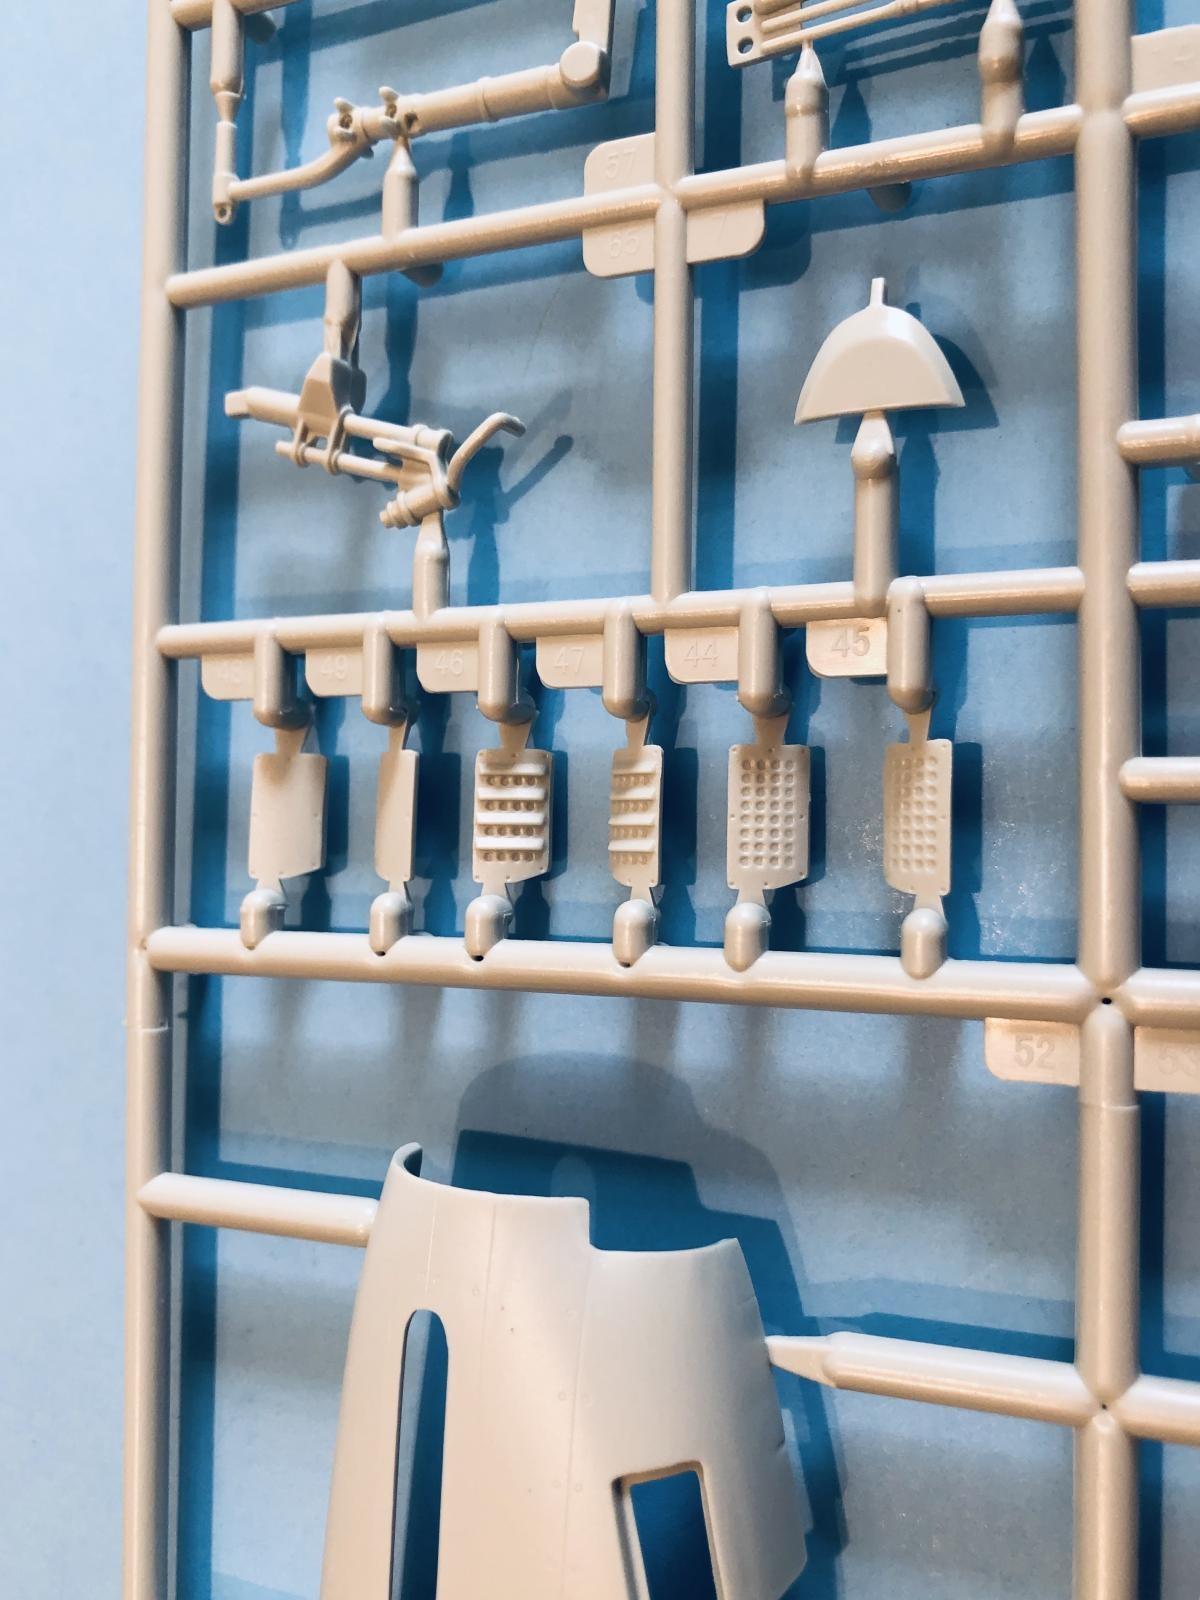
A decent instrument panel is included. They supply a decal to use over the plastic part.
-
- 1. Under wing racks for ordnance or drop tanks.
- 2. Instrument panel.

There are also two different style of instrument panel hoods. One is plain, while the other is ribbed.
-
- 1. Ribbed cockpit instrument panel hood.
- 2. Plain instrument panel hood.
- 3. Air intake grille mesh

Here the IP hoods are shown from a different angle. You can also see the rudder pedals in the lower part of this next picture.
-

- 1. This hood is ribbed
- 2. This instrument hood is plain.
- 3. Notice the rudder pedals.
The radiator tunnel is built up separately and is connected to the tail wheel well. Here's a photo that shows the base part for this assembly. When completed, it will look rather nice...
-
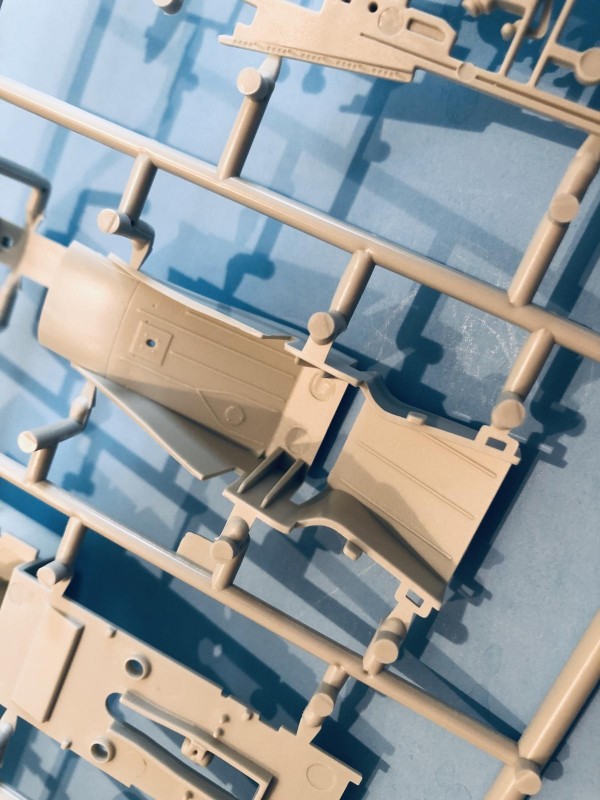
- 1. Radiator duct work. This is located inside the "scoop" found under the fuselage just below / behind the wing.

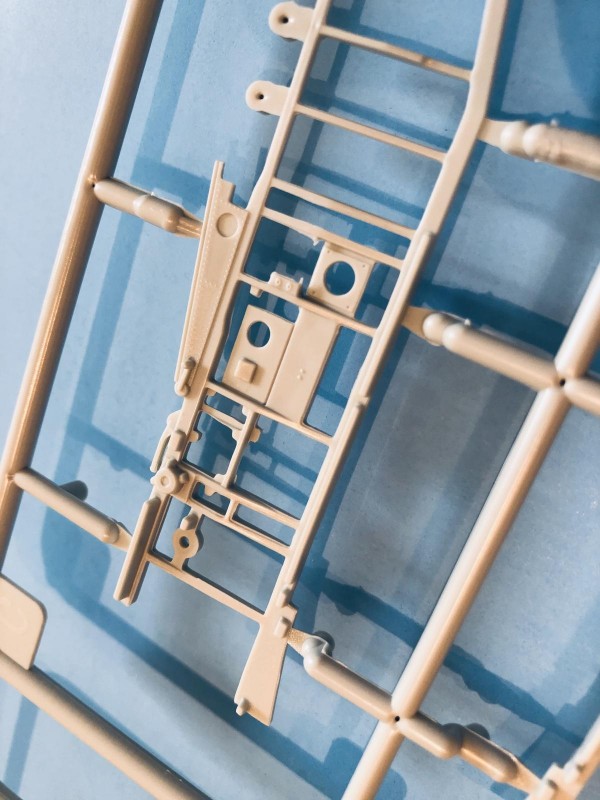
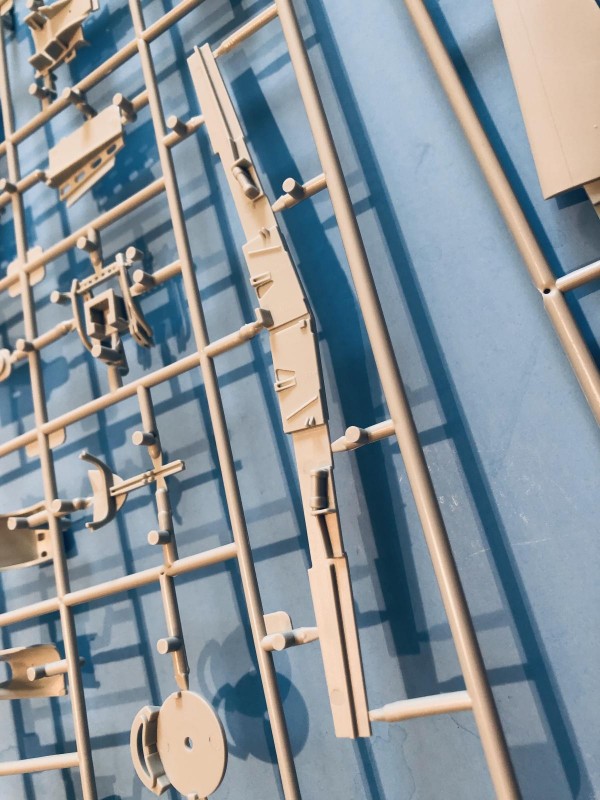
The fuselage is made up with a separate insert for the early tail. This tells me that the original plan was to make an "early" and a "Late" version of the kit with interchangeable parts.
-

- 1. Main fuselage parts tree.

The early Mustang tail lacks the fillet that is typically found on the vertical fin of the later D models.
-

- 1. The later style fin assembly had a fillet that was added here.
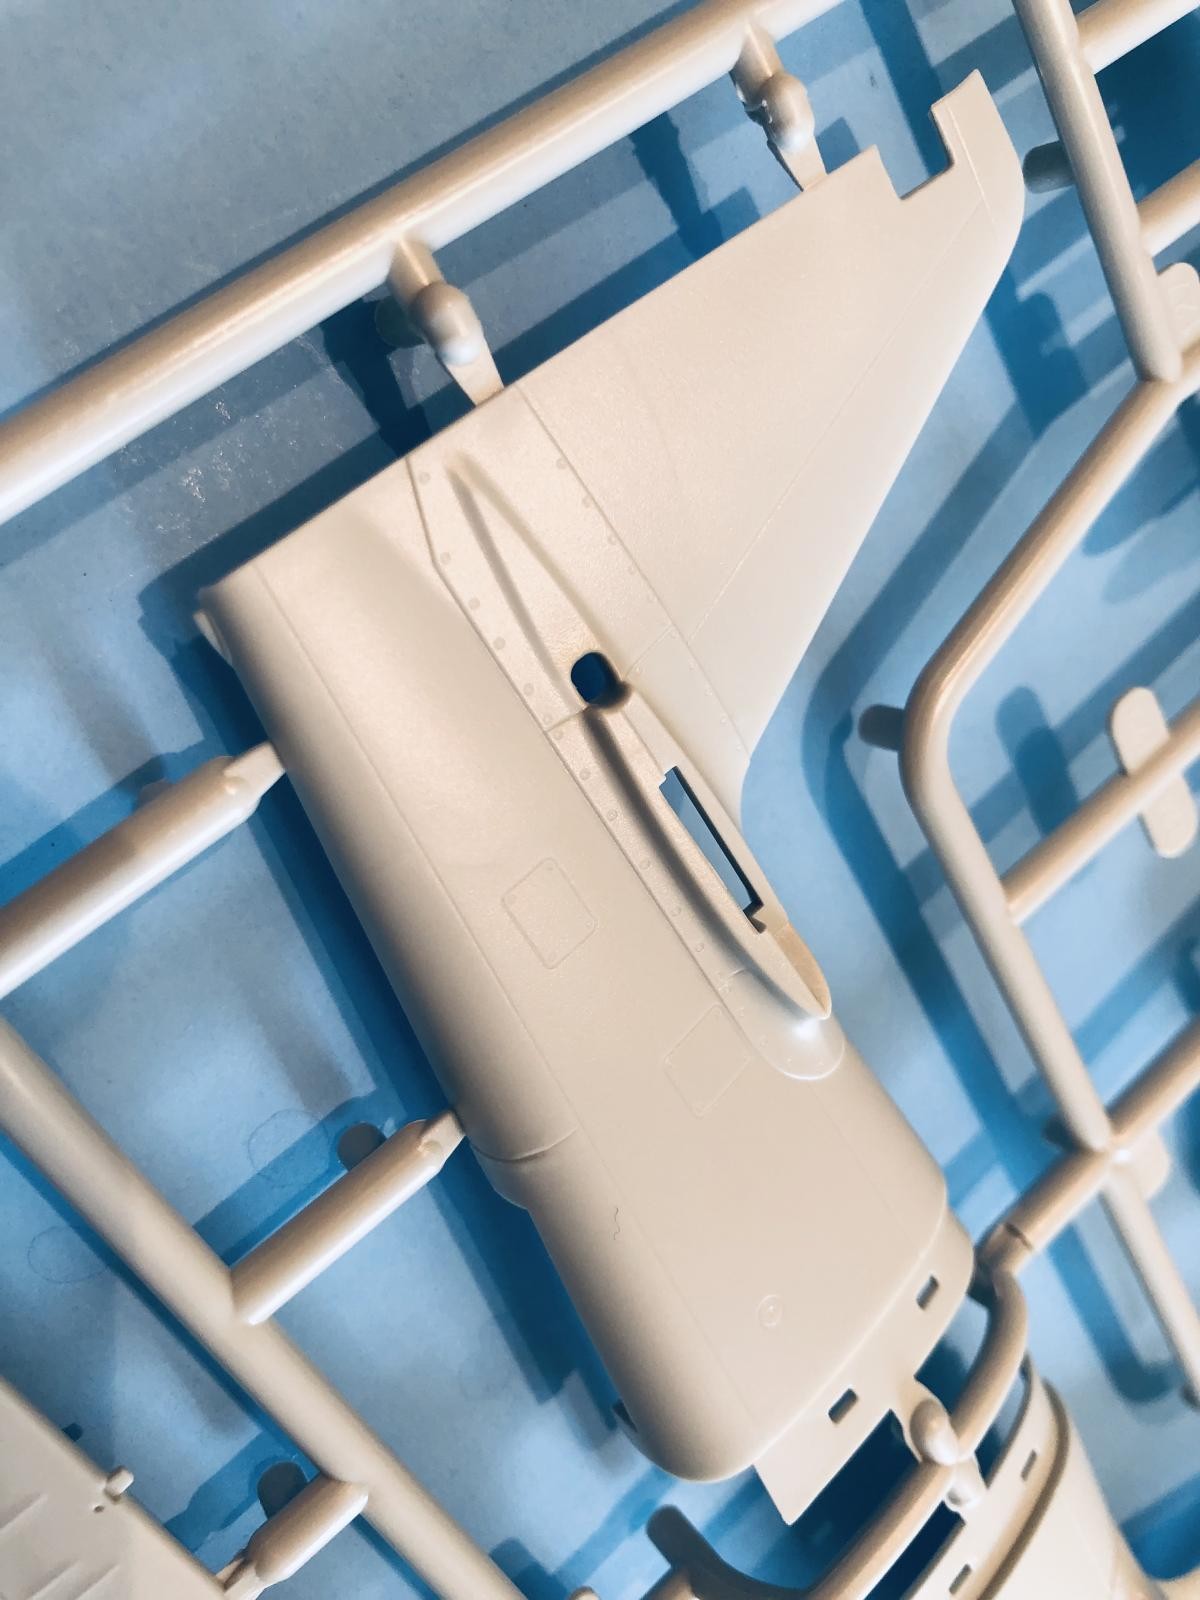
This "fillet" was actually offered as a field modification to upgrade the earlier planes that lacked the part during the War. It helped to regain some of the directional stability that was lost when the Mustang went from the "Razor back" to the "Bubble Top" ... It was found that by installing this fillet, some of the stability was restored. Many pilots actually preferred flying the earlier "Razor back" because of this...
Here's a photo showing the tail insert halves, and the fabric covered elevators.
-

- 1. Tail inserts.
- 2. Fabric effects on the elevators
- 3. Instrument panel
On the inside of the fuselage, there are several prominent ejector pin marks. It may be possible these will be covered by the fuselage interior parts. I honestly do not know if this is the case at this moment. I will be building this model very soon, and have already started a build journal on it. I will be sure to post my findings there.
-
- 1. ejector pin marks
- 2. ejector pin marks. visible on both halves

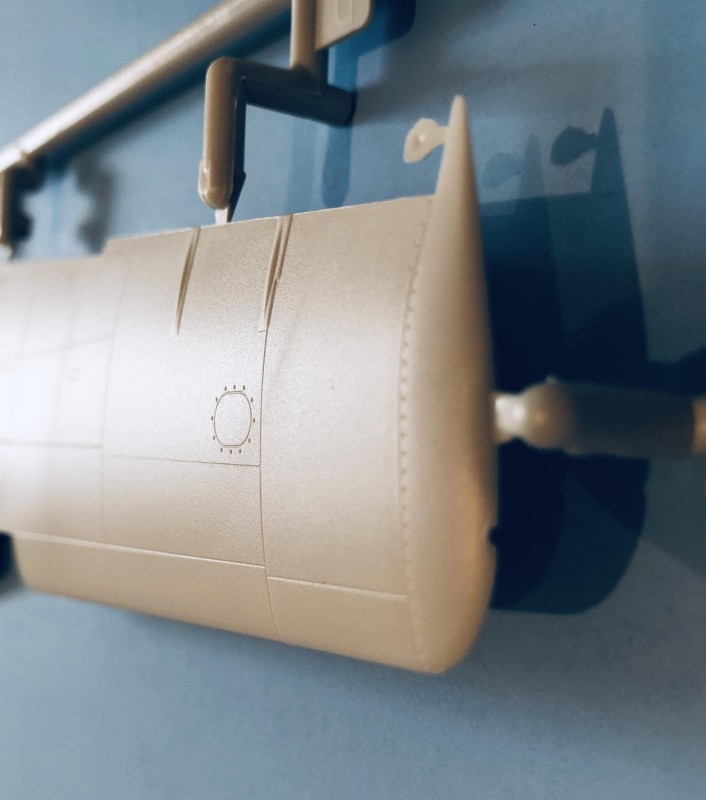
The exterior of the nose looks to be pretty nice too. The panel lines don't look to be too deep. I have not compared anything to a drawing, nor will I. I don't do that... sorry.
My reasoning behind this practice is this: Who says that a "drawing" is exact ? As a former automotive machinist, I have found inaccuracies and faults in several the so called "to scale" blue print drawings that were made by engineers ! This was not found out however, until the machining process was actually started... then corrections were made once this was discovered. We are all human and are prone to making mistakes.
-

- 1. Finely engraved panel lines.
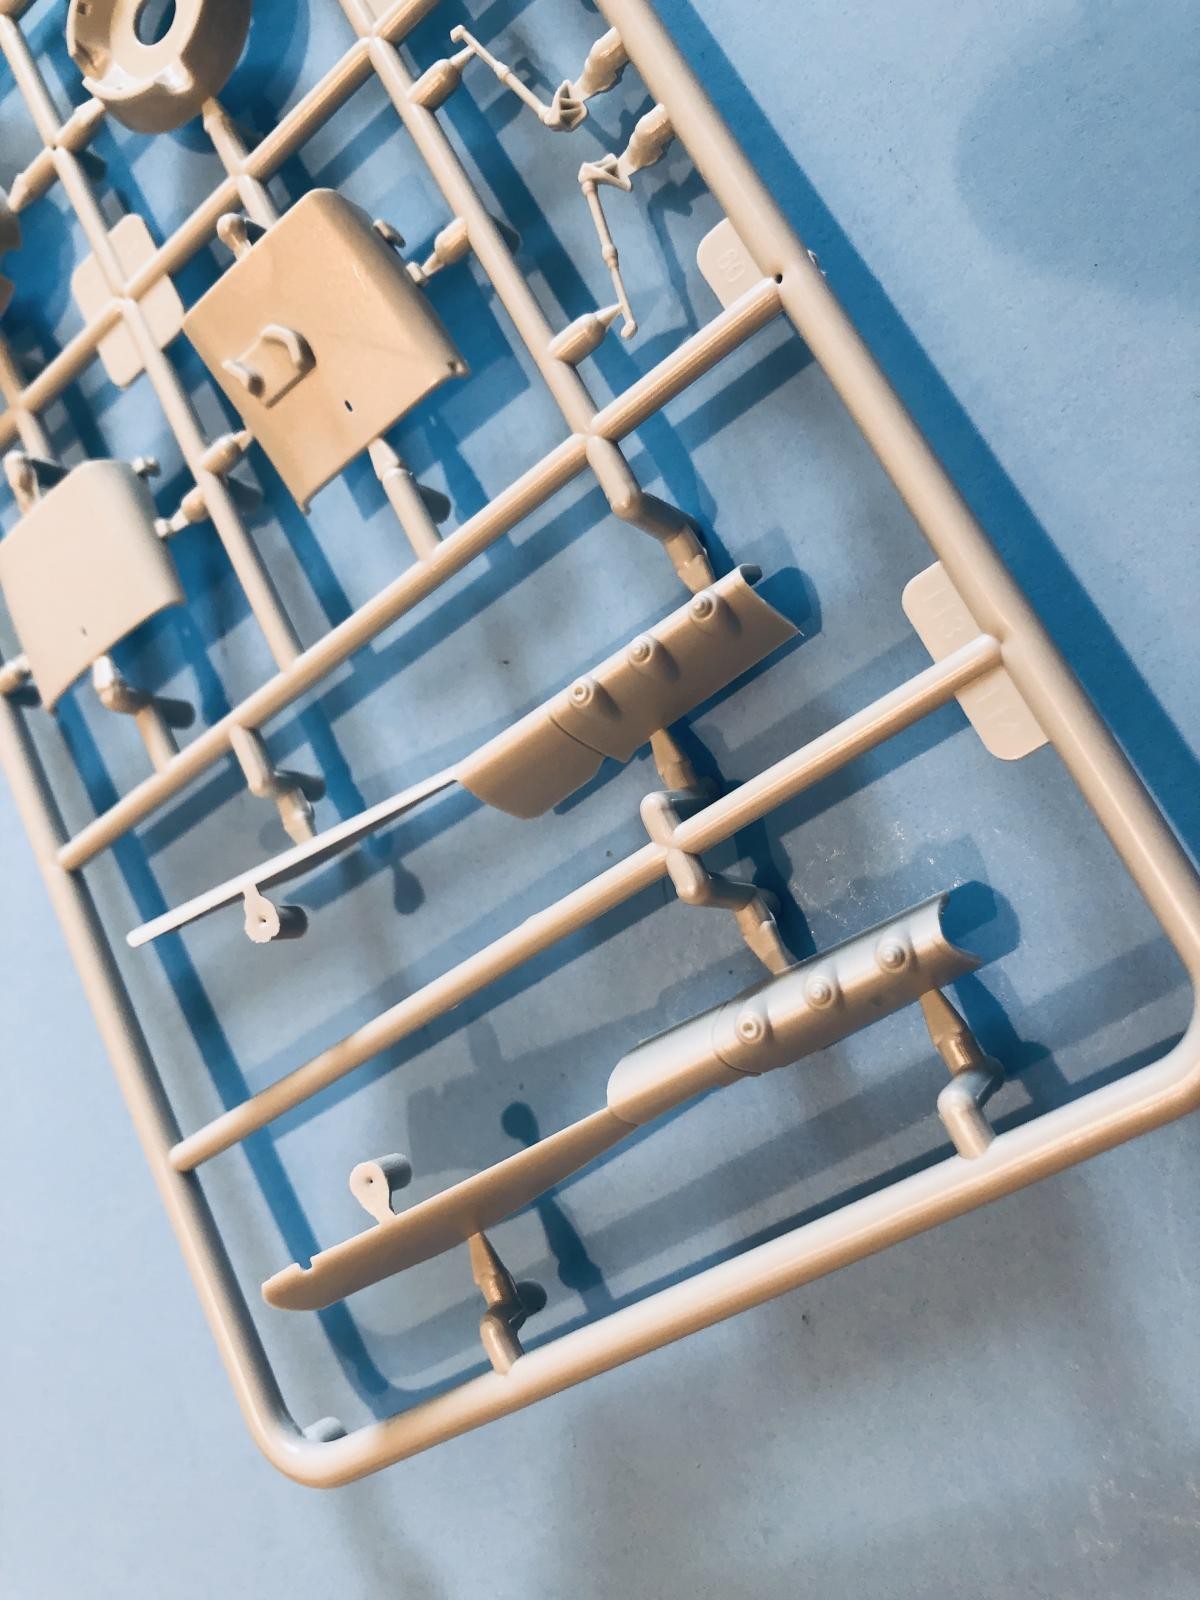
The exhausts are provided with shrouds. Some Mustangs had them, some didn't. Check your references.
-
- 1. These are the exhaust shrouds.

The actual exhaust manifolds are nicely cast. They will benefit from some minor drilling to open up the ends. Other than that, they look nice. I'm sure that a resin replacement is available if this really bothers you...
-

- 1. This area will need drilled out to look more authentic.
- 2. Exhaust manifold close up photo.
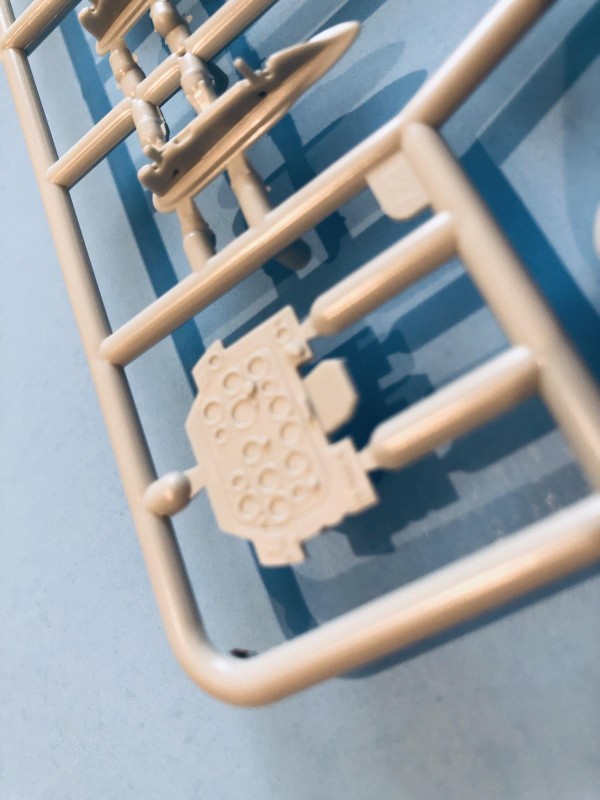
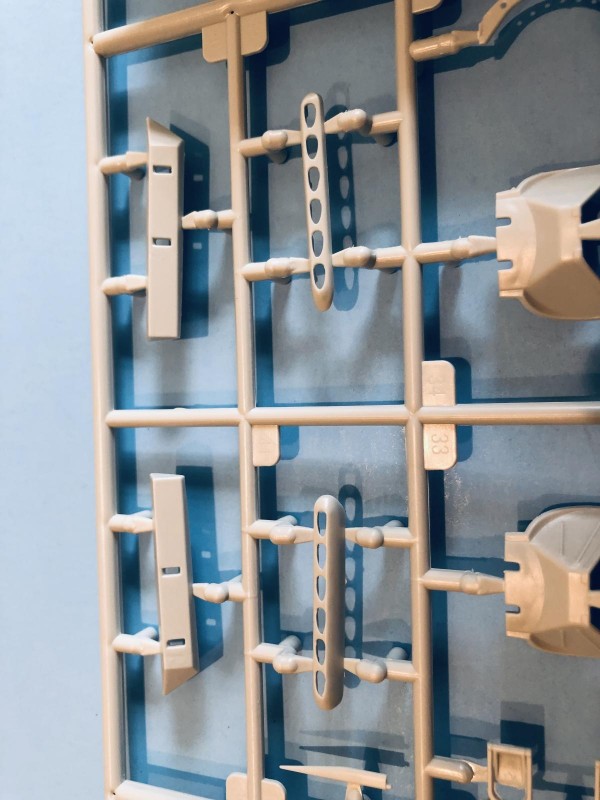
There are three different styles of breather plate covers provided in the kit, for the opening in the lower side of the nose. One is solid, one is ribbed, and one is drilled. All three types were used on the Mustang, so again you should check your references before you get to this stage of assembly.
-

- 1. 32 hole breather plate.
- 2. Ribbed breather plate
- 3. smooth breather plate
- 4. breather plates fit here.
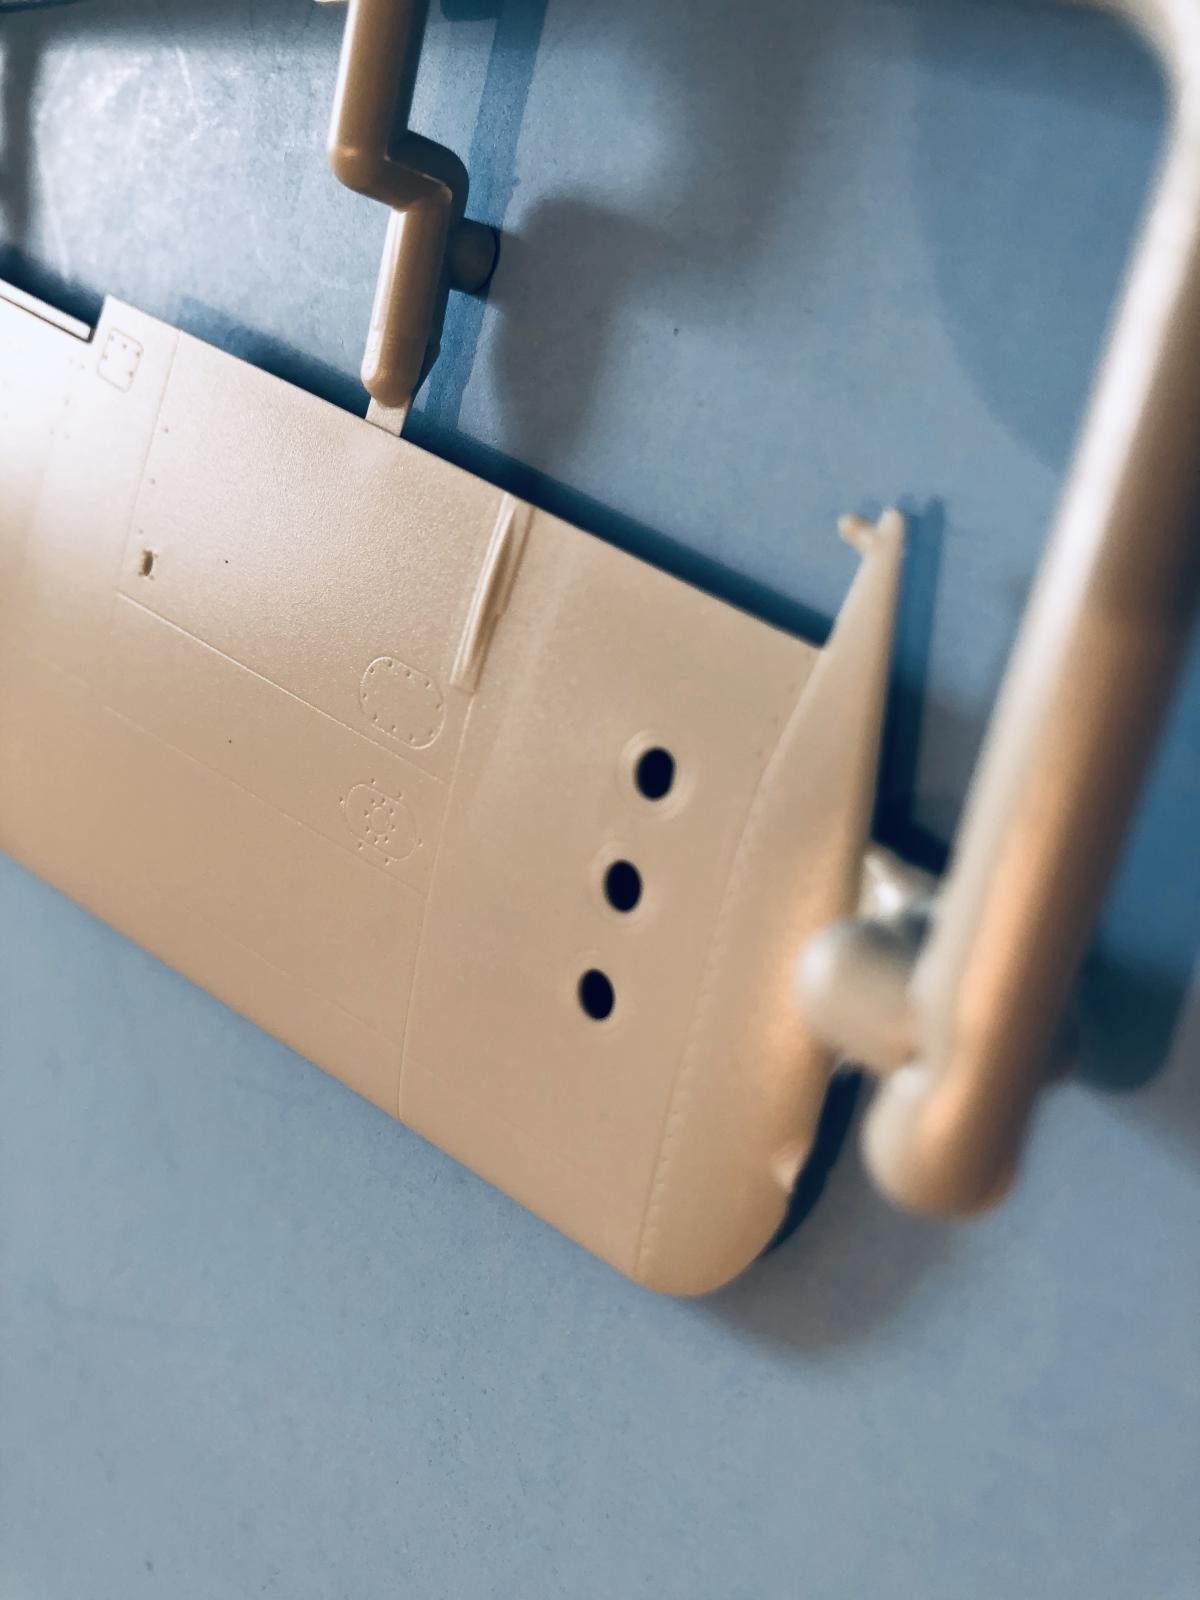
On the side of the fuselage, (where the flaps join against it), there are provisions made that will allow you to easily drop the flaps. This area is filled in and looks as it should if you decide to build your model with the flaps down. This is an improvement and an area that is often over looked.
-
- 1. Notice how this area is correctly filled in. It will allow you to lower the flaps without any alterations.

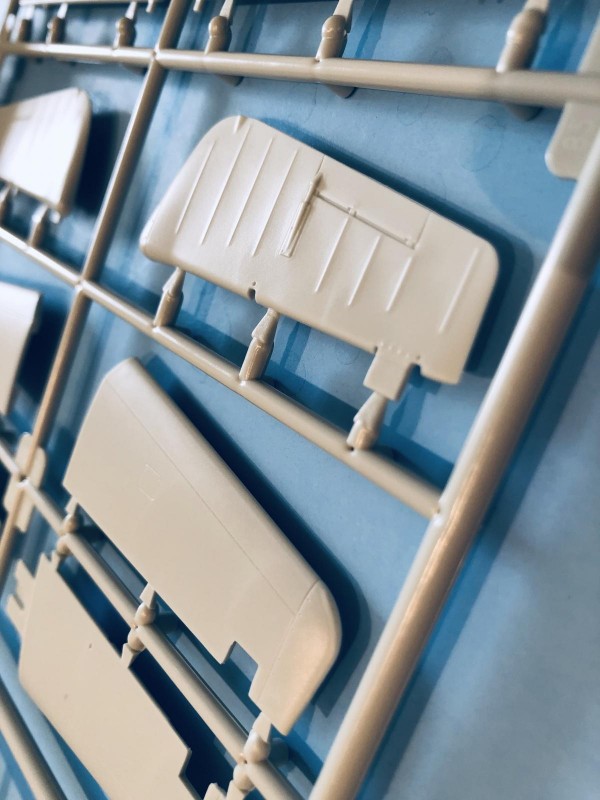
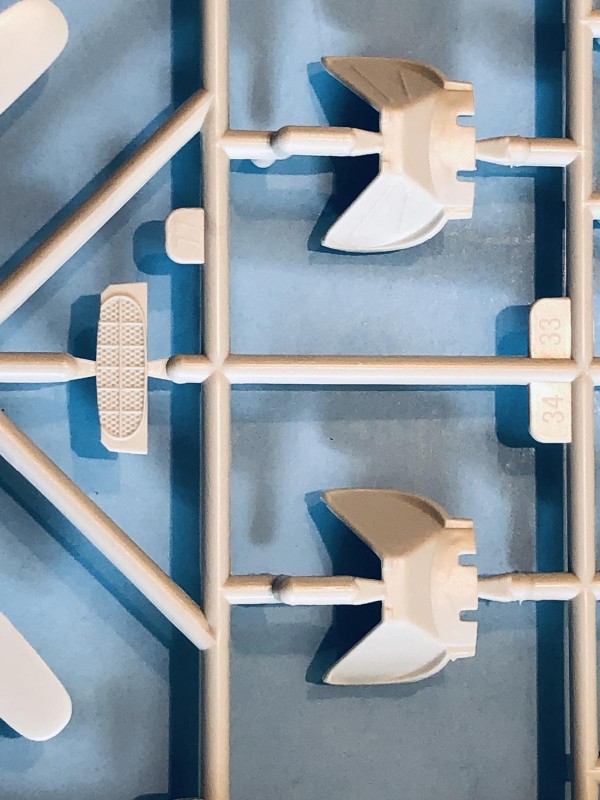
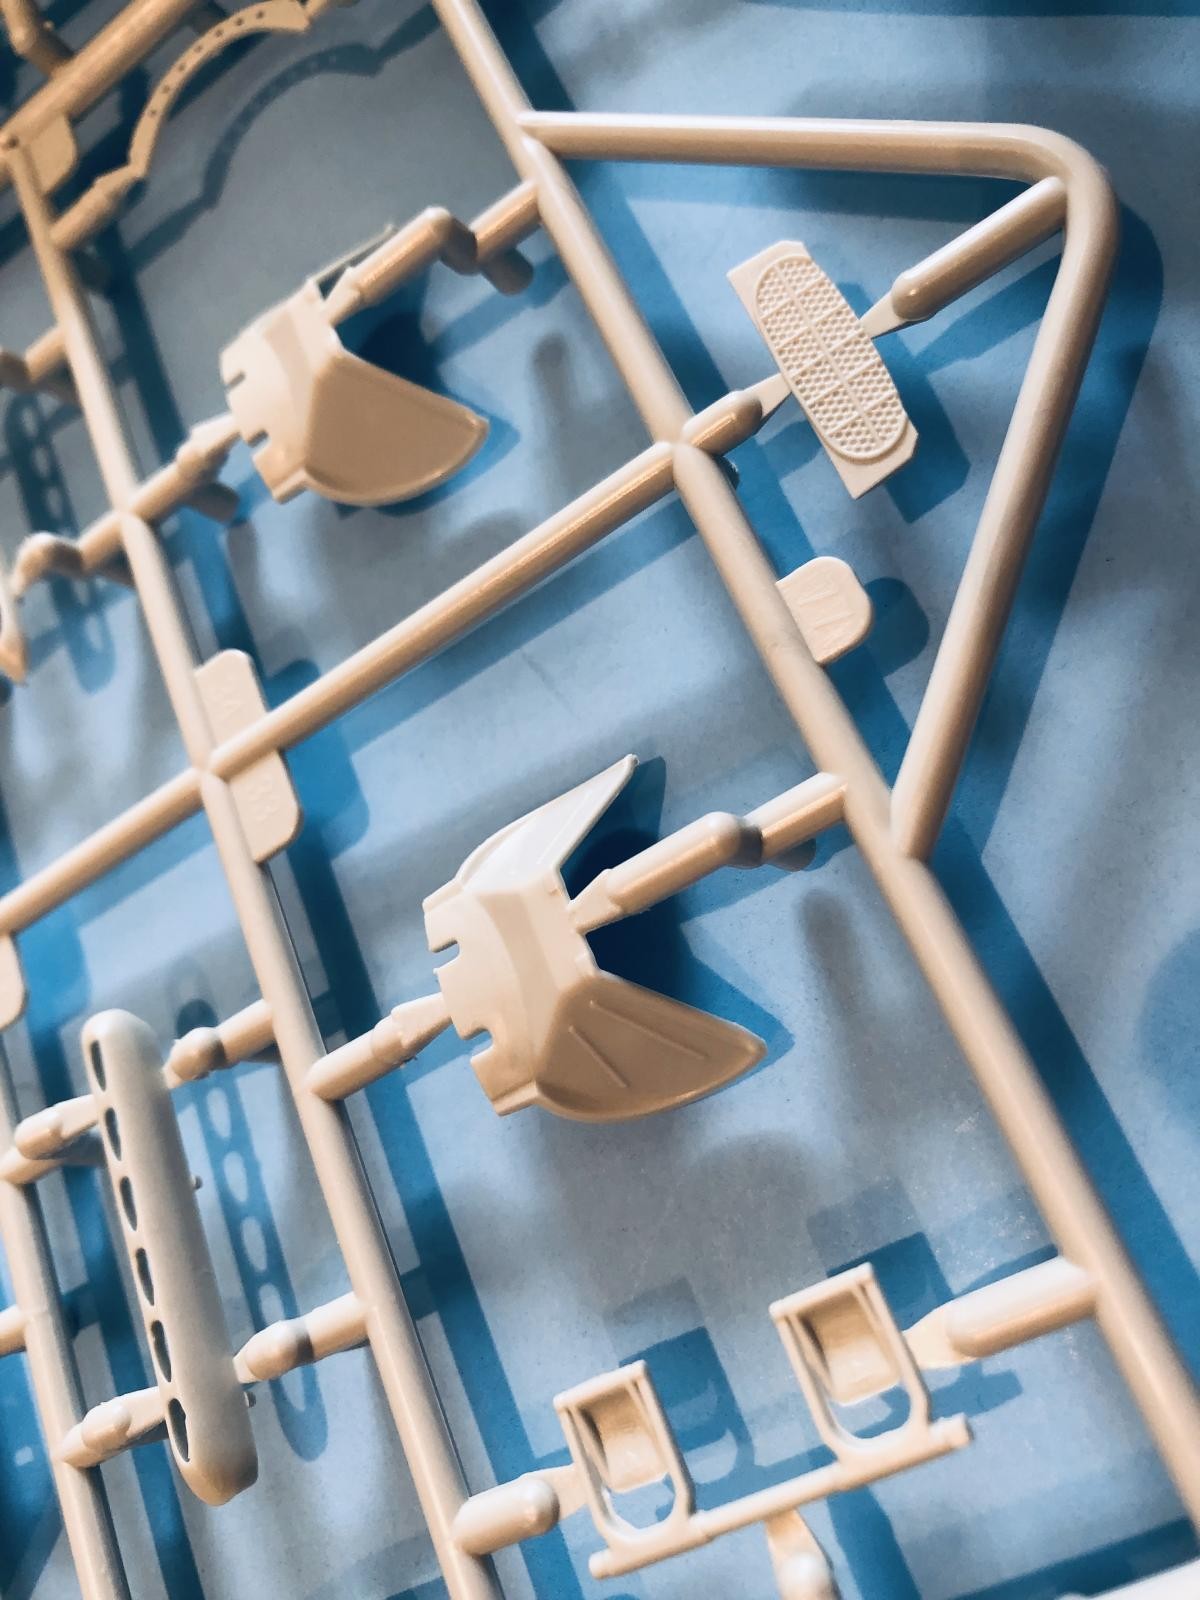
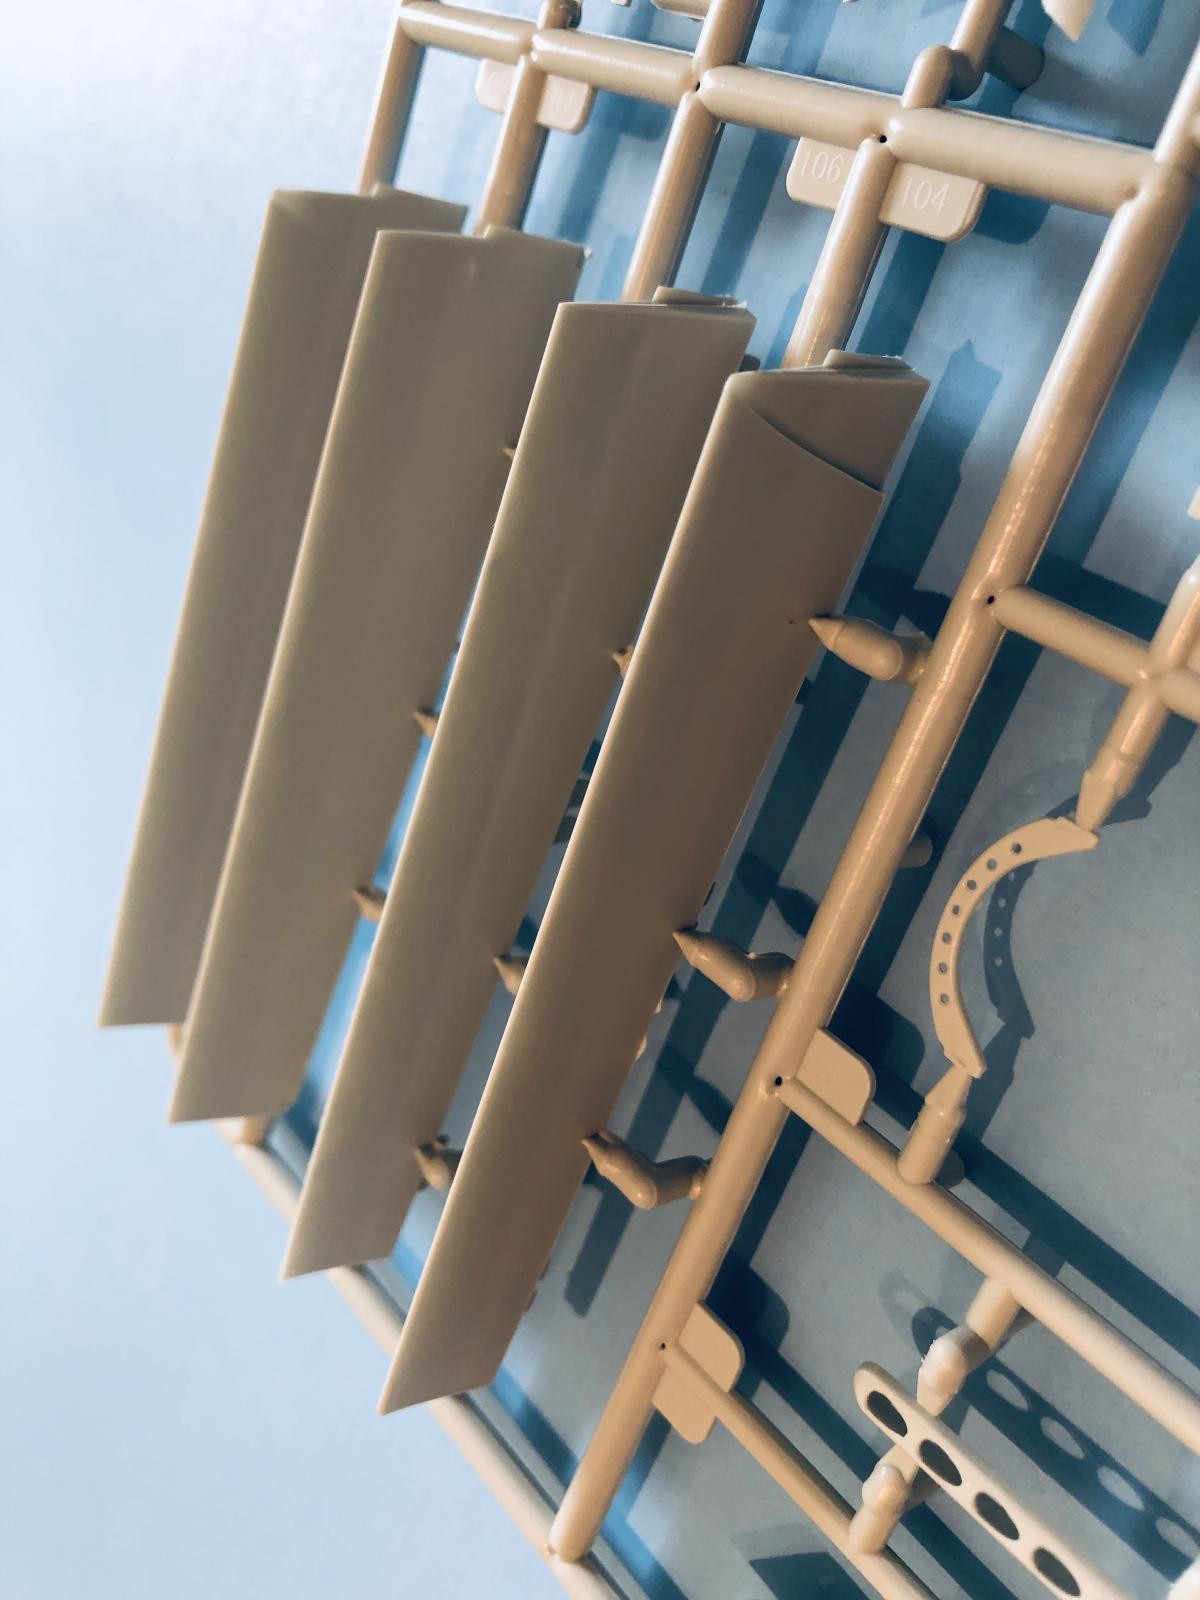
Now that we are talking about the flaps, you have choices here too. The kit comes with a dedicated set of "dropped" flaps, and a separate set for the raised option. The difference is how they are molded on the ends. The ends of the flaps are properly molded on each set.
-
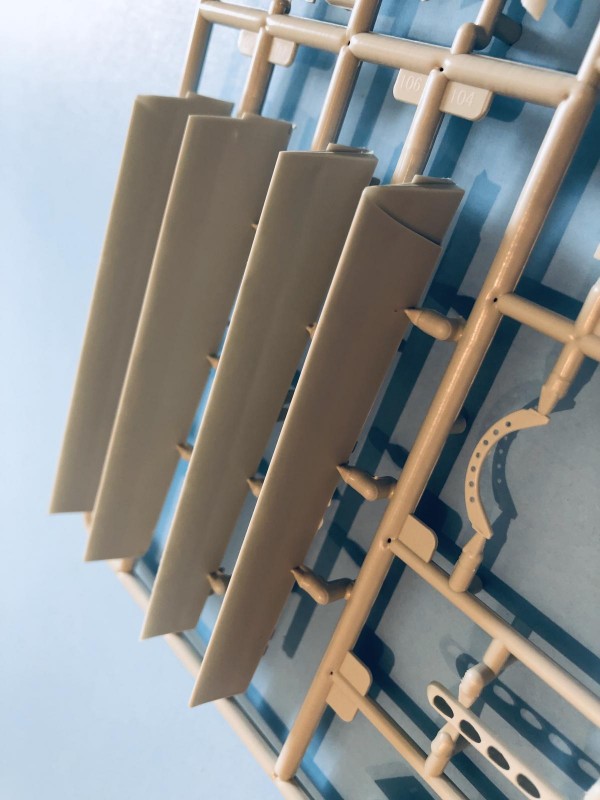
- 1. See this notch ?? It's not visible when installed. This is the raised flap.
- 2. Notice the "lightening holes" detail molded into the canopy brace.
-
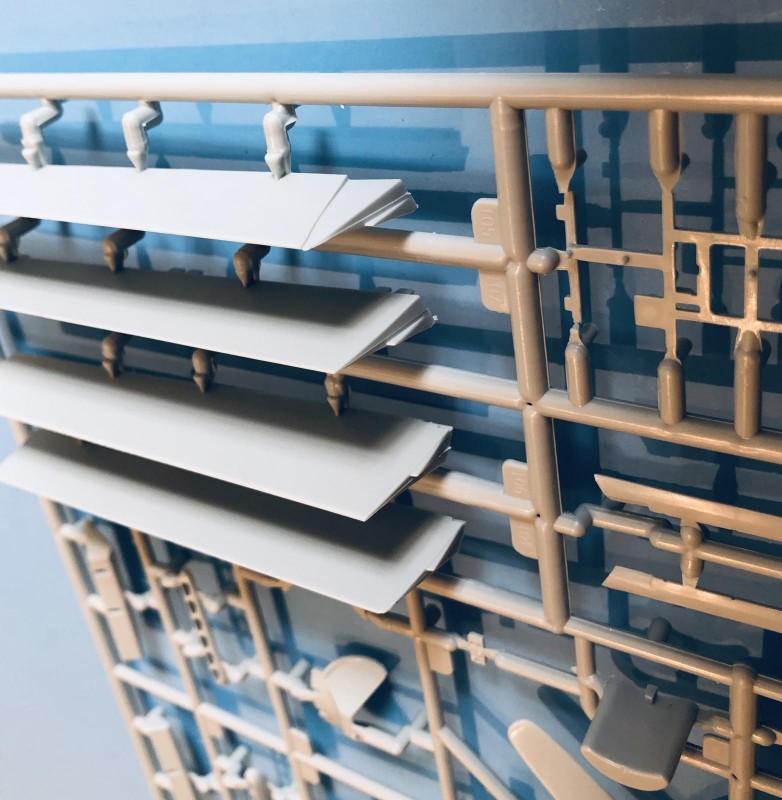
- 1. These are the "lowered" flaps.

This is what I call the "propeller sprue" for obvious reasons...
-
- 1. Lots of parts on this tree........

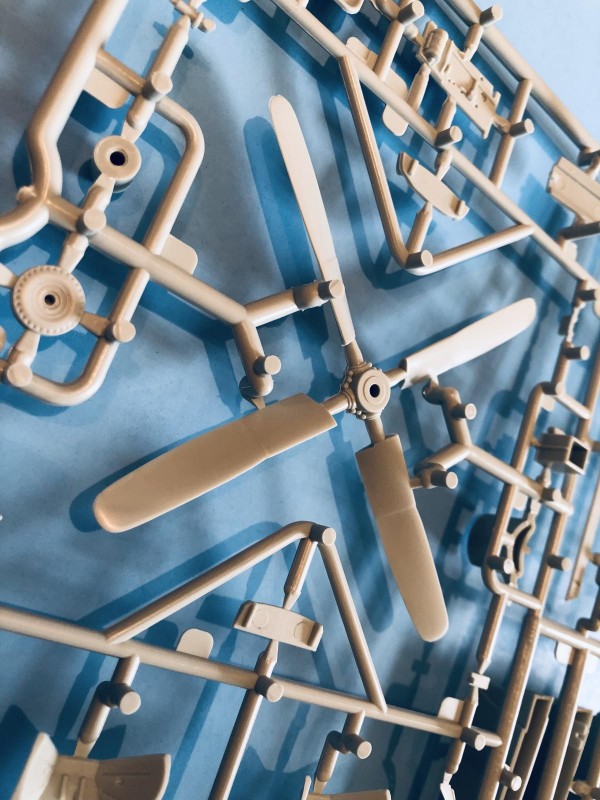
The actual prop is nicely done. I have read about some grumblings online about the 'cuffs' being too small.
-
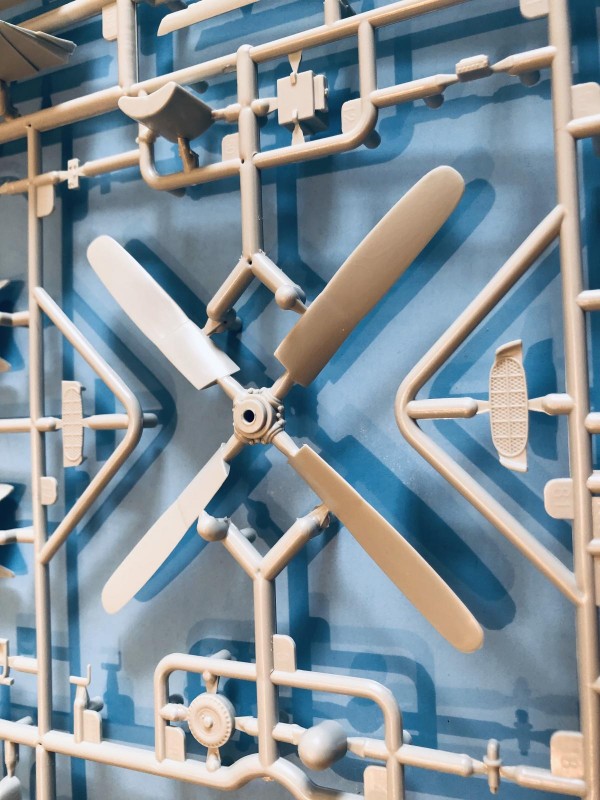
- 1. One piece propeller
- 2. Tail wheel.

-
- 1. tail wheel.
- 2. propeller with nicely detailed hub.

I'm not entirely sure about these complaints after looking at several full sized Mustangs... Here's a picture I took of a real one... You can decide for yourself.
-
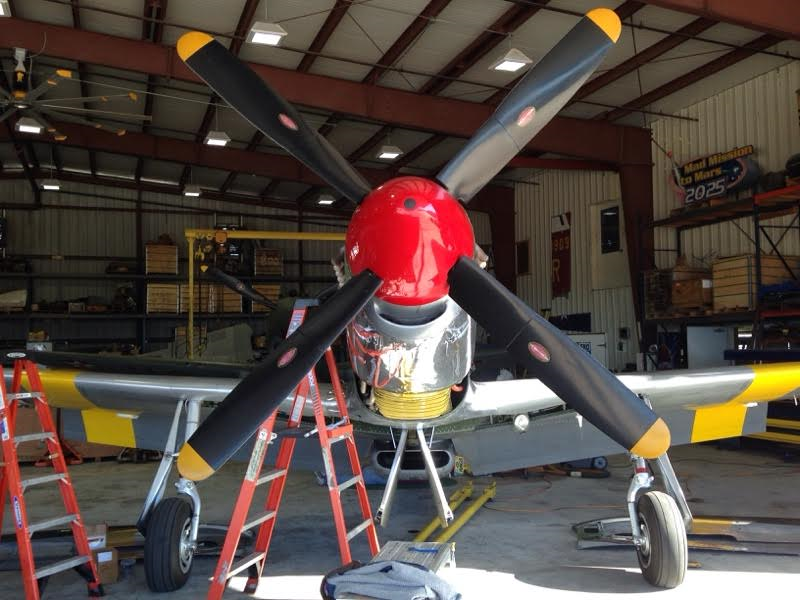
- 1. The kit supplied plastic part doesn't look too bad after all does it ???

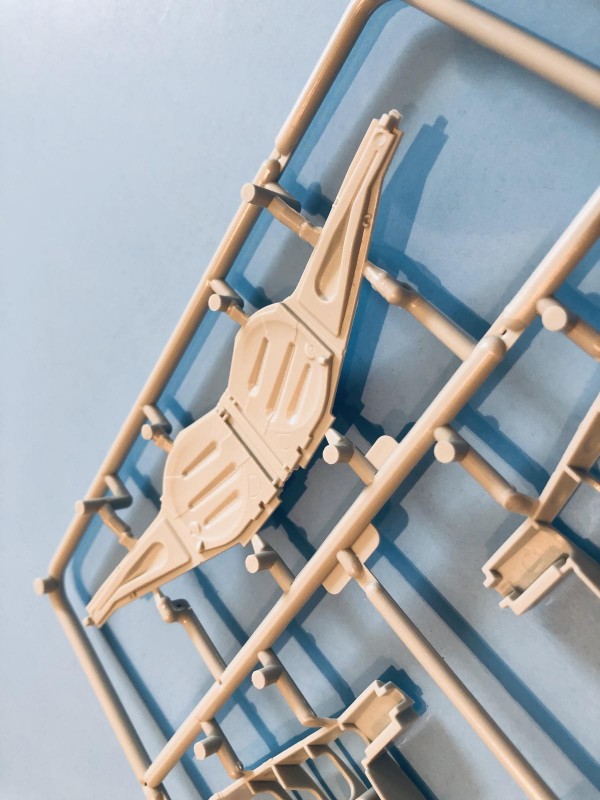
The spinner is molded in a manner that reflects how the actual part was built on the full sized version. There's a seam where the front half of the spinner meets the back half. They got it right.
-
- 1. Two part spinner assembly.
- 2. Under fuselage air scoop intake
- 3. rudder pedals.

The leading edge of the wing has an insert that captures the swept look of the D model wing. This swept area is not so prominent on the earlier B model. The part provided in the kit has three .050 caliber MG muzzles cat into it. This tells me that the original plan was to make a "B" Mustang wing with a few minor parts additions. Hopefully this will eventually happen.
-

- 1. Leading edge wing inserts showing .050 caliber MG muzzles.
The main spar is correctly depicted too. On the full sized Mustang, the wing's main spar actually forms the rearmost portion of the main landing gear well. Most kit manufacturers always get this wrong... Not so on this one. You can see the main spar in this next photo.
-
- 1. Main wing spar.

There are several wing ribs that are visible in the landing gear bay when the wheels are down and locked. These wing ribs also have been accurately molded and should look the part once assembled and painted.
-

- 1. The wing ribs are visible from inside the wheel wells.
- 2. Notice the leading edge "sub spar"
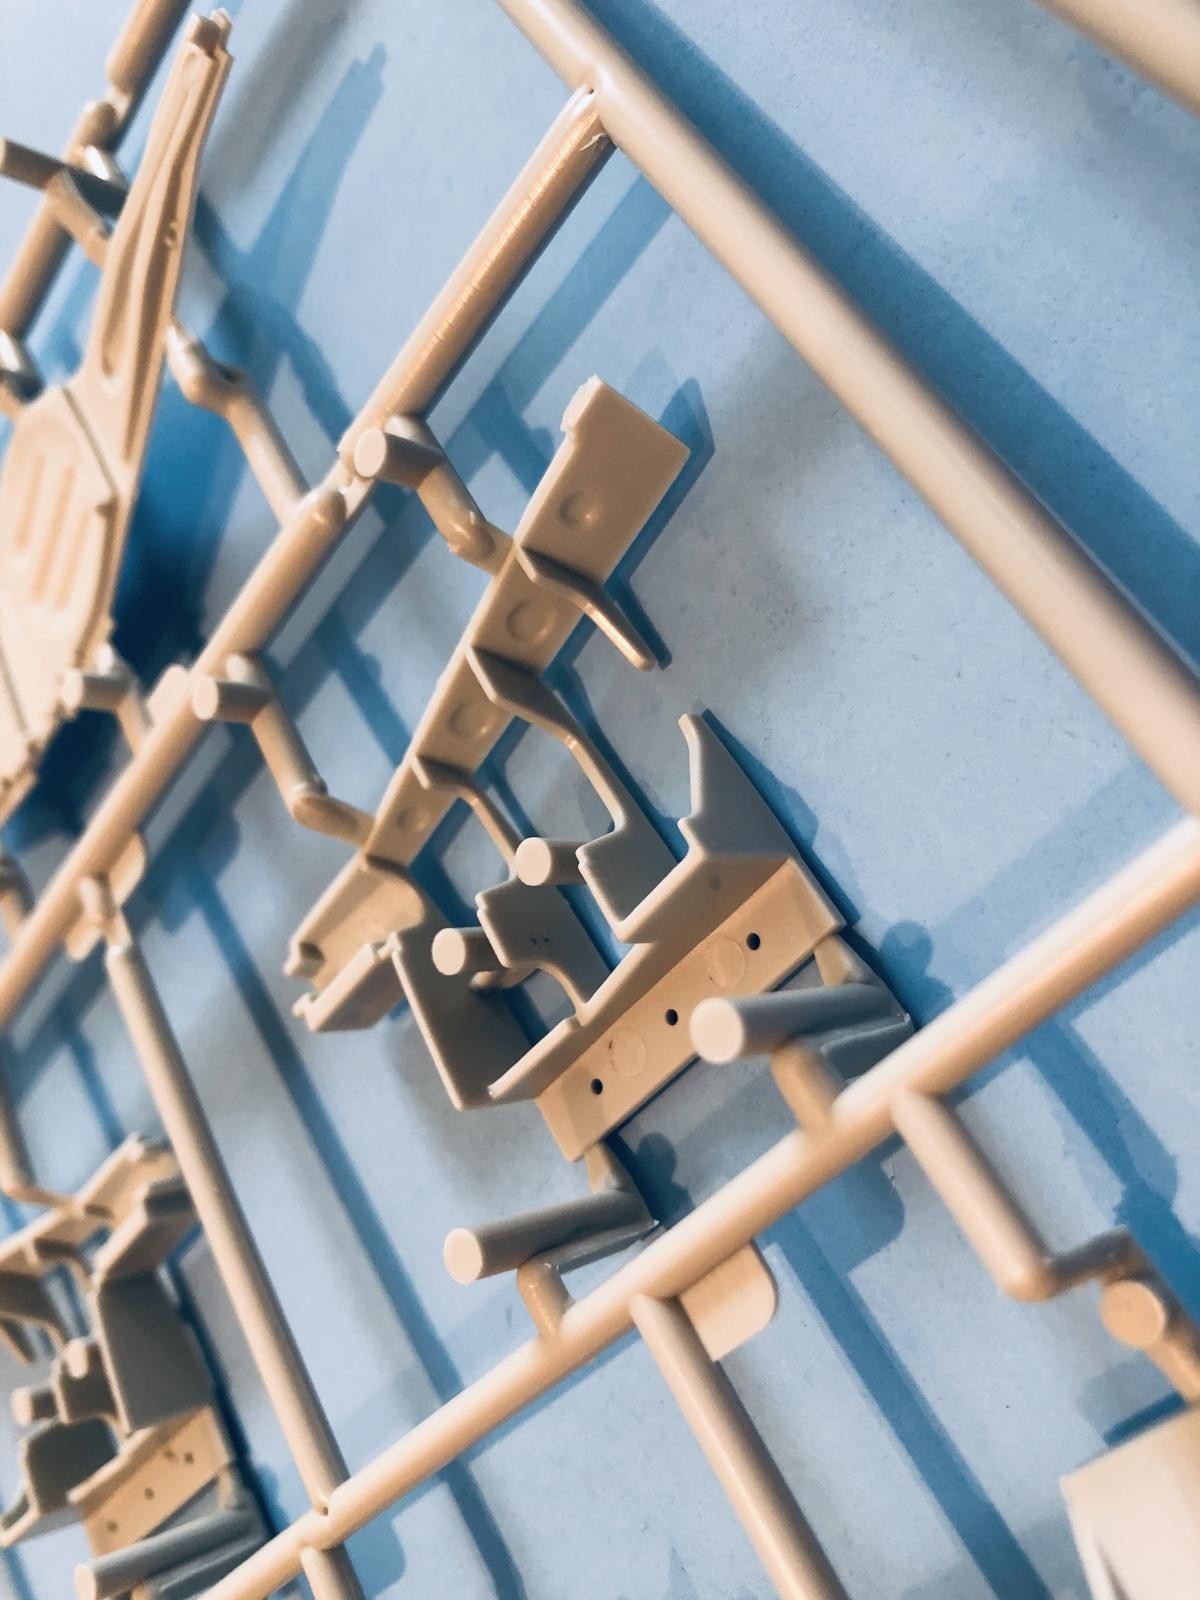
The main gear is also nicely represented...
-

- 1. Main landing gear struts.
- 2. Hydraulic pipes and various tubes found inside the wheel wells.
as are the wheels which are comprised of two halves.
-

- 1. Main wheels.

Here's a close up of the inner side that is closest to the gear door:
-
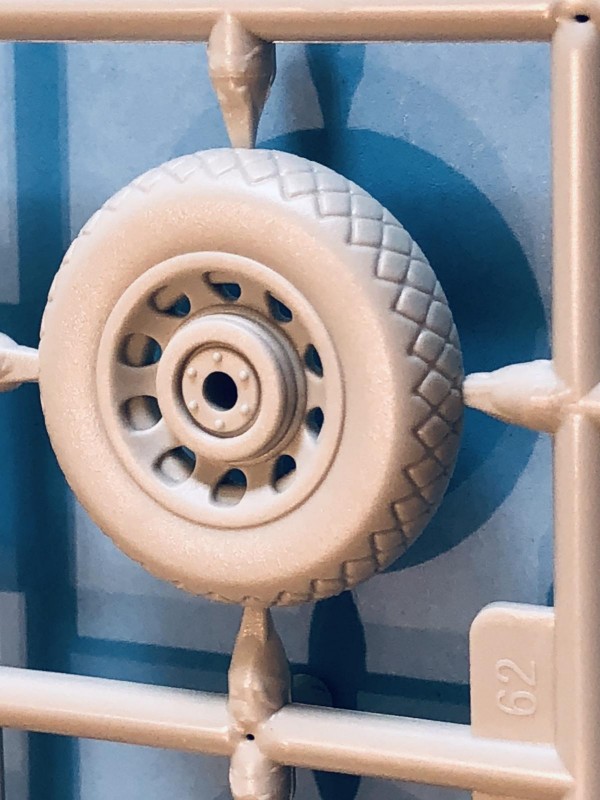
- 1. The tire tread and brake hub details are nicely represented.

and the outer half. You can even see the tire inflation valve on the rim.
-
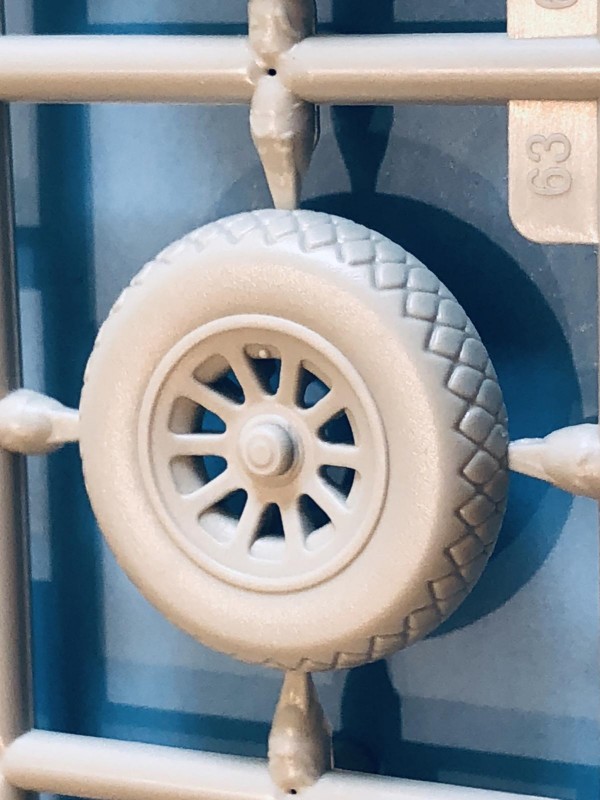
- 1. valve stem

The main landing gear doors are oddly provided as a one piece unit... If you want to display your model with the gear down, you have to cut apart the doors. It would have been nice if they would have provided a separate set of doors for the open / lowered gear option AND a set for the closed / raised landing gear... This is something you will need to exercise care while performing the surgery... I'll let you know how it goes on mine.
-
- 1. This part will have to be cut apart for a plane with lowered landing gear.
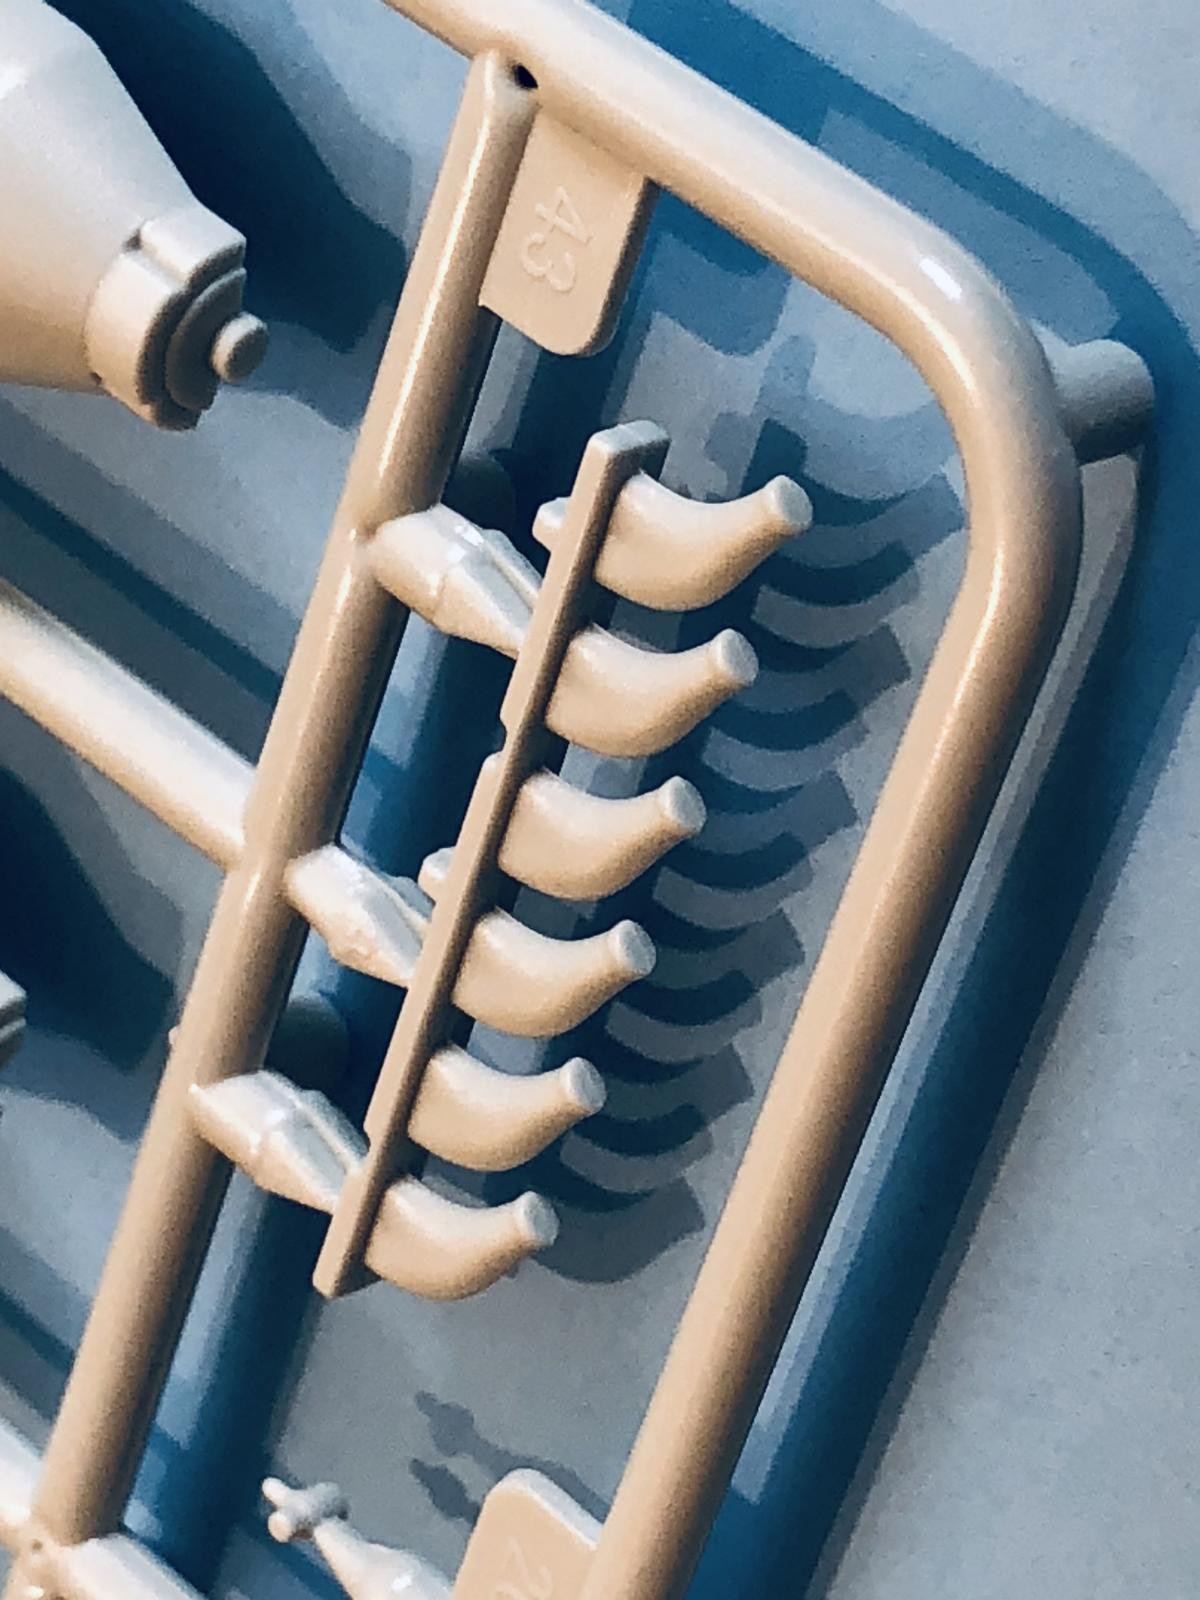
Two identical plastic trees are provided for the under wing ordnance / fuel tank parts. They also contain the exhaust manifolds, main wheels and the radiator faces.
-
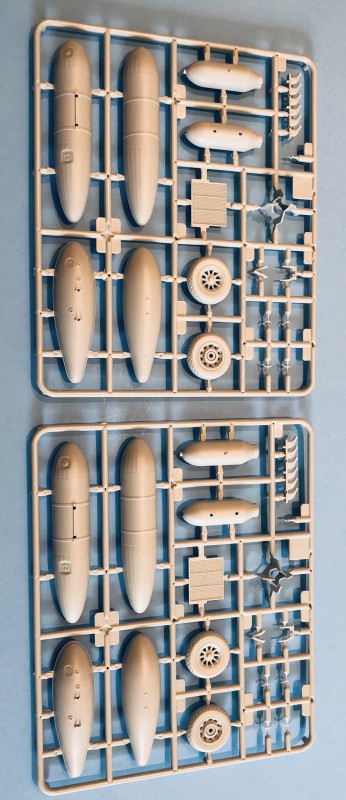
- 1. Two identical parts trees

Here you can see how the "Iron Bombs" and radiator faces are molded. The fins are also included on this tree.
-
- 1. Iron bombs.
- 2. Exhaust manifolds.
- 3. Radiator face.
- 4. Bomb fins.

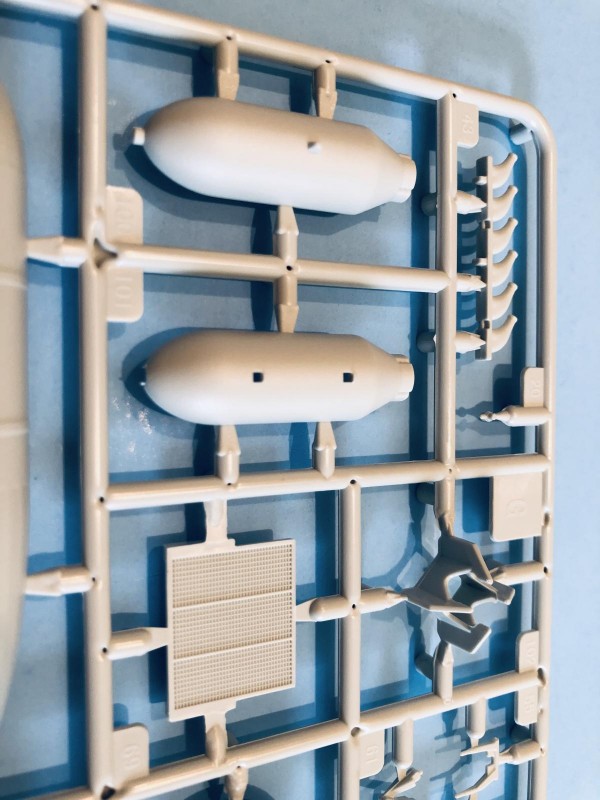
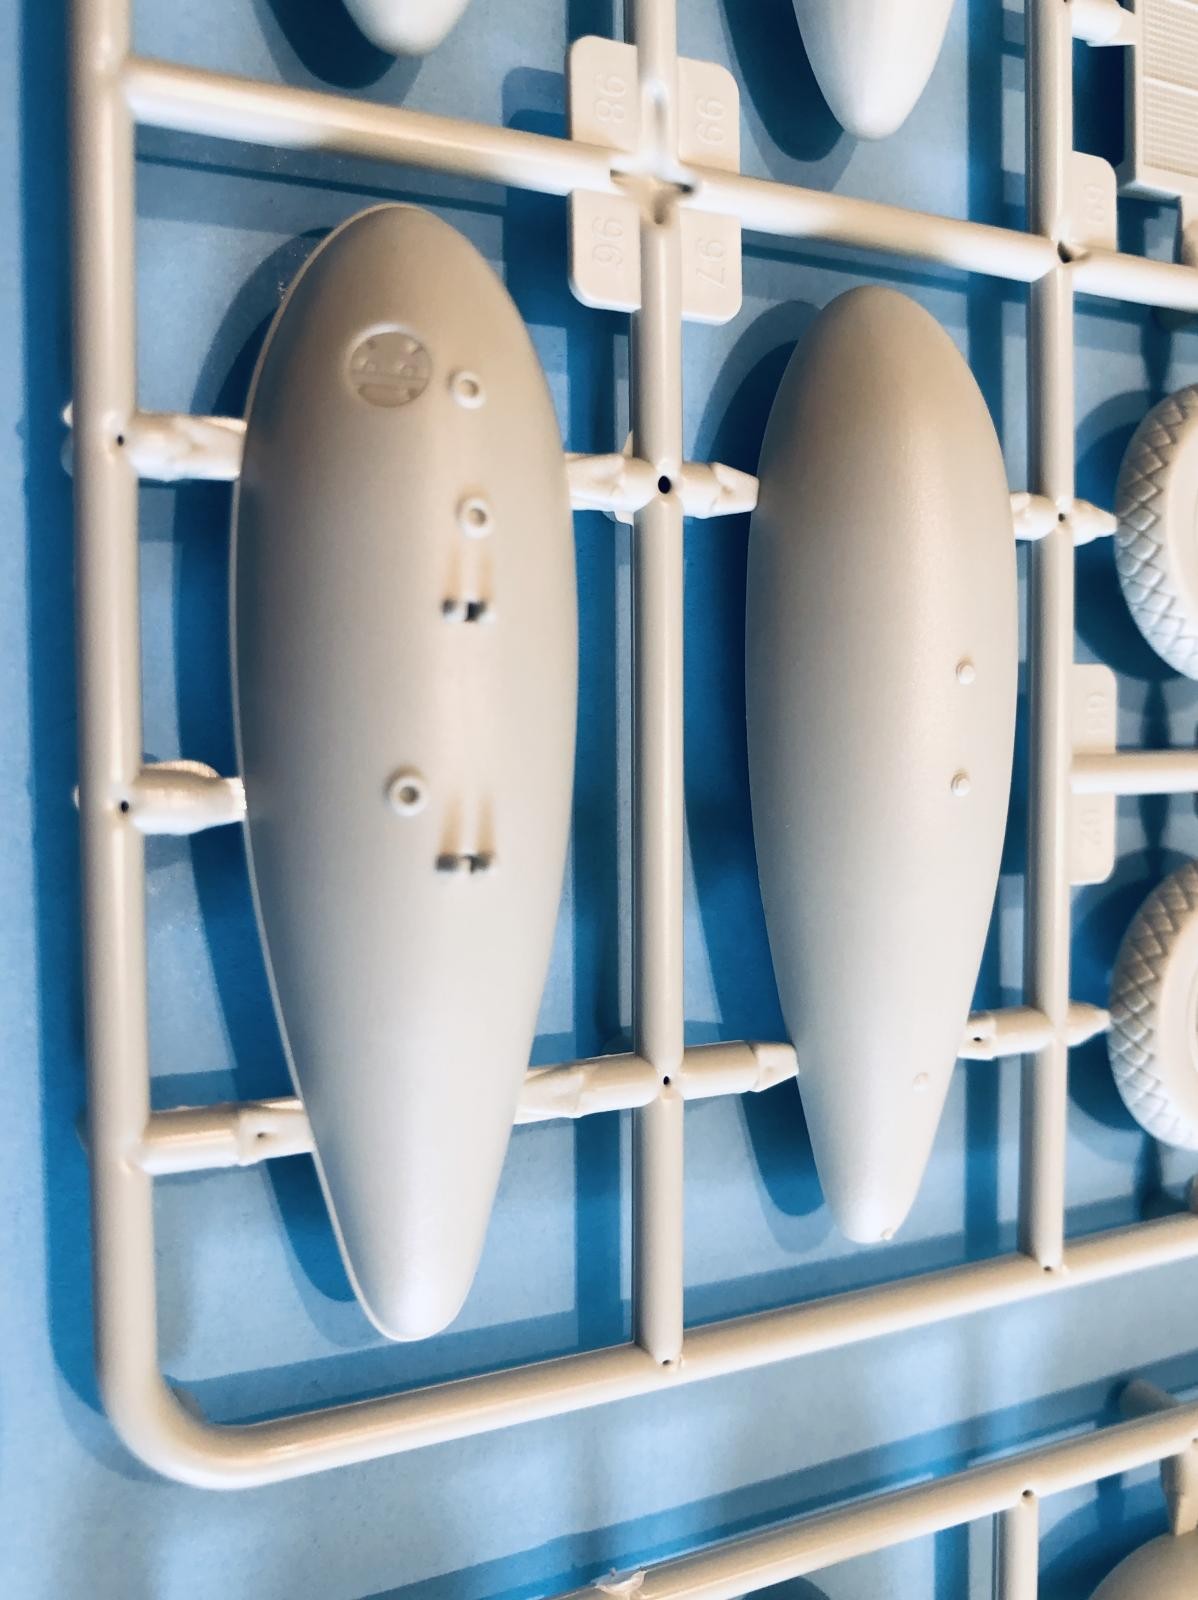
Next we have a close up showing the metal drop tanks.
-

- 1. Metal drop tanks.
and finally the compressed paper drop tanks.
-
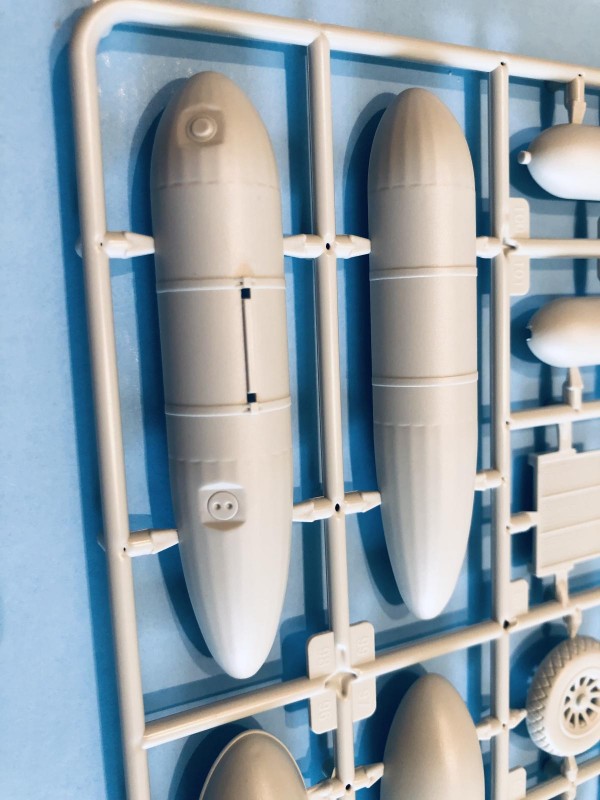
- 1. Pressed paper drop tanks.

I think that they did a bang up job with this one. I have started a build journal on this model. You can see how it's coming along by following this link:
https://imodeler.com/groups/work-in-progress-aircraft/forum/topic/1-32-revell-of-germany-p-51-d5-mustang-painted-as-major-preddys-cripes-a-mighty-3rd/
Too bad that poor business practices have caused us here in the US to not have this kit available to us anymore. It is still available in Europe, and will "hopefully" become available here again in the US.
The ground work has been laid out for a very nice later D model Mustang, using some more new parts that could be interchangeable.
Time will tell.
Thanks for looking.
As always,
Comments are encouraged.
I grabbed one of these last year when I started a new stash. I planned on making it the "Galloping Ghost" with bare metal foil and a replacement resin tail I found on eBay. I started looking for another when I saw the demise of Revell and the prices already started to creep up. I imagine it will be re-released at some point but I'm rethinking the build as maybe "Frenesi" or "Happy Jacks Go Buggy". For the money they are going for now I'd probably spend it on a Tamiya. I'm looking forward to watching your build, it really looks stunning in all the promotional photos and a few builds I've seen online, and judging by the way your Ki-61 turned out this will be stunning.
Jim
Hello Jim ! @jimh
Those would be some excellent choices to build ! I've been watching your work with "Betty Jane" (and now your ANG plane), and both are fantastic. You were a very smart man to grab one of these kits when you did.
Like you, I'm hoping they will release this one again soon... it's a beauty. Hopefully when they do, it will be at (or very near) the original list price. Otherwise, if the price is too much higher, then I would opt for the Tamiya kit as well. The thing that drew me to this kit was the lack of a tail fillet which will allow you to build an early "D" model right out of the box with no mods. The price was also very appealing... you got a lot of "bang" for your buck.
I'm going to be using a combination of Bare Metal Foil and various silver paints when I build mine. If I'm fortunate enough to find another one, and not have to take out a mortgage on our home, I'll build up one using the kit supplied decals for "LOU IV". Now that I have found some pictures that Dana Bell has posted on how it was painted, I want to do that one too. Here's a sneak peek...
Time will tell. Should you decide to start a build journal on your 1/32 Mustang, you can count me in as a follower... 🙂
Thanks again my friend.
I signed up for this website solely to warn other modelers about this Revell/Germany 1/32 P-51D kit. It is the worst I've had since I swore off Airfix kits long ago. As a professional with years and hundreds of ship, F-1, aircraft and other plastic kits behind me, my recent attempt to build this kit ended in total failure...and the trash can. And I honestly haven't trashed a kit in perhaps 10+ years. Panel lines that don't line up (near tail wheel), fuselage so thin on the nose one must reinforce from below with plastic stock to avoid cracking the seam line with any pressure, the weird design of the leading edges and poor fitment to the wing proper (yeah, it's a six-gun plane but I can see the leading edge fillets would work for a 4-gun earlier Mustang, hence why they were molded separately) difficult to near impossible wing to fusleage fitment, likely due to an effort to avoid and gaps. Yet, if one can't join the two due to severe interferenmce, what's the point? I could go on (big gap between the cowl and front windscreen) but won't.
I guess I'm spoiled from some of the modern and wonderful AMK, Tamiya and Meng aircraft kits of late that I build into stunning models. This kit all should take a pass on.
Yeah, it's cheap, very cheap compared to all the quality 1/32 Mustang kits (Taimya, Meng) yet you will pay the piper in frustation as you cover it with lots of filler while swearing to the heavens: why did I buy this pierce of junk? You'll thank me later...
Wow! Bummer! I almost picked one up! I thought this was a “build review” or I wouldn’t have bothered reading this!
How can do many prattle on about a box of parts they haven’t even put together. There is a warm place in hell for people who write all of these dumb worthless “first to open the box” —-REVIEW—- ha! You’re wasting everybody’s time if you haven’t built the kit and may be misleading them because you thought your uninformed opinion was worth something.