Review: H-K Models 1/48 scale B-17G Flying Fortress – here it is with the full review
Utilized by the USAAF as a strategic weapon, the B-17 was a relatively fast, high-flying, long-range bomber with heavy defensive armament at the expense of bombload. When Seattle Times reporter Richard Williams first saw the Model 299 prototype in 1934, with a large number of machine guns aboard, he described it as a "15-ton flying fortress" in a photo caption; Boeing immediately trademarked the name. The aircraft developed a reputation for toughness from stories and photos of badly damaged B-17s safely returning to base. It dropped more bombs than any other U.S. aircraft in World War II. Out of approximately 1.5 million tons of bombs dropped on Nazi Germany and its occupied territories by U.S. aircraft, more than 640,000 tons were dropped from B-17s.The B-17G Flying Fortress was the most-produced sub-type of the B-17 series, with 8,760 produced by Boeing-Seattle, Lockheed-Vega in Burbank, and Douglas-Long Beach.
If there was a B-17 worthy of being called a “flying fortress,” it was the B-17G. The sub-type, which first appeared in squadron service in August 1943, was the result of hard-won experience in combat. The airplane incorporated all the changes that had been introduced to the B-17F. It featured a Bendix gun turret under the nose equipped with two .50-caliber machine guns controlled by the bombardier, which went far to solve the major problem of a lack for forward-firing defensive armament; this was supplemented by manually-operated “cheek” guns originally installed as a post-production field modification and later adopted on the production line. With the upper turret, lower ball turret, tail “stinger” each equipped with two .50-caliber weapons and two waist guns, it was truly a “porcupine” as it was known to Luftwaffe pilots.
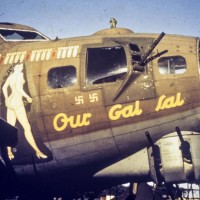
“Our Gal Sal” - Queen of the Bloody Hundredth:
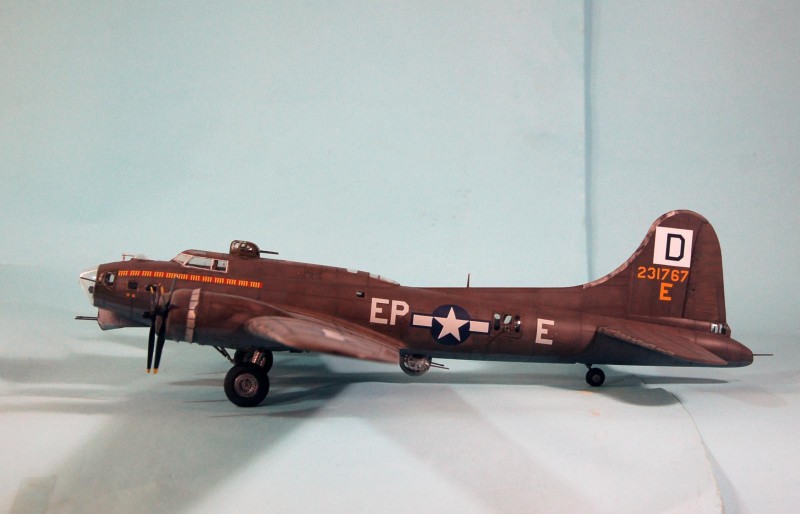
B-17G 42-31767, the fourth Boeing-built B-17G-30-BO, rolled out of the Boeing factory in Seattle on December 12, 1943 and was delivered to Lowry AAF in Denver the next day, where she received combat modifications. She arrived at Kearney AAF in Kearney, Nebraska on December 31. After flying trans-Atlantic via Goose Bay, Labrador, Greenland and Iceland, she arrived at RAF Nutts Corner in Northern Ireland on January 16, 1944. The next day she was flown across the Irish Channel and delivered to the 100th Bomb Group - “The Bloody Hundredth” - at Thorpe Abbotts airfield, in East Anglia, England. Two days later she became EP-E, assigned to the 351st Bomb Squadron and the crew headed by then-2nd Lieutenant Robert J. Shoens which had arrived at Thorpe Abbots five days earlier, on January 12. Master Sergeant Robert Waldrick, 22 years old and considered one of the most experienced crew chiefs in the squadron, was assigned as crew chief, a position he would hold with the airplane throughout her combat life.
Shoens' father had served in the Navy during World War I and his mother volunteered on the World War II draft board. His love for aviation was cemented at age 11 when he saw the Dare Devils perform. In 1941, during his second year of junior college, he decided that he wanted to serve and become a pilot. Turned down by the Navy recruiter, he walked down the hall to the Army Air Corps recruiter's office and enlisted as a private in the United States Army. At the age of 20, he began training, after which he received his commission.
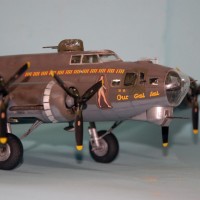
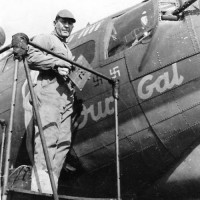
Lieutenant Shoens made a deal with Group Artist Staff Sergeant Frank Stevens (he's the older guy on a ladder by the nose in the photo below) paint the artwork for the airplane on aircraft fabric that was then glued onto the side of the plane, producing one of the largest examples of appliqué seen in airplane nose art. Stevens used his considerable skill to produce a fine study of the female form dressed in the thinnest of swimsuits (to avoid confrontation with the censors). The airplane's name was taken from the popular song, “My Gal Sal,” with the crew demanding a change to “Our Gal Sal” since the bomber belonged to all of them.
“Our Gal Sal” flew her first mission on February 3, 1944. By the end of “Big Week,” she had flown 15 missions. Mission number 16 on March 4, 1944, saw her formation the only one to break through the weather and drop the first Eighth Air Force bombs on Berlin. Mission number 17 was flown again to Berlin, on March 6. The weather that day was clear enough that crews recalled being able to nearly see Berlin from over England. Losing contact with the lead aircraft, Shoens attached his bomber to another group. Luftwaffe fighters and flak saw 60 bombers were lost on this mission, equaling the losses of “Bloody Thursday,” the second Schweinfurt mission on October 14, 1943. “Our Gal Sal” was the only survivor of 15 sent out by the 351st squadron to return to Thorpe Abbotts, with a claim for shooting down two enemy fighters. The only damage suffered was flak damage to the Bendix remote turret, which was replaced by an unpainted turret, marking “Our Gal Sal” as being different from all other B-17Gs in the Eighth Air Force. Shoens flew his 28th and final mission to Munich on May 1, 1944, for which he was awarded the Distinguished Flying Cross.
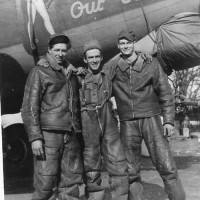
After Shoens' crew departed for home, “Our Gal Sal” flew on through the skies of Europe for the next 12 months to the end of the war, never turning back for a mechanical defect, a tribute to the care of Master Sergeant Waldrick and his two assistants, Sergeants Nels Davidson and Arnold Shluter (the three are in the photo below - L to R: Davidson, Waldrik, Shluter). By the end of the war, she had flown a staggering 125 missions to become “Queen of the Bloody Hundredth.” 26 other crews flew her during this time. After the damage suffered on March 6, 1944, she was never struck by enemy fire again.
“Our Gal Sal” was flown back to the United States in July 1945 and disposed of for scrap at Kingman, Arizona, in August, becoming aluminum house siding and pots and pans for a post-war world she had done much to create.
The kit
The Monogram B-17G has remained supreme (and unchallenged) as the “go to” B-17G kit since it first appeared in the late 1970s. Over the years, modelers have wondered if anyone would ever produce a new kit up to modern standards. Last month at the Tokyo Hobby Show, H-K Models announced they would release a 1/48 early-production B-17G this coming November. The company had released a 1/32 B-17G in 2013 that has sold well in the years since.
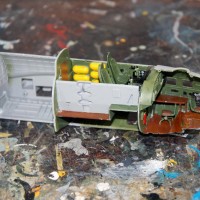
This new kit has the same production quality as the earlier model. Surface detailing is similar in quality to that of the recently-released Eduard P-51D. Interior detail is simplified in comparison to the earlier kit, but the fact is that there is little interior to be seen in the B-17 once the fuselage is closed up, and what is provided is more than adequate. Super detailers who get hold of the Falcon/Squadron vacuform B-17G clear parts may be able to show off what is there better, but most super-detailing will unfortunately go unseen in any completed model. The Professional Complainers who were upset that the nose of the 1/32 kit wasn't properly “flattened” on top ahead of the cockpit will be pleased to note that this area has been changed in this kit. (And they're already complaining over at You Know Where)
Construction
This test shot arrived without instructions. Having built two of the larger kit and having a set of instructions in the third kit I have here allowed me to answer questionable moments during the process of assembly.
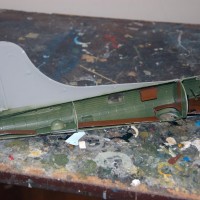
I began by painting all the interior parts before taking them off the sprues. I didn't go into a lot of detail in making the wood floors, as I did with the 1/32 kit reviewed here in 2013, since even in 1/32 scale one can't see most of that detail once the model is assembled.
The one suggestion I have for modelers who want to display the interior is that they pose the forward hatch, bomb bay and rear fuselage door open, and then cut open the doors in the bulkhead parts and pose the doors open, to allow as much light as possible inside the fuselage. You could also replace the side windows of the cockpit with thin clear plastic and pose the windows open, but you still won't see that much.
Assembly was straightforward, but it should be noted that the model will assemble more easily if the bomb bay doors are opened, though it is not that difficult to do a closed option, gluing the doors to their respective fuselage halves prior to further assembly. As I did with the earlier kits, I attached the tail and nose parts to their respective main fuselage half before further assembly, so as to be able to work the fit from inside and out and get it perfect without having to worry about using filler on any seams. Since these parts are separated from the main fuselage on a panel line, care here will be rewarded with good fit.
I also took time to scrape down the edges of the bulkheads a bit. The kit has very tight fit, and doing this will allow you to get the fuselage halves together without a lot of industrial-strength pushing and shoving to bring everything together.
I glued the cheek and waist guns in position so they could be inside the fuselage, with their gun barrels attached at the end of the project. One thing to note is that the armored waist position parts are larger than the clear glass parts, and you need to choose which you're going to use before assembling the fuselage, since you have to cut away plastic to open up that position for attachment of these parts. You should also know what airplane you are doing and check photos of the position, since these could be attached so they were either higher or lower than the standard glass opening.
The wings presented no problem in assembly. It is possible to assemble the main landing gear after you have painted the model, but it is far easier to assemble those parts at this point in the assembly. The good news for modelers with restricted display space is that the wings do not have to be glued to the fuselage, and can be removed. The attachment is quite tight and even if you don't intend to remove the wings for storage, you don't need to glue the wings. I was quite happy to be able to keep the wings off while painting the model.
Colors & markings
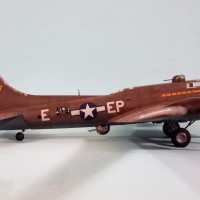
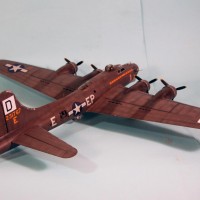
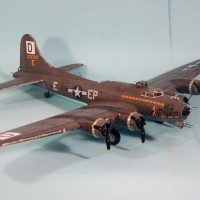
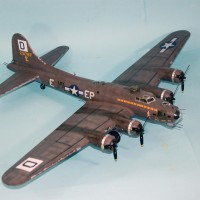
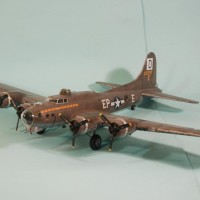
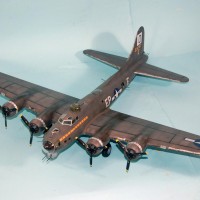
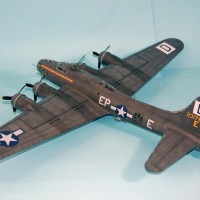
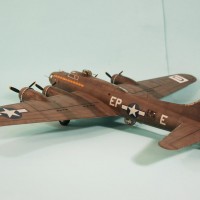
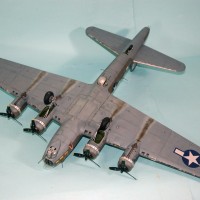
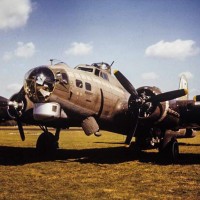
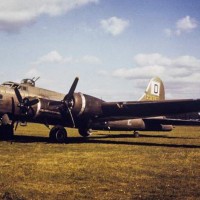
“Our Gal Sal” survived 125 missions, and the PYNup Decals from Meteor Productions depict her as seen with 65 missions. Painting instructions accompanying the decals say that the upper color had faded to a “muddy color.” Doing an internet search for photos of “Our Gal Sal” rewarded me with some color photos that showed this faded effect clearly. What you need to know in creating this effect is that 90% of the “sun fading” B-17s flying out of England experienced was at high altitude above the ever-present clouds, with the result that there is a strong ultraviolet effect in the fading. I began by mixing some “violet” from Tamiya X-16 “Purple,” adding in some white and red till I got what I wanted. After pre-shading the model and then painting the lower surfaces with Tamiya XF-53 “Neutral Grey” that I didn't fade further, I started the upper surfaces by airbrushing an overall finish of Tamiya XF-51 “Khaki Drab.” I then added in some of the violet, and went back over the surface doing “post shading.” This first application was followed by two more with a bit more violet added in each time as well as more thinner, then going over the surfaces. After the third pass, I added in some Tamiya XF-52 “Flat Earth,” then thinned the mixture and went over it again. I added in a bit more white and yellow for the fabric-covered control surfaces. One of the photos showed the rudder a little darker (perhaps a replacement?); I added some Khaki Drab back in and went over the rudder last.
Also, the deicing boots had worn away on the wing, vertical fin and horizontal stabilizers. Before proceeding with the above painting, I painted these areas Tamiya XF-16 “Flat Aluminum,” then “blotched” them with Tamiya XF-85 “Rubber Black”, then masking them off. The cockpit windows were also painted with flat aluminum and masked off, as were the cowling flaps.
The gear legs and wheel hubs were painted with Vallejo “Dull Aluminum” after being primed with Tamiya X-18 “Semi-gloss Black,” which was also used on the propellers. The Ball Turret and the Bendix remote turret were also painted with Vallejo “Dull Aluminum.” When finished, the model was given a coat of clear gloss for the decals.
I used Meteor B-17 national insignia, overlaid with the light grey star-and-bar decals, from decal sheet 48263 “B-17E/F/G National Insignia Part 4." The PYN-up decal for the figure went on over a white base decal, and looks very realistic. The other decals all went on without problem under a coat of Solvaset.
I washed the model to get rid of decal solvent residue, then applied an overall-flat finish. I used Tamiya XF-83 “Sea Grey Medium” for the turbocharger exhaust, then used Tamiya X-19 “Smoke” for the turbocharger and other engine oil exhaust. I unmasked the de-icer boots and applied some “Smoke” with a brush to simulate the nearly-worn-off rubber.
I then unmasked all the clear parts, attached the landing gear and props, installed the upper turret, ball turret and nose turret, and attached the gun barrels for the cheek and waist guns.
Conclusions
The H-K B-17G has an announced MSRP for $119.95 in the US (with some real bargains already announced for pre-orders, so shop around). This is $30 less than Tamiya is charging nowadays for their 43-year old Lancaster kit. It's approximately three times the price now being charged for the Revell (ex-Monogram) B-17G. So, is it three times better than the old kit? Yes. Fit is overall superb (unlike the older kit) and I was able to assemble this kit without use of any filler, only having to scrape down the seams, which preserved the petite surface detail. The surface detail looks very good to me, as someone who has been up close and personal with the real thing, and is certainly superior to the older kit. H-K has already announced they will be releasing a late production B-17G with staggered waist windows, as well as a B-17E/F kit (which is all guaranteed since the correct upper turrets are all on the clear sprue now).
The kit presents no problems that an average modeler who pays attention to the instructions and takes care during assembly can't deal with, and the result is a really impressive model of one of the most famous American airplanes ever made. Highly recommended to all. Kits World Decals has a ton of B-17s - available all over the internet.


Nice build & presentation as always, TC...good job.
Great job Tom. Looks like a real winner. The subtle quality of the paint application looks very realistic.
Very nice, Tom, and nice review.
beautiful finish...just outstanding
Lookin' good, TC --hope my version of my Dad's "Hell in the Heavens" turns out almost as well.
Sounds like this kit is a winner, well detailed and accurate. Guess next year will be building one, though might go for a NMF machine.
The OD fading is very realistic Tom, I like it a lot. Your “Gal” looks fantastic from here
Fortunately, the early B-17G has plenty of camo possibilites. Check Kits World Decals for lots of options.
Top job Tom. I also enjoy the history that goes with the airframe. I will wait for the E model as I would really like to do the multi coloured Hawaiin Air Depot scheme.
Great looking work Tom. Check out the posting on HS, the piranhas are having their usual feeding frenzy.
Which is why I made the snide comment I did in the review. 🙂
We're fortunate most of the worst of them stay there.
Egad! I went over there. The HyperFlailers are even outdoing their usual insanity.
If you've ever wondered where that brush you got tarred with for being a modeler (You're wierd!) came from, it was invented and produced over there. Those people are embarrassing to anyone with an IQ above room temperature.
Rebuild the outer engine nacelle? They make Large Slow People look like fully developed members of the species. (I never thought I'd say that)
Nice job, great review.
Here is something to ponder the chances of this happening. I just read this article, my given name is Richard Williams jr, my dad was Richard Williams,(not the reporter)he was stationed on Tinian Island in the South Pacific during WW2, my dad was the one who loaded the flight crew on the Enola Gay and help load the bomb when they went to bomb Hiroshima on August 6, 1945, i was born 15 years and 1 day after that event. Aug 7 1960. After reading this article about the reporter who coined the phrase Flying Fortress, i went wow, awesome job on this article and theodels, my first venture to this site, it is awesome, brings back memories.
Great looking B-17 Tom - I really like the realistic "road hard and hung up wet" look to it.
Another looker Tom. Paint work is great