Eduard 1/48 P-51D-5
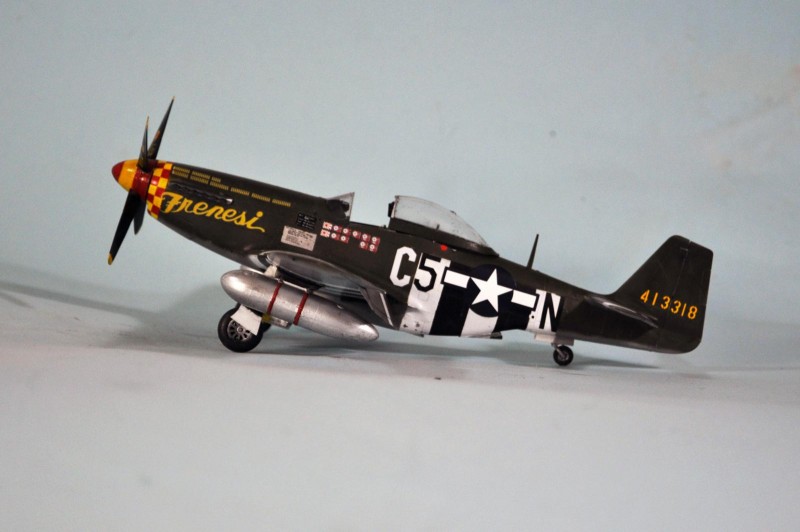
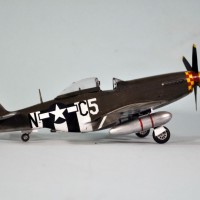
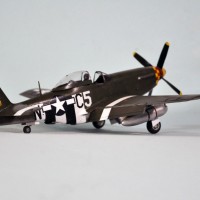
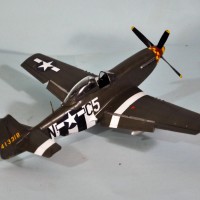
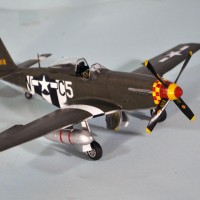
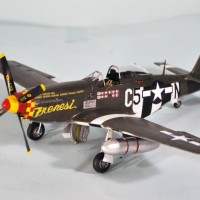
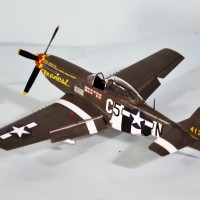
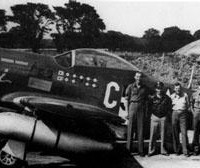
“Frenesi” was named after a song popularized by the great Artie Shaw, pronounced "Free 'n Easy". Why would a fighter pilot name his airplane for a song? Click here - https://www.youtube.com/watch?v=sMOHMYl5BCs - and find out. The airplane was one the very first D-model Mustangs the 357th Fighter Group received in late May 1944, and was probably the only one that was operational on D-Day.
Tommy Hayes:
Born March 31, 1917, in Portland, Oregon, Thomas L. Hayes, Jr., enlisted in the Aviation Cadet Program of the U.S. Army Air Corps on June 19, 1940. He was commissioned a 2nd Lieutenant and awarded his pilot wings at Kelly Field, Texas, on February 7, 1941. Assigned to the 70th Pursuit Squadron of the 35th Pursuit Group at Hamilton Field, California, from February to December 1941, he was among the first to be sent to Australia in January 1942, where he was assigned to the 17th Pursuit Squadron of the 24th Pursuit Group, which soon moved to Java at the end of the month. Flying combat there from the first Japanese attack in early February, he was shot down and wounded on February 19, 1942.
Evacuated to Australia, after he recovered from his injuries, he was assigned to the newly-arrived 35th Fighter Group in March. The group equipped with some of the 100 P-400 Airacobras that had originally been intended for the Philippines before they were stopped in Australia in February 1942. Flying from Three Mile ‘Drome at Port Moresby from late April 1942, he managed to survive combat against the Japanese aces of the Tainan Fighter Wing in May and June. By the time he received orders back to the United States in October, he had been credited with two Japanese aircraft destroyed on the ground in an action for which he received the Silver Star. The citation reads:
“For gallantry in action over Buna, New Guinea on August 25, 1942. Through a combination of heavy tropical rain and very limited visibility, Lieutenant Hayes skillfully piloted his P-400 type aircraft into position so that on the bombing run direct hits were scored and eight to ten enemy planes were destroyed on the ground, a gasoline dump went up in flames and a heavy calibre machine gun position was silenced. This very successful raid was accomplished against the Japanese at Buna. It was the second trip over the mountainous and jungle terrain to the target area that day for Lieutenant Hayes. On the first flight adverse weather prevented the formation from locating the enemy. Courage and determination were displayed by this officer in undertaking a second hazardous mission immediately after the first flight returned to the home base.”
Returning to Hamilton Field in December after home leave, he was assigned as a flight instructor with the 328th Fighter Group until May 1943. That month, he joined the newly-formed 357th Fighter Group at Santa Rosa and Oroville Army Airfields, California, as Commander of the 364th Fighter Squadron. The 357th FG deployed to England in December 1943, where they received new P-51B Mustangs to become the second USAAF fighter group to operate the type. Originally assigned to the Ninth Air Force, they were “swapped” to the Eighth Air Force at the end of January 1944.
Between the group's entry into combat in February 1944 and March 28, 1944, he was credited with 4 enemy destroyed, plus 1 probable. On March 28, Hayes was promoted to Deputy Group Commander, serving until August 14, 1944. During this time he added another 4.5 enemy aircraft destroyed in the air, for a total of 8.5 destroyed in the air, 1 probable, and 2 destroyed on the ground. His replacement as Deputy Group Commander was another South Pacific veteran, John D. Landers.
Returning to the United States, Hayes served as the Deputy Training and Operations Officer with the 3028th Army Air Force Base Unit at Luke Field, Arizona, until April 1945, when he was promoted to Colonel and assigned as Director of Training and Operations, Air Inspector, Deputy Base Commander, and then Assistant Commandant for the 3028th Army Air Force Base Unit at Luke until November 1946, when he became Commanding Officer of the 3010 Army Air Force Base Unit at Williams Field, Arizona, until July 1947, at which time the Air Force sent him back to the University of Oregon to complete his bachelor's degree.
Hayes served as a Planning Officer with the Plans Division at Headquarters U.S. Air Force in the Pentagon from September 1948 to November 1951, then attended NATO Defense College from December 1951 to May 1952. He was assigned to the NATO Combined Exercise Planning Department from June 1952 to June 1955, followed by service as Assistant Deputy for Operations with Headquarters Western Air Defense Force at Hamilton AFB, California, from July 1955 to September 1956. Col Hayes served as Assistant Deputy Chief of Staff for Operations with Headquarters Western Air Defense Force at Hamilton from October 1956 to September 1958, and then as Deputy Chief of Staff for Operations with Headquarters 28th Air Division at Hamilton from September 1958 to October 1959.
Promoted to Brigadier General, he became Chief of the Plans Division and Acting Director of Plans and Policies with Headquarters NORAD, from October 1959 to July 1962, followed by service as Commander of the Minot Air Defense Sector at Minot AFB, North Dakota, from July 1962 to July 1963. He was Vice Commander and then Commander of the 65th Air Division at Torrejon AB, Spain, from July 1963 to July 1964, and then Commander of the 86th Air Division at Ramstein AB, West Germany, from July 1964 to January 1966. His final assignment was as Deputy Commander for Resources and Management with the Military Management and Terminal Service at the Pentagon from July 1966 until his retirement from the Air Force on February 1, 1970. Tommy Hayes died on July 24, 2008, and was buried at Arlington National Cemetery.
The Kit:
This is the second P-51D-5 kit I have reviewed. If you don't know what's in the box, I'll refer you to the earlier review.
I am sorry to report that the Eduard decals that come with this kit are the worst I have ever found in any Eduard kit since they gave up using Propagteam decals. I had sheets from two different kits that were the same, so it can't be laid to a one-off printing error.
The problem is the decals are too thin and are translucent. This is particularly troublesome with the yellow markings for the “Frenesi” option, since they go over dark green paint. I was fortunate to have two kits, because it took both “Frenesi” decals overlaid to get a result that was acceptable. The serial numbers folded when I started to slide it off the backing. When I used a replacement from the second sheet I had a worse result. I ended up using serial numbers from the Bullseye Decals “Yoxford Boys #1" sheet. If you want to do P-51Ds, both “finned” and “unfinned,” the four sheets this company has released are marvelous and I highly recommend them. Do note that Bullseye Decals are only available through Sprue Brothers.
If you are determined to do “Frenesi,” as I was, then I recommend the Eagle Editions Eaglecals EC-102 “To War With The Yoxford Boys,” which has this option, since those decals are of dependable quality. The problem with the kit decals also extended to the ID letters; had I not had two sheets, I could not have completed this project. I used Fundekals national insignia that went over the D-Day stripes without bleed-through, which the kit decals failed to do. I wish my report here was otherwise, since in every other way the kit is wonderful, but modelers need to know the facts. I wasn't aware of this problem with the first P-51D-5 kit I reviewed, since I used aftermarket decals for that project, and the decals for the initial “Chattanooga Choo-choo” release I used presented no problems.
I also received several Brassin sets for this kit: resin cockpit; resin prop and spinner; three sets of wheels with different tread patterns; cast metal gear legs and resin gear doors; and resin exhausts. I have to report that when I compared the resin cockpit parts with the plastic parts in the kit, I could not see any superiority of the resin; once the cockpit is assembled and inside the model, there will be no difference that is observable, other than the seat, which has a pad on the resin part. (This is also the result I found with the resin cockpit for the Tempest V.) As regards the resin prop and spinner, I could see some variation in shape of the spinner and blades compared to the plastic parts, but I had to look a long time. Some of the “never ever satisfied crowd” complained about the shape of the blades when the kit was first released, but the difference is so slight and so subtle that 99% of those who look at the result will not see the problem. I also couldn't see any significant difference in the shape of the resin spinner compared to the plastic parts. The tires are nice, but I'm not recommending them other than you should get them if you simply must have a resin something on your model; again, 99% of people are never going to notice the difference, and in fact the plastic wheel hubs are superior. The gear legs look nice, once you scrape off the mold seam, but since I had no problem with the plastic parts on the other two Eduard Mustangs I have built so far, they're not something I would invest in, and the fact they don't like being painted silver is another strike against them. The resin gear doors were not better than the original plastic parts. The resin exhausts have the ends open; that's never been a high “must have” for me. In the end, the only “aftermarket” part I used was the seat, and I could done otherwise and not missed it.
Once again, these goodies reminded me “it goes to 11!” My advice on all these Brassin sets is: save your money (they're expensive) and apply it to getting another P-51D model. Again, Your Mileage May Vary, and remember the Al Superczynski Rule: It's your model, build it the way you want. The “resinaholics” at Hyperflail can now rise from their fainting couches.
Construction:
As with all the recent Eduard releases, this kit demands you bring as much modeling excellence to the project as it does. All parts fit very precisely, and any sloppiness in cleaning up all sprue nubs, or hamfistedness in assembly, will lead to multiple problems down the line. Take care in preparation of parts, take care in assembly, commit to the revolutionary act of following the instructions, and the result will be one of the best models you have ever created. If you do it right, you won't be using any filler anywhere (other than on the wings if you so choose).
Construction begins with the cockpit. I painted all the parts on the sprue before further assembly, following the kit instructions regarding colors. There are a myriad of small parts, so take care in separating them from the sprue lest you feed the carpet monster or they fly off into the Department of Lost. Fortunately, my new government-supplied eyeballs (with 20/20 vision restored) allowed me to put the optivisor aside, but if you have one (and haven't had the lens-correction operation) you're probably going to need it to get everything done. The result is a very good looking cockpit. I don't think the resin guys are going to beat this. I used the photo-etch instrument panel and most of the other bits (other than those way too small to make out, and there's quite a few of them for the more determined modeler), as well as the very nice seat belts. Since I was doing a 357th FG P-51D-5, I used the K-14 gyro gunsight because they were the first group to completely equip with the "ni missum" sight.
I followed the instructions for attaching all the other fuselage interior parts, and when it came time to bring the fuselage halves together, all was well. I only needed a light scrape down of the centerline to get rid of minor glue build-up.
As I noted, the wheel well includes 13 parts. Since I was doing an early P-51D, I painted the main spar yellow zinc-chromate and the rest of the parts with Vallejo White Aluminum to simulate aluminum lacquer. Once it was all assembled, I brushed some Tamiya smoke over everything to simulate oil and dirt and to “pop out” detail.
The wing came together without difficulty.. I particularly liked the separate section for the machine guns, which obviated having to clean up a seam through them. For this kit, I did not fill the panel lines in the wing, since that had not proven to be so important given the effort required when I did the previous Eduard kit. The fact this wing would be painted with camouflage paint also helped that decision.
Attaching the wing and fuselage sub-assemblies presented no problems, and I finished off with attaching the horizontal stabs and the radiator exhausts.
Colors and Markings:
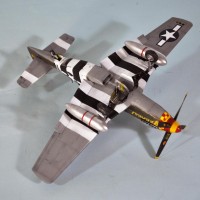
“Frenesi” presents a fairly complex paint scheme. I started by painting white for all the ID stripes and the nose and spinner for later painting with yellow. I then masked the white stripes. The ID markings on the upper wing and horizontal stabs was 15 inches, which I did with drafting tape cut 5/16 inch wide. The D-Day stripes are 18 inches, 3/8 inch wide in scale. I was able to use Tamiya tape for these, since it has a roll that width; this made it easy to get around the various curves on the fuselage. After painting the nose yellow, I masked it off with Tamiya Tape. I then painted the black stripes, and pre-shaded the rest of the model. With the black striped masked, I used Tamiya XF-81 RAF Dark Green for the upper surfaces and XF-83 RAF Sea Grey Medium for the lower surfaces. With everything unmasked and allowed to cure overnight, I gave the model a coat of clear gloss.
My trials with the decals are listed above. The bottom line is, at least for this option, the Eduard kit decals were too thin and translucent. If you use the kit decals for any other option, be aware they are very thin and want to fold up like a cheap suit at the first opportunity.
I gave the model a coat of clear satin, which mimics the waxed look in the photograph. I then attached the gear and prop and mounted the canopy in the open position.
Conclusions:
Eduard's P-51Ds are beautiful. If you buy one of the overtrees kits at $19.99, add in Eduard's photoetch for the cockpit, and grab an aftermarket decal sheet (if you're not completely overstocked with P-51D decals), you'll save money over the Profipack kit and you won't suffer the disappointment I did with the kit decals. The plastic in the box is wonderful and it's all you need, with “some modeling skill required.”
Another good one Tom. Odd about the decals and even odder, I've never built an Eduard kit
Nice pony Tom. I had similar issues with their decals on another kit. Thin is good but not to the point of translucency and folding back on themselves.
Nice to know the history, i had always thought it was prounounced Frenezzi as in Frenetic. The more you know!
I've always thought he named it for the song because the song did the same thing for him it does for me - remind me of a great day of flying. Free 'n' easy!
What a beauty im starting to worry bout new decals cos this Is not first time a heard bout these problems. Going to build fw190 A8 So i will see
Remember reading some time ago at Eduard’s newsletter that they were getting a new decal printer starting with their Mustang kits. Wonder if this D-5 box is the first one using those? The royal edition decal sheet I have is made by Fundecals, and they look sweet, hope they don’t behave as badly as yours did Tom. Great build as usual
Fundekals are always good.
Nice job Tom and thanks for the story. I read this yesterday on MM and am glad it ended up here. It's nice to see the photo images in a larger size.
Very nice build and once again the history behind the airplane is superb. Thanks for details on the build. I'm beginning an "overtrees" kit to build Jerry Yellin's "Dorrie R". Jerry was a friend and he died a couple of years ago...he flew from Iwo on the last fighter mission of WWII.
Sorry to hear about the decal problems. I’ve never had any problems with Eduard’s recent decals. As I look at my copy of that “Frenesi” sheet, the markings are perfectly printed and in register. However I see what you mean about how thin they appear to be. No worries. It’s a great kit nevertheless and I’m going to use markings by Lifelike Decals anyway. Should have this pony fired up and running in a couple of weeks.
Another good looking build, Tom. Great advice as always.
Yeah, they look perfect till you use them.
Another good looking Mustang Tom! Great story also.