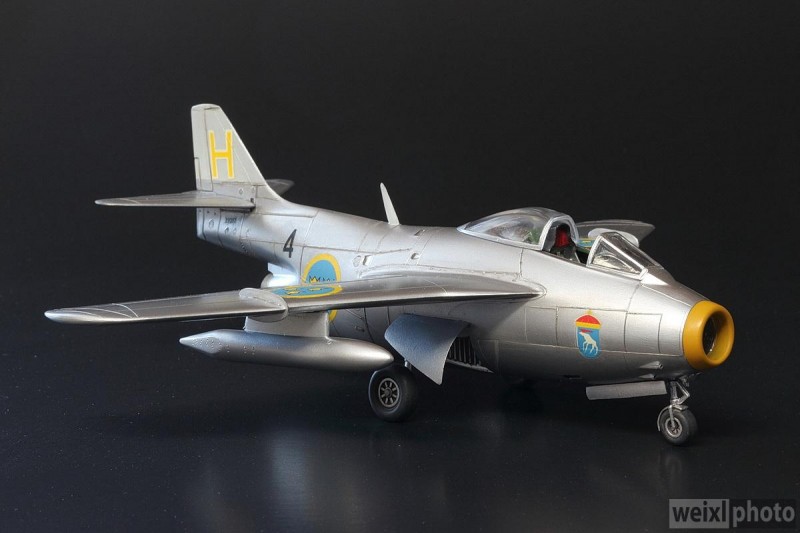
1/72 Scale Heller J-29E SAAB Tunnan “Flying Barrel” by Don Weixl June 2020
I have had this kit in my stash since the late 70s! I think it cost about $4.00 Canadian back in the day. Heller's 1/72 scale aircraft kits were generally really good for that era, although the decals were a bit on the crude side. Raised panel lines were the norm, but I am Ok with that.
I enjoy the less popular and somewhat quirky jets from the 50s and 60s. I did a bit of research on the Flying Barrel. Apparently it was quite the performer in it's day. It was comparable or better performing than the F-86 Sabre. Besides Sweden, Tunnan's were sold to Austria.
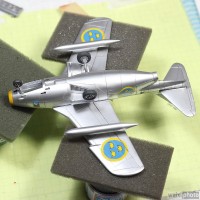
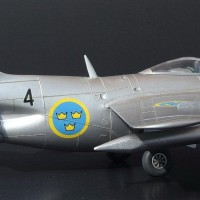
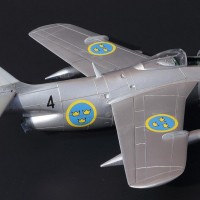
The kit was built without any modifications. Minor gaps were filled using Mr. Surfacer 500 primer /putty. I love this stuff. I rarely use conventional putty anymore. You can thin it with lacquer thinner and apply it with a fine paint brush into cracks etc. The bare metal finish was replicated using Humbrol Metalcote 27001 polished aluminium thinned with lacquer thinner and sprayed through my single action Paasche H airbrush. I did not use any primer as I find shiny plastic as a base will give a smoother metallic finish.
To give the model a bit more depth, I used an acrylic “sludge” wash made from dark gray acrylic paint mixed with water and dish soap. I flowed this mixture along the raised and recessed panel lines using a fine paint brush. After a few minutes, I removed any excess with a Q-Tip swab.
The kit decals are pretty challenging to use as you would expect from a 40 year old kit. However with patience and hot water, they can be made to work and even settle down over panel lines. I carefully cut away any clear decal film which had yellowed over the years. I did not use a clear coat on the model.. In my experience, clears can yellow over time so I am avoiding them when I can.
I added the wing pylons and fuel tanks after the kit was painted. There was a fairly large gap between the pylon and the wing. It was too late to use putty so I used the trick of mixing acrylic silver paint with white glue. I flowed this mixture into the gap and wiped off the excess with a Q-tip.
Hi Don! This is a fantastic build of a sweet Heller model. You did a great job.
I love old Heller models, I find them joyful to build.
I face the yellowing-over-time-clear-varnish problem too...
On the other hand, varnish is supposed to enhance the look and protect the camo, or not?
I've noticed that my oldest built models (45 years before) were left unvarnished and haven't yellowed so far...This is interesting and I might consider leaving some (say the NMF) of my models unvarnished.
All the best, my friend!
Hello Spiros.
Thanks you for the kind words. Working on an old Heller model is like a step back in time. No pressure to achieve amazing results. After all, it is only a $4 model!
I avoid clearcoats on natural metal and white finishes. On camo finishes I have used them, especially when I am trying to achieve a very flat finish. Flat clearcoats can hide lots of paint and decal roughness. In my experience, a perfect super glossy paint finish (like on a custom show car) is the most challenging to achieve. Any imperfections in the paint or decals, orange peel, etc. will show up in photos.
Happy modelling!
Well done Don, I hope mine looks as good when I get to it, here's my Heller CM170 built 2006 finished in Future, pic' as it is now !
1 attached image. Click to enlarge.
Thanks Allan. Are you saying the Future yellowed? Can't tell if it is the lighting or the paint. Nice Fouga...I nshould build mine but the decals are beyond hope. Maybe a private aircraft livery like gloss black would be cool.
It's my camera, the background is white melamine, I've had no problems with Future, I may have some spare decals if you want this scheme ! ------- here's a pic from 2006.
1 attached image. Click to enlarge.
Whoa…that’s better. She is a beauty! Super smooth finish.
Nice Barrel Don.
Although this is a box from the '70s, you really made a nice kit out of it.
Thanks John.
I don't think there was a boy growing up in Sweden in the 70s or 80s who did not assemble one of Heller's J 29. It is still possible to make a nice model out of it, as you have proven.
Thanks Stellan. The J29 is rarely talked about in the North American aviation press. I knew very little about it until I started some research to support my build. SAAB was an amazing company for such a small country.
Nicely done Don, those old kits can be built into some nice models with a little patience and some skill.
Thanks Tom. This old kit had no issues besides old decals. The fit was actually really good. In my opinion Heller was usually better than their competitors at the time such as Frog, Airfix and Matchbox.
Absolutely perfect! Very crisp build of a nice little Jet. Well done...love these Heller kits.
Thanks Thomas. I am a Heller fan as well. Reminds me of the "good ole days".
Impressive build with a great job on the NMF finish Dan.
The decals look great and a nice finish on the jet inlet...and you can't beat that $4 value!
The Tunnan was a great plane and an important part of an impressive line of SAAB aircraft.
I also have the old Heller kit and the decals are toast.
Recently, I found the Airfix kit (Heller molding) on Ebay for a great deal - and I was lucky enough that it came with a set of Flying Colours Aerodecals.
Really looking forward to try one with a camouflage scheme and the other with the UN markings. Seeing your build is great inspiration.
Thanks Dan.
1 attached image. Click to enlarge.
Thanks George. Those decals look very impressive compared to the old Heller ones! Humbrol Metalcote is an inexpensive option for an easy metal finish. I found the the trick is to thin it quite a bit with lacquer thinner before airbrushing. I look forward to seeing your completed "Barrel".
Looks very nice! I also have a 1/72 Tunan - not sure which boxing - but like George will probably seek out replacement decals - maybe one in UN livery.