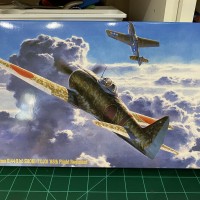
EoJ Group: All Black 1/48 Hasegawa Ki-44-II Shoki
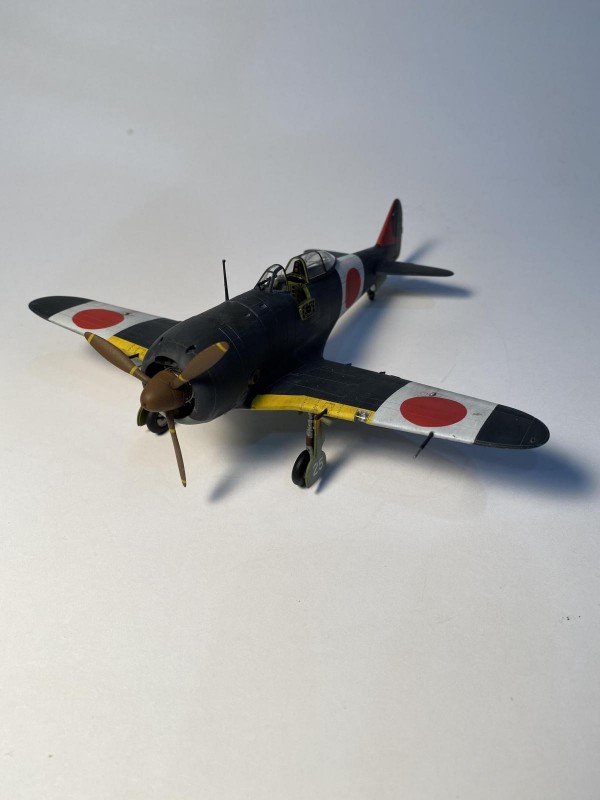
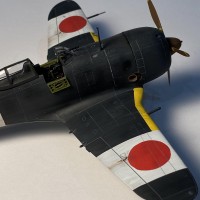
I built this kit for the Empire of Japan Group. I had discovered some diagrams of a Shoki with an all-black paint job. Although the prospect of an all-black plane was daunting, I decided I would give it a try. There are no photos of this particular plane, so my information relied on the research done by the authors of various books. Each reference depicted this plane with a slightly different color scheme. I decided to build the plane with yellow leading edges, white homeland defense panels on the wings and rear fuselage, and a light gray belly.
I wanted to put a little extra effort into this build, so I got an SBS resin cockpit, an Eduard photoetch set, a set of Life Like decals for this plane, as well as a set of Eduard canopy masks (I have gotten lazy and almost always use pre-made canopy masks). The SBS resin set was so detailed and complete that I ended up not using the Eduard photoetch at all. Part way through the build I decided I wanted to try to make my own masks for the plane, and paint all the insignia. I borrowed my wife's Brother Scan and Cut machine that she uses for card-making and cut masks for everything except some numbers on the landing gear covers. The plane and markings were all painted using AK Real Colors, which have become my favorite for my airbrush painting. The only decals used on the model are some numbers on the landing gear covers. Overall I am pleased with how the masks performed and plan to do some more mask-making on my wife's Scan and Cut. The plane is weathered with a variety of artist's oil colors.
Thanks to everyone who contributed information on the proper color of the hinomarus and those who offered encouragement as this model progressed. If you are interested in any of the processes used in this build, the in-progress postings are located in the Empire of Japan Group.
Everyone stay safe.

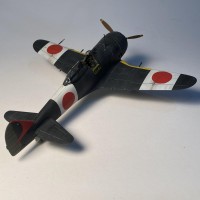

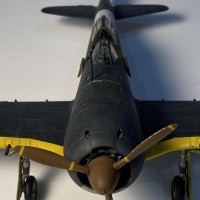
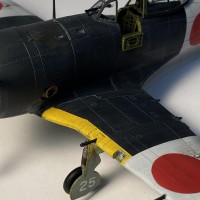
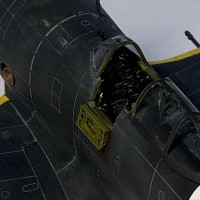
It's always a pleasure to be successful at something on your first go 'round... You should be quite delighted with the paint work, I think it looks fantastic. Certainly different too.
George, this one is a dead serious good looking model. The combinations of colours turned much better than I had imagined when I first read your initial thoughts about the plane itself. Kudos, it’s magnificent, and painting insignias is never a bad option. My only remark goes to the missing aerial, it begs to be there 😉
I forgot about the aerial until you mentioned it, Pedro (@holzhamer). It seems like on every kit I forget something. A lot of times I don't even notice it until I am looking at the photos I posted. I once built a plane, put it in my case, and then I noticed a couple of weeks later that I had not added the main gear doors. Never found the doors again. I still have that plane to remind me to double check things. Anyway, I should be able to get the antenna on without too much effort.
George, @gblair
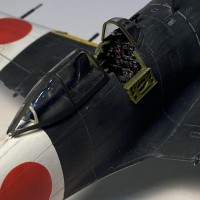
This is a magnificent build ! The "office" looks nothing less than spectacular...It's very realistic looking, especially the instrument panel and seat. I have never seen another Ki-44 like yours, that was painted wearing these black colors. It was an absolute joy to follow along with the build journal. Those home made masks you made using your wife's Scan and Cut machine worked out very good too. Maybe I can talk my wife into taking up a new hobby with making cards ?
I agree with Pedro, painting on insignia and markings almost always look better in place of using decals, especially in the larger scales.
Your "Tojo" build was a home run. You knocked it out of the park. The details in your build make it look like it was the larger 1/32 scale cousin... If I didn't know better, that's what scale I would think your model was... It's that good !
Thanks for participating in our Empire of Japan group build, and if you have another Japanese subject in the stash, you're always more than welcome to come back and build something else.
I pressed the "liked" button too. Thanks again my friend...and please stay safe.
Thanks for the good words, Louis (lgardner). I started modeling when I was a kid, but slowed down when I was flying for the Air Force. I retired from the Air Force and started teaching high school and college, and had even less time. So, I finally retired for good about 6 years ago and started modeling again, only to find that the new techniques for building had increased at an astounding rate. Now, when I try new stuff, I am always surprised when it actually works. This was my 2nd kit for EoJ, the first was a Fine Molds Lorna. I have a few more I want to do, but I want to build an Me-109 and a Spitfire first, then I think EoJ will be up again. Stay safe!
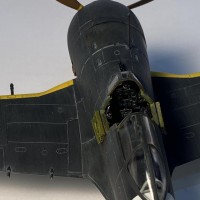
Great looking Ki-44. Really like how you lowered the cockpit access panels to allow more of the detail work to be seen.
Thanks, Doug (@eydugstr). My work on cockpits is normally limited to adding Eduard photoetch. The instructions for the SBS resin cockpit that I added had you thin the plastic walls of the fuselage halves to .5 mm. I was positive my Dremel would eventually punch through the wall at some point. When I got the walls thinned without serious kit destruction, I was feeling pretty good about my level of modeling Karma and decided to cut the fuselage walls to add the resin cockpit access doors. Surprisingly, it worked great.
Well done! Can imagine that there was a lot of sand, test fit, and sand again going on to make the SBS cockpit happy. Most of the access doors I've seen in the open position are usually on British Spitfires, it's a nice change of pace to see that done on a Shoki (especially one with the black paint scheme).
A fantastic build, George! I like unusual color schemes.
Thanks, Robert (@roofrat). I also like paint schemes that are outside the norm.
Great looking Ki-44 George. And I agree about unusual paint schemes.
George, you did a fantastic job on this Tojo!
I had followed your build, seeing this great model emerging, but the final outcome exceeded every expectation.
Add the fact that the scheme is out of the ordinary and a masterpiece is done indeed!
Congratulations!
🙂 … Greetings … 🙂 :
One very impressive Tojo. This one caught my attention as I logged into the forum.
Besides the great finish and a very convincing weathering as well as the very fine job in the cockpit, it was the way the light reflects off the cowling in the first picture.
Very nice work George.
A very nice build George.
I really like the weathering you provided on this model.
Love the scheme, well done. I'm currently playing with a Ki.43 and like you, I'm using the SBS cockpit. It also say to thin the walls down to .5mm. A test fit show I may be able to get away without doing so. Right now I'm fighting with the resin rear cockpit deck; the plastic area needs to be removed first but the fit of the resin piece is far from stellar
You might be right, George (@blackadder57). The resin floor slotted into the same slots on the plastic fuselage sides that the plastic floor from the kit would use, so I figured the floor would fit fine. I think they have you thin the sides down because the plastic fuselage along with the resin cockpit side would appear too thick when viewed at the cockpit rail, or in my case in the area cut out for the fold-down panels on each side of the cockpit. Sorry about your resin deck, mine didn't have one.
Wow, a black Tojo, now that's impressive. Black is a tough color to get right on a model George, but you mastered it. Well done.
Nice work, George. Black is difficult and you weathered this one just right.
Thanks everyone for the kind words. This was a fun, trouble-free kit, even with the resin cockpit. I may be missing for a little while, as my daughter is having her first baby this morning. The baby is turned the wrong way for a regular delivery, so they will have to deliver the baby surgically. Thanks to Covid, we won't be able to see my daughter or her new daughter until they get home sometimes next week. Everyone stay safe.
Well - you sucked me in with this one! I love unusual schemes (am working on a blue Sonia now), and I'm going to HAVE to have a black Tojo! Yours looks fantastic! Love the weathering of the black - I may hit you up for some hints (and some conversation about the AK paints - I'm looking for a brand with enough colors that I can control well...).
Good luck with the grand baby! I'm at 8 and counting...
Thanks, Greg (@gkittinger). I like paint schemes that don't blend into all of the other planes on the shelf. I'm the same with my model trains...gotta have that one boxcar that stands out from the rest. AK Real Colors are a hybrid paint like Tamiya. It is acrylic, but it is lacquer-based. It is very similar to Tamiya paints, in fact you can use Tamiya thinners with AK Real Colors. You can brush paint them. The big difference between Tamiya and AK Real Colors is that they have a lot of colors in their line. I live in South Central Texas, and AK is hard to find. I have to drive to Austin to get my paints, or I order them online from Megahobby, who usually has them all in-stock. There is a slight odor with these paints, but nothing like the old Floquil paints. As far as the weathering, using oils is something that the armor guys do all the time. It's just a matter of experimenting and see if you like it. It has taken me a while to find something that I like.
That's one mean looking Shoki, George - a really striking build. No better color for a "demon" death-bringer than all black. I also like the way the dark color is set off by the white homeland defense bands. I have seen some very dark color schemes on late war IJA aircraft like the Ki 100. I wonder if they were also black. You have done a great job in giving the color a varied weather appearance. Did you also use black- green for highlighting or in filters or is it just the tint of the photos? In an case, overall weathering looks very realistic. particularly the lighter shade for panel lines. The EoJ build has really stoked interest in the Shoki -for me at least. It is a brutish looking airplane, with the airframe seemingly wrapped around the massive engine. Very much purpose built for interception, I 'd say.
Thanks, Colin (@coling). This Hasegawa kit really was a dream to build. I replaced the cockpit, but the kit cockpit would have been acceptable on its own. I was worried about an all-black finish. I mixed a very dark gray (nearly black) for the base color, then did some shading with a German black-gray and a blue/black that I mixed. I used AK Real Colors and Tamiya paints for everything. Using artists oils for weathering also allows some color shifts, just like the armor guys use oils as a filter. This plane was known to have been all-black in late 1944 when it was stationed outside of Japan, and then had the white homeland defense panels added when the plane & pilot were transferred to Japan. I don't think this model would have looked as cool if it was all-black. The contrast of the black and white make all the difference. When I was doing the research on this plane, I think I saw both Ki-43s and Ki-100s in either black or very dark green. I recently got an old Otaki Ki-43 that is screaming to be built. Looking forward to seeing your dark fighter.
Great looking kit George, really well done!
George, I think this is very special indeed. The finish you have achieved looks very realistic indeed. The subtly done lighter panel lines definitely add to that. The aftermarket details you added have also taken this to another level. And then the masking! Excellent work!
Thanks, James (@jamesb) and Paul (@yellow10) . The all-black finish was a challenge, but this was one of those rare models where just about everything seemed to work out correctlly.
Black is plain evil on an aircraft. Looks really nice with painted markings.
Thanks, Stellan (@stellan). Although I had never tried something all-black, I found it similar to olive drab or khaki schemes, just darker. I have to admit that the weathering really made a difference.