Airfix 1/48 Hawker Hunter F.5
To my mind, the Hawker Hunter is aesthetically one of the best-looking jets ever designed. In that opinion, I am not alone, as many have responded favorably to the flowing lines of Britain's first successful swept-wing fighter. With the first prototype having flown July 20, 1951, the Hunter is one of the longest-serving jets in any air force, with the last of its type retired from the Royal Air Force only in 1996.
Interestingly enough, this most successful of all Britain's post-war military jets was not always considered a success. The early development of the Hunter was plagued with so many problems it seemed likely it would be replaced by the Supermarine Swift until that airplane revealed even more serious design faults. Overcoming the gun firing problems which were causing major problems in engine operation was like dealing with the Hydra: solve one and two more would take its place.
Hawker Aircraft came late to jet aircraft, and even later to swept wings. Where the company had a 30 year run of success with all previous designs, it seemed to lose its footing with the Hunter. Its immediate predecessor was the straight wing Sea Hawk, a design that was six years behind its US contemporaries when it finally entered service with the Royal Navy in 1953. As a design, the Hunter suffered from a too-extended gestation, which failed to take into account very important discoveries about jet aircraft that could have led to early modification of the design: the horizontal stabilizer was not an all-flying type, and was in the wrong position aerodynamically, being high on the vertical fin rather than low on the fuselage where it belonged. The use of the flaps as airbrakes turned out to cause a severe nose-down pitching at high speeds, and after much work a simple hinged brake was fitted to the fuselage underside. However even this was troublesome and had to be disabled when the landing gear was down. There was aileron pitch-up stall which was only cured by the eventual addition of a sawtooth leading edge to the wing. What would turn out to be the biggest fault - one shared with all other British post-war designs - was the extreme lack of range, since the original RAF requirement called for a point- defense interceptor.
Eventually, the Hunter emerged from all this development (which included several test flights with extensive criticisms from Chuck Yeager during 1952-53) with handling qualities that became the standard against which other military aircraft would be judged. The airframe was so strong that no Hunter was ever lost to midair structural failure. The firepower of four 30mm cannon was such that any target that got in a Hunter's sights could be shredded with a 2 second burst. 1,972 Hunters were built, of which 400 were later re-manufactured for service with second air forces, and it served with no less than 21 different world air forces, a record only bettered by the MiG-17, which was produced in far greater quantity.
During the early life of the aircraft, marks alternated between power by the Rolls-Royce Avon and Sapphire engines as the F.4 (Avon) and F.5 (Sapphire). The F.4 entered service with 54 Squadron in March 1955. The F.4 had more fuel than the Hunter F.1 that had previously equipped the squadron and strengthened wings, enabling carriage of various air to ground stores including bombs and rockets. The Sapphire-powered F.5, which entered service a month before the F.4, equipped 263, 257, 1, 34 and 41 Squadrons of Fighter Command for domestic air defense, since they only had the capability of carrying two underwing tanks and no underwing ordnance.
Production finally centered on the Avon-powered Hunter with the F.6, which came into operational service beginning in 1955.
Service During Operation Musketeer:
RAF Canberra and Valiant bombers were based on Cyprus for strikes against Egypt during the Anglo-French intervention in Egypt following nationalization of the Suez Canal; it marked Britain's last attempt to act as an imperial power. Since the Egyptians were known to have received Il-28 Beagle jet bombers from the Soviet Union the year previously, it was feared they might respond to allied bombing attacks from Cyprus by sending these bombers to hit Akrotiri air base. Two Hunter units, 1 and 34 Squadrons, which served together at Tangmere, were sent out from England in late September to operate in the air defense role.
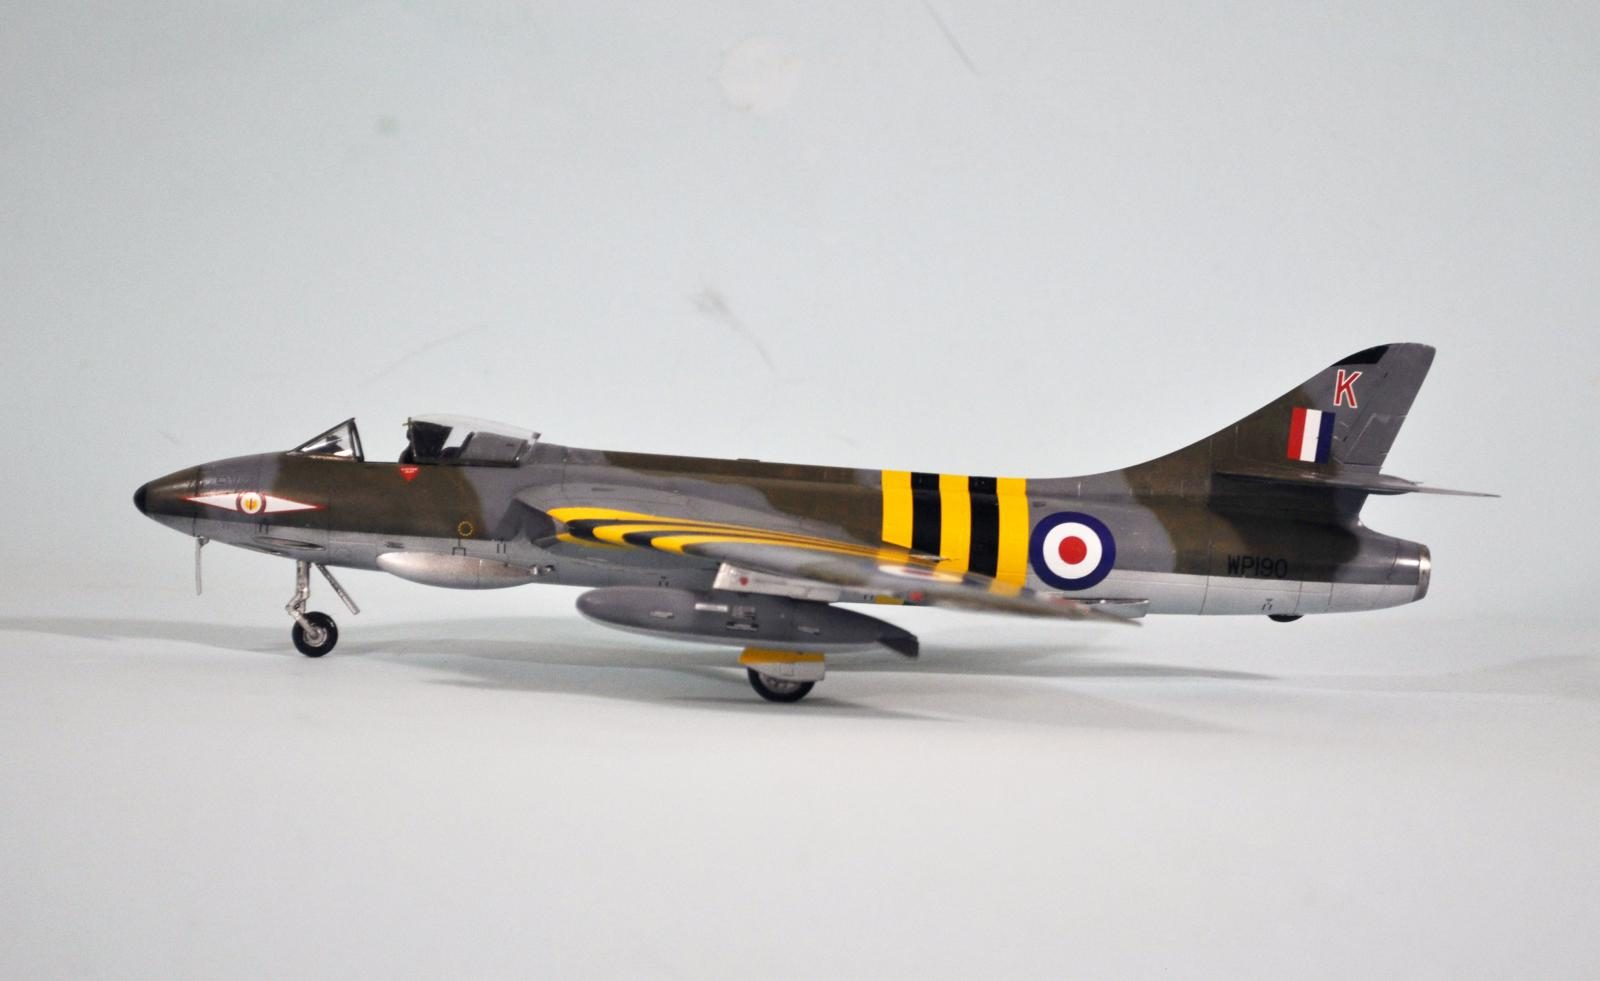
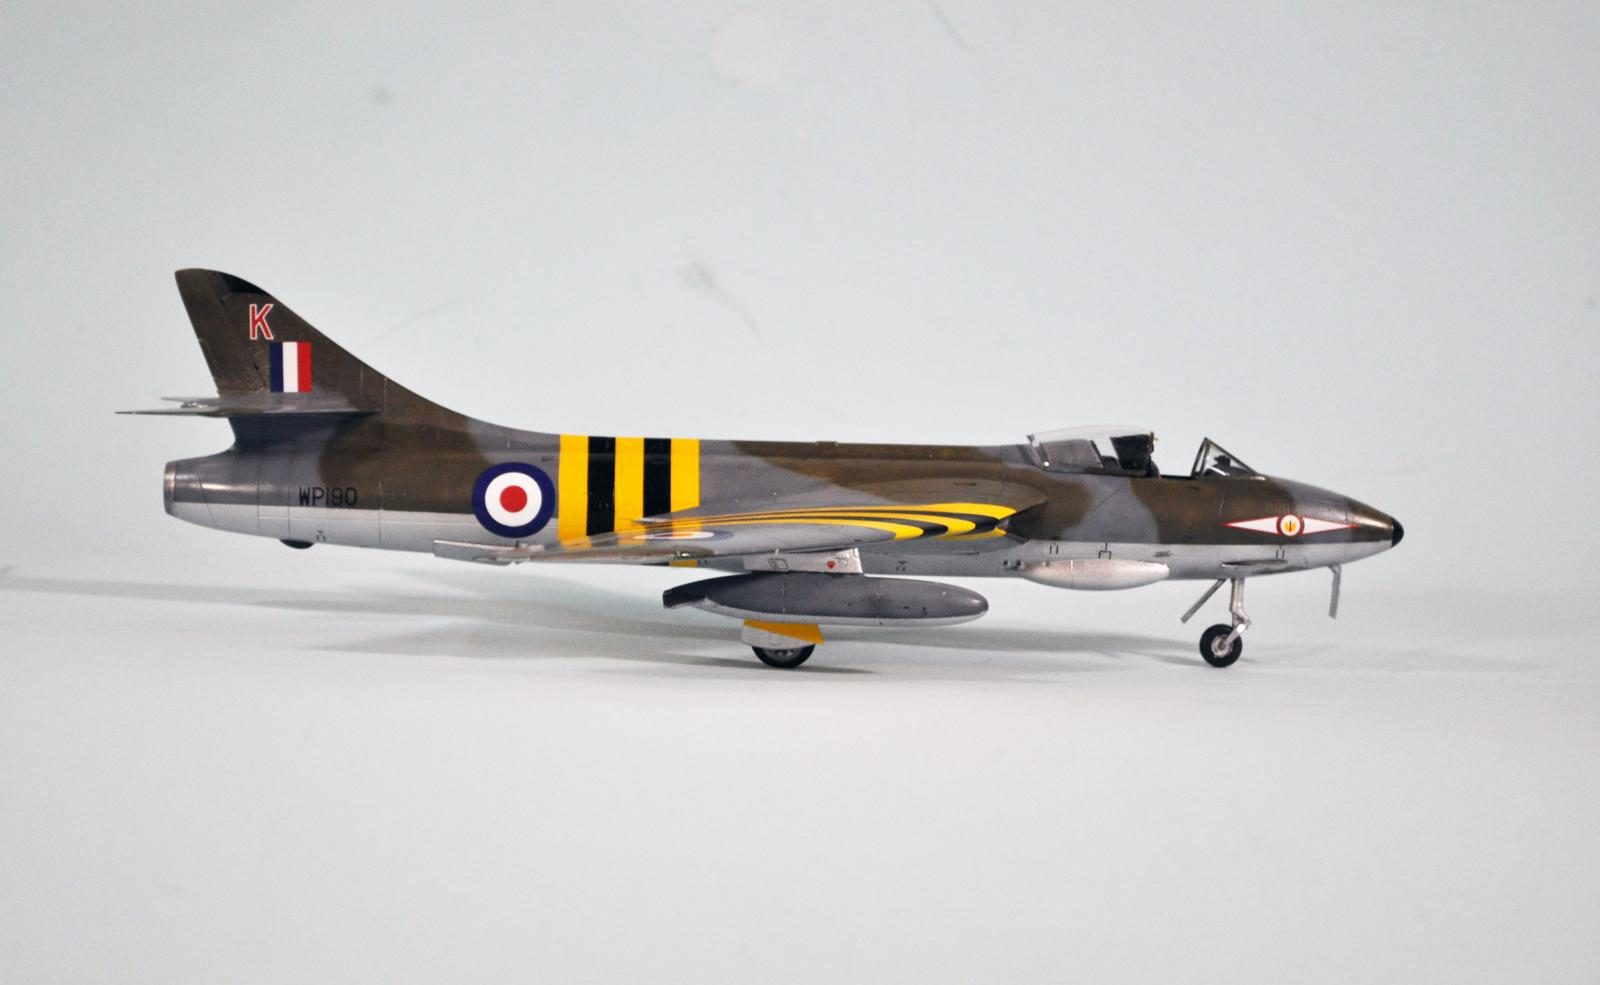
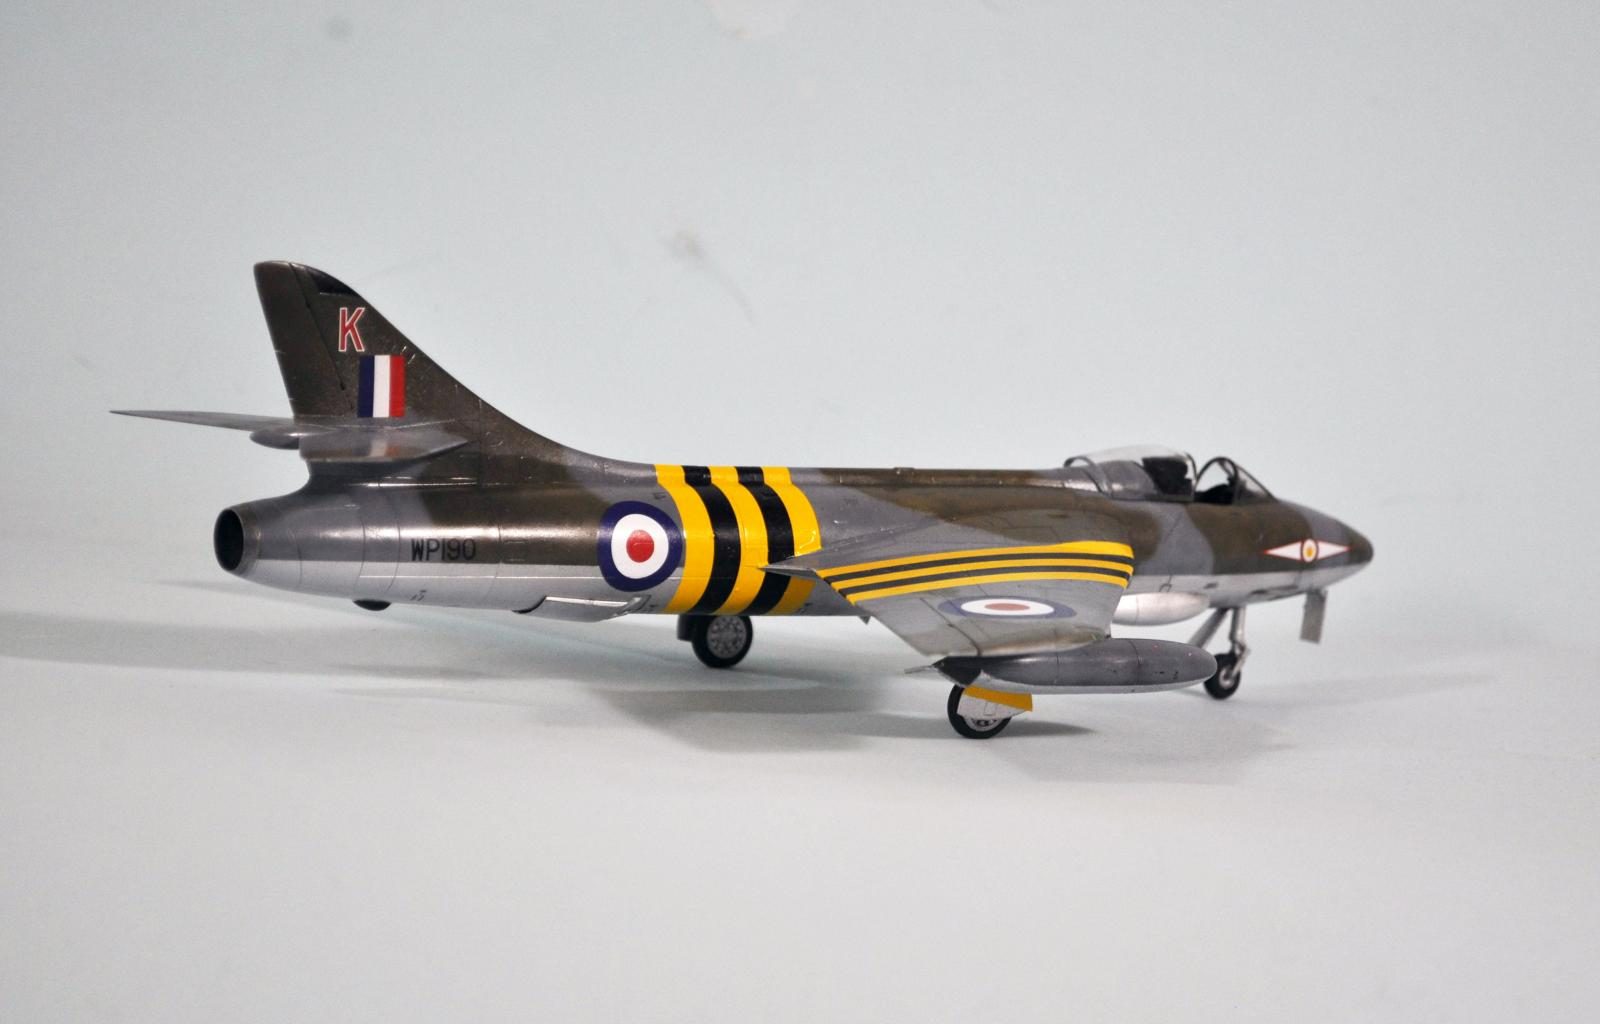
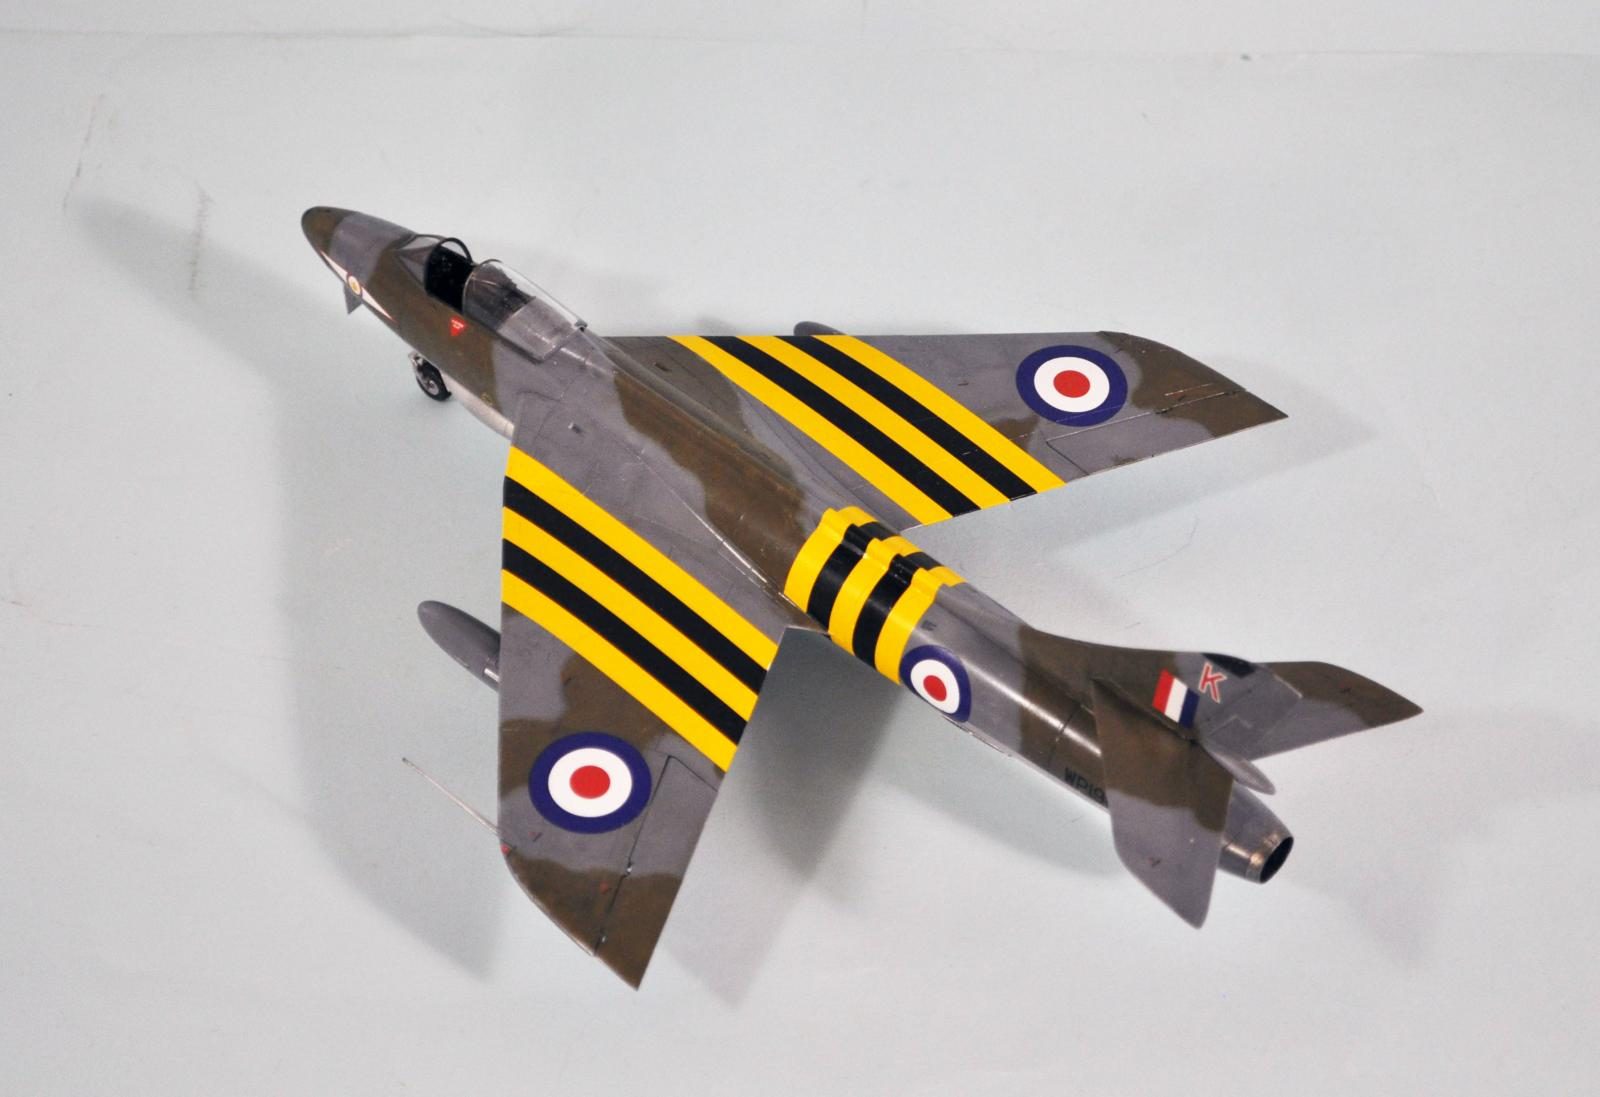
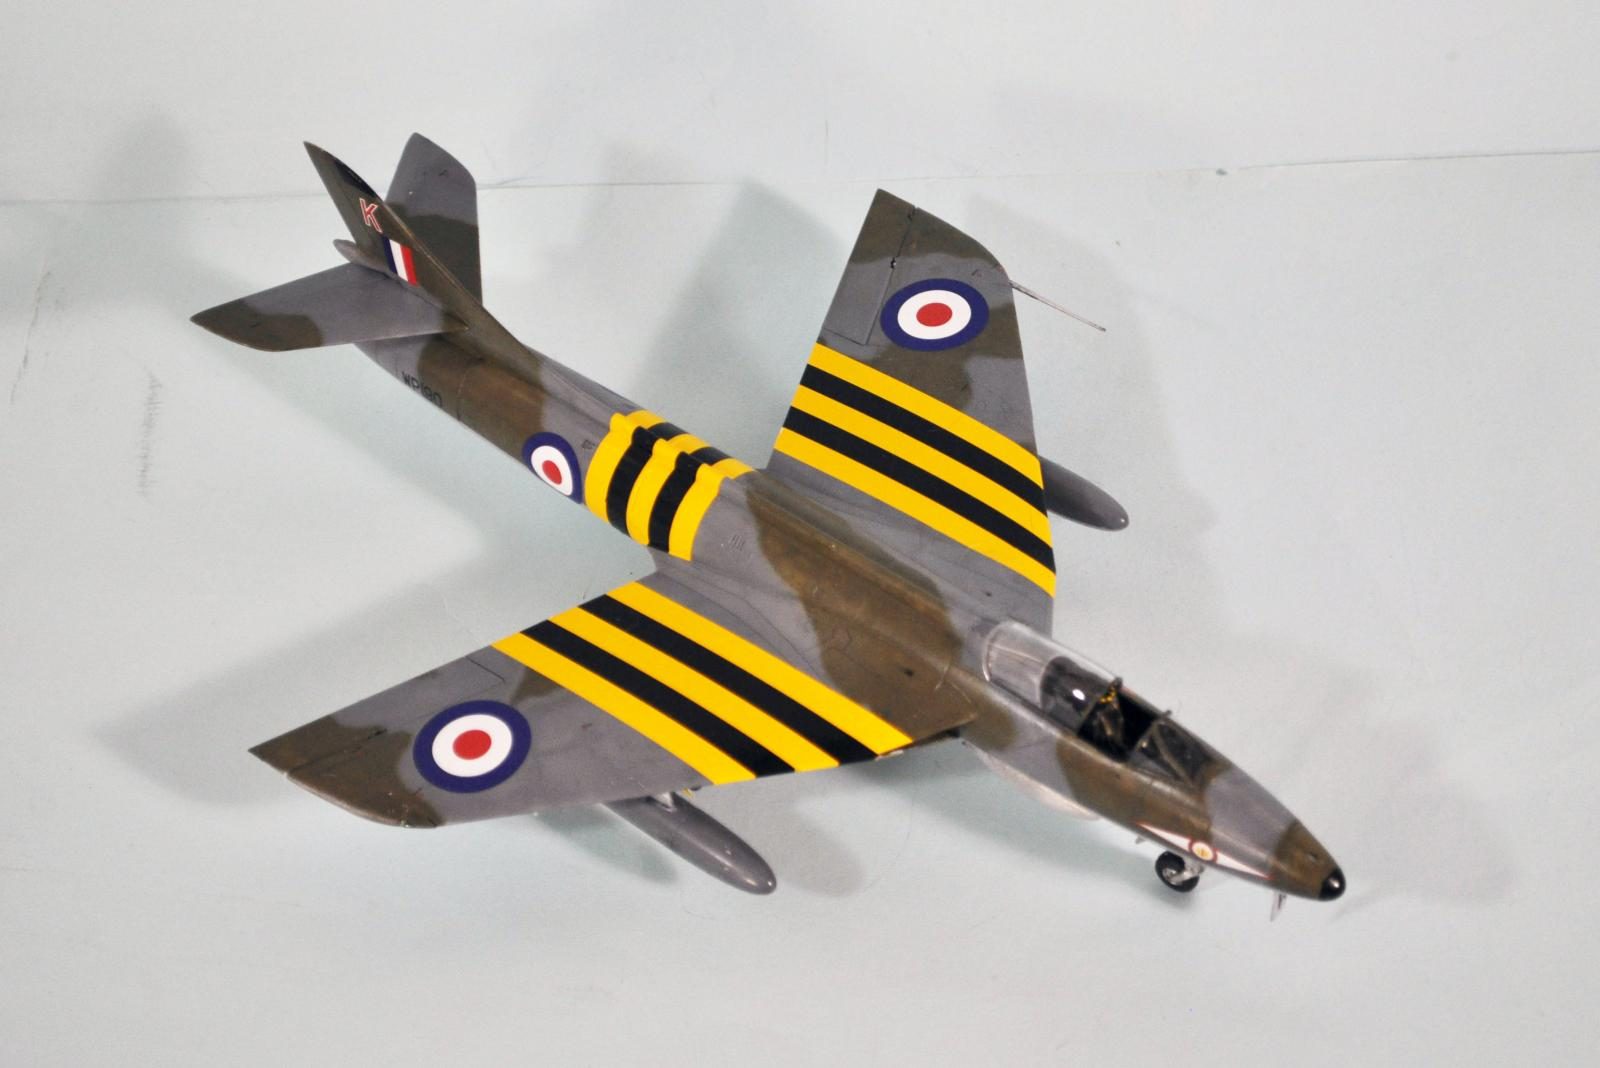
Inasmuch as the Egyptians were not operationally ready to carry out missions with their Il-28s, this fear of counter airstrikes never became a reality, and the Hunters did not see active combat during the operation other than two flak-suppression missions in support of the Valiant force, though it has been reported there were several "long moments" where Hunters confronted Grumman F9F-6 Cougars of the U.S. Sixth Fleet, which was shadowing the Anglo-French operation. None were lost on missions, but two were destroyed on the ground at Cyprus by EOKA terrorists. These aircraft carried the black-and-yellow operational identification markings for the operation.
THE KIT
The Hunter appeared in the US as a plastic kit some 60 years ago, with a 1/48 release by Lindberg that could, with a lot of putty, sanding, and a fair bit of scratchbuilding talent, be turned into a fair approximation of the airplane. The next 1/48 kit would not appear until the mid 1980s, when John Adams of Aeroclub released an F.6, FGA.9 and T.7 as vacuformed kits. These remained the best 1/48 Hunters when Academy released their 1/48 Hunter in 1998 - with a cockpit done in 1/72! Fortunately, Aeroclub released a 1/48 correction set, since the rest of the model was essentially correct.
These kits are now all nice bits of history, with the release of the Airfix 1/48 Hunter series, of which this F.4/F.5/J.34 kit is the second after their F.6. As with the rest of “new Airfix,” the kit is designed for ease of construction, coupled with a high degree of accuracy. It is nowhere near as fiddly to get right as the Academy Hunter.
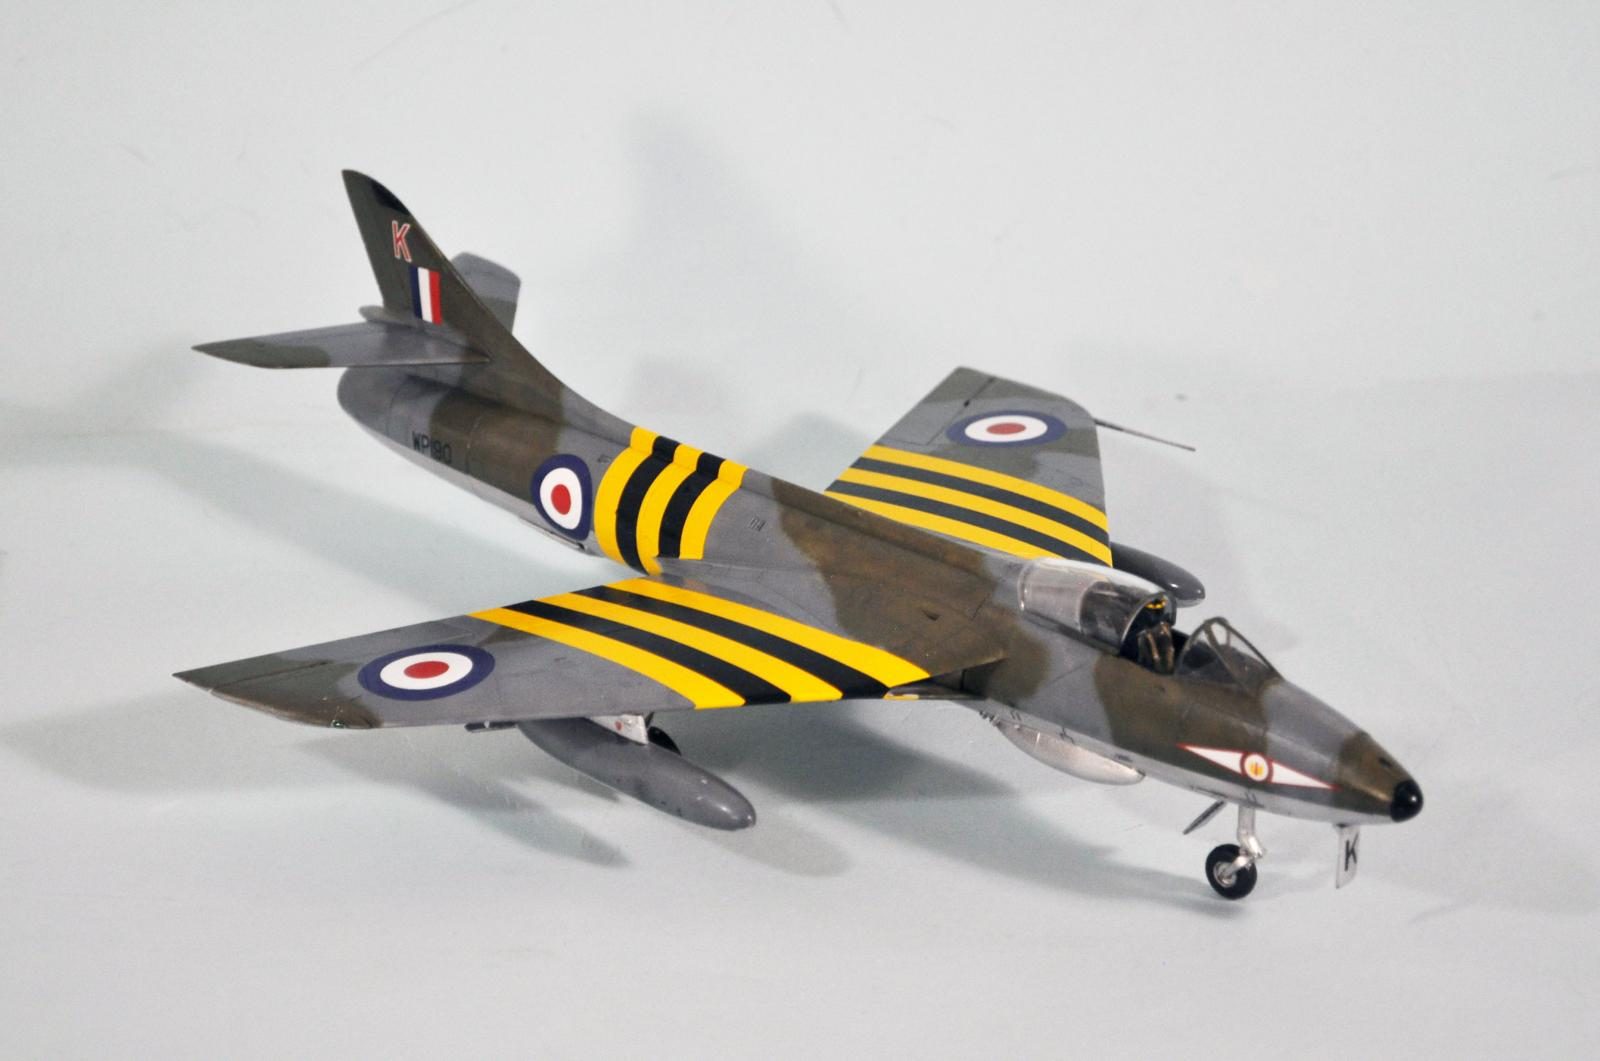
The cockpit canopy is beautifully shiny and clear; it comes in both closed and open options. With a black cockpit, the closed option doesn't lose much detail-wise while not marring the beautiful lines of the original. The cockpit is indeed 1/48, and supplies sufficient detail considering it's black. If a modeler chooses to open the canopy, a resin MB Mk.2 seat would look good.
This kit has separate pieces for the outer wing leading edge to give the “straight” swept wing of the early Hunters. Decals are provided for an RAF F.5 of 1 Squadron during Operation Musketeer, which includes the black and yellow stripes; a Belgian Air Force F.4, and a Swedish J.34, the export version of the F.5. All three are camouflaged on their upper surfaces, with the lower surfaces in “High Speed Silver,” an aluminum paint. They are not NMF.
CONSTRUCTION
As is usual with “new Airfix,” if one follows the excellent instructions, there will be few difficulties encountered, and an excellent result is assured. As with all modern CAD designed kits, parts fit is precise and you are well-advised to be certain you clean off all sprue nibs after you cut a part off the sprues.
I chose to use the parts for the ejection seat that included molded-on seatbelts. I added fish weights in the space beneath the cockpit floor behind the nosewheel assembly. I glued the rear fuselage parts to the forward parts before further assembly, so I could work the joint from both sides and insure good fit that wouldn't need any filler later. This kit has a separate sprue with the F.4 and F.5 rear fuselages, which are different from each other and different from the F.6 rear fuselage parts that are included in the main sprue. I particularly like the way Airfix designed the intake trunking, so that it fits in each fuselage half separately and aligns easily. The shell casing “Sabrinas” fit much better than did the Academy kit.
The wing assembly requires that the one-piece upper half be attached to the fuselage first. I discovered that if I started the assembly by gluing the leading edge of the intake trunking to the intake lip of the wing and was sure to get that firm and smooth, followed by squeezing the wing to the fuselage to get the wing-to-fuselage gap at the forward edge nice and tight, and did this on both sides before proceeding, that the rest of the attachment was easy and resulted in no need of filler. This is much superior to the Academy kit, where it is advisable to attach the wings to the fuselage half before assembling the fuselage, to work the wing/fuselage seam into position.
Once the upper wing part is attached, the gear wells are assembled and then the lower wing is attached. Here, I found that if I made sure to get tight fit on the fuselage/wing joint, that the rest of the assembly “clicked” into place. Be sure before assembly to open the mounting holes for the drop tank pylons if you are going to use them.
That said, the one problematic area of the whole project is the outer wing leading edge parts. Fit is not as good as the rest of the kit, and you need to fill all the seams and get them very smooth, since there is not a separate panel there on this wing. I found I had to fill with CA glue and sand twice to get rid of “phantom seams.” The sanding down needs to be done carefully, lest you lose some important engraved surface detail, which will have to be rescribed no matter how careful you were. The flaps and ailerons are separate. This is one case where the flaps will fit equally well up or down.
I kept the horizontal stabilizers and the dive brake for assembly after painting. Having the horizontal stabilizers off of the vertical fin makes painting the camouflage pattern there much easier, while assembly after painting is no problem.
If you choose to use the closed canopy option, be particularly careful when you run glue around the edge. You need to also apply the camouflage colors to the immediate rear of the cockpit on the spine before you attach the canopy since it overlaps onto the spine aft of the cockpit so you will see the colors beneath it. The fit is very tight, and it is easy to get a little glue up in the rear of the canopy through capillary action if you are not careful. The fit is tight enough you will need to rubber-band the canopy to get it to sit down completely without any gaps. I chose the open canopy option for this kit.
COLORS & MARKINGS
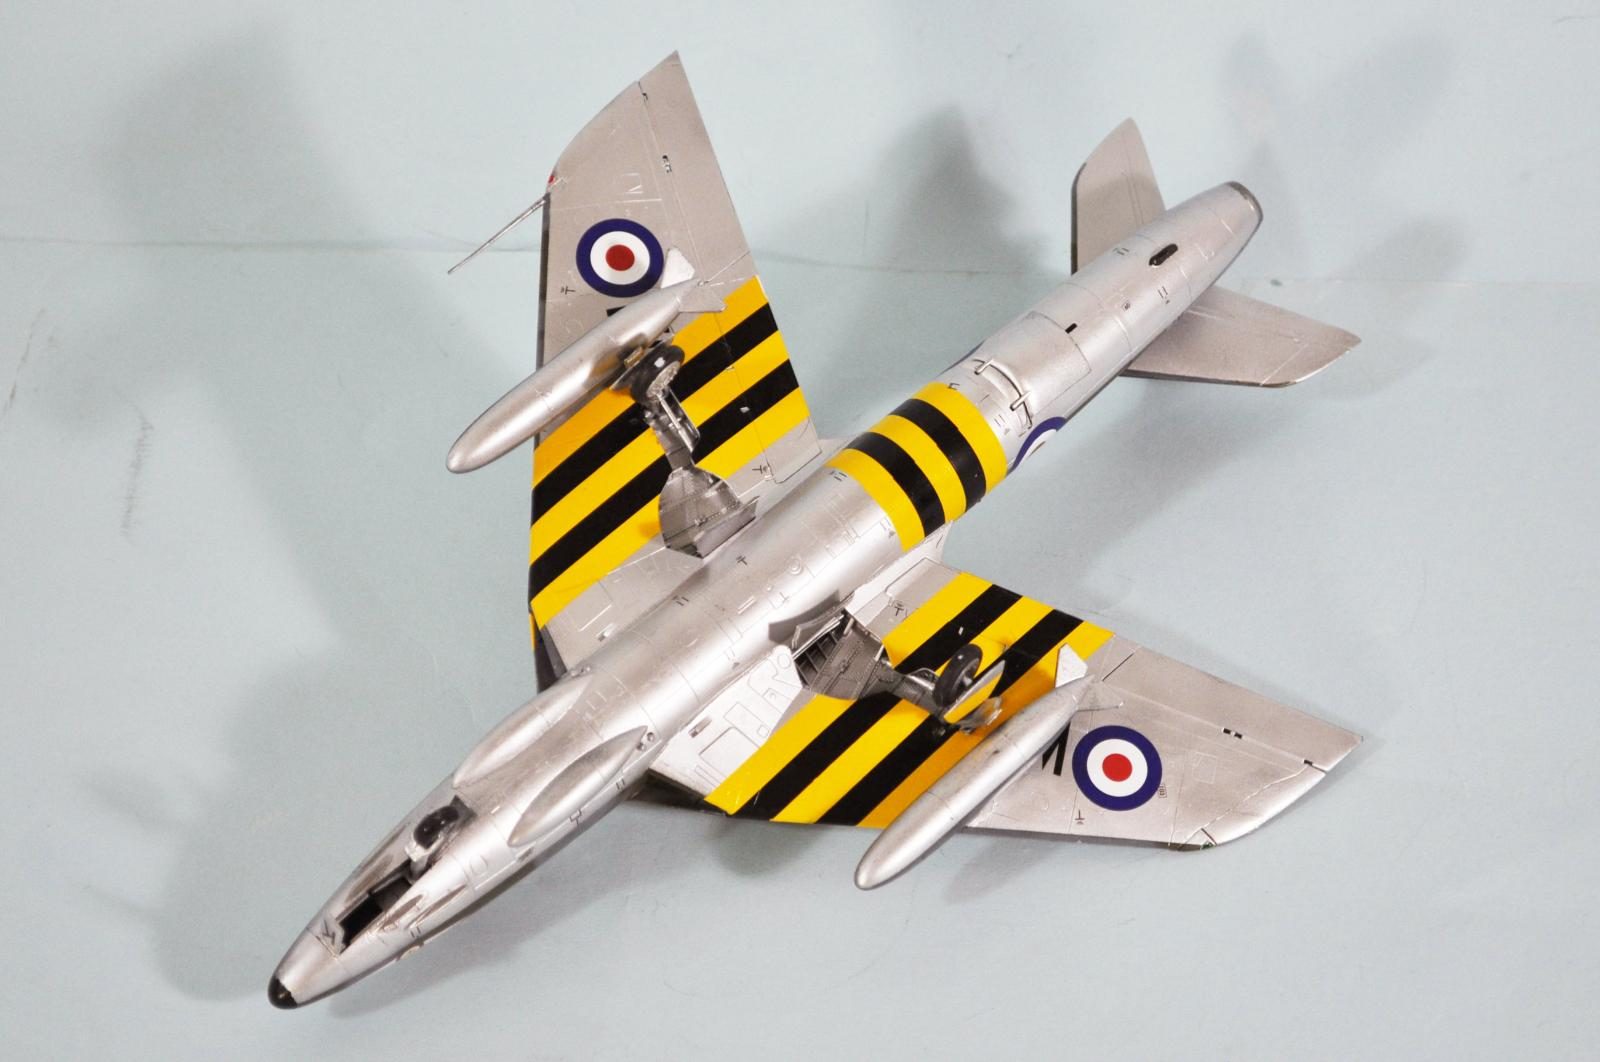
I painted the upper surface camouflage, using Tamiya XF-66 for the Sea Grey used in post-war RAF camouflage, and Gunze-Sangyo Mr. Color “Olive Drab 1" for the postwar Dark Green. When the upper surface was dry, I masked off the dividing line between upper and lower - which includes overlay of the leading edges of the wings and stabilizers, then gave the lower surfaces a coat of Tamiya X-1 Gloss Black before shooting it with Vallejo “White Aluminum.” I gave the model an overall coat of clear gloss, which turned the aluminum to a High Speed Silver painted surface. Once painted, I attached the horizontal stabilizers and the speed brake.
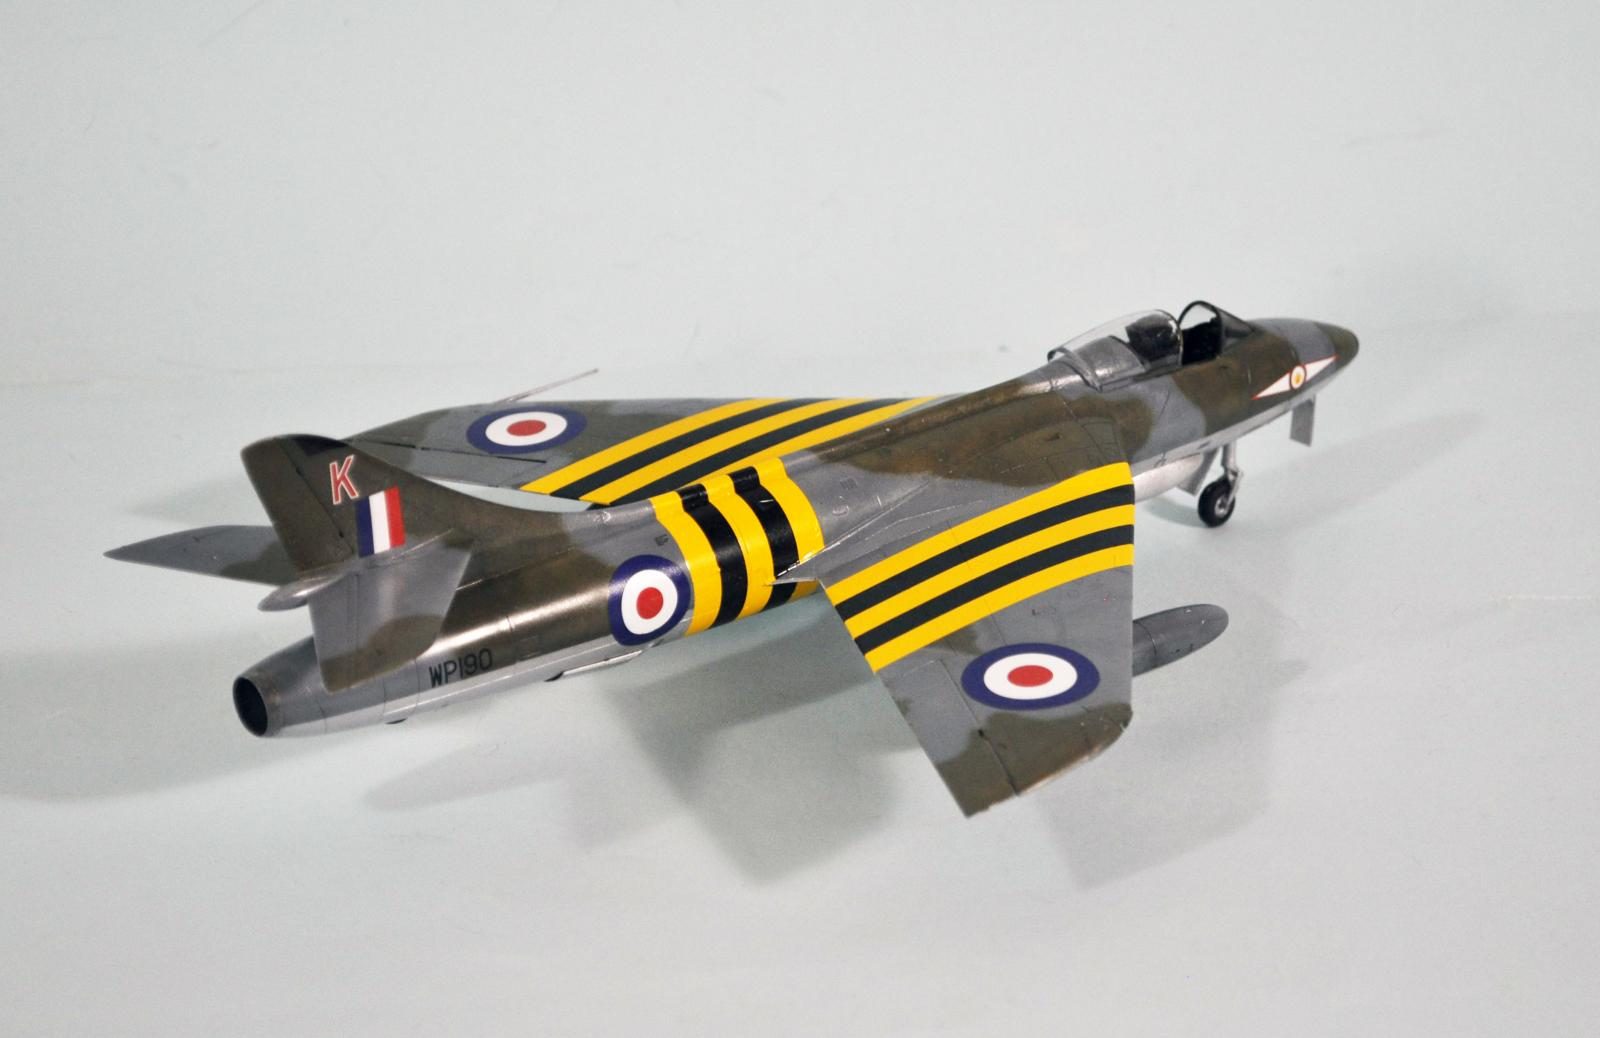
The kit decals when on without problem. Be careful applying the black-and-yellow Op Musketeer stripe decals on the wings, to insure they are correctly aligned between upper and lower along the wing leading edge. After the decals set up, I gave the model an overall coat of Clear Satin finish, which gives a “scale” gloss surface.
I put the seat in the cockpit and attached the canopy in the open position. I attached the landing gear per the instruction sheet, and then attached the underwing drop tanks.
CONCLUSIONS
Airfix's Hunter series is among their best. Next in line will be an FGA.9. I have the beautiful Aeroscale resin conversion to do the two-seat T.7/T.8 trainers, and an F-6 kit to modify (with the Avon rear fuselage part from this kit), which will be my next Airfix Hunter project. If you like the Hunter, this series are the kits to buy. Follow the instructions and any modeler of average skill will have a beautiful addition to the collection.


Another very nice build from your hands, Tom.
It is a real eye catcher.
And the black/yellow markings make sure you don't miss it on the shelf.
Great job on this, Tom. Painting is super!
It's nice that the Operation Musketeer black/yellow stripes are supplied as decals, and equally more amazing that they seem to have laid down perfectly, even at the "meeting" points! You did a fine quality job there, my friend.
Seems that Airfix got it right, cockpit included.
Hunter, an aircraft so beautiful it is boring to look at.
Thanks for an excellent review, Tom. Just wish I could afford the model...
The Swedish J 34 (not J.34 nor J-34) was the export F.50 version of F.4. It was painted in standard Swedish colours of olive green uppers and light grey blue unders, not NMF or even high speed silver. The Swedish Hunters were capable of carrying a AIM-9B Sidewinder (Rb 24 in Swedish service) under each wing for air to air engagements.
Learn something new every day. Thanks for that Stellan.
No worries, Tom. Glad if I can add to the facts bank. Keep up the good work.
Sharp work, Tom. Those stripe decals worked really well.
Great job on your Hunter. Looks fantastic as usual.
Nicely done, great color scheme.
Great build of a really stylish jet.
The Hunter is truly a beautiful aircraft. Airfix has done a great job on this Cold War classic. I hope they can upscale their Supermarine Swift to 1/48 and also give us a Scimitar in 1/48. Needless to say Tom, this is another beauty from your stable. Well done.
Yes to the Swift - I think the only reason they haven't done it is perhaps "iffy" sales prospects outside UK, and right now with the financial state of Hornby they need to hit a home run each time they're at bat.
Suspect the same would be true of the Scimitar. I know I'd do both, but then Being Obtuse has been a life goal. 🙂
Another excellent build. Again, I really like the new Airfix and what they brought.
I thought the Gloster Meteor was a good looking plane until the Hunter came along. You’re right. The Hawker Hunter IS “aesthetically one of the best-looking jets ever designed” and you’ve proved that. Terrific!
A good-looking Hunter. The stripes are a real standout on those dark RAF schemes.
Very nice job, as usual, Tom! I'm getting started on mine now, and looking forward to getting past the wing leading edge inserts so I can move on to the fun stuff! I have an F.6 kit as well that I plan to do as a Black Arrow one day.