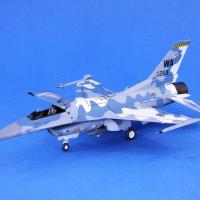
The Aftermarket Trap: Italieri Reggiane 2002.
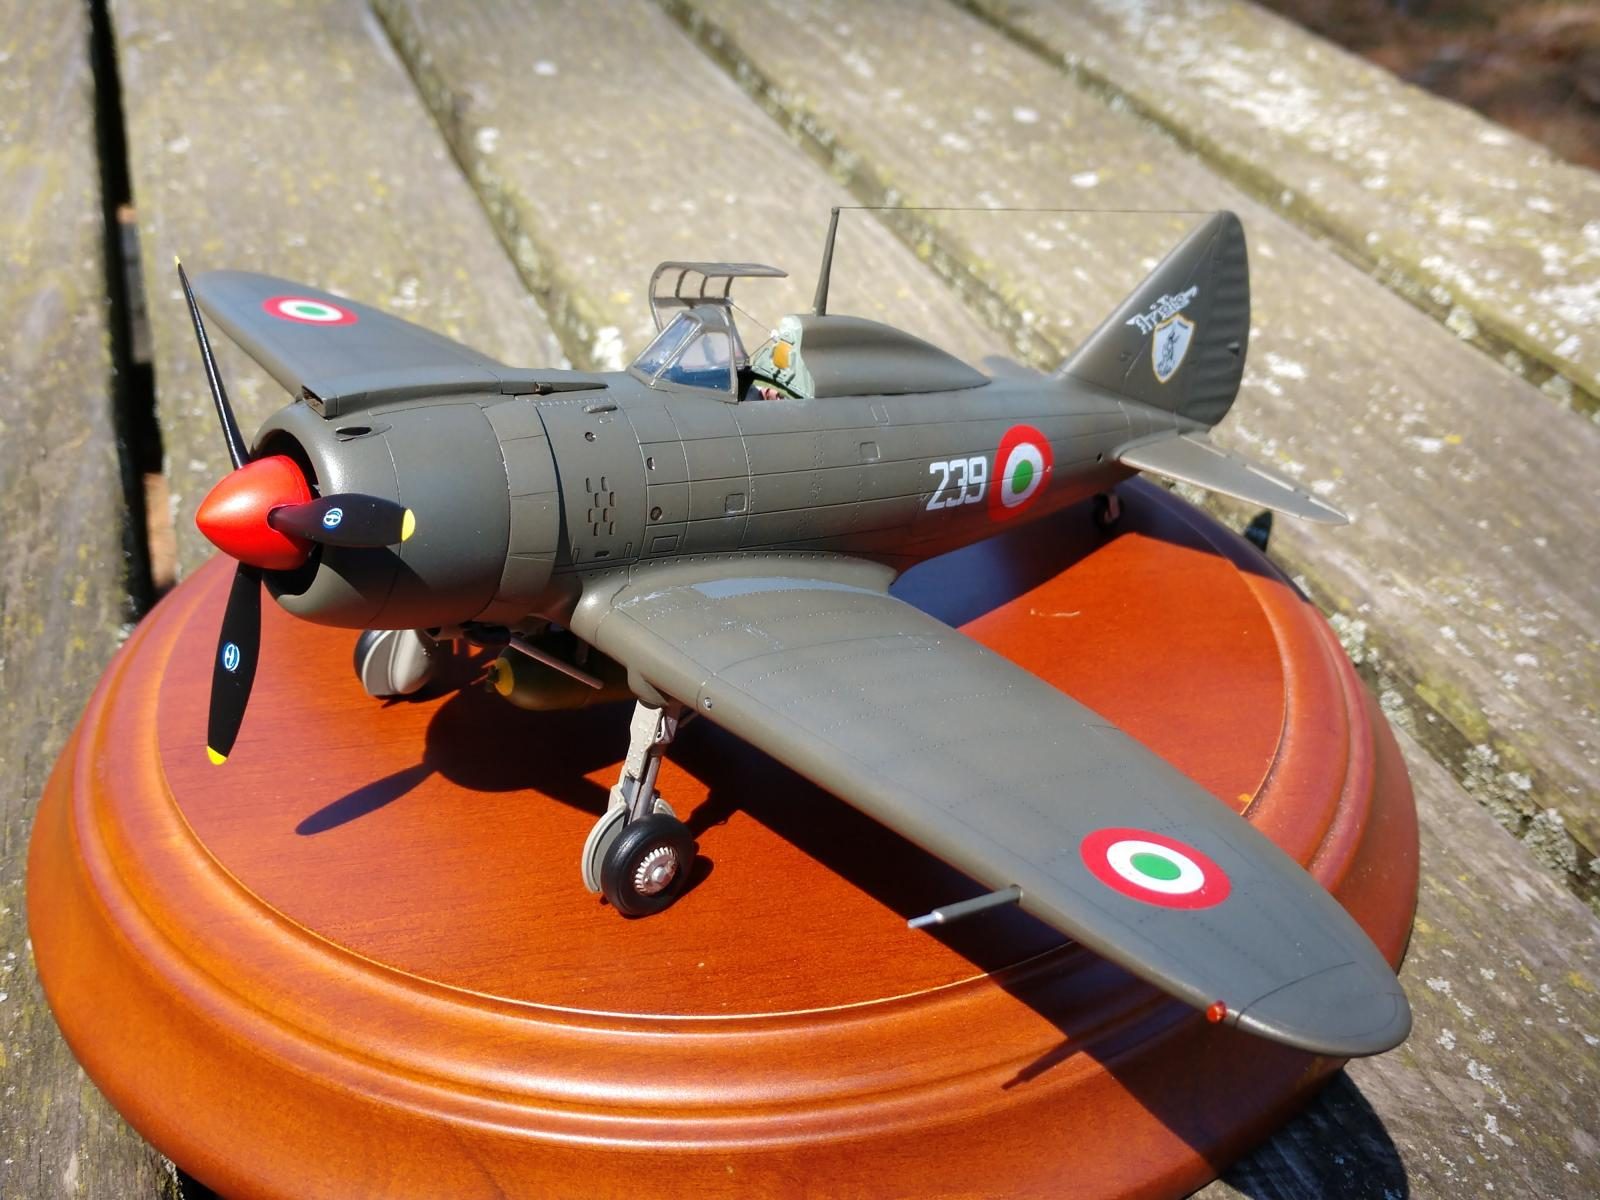
The Italieri 1/48th scale Reggiane Re.2002 kit is "fine." It's a "fine" kit that goes together with no fit issues and you can slap paint on it and be happy with it. But "fine" stops at being a model kit that you can glue together and have fun with, because if you are someone with AMS like me, you dive in and realize this is a mess of issues and you just have to try to fix them. Originally I bought this from a swap meet to "throw together". But when I started it, well, you know how it goes.
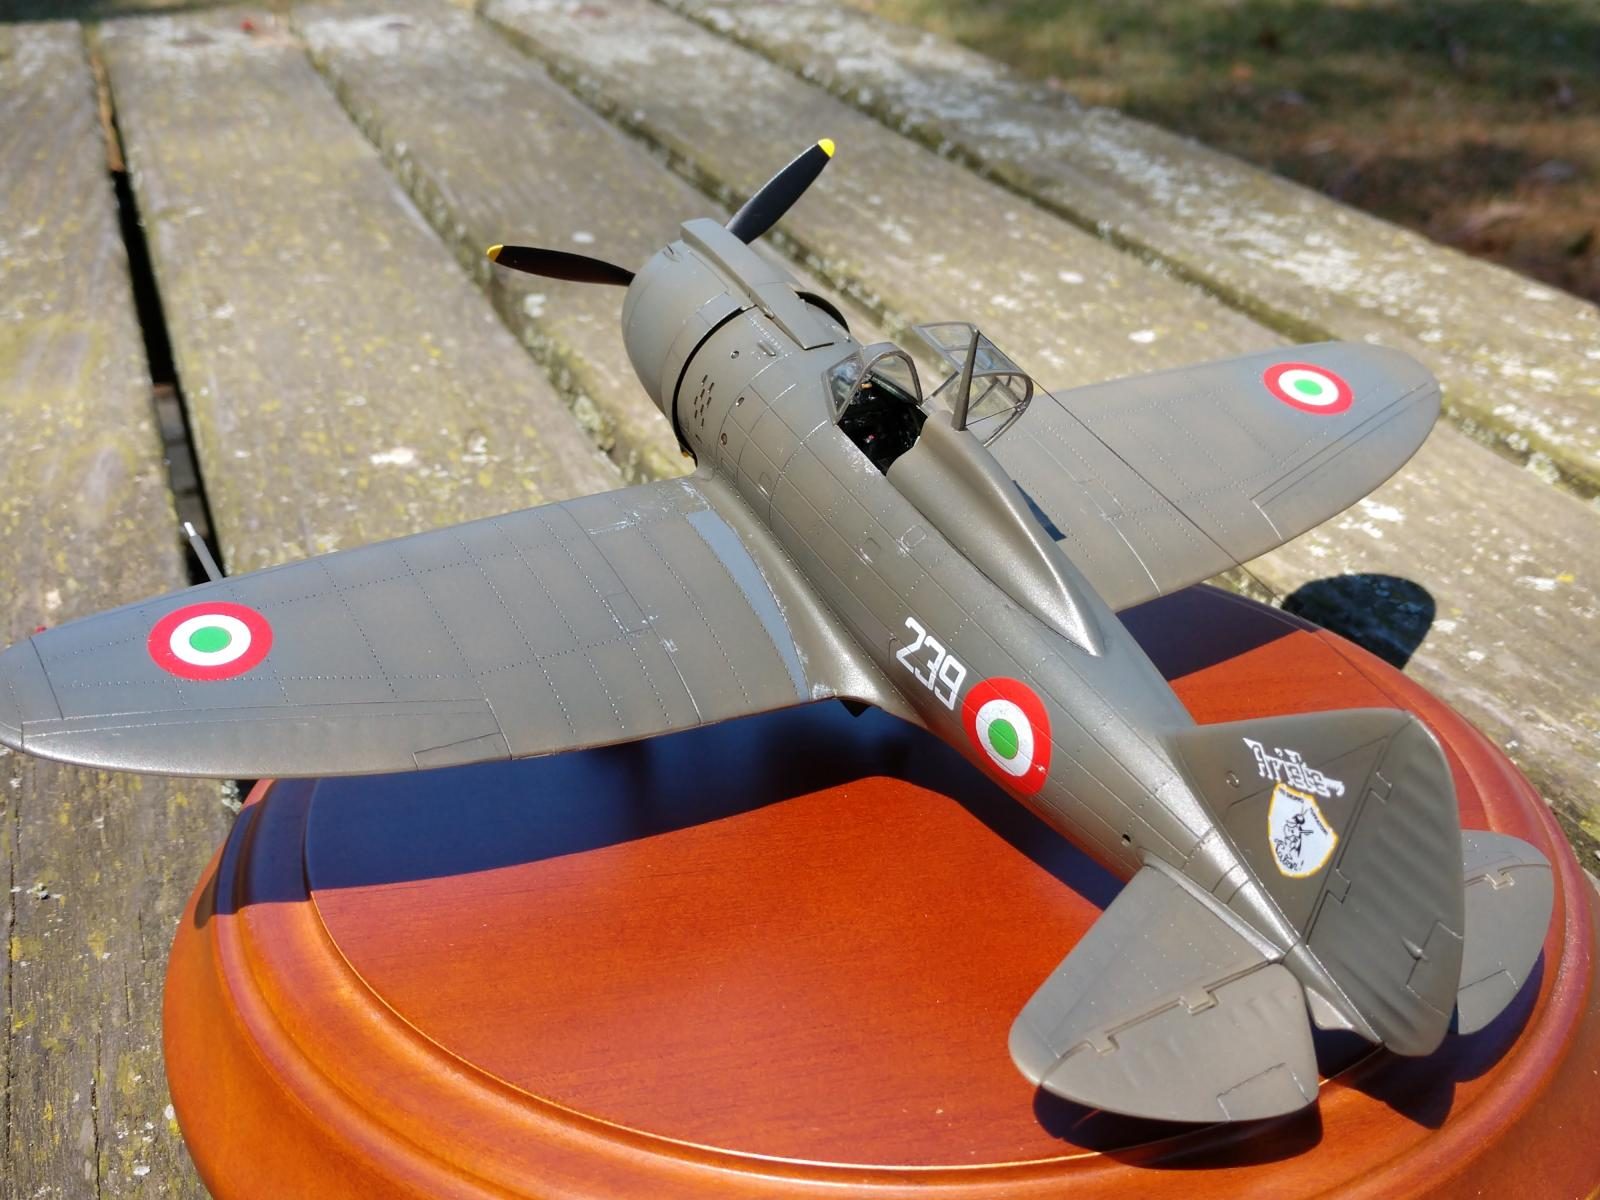
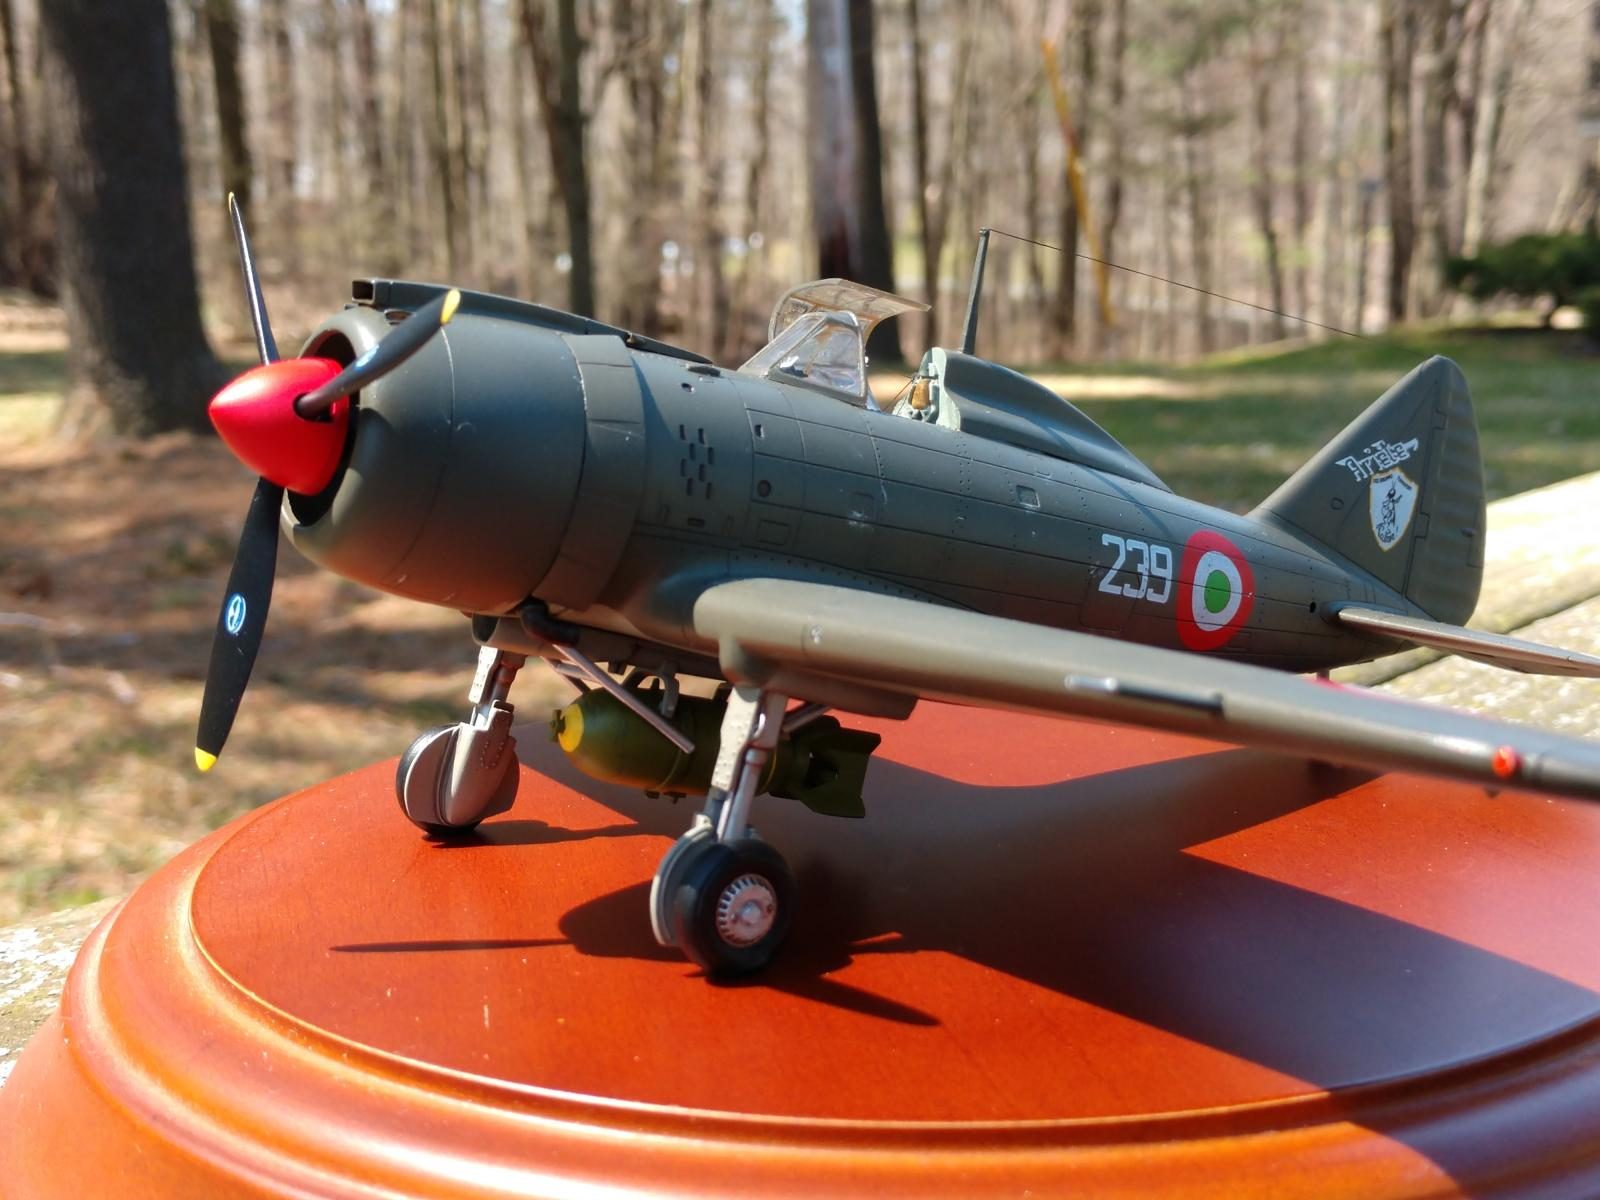
The first thing that should raise alarm bells for you is Italieri includes a reference photo book with this kit. The plastic parts look nothing like the aircraft in the photos. This book does nothing but show you how whoever made this kit probably designed it by casual glances. Dry fitting reveals something just isn't right. I look online, and low and behold, Vector sells resin updates for this kit. So I buy them. While I'm at it, let's scratch build my own interior. Brake lines, new hump, rescribed panel lines, spend a few days trying to figure out the correct flap arrangement (there was a picture of it in the book the whole time).
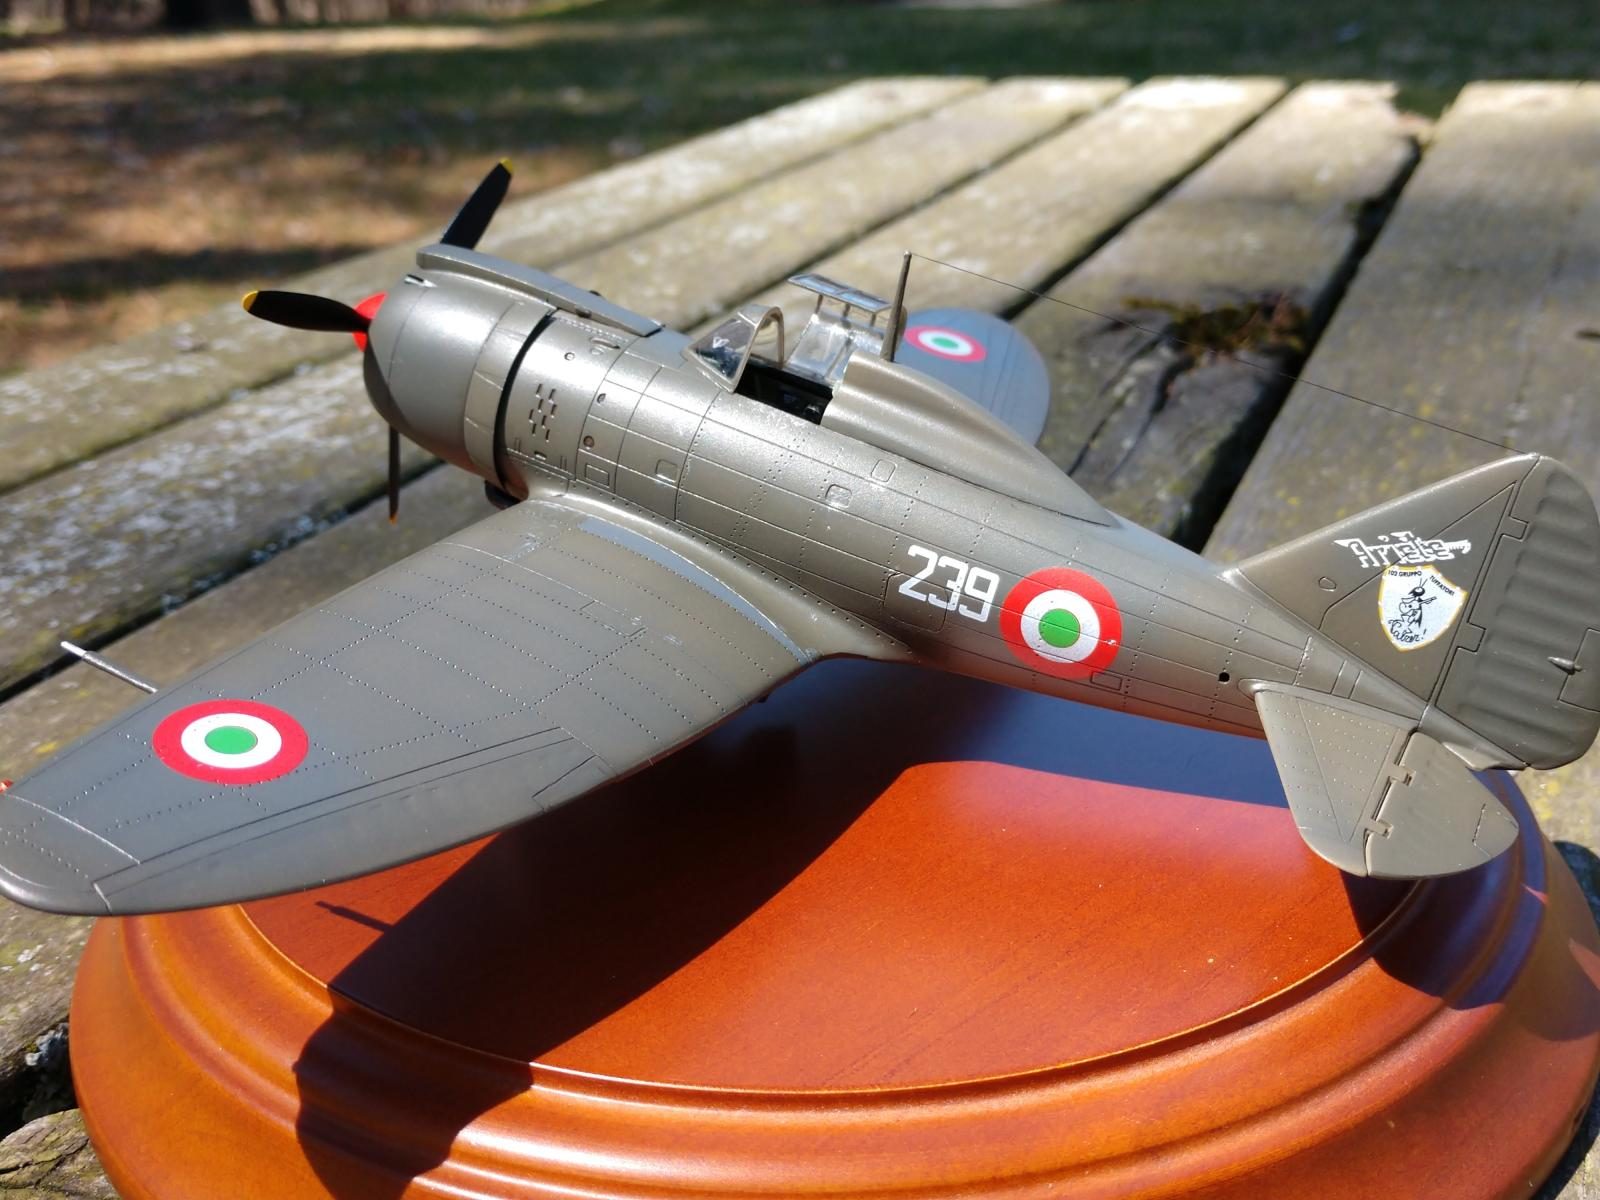
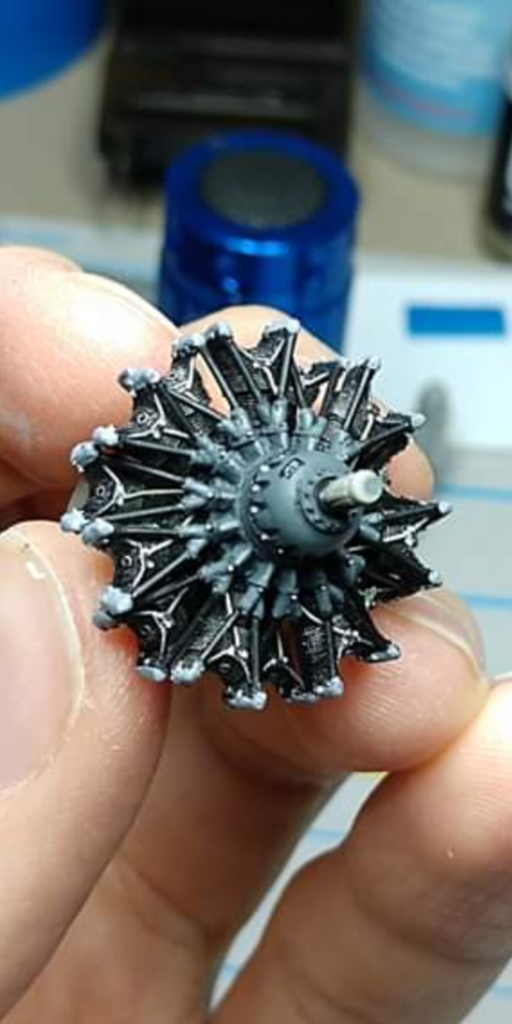
I end with a project that cost three or four times as much as I got the kit. There's a Quickboost hump, SBS seat, Vector cowl, prop and engine (which I spent more time than I want to admit on and you can't see a lick of) in there. And I'm pretty sure the color of Hataka paint I used is wrong. So now I sit here and look at this thing, and I wonder.
Err, it might sound like I'm complaining, but I'm not. I had fun; if I didn't I wouldn't do this to myself over and over. ... right? Right. Thanks for looking.


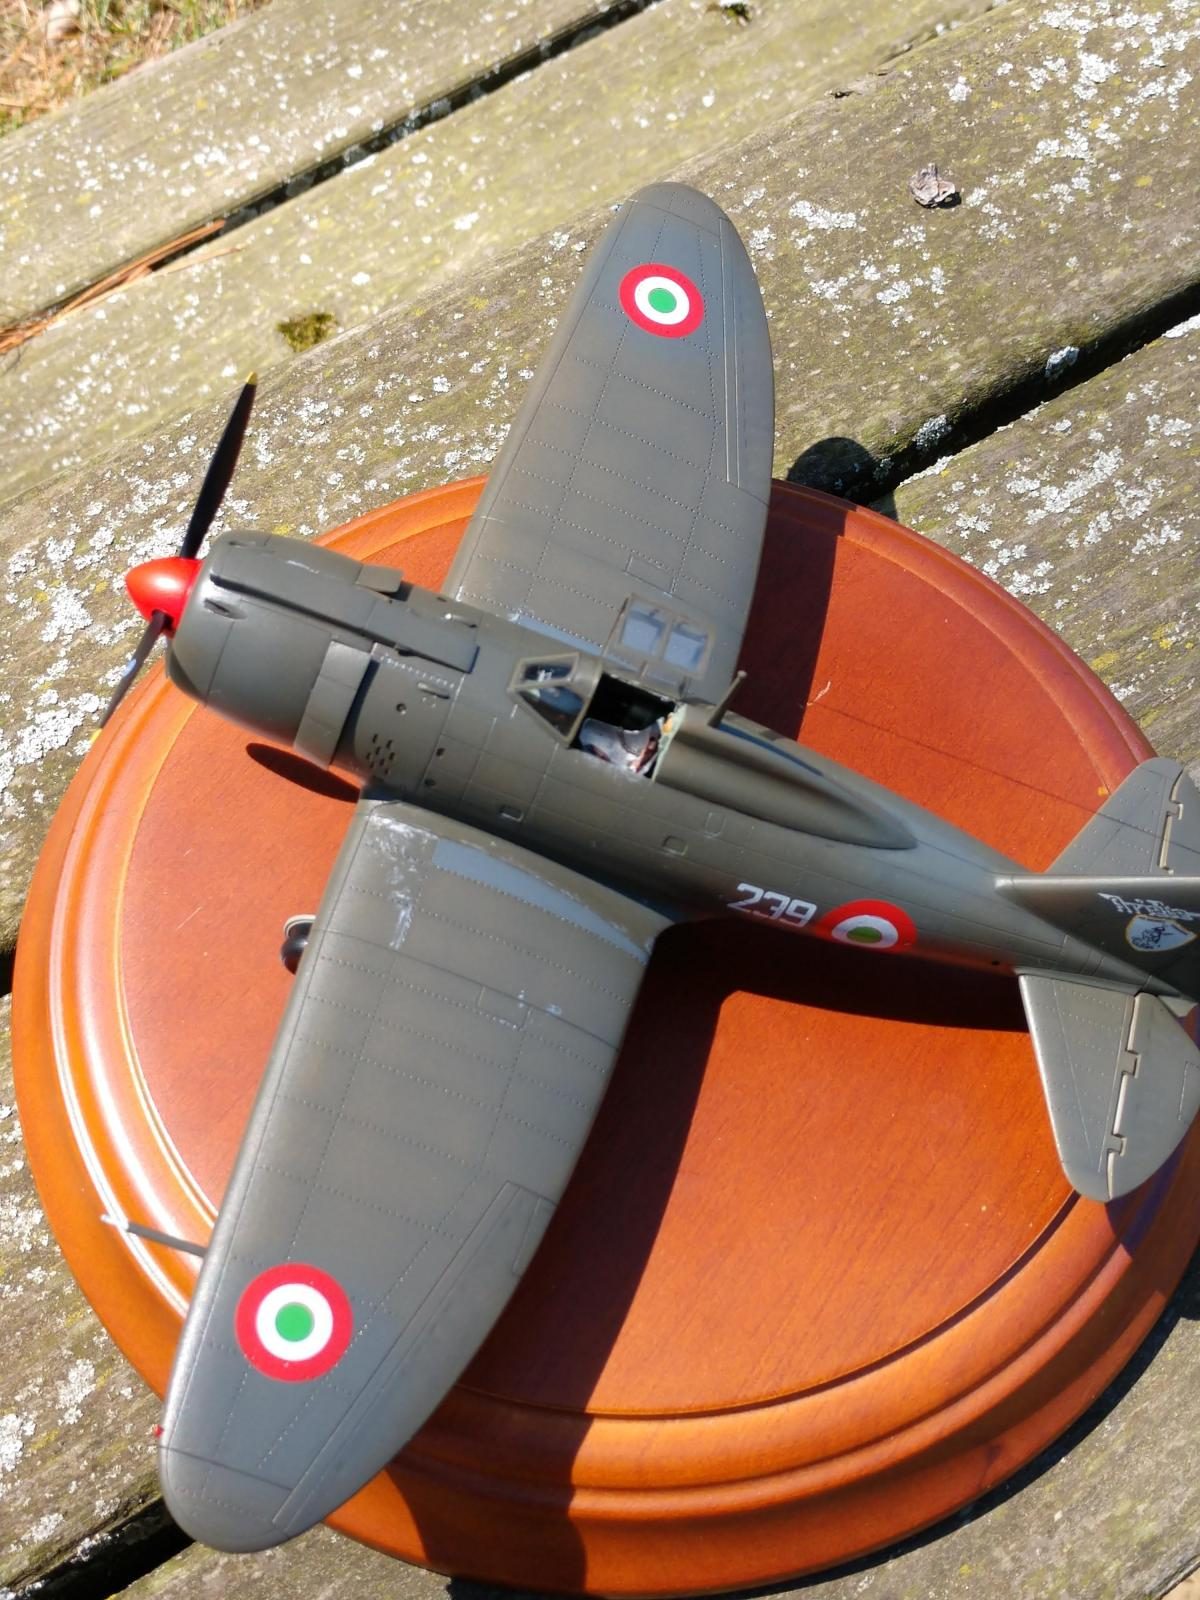
Looks very clean in this colour scheme, not the normal Italian spotty job. AMS or not, you turned it into something to look at twice. I´ve been toying with the idea of getting Special Hobby´s Re 2000 and turn it into a Swedish J 20 so seeing this might be a sign.
Great result for all that extra work and an Italian scheme that even I could do!
It is good that you had fun - but really, it came out GREAT too! I especially like the thin edges on the intakes on top - that small one on the side is worth a lot!
Thank you for sharing! - I'll pust the star 🙂
Perfection always takes time but eventually pays off like you have prooven with this build, Kyle.
Most important is that you had fun and are satisfied with the result.
And the result is absolutely great.
Looks "Fine" to me. That's a pretty big egg it's humping. Hint-next time throw in some pics from the right side too.
It looks "fine" to me too! That engine hidden away in the cowl is beautiful. Too bad you can't see much of it in the assembled model, but remember you know its there. Right?
Looks good Kyle. Good to know that "glutton for punishment" is inheritable. 🙂
Kyle, I ended up buying most of the same AM pieces you did, but my Re 2002 is likely to remain in the box while you've turned yours into a great build. Keep on fretting the small stuff if that's what makes you happy.
I can only echo all above comments, Kyle: this is a wonderful build and, though I am an OOB guy, I positively state that all extras you added paid off!
It's a great looking bird, and I've fallen all too often into that same trap: "this will just be a simple OOB build," but then - something doesn't look right... 🙂
Ahoy Kyle! Great to see you here with couple of (not surprisingly) really lovely models. I guess there is a modeler gene after all (never know by my kids though). Please keep posting your work here.
I don’t know how I missed this. Nice work!