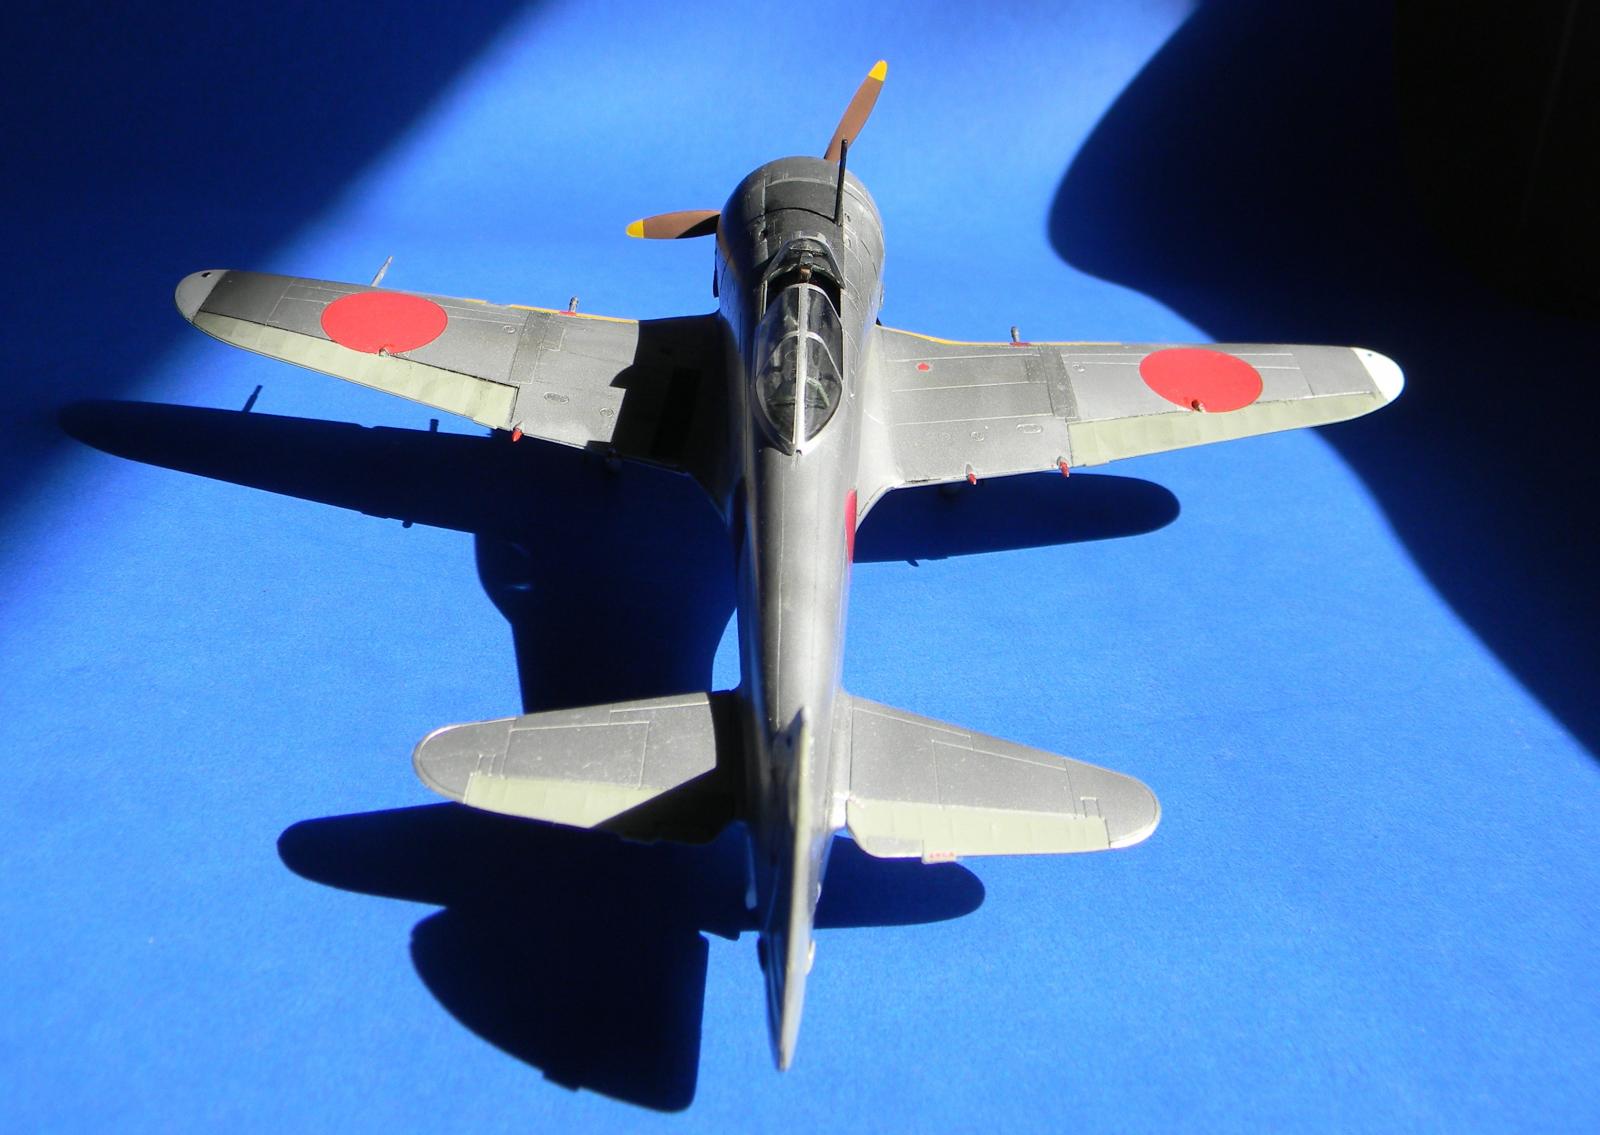
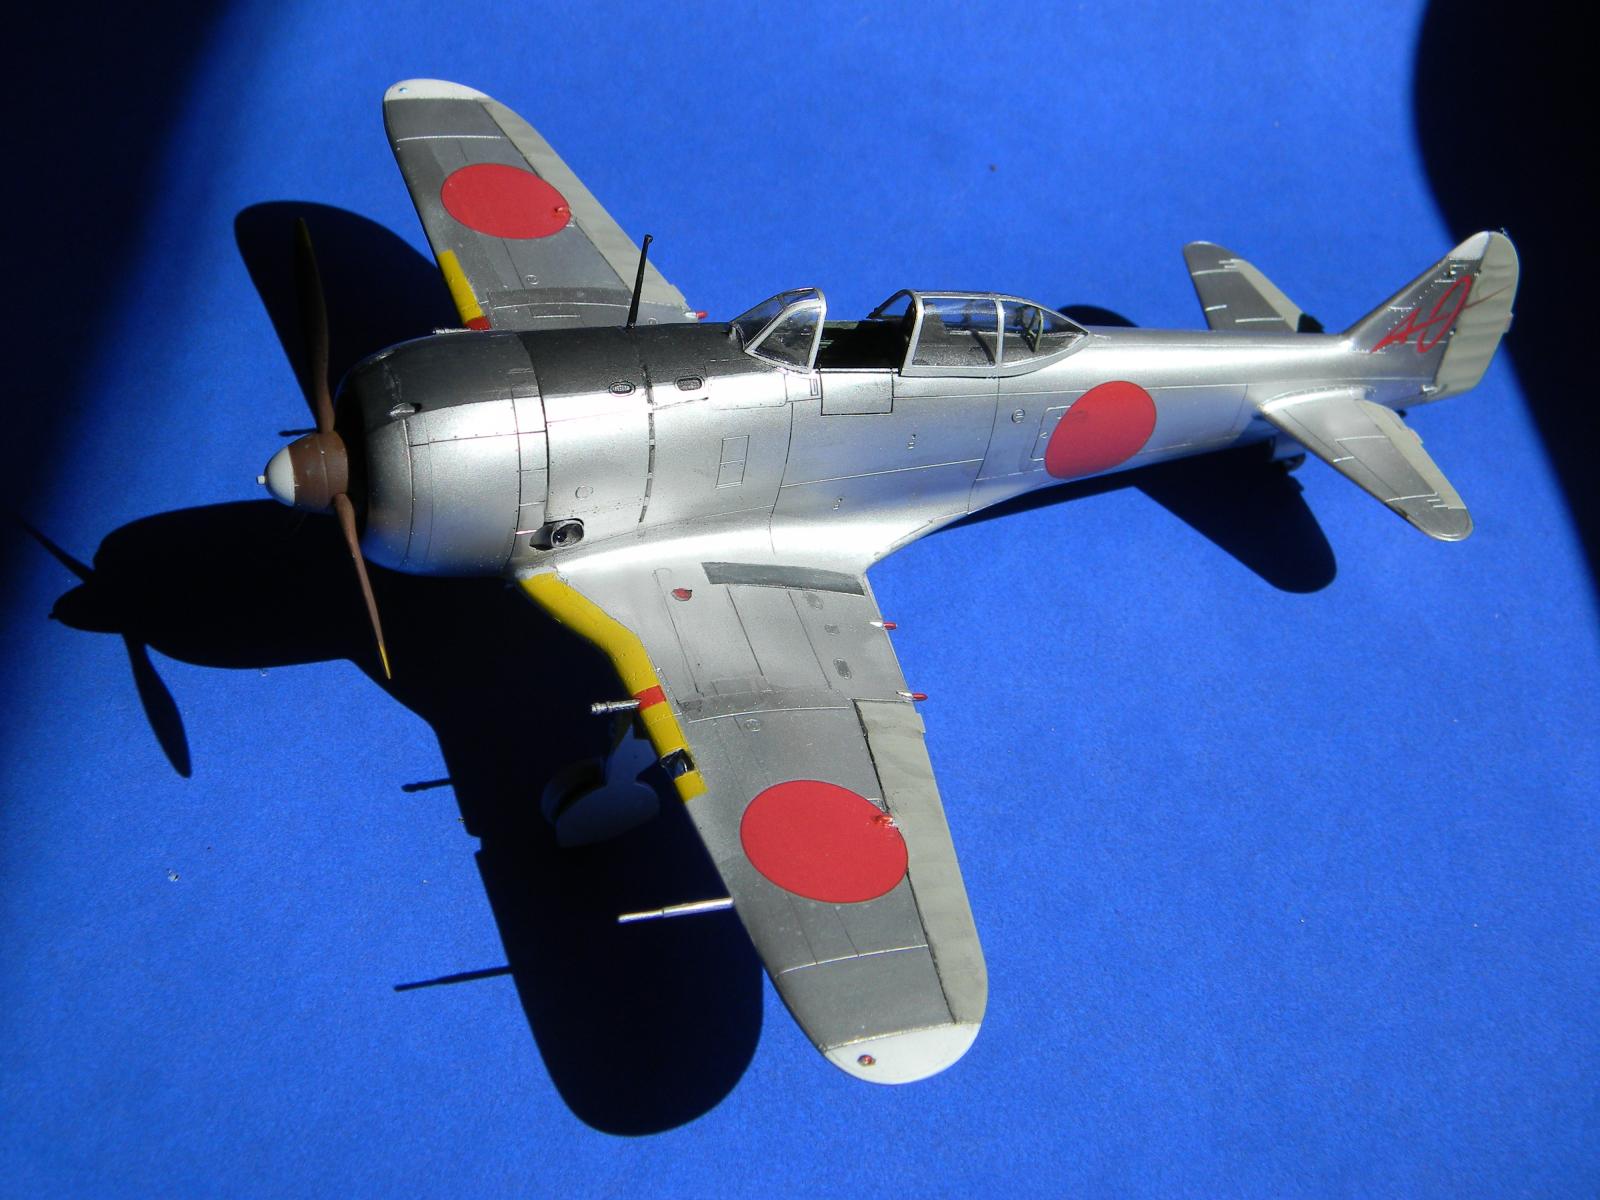
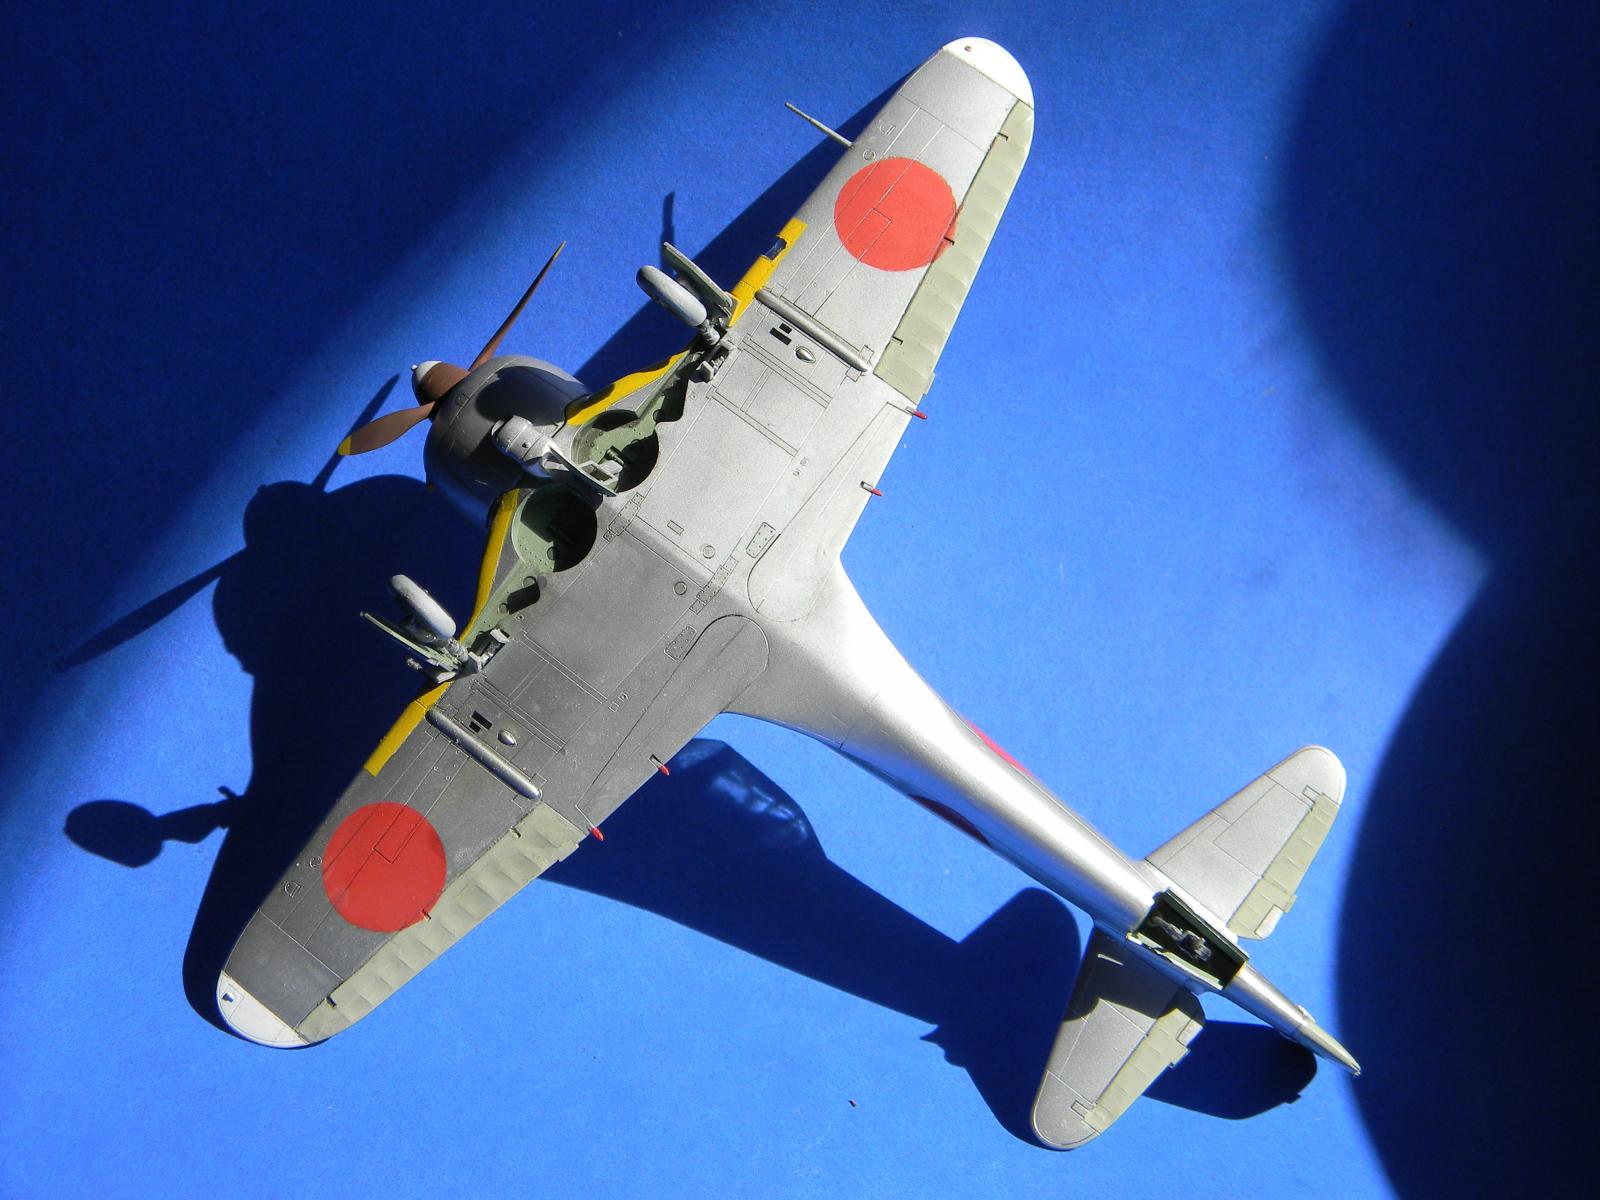
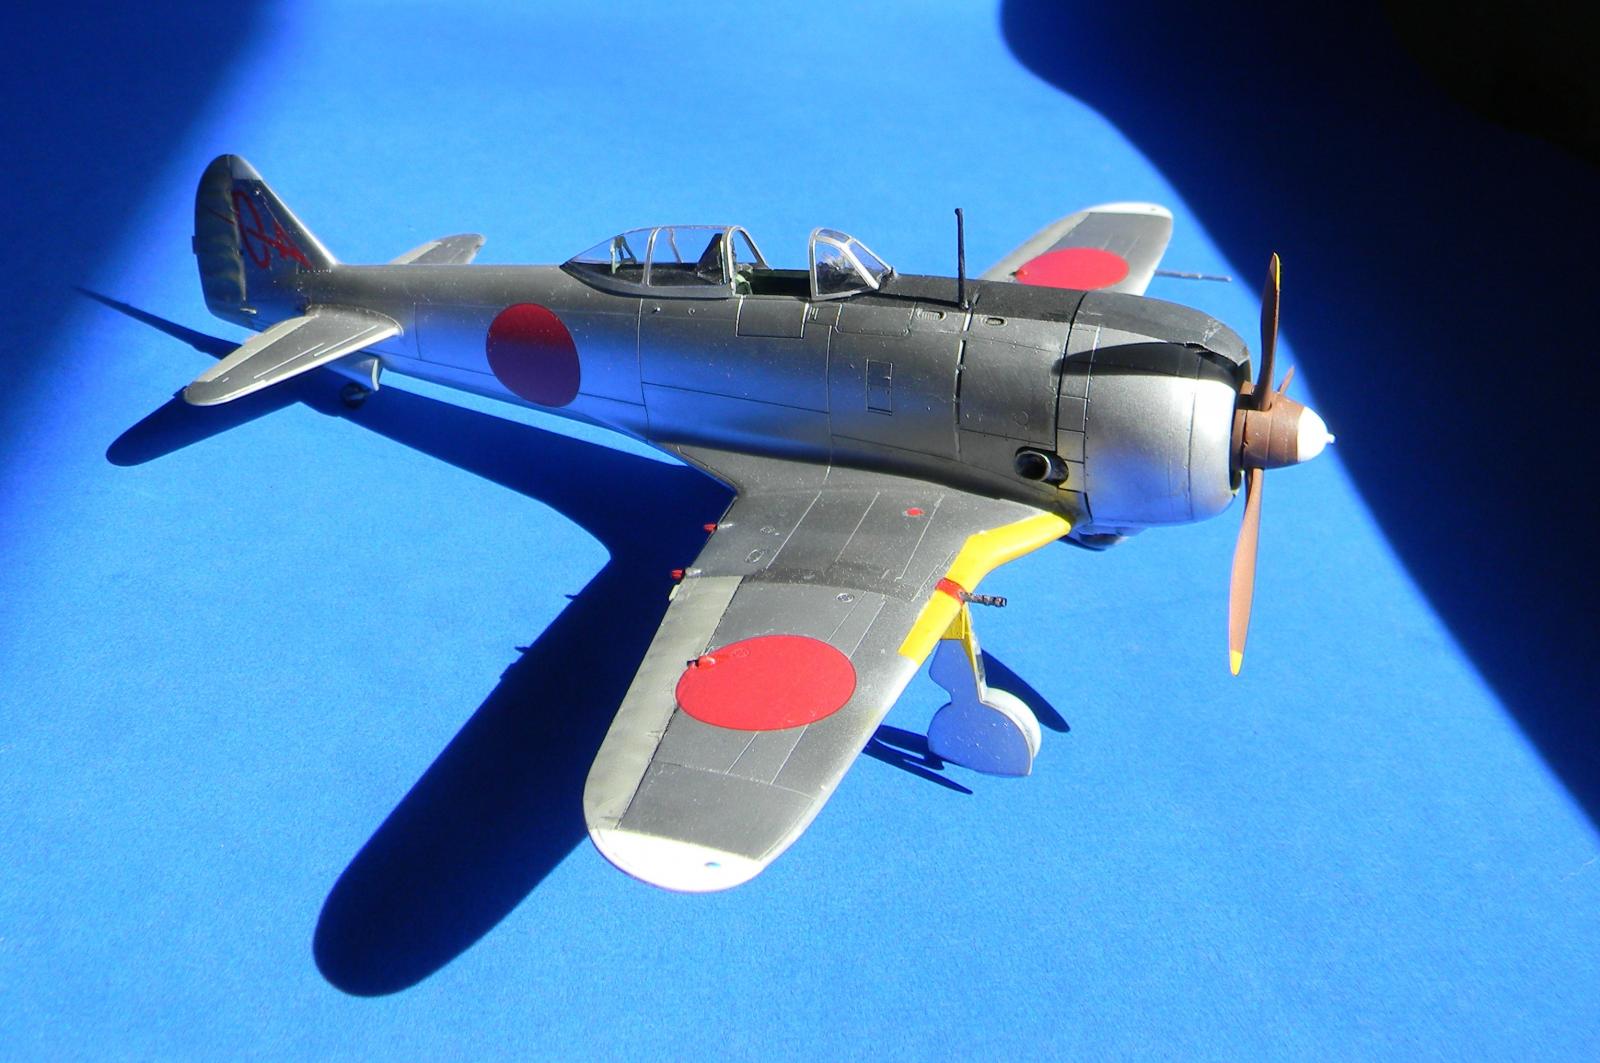
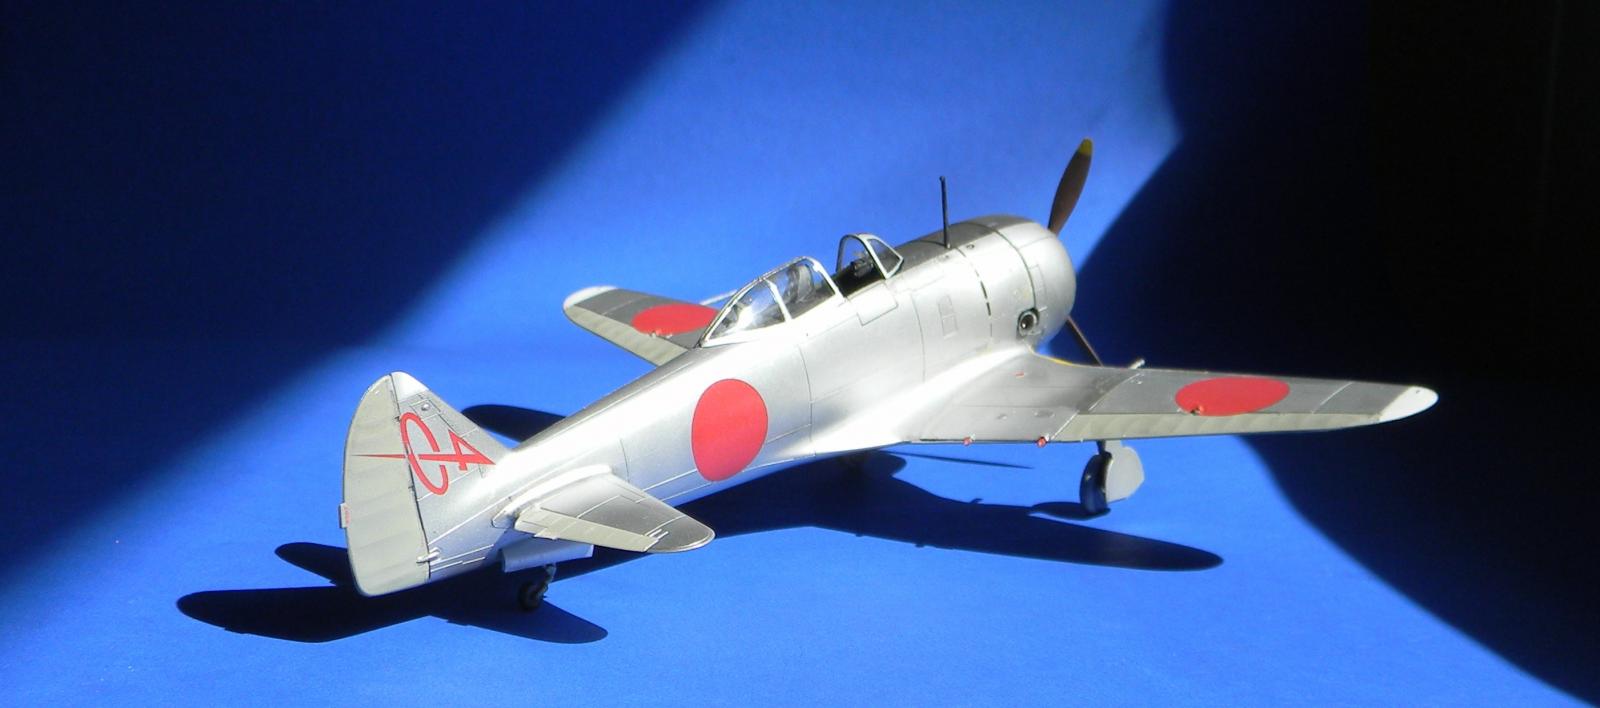
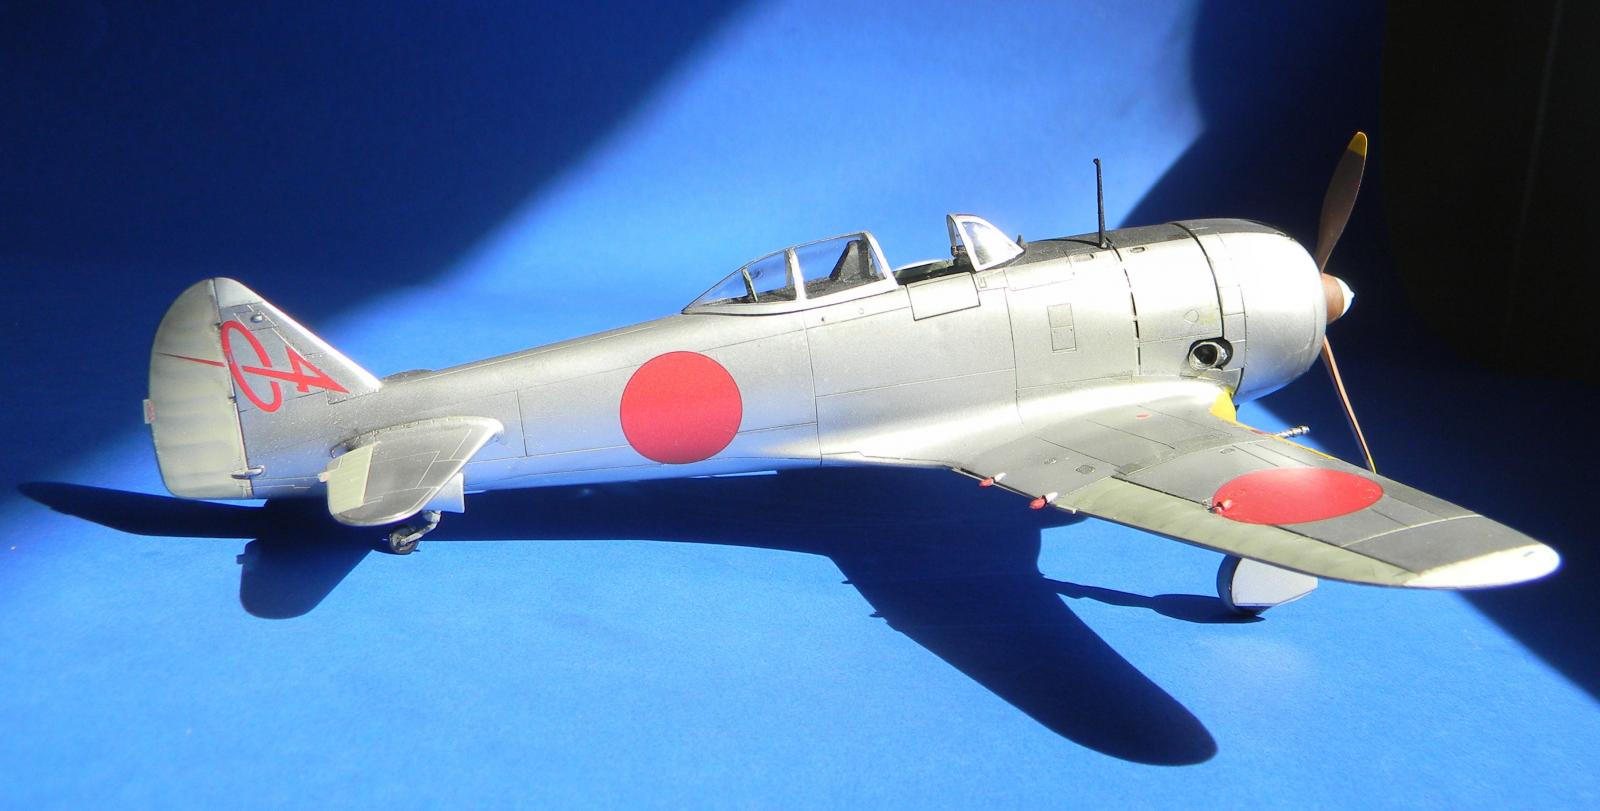
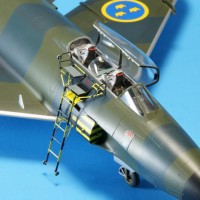
Hasegawa, Nakajima Ki44-II, Hei Shoki (Tojo) of the 104th Flight Regiment
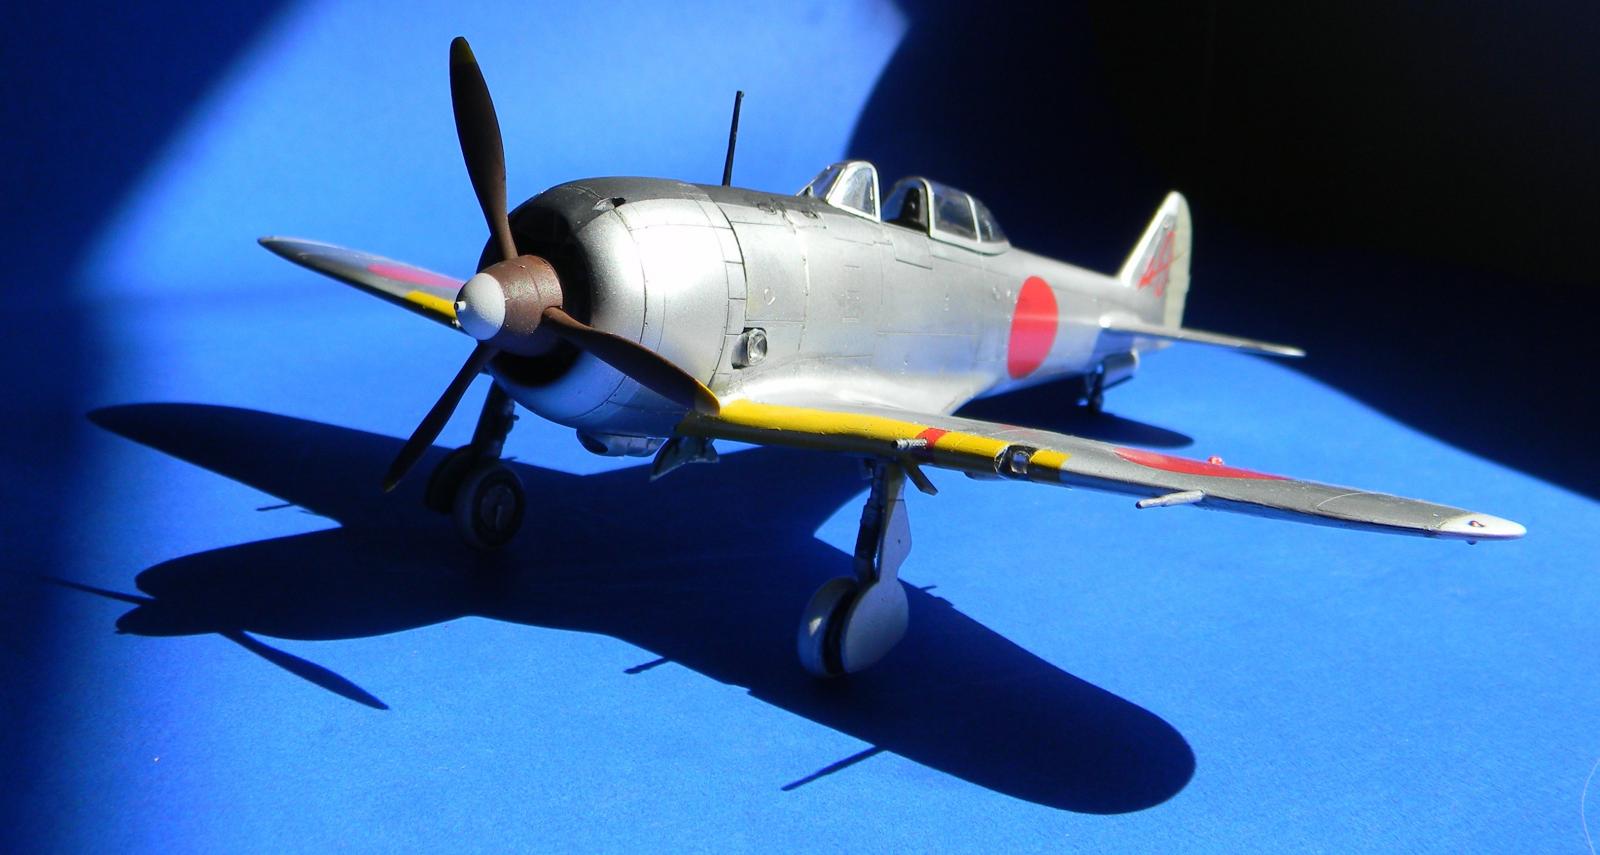
Once again I found myself at the Hobby Store wanting to do something easy and relaxing and for some reason the store owner likes to have Nakajima Ki44 1/48 kits on the shelf. Apparently they sell. This would be a short quick build . . . like going to war.
The paint scheme wasn't complex and the opportunity to show the lines and shape of the Ki-44 would go well with a simple natural metal finish. Assembly was straight forward with out any of the Hasegawa inserts. The only problem was the control stick that would fall out from sausage sized fingers that repeatedly knock the stick out of place after gluing the two fuselage halves together and even with the use of hemostat the tool that surgeons use to repair delicate tissues in the human body, did I manage to loose the stick. No problem, I scratched built a new stick, prior to that I painted the interior of the cockpit Nakajima cockpit green Tamiya XF-71, paint the gauges in black and picked out the details with colored pencils. Followed by a wash of Tamiya panel line accent color in black. Followed by some Tamiya tape for a seat harness. Having ended the first campaign we moved on to the main battle.
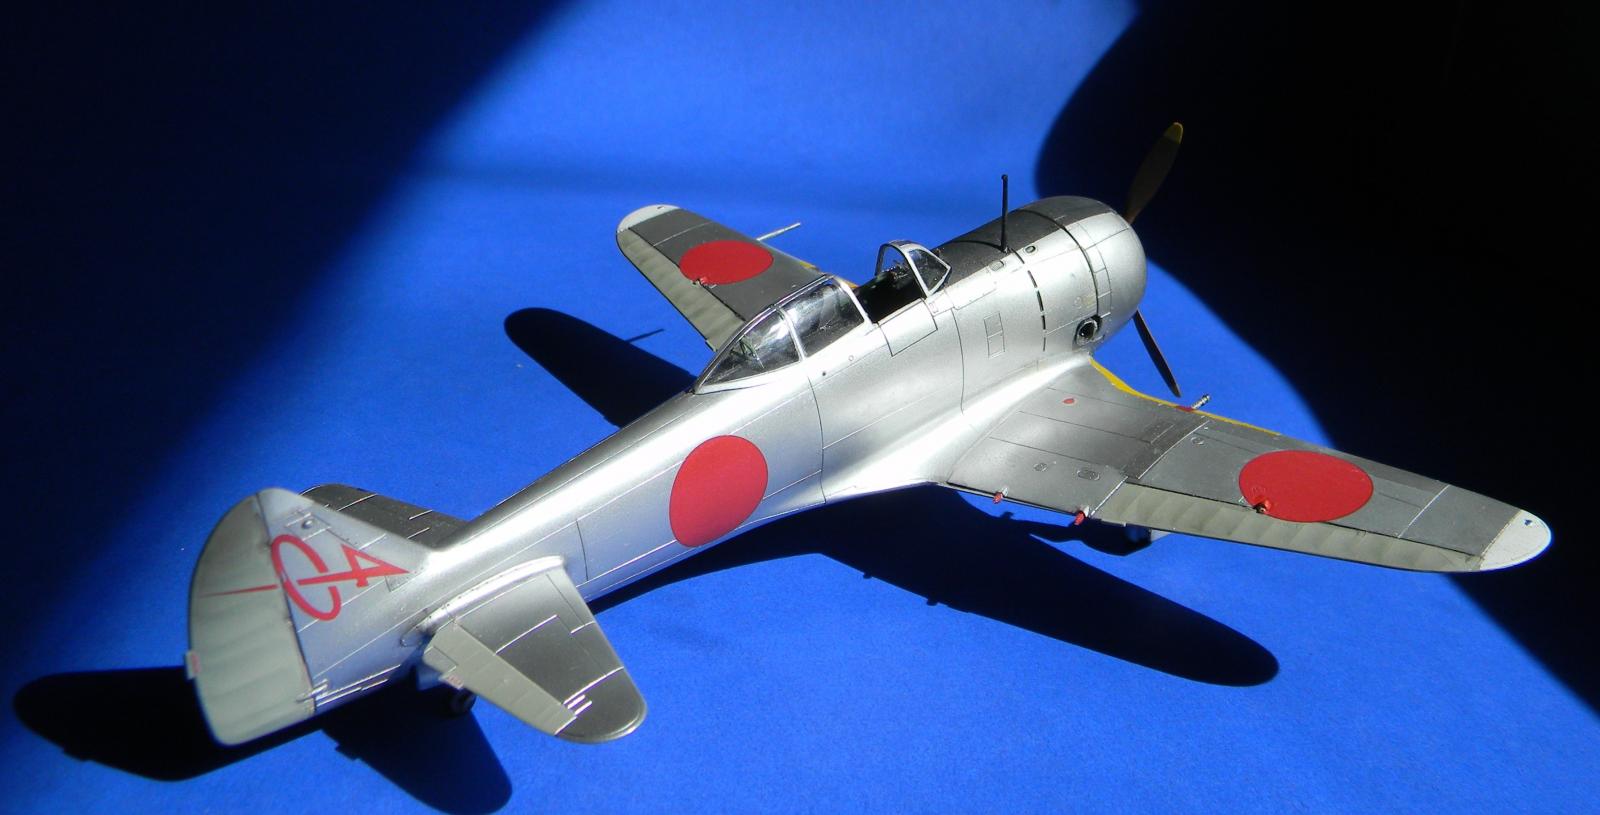
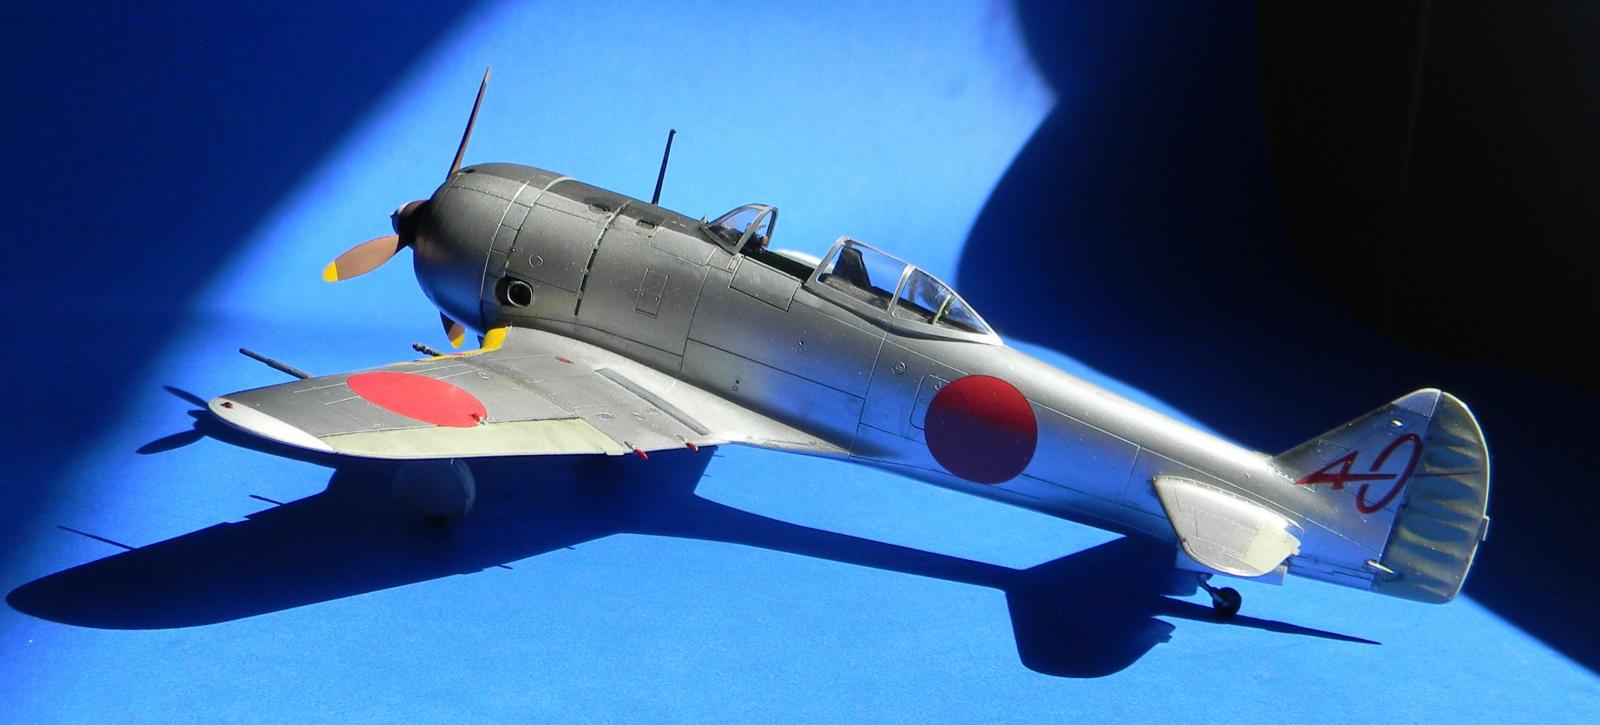
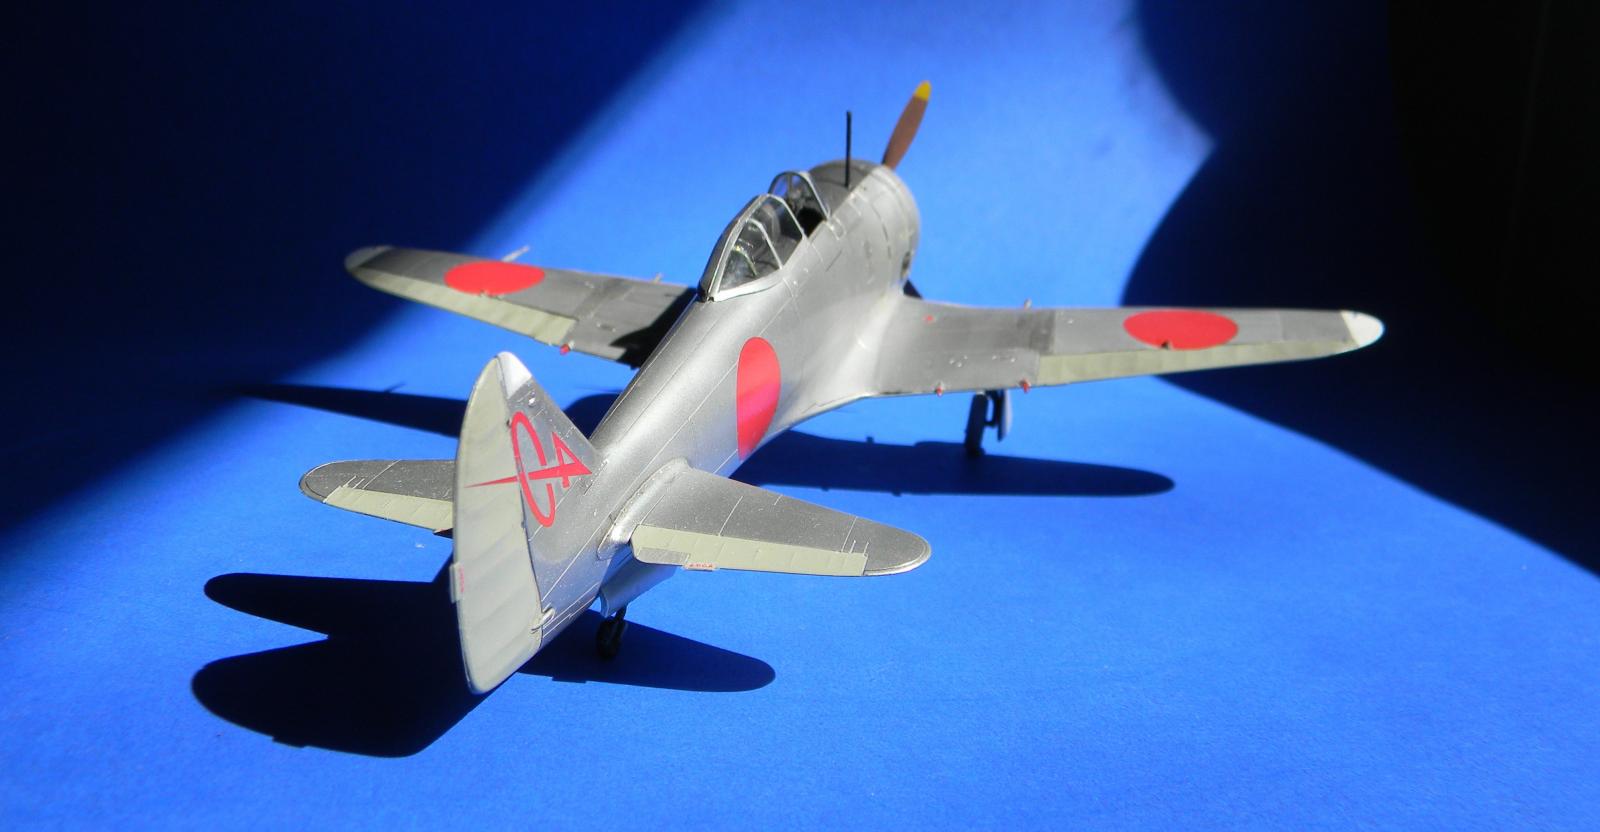
For years I had used Floquil model rail road paints and had gotten used to using Old Silver which was the go to product for ham fisted modelers who needed to have good results with out fussing about. The end is near and the age of enamel paints and lacquers for hobbyist is moving south. Kicking and screaming I pulled out Model Master Aluminum Metalizer Lacquer and started to use with what seemed like a ten year battle of lifting off Metalizer with Kabuki tape applying another application of Metalizer follow by creating another error or having something bleed onto another panel line. I started to mix various shades of Lacquers in the Model Master line. Sometimes I found that by lightly shaking the aluminum bottle that you could get subtle shades of aluminum too. After each application I started to brush on Pledge. (Going to Wally world to find the Pledge was an adventure during a pandemic . . . look mom no mask.) I would of, should of, painted the ailerons, elevators and the rudder first with Tamiya XF-72 but, you live and learn during the adventure. Next time. The yellow identification strips on the leading edge of the wing where painted in Testor's enamel chromate yellow. Another learning experience. After getting things into shape a final coat of pledge for decaling was done. For the most part the decals went on with out a problem until one of the bottom red roundels split and start to come apart. Rather than try to fix the decal I chose to remove it and its companion piece on the other wing. Out came the OlFA cutter and two circles where cut in Kabuki Tape and used as masks to replace the decals. Painted Tamiya red. The red was not coated with Pledge and the rest of the model was given another coat. Panel lines where accented with more Black Panel Accent color. Applied like a pin wash. The canopy was finished with a Eduard mask and dipped in Pledge . The landing light was replaced with a MV lenses. Covered with scotch tape and The model sat for several months.
Fortunately, Louis Gardner gave another shout out for "The Empire of Japan 1919-1946" group build. Thank you, Lou. A photo shoot was planned. Then it was learn that a house cat had gone missing and unattended for an hour or two. Curiosity and closed doors do not mix well. Lady luck prevail the model had been looked over and the hair was removed. Nothing broken just another hair raising experience to a simple relaxing and easy build. The shoot was done with two production assistants in natural light. One assistant kept on batting the camera strap and the other cat wanted to inspect the hardware. Taking photos with one hand works, two hands on the camera and no cats works better. Eventually, everyone was professional and went about their business.


Despite the issues it turned out very nice. I built this a while ago and I think I may need to get another
I just had to throw out a bottle of Floquil Bright Silver and I'm down to my last bottle!. I have and use all the Alclads, but theirs's just something about the Floquil silvers!
Very Nice Devil-Queller. Painted very well, and good job getting those flaps up.
Love Cats (most of the time) and have a few, but from a modeling angle, cats and plastic don't mix.
Quite a nice build. I have liked the lines of the Ki-44 despite it being a bit unpopular among IJAAF pilots (mostly because it was designed to be an energy fighter for zoom and boom attacks rather than maneuver like the Ki-43/Ki-27.)
Brilliant build, I recently built two Ki-44 and I have 2 more in the stash. The Tojo has great lines and there’s a wide array of camo schemes to paint them, and even more ways to weather them. If you don’t mind lacquers, I have found Mr Color Super Metallics (SM20X) to be very durable and give a great shine.
Seeing this has prompted me to try and finish my 1/32 version, definitely liked.
George, @chinesegeorge
I would love to see you finish up with the foil on yours. The larger Hasegawa kit builds up into a beautiful plane. Take care and stay safe.
Thanks, Louis.
Really like the NMF. It has a very natural sheen.
It is an awesome looking Tojo, Stephen.
The NMF did indeed came out very nice.
This is a wonderful build, Stephen!
The NMF shades look great!
Glad your cats co-operated during the photo shoot!
Looks great! Nicely done.
Stephen, @stephen-w-towle
First off, I want to thank you for building this one for our Empire of Japan group. Secondly, I want to compliment you on your build. It looks magnificent. I especially like how you painted the panels to have a different shade of metallic. Painting a natural metal finish is hard to do and have it look like something. That's why I started using Bare Metal Foil. It is actually easier for me to go that route, since I am so horrible with the painted on bare metal.
You have had a little more than your share of things happen to you during this build, yet in spite of all these obstacles, you prevailed.
I had a big German Shepherd, and unfortunately, her hair was always getting everywhere. We bathed her and groomed her as we should, cleaned the floors regularly and so on. Yet in a matter of hours, our floor would look as if it hadn't been cleaned for a while. Needless to say, I have more than one model in the display case that has some German Shepherd DNA lodged into it somewhere, in the form of dog hair perfectly blended in with the paint.
I am happy that your cats cooperated with you during the photo session.
The Ki-44 is one of my favorite Japanese fighters. The Ki-61 Hien is my favorite, and this one, the Ki-44 is a close second. It reminds me of those animated cartoon English Bulldogs. They took a great big engine and built a tiny little airplane around it.
I recently finished up building a 1/32 scale Hasegawa version and it looks very good in a bare metal foil finish. I have several more of these 1/48 scale Shoki's in the stash, and now that the Empire of Japan has been extended without a deadline, don't be surprised if you see me break out a few more of these in the future. There are a bunch of different options available when it comes to camouflage schemes.
They look so cool, and yours looks perfect. I definitely pressed the "liked" button. Thanks again for building and please don't hesitate to do another one (or more) for our Empire of Japan group.
Well, it looks like a nice simple easy build to me!
A nice, simple, easy build, with a great result, that is!
Thanks guys for your gracious positive comments and for giving the gift of time in looking things over. Its a good motivator.