1/72 Airfix Beaufighter TF Mk. X Coastal Command
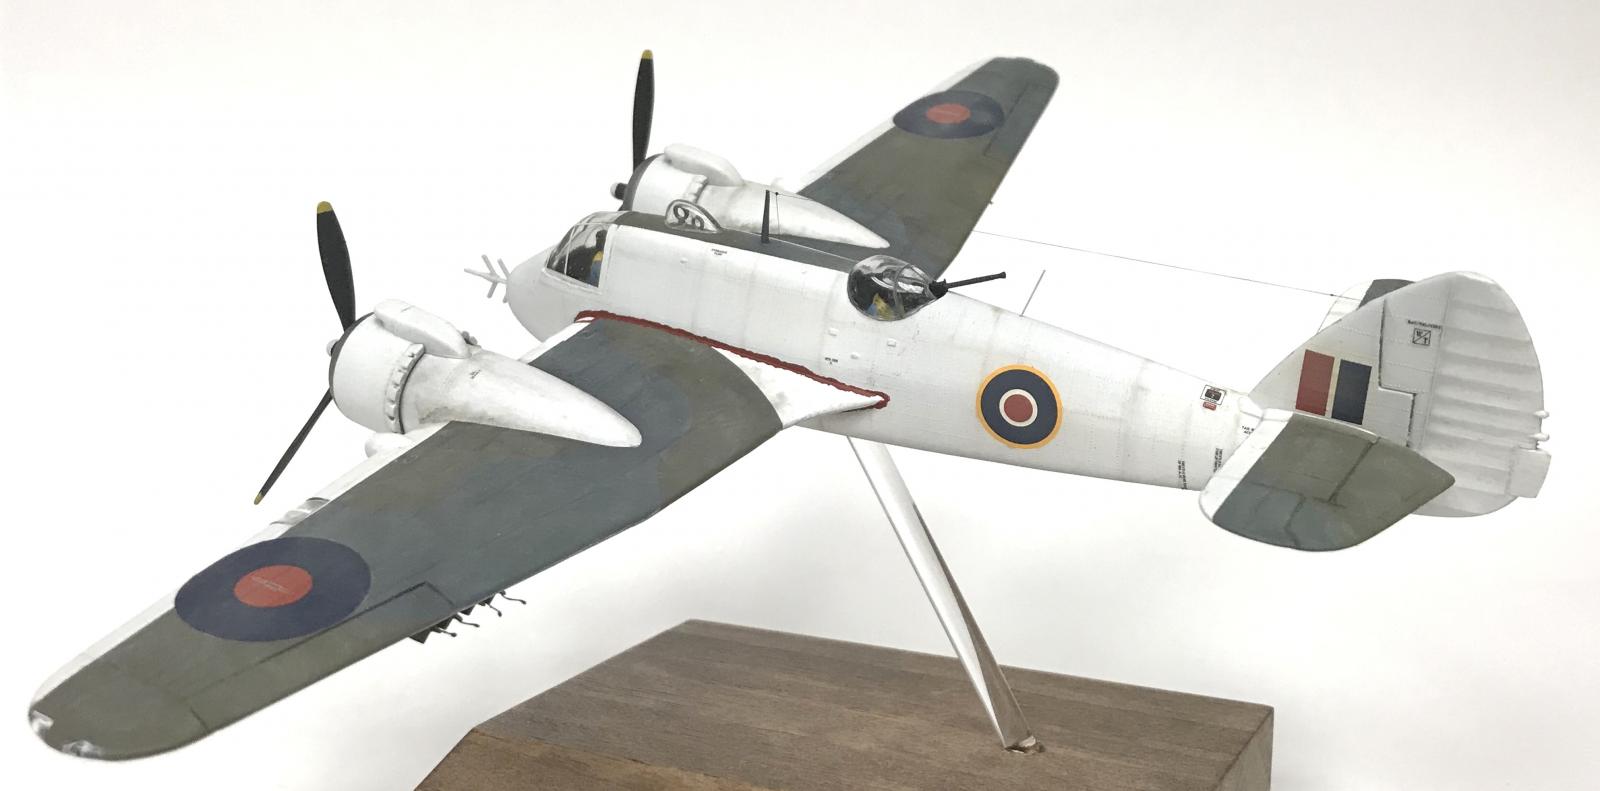
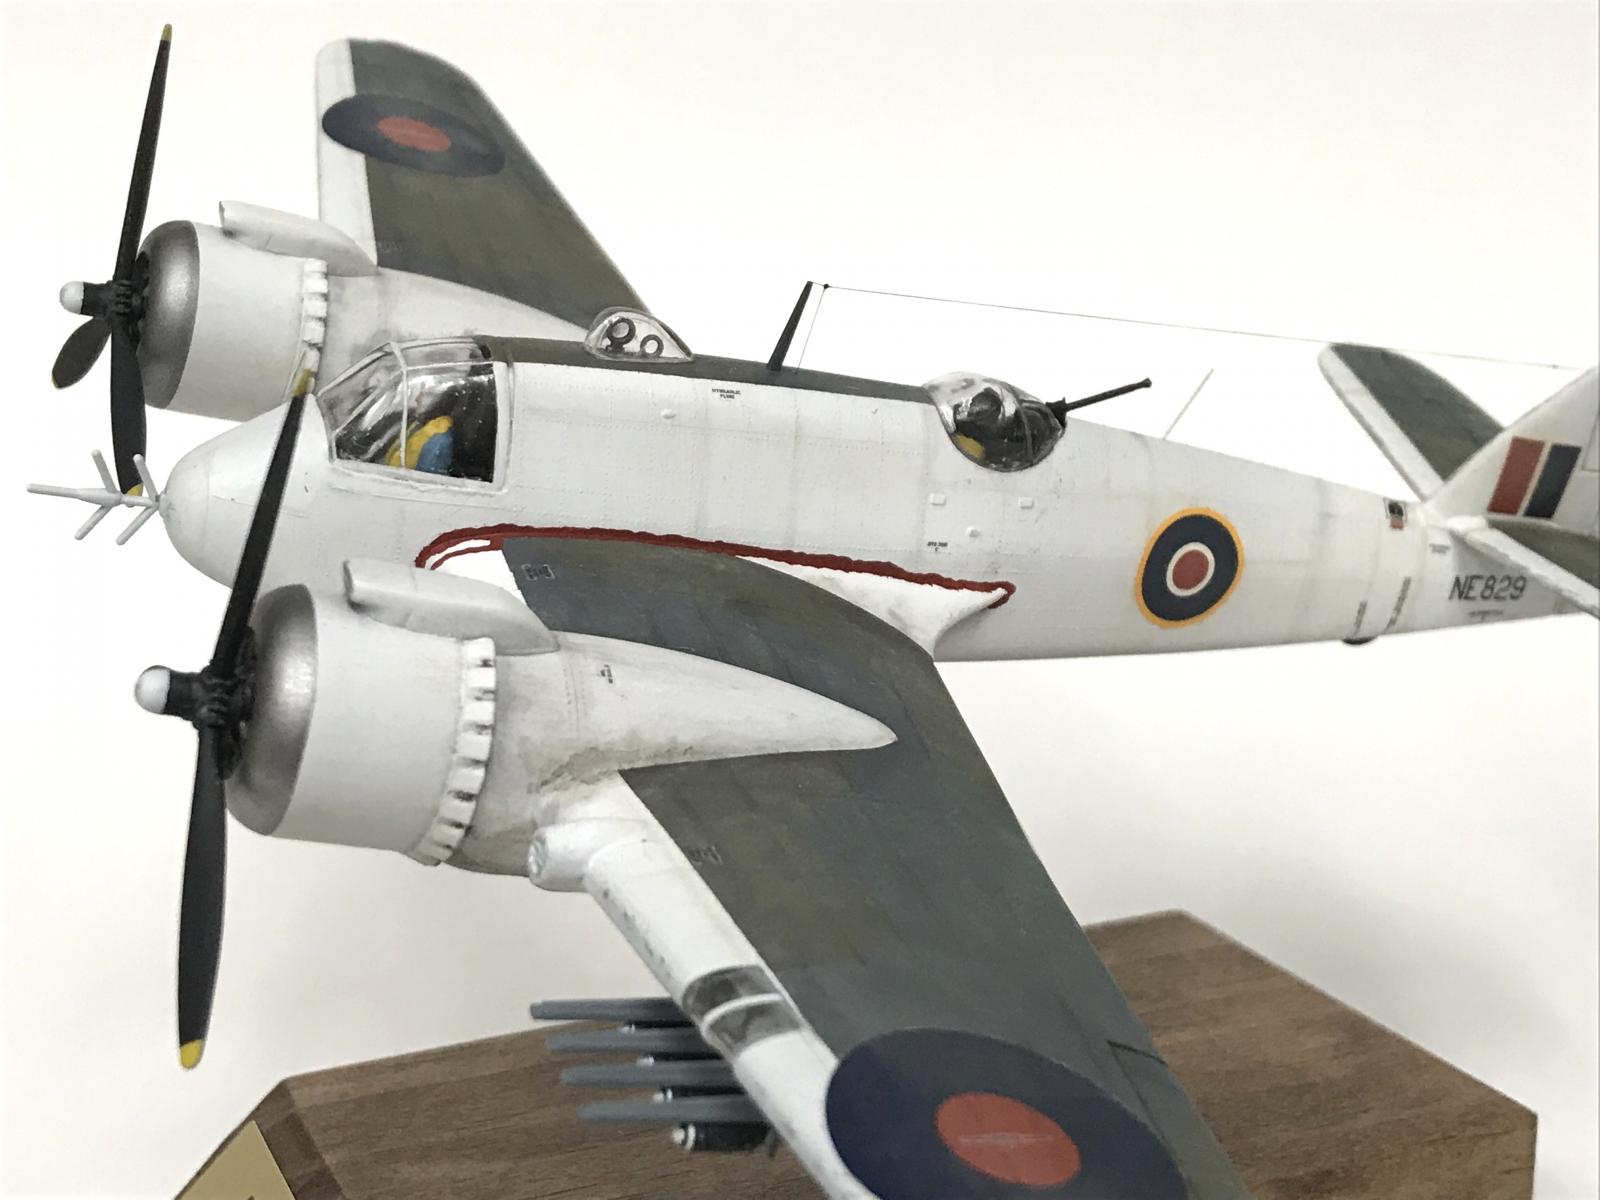
I call this my FrankenBeau... This was from the old Dogfight Doubles kit (along with the Bf 109 G from my prior post) so a very basic kit. No gun ports, no ejector chutes, raised rivets and panels...
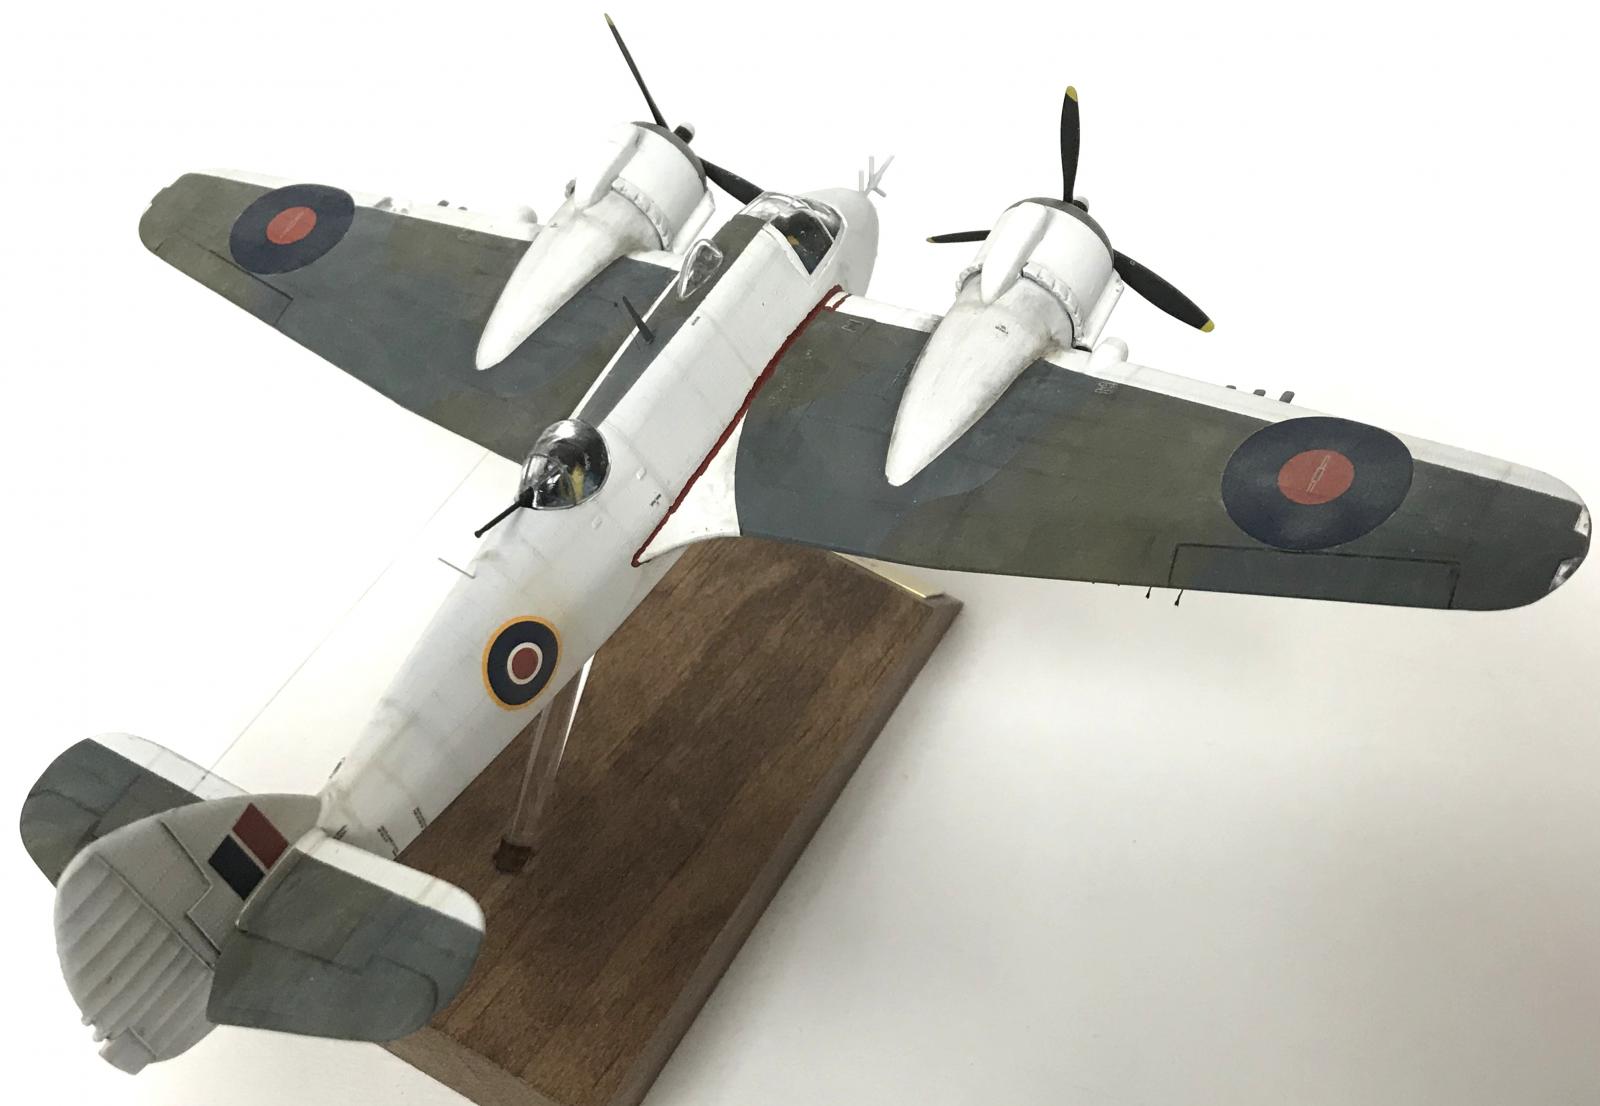
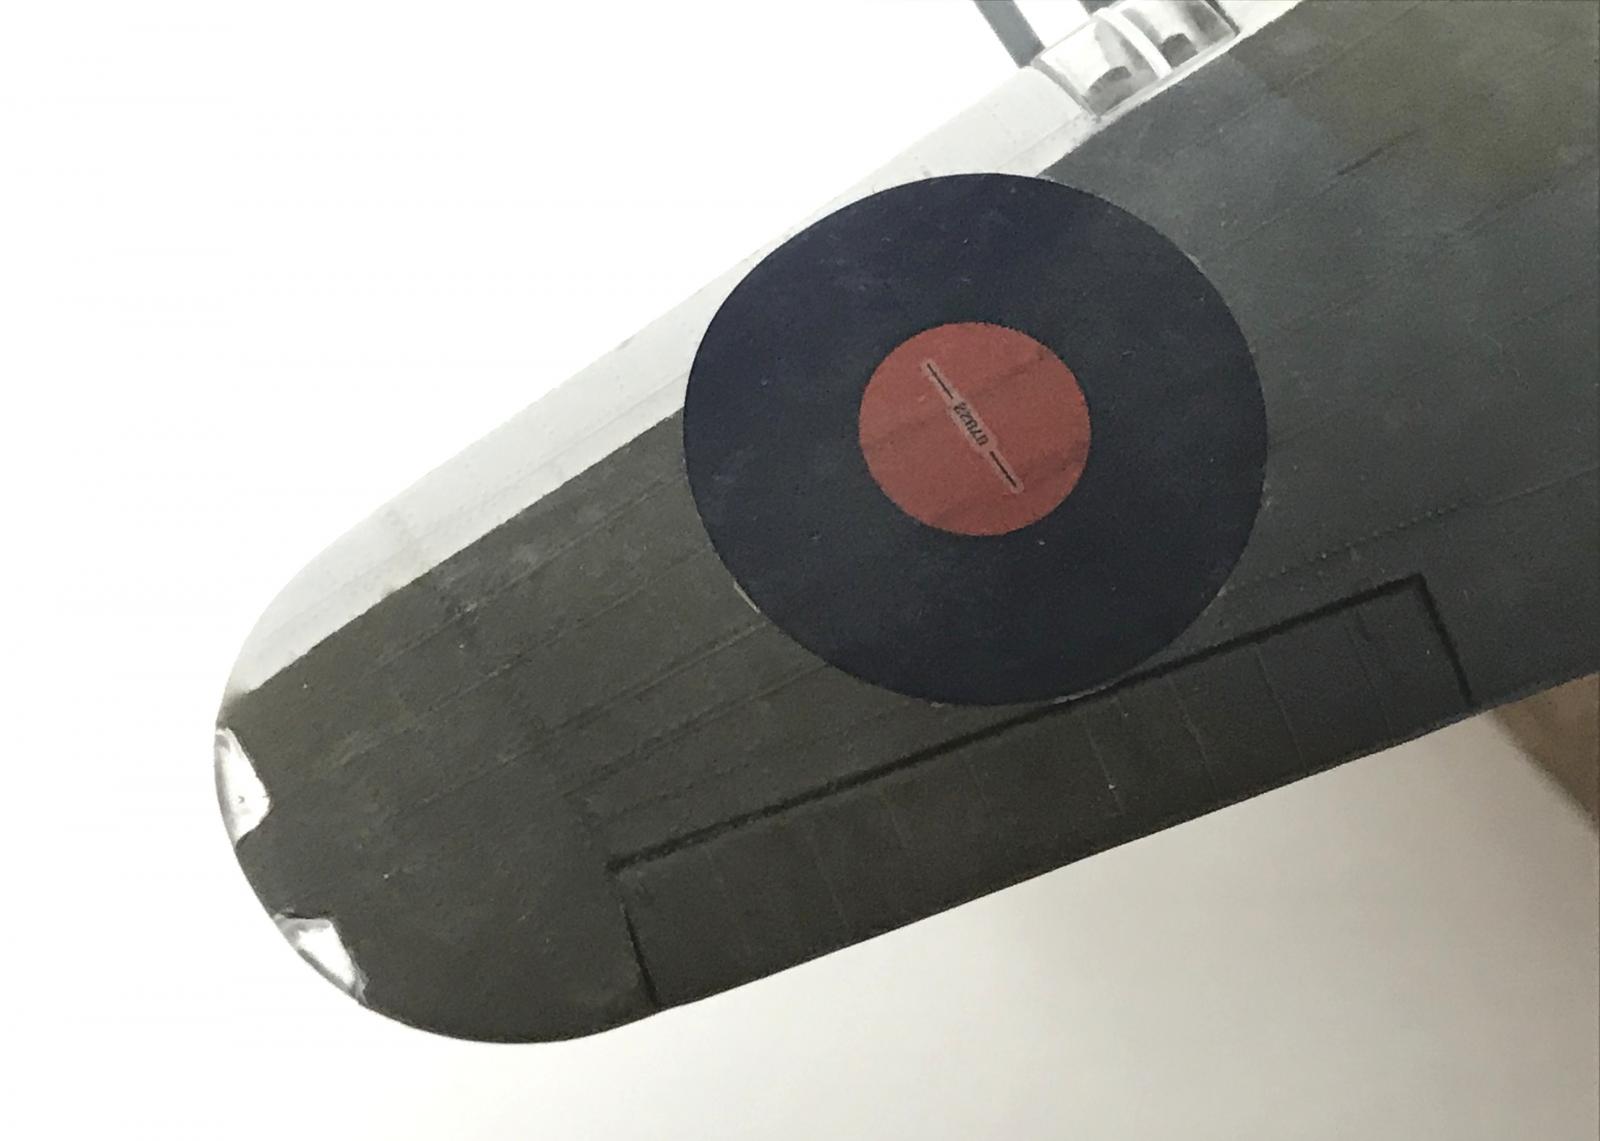
I had accidentally purchased a box of Hasegawa Beaufighter parts years ago at a model show, so I decided to pull from what was in that box to modify this. I also was given a partially built new tool Airfix Beau from a friend who already had built it up pretty far, but it was badly warped (tail section) so I decided to rob from that box also. There was an Xtra decals insert (no decals - just the reference sleeve) that showed this Coastal Command Beau, and I loved the scheme, so I used the decals from the new Airfix kit to approximate those markings (not totally accurate, but close enough for me!) after I found reference photos of the actual aircraft.
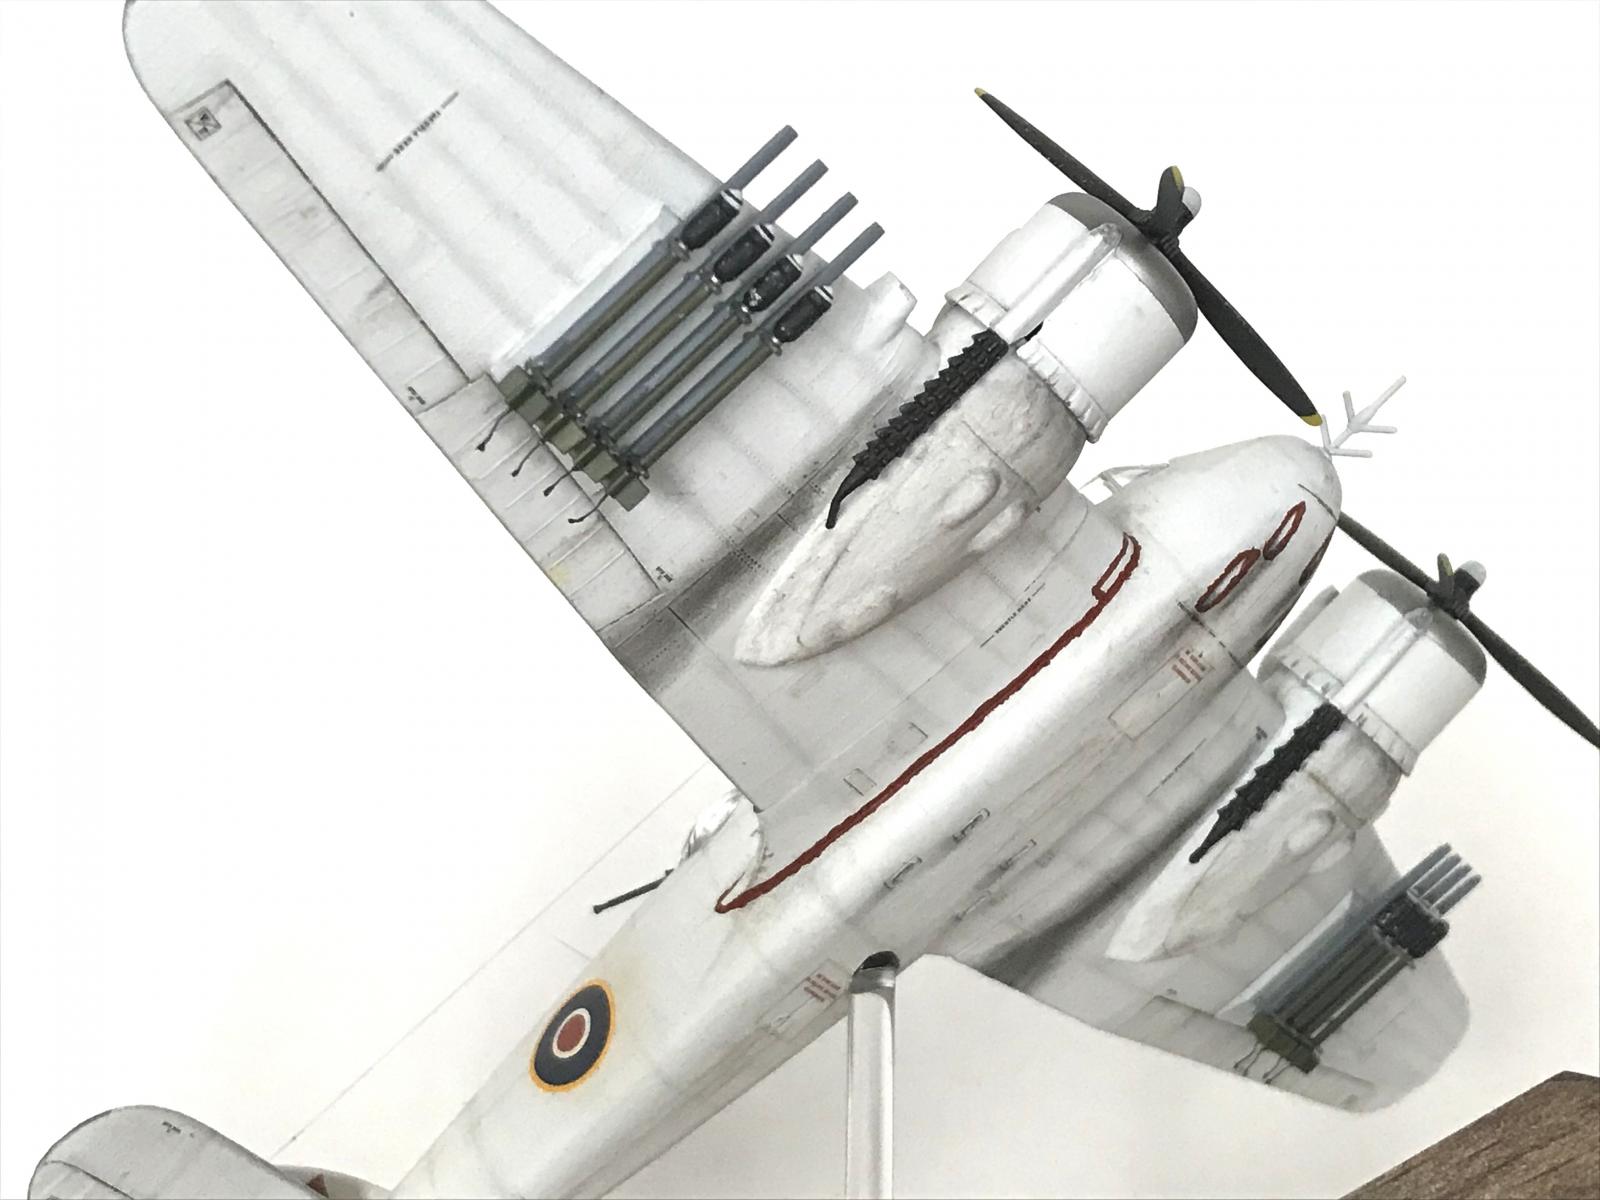
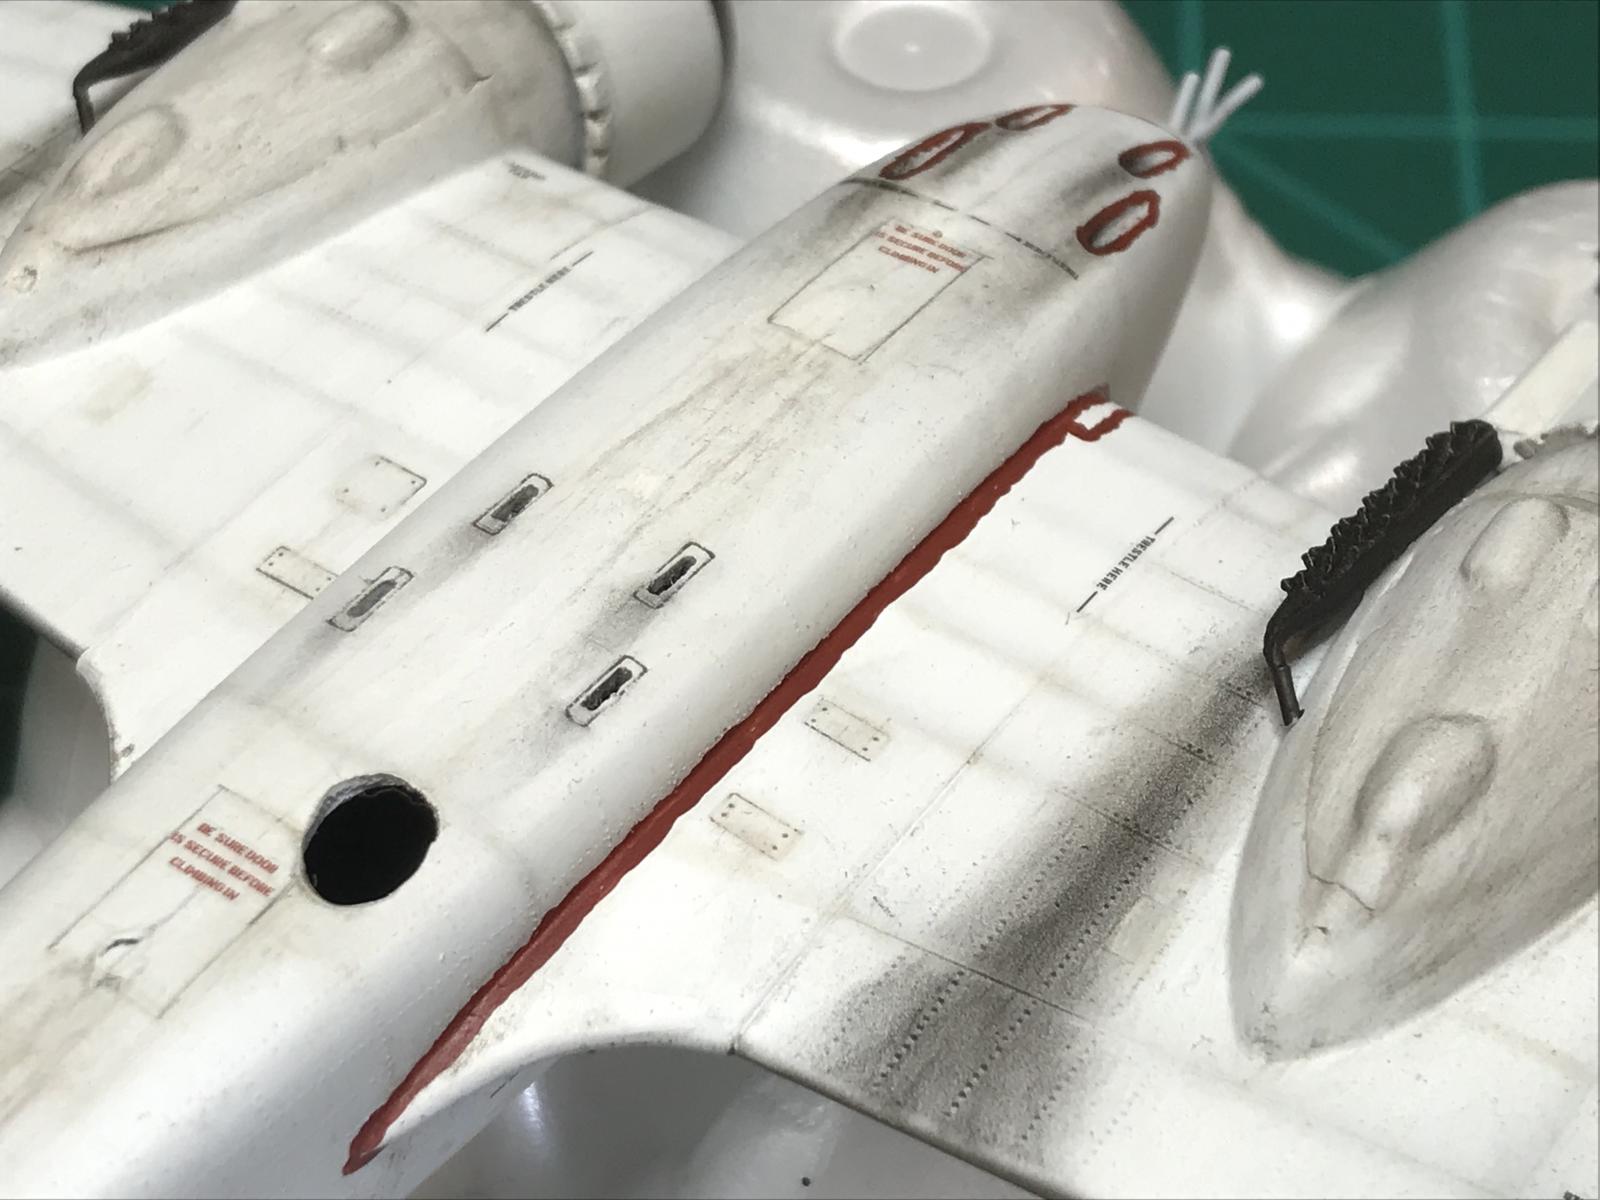
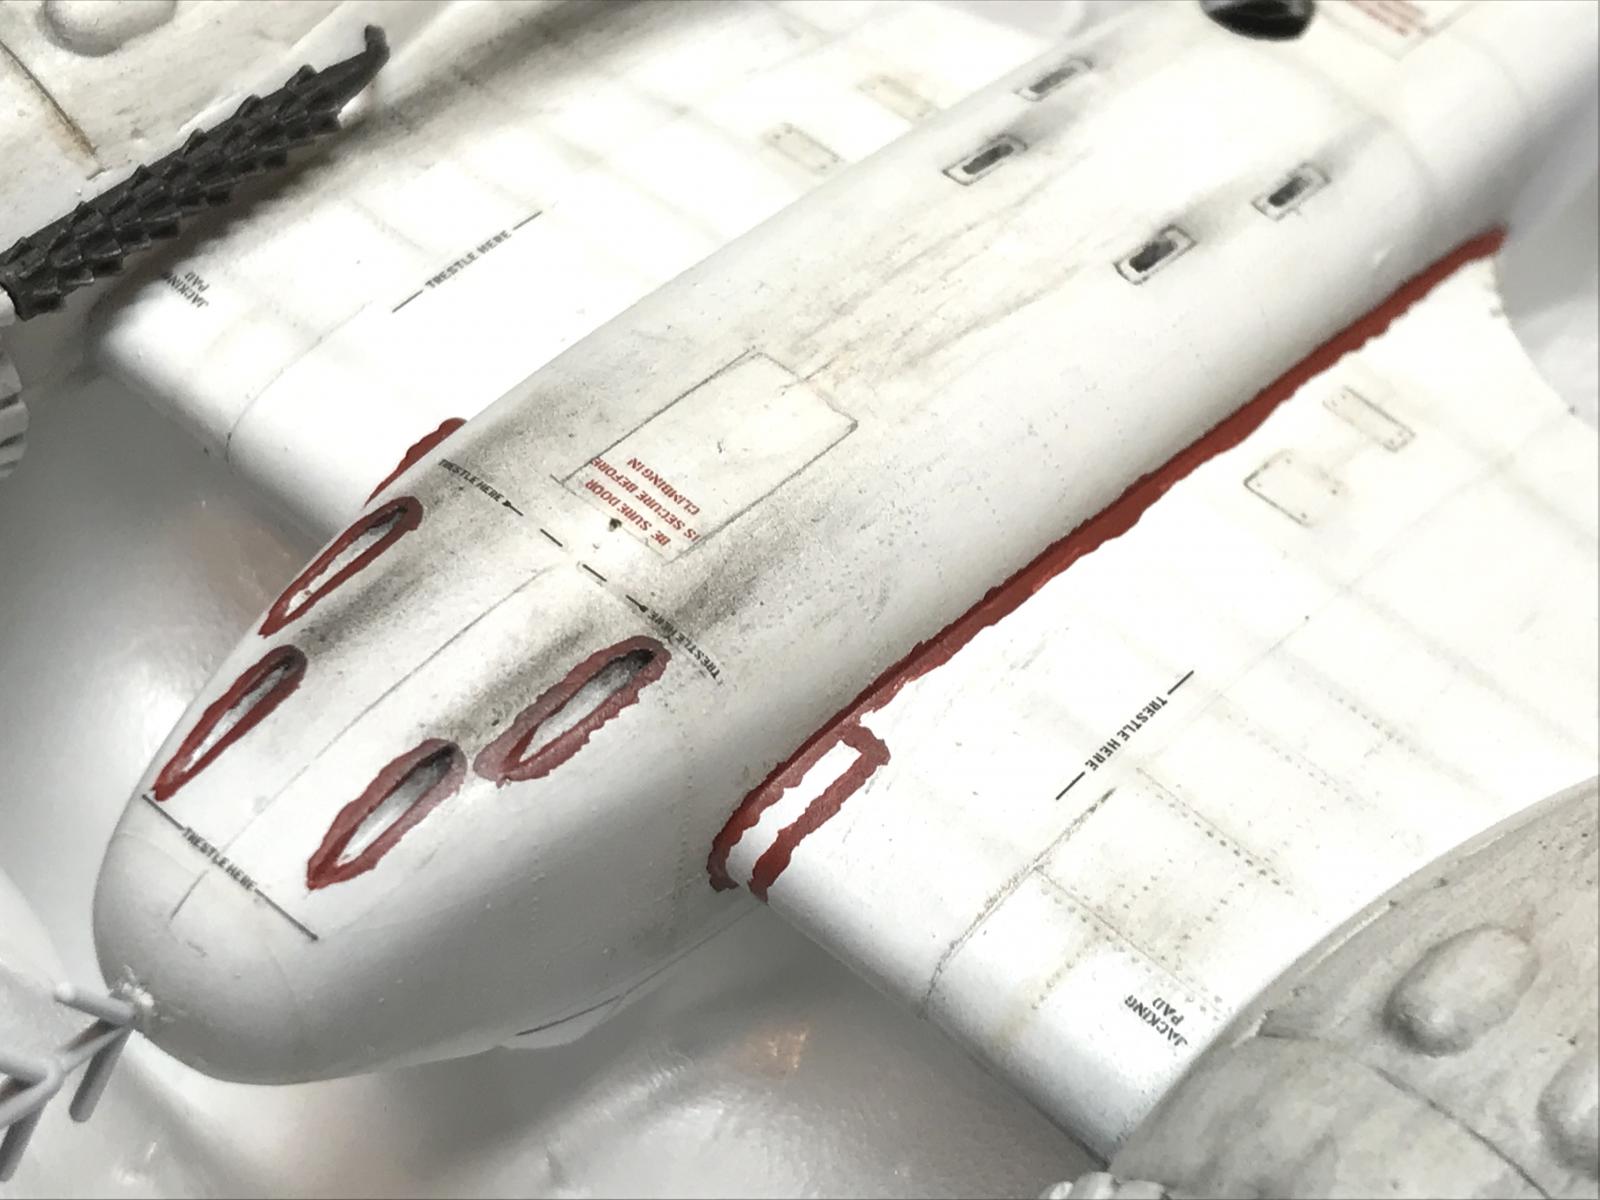
So - I reamed out gun ports and created some ejector chutes using reference pics. I had the main build pretty much together before I received the new Airfix kit, but once I received that, I used it as a reference for the size of the tail wheel hole, panel lines to mark more definitively, etc. I had already filed out the wing tips and wing light areas and used the wing tip and landing light lenses from the Hasegawa parts, which weren't totally the correct size (depth) or I would have used the Airfix clear parts. I realized after I had added the wing tip lenses that I should have drilled and painted the bulbs, and that the entire lense case was not colored. I decided it looked closer to realistic just leaving it clear than painting with red/green clear paint.
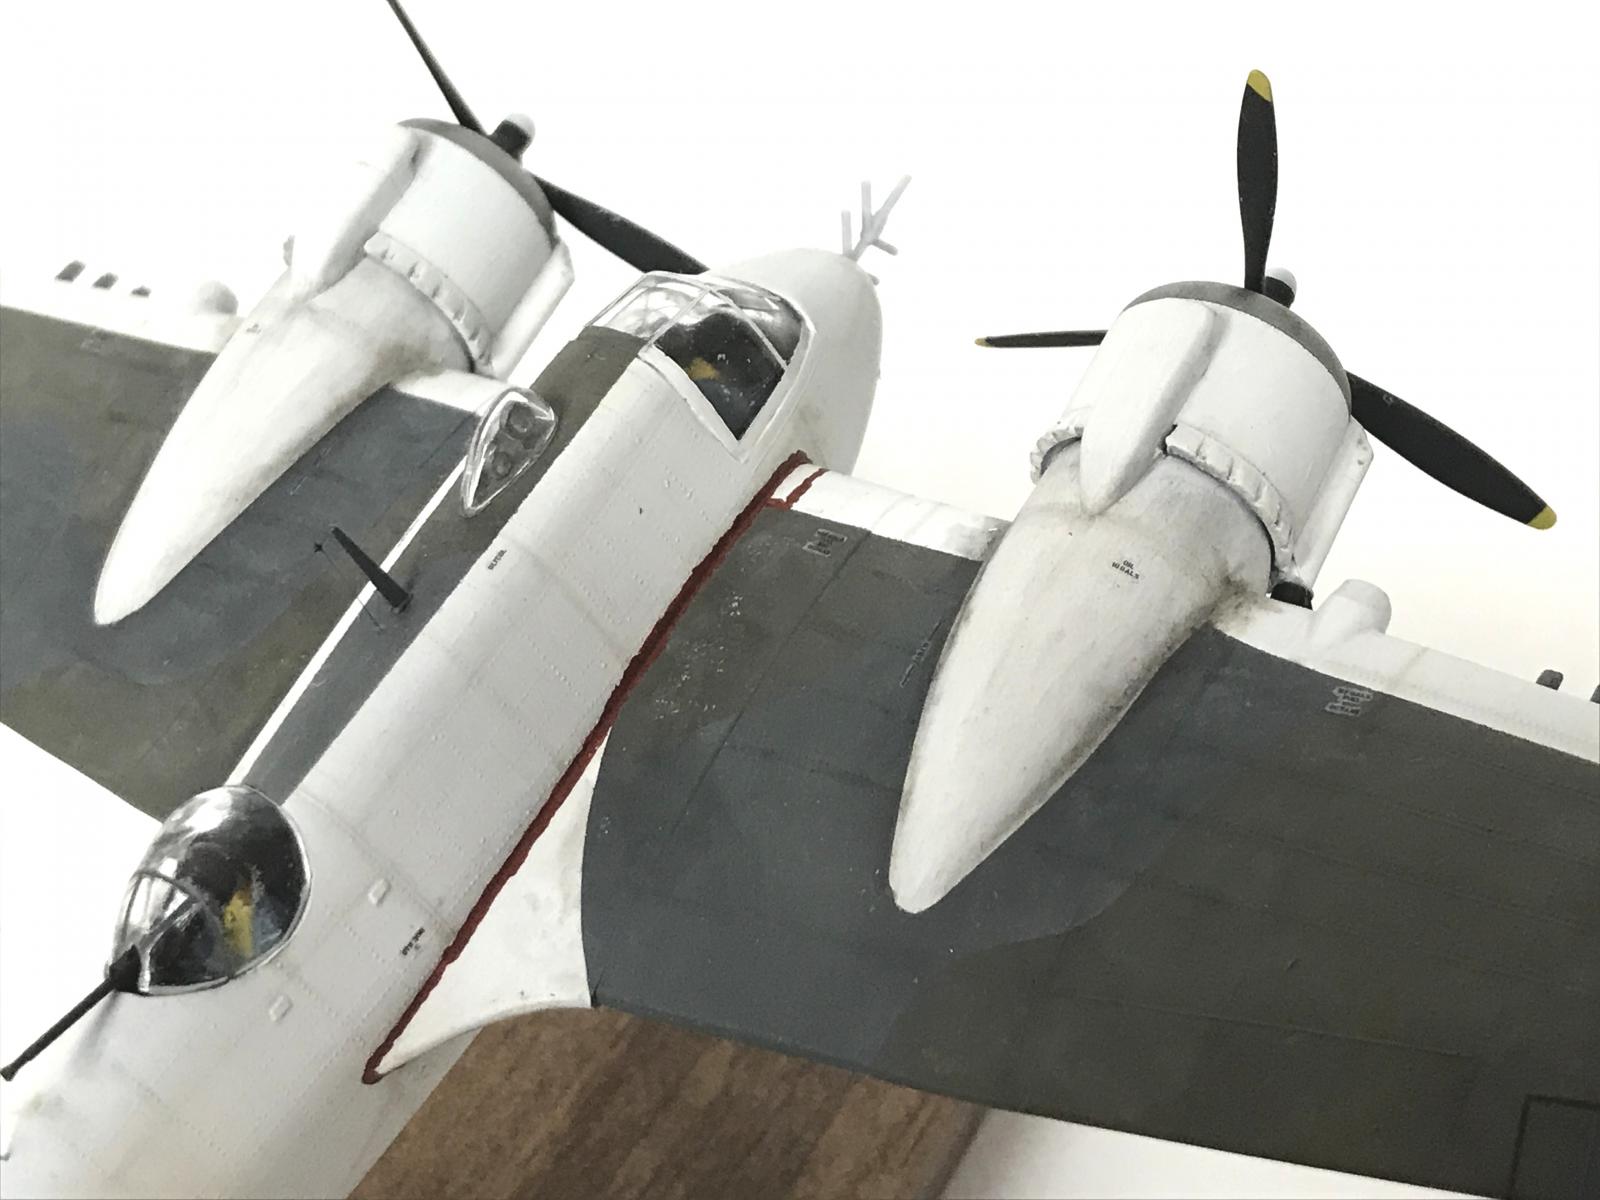
I added the two loop aerials and perspex bubble from the Hasegawa parts. I had hoped to use the solid glazing for the rear gunner's copula to match reference photos, but no dice - too much work to try to fill in the rim of the hole to get that to work, so I cheated and used the Hasegawa gun and the original kit perspex, as well as the original canopy. The pilot and gunner are from the original kit.
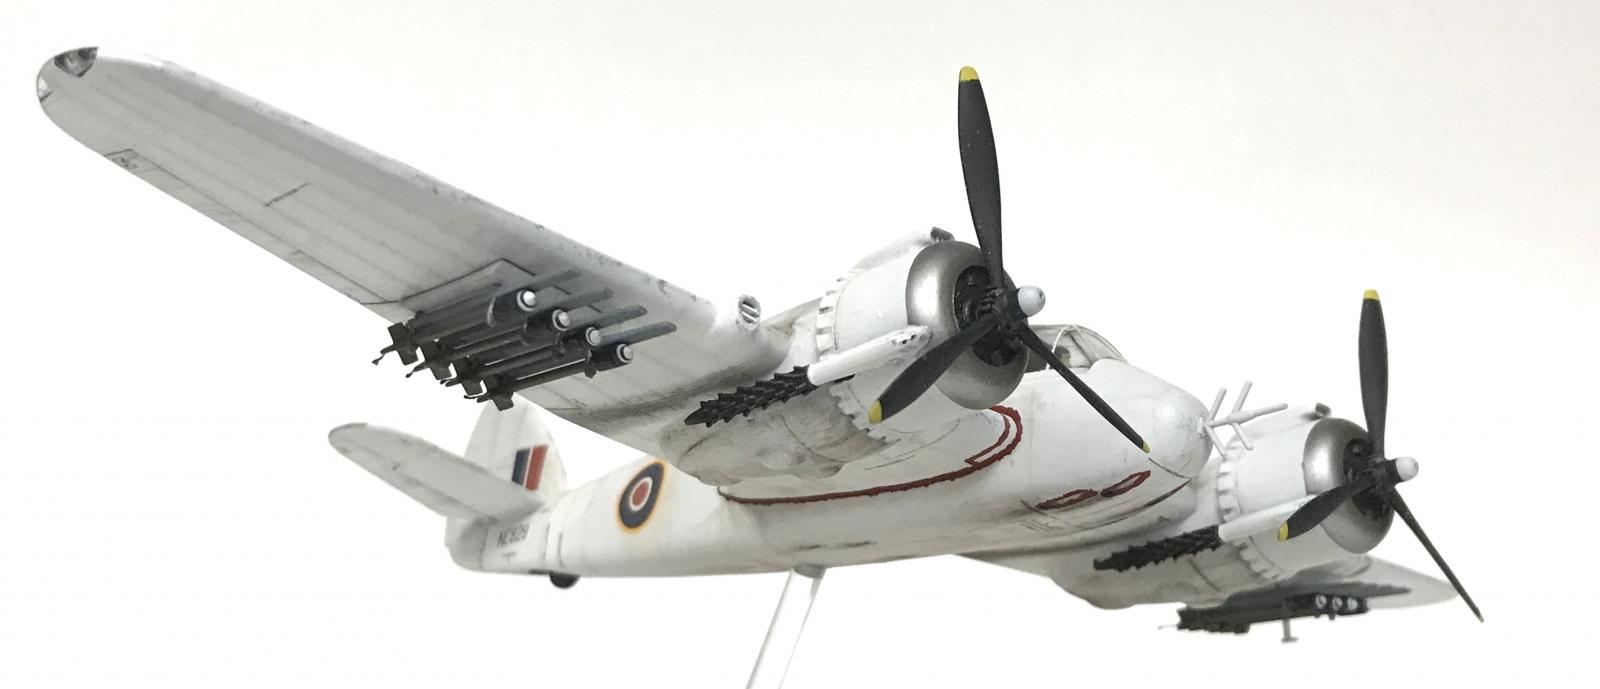
The props were from the Hasegawa kit, as were the white metal exhausts (probably AM product left in the box). They need a little work to get to fit, and I'm not sure they are totally accurate in how non-flush they mount against the nacelle, but they were already on before I got the new Airfix kit, so I left them.
I added the two small fins/louvers inside each of the wing intakes, and modified the front end of the exhausts to match reference photos. I scribed a few panels and doors to add more detail; added rear spine aerial with sprue; used the nose radar aerial and pitot from Hasegawa parts.
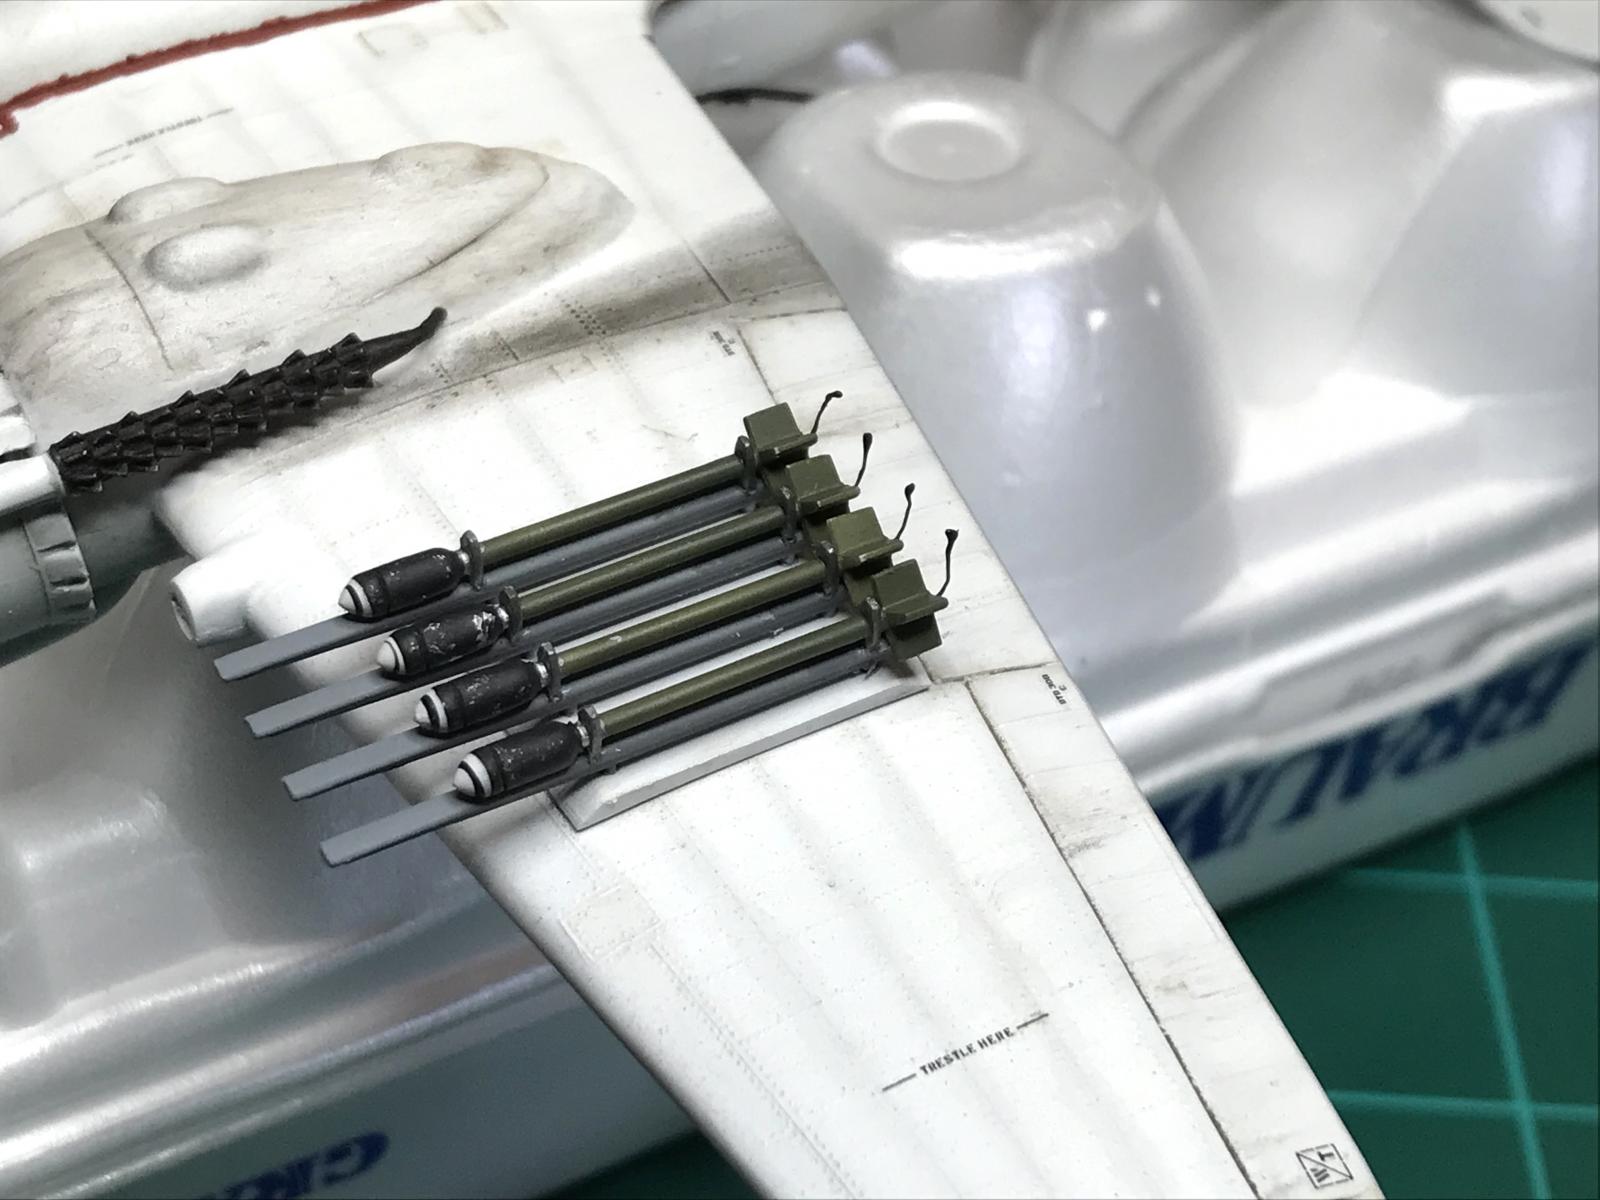
The rockets and mounts were from the new Airfix kit. I added the pigtails to the rockets using copper wire and a small blob of white glue - I'm not exactly sure what they were or if they were removed before flight, but they appeared to be flexible (drooped when on the ground), so I assumed in-flight they would stream behind the rockets. If someone confirms they were removed before flight, I'll pull them off! I couldn't find any mention of their purpose in my research into the rockets.
Painted with Tamiya paints, weathered with pastel chalks, AK pencils, silver paint for chipping, MiG panel wash (both as panel liner and as a filter to tone back the stark white paint), and oil dot filtering over the camo areas as the final touch. I also lightly oversprayed the camo and decals with highly diluted buff paint weather the decals in particular.
I did have a little silvering issue with the decals. Now that I'm airbrushing, I'm having difficulty achieveing a really solid gloss coat - I've tried the Tamiya gloss and Alclad Aqua Gloss, and still haven't got it down. I seemed much easier when I just rattle-canned with Testors Glosscoat, but that formula has changed, and I believe it's going away anyway.
I have been experiencing one other frustrating problem that I don't quite understand, that has to do with the interior of canopies. In several canopies that I've had to mask using Scotch tape, when I remove the tape, it's as if static has pulled material from the inside of the fuselage up against the inside of the canopy. I even ran some water into the interior after removing the canopy mask and tried to wash it out, but you can still see flecks on the inside of the canopy. I sometimes use the clear masking tape because it's easier to see where to trim the tame inside the canopy frames when the frames are very slight (can't see them through Tamiya tape). Anyone have any suggestions for what could cause this?
There you have it, my Coastal Command FrankenBeau!