1/48 Hobbyboss F-105G Thunderchief (80333)
This kit is overall very nice but there are a lot of very fiddly bits that test the patience. In particular, the flap assembly and the exhaust assembly are a bit challenging since there are so many parts with little or not mating surfaces. The landing gear are also a big challenge since they are so frail. I replaced mine with Scale Aircraft Conversions metal landing gear but to be honest, they are very malleable and are also frail as a result. I wish Hobbyboss had provided for reinforcement of the landing gear with steel rod as featured in some Tamiya kits. I suppose I could have done that myself but I thought I'd be covered with the metal replacements. The worst problem with the landing gear though is the lack of sufficient mating surface. While photographing the model, I broke off each main gear while repositioning the model.
The fit of the kit ranges from pretty good to excellent I have no complaints there. The one exception is the pilot's canopy. The closed version fits terribly and I didn't think I could blend it effectively so I opted for the open version. The odd thing is that Hobbyboss does not include an open option for the rear cockpit. So I was left with one open and one closed which looks a little goofy.
One thing I like about the kit is the surface detail. The panel lines and rivets are very prominent. I feel they look good on this subject although I'm sure many will not agree. To each our own.
I used a variety of Alclad shades. On the main parts of the fuselage I masked off each panel and used Aluminum, White Aluminum and Semi-matt Aluminum. I am please with the outcome which subtlety alters the sheen and tint in a random way which seems realistic to me. To be honest, I would prefer to be able to replicate an oxidized and slightly scratched appearance I see in photos but I haven't figured out how to do that yet.
In addition to the landing gear, I added Legend ejection seats and the Quickboost ventral fin.
I used, Helicon Focus which is a focus staking software, to blend several photos from each angle, each with a different focal point so that the entire image is in focus. I also used ambient light rather than flash since with metal finishes, I find flash creates a harsh effect. Of course, with ambient light, a tripod and a remote release are important to compensate for longer shutter times. The stacked images were further edited with Photoshop Lightroom.
I would only recommend this kit to someone with a fair amount of experience. I think this kit would be too frustrating for a beginner.
There's no arguing though with the fact that the F-105 is a great looking jet so if you agree, I'd suggest you give it a try.
Flickr Album: https://www.flickr.com/photos/98961263@ ... 0030765521
All my models: https://www.flickr.com/photos/98961263@ ... 3606379755
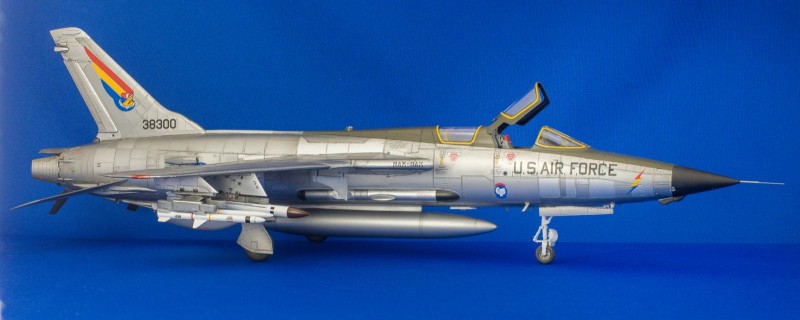
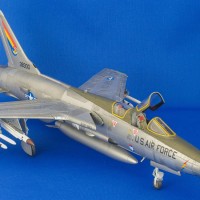

Just curious where you found an NMF F-105G. The F-105Fs all came off the line in painted aluminum, but the F-105Gs were all created in the days of SEA.
Personally, having done an HB F-105D, I didn't find it an overall improvement on the old Monogram kit, which has gear that doesn't jiggle in the slightest breeze - and a pilot's cockpit that actually meets the fuselage sides. But to each, their own.
Your research is likely more in-depth than mine. I just assumed they were natural metal. I was going to do the camo scheme but I changed my mind at the last minute. The Hobbyboss instructions were little help with the paint - they had a silver bottom and a camo top. Perhaps it is correct but I couldn't find any pics of one.
Thanks for the info:)
@rbungay - oh, no - the HB paint instructions are even more wrong than you gave them credit for being. I have to say, I think the F-105's shape is better served by the aluminum scheme.
I have a Monogram F-105F I am going to do as Leo Thorsness' MoH Weasel.
Beautiful looking Thud! Most of the 1/72 scale 105's that I have done has fragile landing gear.
Great build, Richard @rbungay
Nice build, Richard, loved reading your NMF techniques!
Looks great, Richard. The overall appearance of the paint job and markings are very striking.
Looks great - nice job with the NMF. This is the scheme my dad flew, and thus my favorite for the Thud.
Nice work on this model Richard.
For some reason, the armament stands out more visually.
Well done, Richard (@rbungay). This is a really big beast in 1/48. Several of the officers in my USAF pilot training class received the Thud as their initial assignment. Brings back memories.
Beautiful NMF Richard @rbungay! I too have been playing lately with Alclad NM paints and love the subtle variety that can be achieved with some time and patience. And they are easy to use. Great photos. I started using Helicon Remote and Helicon Focus this year as well. It's time consuming but allows for great depth of field with all parts of the model in focus.
Agree with all the above Richard. Your NMF is superb & you certainly have mastered Alclad. Your photos are excellent too & the blue background really shows up all your hard work beautifully.