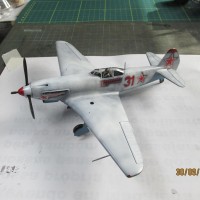
Hasegawa 1/72 F4U Corsair
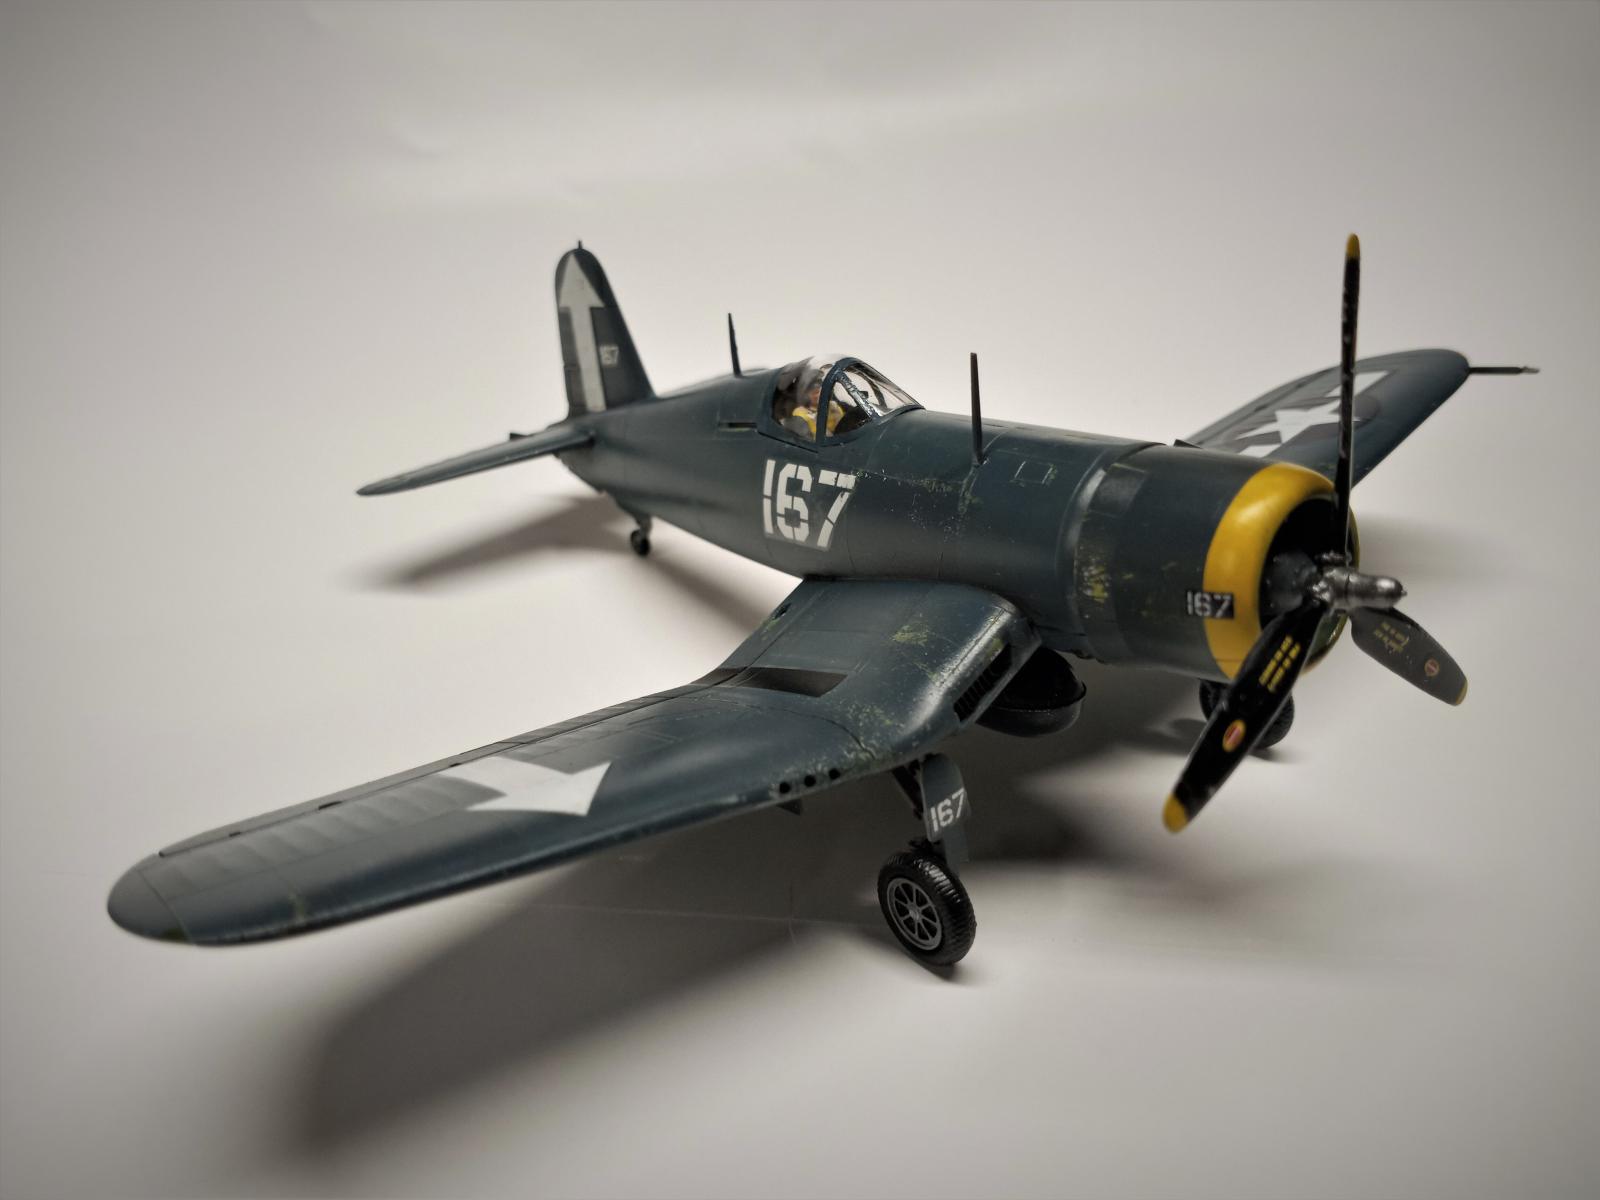
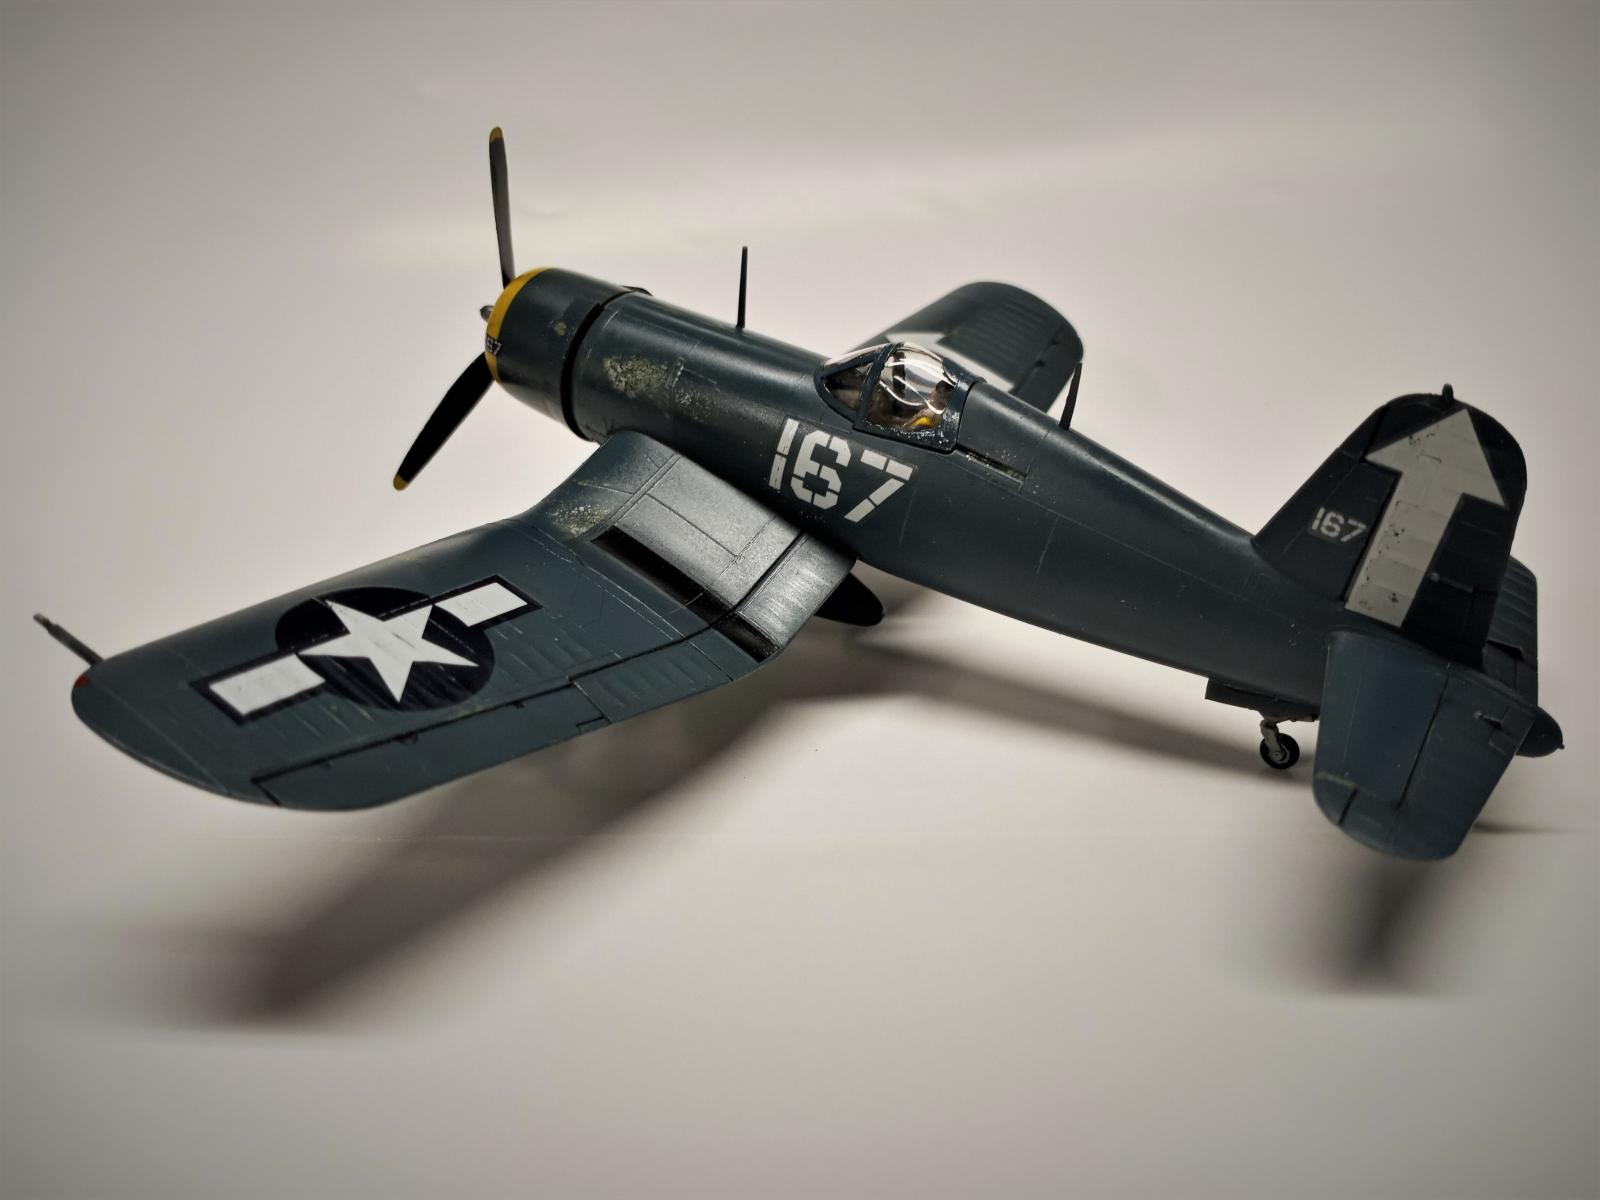
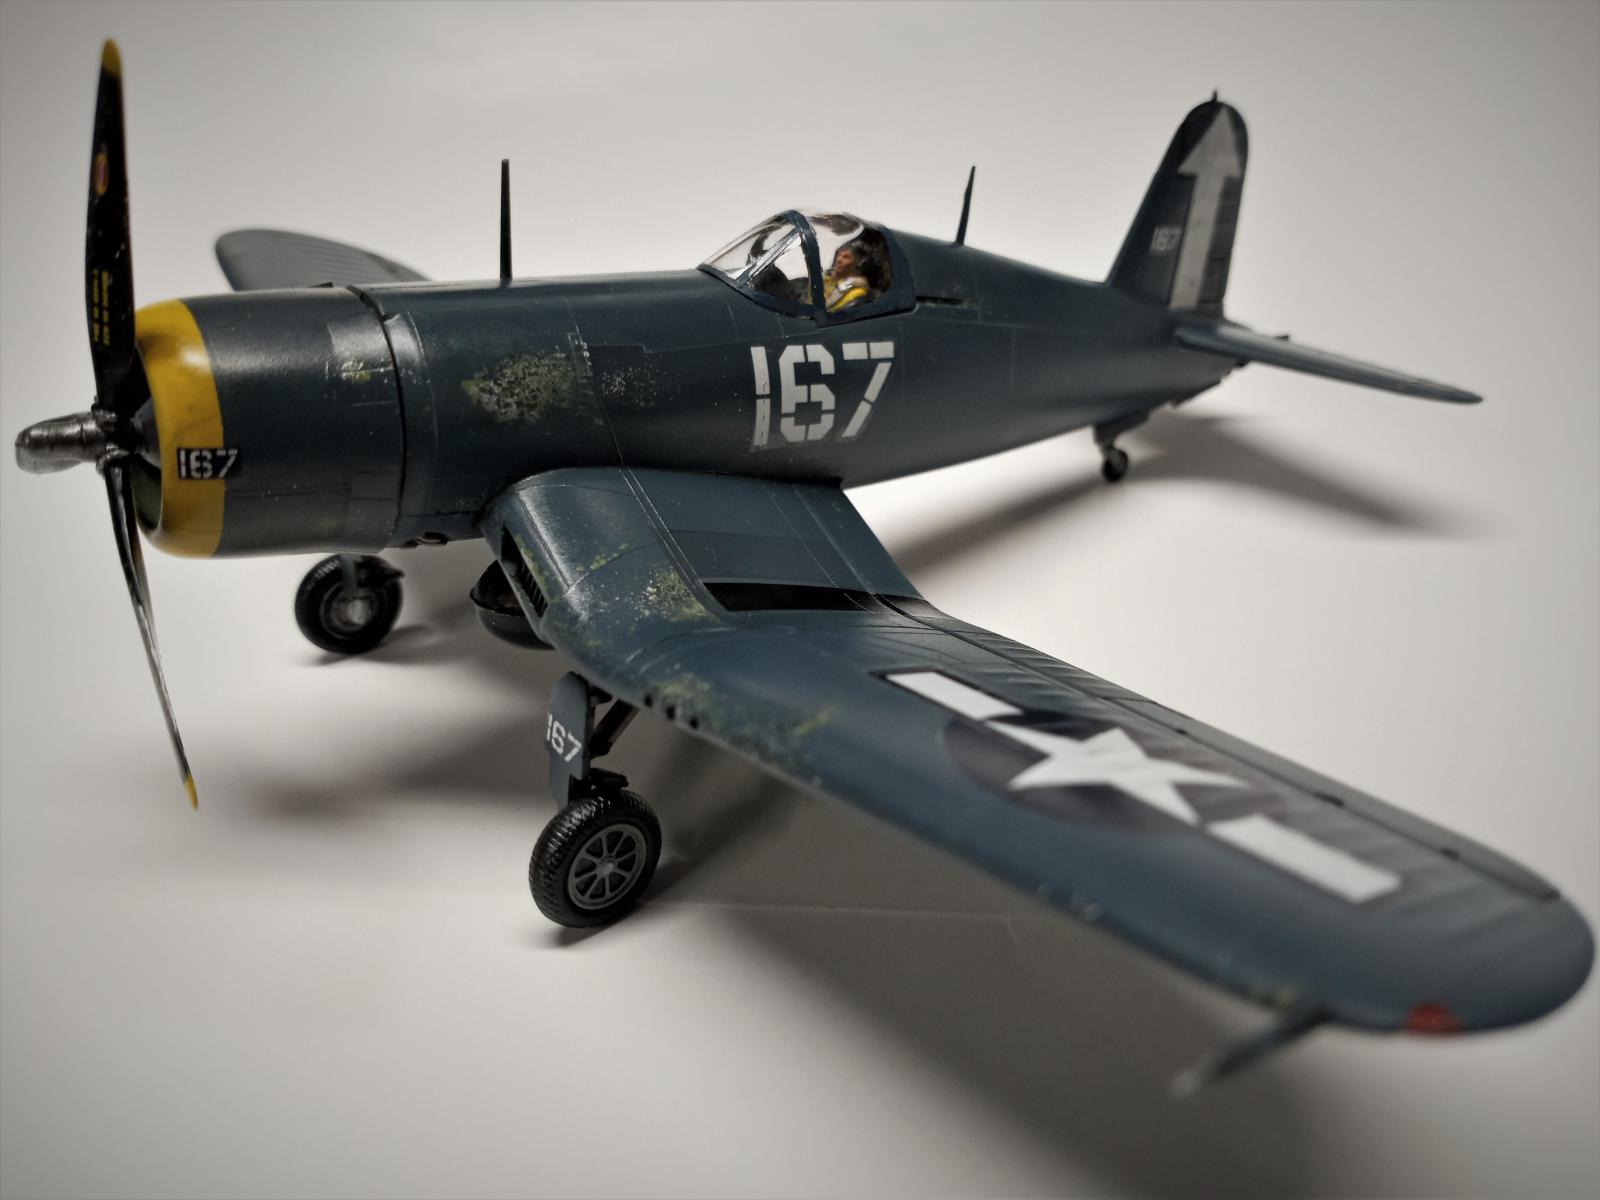
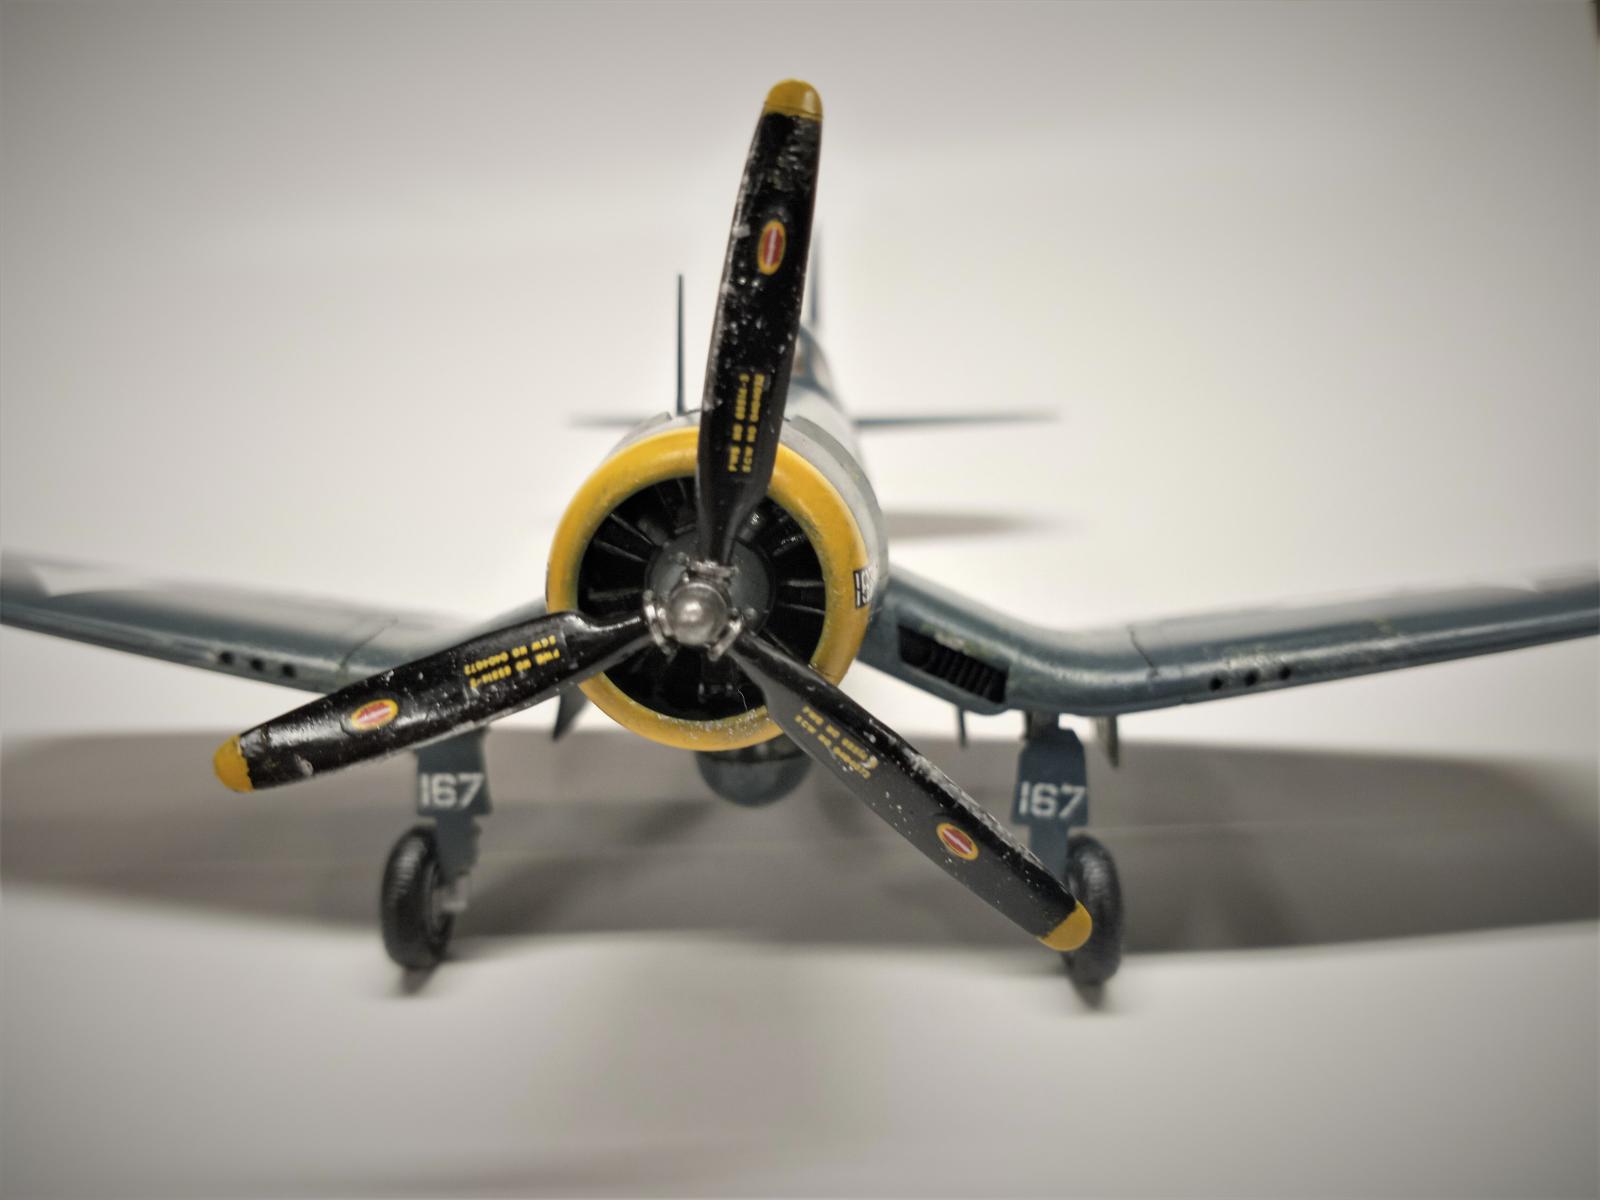
Some good and some bad came out of this kit for me. The good; I managed to build the kit without breaking off the rear fuselage antenna or wing tip pitot tube which came molded into their respective parts, I experimented with hair spray chipping effects which turned out OK (didn't want to over do it), I used Pledge floor wax as a finish coat and on the canopy and loved the results, and I'm finally learning how to paint tires and rims. The bad, I did not paint the yellow far enough down on the cowling, the spinner is the wrong color, the cooler grills are upside down (couldn't tell from the instructions, should've looked at a pic) and the horizontal stabilizers aren't horizontal (I'll put it on the shelf tail in). Still fun, and I'm still amazed at how big these US Navy planes were compared to their counterparts.
Thanks for looking. Happy Thanksgiving.


Beautiful Corsair David @adamcda13
Great learning moments with superb results.
Those minor points are definitely not visible if you don't mention them.
Most important thing is that your model looks superb, David!
There will never be a perfect model, but there are excellent ones, like this one.
Love it!
very nice painting! It was gloss sea blue?
You pulled it off - looks very nice!
Great job!
Very nice David. I don't know of a modeler among us who hasn't made mistakes when building a model. The important thing is to learn from those mistakes and keep that in mind for the next build. That's a fine looking Corsair you have there and I suspect your next one will be even better.
Very nice David (@adamcda13). I am into the Corssair subject, because I am about to finish 1/48 on my own. As I could see It is very nice and pleasant project (even though It is in 1/72 scale). Best regards.
One more thing I learned...I put the landing gear together and applied the decal to the forward wheel bay cover before final installation. Much easier than trying to apply a tiny decal to a finished assembly.
Thanks for all your comments.