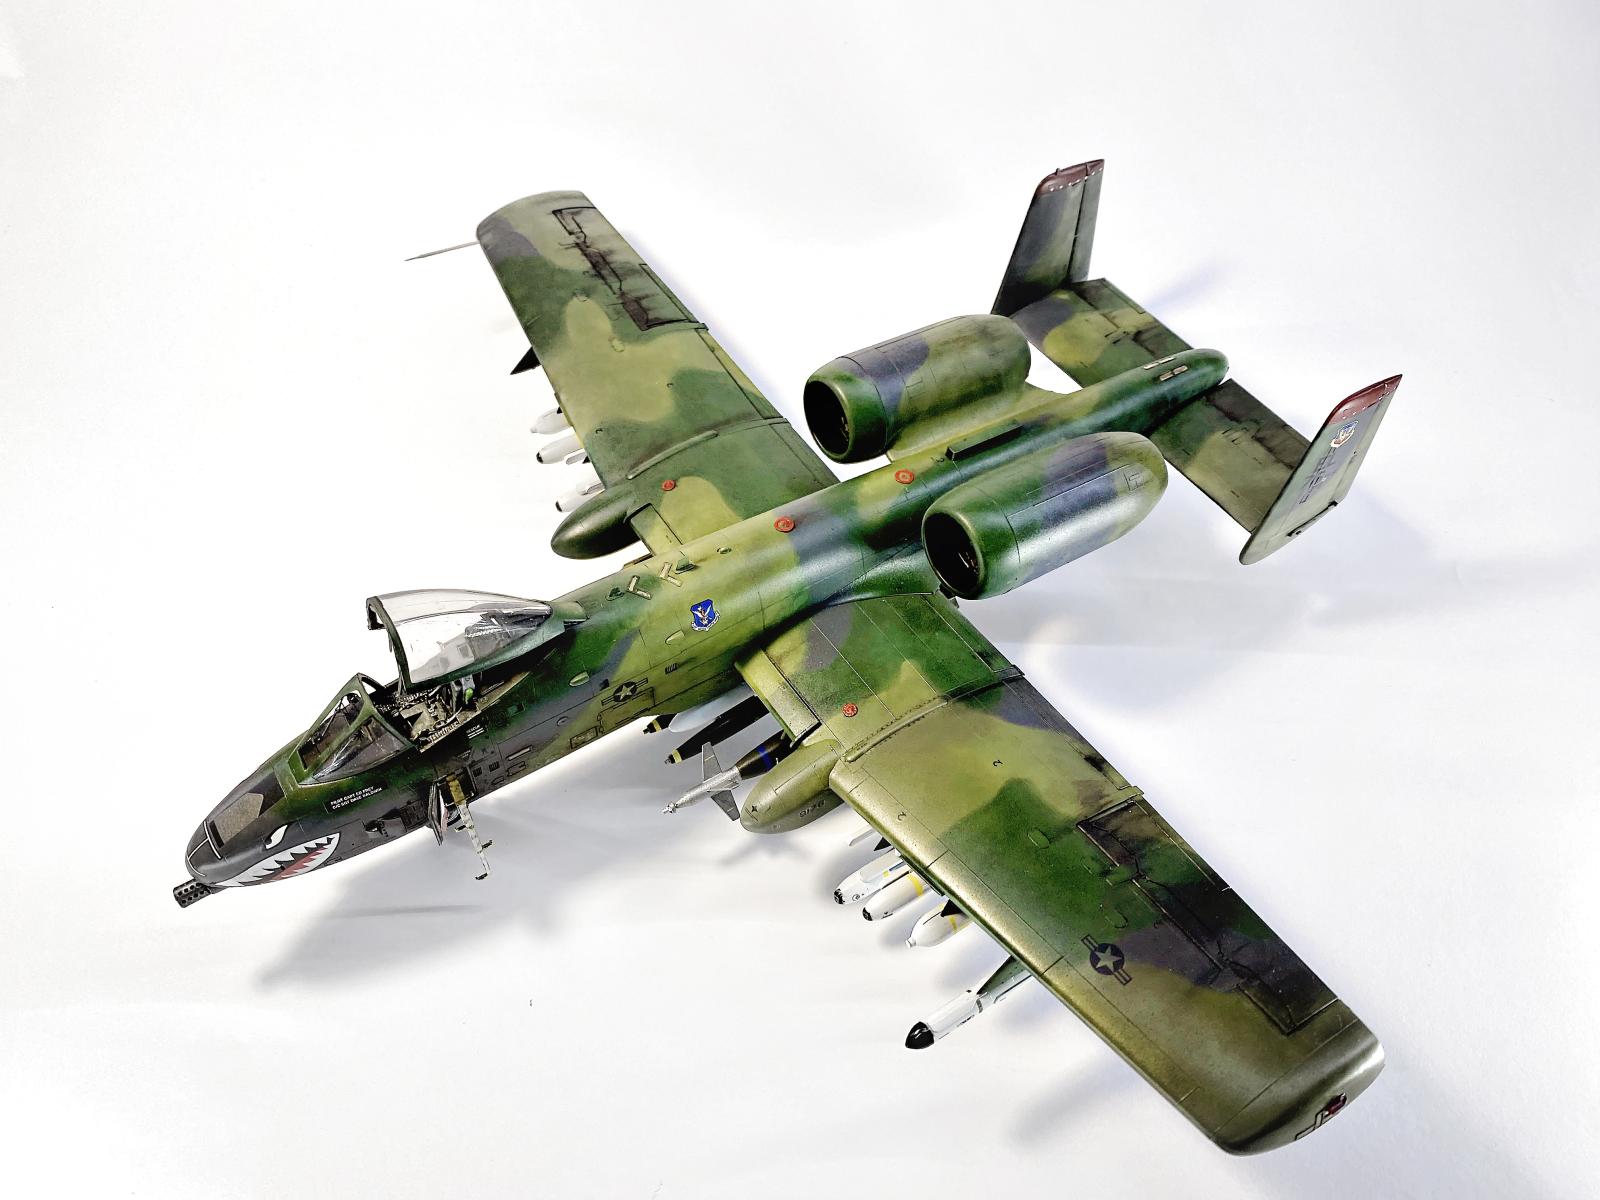
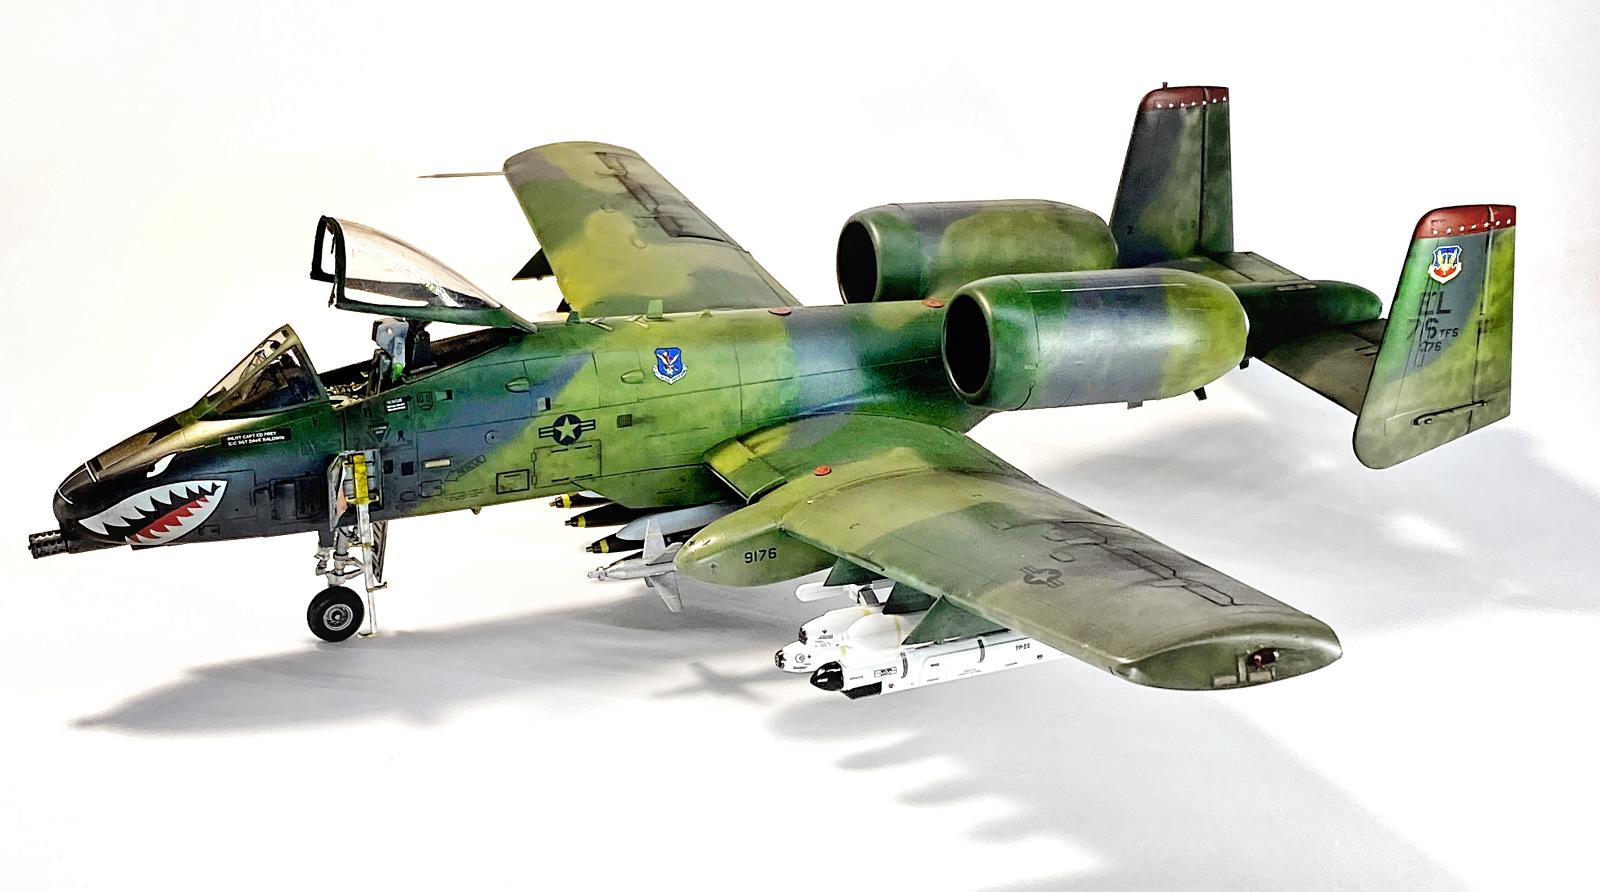
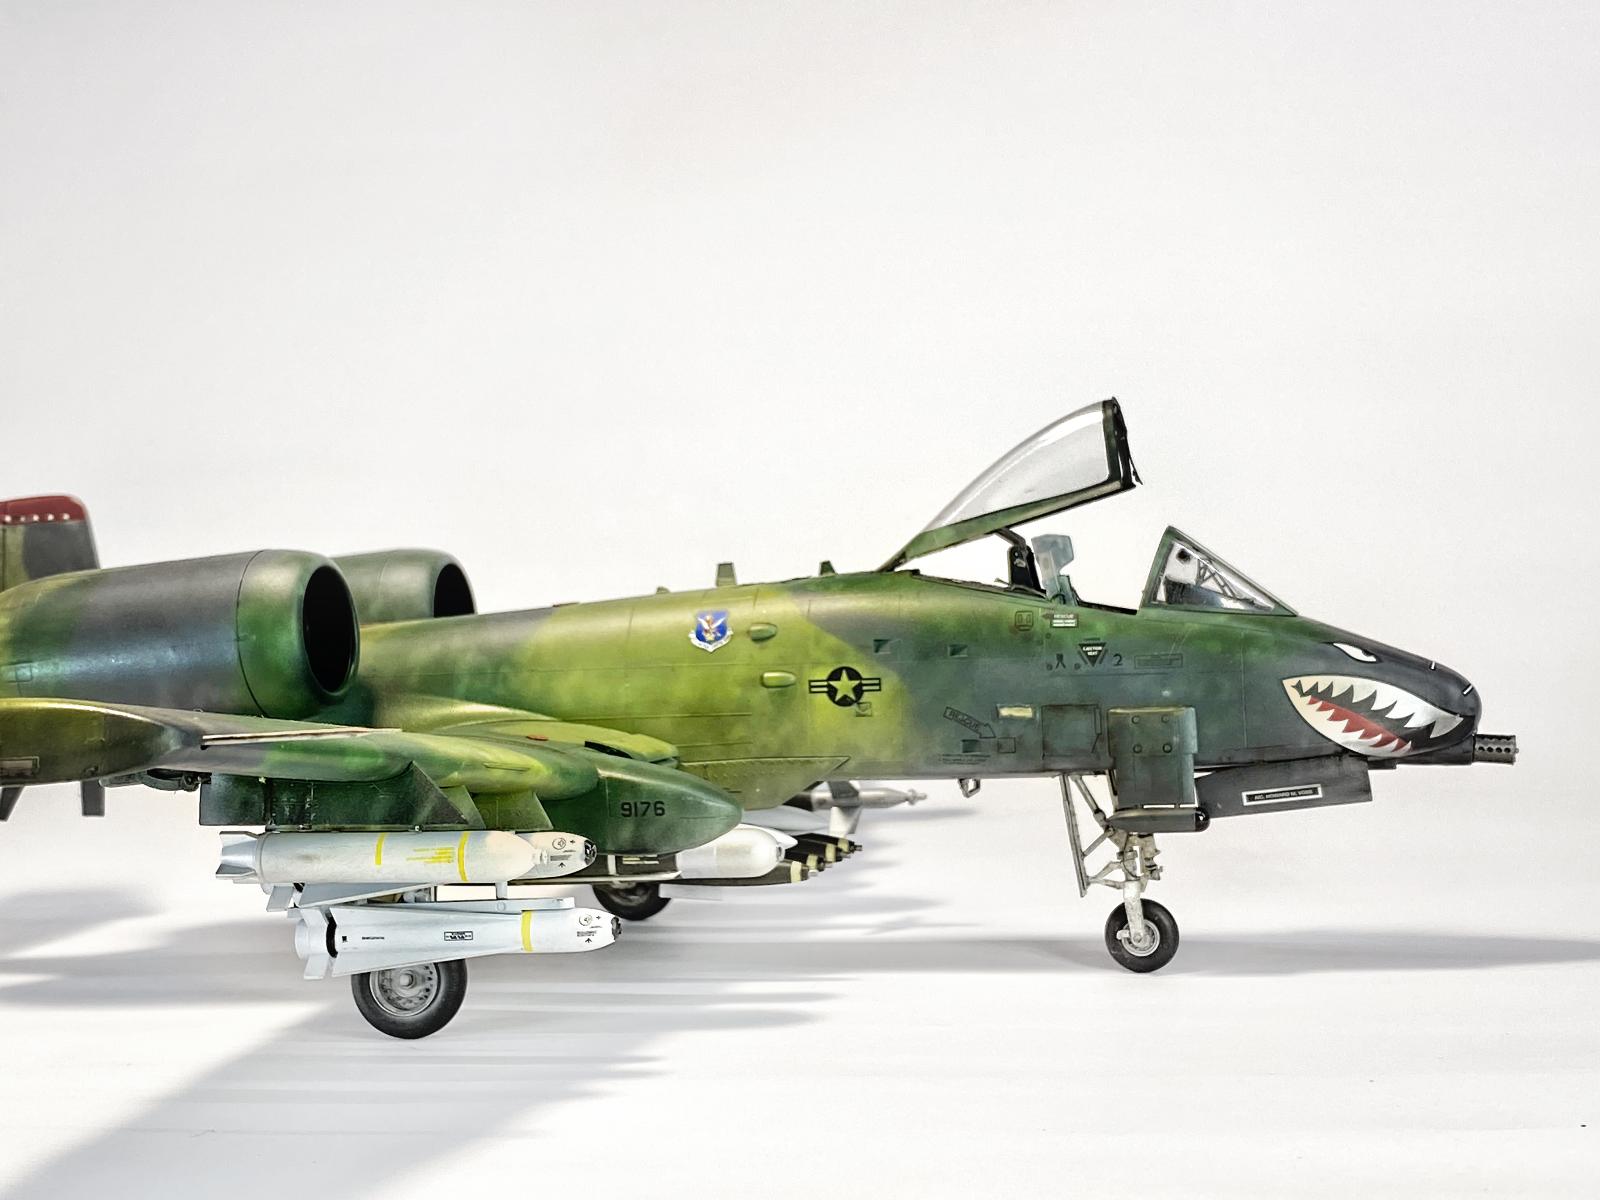
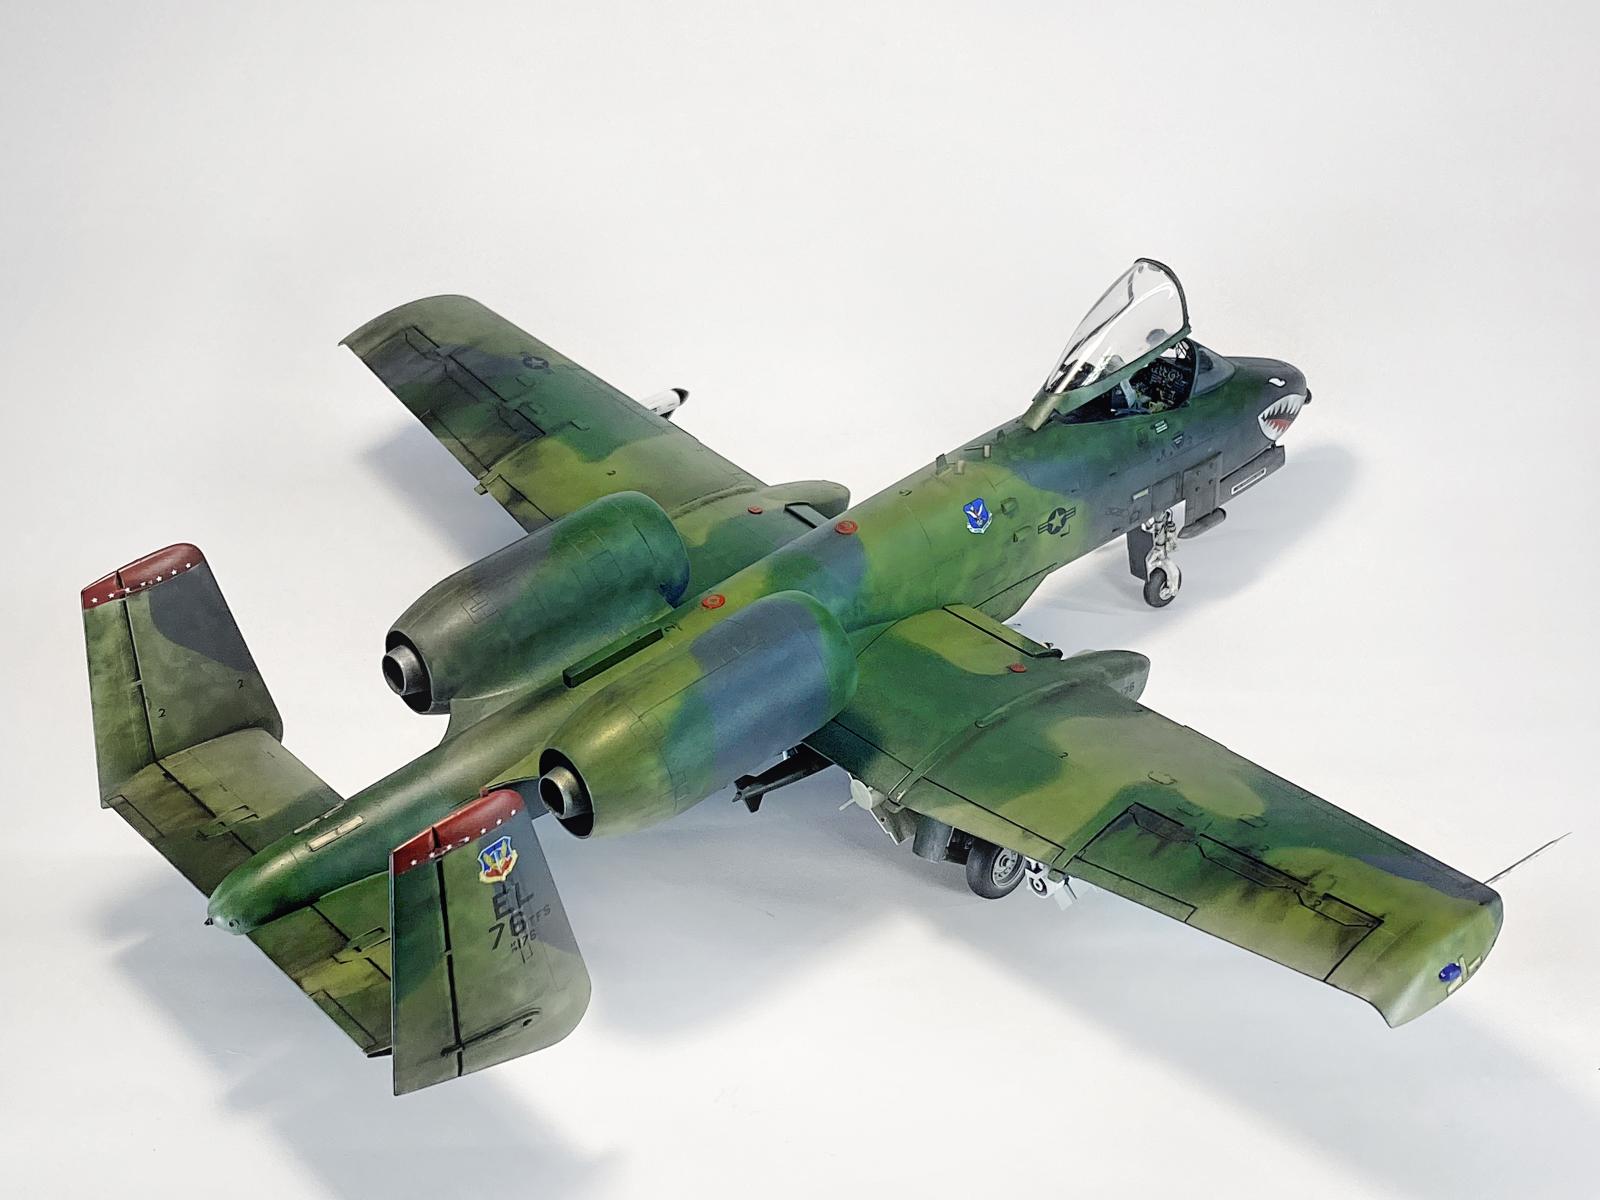
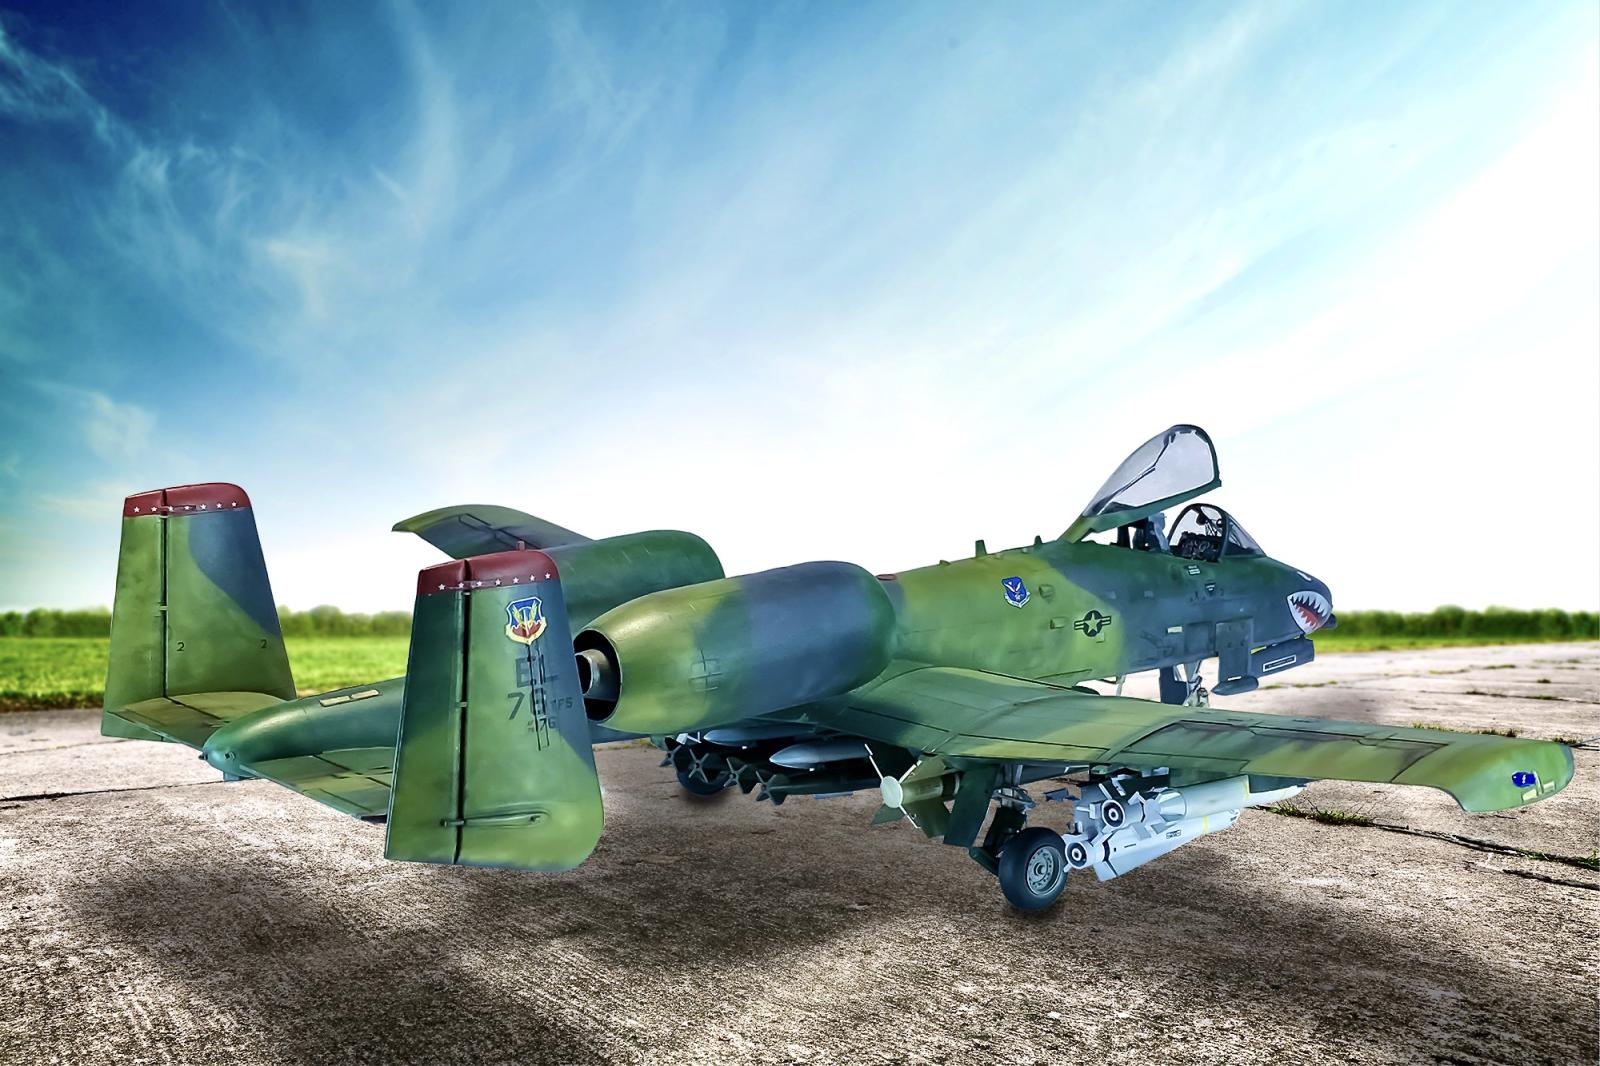
18 - 1/48 Tamiya A10-A Thunderbolt II (Warthog)

So this was definitely a build I was looking forward to and avoiding till my skills improved (a little at least) but I had to do it, it kept staring at me.
So I pulled it out and just got going with my limited skills and a lot of advice from more experienced modellers.
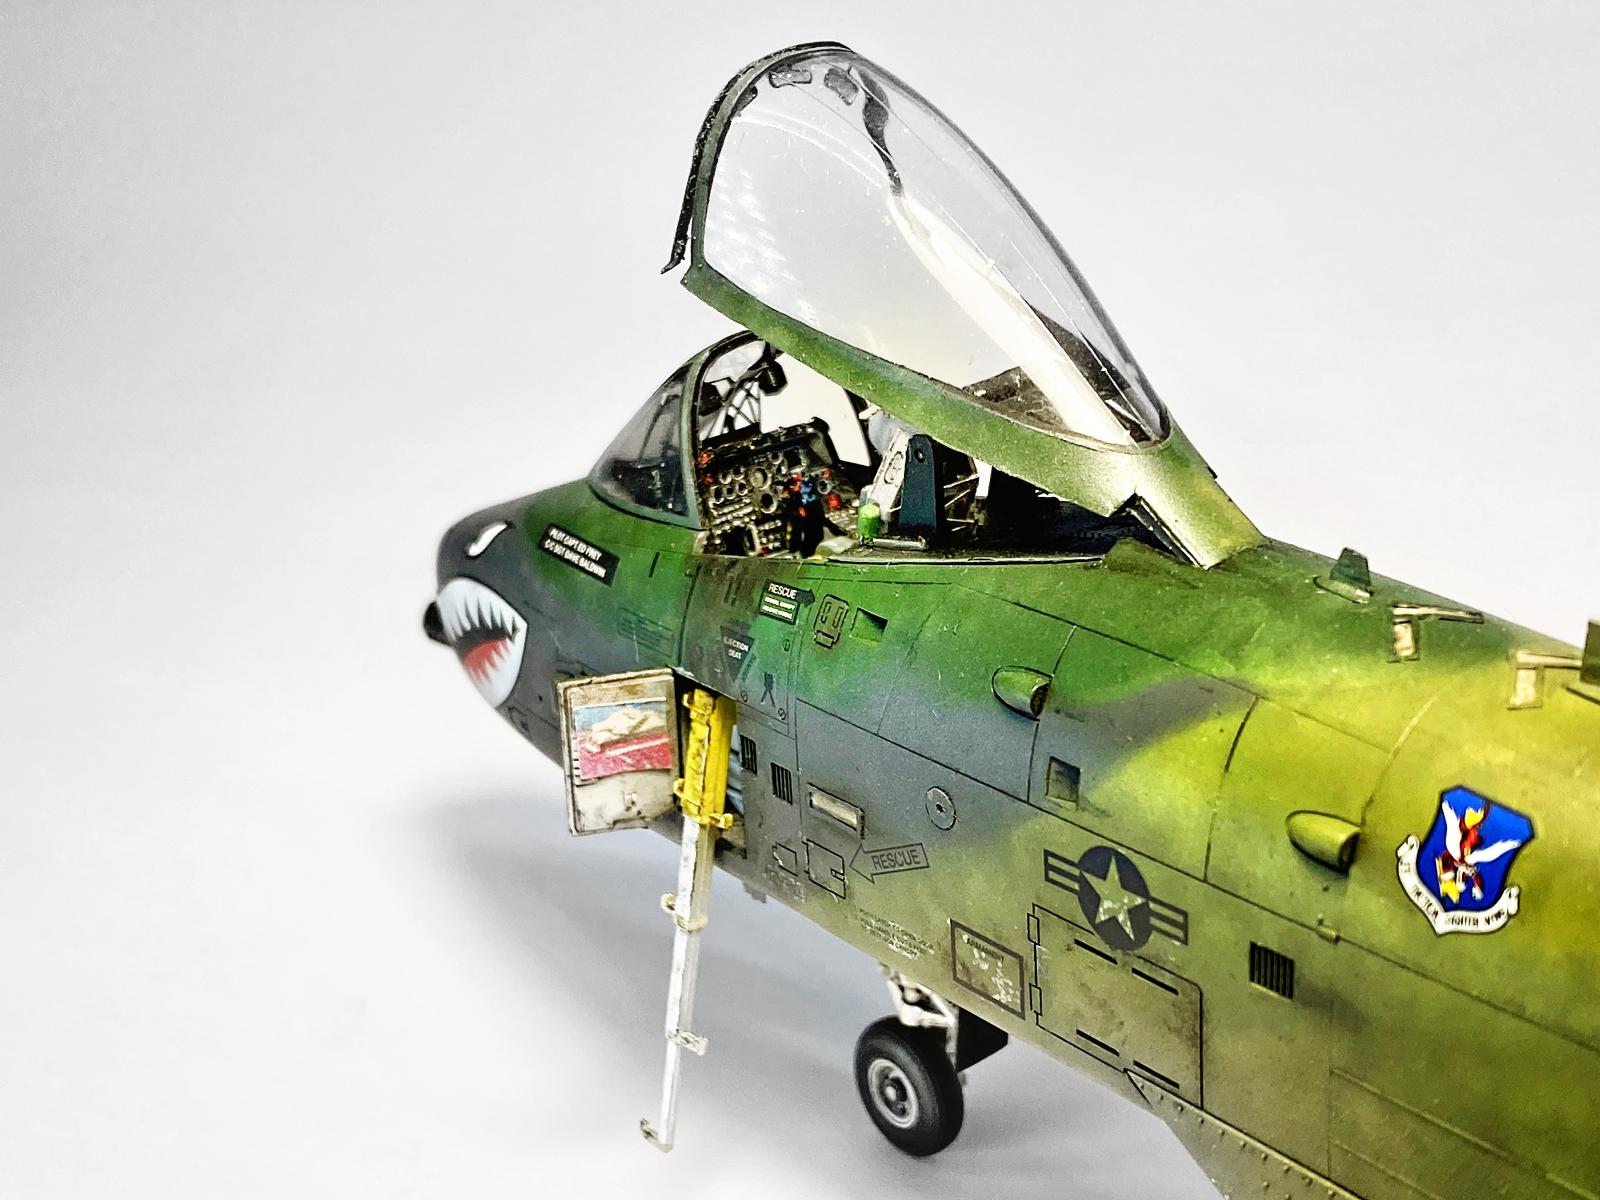
I added an Eduard Photo Etch kit to it, and upgraded the Gau-8 Cannon with a PE one as well - my first time using photo etch so it was quite a learning process. It took a long time on the build but I really enjoyed working with it.
I used my favourite technique for preshading so far which is black basing, starting with a primer layer of Vallejo Black primer then going over it with random patterns with a white Tamiya paint. I went heavier in some sections and lighter in others to increase the randomness and variety.
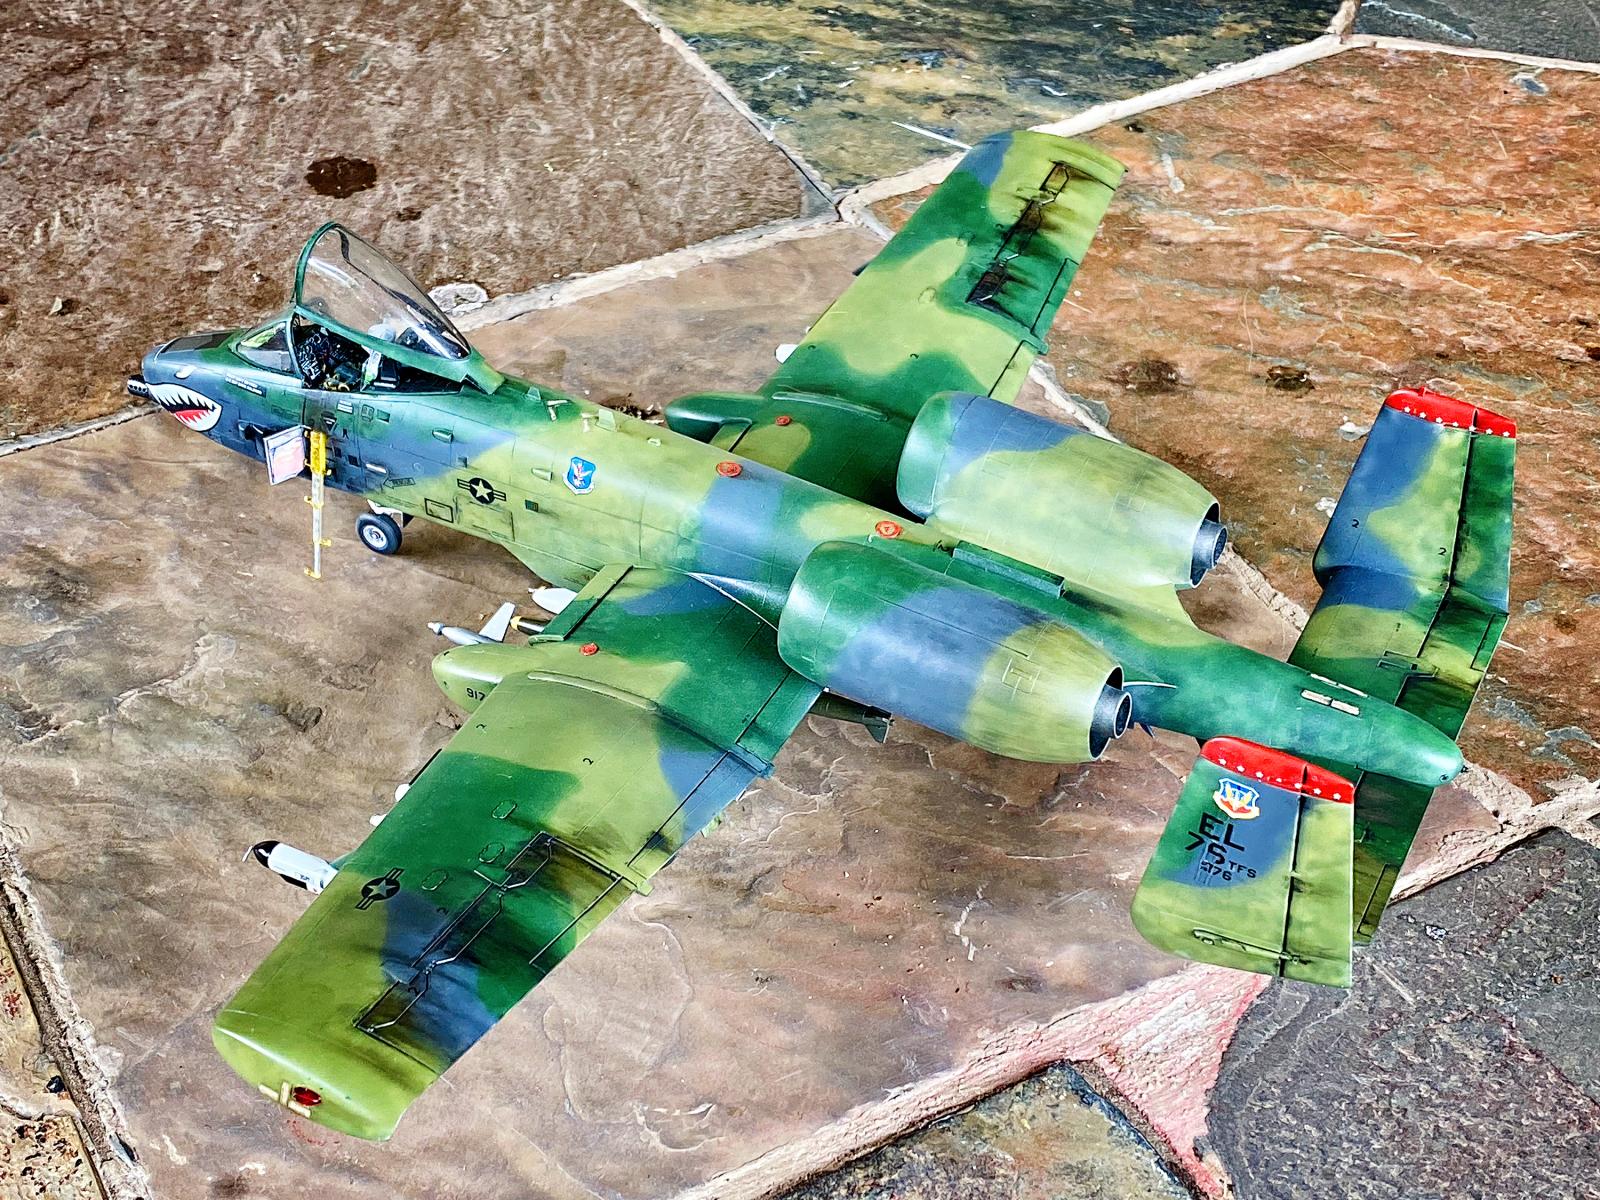
After that it was onto the 3 colour camouflage, building it up slowly so the preshading didn't get covered up. Once that was on a gloss coat and then panel line highlights and Decals. I love decalling (I know I'm one of those wierd ones), so really enjoyed adding the stencils and all the details, the sharkmouth however was pretty daunting and I had to be very careful.
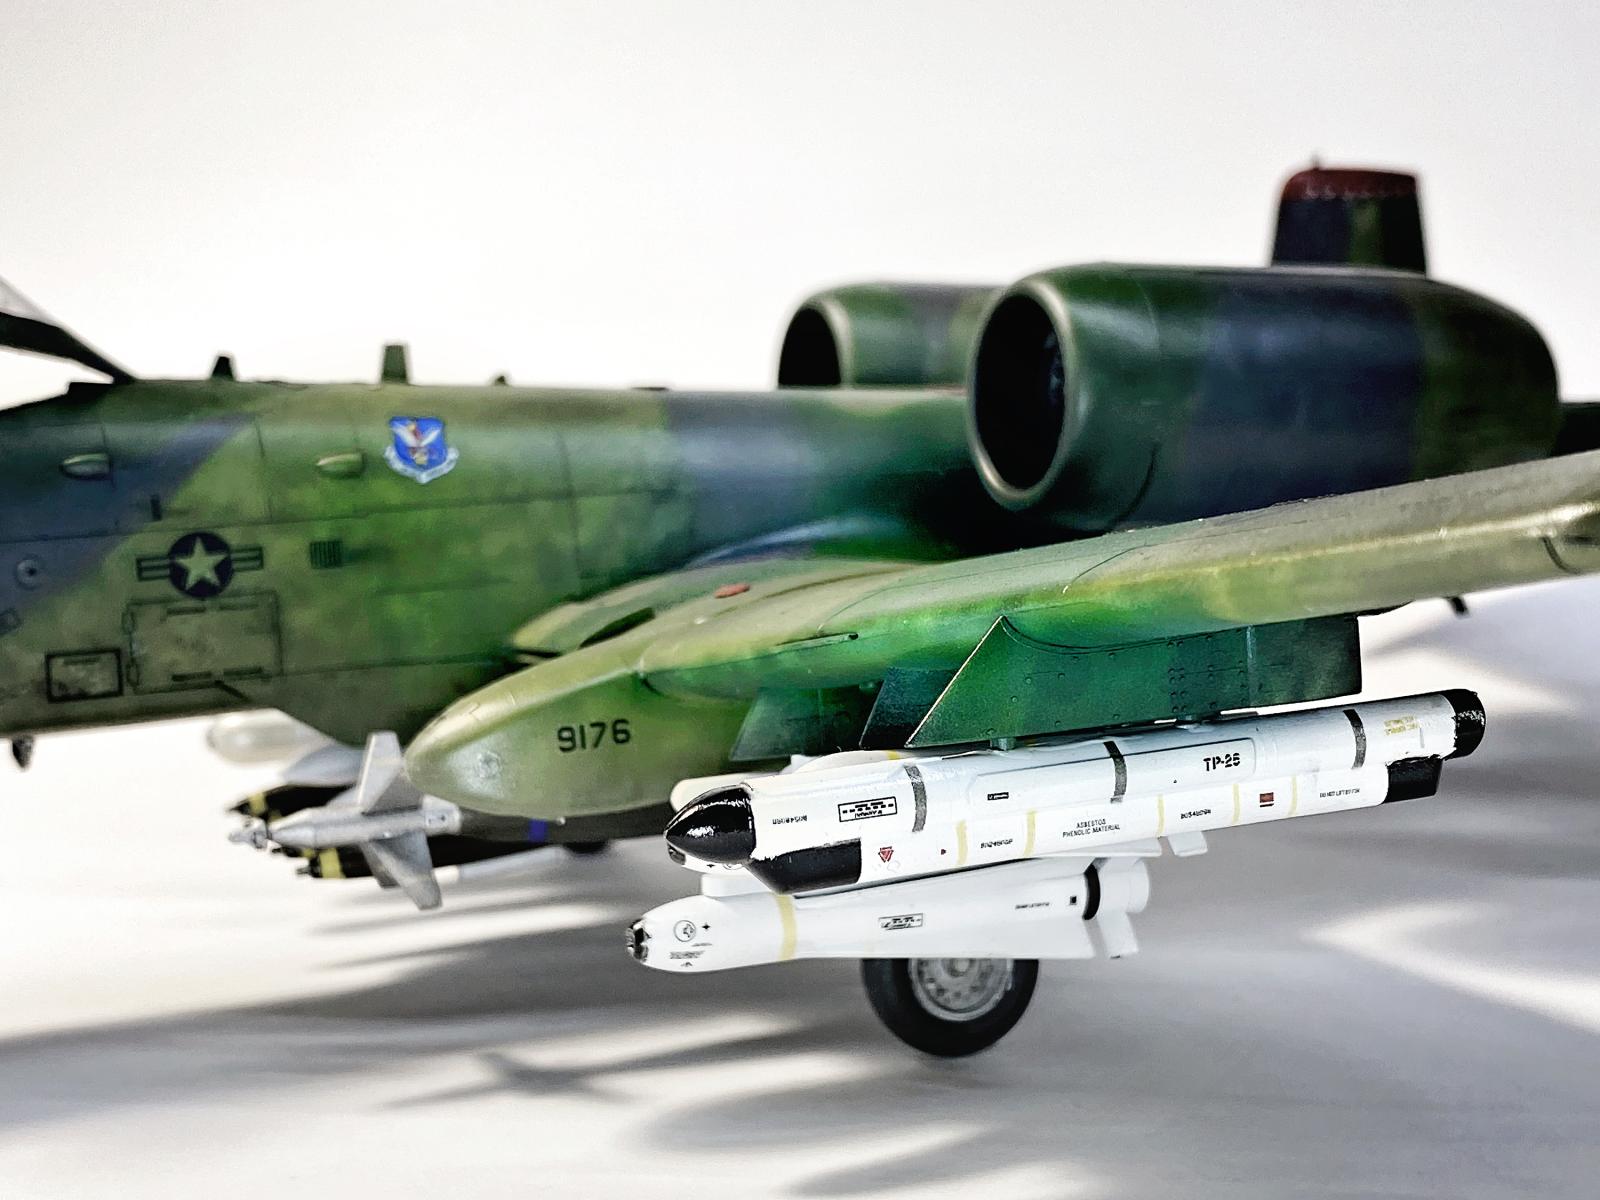
Then, as you all know the firepower that comes with a Warthog is immense, onto the ordnance, I really wanted to get these looking really nice to go with the rest of the build so I got some ordnance decals to add to them and painted and decalled them up as best I could.
Next came a matt coat and out came the oils for some weathering - a lot of the references show the Warthog looking quite dirty but not overly weathered so I added the oils onto the ailerons, and around panel hatches and a few streaks behind different parts that are raised.
I sealed it off with a satin finish and then I called it DONE.
You can have a look at the progress of the build here - https://imodeler.com/groups/work-in-progress-aircraft/forum/topic/tamiya-1-48-a-10a-thunderbolt-ii-warthog/


Excellent result and mean looking Warthog, Anthony @anthonyricco
The scheme turned out beautiful as the rest of the aircraft.
It was a pleasure to follow your thread and see the progress on this one.
Well done.
Thanks John - appreciate the comments - anything you see that could be improved on the next one?
@anthonyricco, as said by Spiros (@fiveten), your approach on creating beautiful kits is already at a high level. Getting more confident in certain techniques can be achieved by building more and more. Seems like this is definitely going to happen. Looking forward to the next ones.
Thanks so much John, really appreciate the encouragement - yip definitely going to practice a lot more, really enjoying this hobby.
I agree with everything our friend @johnb said, Anthony!
Well done!
Thanks so much Spiros - same question to you - do you see anything I can improve on with the next build?
Your skills are already very good, Anthony @anthonyricco! My honest advice is: keep on building! The more you build, the more your overall skills will improve!
So, keep them coming!
Well thats an easy one haha - I'll definitely keep on building. Thanks for always encouraging man - it is always a help.
Great work Anthony! @anthonyricco, That bird turned out so well my friend! Keep up the great results! ?
Thanks a lot Gary - I'm very happy with the results. Definitely my best kit... so far.
Excellent job @anthonyricco. The 3 color camo scheme turned out glorious!
I am not familiar with the pre-shading technique you mentioned, so I will go check it out on your WIP thread.
@greenterrorz thanks so much, yeah check it out - the black basing works really well for random weathering and shading instead of just around the panel lines. Hope you can use it.
Brother that is nice now you've got me wanting to complete the Revell offering I have laying around 3/4 finished
Haha, come on @markh - don't let them shelf queens get old and wrinkly, finish it off - its such an awesome plane - would love to see yours done.
That looks great mate, amazing job! i love the european camo of the 80's!
Thanks so much Tam @fow_models, really appreciate the comments, yeah the Euro camo is so much nicer than the grey.
That looks great! I think your skills are coming along nicely. I have been using the black-basing technique since I started using an airbrush a couple of years ago, and it's still hit and miss for me sometimes, especially when the top colors are darker shades. It takes practice and experience to get the right amount of "bleed" through the top colors to make depict irregular fading. You are on the right track!
Hey Greg @gkittinger - thanks so much, yeah the black basing is tough to get the right amount through without too much coverage - especially when you are spraying and the paint is wet and looks like it isn't covering enough, or too much. Practice makes perfect so I'll get more of it.
That looks great! I think your skills are coming along nicely. I have been using the black-basing technique since I started using an airbrush a couple of years ago, and it's still hit and miss for me sometimes, especially when the top colors are darker shades. It takes practice and experience to get the right amount of "bleed" through the top colors to depict irregular fading. You are on the right track!
I think your skilz were up to the challenge here. This looks excellent.
Thanks so much Tom @tcinla - appreciate that, hopefully the skills are improving with every build, not much more I can ask for.
Nor can any of us.
One mean looking machine! Nice work!
Looks scary as a Warthog should, great result, you must be very pleased with how it turned out.
Thanks @chinesegeorge - yeah a really scary looking plane, I'm very happy with how it came out thanks, was worried I wouldn't do it justice, but I think I pushed my levels on this one. Thanks a lot.
Thanks Robert @roofrat - yeah its one of the meanest looking planes in my opinion then you add that cannon and all those missile, scary stuff.
Well done Anthony on presenting an excellent A-10 decked out with all its regalia under the wings. This build showcased some great skills on your part. Welgedaan ou maat!
Baie Dankie, haha - I really appreciate the comments. Yeah the under wing beauties were really fun to get looking good.
Really nice looking Warthog, with some awesome ordinance hanging there. That 30MM pe work is excellent, I was drawn to that detail, which is the centerpiece of the A-10. I agree with photo-etch stuff, it is challenging. Just curious what you used for the gloss coat before applying decals? Because your decal work doesn't show any silver edging at all, really well done. What is your technique Anthony, how many layers, what do you use, any light sanding in between the coats you apply? The artwork on the ladder bay door is a nice touch. I like your weathering and applied oil stains, kinda fits the Warthog that lives in the weeds as a close-in support beast.
Hi Joe, @jroamer thanks so much for the message. Yeah the photo etch was tough but I really enjoyed it.
The gloss coat I used was Tamiya, x-22 Clear, I usually do a mist coat and then once I get to the end of a section I'll go over again with a heavier coat,so that it looks wet.
I don't do any sanding or anything. For the decals I use water to start with and wet the place the decal is going to go, then I place it and once its on I use Tamiya MarkFit Strong over it to soften it a bit - after leaving it a bit, (usually till the next decal is placed), I then gently roll a cotton bud over it to press any liquid out from under it, once Ive done that I put a little bit more Market Strong on top again.
If the decal is over panel lines or a lot of different curves or bends I use markFit Super Strong - just remember with Super Strong to leave it alone - it will wrinkle up and look horrible but don't touch it.
After that I let them dry off and then add a matt coat with Tamiya XF-86 to seal them and prep for the weathering layer.
Thats pretty much my process - I hope that helps.
Thanks the artwork on the door may not make sense, haha, its kind of a joke a friend of mine is building an Abrams tank and I kept telling him he is building target practice for my Warthog and he kept telling me that his Abrams would shoot my plane down. So I got a pic of his tank and put it into the door and sent it to him saying that was a kill marking, haha.
Turned out great, Anthony.
Thanks John
Fine job on your A-10, Anthony@anthonyricco. The weathered camo looks really striking and your work on the details, like cockpit and load-out really enhances the final result. It was great to watch this come together in the WIP thread. Congratulations on getting this across the finish line so sucessfully.
Thanks so much Colin - I really wanted everything on this to enhance it and not do it well on one part and then have it let down by not taking care in another. I really appreciate your comments.