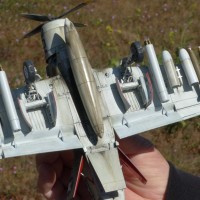
Tamiya A-1H Skyraider, 1/48 scale
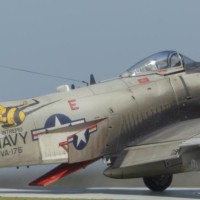
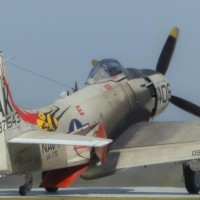
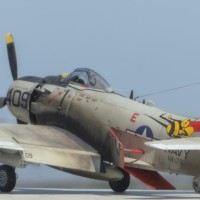
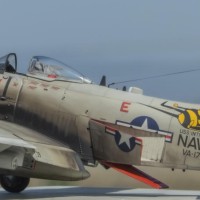
Hello iModeler! Here is my Tamiya Skyraider for your review. OOB aside from ordnance - Mk. 82 bombs from AMK, 4-shot Zuni rocket pods from ICM and the Zuni rocket warheads are 3d modeled and printed by me because I just did not want to deal with those mould lines.
My main goal was to represent the dirty filthy exhaust stains - I used Abteilung 502 oil paints followed by MRP soot for the lighter bits. VMS Paper Shaper and a Post-It cut to size was used for the canvas cover behind the pilot seat.
Any words of wisdom on how I can make the next one better would be greatly appreciated. Cheers!
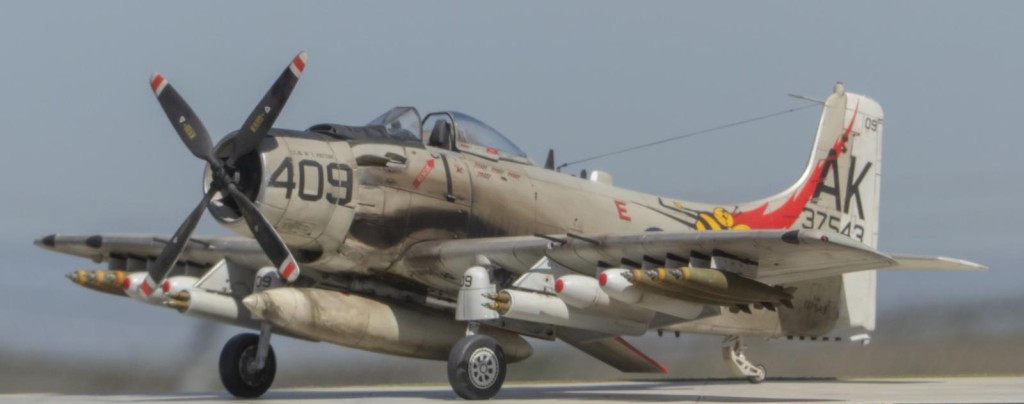
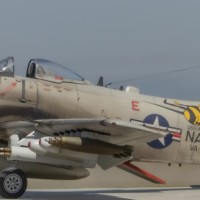
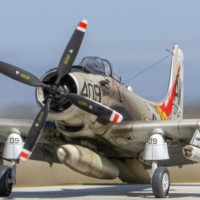
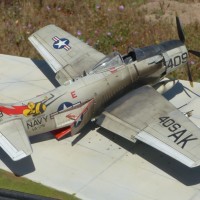
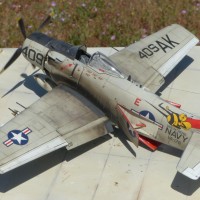


Excellent allover, Ramon!
thanks Spiros!
I thought I was looking at a picture of the real thing! Excellent pictures and excellent job.
Erik
Thanks Erik! If you had to look twice to decide if it was real or a model, then I consider that a win. Cheers!
This is really excellent. Finally, someone got a Skyraider dirty enough to be accurate. No Skyraider pilot would fly one that looks like what most modelers create - they're so clean there must be something wrong.
Your paint work and the weathered oiled-up finish is really good.
FWIW (and not a complaint) at the time VA-176 was in Vietnam in 1966, the bomb shortage was so acute that they were carrying the old WW2 "fat" bombs. If you're interested, look up my book "The Tonkin Gulf Yacht Club: Naval Aviation in the Vietnam War" from Osprey over at Amazon for further information.
Thanks for the compliments Tom! I have noticed that title on Amazon and it is on my wishlist. Maybe i will treat myself come father's day...
My original plan was to use the leftover ordnance from WW2 but in the end, I couldnt bring myself to deal with all those bomb halves in the kit and the resulting seam line clean up, so I used some Mk. 82s that I had ready to go from another build, stole some Zuni rocket pods from an ICM Bronco, and again, because I didnt want to do seam line clean up, I made and printed my own rocket warheads instead of using the kit parts from the Bronco.
The next one will be better. Thanks again for the compliments!
"the next one will be better" - the goal of every serious modeler. It's how progress happens.
Those old leaky fat bombs as dangerous to navy as to the enemy.@tcinla
Love it. Tell us more about how you took the pictures so that they look so real.
Thank you Marcello! My son and I took our models to a local airfield to use as a background. The models were placed on a diorama base that looked like a section of flight line, which was on top of a lazy susan resting on a wooden stool. That way, the model was a few feet off the ground.
The fStop on my camera only goes to 8, so I step away about 15 feet, then zoom in to frame as desired. that allows the entire model to stay in focus.
I also make the focal point at scale eye level, and tilt the camera up so the horizon is in the lower third of the composition. That, the background, and the sunlight help me take pictures that give a more realistic look.
i am not a trained photographer, I have just been playing around but still I hope this helps!
Thanks for the cues Ramon!
no prob, happy to help!
Thanks, I hope one day to be able to take pictures like yours!
Gorgeous!
You got a good representation of how exhaust stains collect around the corrugation of the aluminium skinning. One thing you may want to improve is the detailing of the tail wheel (as you were asking :)). Look at this photo how the forward part is actually two prongs rather than the flat one-piece Tamiya made http://data3.primeportal.net/hangar/jean_thomas_rembert/ad-4n_skyraider/images/ad-4n_skyraider_52_of_57.jpg
That is an AWESOME pic, thank you Stellan! I have another Skyraider to build this year, and I will put more attention to the tailwheel.
Thank you for the compliments but thank you even more for the constructive feedback - i owe you a beverage!
Cheers!
Looks like a well worn work horse the Skyraiders were...really nice job, Ramon.
thanks Gary!
Good looking dirty Spad Ramon. Two thumbs up.
thanks for the compliment Tom!
Wow! Superb, all around. Great job!
thank you Gary!
Awesome work, Ramon. My neighbor flew these bad boys off carriers during Viet Nam. He'd agree that you got the oily, dirtied-up look just right. All good.
I bet your neighbor has some pretty cool stories to tell... thanks for the kind words!
Gorgeous photography as usual, and a stunning looking dirty bird! +1 from me, along with two thumbs way up.
thank you Andrew!
Beautiful work, Ramon! That's one dirty workhorse, very nice finish and weathering.
I punched the 'like' button!
thanks George!
Fully agree on all the above given compliments, Ramon @anvil6
Awesome result and the way you took the picture even enhanced the already amazing looks of your build.
Well done.
thanks, you are too kind!
Love it - saving the link for a reference! The weathering looks fantastic - well done!
thanks Greg!
Looks absolutely outstanding! Very realistic. I thought it was a real Spad too, Ramon.
Thanks Eric! i was inspired by people like Michael Paul Smith and Fred Shammas. Those guys were wizards and I guess I want to build models and take pictures like they did.
Exceptional job here sir
thanks Mark!
Fantastic work, Ramon. I love this popular scheme of the VA-176 Skyraiders and your weathering is perfect. William Patton's VA-176 MiG kill is also a thrilling story to have represented by such inspired artwork. Thanks for the tips provided on the striking photography. I will have to try this technique myself. BTW, how did you keep such a steady hand to get just the right curvature to the exhaust streaking. Did you use masks to prevent overspray? I am always nervous doing this kind of thing at a later stage since I dread ruining several layers of paintwork by slipping up.
Thanks for the compliments Colin, you are very kind!
As for the exhaust stains, first of all never be afraid to fail. Experience is what we gain when we survive our mistakes and fortunately in this hobby, 99.99% of our mistakes are totally survivable.
So here is my process: after decals were done, I applied an acrylic clear gloss, but a matte one is good too. The acrylic coat protects the paint and decals from the next step - I got some Abteilung 502 SMOKE oil paint and just applied it with a brush in accordance with my reference pics. in my particular case, the bottom streak was a lot heavier, so I applied liberally, and then touched up and blended with mineral spirits as needed. For the top streak, i applied a much lighter streak of oil paint and blended that even more with mineral spirits until it was almost just a ghostly suggestion of a stain.
Next, after that dried overnight I followed up with MRP Soot lacquer paint shot through my airbrush. It is pretty translucent to begin with so I just built it up slowly until I was happy with the results.
the nice thing about this way is that if i felt that I had messed up, i could just wipe it all away with mineral spirits and start over.
This is just one way, there are many paths to the same destination. Be bold and again, dont be afraid to fail. I hope this helps. good luck and give it a try. Its fun and I cant wait to see what you come up with!
Ramon, Very nice work, I've always liked this aircraft and really enjoy a well built model of it, like what you've done here.
I recently came across a gentlemen in the local car dealership while having some work done on my car. He was wearing a VA-176, turns out he was a flight leader for this group in the mid 60s. I spent a wonderful hour and half listening to this guys Skyraider story's.
To all my fellow model guys, If you ever get chance to talk with these guys, please take the time to do so, its really great, you won't regret it !
thank you , and WOW how lucky is that to get to talk to a national treasure like that guy! I would LOVE to meet up with someone like him, buy him a beverage or lunch, and just listen to their stories.
All of the above! Fantastic build!
thanks Robert!