Blenheim Overpainted Roundels
Hi folks
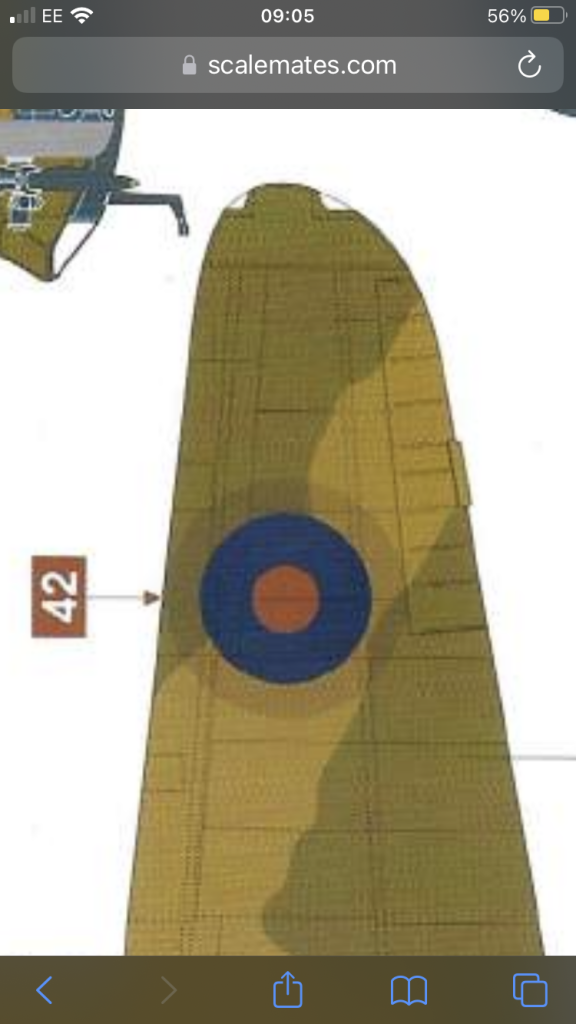
I've just recently bought the 1/48 Bristol Blenheim and I'm very excited about getting started with it! The scheme I want to build is a pre war one with over painted roundels, however I can't seem to make sense of how to do it own what order to paintmask things in. Airfix give you a brief description but could someone please elaborate further or walk me through it!
Thanks!
Well, are you brush painting or spraying? Do you weather after you've painted?
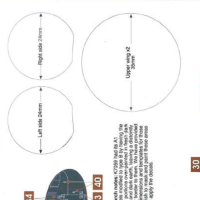
Easiest way would be photo copy the instructions, cut out the center disc, and use it as a mask to paint the overpainted disc with original colors with just a touch of black added.
Lots of other options if you spray, or weather, but that's the simplest.
Colin has the Easy Way outlined ere.
I think I would do what Colin (@tail-dragon) has suggested, Denney (@denneylucasfroud). The easiest way would be to paint everything normally, then cut a mask in the size of the extended roundel shadow, spray with a slightly darker surface color, then add the decal. If you are a pre-shader, you could paint the extended roundel in a dark color before painting the surface colors, then spray thin layers of the surface color, allowing the darkened color to show through, then add the decals. I did something similar on an IL-2m3 I just built. The plane had its camo covered by a layer of black that started to fade, allowing the camo to show through. I painted the camo normally, then added a very thin layer of black that still allowed the underlying color to show through. If you aren't a pre-shader, then I would add the darkened area after the camo. Good luck.
Hi Colin thanks for the quick response! Sorry I should have clarified, i airbrush all my builds and I weather after painting/ decals
Just to clarify, do you mean cut out the centre and mask using the empty circle it leaves behind, or do you mean cut out the circle and mask with the actual circle if that makes sense?
Thanks again Colin
?
Use the empty circle Denney. I did that with my "Captured A6M5. I used a circle cutter and Oracal Oramask 810 stencil film. Its low tack. As mentioned above. Spray your camo, mask and then spray the new camo. Two choices here. Lighten up the first camo and then spray with original paint colours or spray the original colours and darken it up for the "new paint". My personal choice would be the first option which I did on mine
Hi George this helped massively!
I do have a habit of over thinking things like this hence one more question
When you say lighten the first camo, are you referring to lightening the main camo scheme as a whole? And then masking and spraying with the normal unlightened dark earth/dark green?
Lighten the whole camo scheme for the entire aircraft, a kind of weathering. I use a touch of light grey as opposed to white. Mask and then shoot the colours as they come out of the bottle. Note the difference of the painted on markings. The fin flash was out of the bottle and the upper wing roundels had a touch of grey added
You’ve been a massive help Thankyou!
I think I’m gonna go with the spray normal camo, then mask the roundel space, add a touch of black to darken and hopefully it should look okay! Once again thanks for clearing things up and bearing with!
All the best
Looking forward to the result
Welcome aboard, Denney @denneylucasfroud
Given tips do seem the appropriate way forward.
Turned out to be a learning session for me as well.
Looking forward to your Blenheim once done.
Those were some great tips!
Welcome aboard, Denney!
Looking forward to see your models!
Hi Denney, here's a few pics of my Spitfire with the RAF markings painted over with RAAF colours, welcome to iModeler.
3 attached images. Click to enlarge.