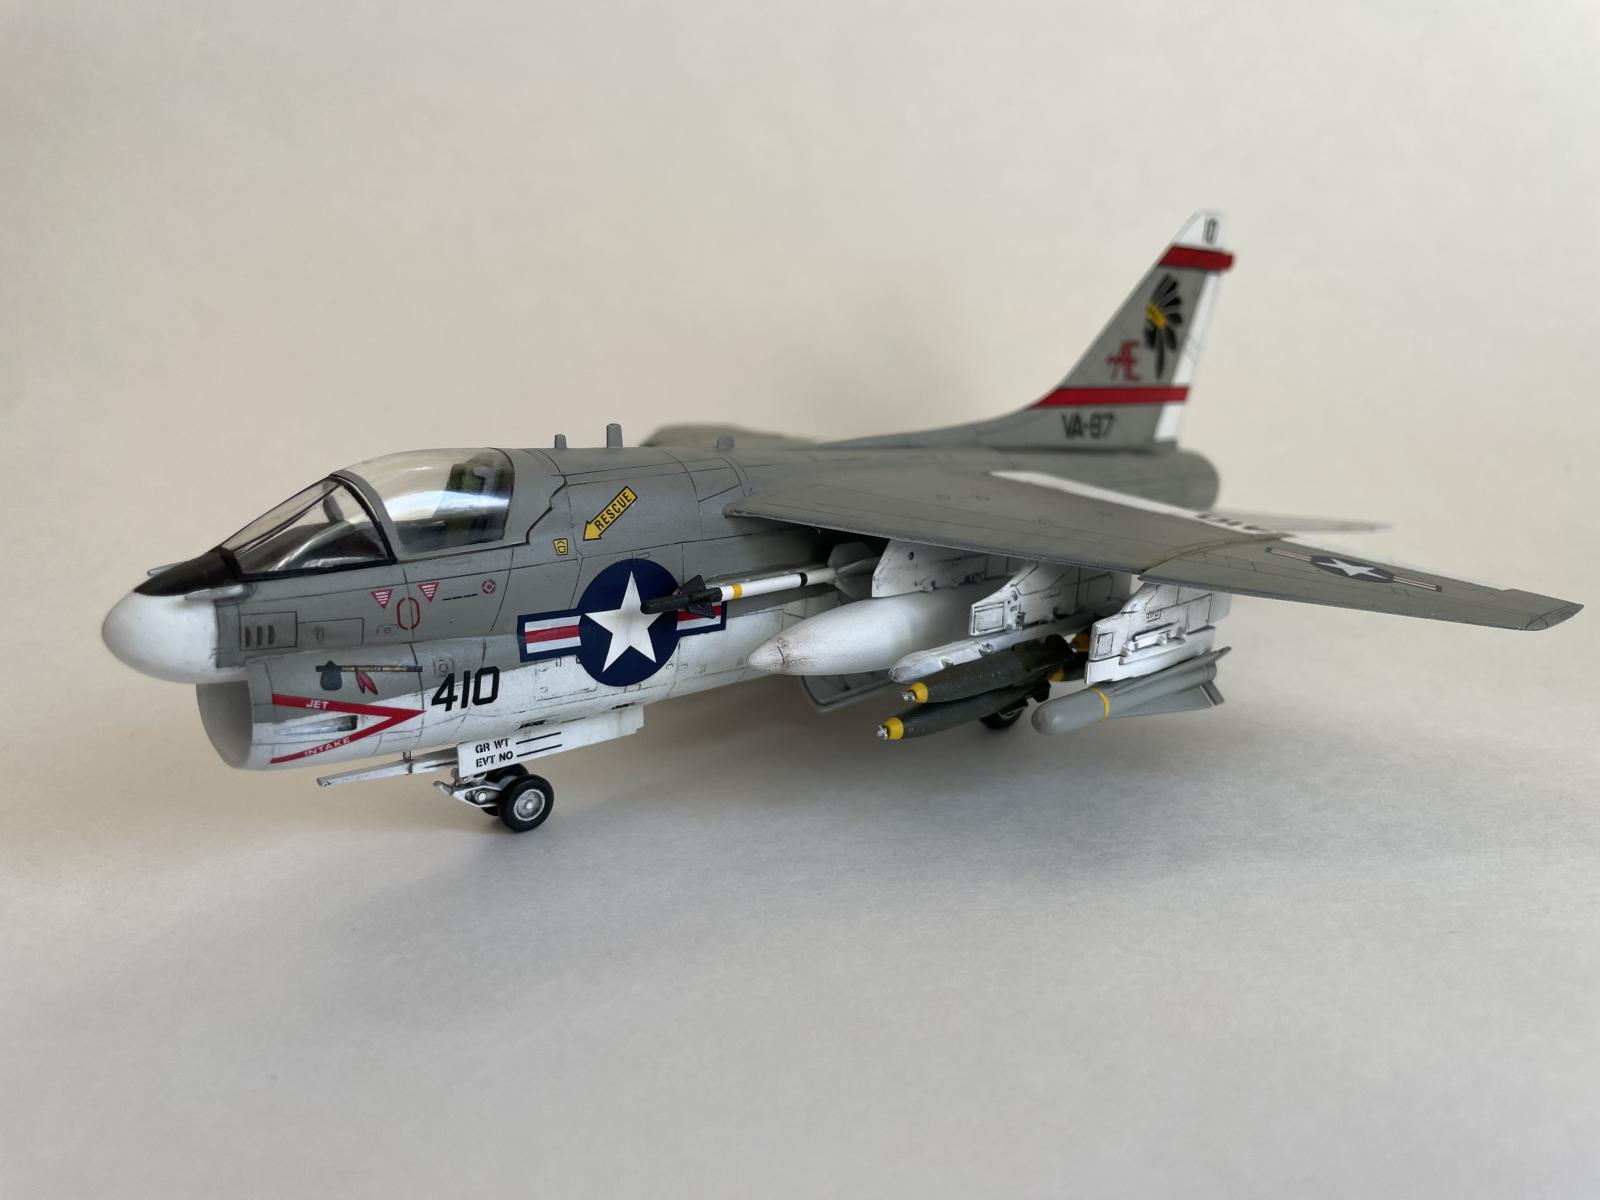
1/72 Fujimi A-7B Corsair II
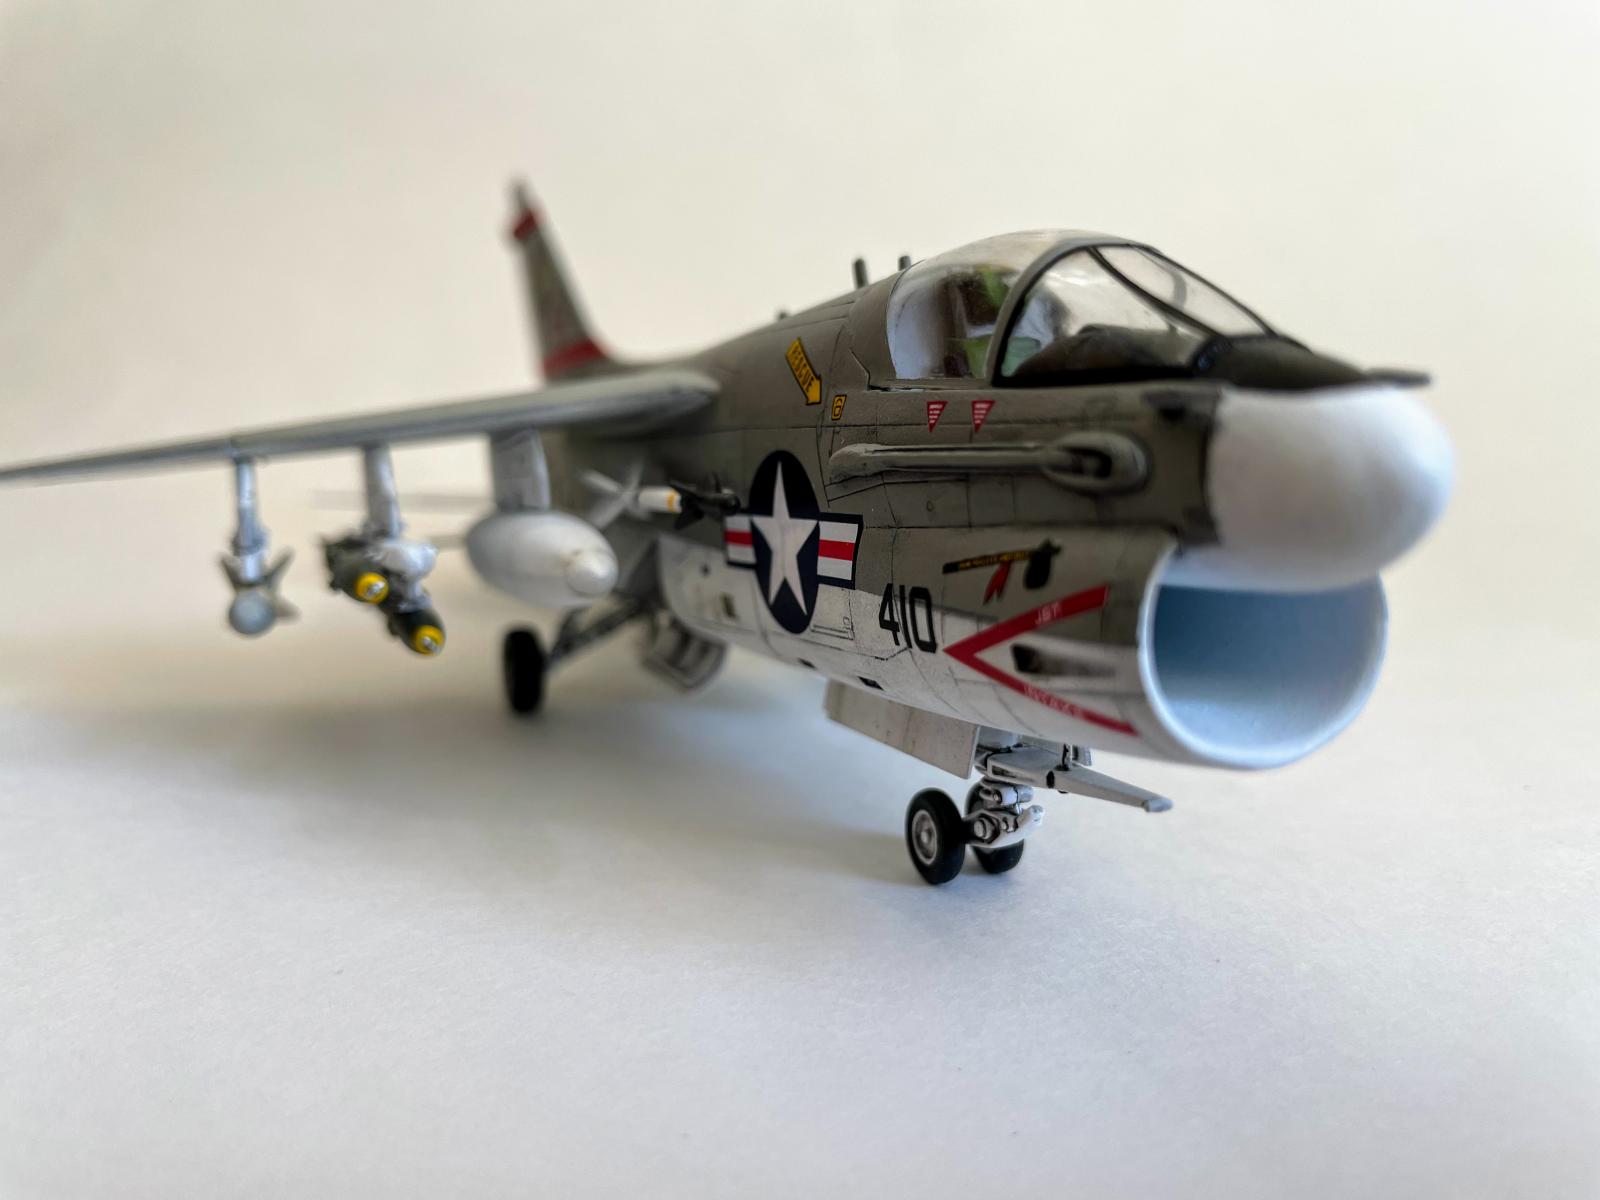
The LTV A-7 is a subsonic, carrier-based attack aircraft developed in the 1960's for the U.S. Navy as a replacement for the (still relatively young) A-4 fleet. Vought based its proposal for the A-7 on its successful F-8 Crusader, with which it shares several characteristics, and named it after the manufacturer's famed WWII fighter-bomber, the F4U Corsair. The A-7 was rapidly developed and deployed for service in Vietnam, with one aircraft produced per day over several years by the 30 or so thousand workers at Vought's Dallas, TX plant.
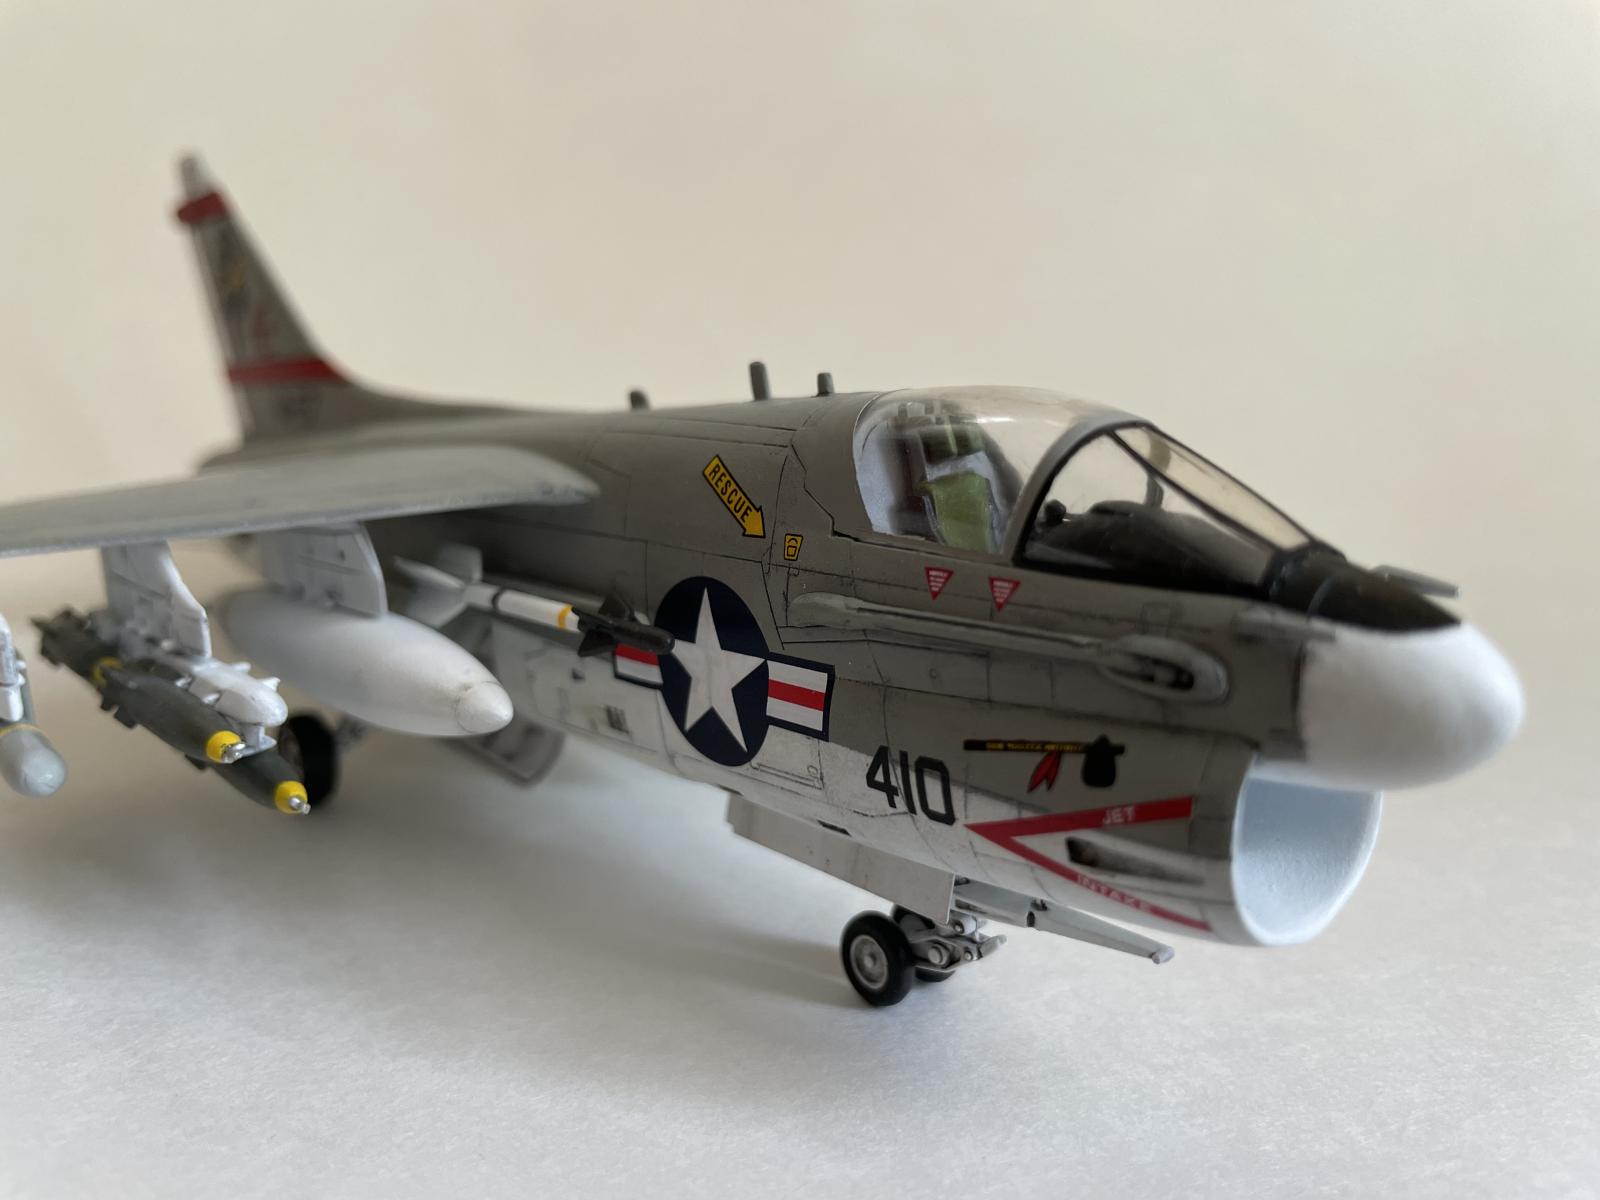
Nicknamed SLUF (short, little, ugly…um…fellow) by its acquaintances, the A-7 is not a particularly slick or graceful aircraft. Its dominant feature (which I think is pretty cool) is the gaping nose inlet that had to be given a wide berth by flight deck personnel. It wielded an impressive armament: two canons on either side of the nose inlet and a pair of AIM-9 Sidewinders mounted on either side of the fuselage were for air defense; it could carry a wide range of missiles, rockets, and bombs on its six underwing pylons, with a total capacity of 15,000 lbs. Though it struggled to achieve power on takeoff in the hot, torpid air of Vietnam, the plane could fly: it once took off at sea — with wings still folded — during night operations in 1972. When the pilot discovered the error, he was able to maneuver the plane around and land safely on the carrier. This was apparently not as rare of an occurrence as it should have been: the same thing happened to an F-8 pilot who flew for quite some distance, noting sluggish performance and low power, cursing the ground crew, before looking out the canopy to discover his wings were still folded. He, too, returned safely. Apparently Vought was unaware that any of this was physically possible.
The A-7 was formally retired by the USAF and USN in 1991, and in 1993 by the ANG, following successful operations during the Gulf War. (The USAF effectively rid itself of the A-7, which it was strong-armed into adopting by the DoD during Vietnam, much earlier, replacing it with the A-10 in the late-70s).
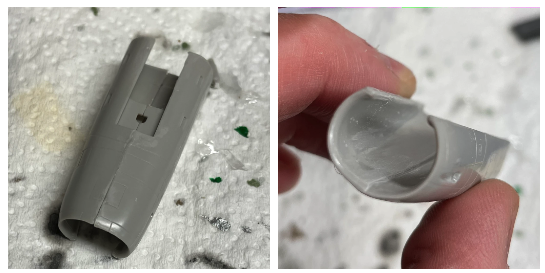
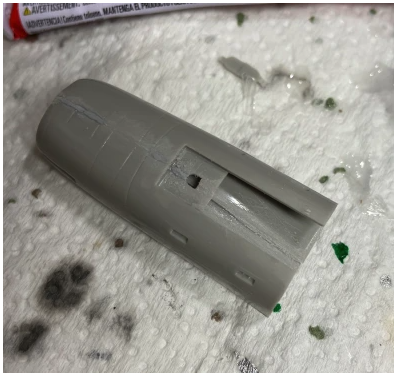
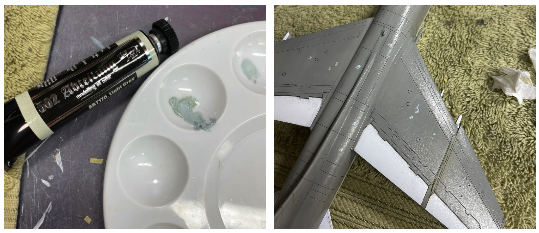
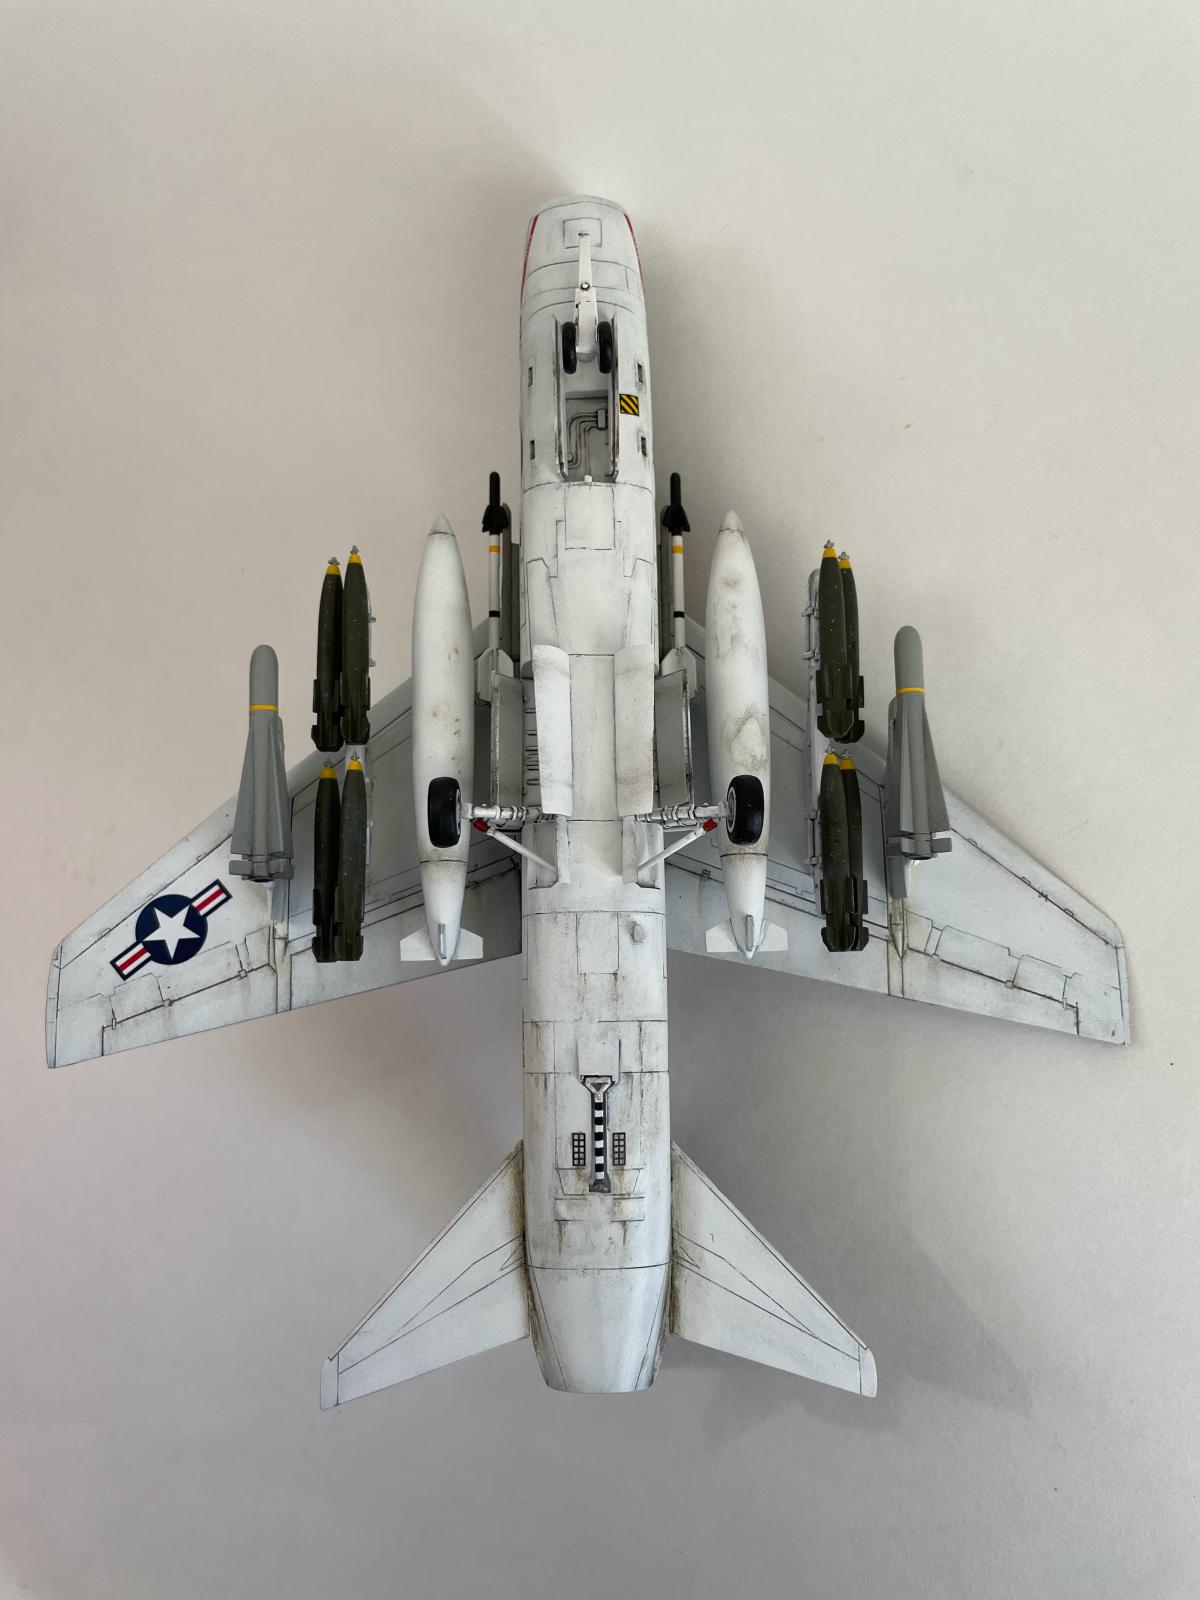
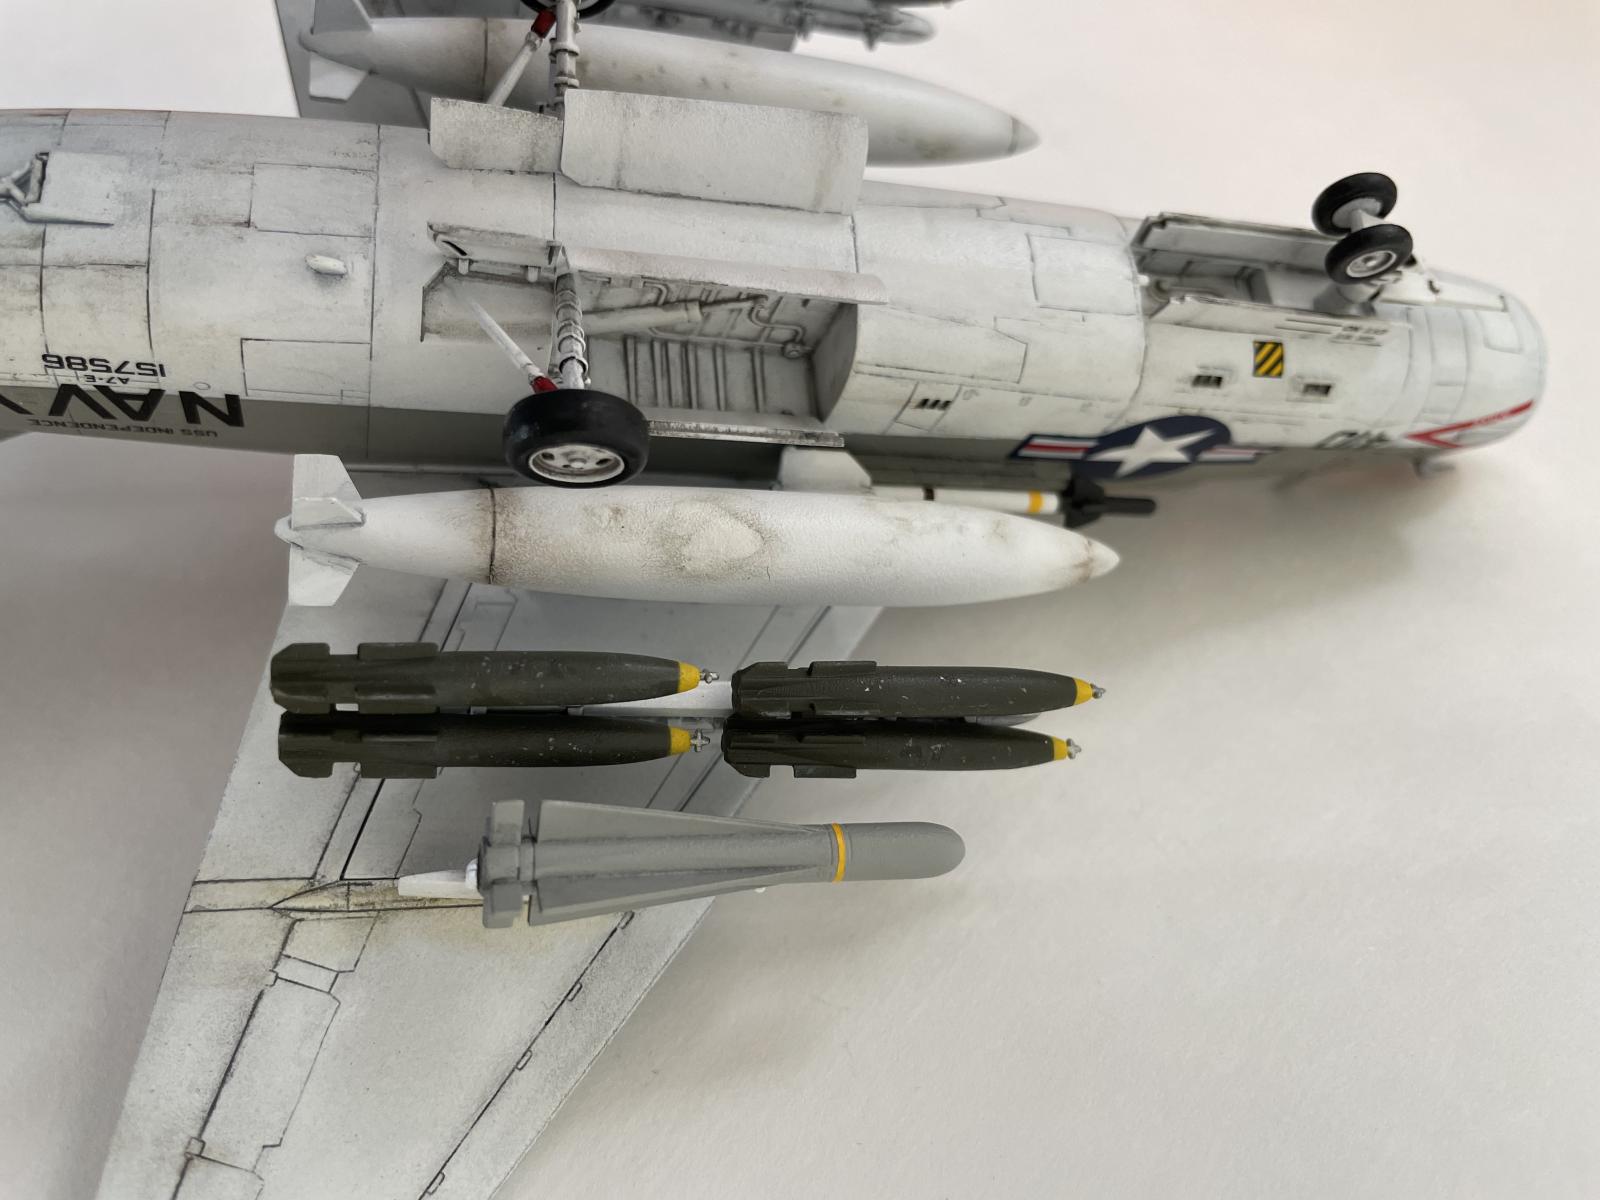
The Fujimi A-7B kit has 66 parts in gray styrene. Munitions include 10 MK-82 500 lb bombs (distributed across 4 pylons) and two AIM-9 Sidewinders. Decals are for the VA-125 Barn Owls or the VA-56 Champions, but these particular sheets were in poor condition (the transfer paper basically disintegrated in the water in seconds). Meanwhile, I had earlier obtained an Italeri A-7E kit, but was dismayed by the lack of an actual opening in the nose intake:

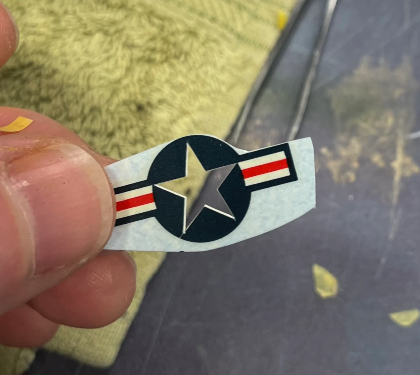
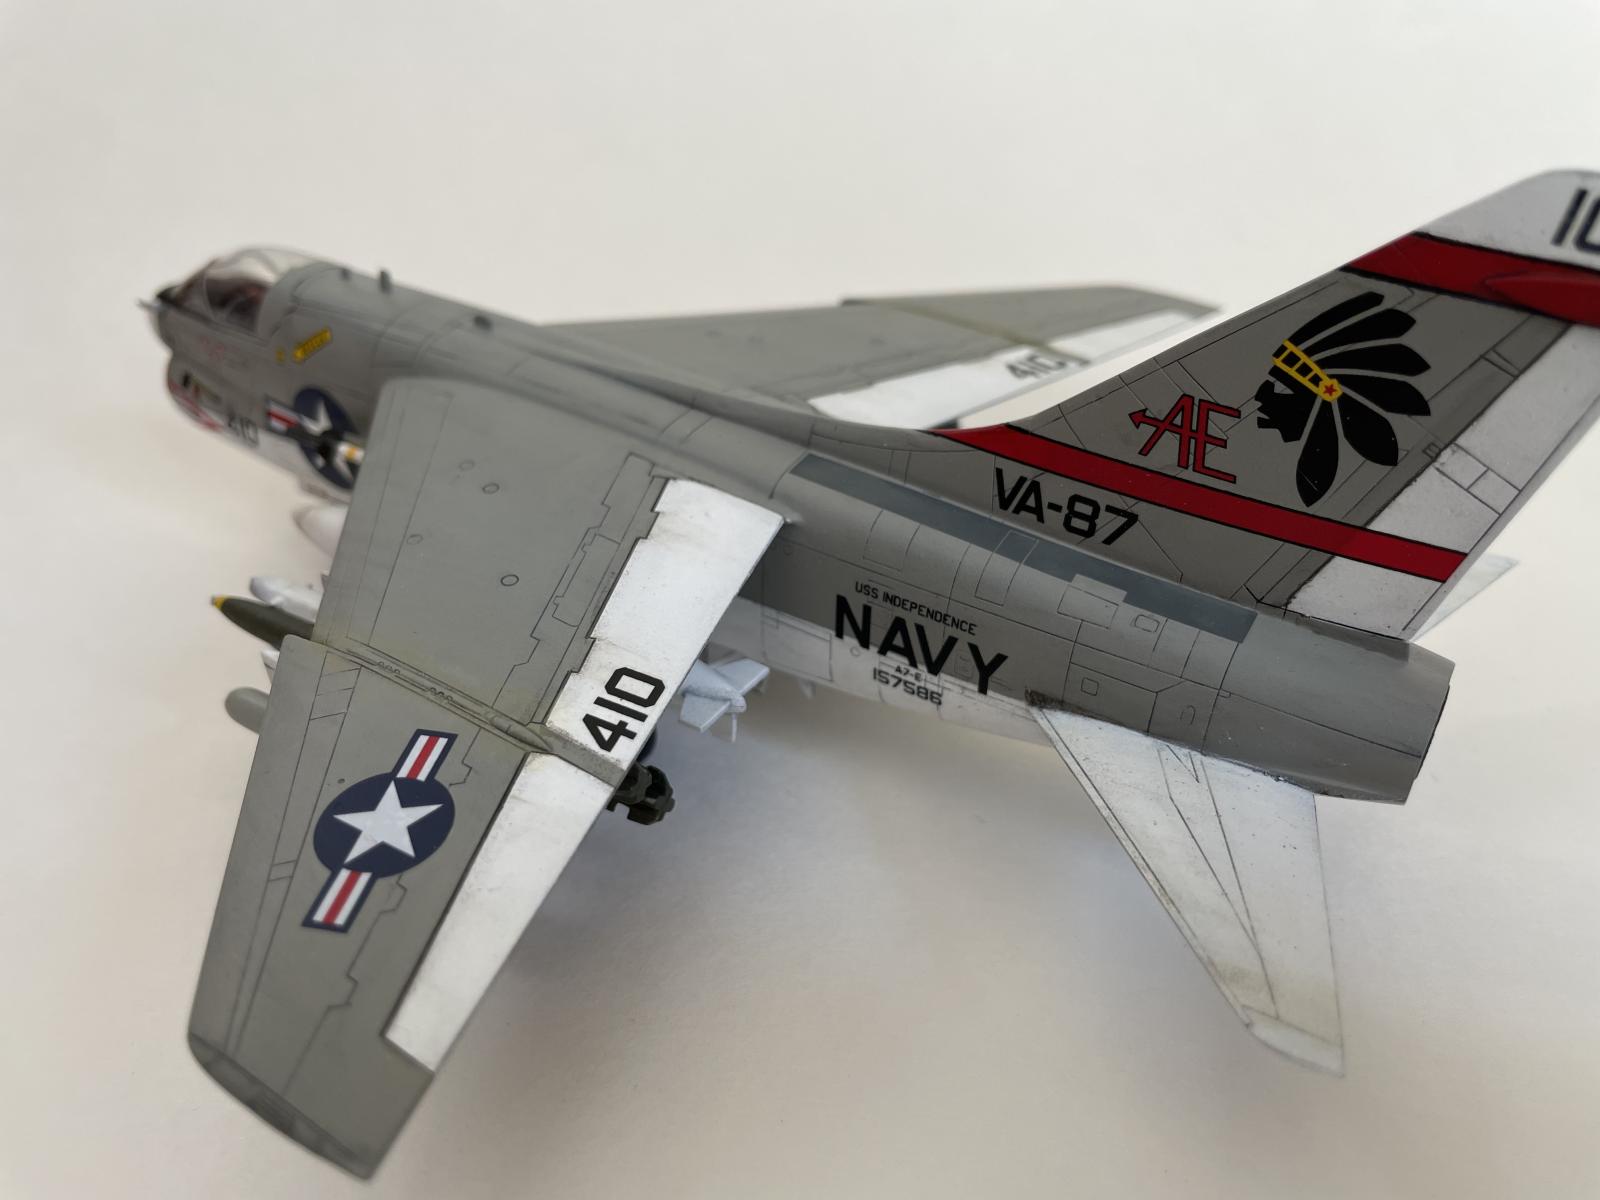
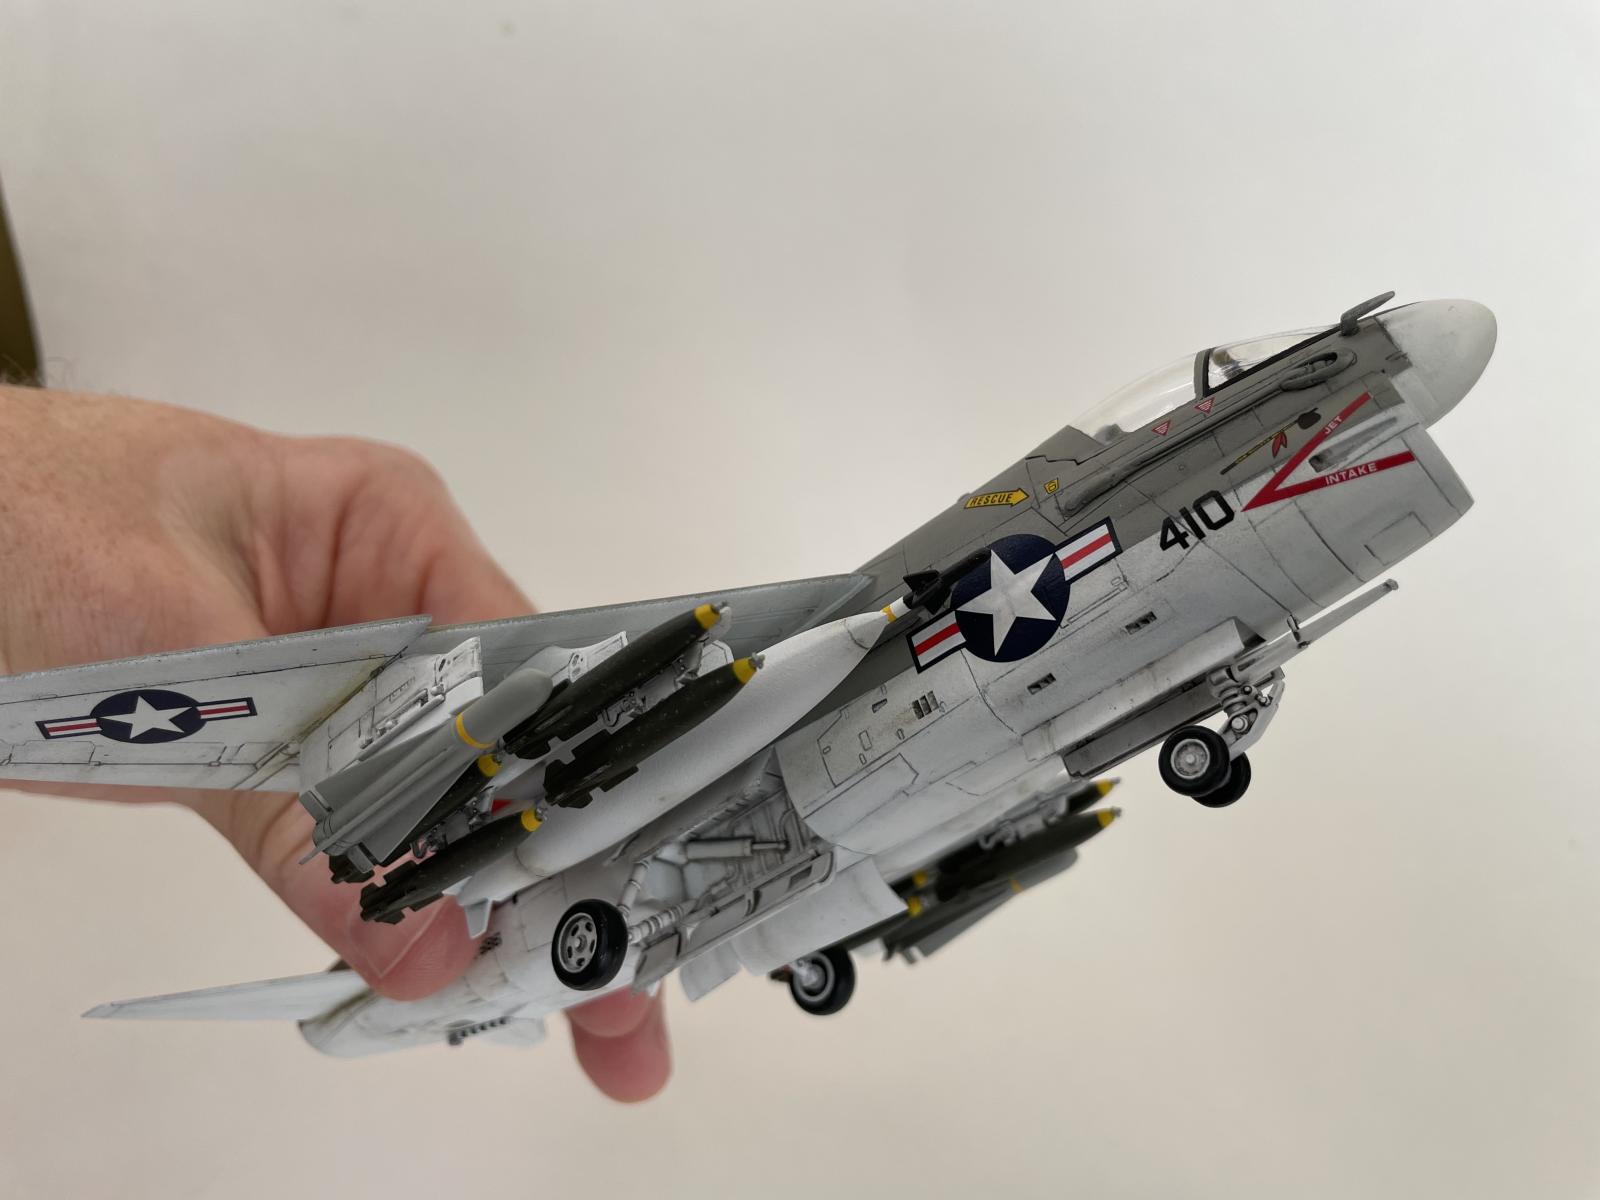
This sad state of affairs is what compelled me to pick up the Fujimi kit, which has, not only a true opening here, but some nice trunking to boot. Now, while the Fujimi decals were a bust, the Italeri decals were in excellent shape and included markings for the VA-87 Golden Warriors, who sport the coolest A-7 tail art IMHO. I therefore decided to build the Fujimi kit but use the Italeri decals (apparently VF-87 flew both the A-7B and A-7E, so the realism gods be appeased). The other downside of the Fujimi kit is that it only has MK-82s for ordnance, whereas the Italeri model has (what look like) AIM-7 Sparrows and AGM-65 Mavericks to choose from. So I also planned to filch munitions from the Italeri kit down the road.
As with my previous posts, this is a tad on the long side and I describe parts of the process that likely won't be interesting to more experienced builders -- you guys can skip to the bottom to see the finished piece. But, if you are still new to the hobby (like me), you might find some of this helpful.
My process was:
- Prime (Stynelrez at 25 psi)
- Pre-shading (Tamiya acrylics Black XF-1)
- Base coats (Tamiya acrylics [XF-20 Medium Gray and XF-1 White] thinned ~50% with Tamiya X-20A at 20 psi, 4. Alclad metallizers at 15 psi)
- Gloss Coat (Alclad Aqua Gloss at 15 psi)
- Enamel pin wash (Tamiya Panel Line Accent: light grey on underside, dark gray on top, black on landing gear and wheel wells)
- Gloss Coat (as above)
- Weathering effects with oils (Mig Oilbrushers and AK Abteilung 502)
- Decals
- Gloss Coat (as above)
- Some additional pin wash and weathering (enamels and oils) over select decals
- Matte Coat (except for landing gear, interior surface of doors, and Maverick missiles) (Alklad Klear Kote Matte at 15 psi)
- Lights (Tamiya Chrome Silver X-11 followed by Tamiya Clear Red (X-27))
Vallejo putty is toothpaste
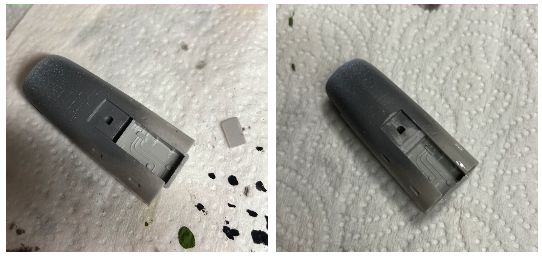
Overall, the model came together well. The biggest issue had to do with the intake trunking, which just didn't join flush. The large gap on the underside (left) wasn't a big problem, but the uneven seam on the inside of the trunking (right) would take some work:
Sanding alone was not gonna do it, so I would need to use some putty. I'd been using Tamiya white, but had seen Vallejo's putty and was drawn to the convenient-looking applicator,

I imagined myself just running that putty down the seam in a nice bead. So that's what I did:
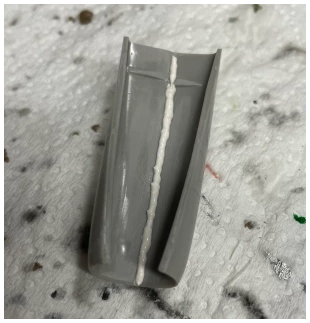
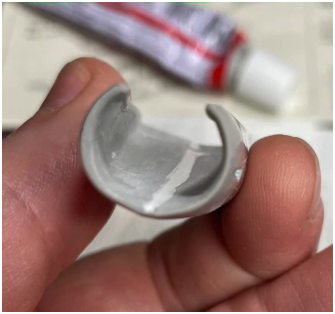
And then I waited. And waited. I waited 2 days and this stuff was still soft. I began sanding it and it started sloughing off in chunks. I ended up just completely stripping it away, as if it was never there. I got out the Tamiya white and stopped trying to be fancy. I did, however, screw the applicator tip from the Vallejo putty onto the Tamiya tube so that I could have the best of both worlds. I was able to level off the seam and sand it smooth:
The other bad thing about this assembly is the wheel well on the underside:
Entirely absent of any detail! Meanwhile, the Italeri kit had OK detail here, and so I tried to integrate that piece,
After sanding it a bunch, I could fit it in but discovered it wasn't quite long enough. To fill the 1.5mm gap I found some spare sprue scrap and fit it in, added some Mr Surfacer 500, sanded, and ended up with an improved wheel well.
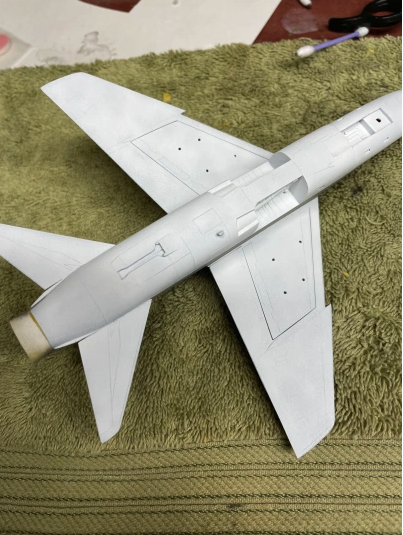
Finally, seeing as the underside of the aircraft is white, as is the interior of the intake, I thought it would be good to paint them in two different shades. I planned to use Tamiya acrylic white for the aircraft body, and I had an unused bottle Vallejo Model Color white that I thought I'd apply to the intake trunking. So, I happily added a few drops of color to the airbrush, thinned with some Tamiya X-20A thinner, and, well, nothing happened. The mixture turned into a goop and clogged my airbrush badly enough to require a significant clean up. Evidently, Tamiya acrylics aren't “true” water-based paints, like Vallejo Model Colors, and so there was some bad juju when the X-20A met the Vallejo.

Pre-shading or black-basing or whatever it is I ended up doing
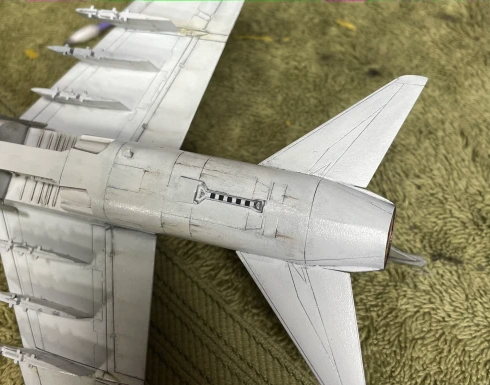
This is the first model I've done with either large gray (top) or large white (underside) regions. The white underside of the aircraft would be especially susceptible to some interesting pre-shading or black-basing effects, and I do like the look of a kind of mottled finish. I'm wary of pre-shading, because I think it's going to fill the panel lines and, depending on the color, isn't particularly visible after base coats, and it seems like panel line washes (that are somewhat sloppy) can recreate the effect of the pre-shading. To get the mottled look, I tried something in between pre-shading and black-basing: I sprayed black in a mottled pattern, with the plan of applying an even white base coat over it, but light enough to let the mottled pattern show through:
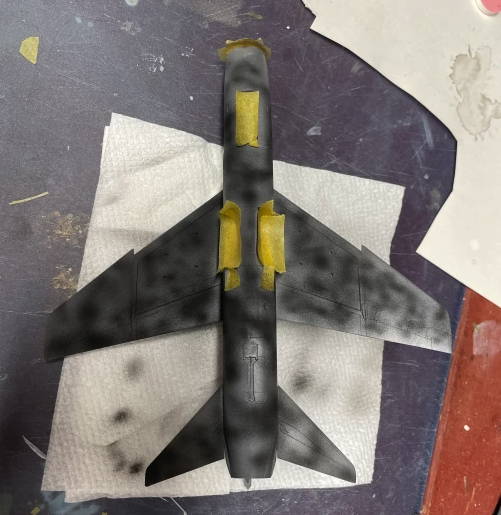
I learned quickly that this was not going to work, since the white base coat too easily covered the mottled black. This is probably why nobody does this sort of thing. So, I deftly turned this into a pseudo-black-basing method and began spraying the white base coat in a mottled fashion over the mottled black. Yes, odd. In the end it came out OK, though I ended up overdoing the white. Even though it's the desired effect, the mottled coat always looks uneven and underdone to me, and I can't see it differently.
More fun with oils
I had a bit of fun with Mig Oilbrushers on my last two models, but didn't do too much (just some dirt/grime streaking on control surfaces). I recently picked up some other modeling oils from AK: the Abteilung 502 line includes tons of colors and prepackaged sets for tasks like weathering, light & shadows, and so on. These come in tin tubes and are quite a bit thicker than Oilbrushers, closer to actual artist's oils, though they are ready to apply out of the tube (and some thinning could be in order).
I wanted to try a couple different things with the oils: dirt/grease streaking, some color variation in places, and faded paint. To attempt to simulate sun-faded paint, I lightly applied some Abteilung Light Grey in small dots and just blended with a dry brush. I kept a brush dampened with white spirit handy to remove excess paint and to help with blending.
I blended back along the direction of flight in straight strokes streaks to add some texture to the otherwise monotone surface (below left). I also applied some to the top of the fuselage, most evident on the first panel behind the cockpit in the picture below right:

To do dirt streaks around exhaust vents and on control surfaces, I used Mig Oilbrushers Starship Filth, which is a fantastic color (a dark, earthy gray); I thought black would look too stark against the white flaps and ailerons. I also tried to simulate dirt streaking away from the panel lines, particularly towards the rear of the underside of the fuselage (this seemed appropriate to me for some reason). For that I tried Abteilung's Sepia (which is close to a raw umber). This is fun and it's easy to get carried away.
Playing around a bit with color variation, I tried to add some ruddy-yellow hues to the otherwise uniform gray. I've noticed that some gray-toned aircraft can develop a yellowish/ochre discoloration on different surfaces, possibly due to various types of corrosion. I didn't want this A-7 to look like something that was wasting away in a trash heap, so I tried this out on just a single high-stress location: the hinges on the foldable wings. I used Oilbrushers Summer Soil mixed with White and lightly blended it onto the gray surface. I have no idea if this is realistic, but it adds some life to the dull gray surface:

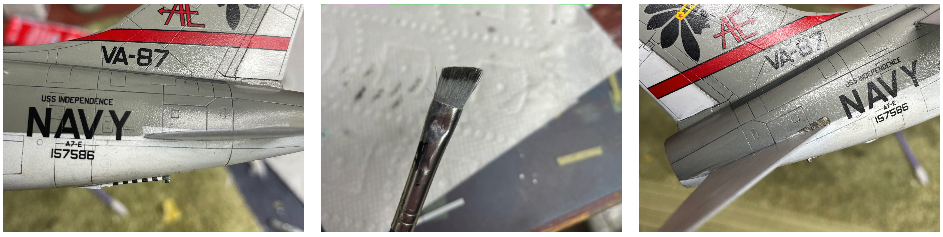
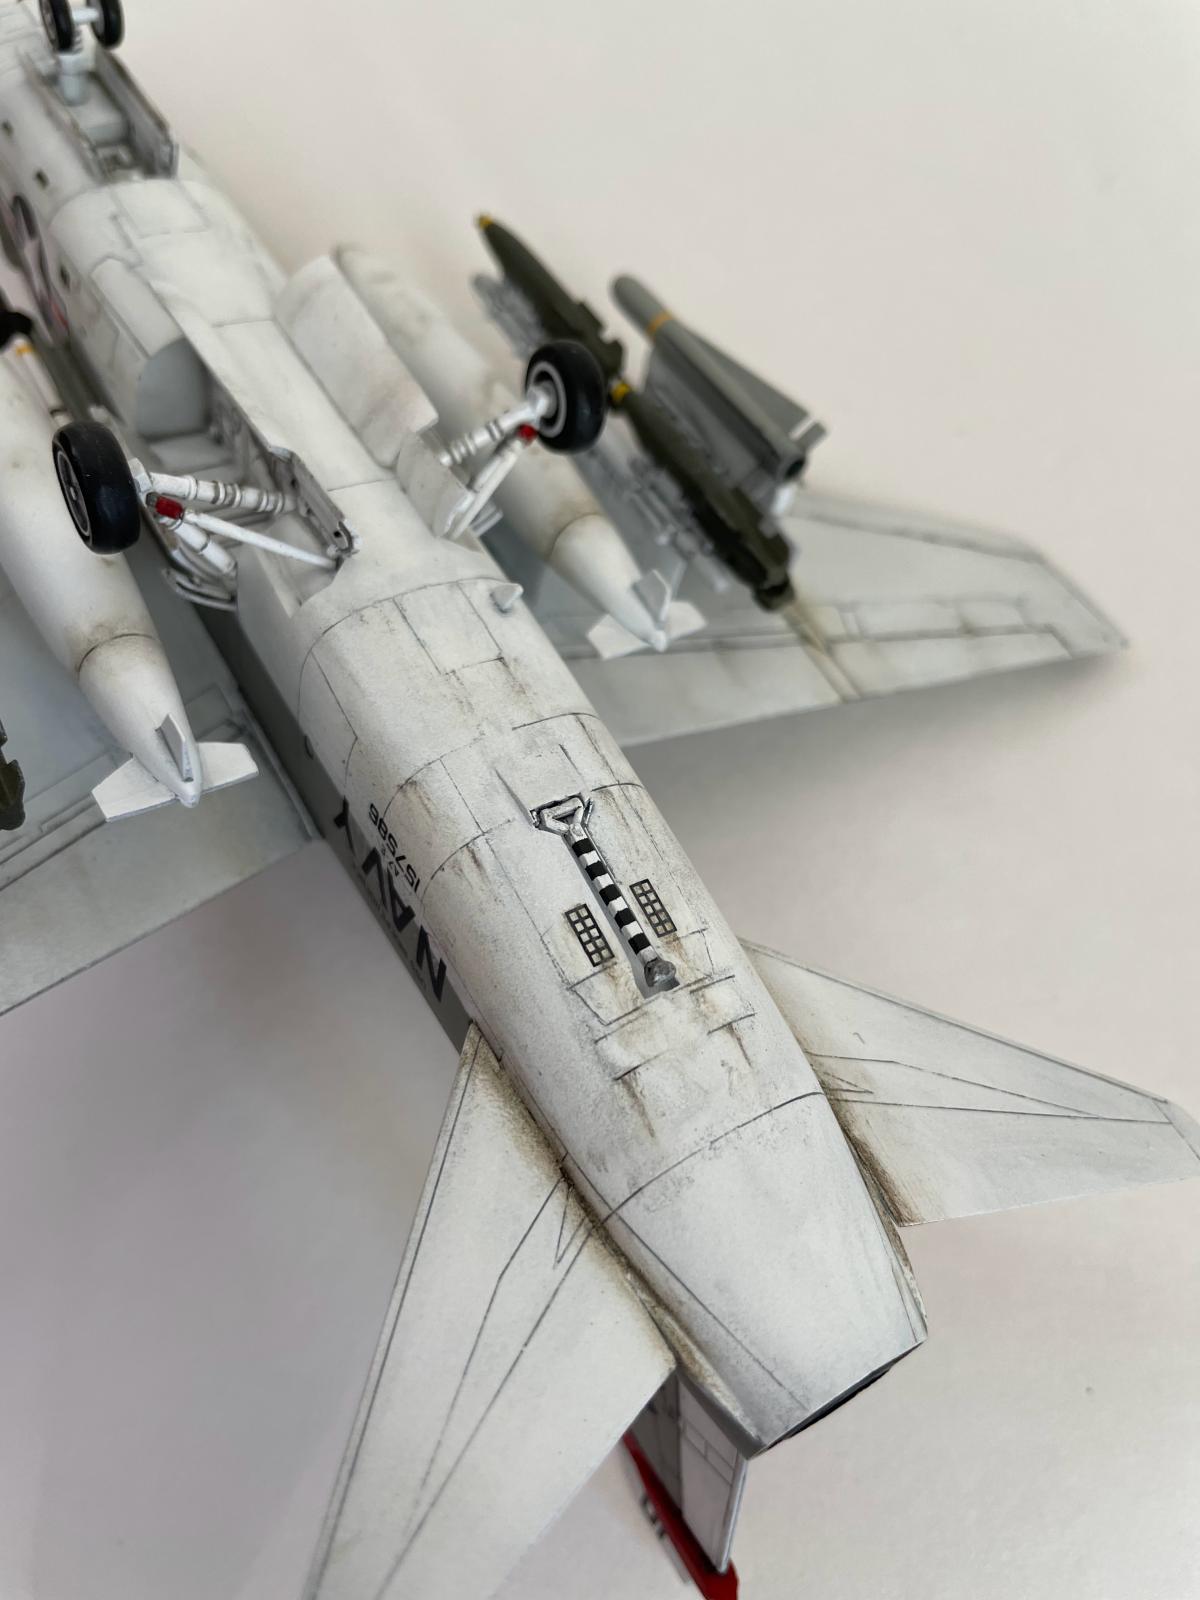
Finally, I wanted to recreate the wear on the rear fuselage where the “stabilator” rotates about the root. This is a metallic triangular wedge-shape that often has dirt and wear along the angular lines of rotation,

The challenge was to get the grime to follow these lines and not just make a cloudy smudge. The 1/72-scale is a little small to really do this justice, but I tried to create them by pressing the side of a flat paint brush against the area, letting the bristles form the lines. Below left is the freshly-painted metallic wedge-shaped area just above the stabilator, middle is the brush (armed with some Starship Filth), right is the end result:
Decal drama
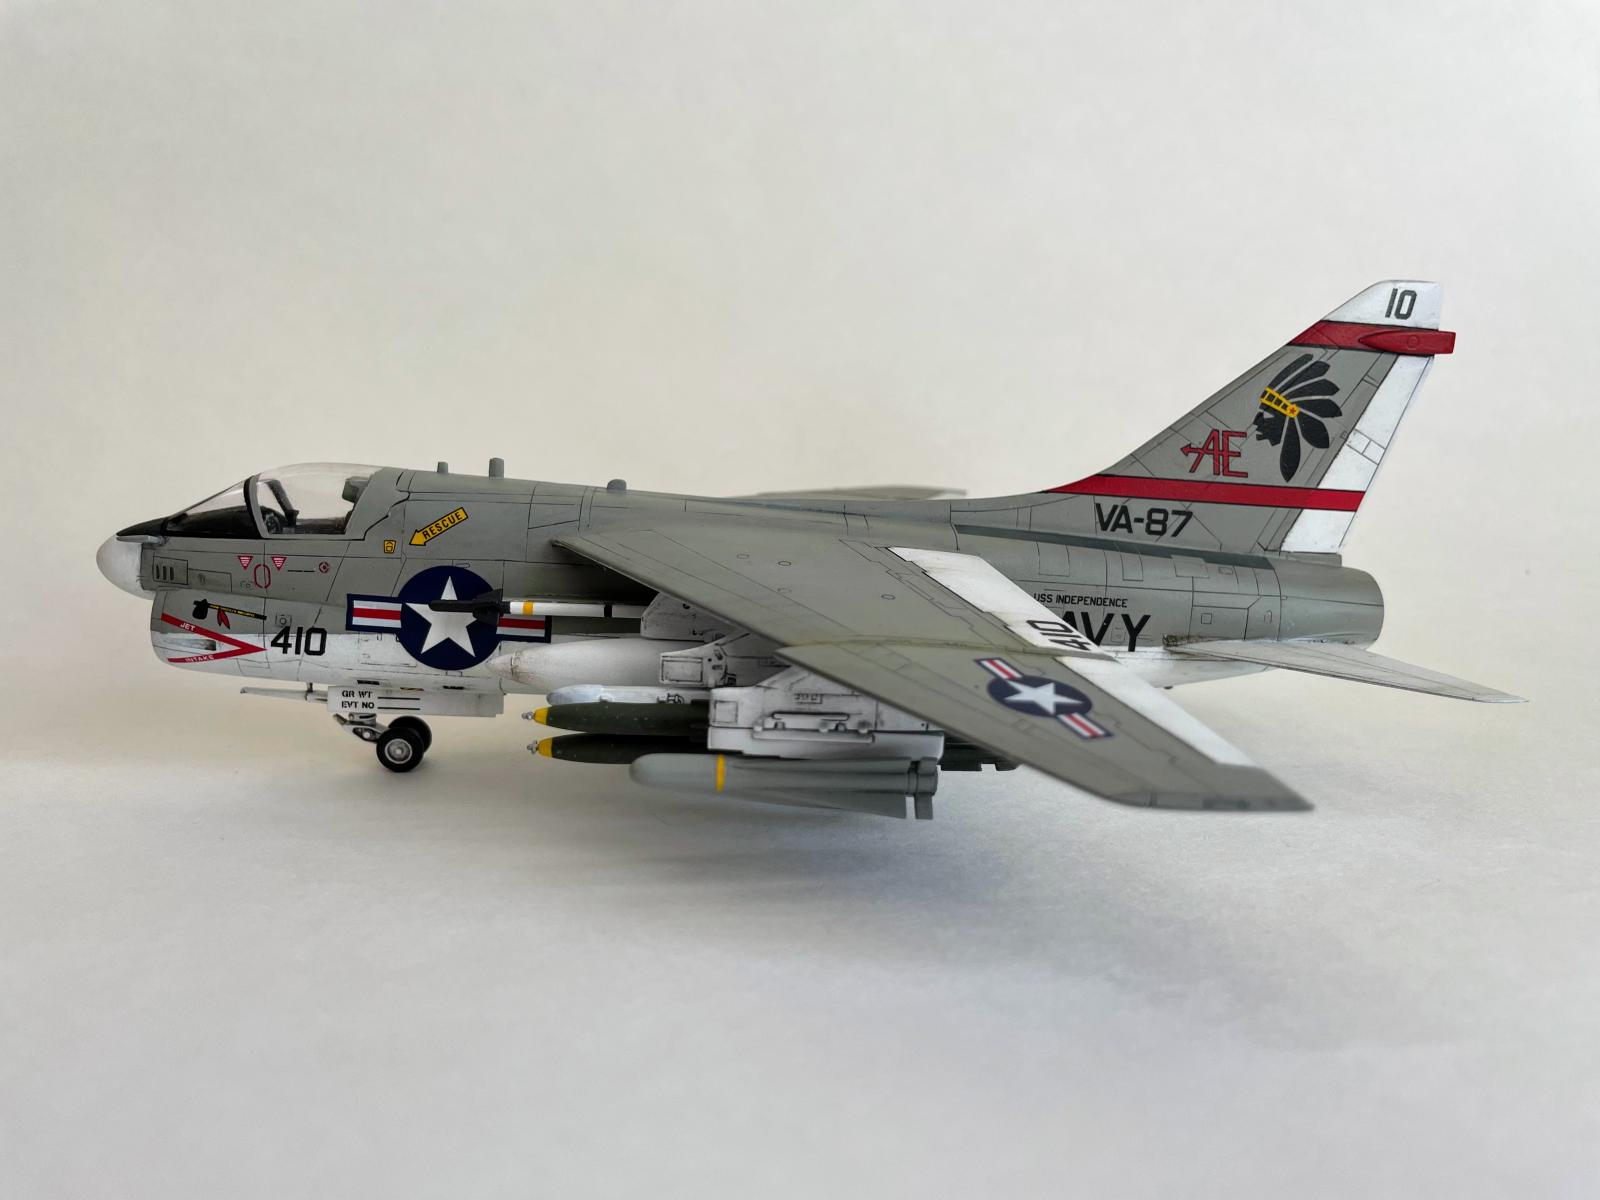
The Italeri decals went down wonderfully. No trouble at all. There were two issues, however: the red stripe on the tail (seen just above) didn't extend all the way to the edge (also visible above) and the shorter red stripe on the top of the tail just didn't fit over the bulge there (see the second stripe in the photograph of the real plane above). I had to paint the top red stripe and the completion of the bottom red stripe. The colors don't match perfectly, and had I known I would have just painted both stripes (I had already applied the bottom stripe by the time I realized the top wasn't going to work). I did have a sense that the top decal would be trouble, and so I should have tried that one first.
Second, the USAF insignia on the fuselage sit right over the gray/white dividing line, and this showed through:
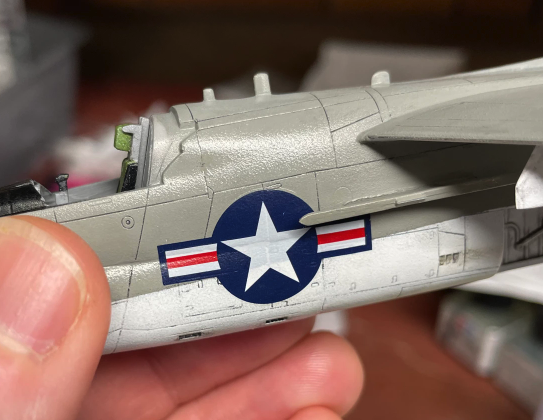
I struggled with what to do with this, and even polled the hive mind at britmodeller.com and got some excellent ideas. In the end, I decided to try to paint over the star. I had another insignia from the Fujimi kit that was identical in size, and so I carefully cut the star out of it using my hobby knife and a straight edge,
Because the two decals were the same size, I was safely able to tape this one down as a mask over the decal on the model. I then lightly airbrushed some white on top,

Alas, not perfect. You can see where the stencil didn't quite match up, resulting in some blurry edges. I sat on this for a few days then decided to just replace the decal. I found some nice Microscale USAF insignia from Hannants and waited 10 days for them to arrive from the UK. I removed the emplaced decal: I had to sand it off because I really Solvaset bombed it. This was fine, but in order to not accidentally sand off the surrounding finish, I left a slim outline of the original decal. The trouble is that the Microscale decals are just a hair smaller, and wouldn't completely cover this area. I didn't want to sand down and repaint and varnish this area, so I decided to use the other Italeri insignia meant for the other side of the fuselage to cover it (but first painted white where the star would be). I then used a Microscale insignia on the other side: the two are not identical, but this was close enough.
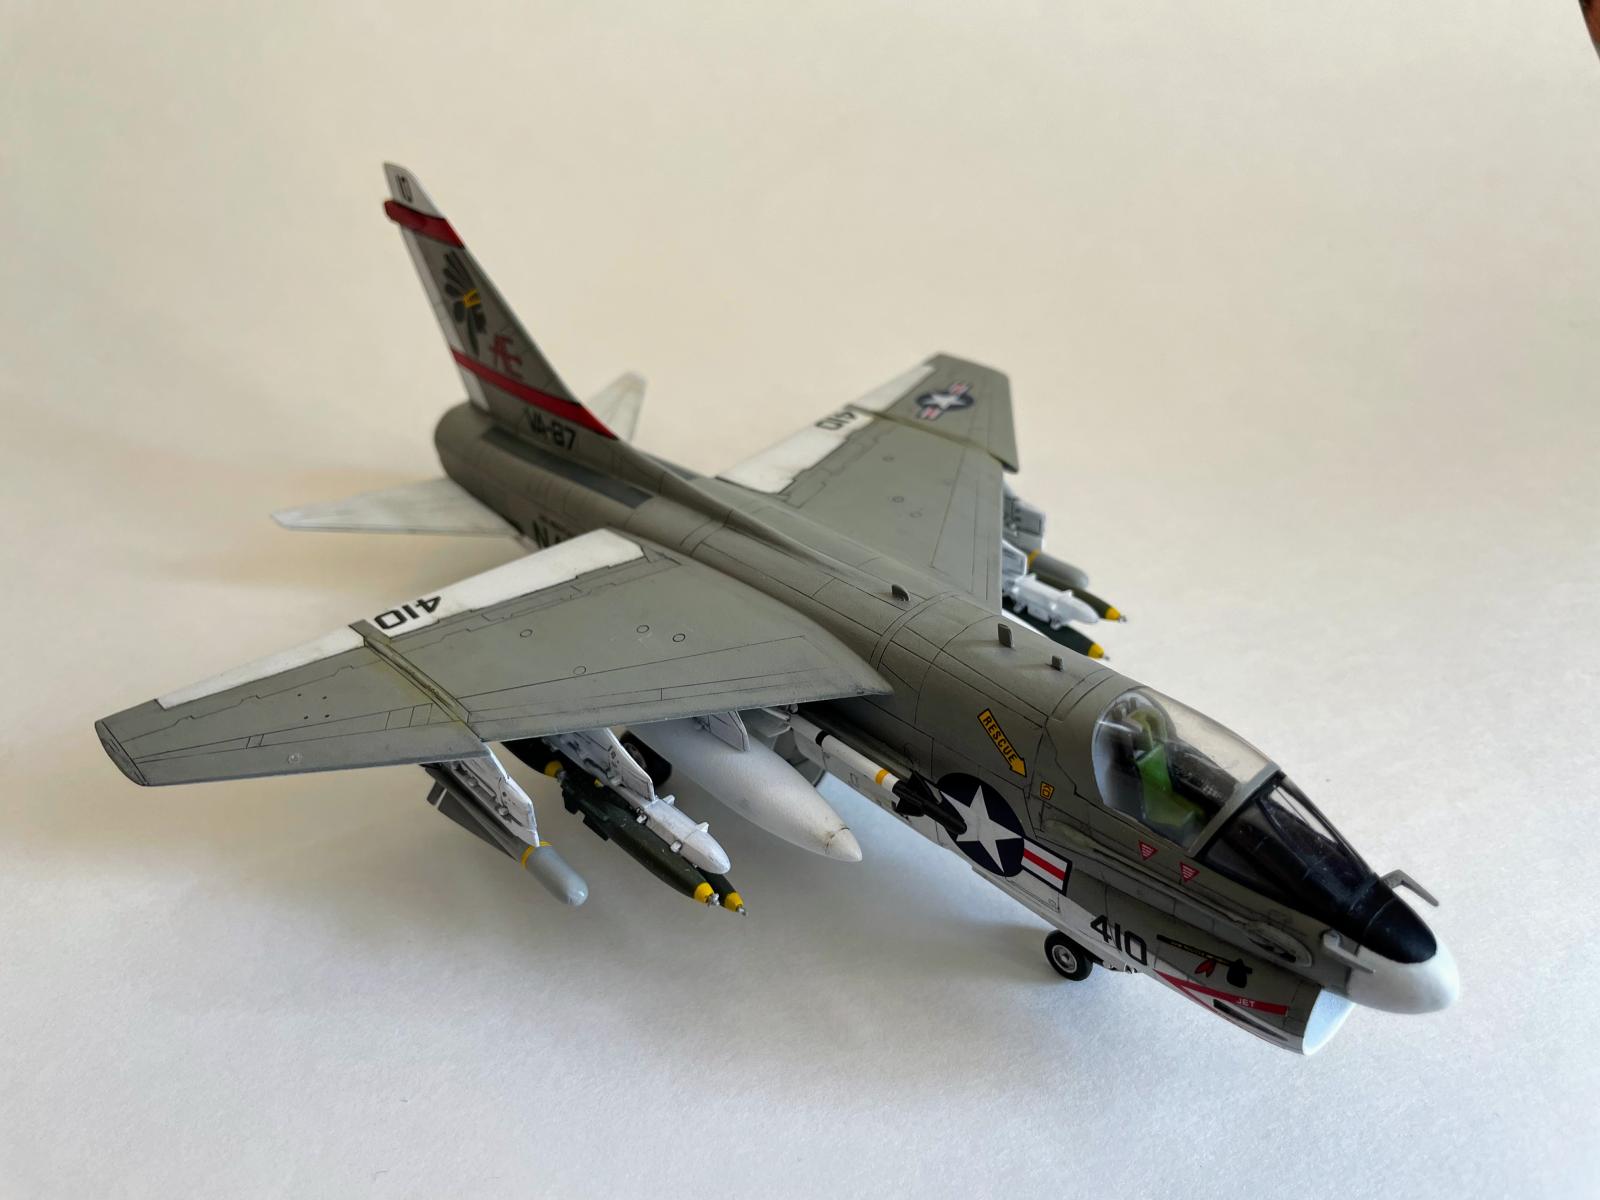
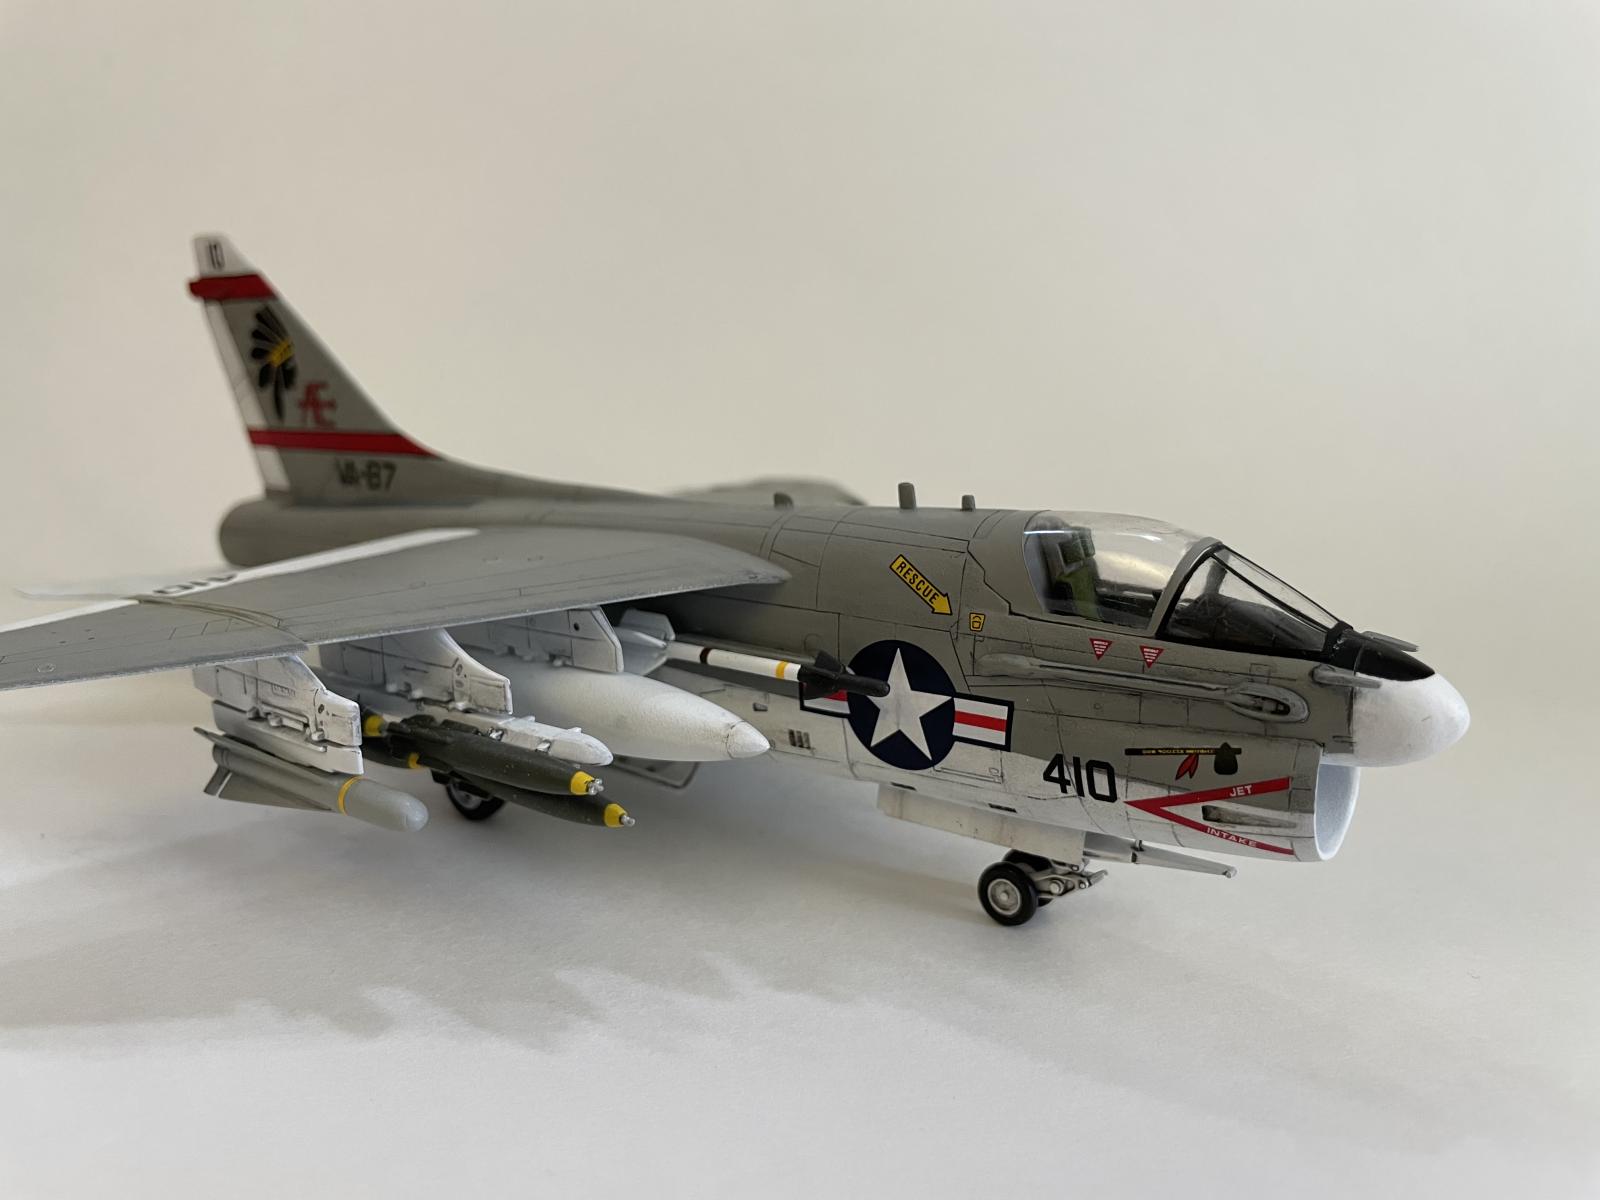
This was a good build. Learned some stuff, thankfully with minor pain. Thanks for reading!

Very nice Corsair, Brian @bapowellphys
Especially when taking all the struggles into account and the miniature scale of this kit.
The weathering is very realistic.
Thanks for guiding us through the process, now we know where to look at when building this one.
A truly superb result, Brian!
Your struggles were worth the effort as you ended up with a fantastic build and finish. All good.
Nicely done! A lot of modeling is experimenting and problem solving, and then applying lessons learned to the next project. You navigated this project nicely!
Nice work, Brian! Another fact about the A-7 is that to this day it is the only US military aircraft program to become operational ahead of schedule and under budget since WW2.
Awesome A-7! Thanks for the commentary, great way to learn from others to improve my skills. Weathering, grime, and oil application looks perfect, something I'll have to try on future builds.
Nice! Weathering is spot on. Great looking A-7! The yellowish coloration you see on the aircraft is a combination of leaking engine oil and flight deck crud. Yes, indeed that gaping intake and the low position of the engine exhaust was a challenge to navigate on the flight deck.
After all your struggles you ended up with a model to be proud of.
A fine article Brian, and a great looking SLUF!
A-7s are one of my all-time favorites, Brian @bapowellphys, and yours looks great. Lots of work to make a Fujimi with a big intake look good. I have never had Vallejo filler fail to dry. I usually use it to fill small gaps by applying it, and then wipe it smooth with a paper towel with a little alcohol on it. I also made the mistake of using Tamiya X-20 with Vallejo and ended up with Jello. I finally decided that there was some wisdom of using the thinner from the same manufacturer as the paint. I know builders that thin Vallejo with water or alcohol, but I haven't had much luck with either of them.
Thanks George. I did try to thin the Vallejo with water and it just came out runny. I'll try the Vallejo thinner next time!
NICE! The venerable A7 "SLUF".
What a mission, but safely back at base. Well done!