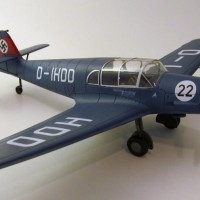
ICM Mig-3
Hi All!
Have you ever started a kit and soon wondered “What the hell” did I get myself into? That kit for me is the ICM 1/48th scale Mig-3. Rarely have I run across a kit that fit so badly, was over-engineered, and with the amount of flash I experienced in this kit. The flash is sneaky, parting lines on almost every part. The wing is made up of 9 parts, and the nose 5 parts. The instructions are nebulous at best. Mounting pins and holes are very small and shallow. And because I acquired several ICM sets of Soviet aircraft, I have at least 4 of these monsters.
The agony started with the cockpit. It is sparse, but the locating holes are very small and shallow. You need to drill them out and enlarge them a bit. Because the frame is so flimsy, crazy glue will be needed to assemble the cockpit. The seat has no clear location point, so you need to guesstimate it location. The instrument panel has no detail, nor does it have a decal. With the way the build was going I opted not to build the Klimov engine, The rear decking needs careful placing, and the cockpit needs TLC when attaching it. After adding some baffles, the fuselage, which was warped was assembled together. The nose parts do not fit and need careful trimming and sanding, and possibly a spreader Are we having fun yet?
After several tries, I assembled the outer wing halves together (Which were warped), then attached each to the fuselage. I then allowed this assembly to completely dry (I had put the model back in the box and glowered at it hoping it would fix itself, it did not work). When dry, I added the lower center section, and here again, filing, trimming, and sanding to get it to fit was the order of the day. Now for the (add a sailor's descriptive terms here- and purple clouds!)wing root parts with the air scoops. Cutting and filing got them close. finally, the wing bottom with the radiator was added. The Ailerons were attached and the wings were done, except for the filing, filling, and sanding which was needed. At this point, the horizontal stabilizers were added as was the rudder. I decided to not add the landing gear or prop until all of the sandings were done ( trust me, if your build goes like mine, lots of filler and sandpaper!).
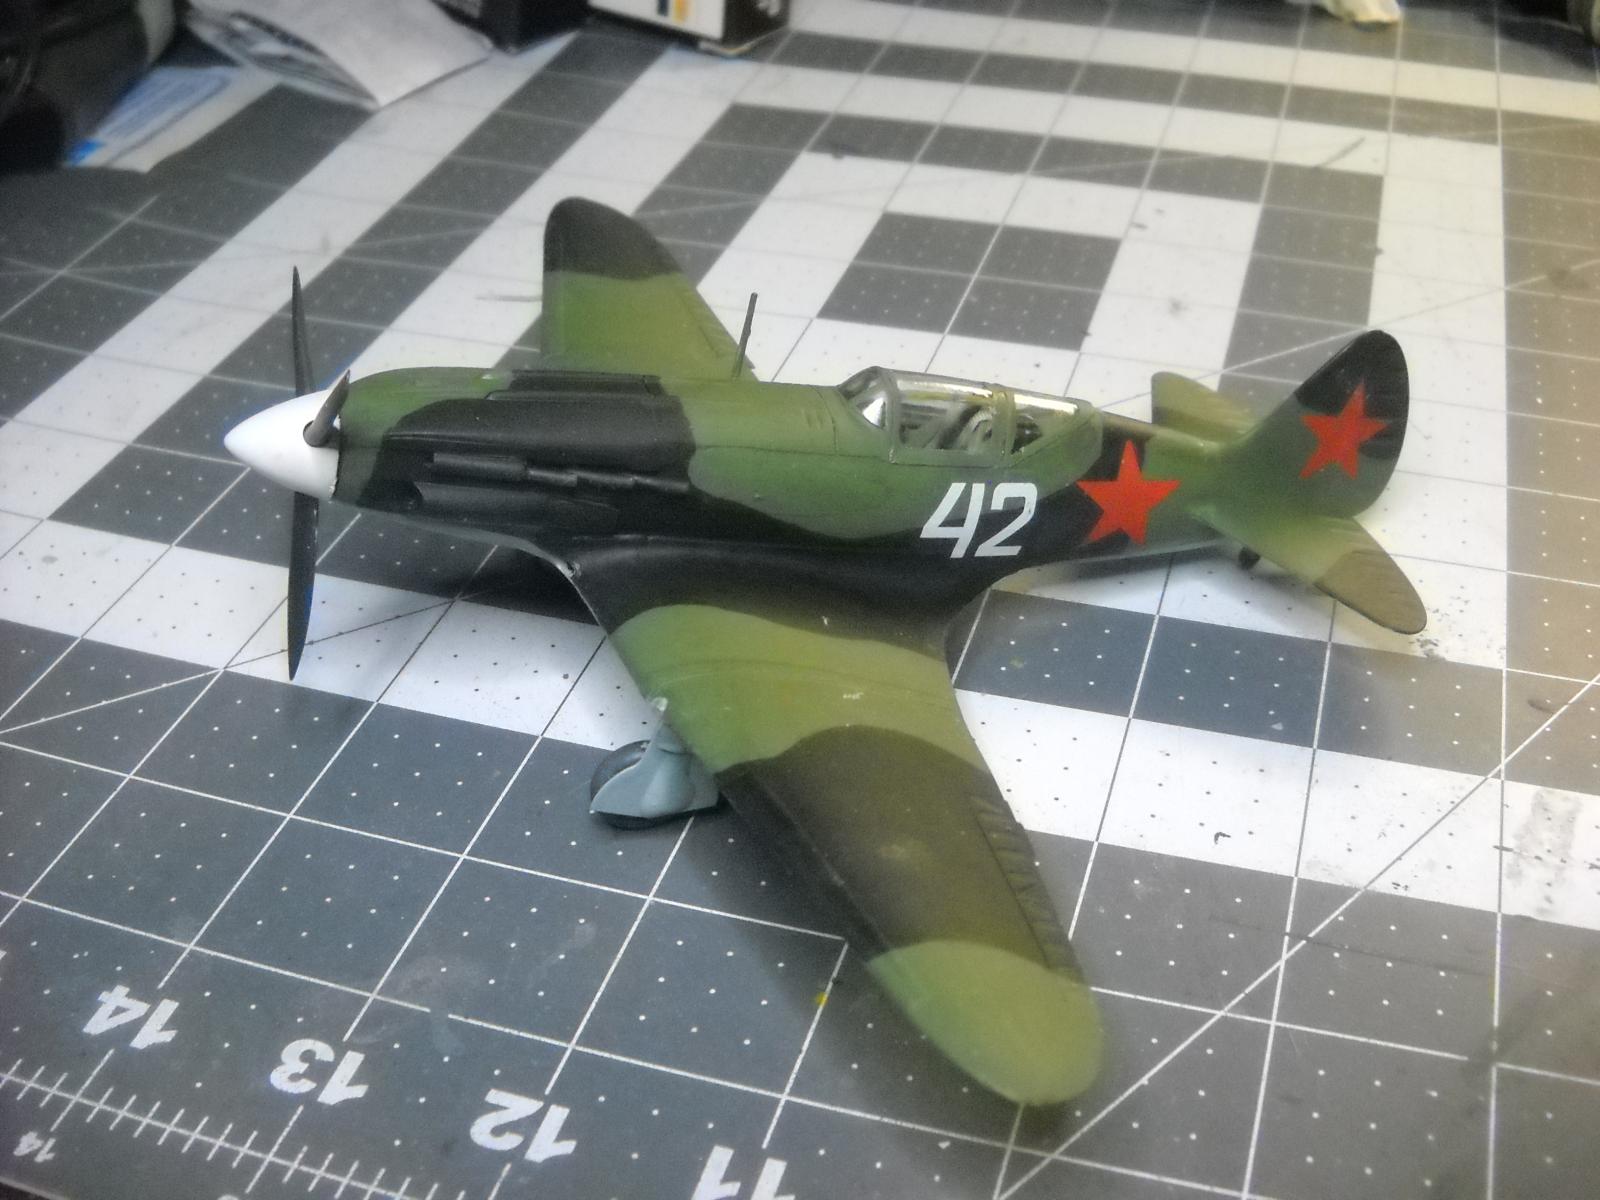
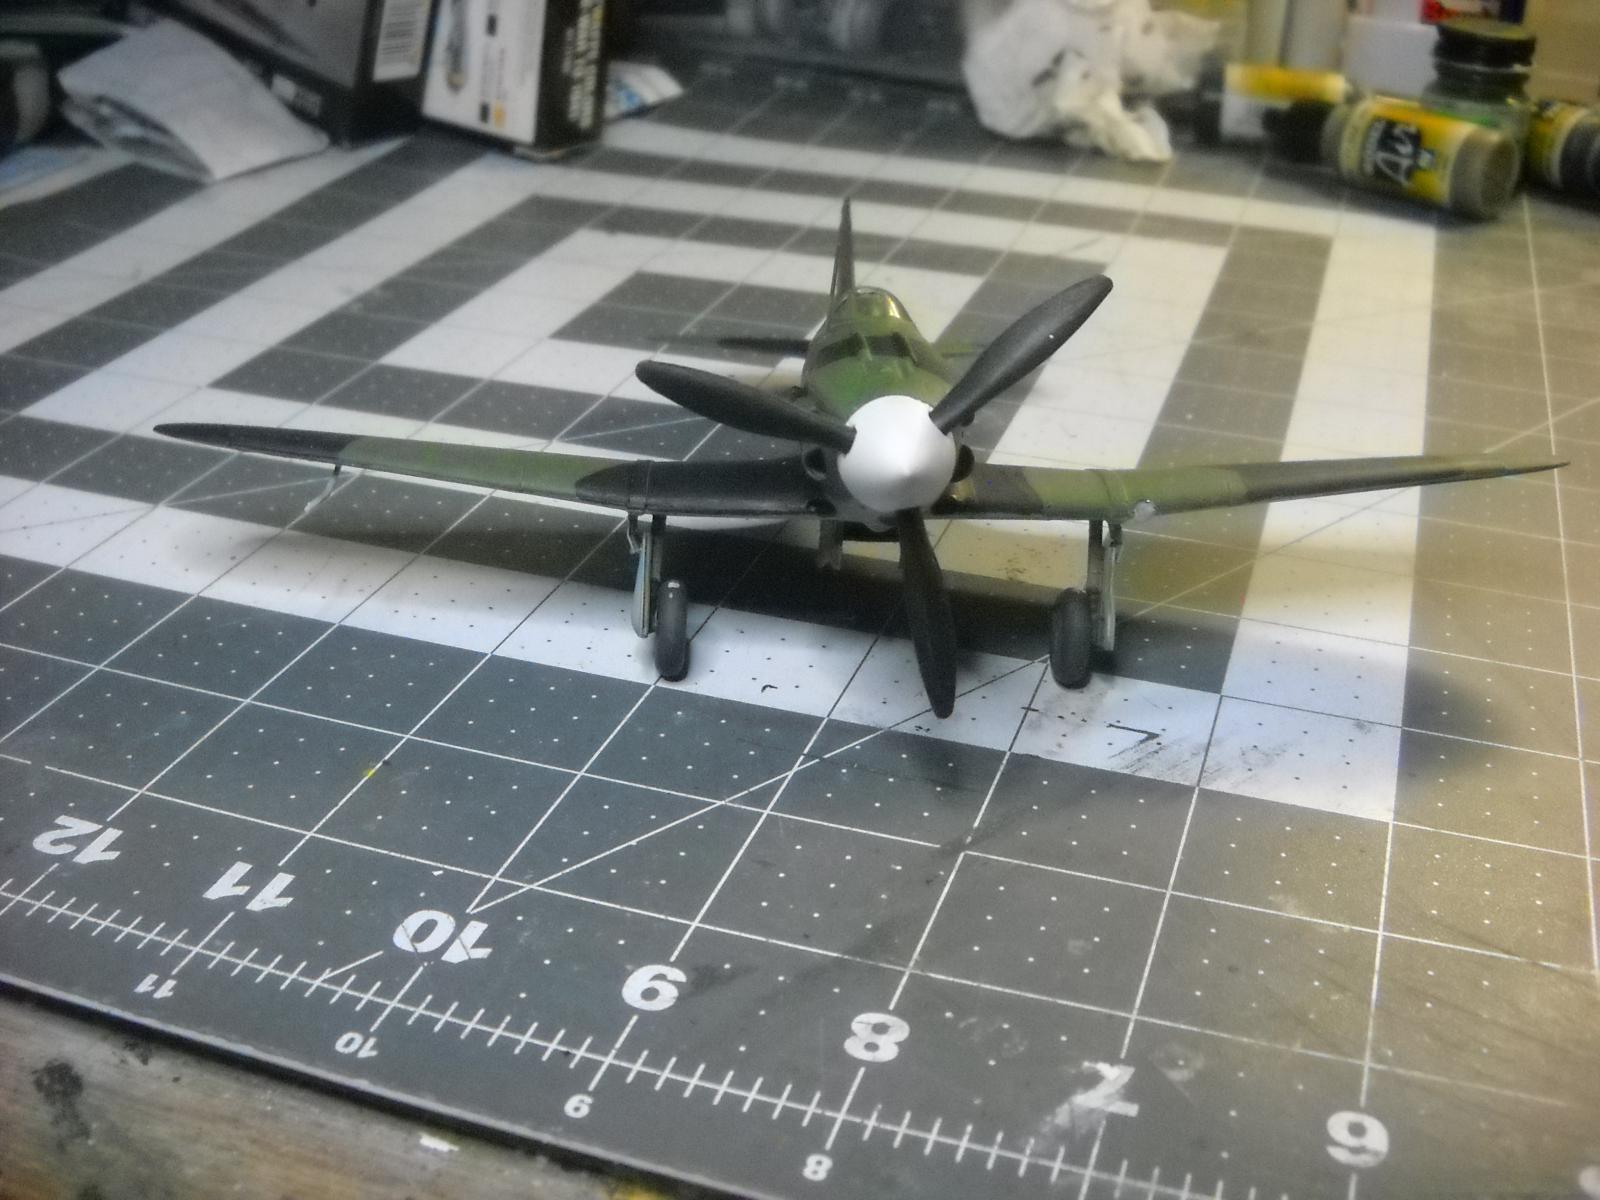
When the kit was finally sanded, I looked at the landing gear. You need to attach a tiny part on top of the gear and it appeared this was to be the attachment point when the gear was glued on. With the main strut cover, this was to attach the landing gear. It all looked too weak to me, so I used some thick CA glue to reinforce the landing gear joint. Finally, I could start painting. The Russian Under side blue from Polly Scale looked too intense, so I used good ol' RLM No.65. This took the strain off of the eyes and looked closer to the original color. The upper surface was painted a pattern of Black and Olive Green The paint used was Vallejo and a bottle of Polly Scale Russian Topside Green. When cured, a coat of Future was applied for the application of the decals. Are you sitting? I used the ICM decals.
Yes, the decals are known to not react with any known decal setting solution. You can use them by using Future as a setting solution. First, soak the decals until they slide on the backing paper. Then apply Future to the area where the decal is to be applied and place the decal over the Future. Apply more Future over the decal, making sure it is located where you want it. When dry, the decal has been sucked down into the model's contours.
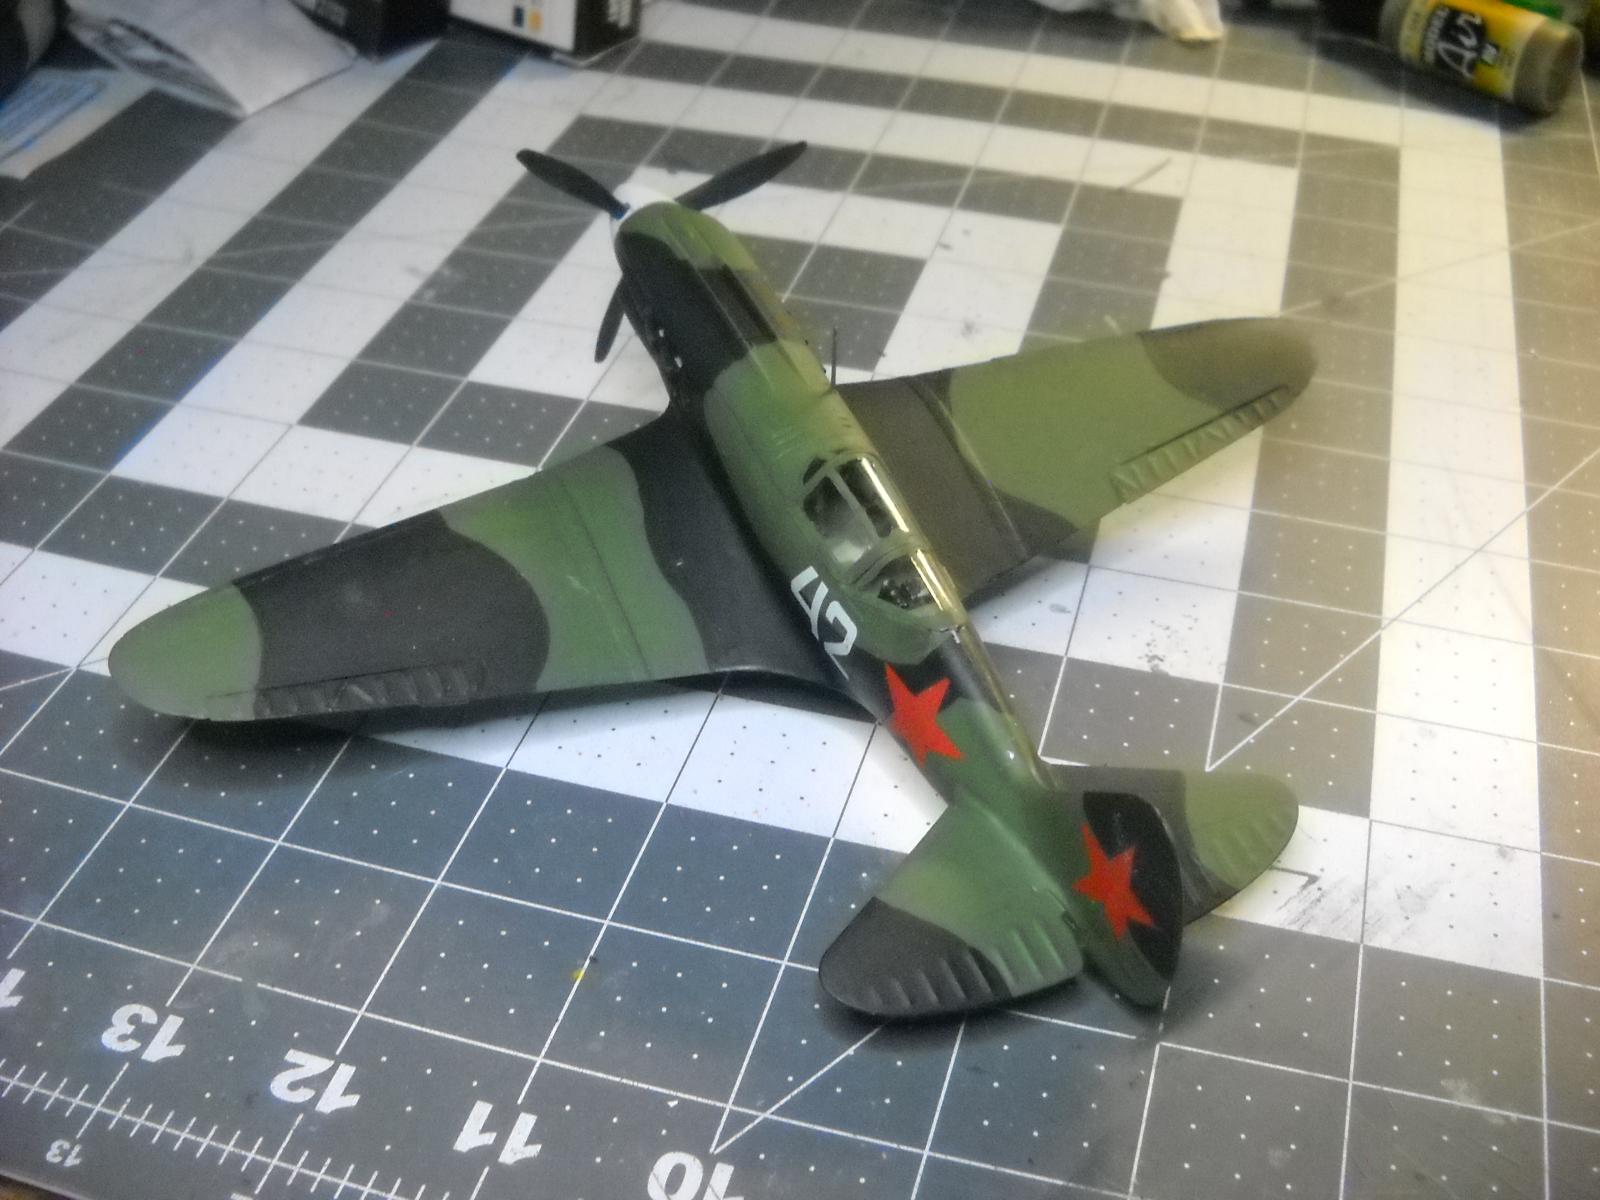
When dry, the model was coated with a clear flat coat. When this had dried the final bits, prop, pitot, canopy, and the like were attached and the model was FINALLY done. The model represents a Mig-3, coded white 42 of an un-named Soviet Navy Baltic Fleet unit.
The ICM Mig-3 is a poorly fitting, over-engineered model of the airplane. Add in the flash and parting lines you start to wonder if the kit is actually worth building. The Trumpeter kit HAS to be better. I cannot recommend this "kit" to anyone.
Bruce
Congratulations on wrestling it to the ground! Looks really good to me.
Brian Riedel
A super result out of a challenging kit, Bruce!
Well done!
Well...It turned out pretty darned good!
Even though this kit fought you a lot, you turned it into a very nice looking MiG, Bruce @mig3rbrucearcher
Well done.
You really turned this around Bruce and produced something really great, anyone can buy a Tamigawafix masterpiece and make a nice looking kit but it takes a scale modeler to build this to the standard you have achieved so well done you !
Slogging through all of those Classic Airframes and Ventura Spitfire kits gave me the nerve to start, then finish this kit.
Bruce
Great "Never give up" effort and results!
Nice work. I came across one of these in my stash and marked it for disposition at the next Swap I attend. Thank you for confirming the soundness of my decision.
Looks pretty good from where I’m sitting.
Well done, finishing the wrestling match. Mine got binned.
A victory of talent and persistence over plastic.
I do not know about the talent part...
Looks great ,you've won the day.
Very nice work on this. I've had this kit in my storage closet for years. After reading your build experience, It may stay there for a lot more.
You managed to finish it very nicely despite the difficulties!
This kit is one of the very early ICM kits, and nearly 25 years old (I suddenly feel very old… I still remember these “new kits from Ukraine” sneaking into the market slowly.
I have heard very mixed opinions about the kits from “this s@%#* can’t be built” to “I had no problems at all”. I guess the secret is a lot of dry fit, and not following the instructions too strictly.
If they had not over-engineered the wing and nose, and left out the Klimov engine it would have been better. It looks nice if you can finish it, but finishing it...
I am now going to start a Yak-9DD. The first thing I need to do is wash the mold release off the parts, and come up with new exhausts!
Bruce
Well, you got a good-looking MiG out of it in the end! Well done.