Review: Kit Review for 1/48 scale ICM Ki-21 "Sally" #48195
This article is part of a series:
This is a model that I have been wanting for many years. I have not included any of the history behind this aircraft.
Several years ago I read that ICM was going to someday be releasing a kit of this plane in 1/48 scale. Once I knew this was in the making, I knew right then and there I had to get one of these as soon as they became available.
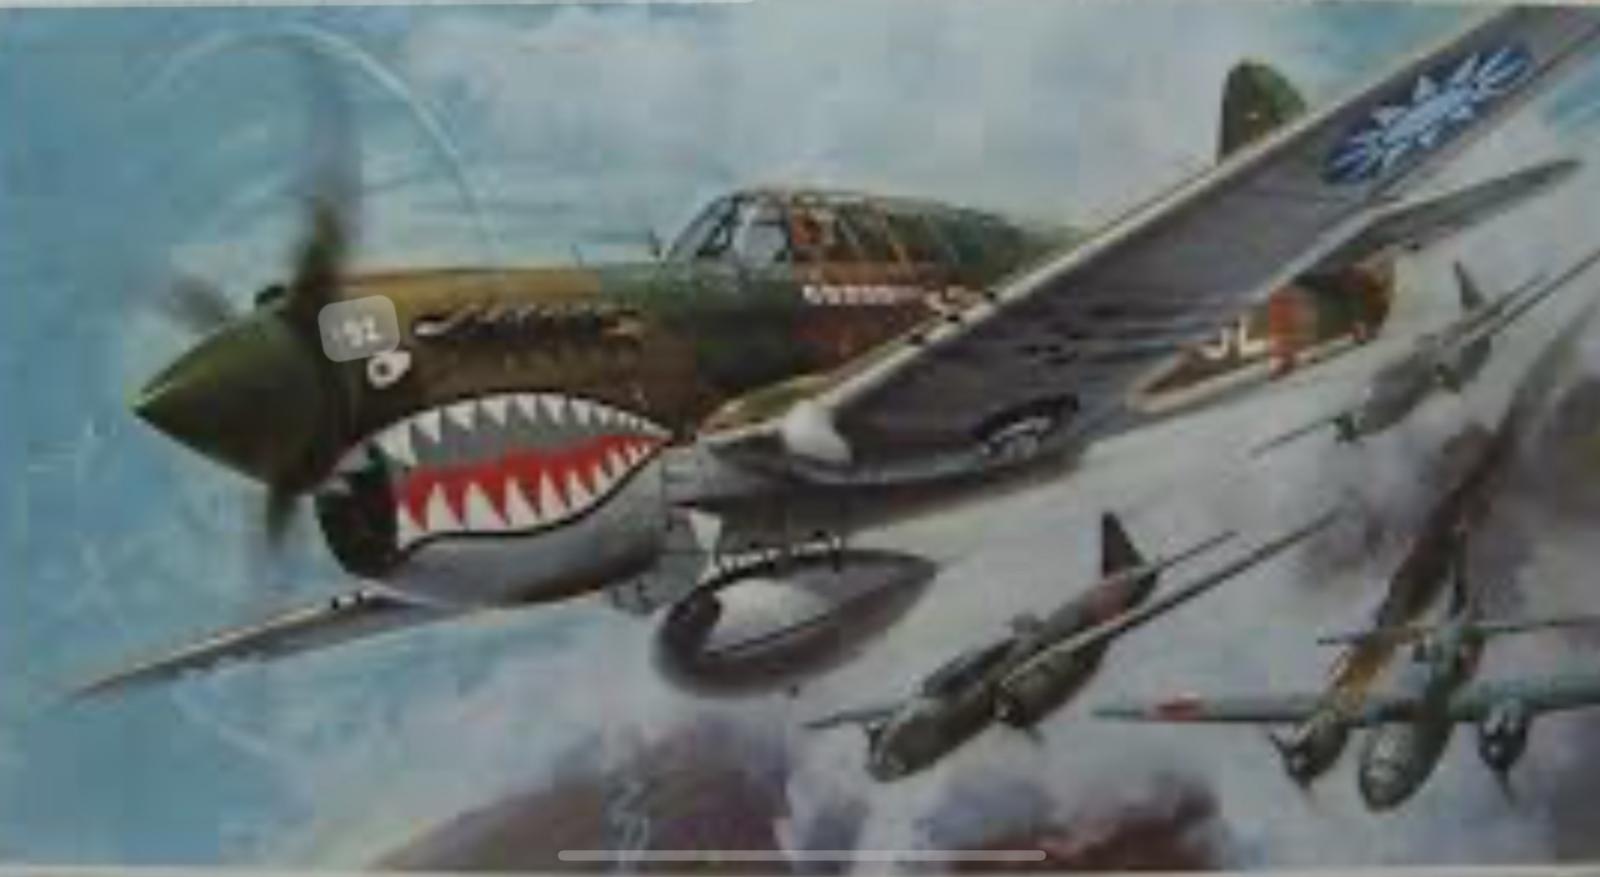
My very first model ever was a 1/32 scale Revell P-40E. I was 8 years old at the time. Back then, all of the model kits had wonderful box art, and this one was no exception. I can vividly recall daydreaming while in math class about how I was diving my very own Flying Tiger P-40 through a formation of Japanese twin engine bombers... This is also likely the same time when my fascination with aviation and aviation history began.
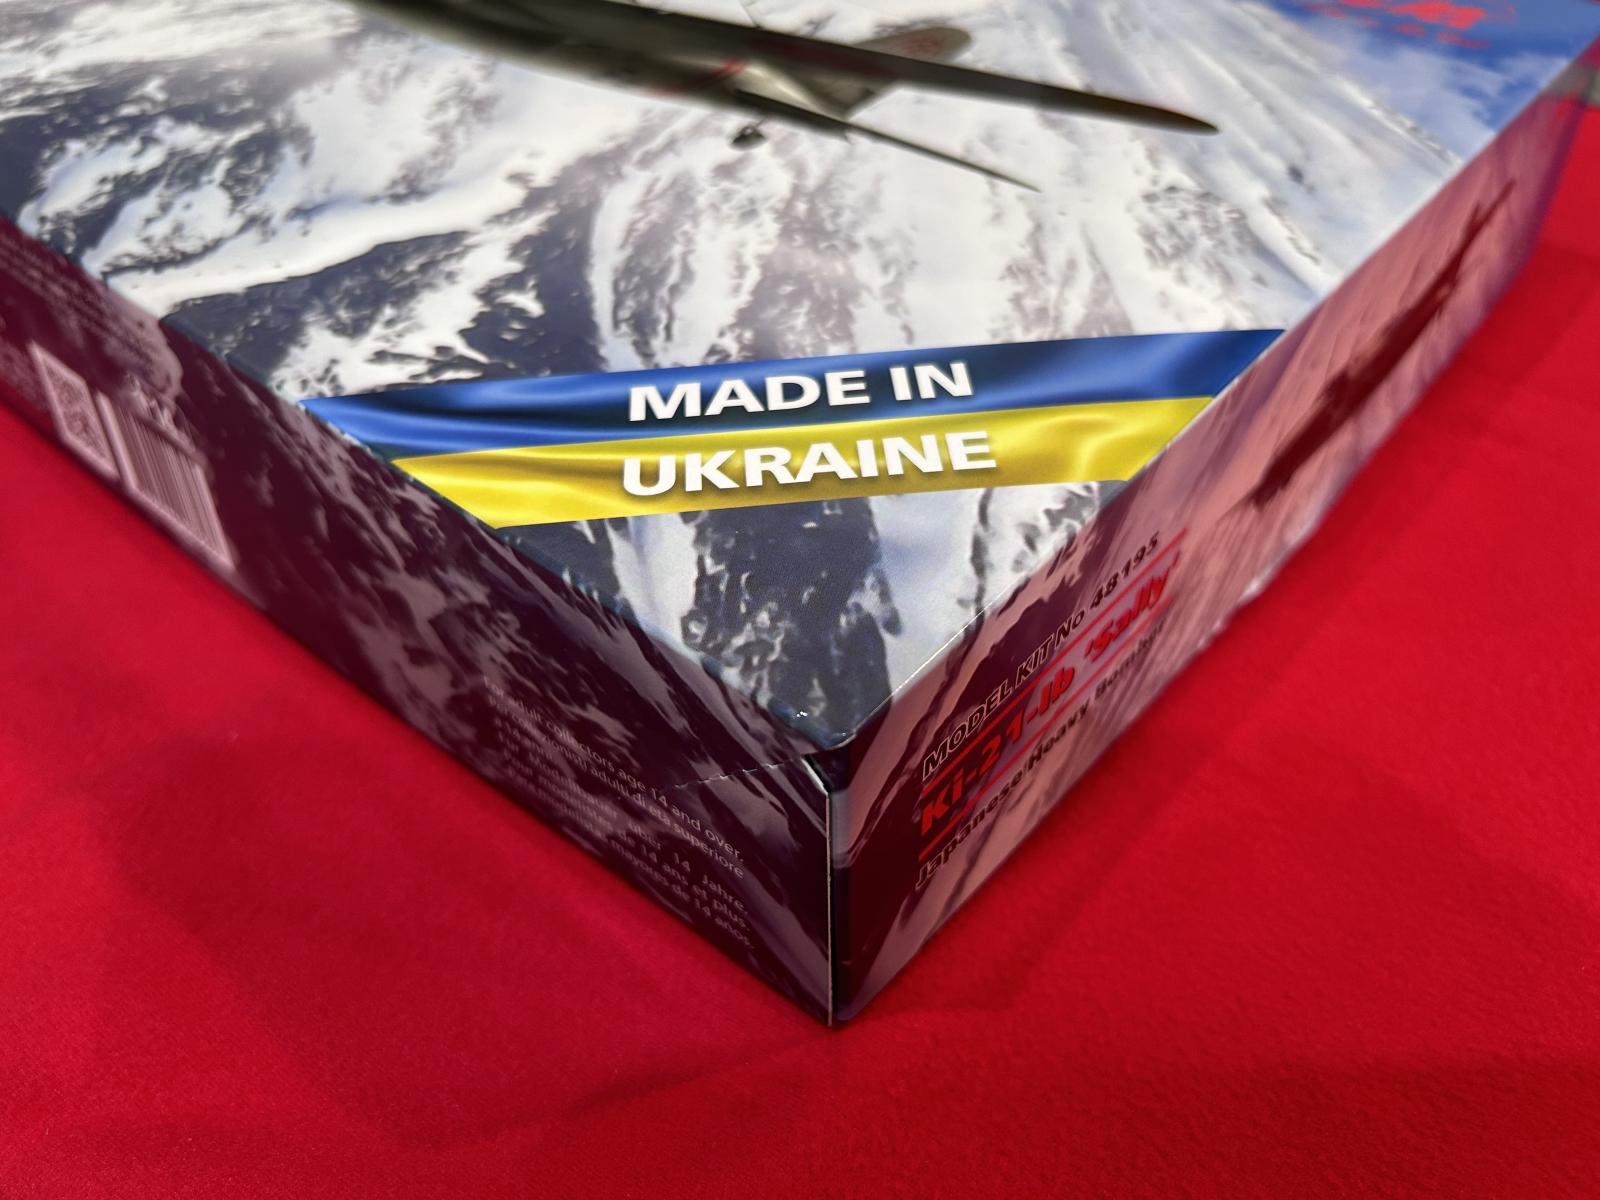
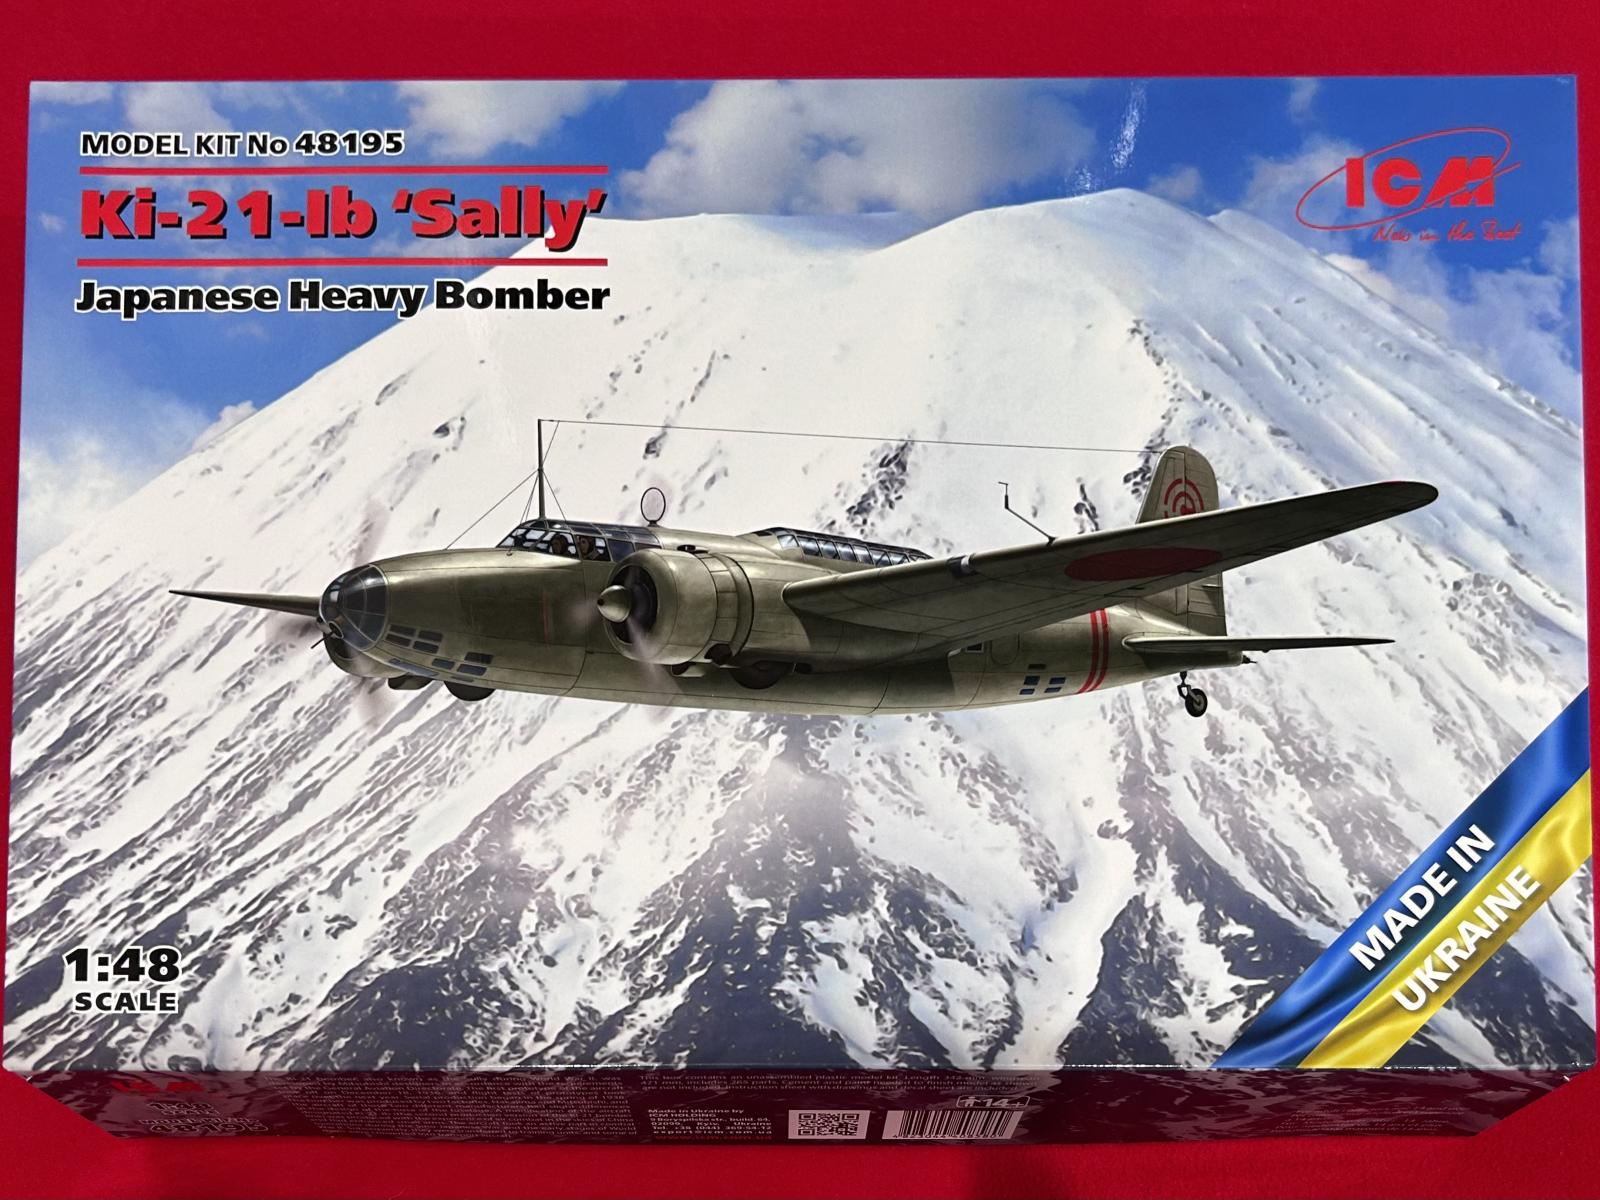
One thing to note, is this model is made in the Ukraine as can be noted by the box corner.
This ICM Ki-21 Sally also is adorned with excellent box art. As best as I can tell, this depicts a Ki-21 Sally flying near Mount Fuji.
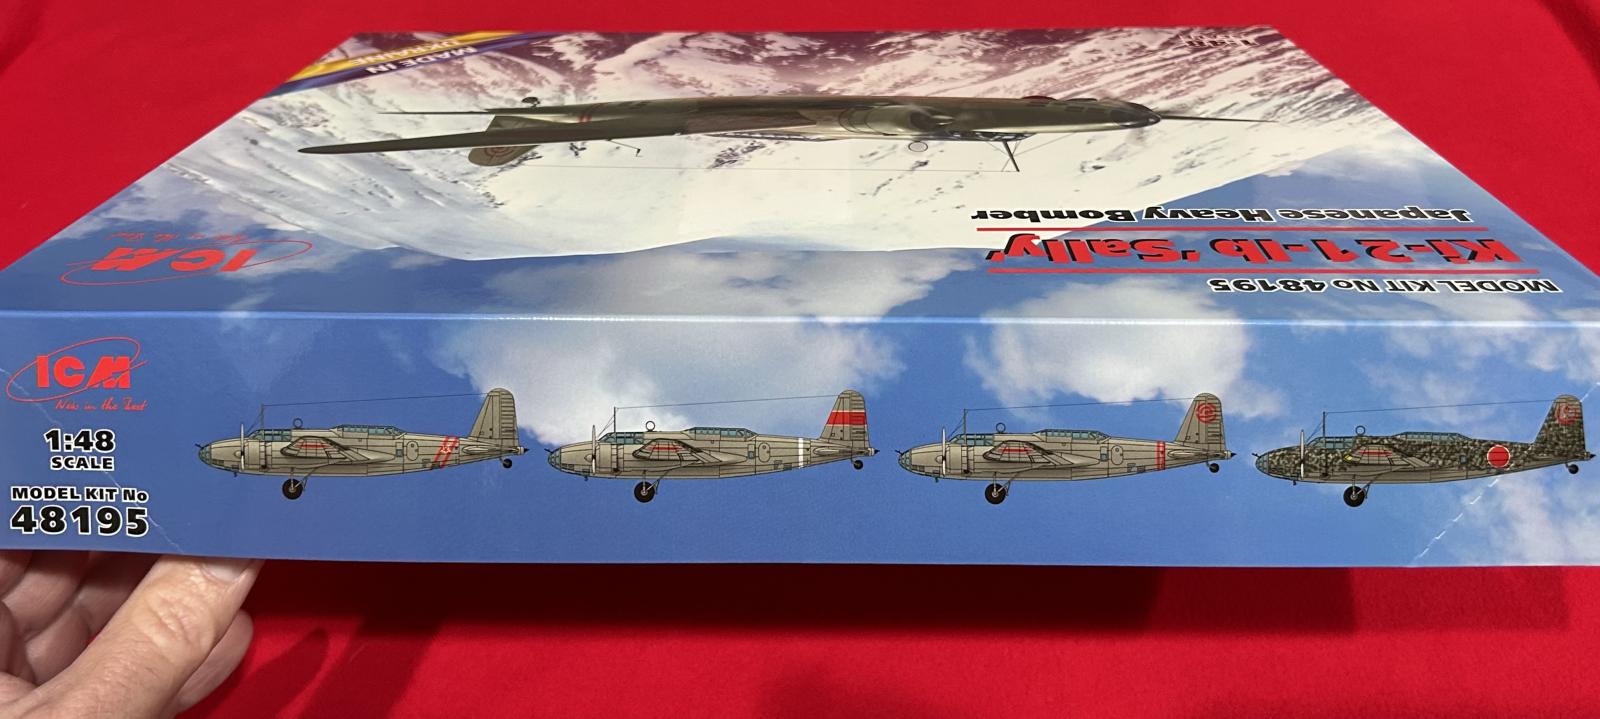
The side of the box shows the four decal options included. I will get to the decals in a moment.
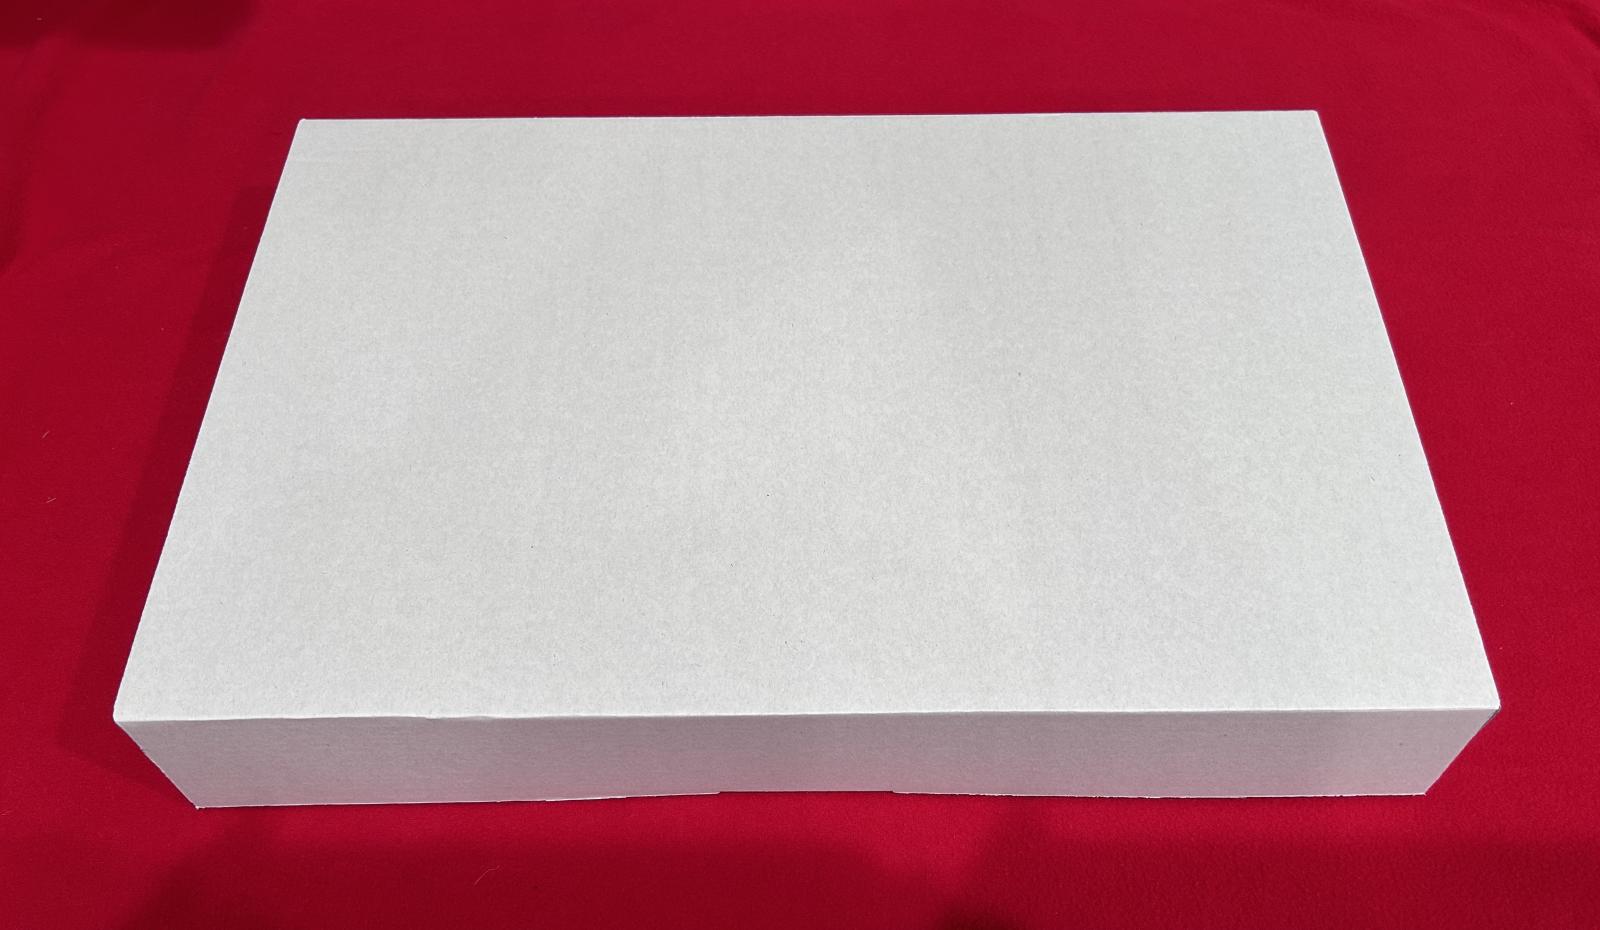
Once the box cover is removed, you will find a plain white cardboard box. It is very sturdy, and I believe very welcomed ! I can't tell you how many model boxes I have in the good old stash that have collapsed from having other model kits stacked on top of them. If you have built any of the recent ICM kit's you will be familiar with the white cardboard box.
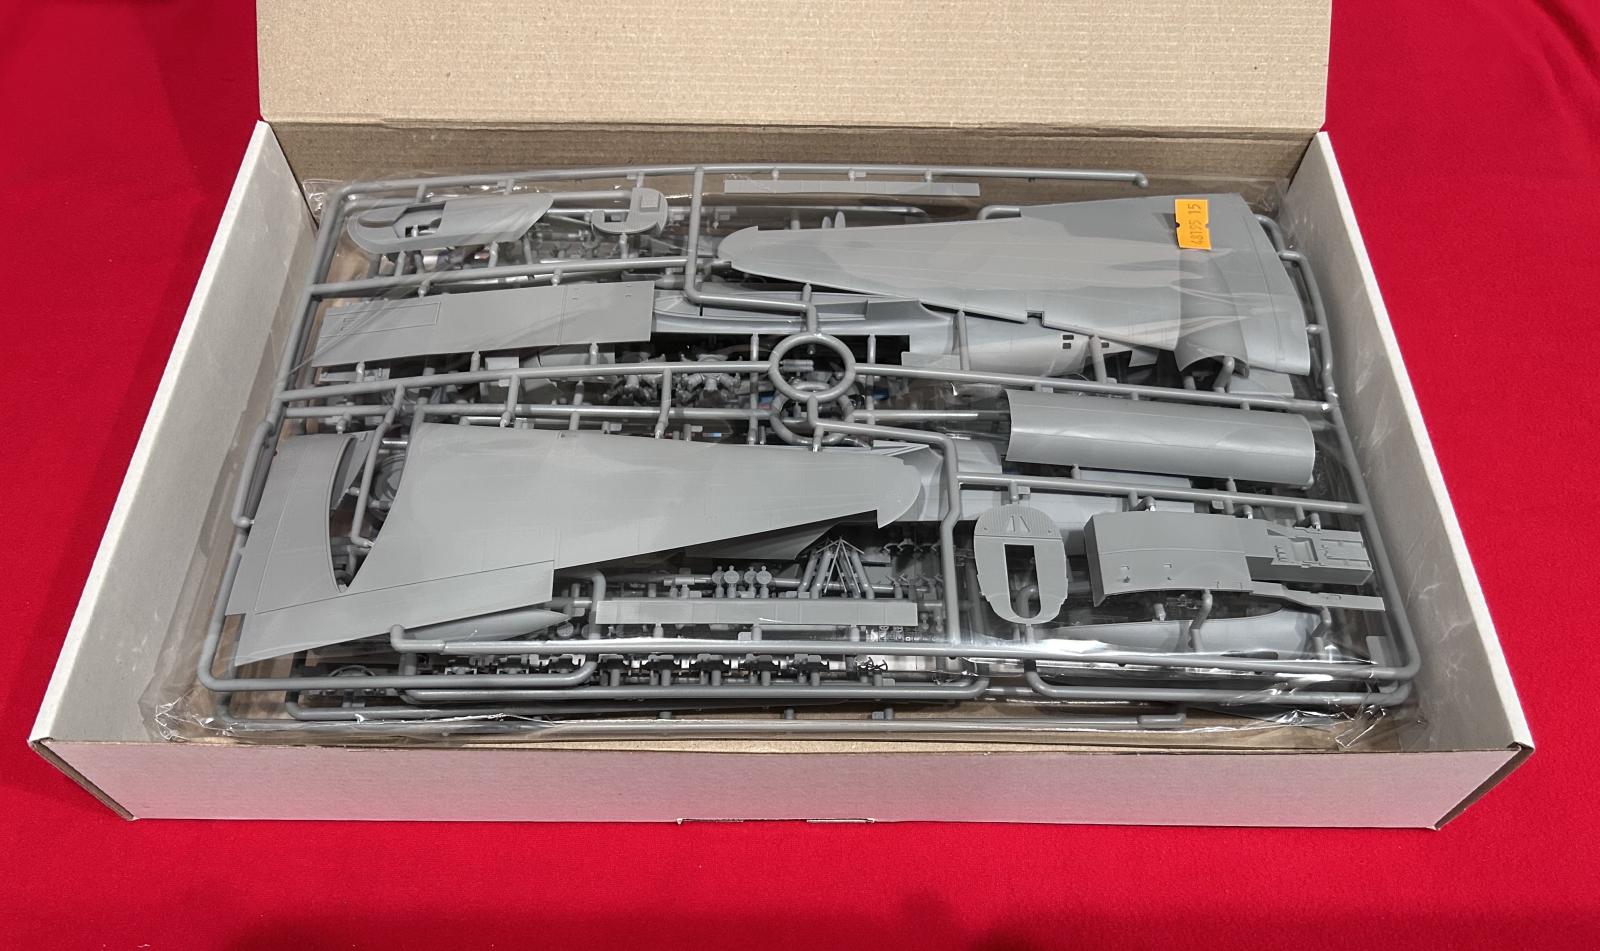
Once you open the white box, you are greeted by the plastic parts, which are nicely packaged in a clear bag with adhesive on one end that can be sealed again after you remove the parts tree you are after. The box is chocked full of goodness !
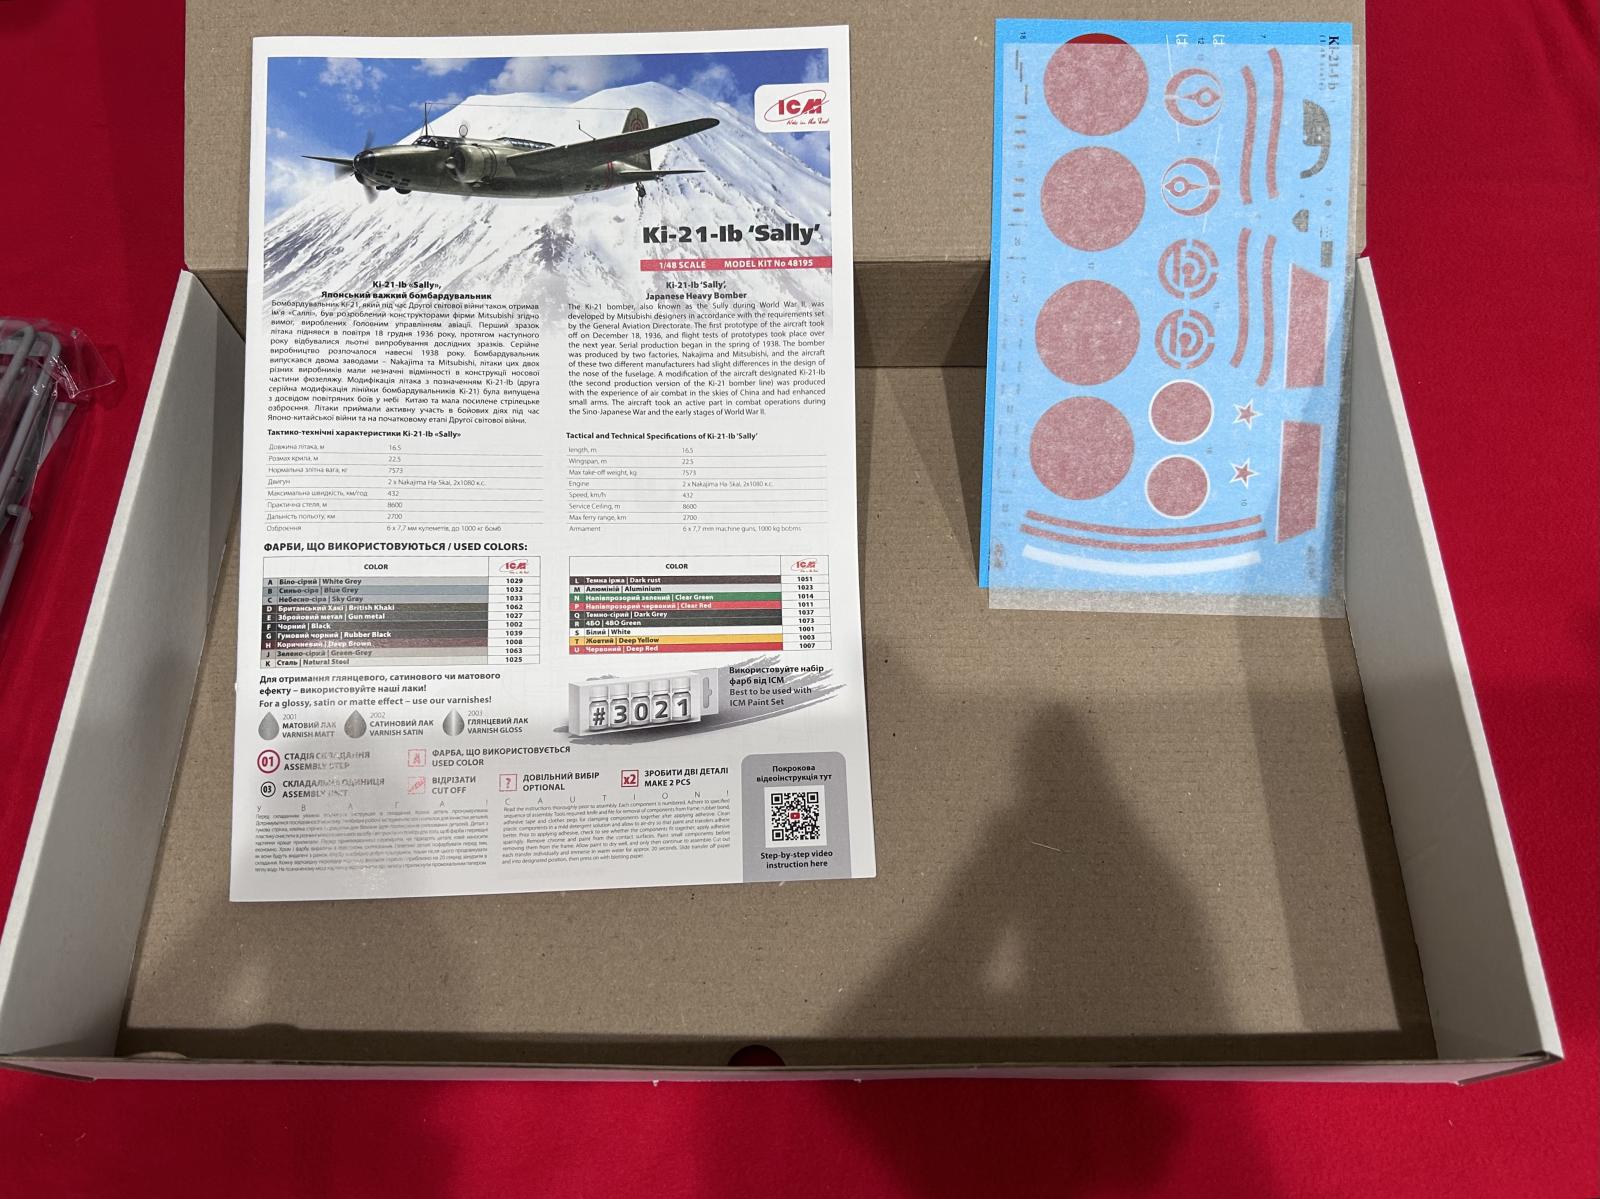
Packed safely below the plastic parts, are the instruction booklet, and the decals.
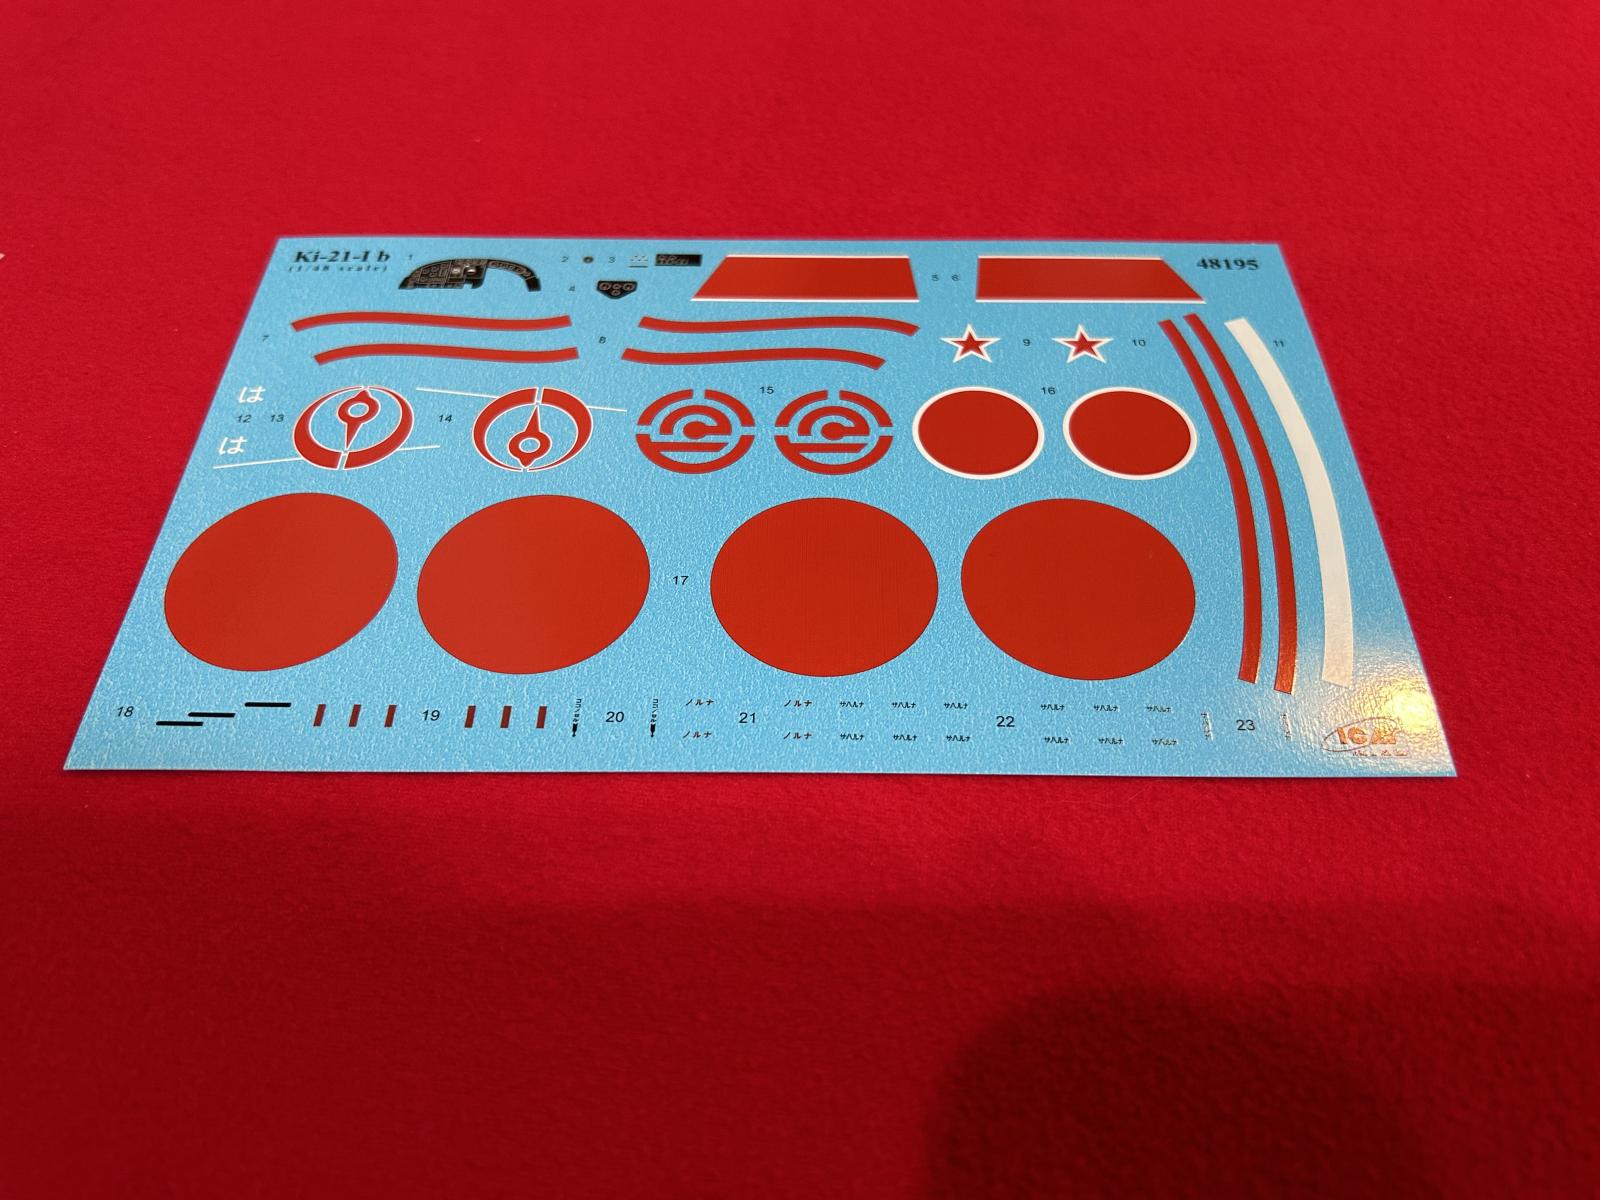
The decals look to be nicely printed and in register on my copy.
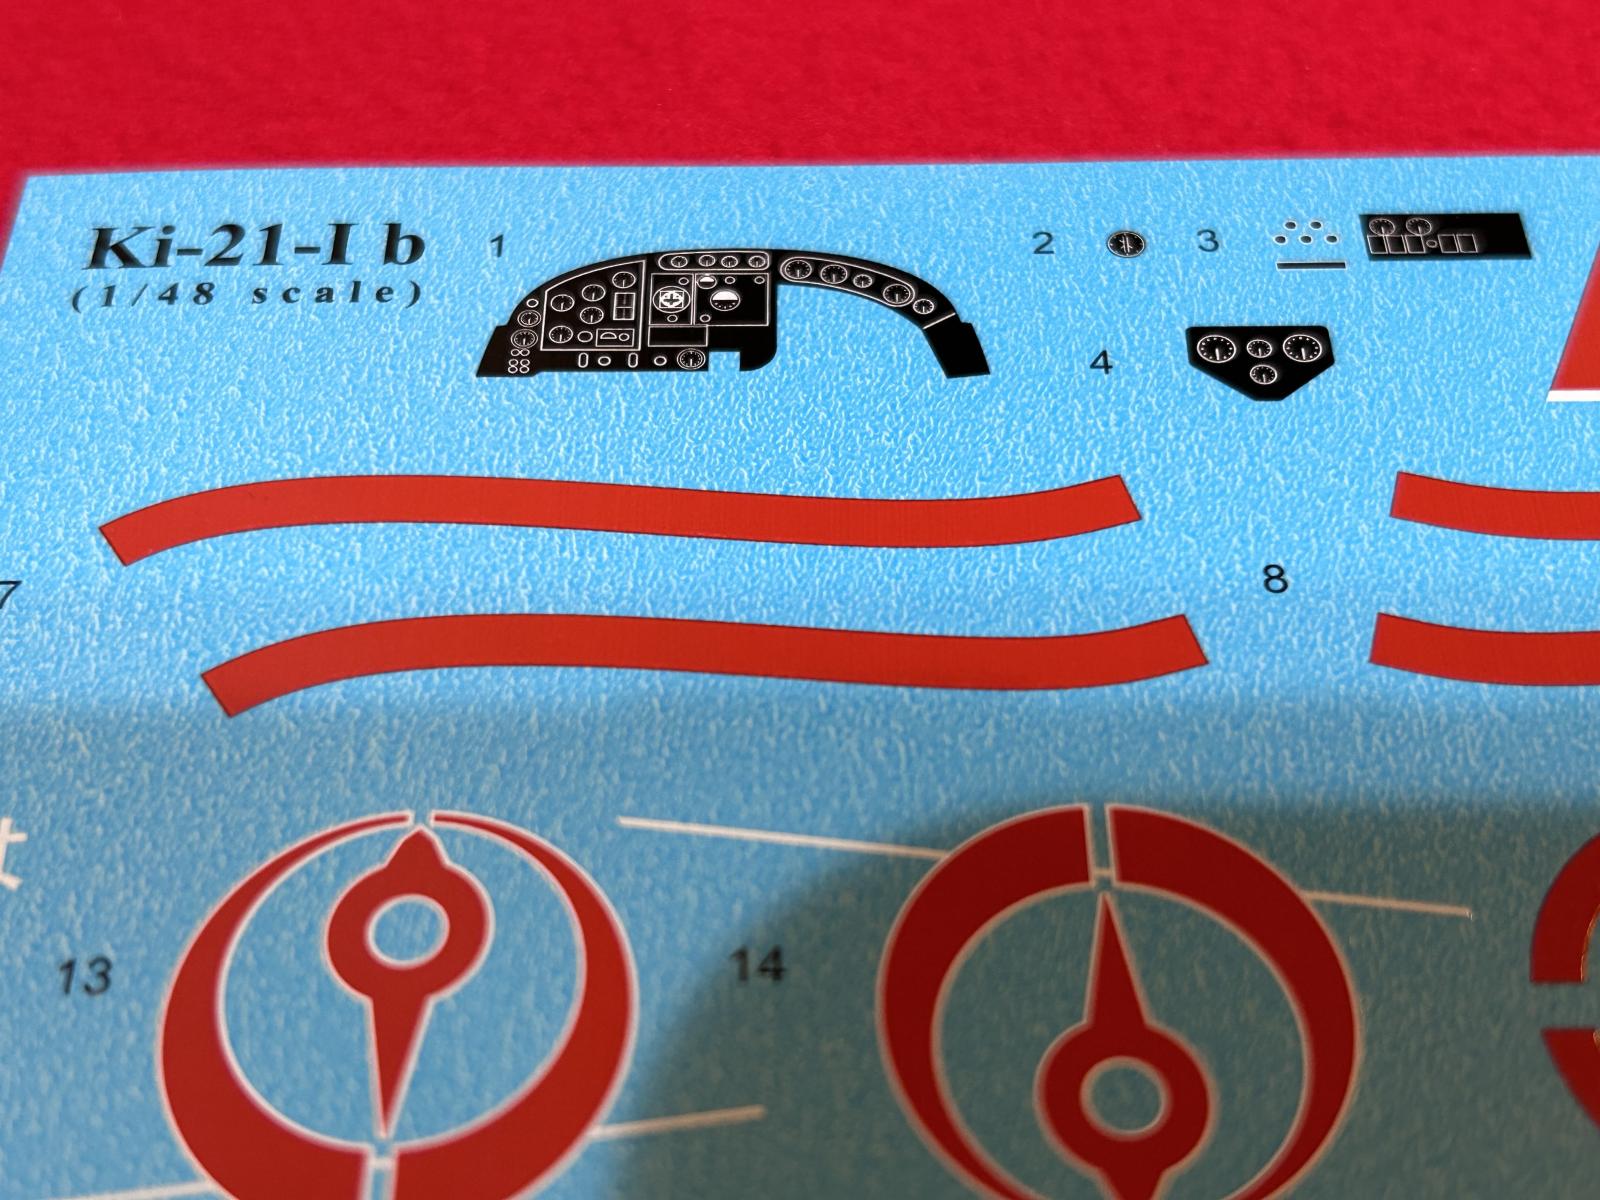
The instrument panel has a decal to use if you decide to. The actual plastic IP has raised details and one could paint this if you so desired.
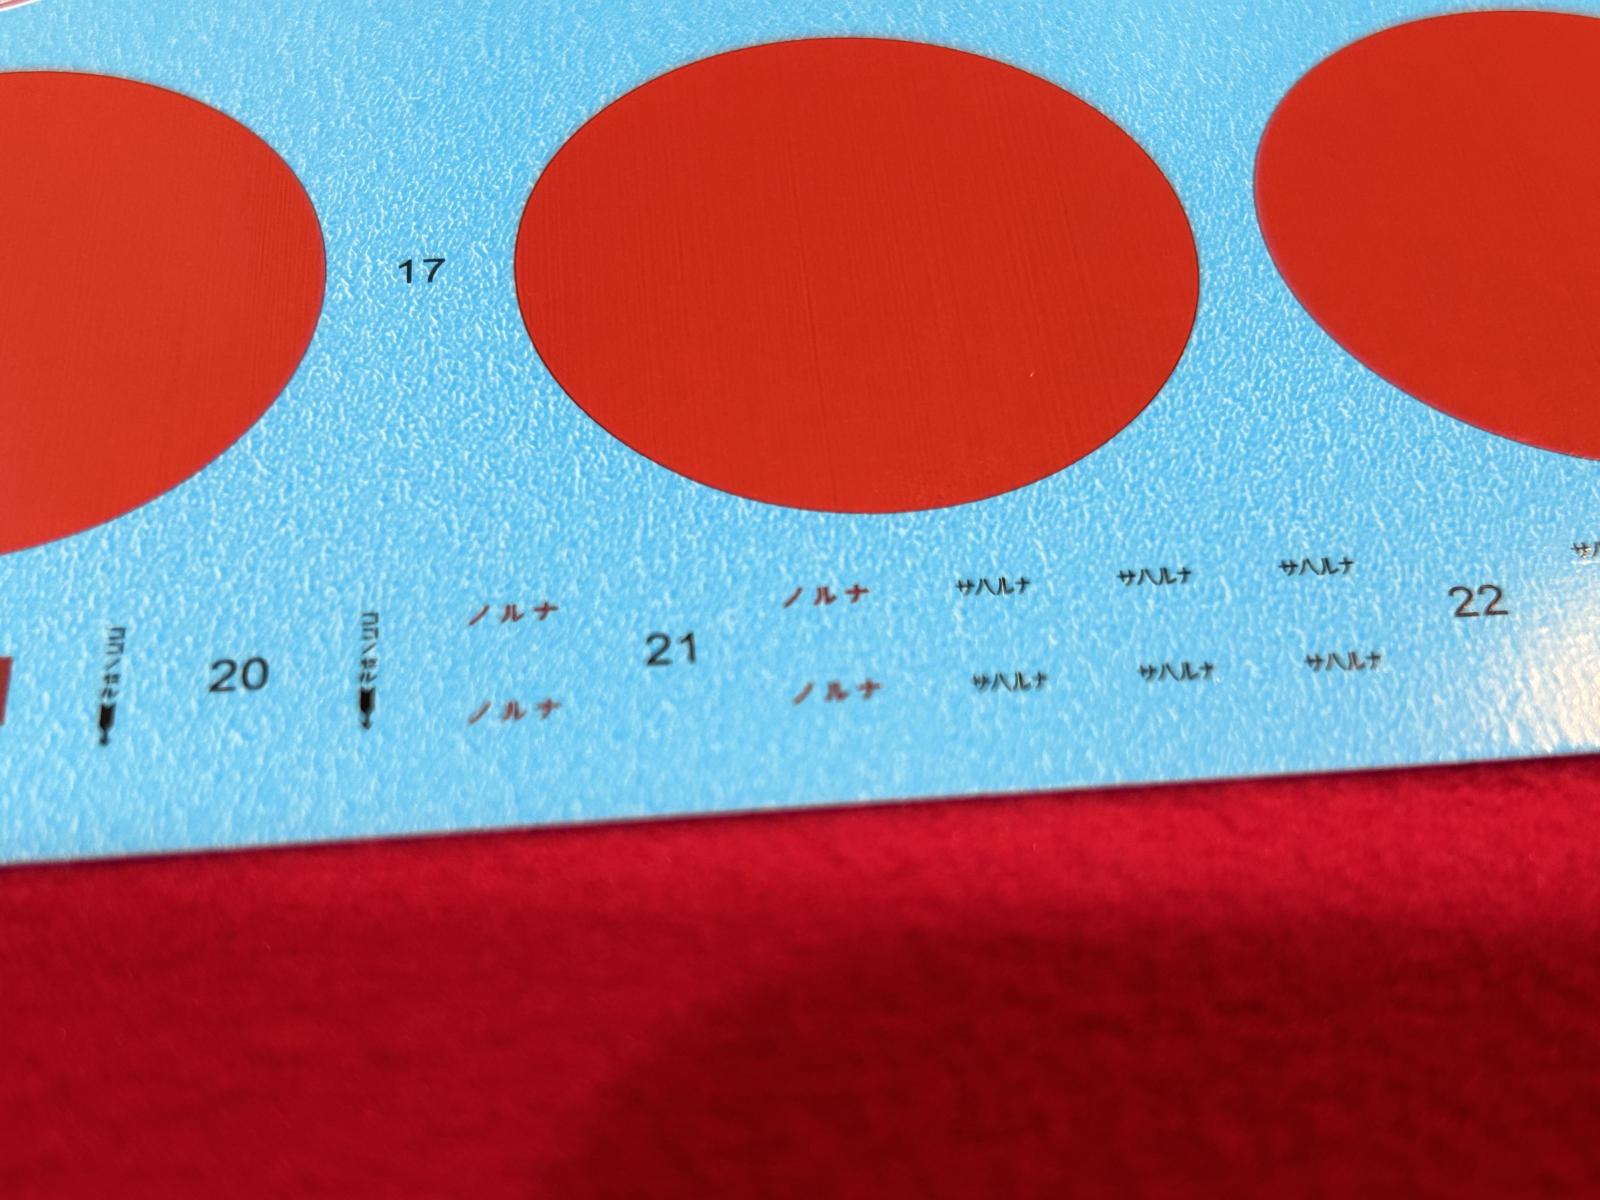
The small Kanji characters are also well printed. I can't read Japanese, but if I could, chances are I could make out what is being said here. I'm guessing these are your typical aircraft warning stencils, similar to "lift here", and the like.

On to the instruction booklet. It is glossy, and printed in color. The cover page gives a short history of the type, and the color call outs are also located here.
The instruction sequence appears to be very logical, and in a somewhat standard order. Although I have not studied them very well, it appears as if you can install the tail wheel at the very end of the build, hopefully avoiding breakage.
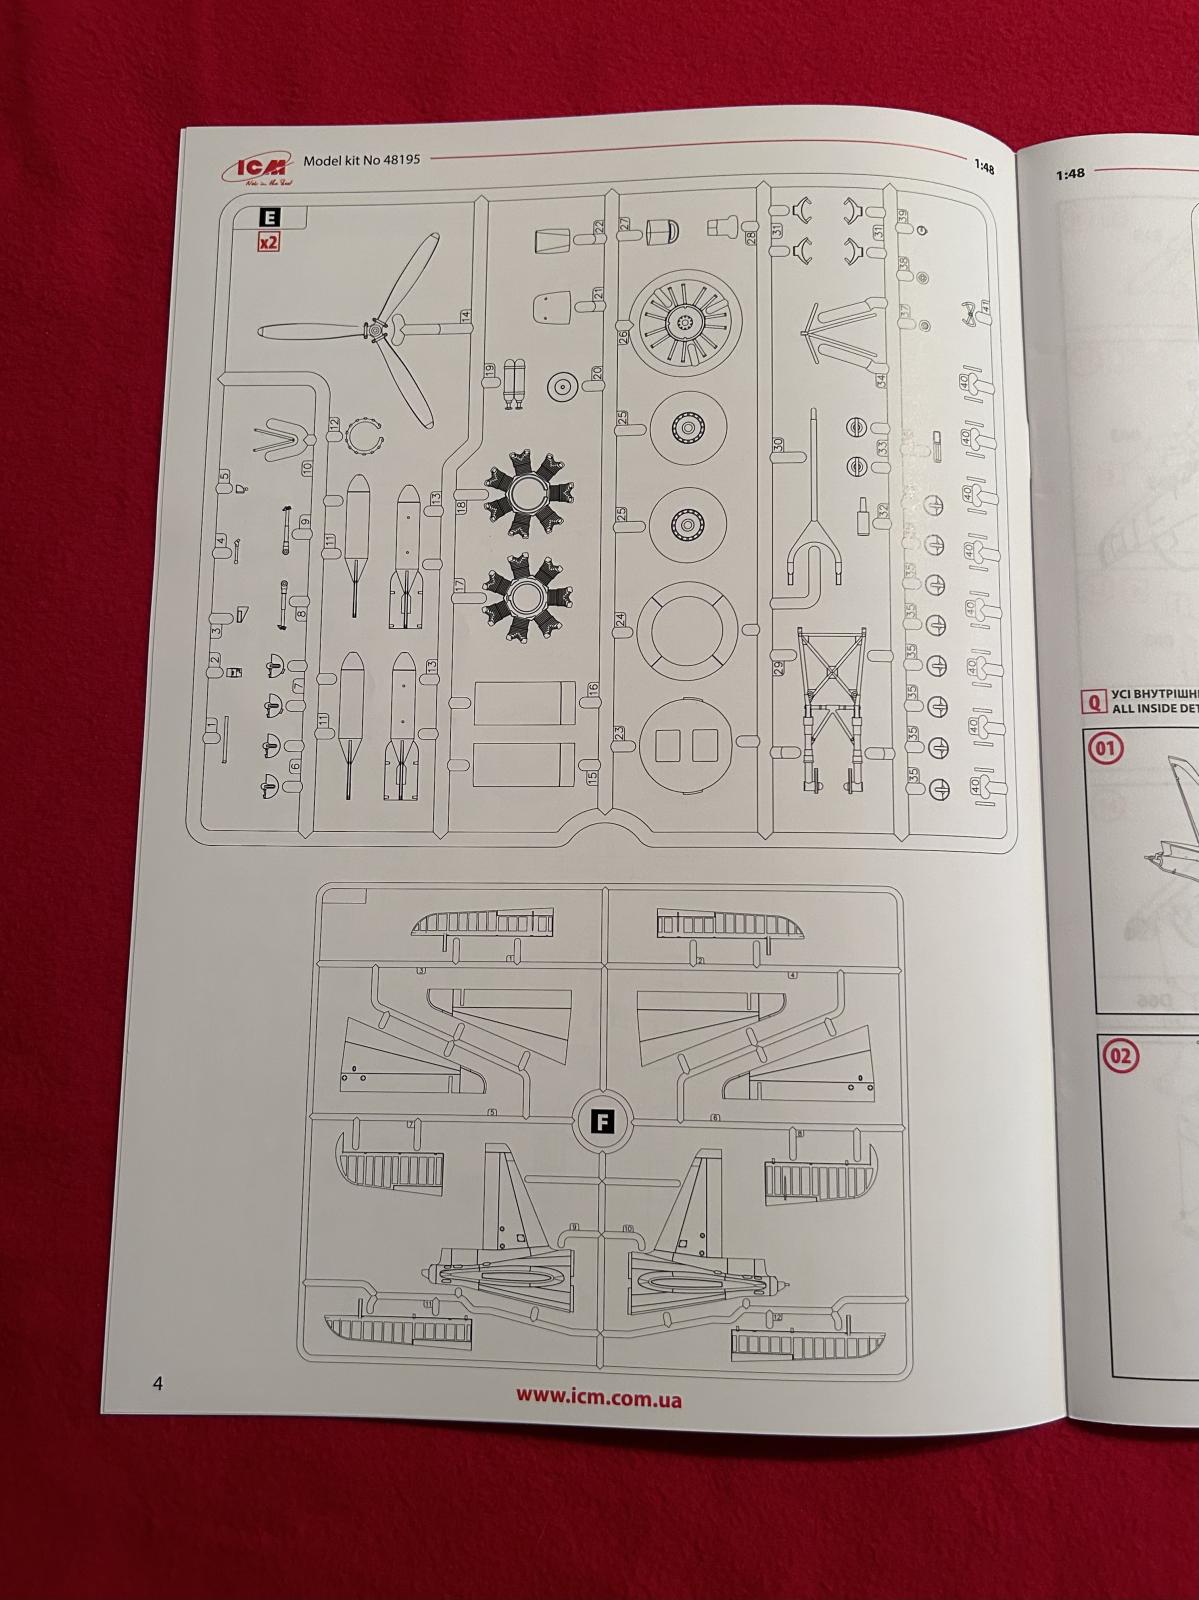
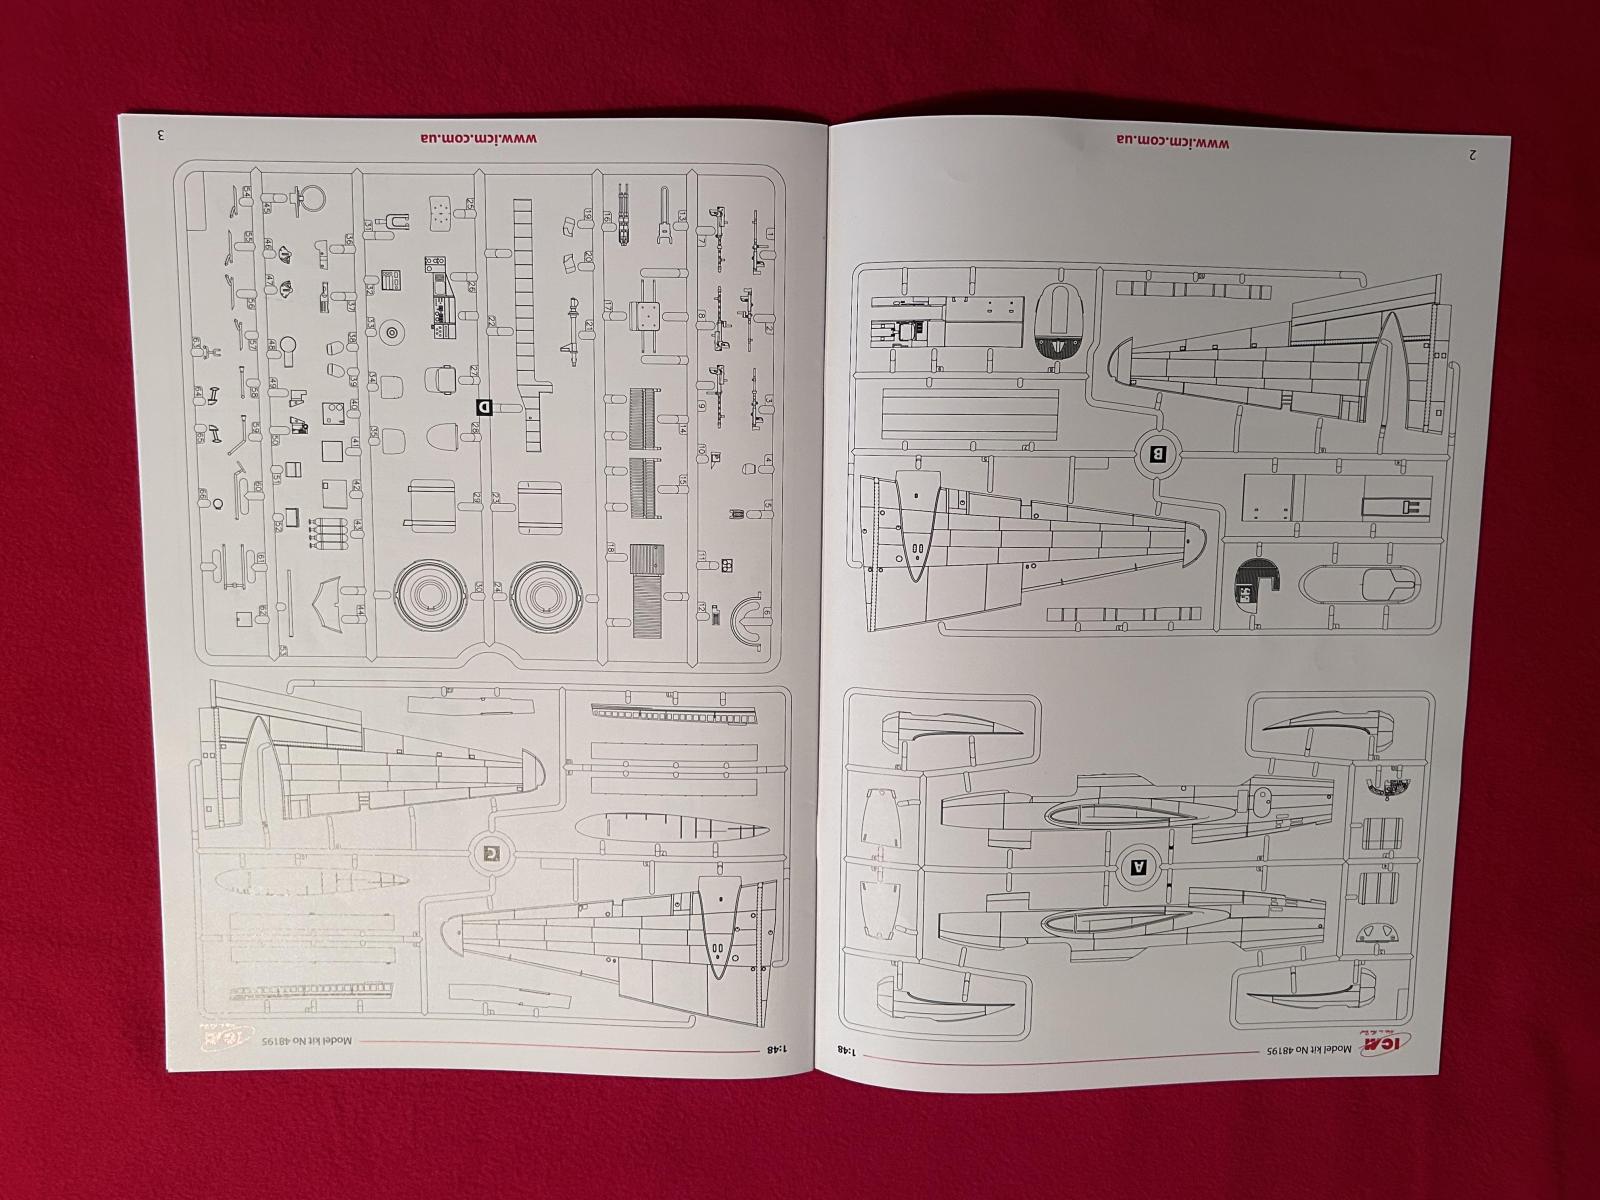
Immediately following this, there are several pages with a diagram layout showing the parts numbers and where they are located.

The vertical fin is glued on to the main fuselage section early on in the construction sequence. This is actually the very first step, and not the cockpit as one would expect.
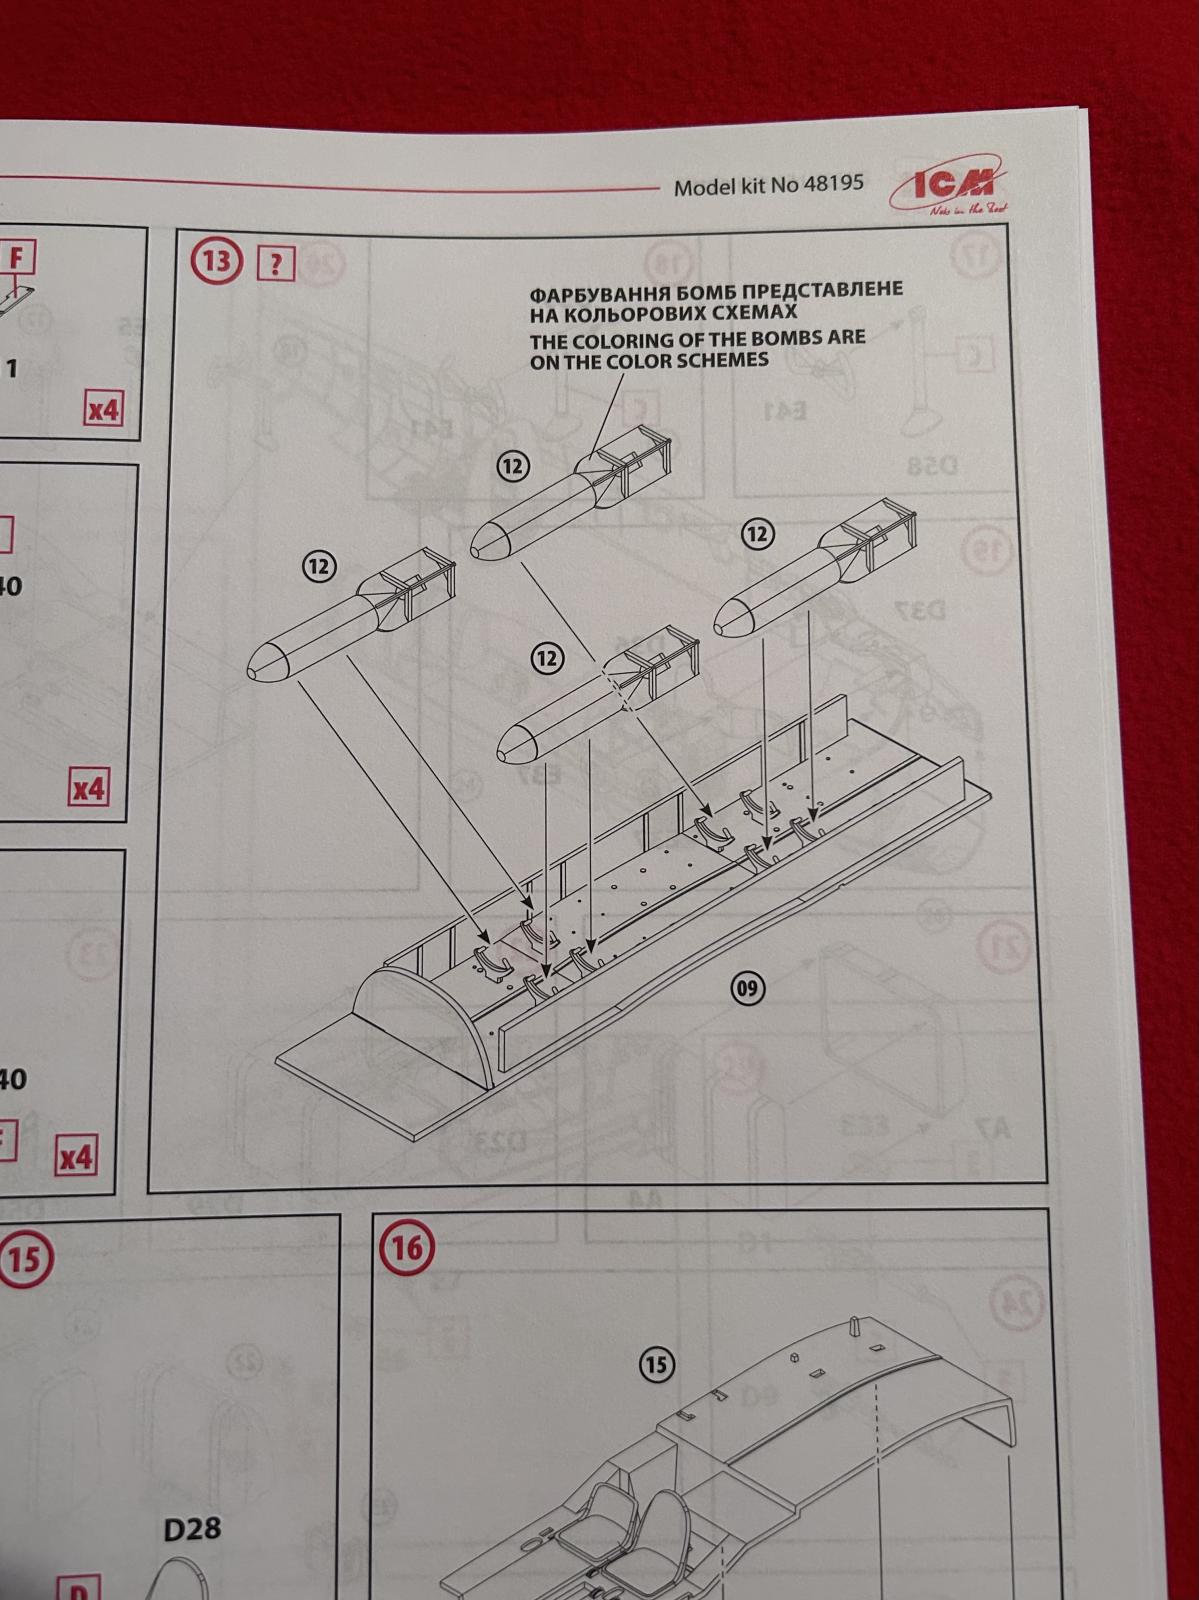
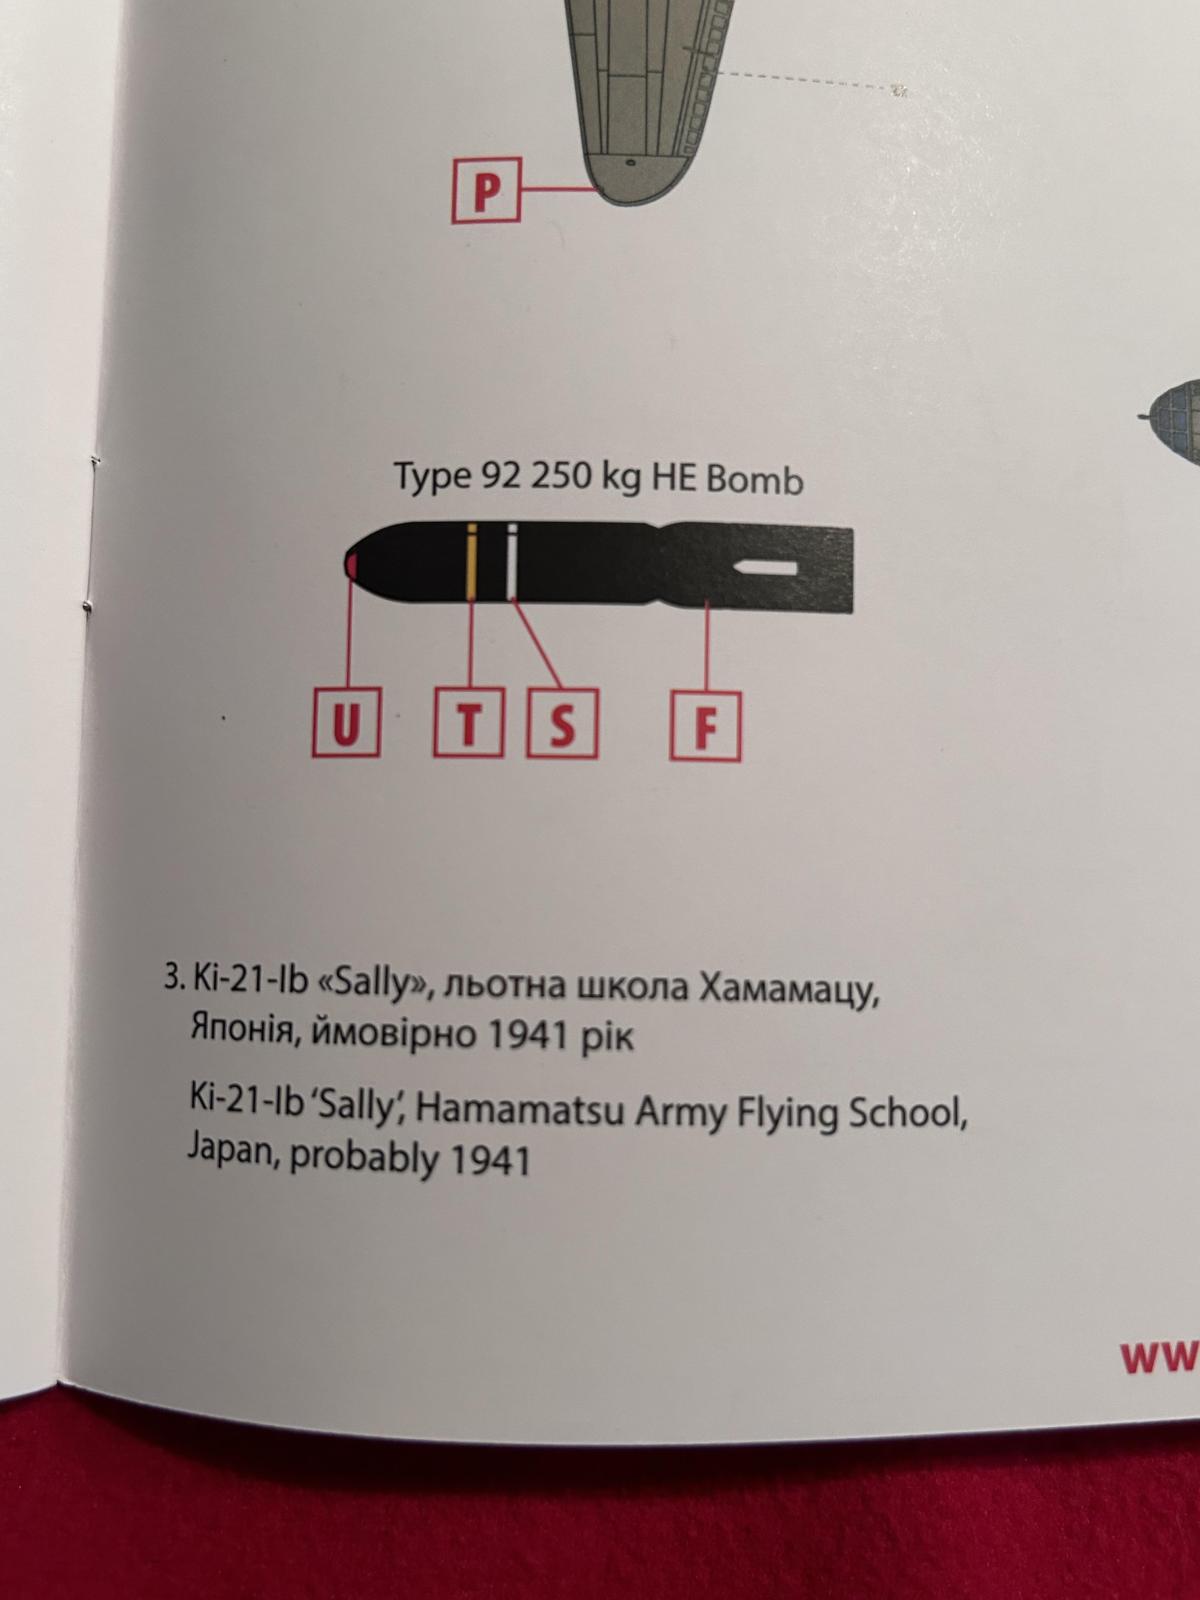
The bomb bay is equipped with the option of being built either opened or closed. There are four bombs included as ordnance. If you would rather not display the open bomb bay, a closed solid cover is also included.
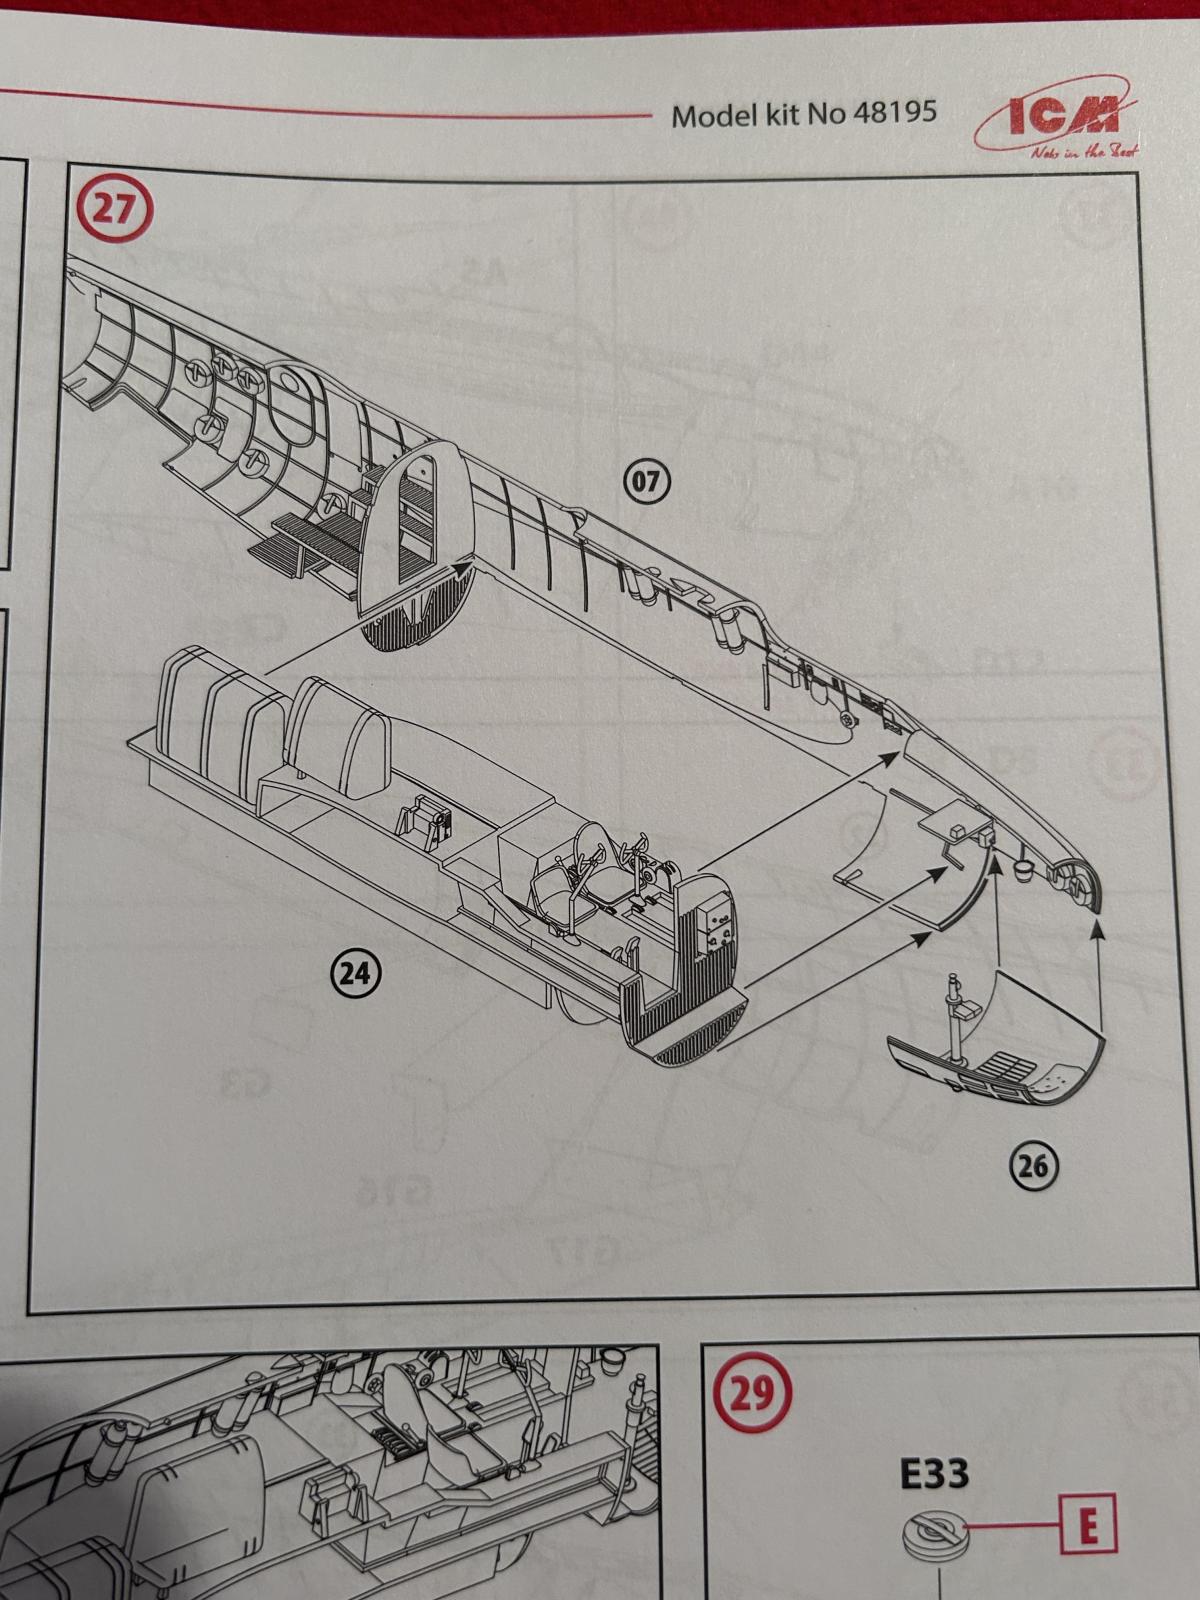
The completed cockpit assembly includes the fuel tanks, which are mounted above and slightly behind the bomb bays... Hmm. Do you see a fire hazard here on the real plane ? 😉
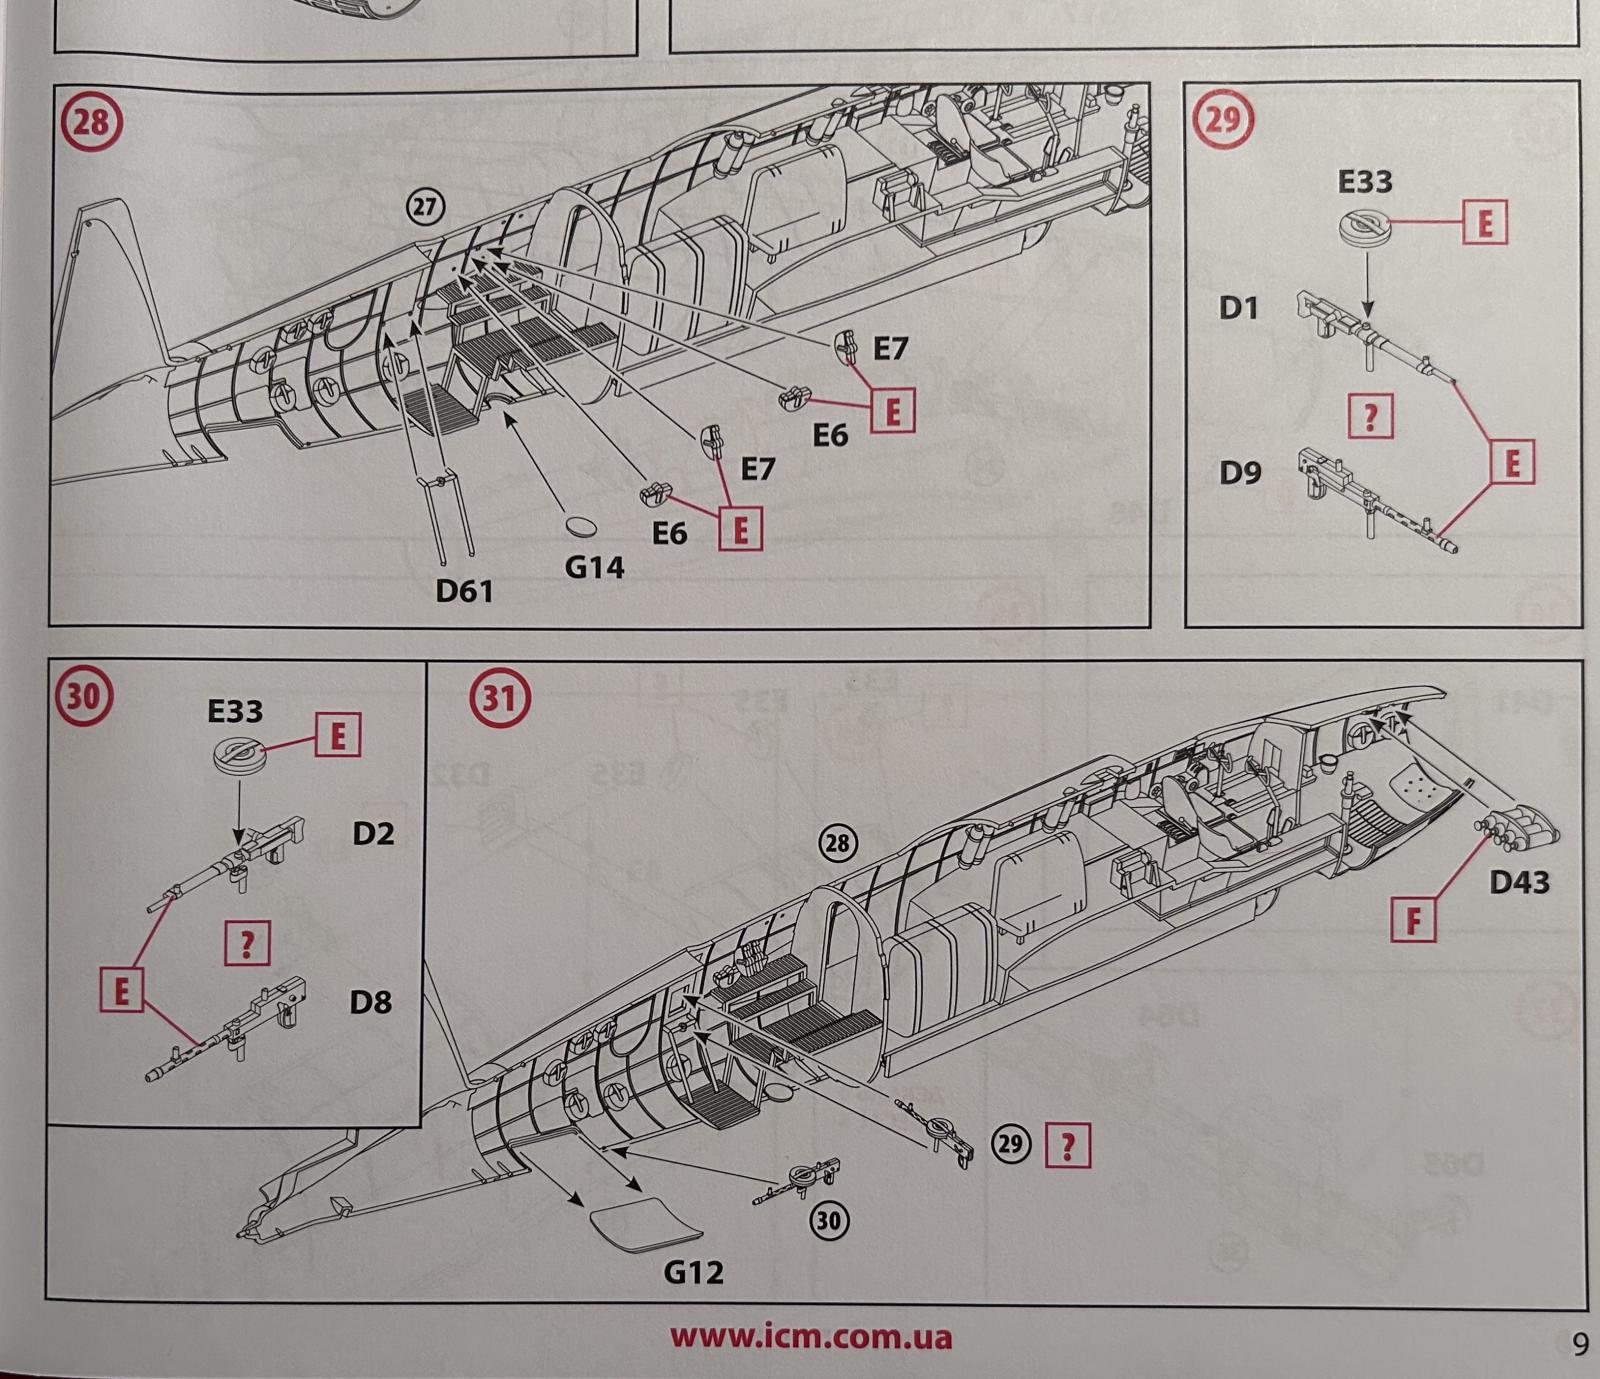
The fuselage interior is also very nicely detailed. This is one of the final fuselage assembly illustrations, so you can see how much detail has been incorporated.
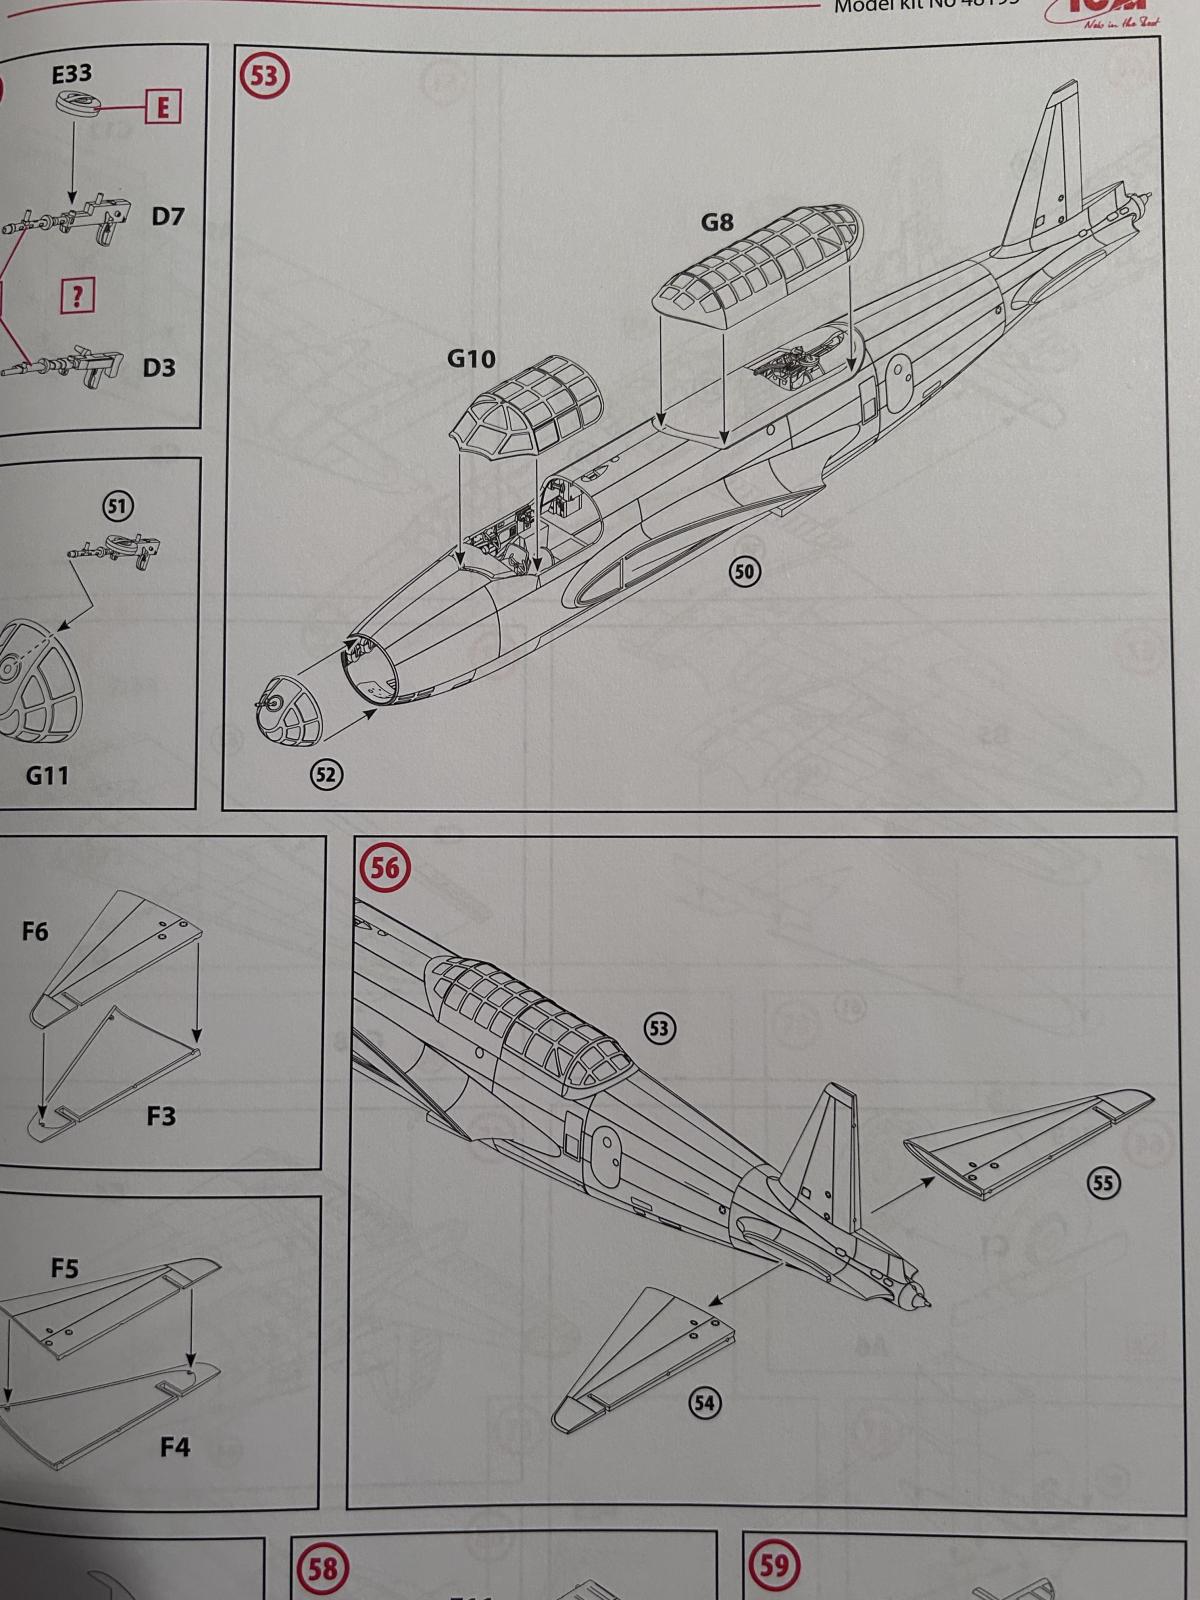
The clear parts are added, and the flight controls are molded as separate parts. I believe you could pose them off centered if you wanted to.
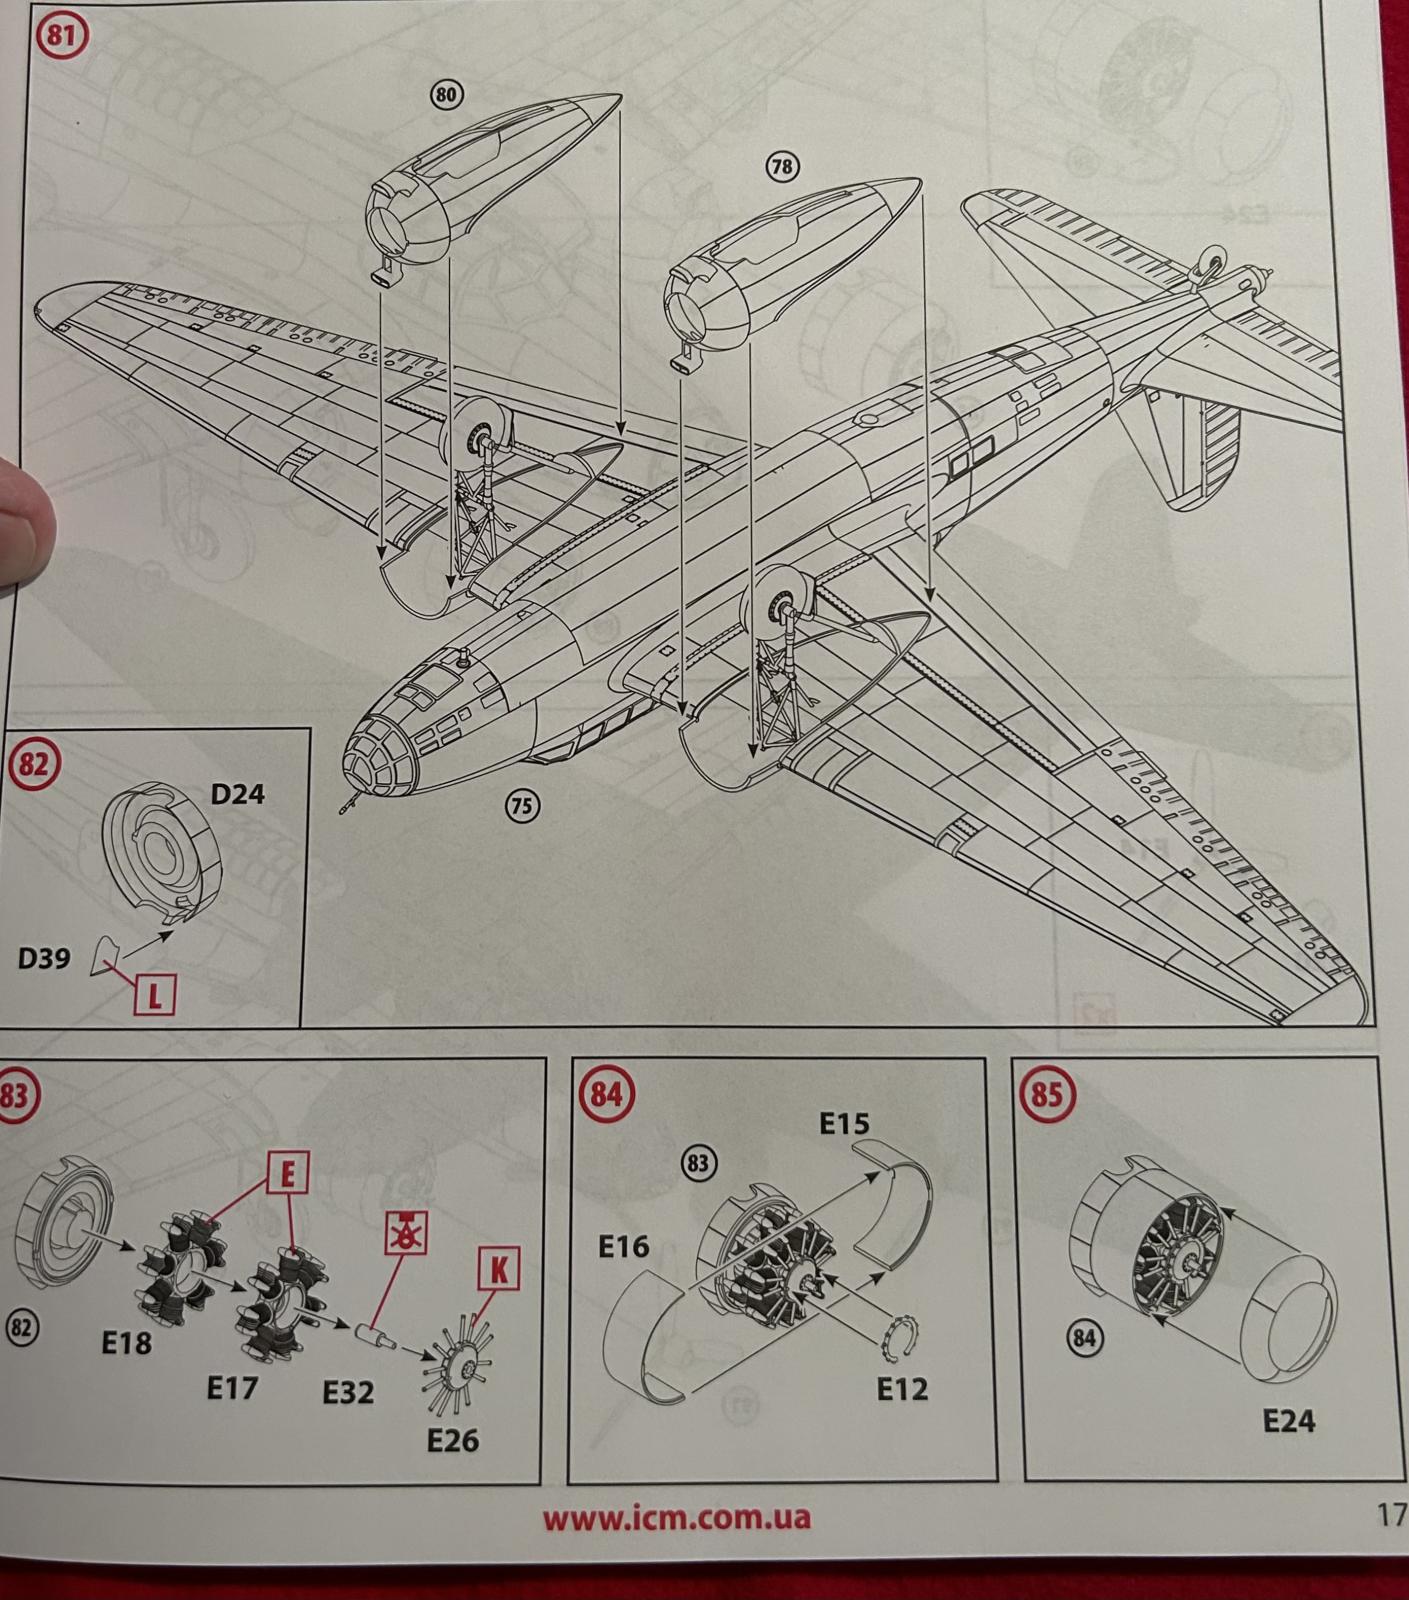
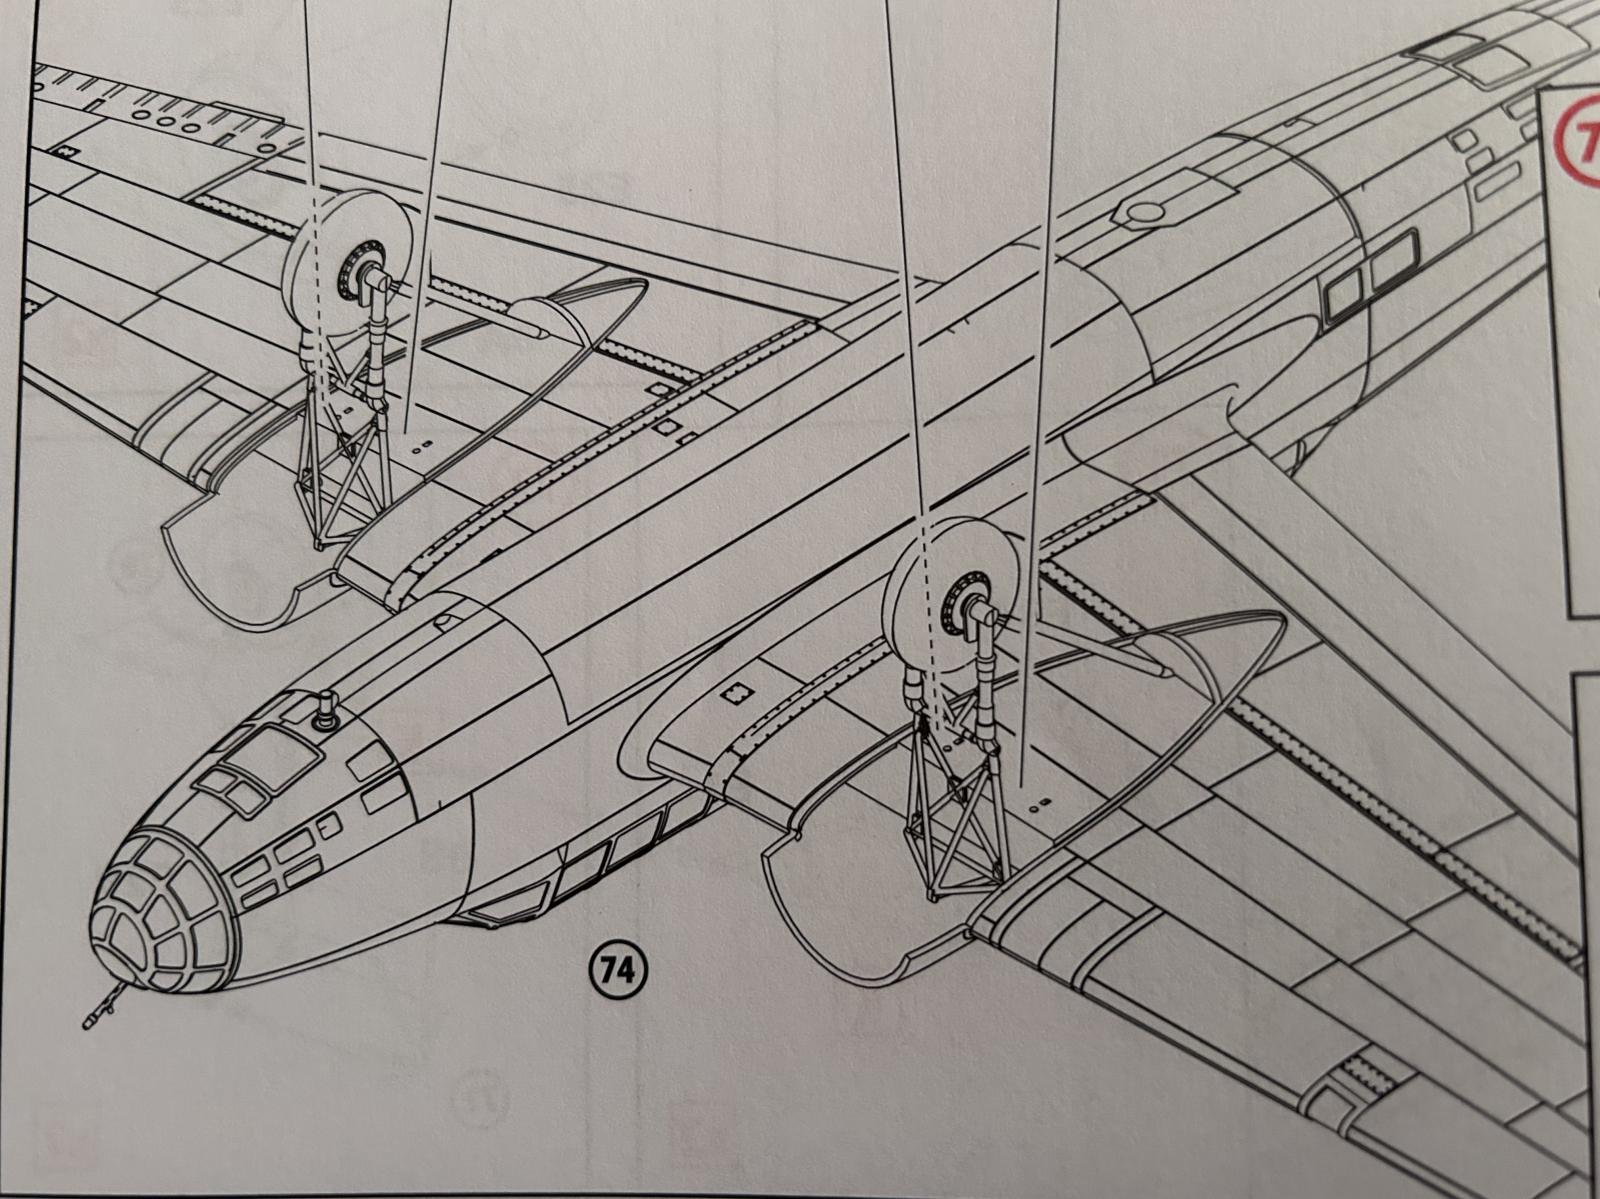
The landing gear are mounted to the bottom of the wing, and then the engine nacelles are installed over the top of this.
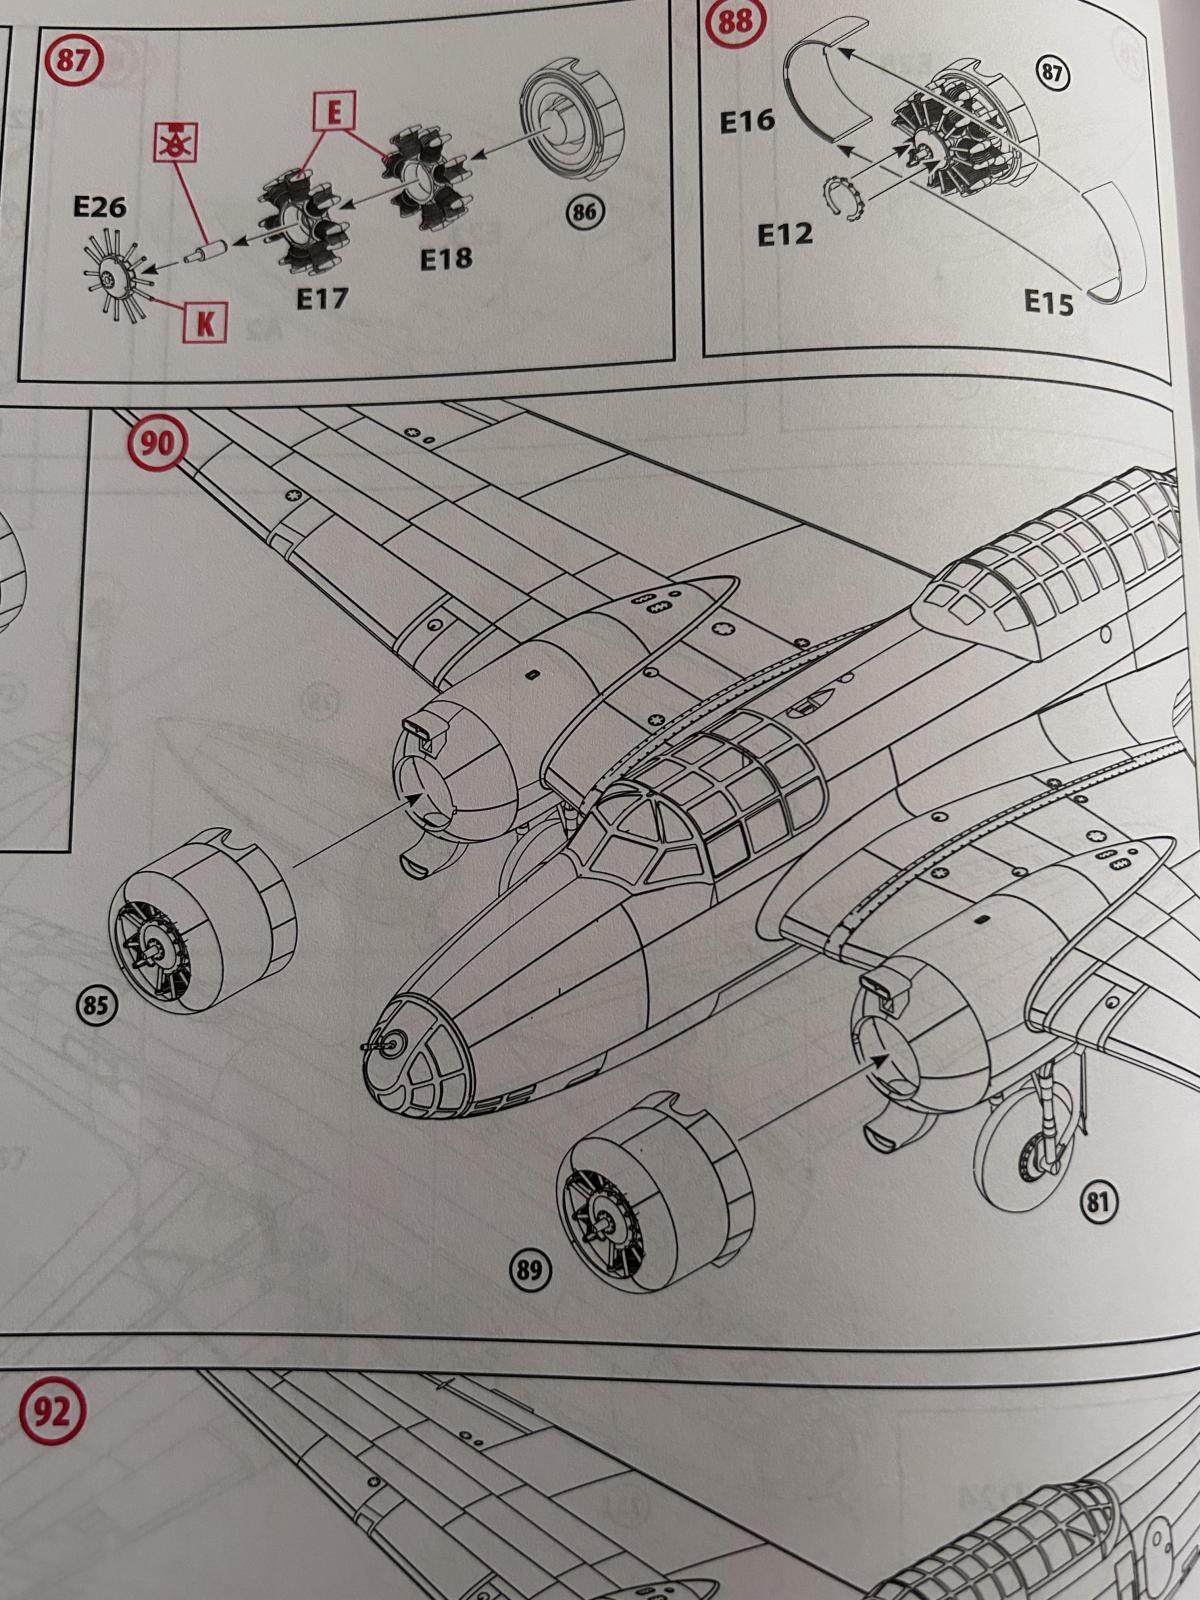
The engines are beautifully molded, and are little gems of their own. You build them, and install them at the end of the assembly sequence. This might make it a little easier to paint.
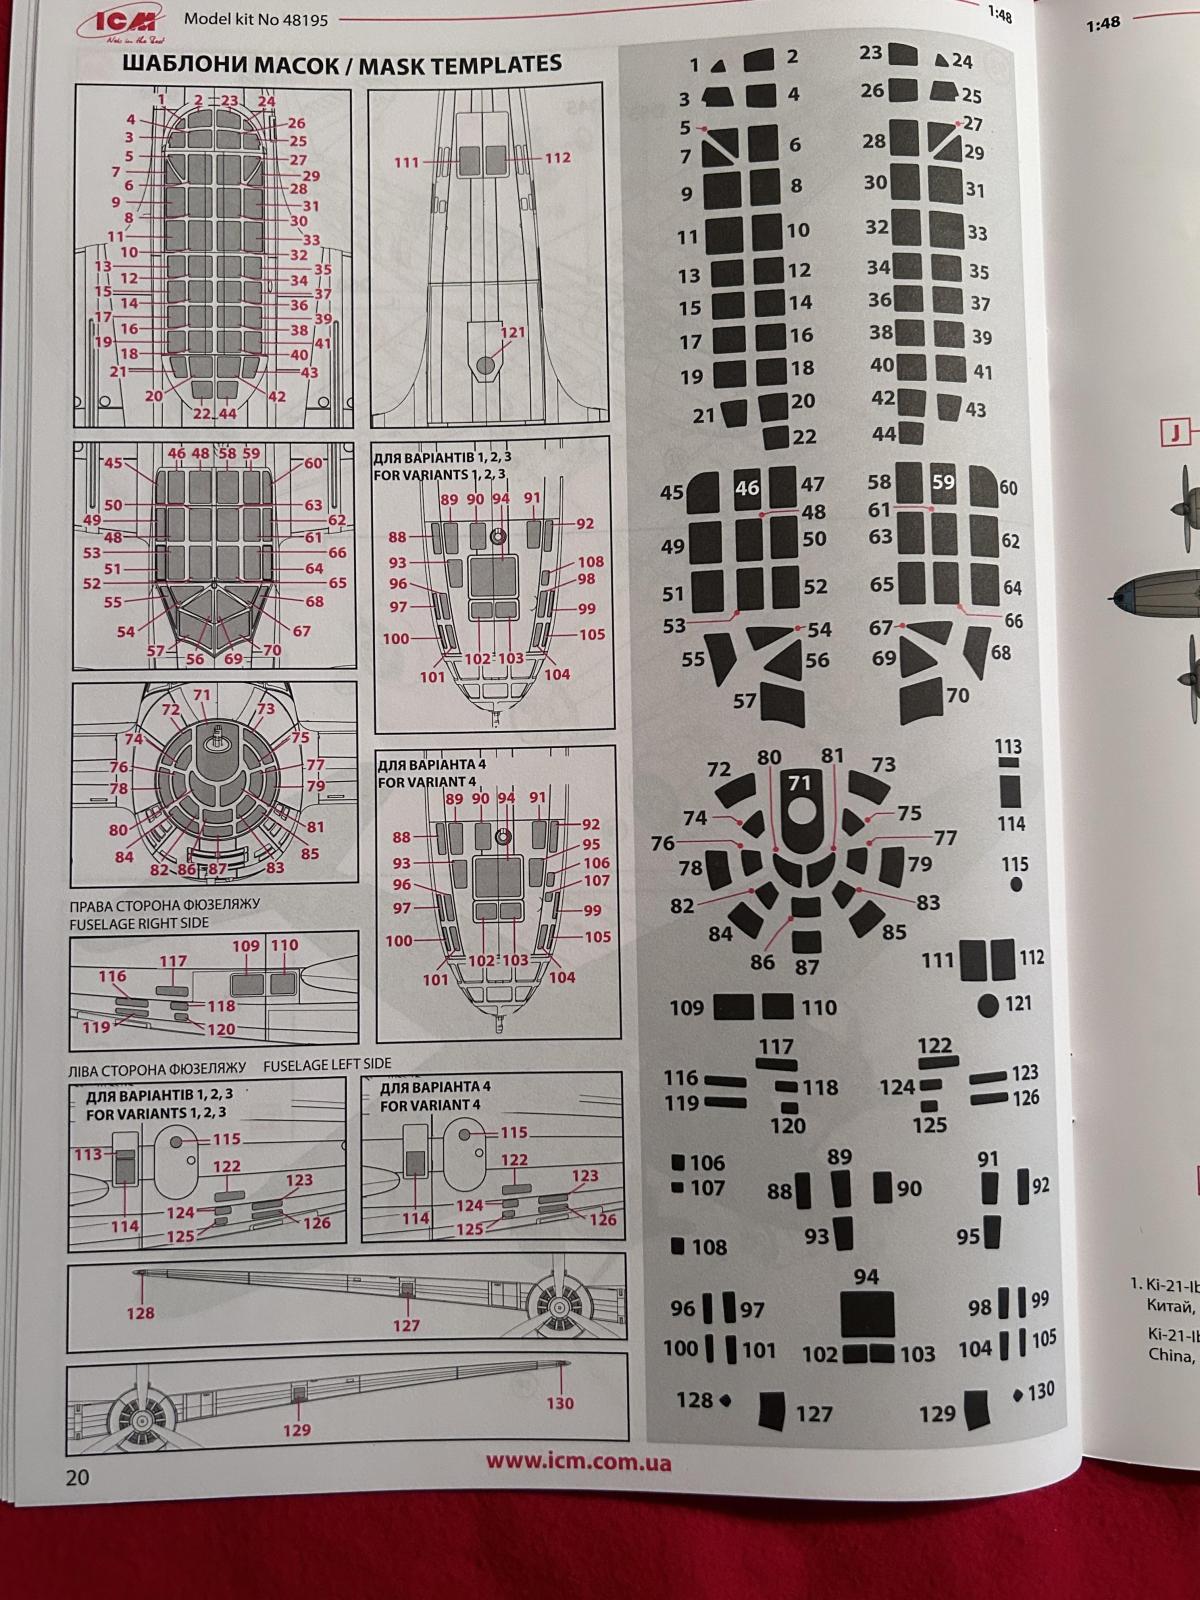
These are the masking templates, and an illustration showing where they go. My model didn't come with a masking set. It looks like ICM has provided the templates for the windows, but it is up to the builder to actually cut them out using the provided template.
If anyone has a kit that came with a separate masking sheet, please let me know. I'll amend the article if needed.
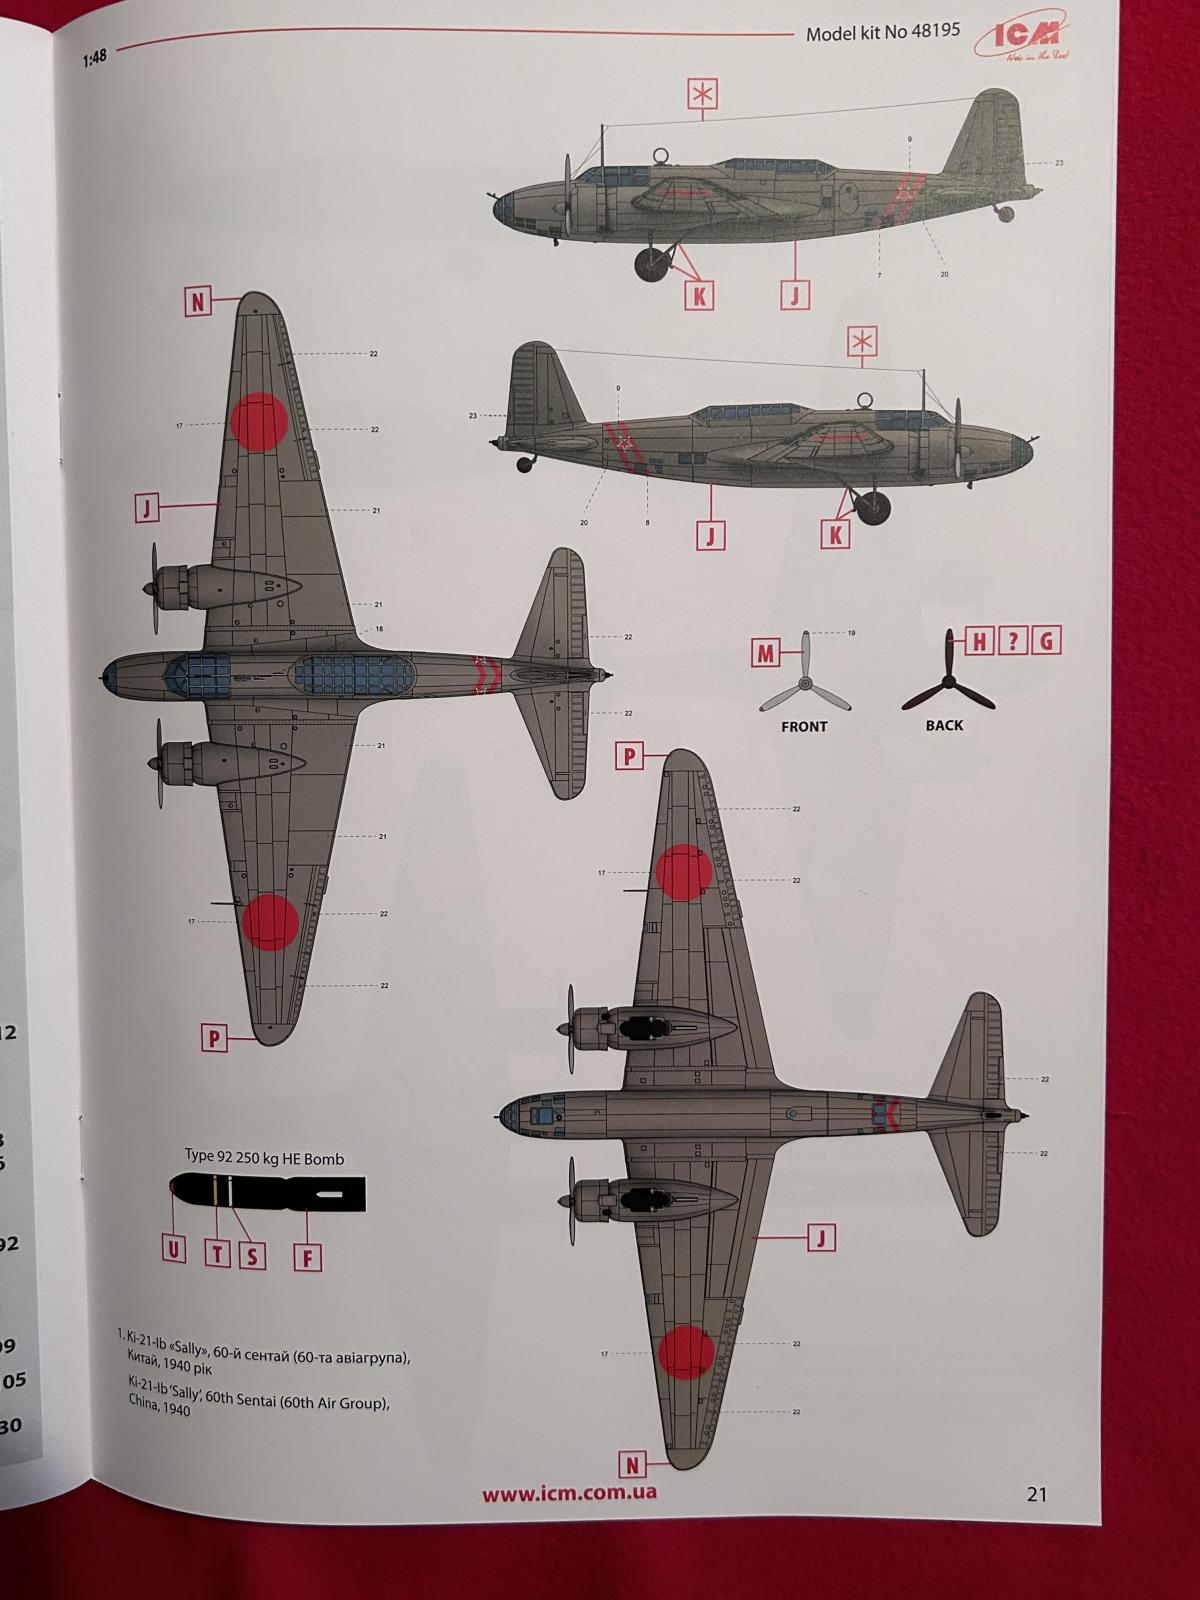
This is the first decal option. It is an overall Gray Green Ki-21.
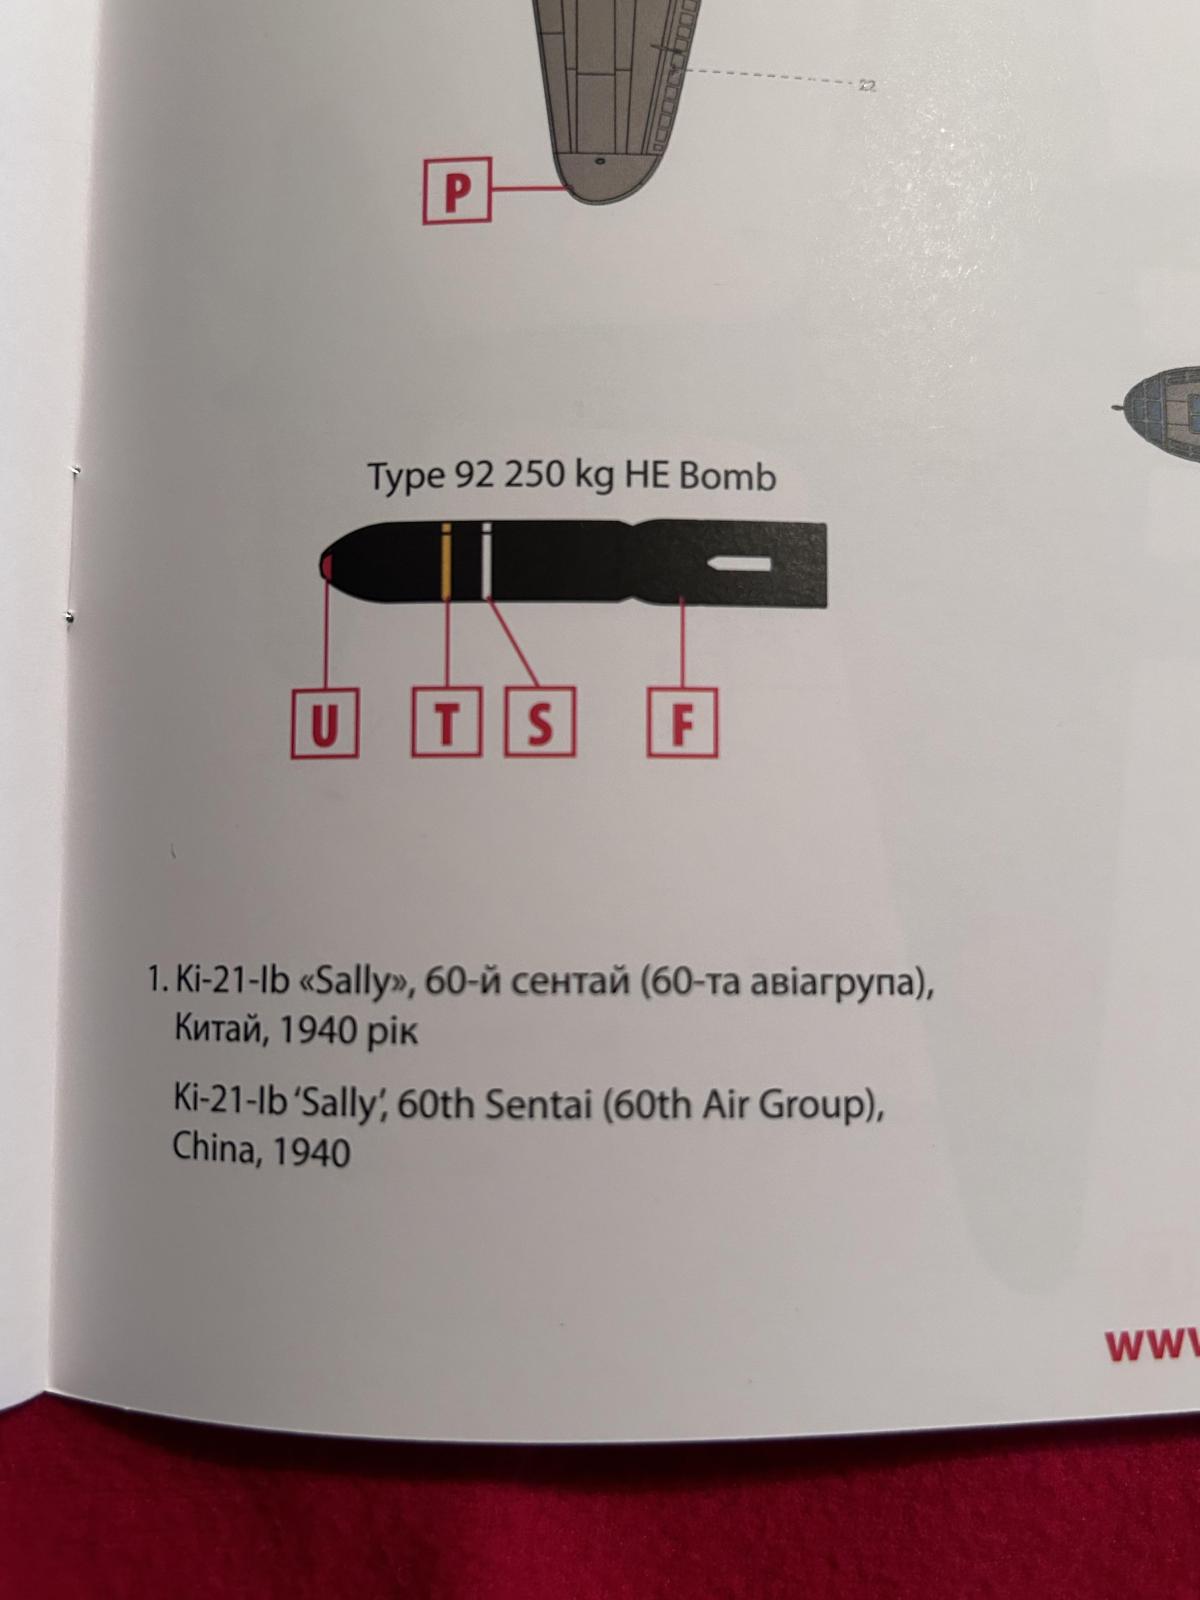
This is the unit information and where it served.
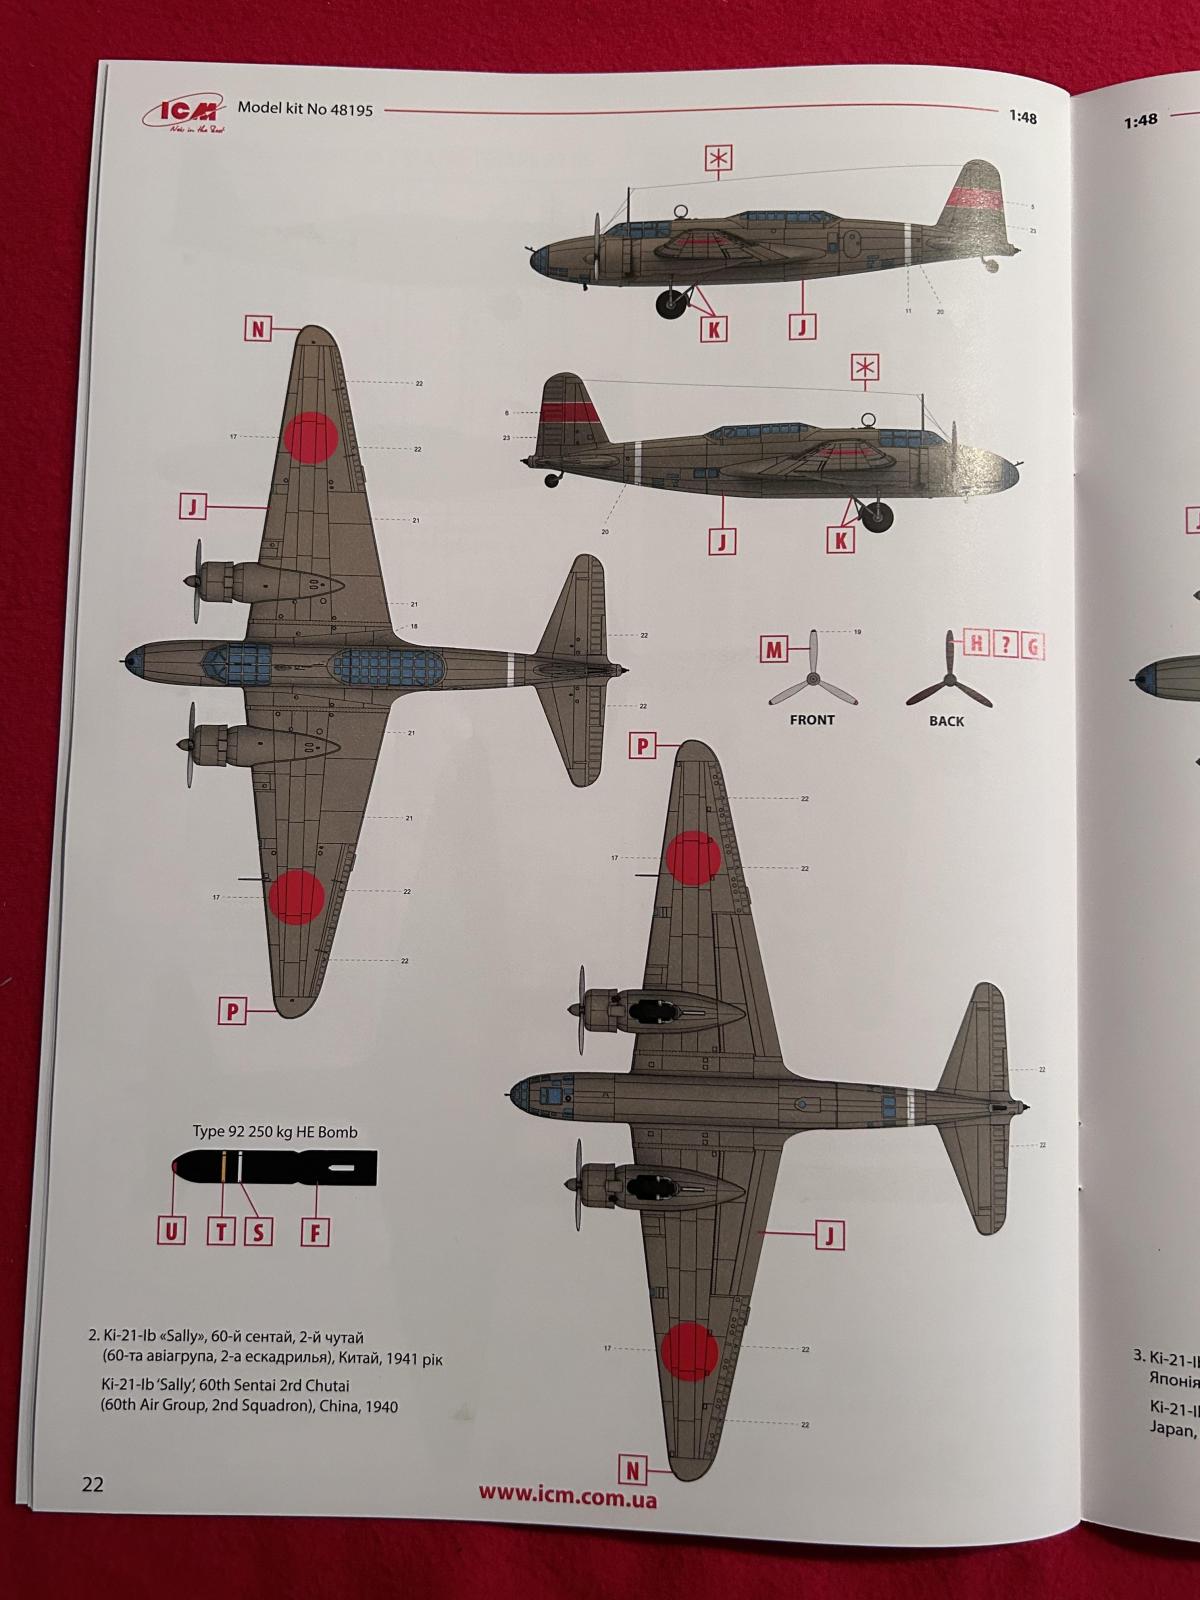
This is the second option. It too is an overall Gray Green Ki-21.
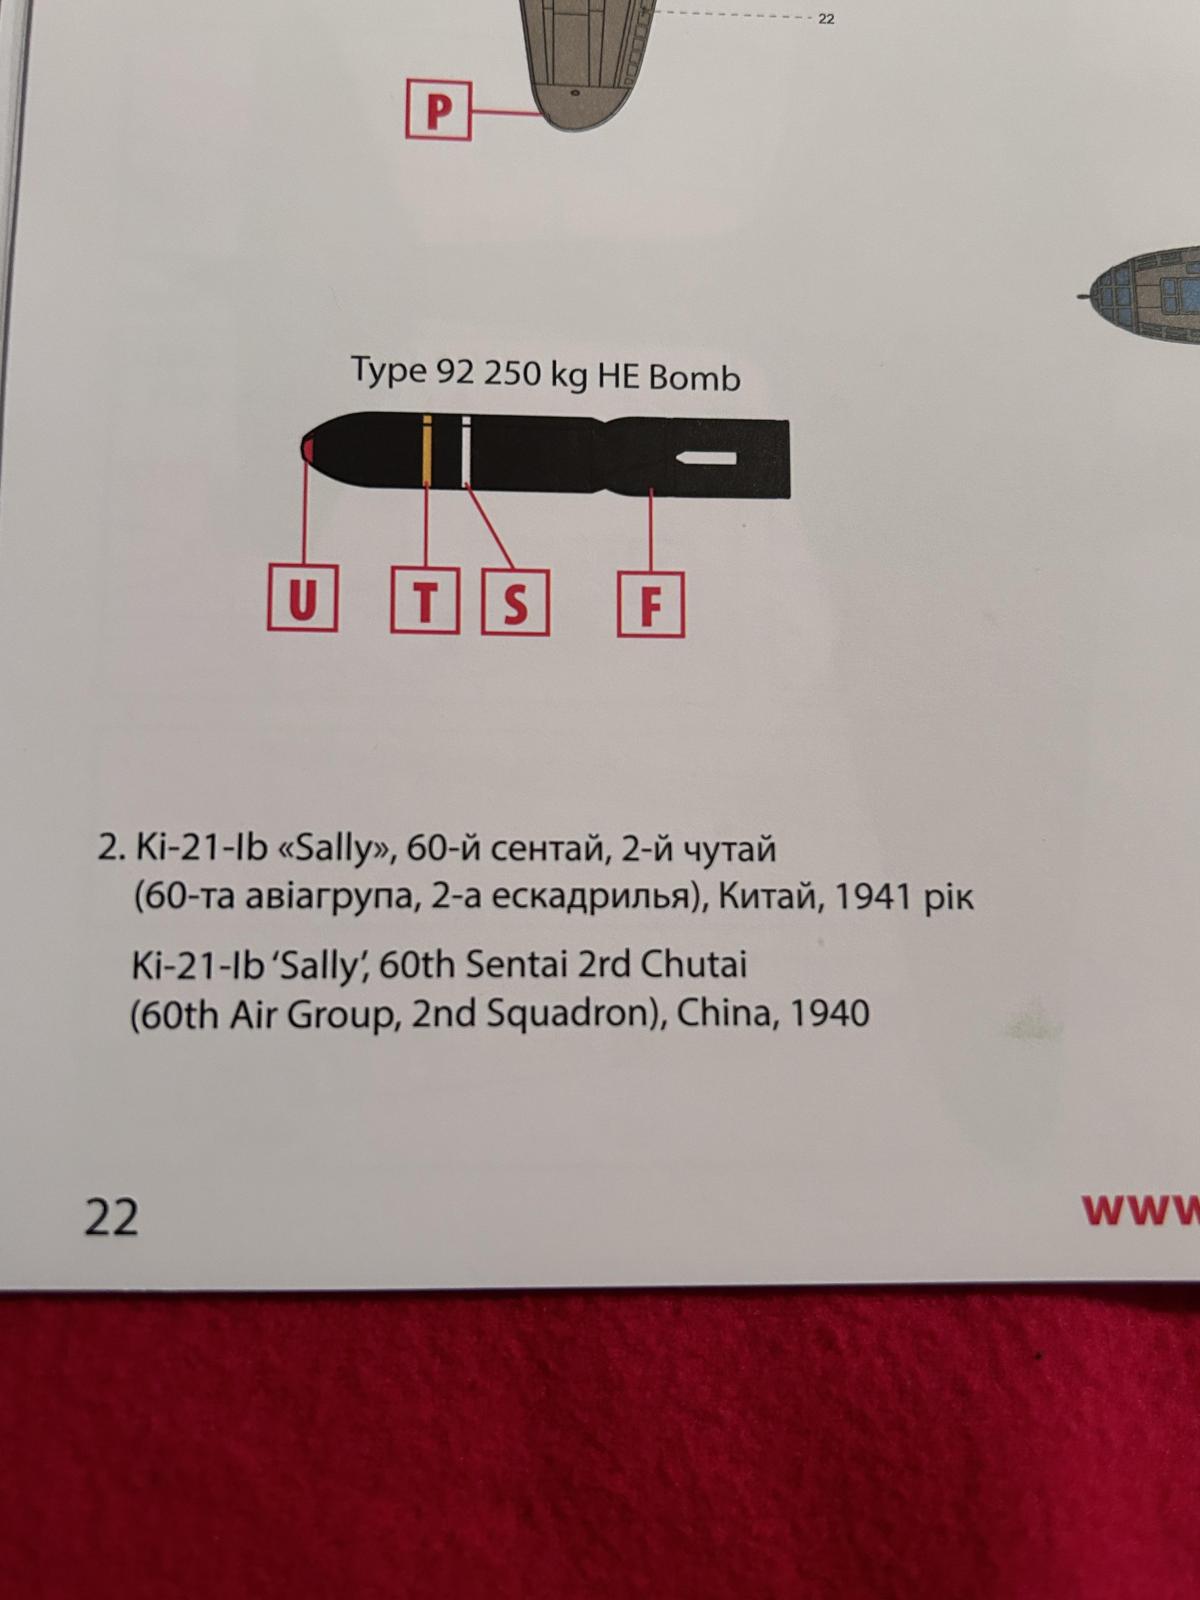
This is the unit information and where it served.
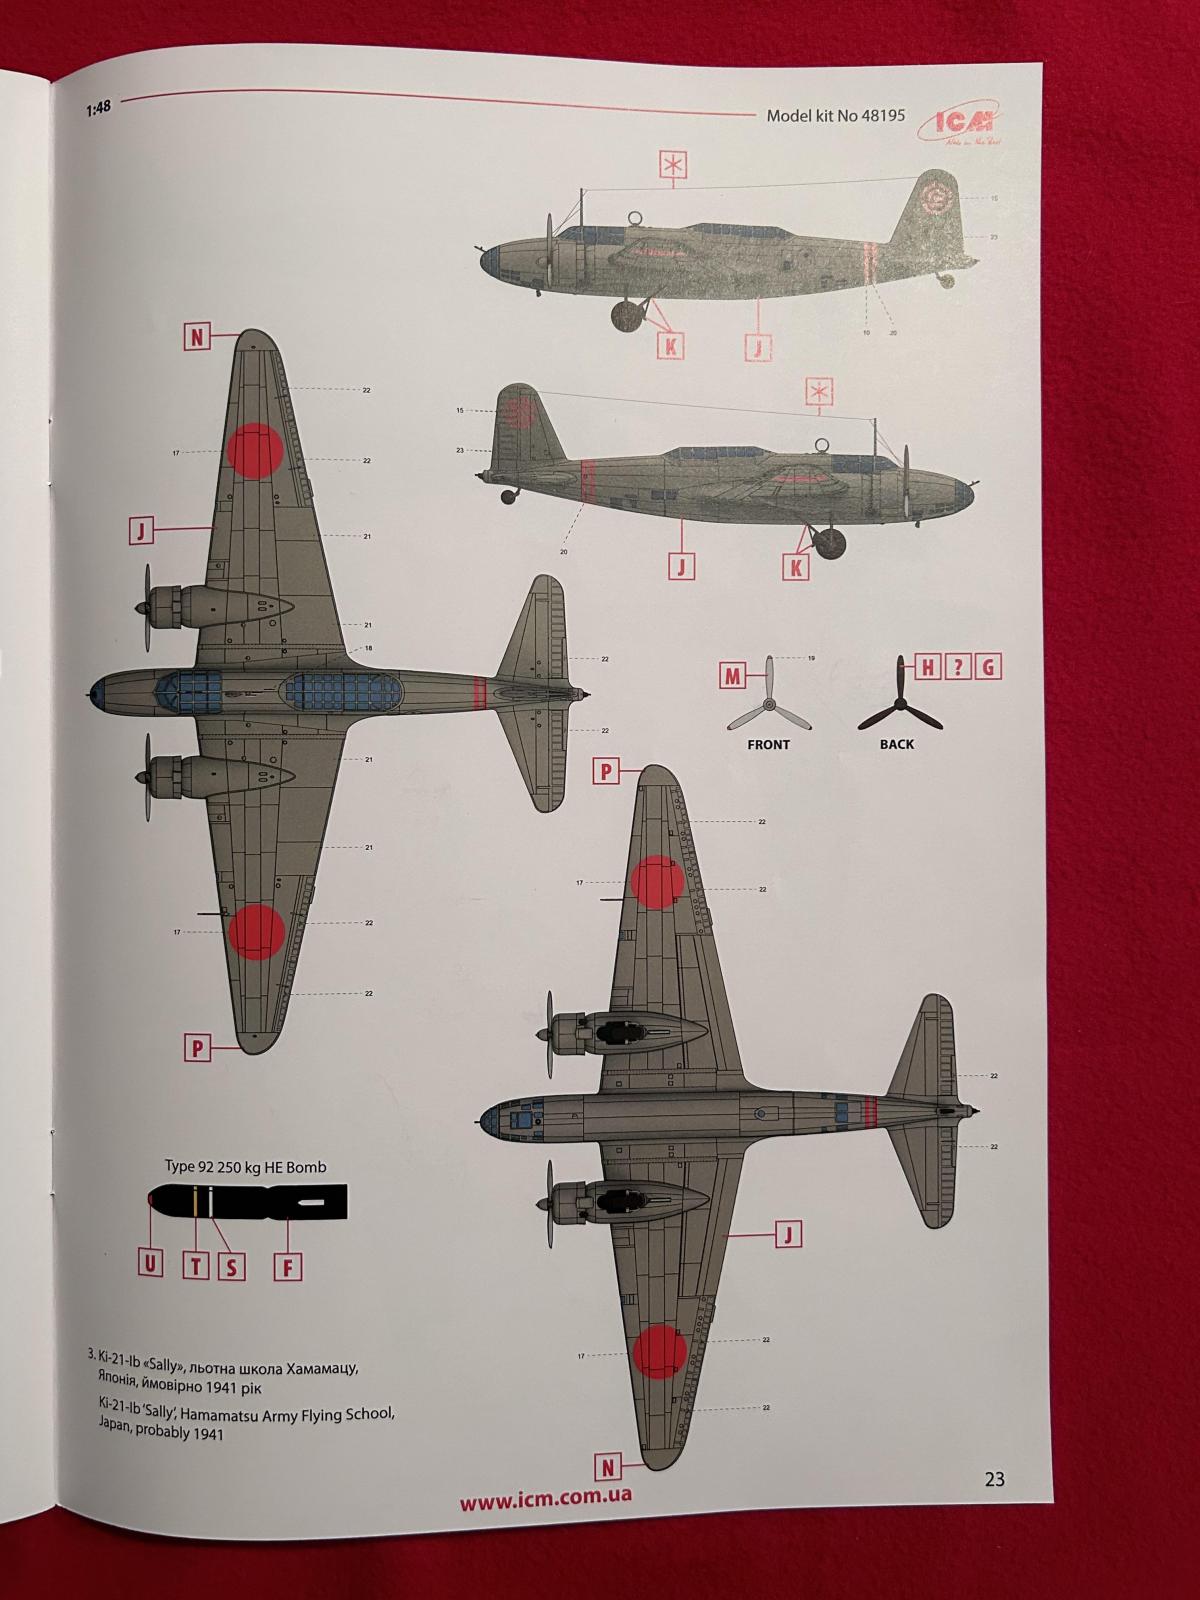
No surprise here... We have another overall Gary Green Ki-21.
This is the unit information and where it served.

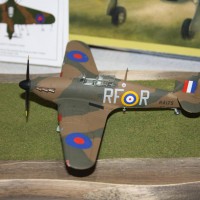
This is the one I will likely be building. It originally started out as an overall Gray Green aircraft, but it was later camouflaged using a Dark Green. It also has the Yellow color on the leading edge of the wings. This was an IFF feature used by many Japanese planes after a certain date and time which now eludes me.
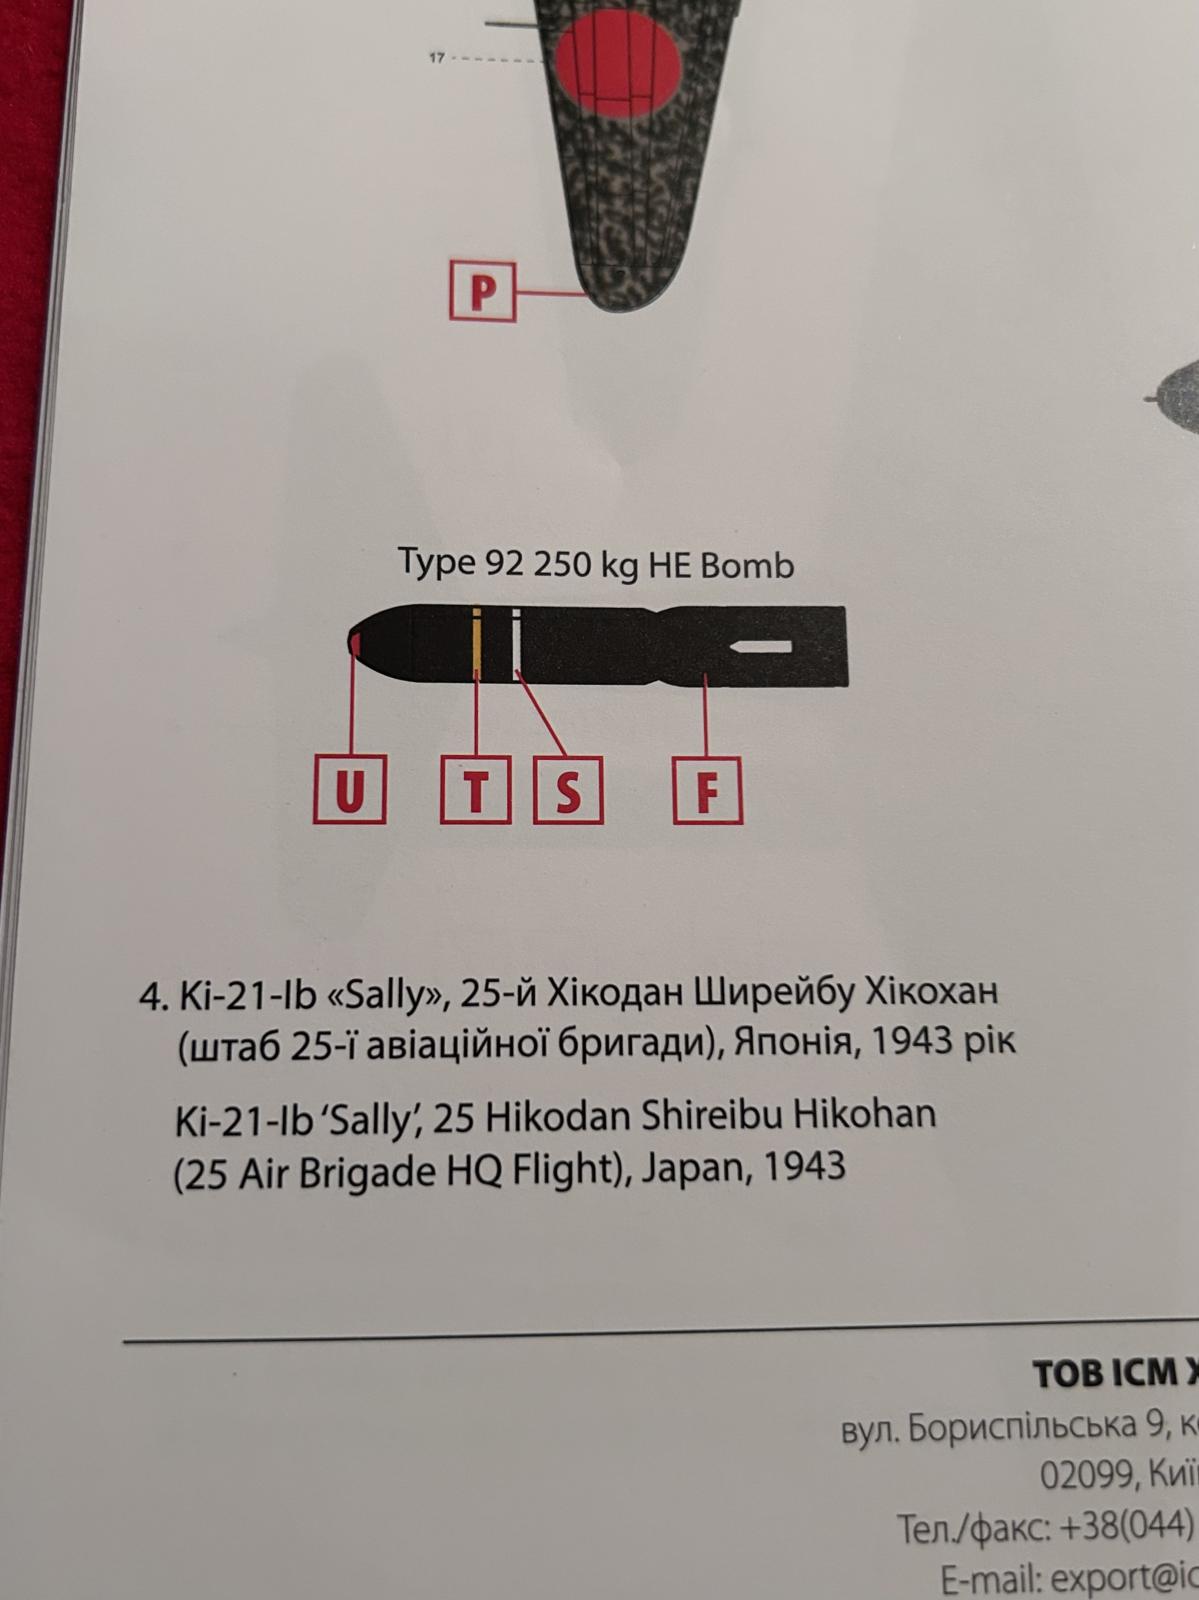
This is the unit information and where it served.
Now on to the plastic parts ! Here we go...
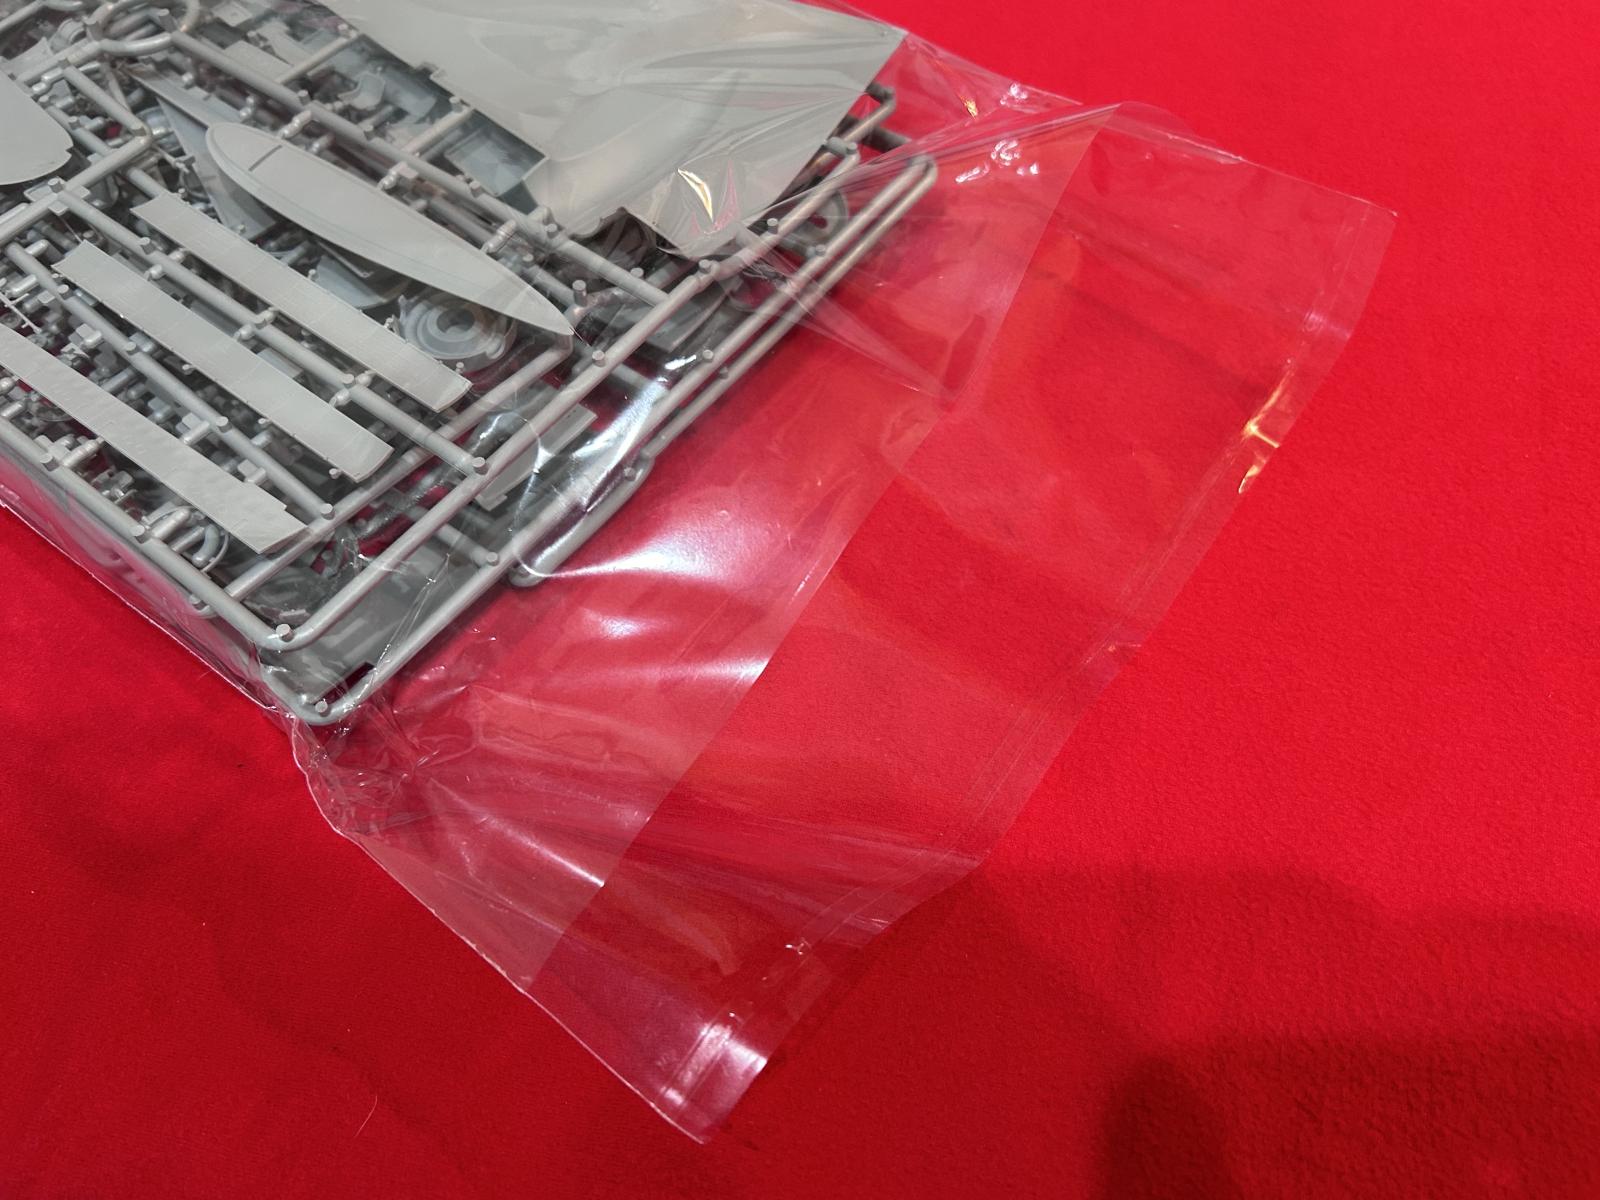
As mentioned above, the parts bag is reseal able. This shows the adhesive end.
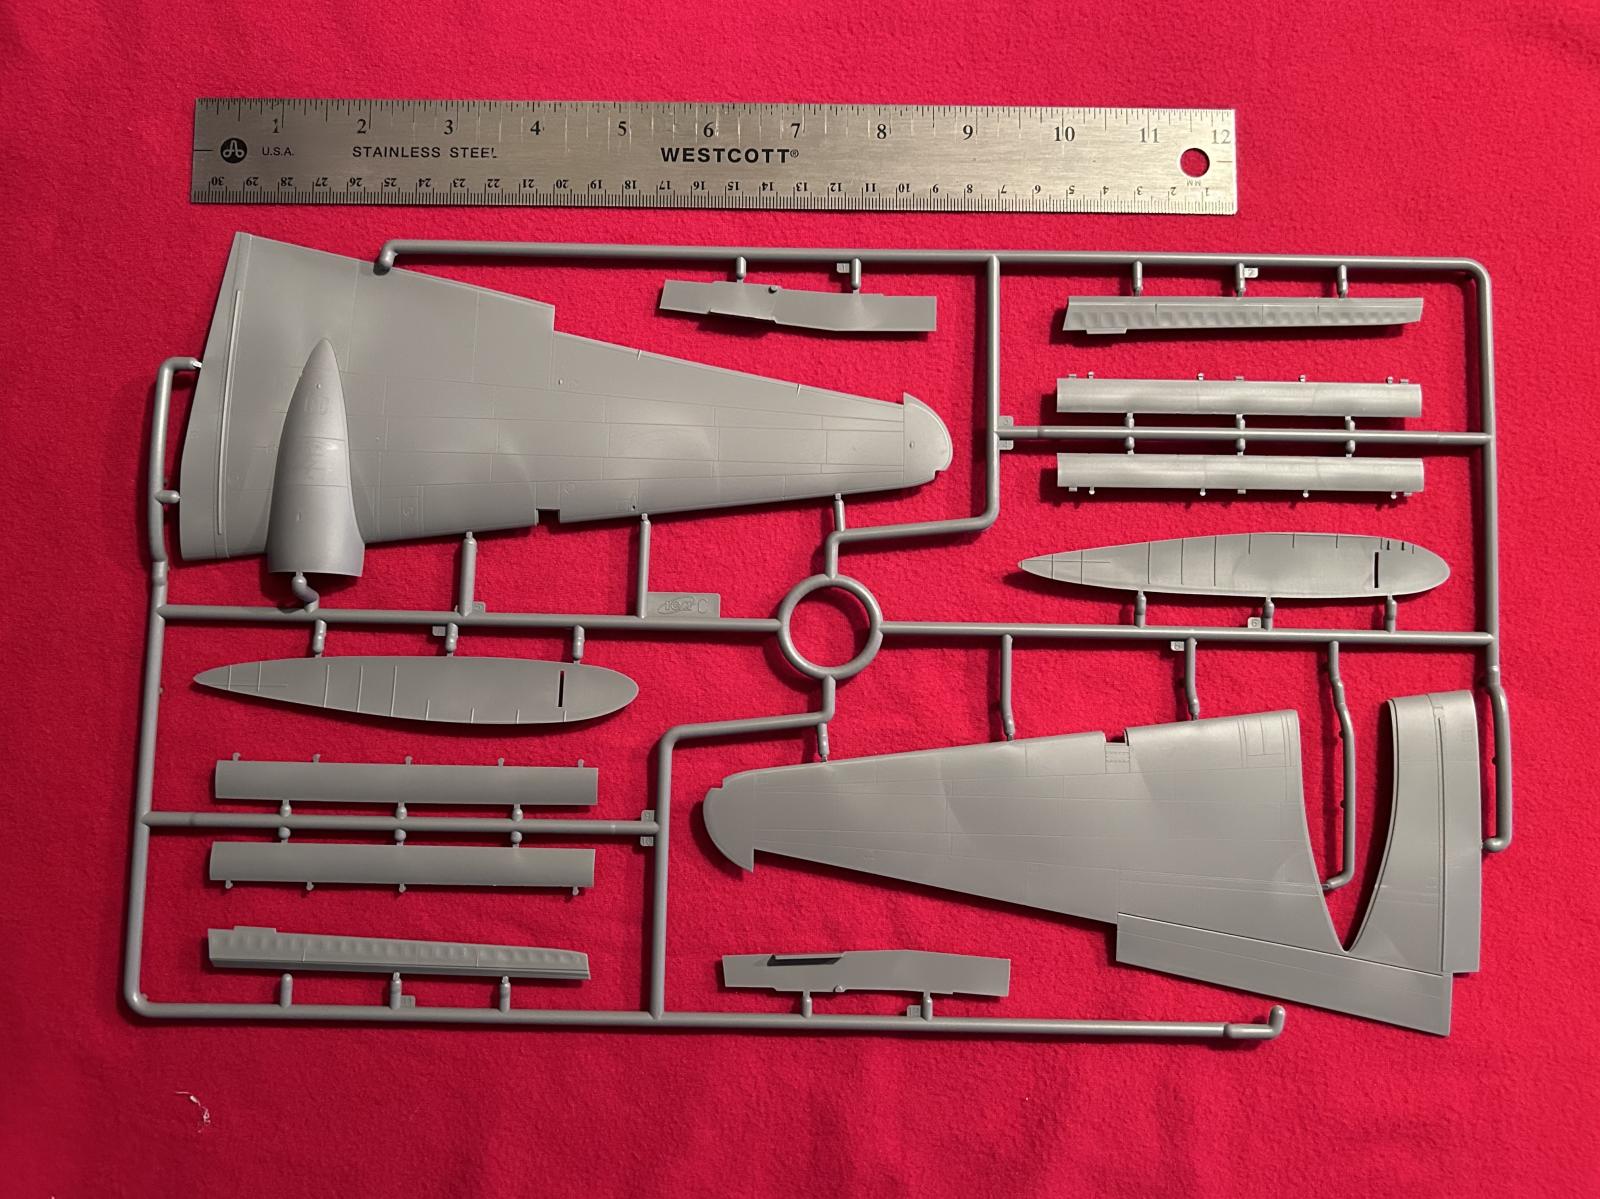
This is one of the wing parts trees. This model is fairly big. I would guess offhand and say it is about the same size as a Heinkel He-111. I have included a steel ruler in with the pictures to show the size. The ruler is a standard 12 inch size.
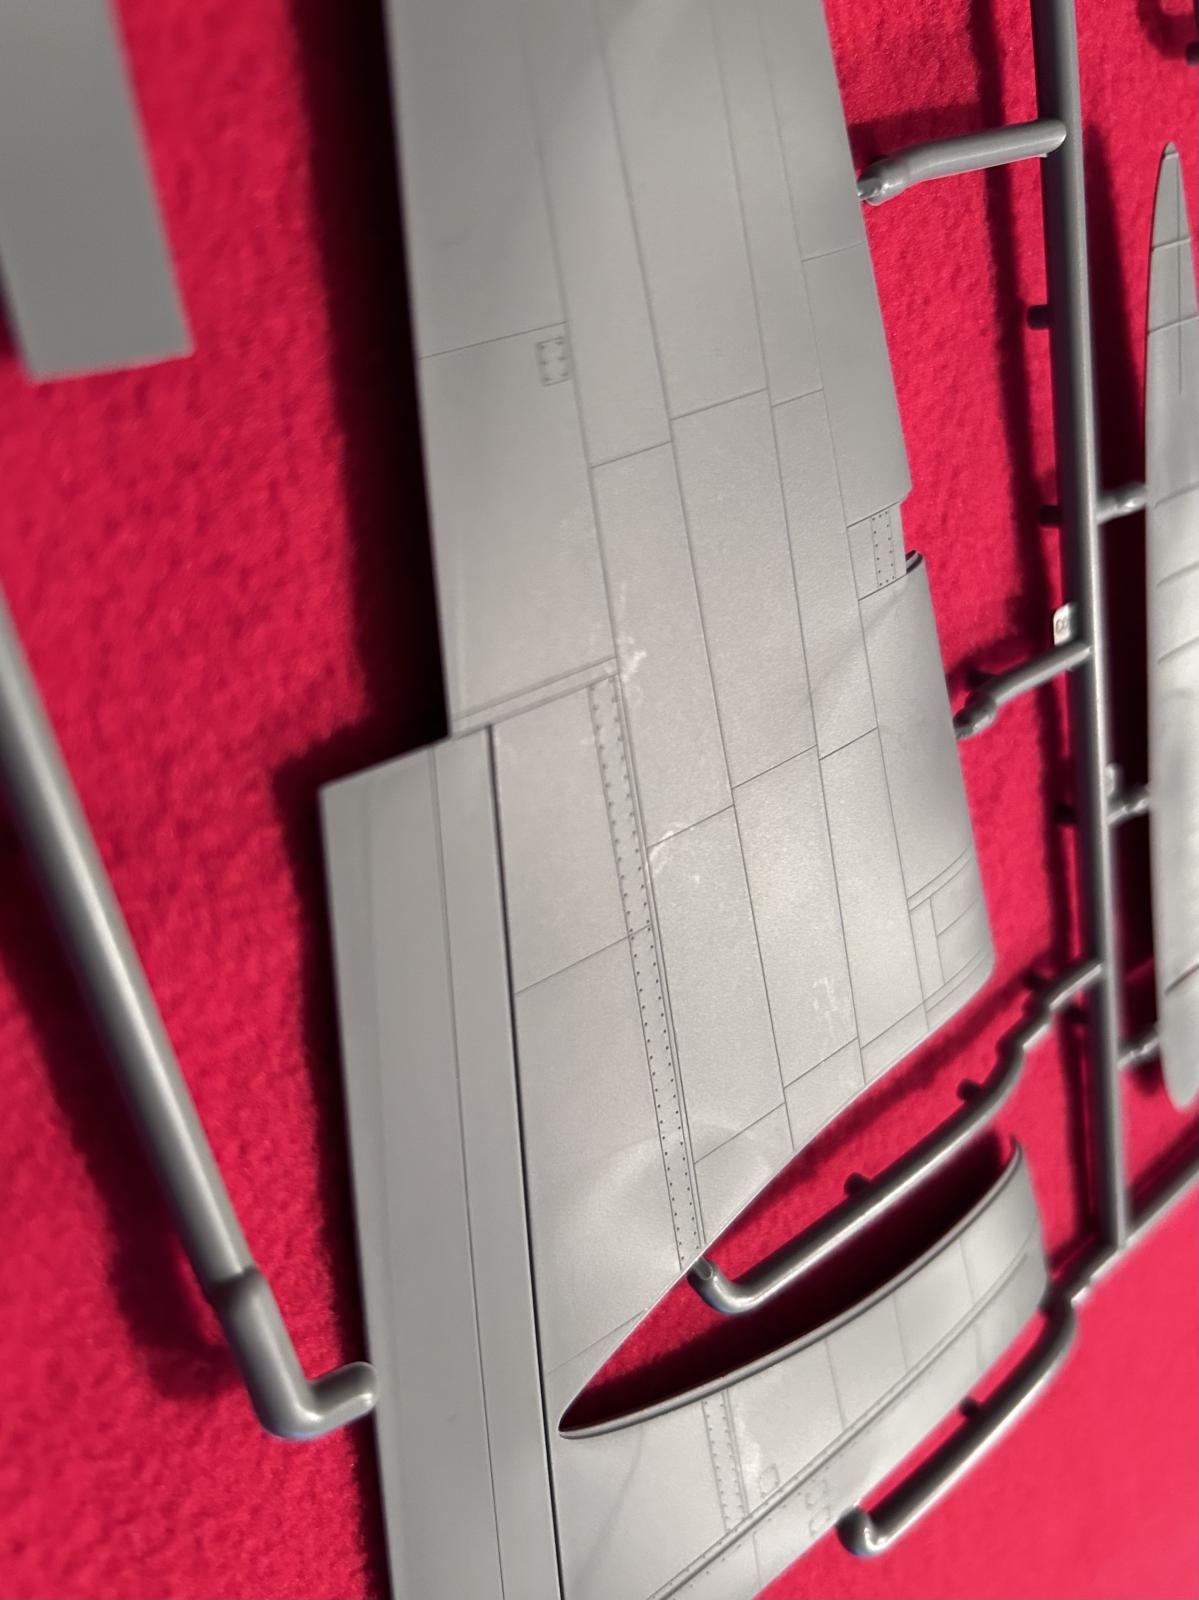
The details molded into the plastic are nice and subtle. They should look really good once painted.
The controls were fabric covered. This shows a close up of the fabric details. I will let the pictures do the talking here. I'm OK with it as is and I will build mine right out of the box.
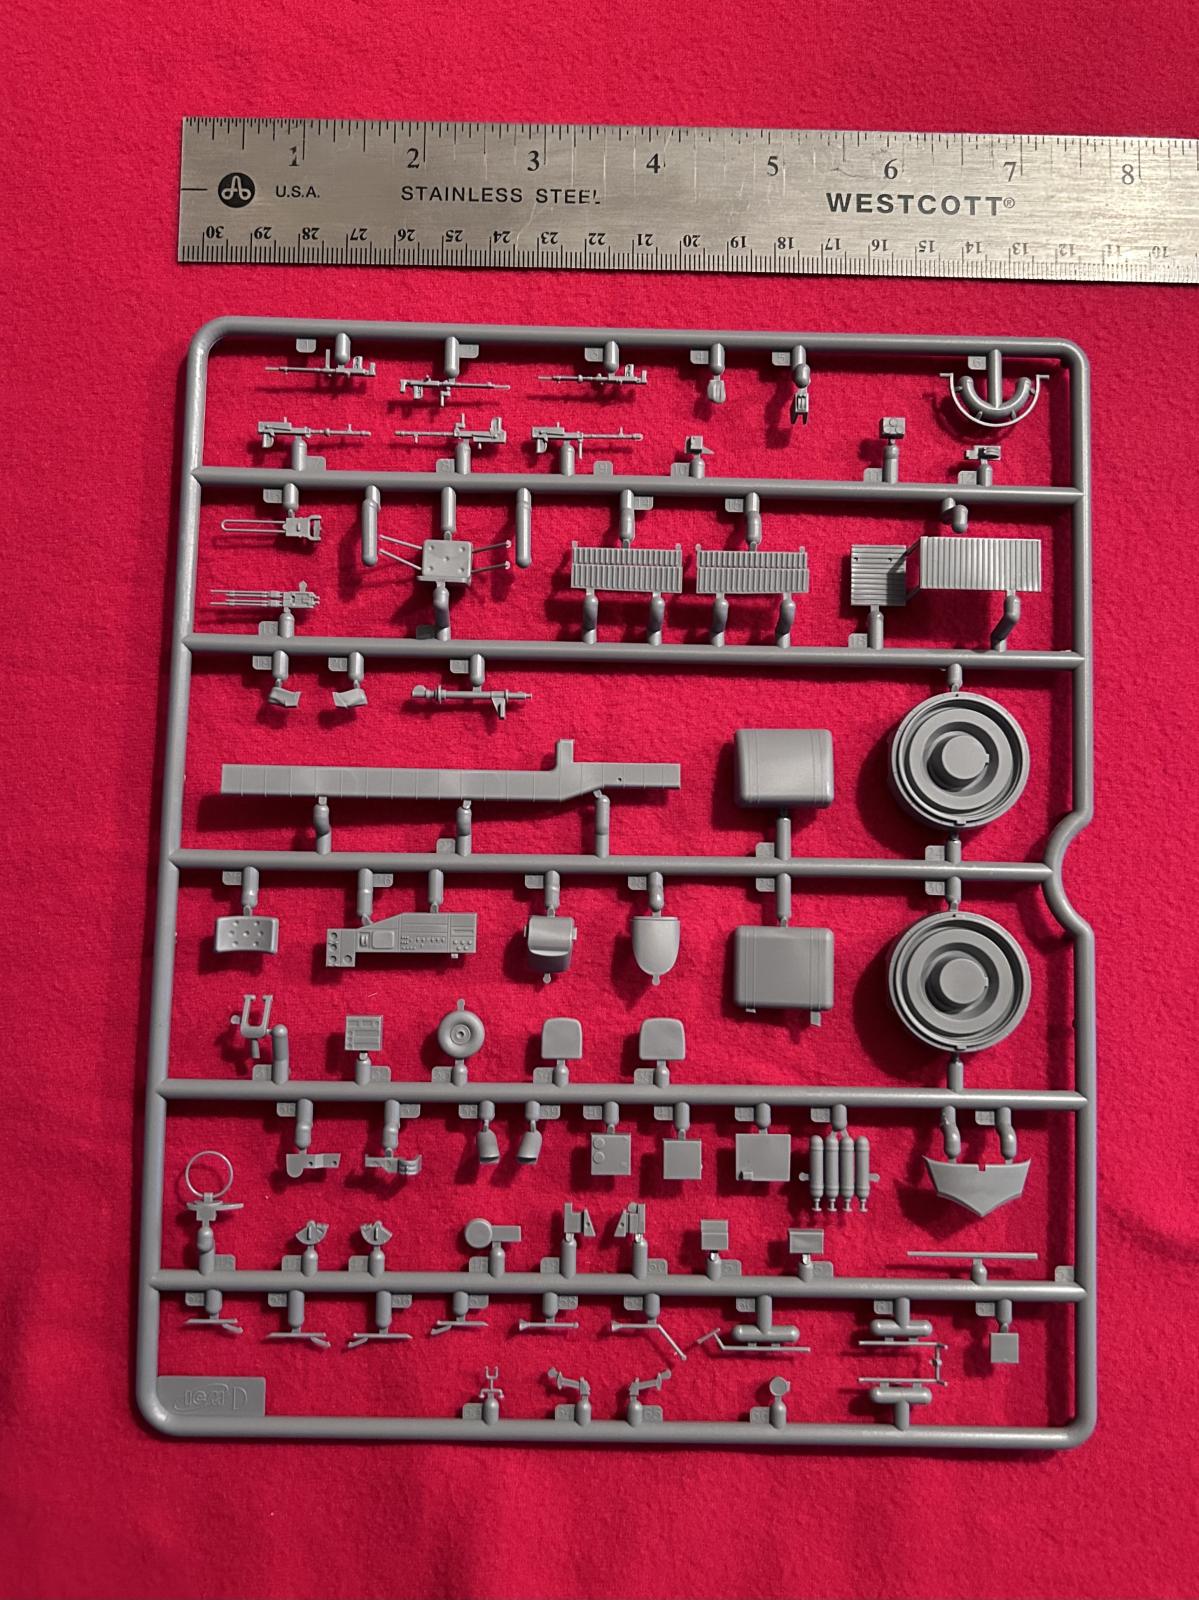
Here is the plastic tree that contains the crew served MG's. Most of the tiny parts and some landing gear parts are included on this tree.
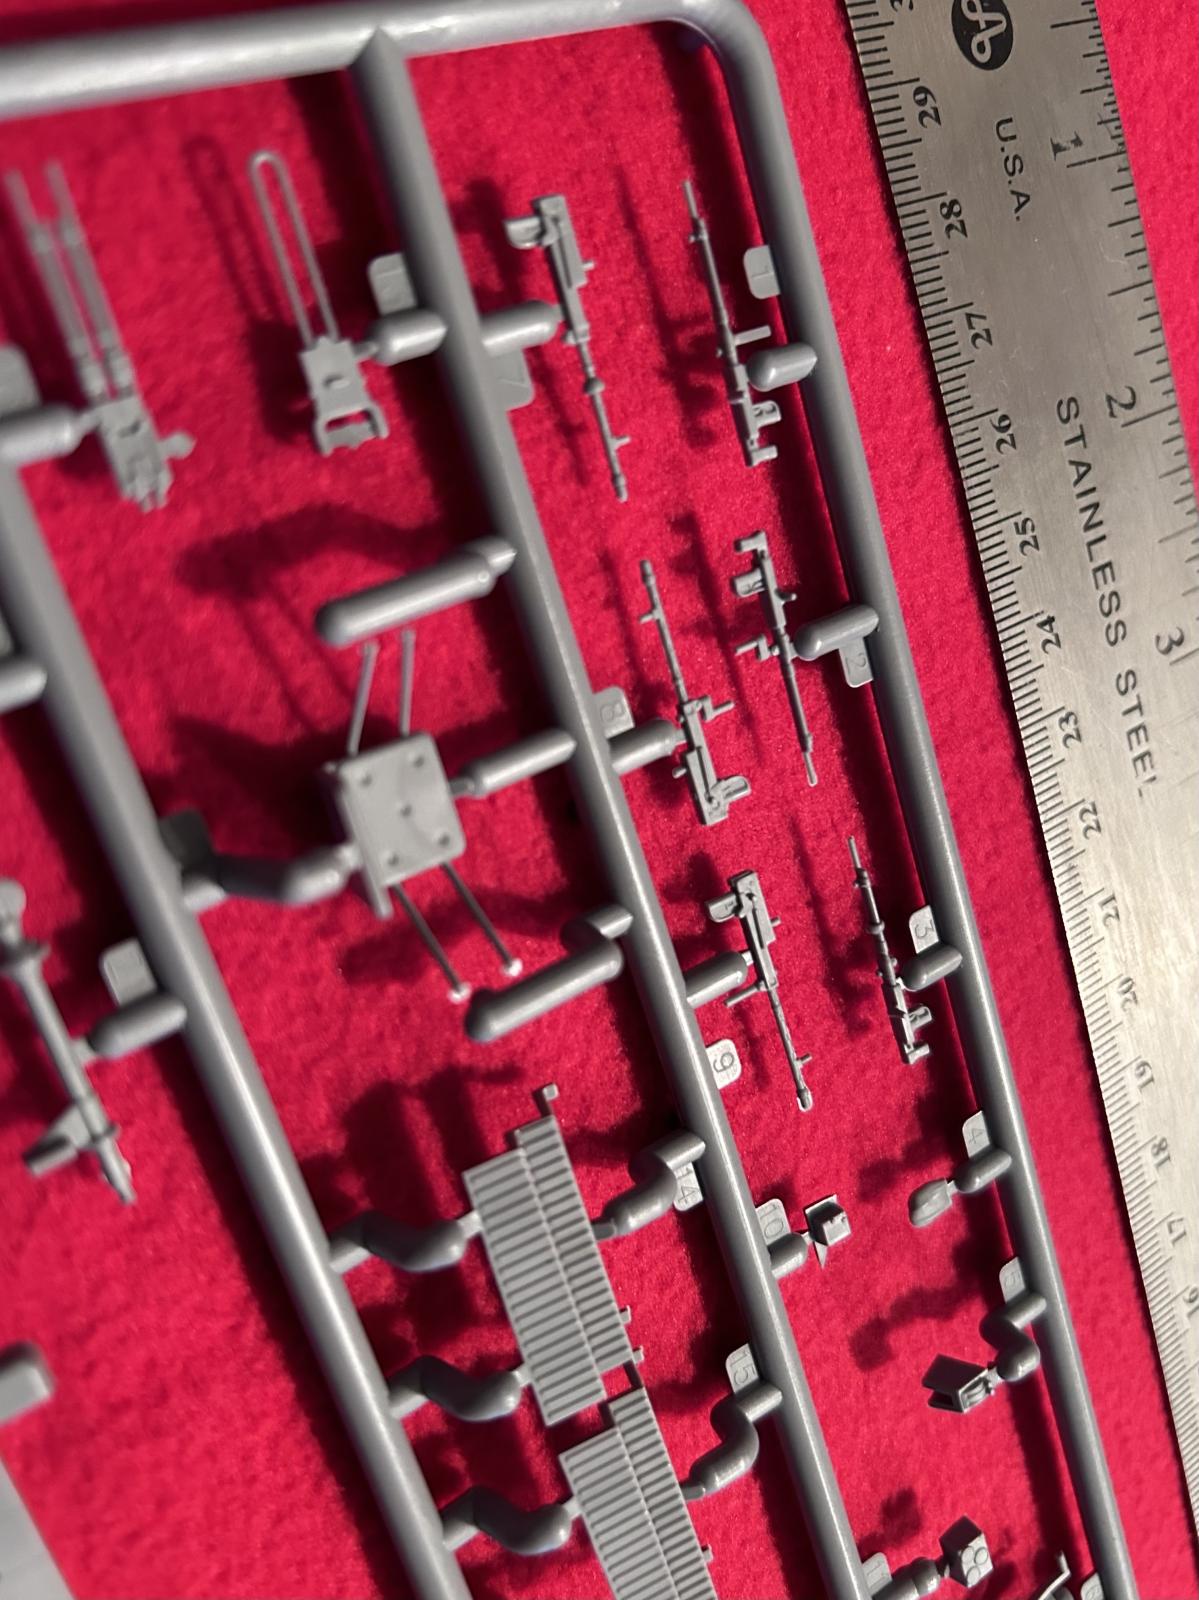
This shows a close up of the amazing details included on the MG's. These will look outstanding once painted and installed.
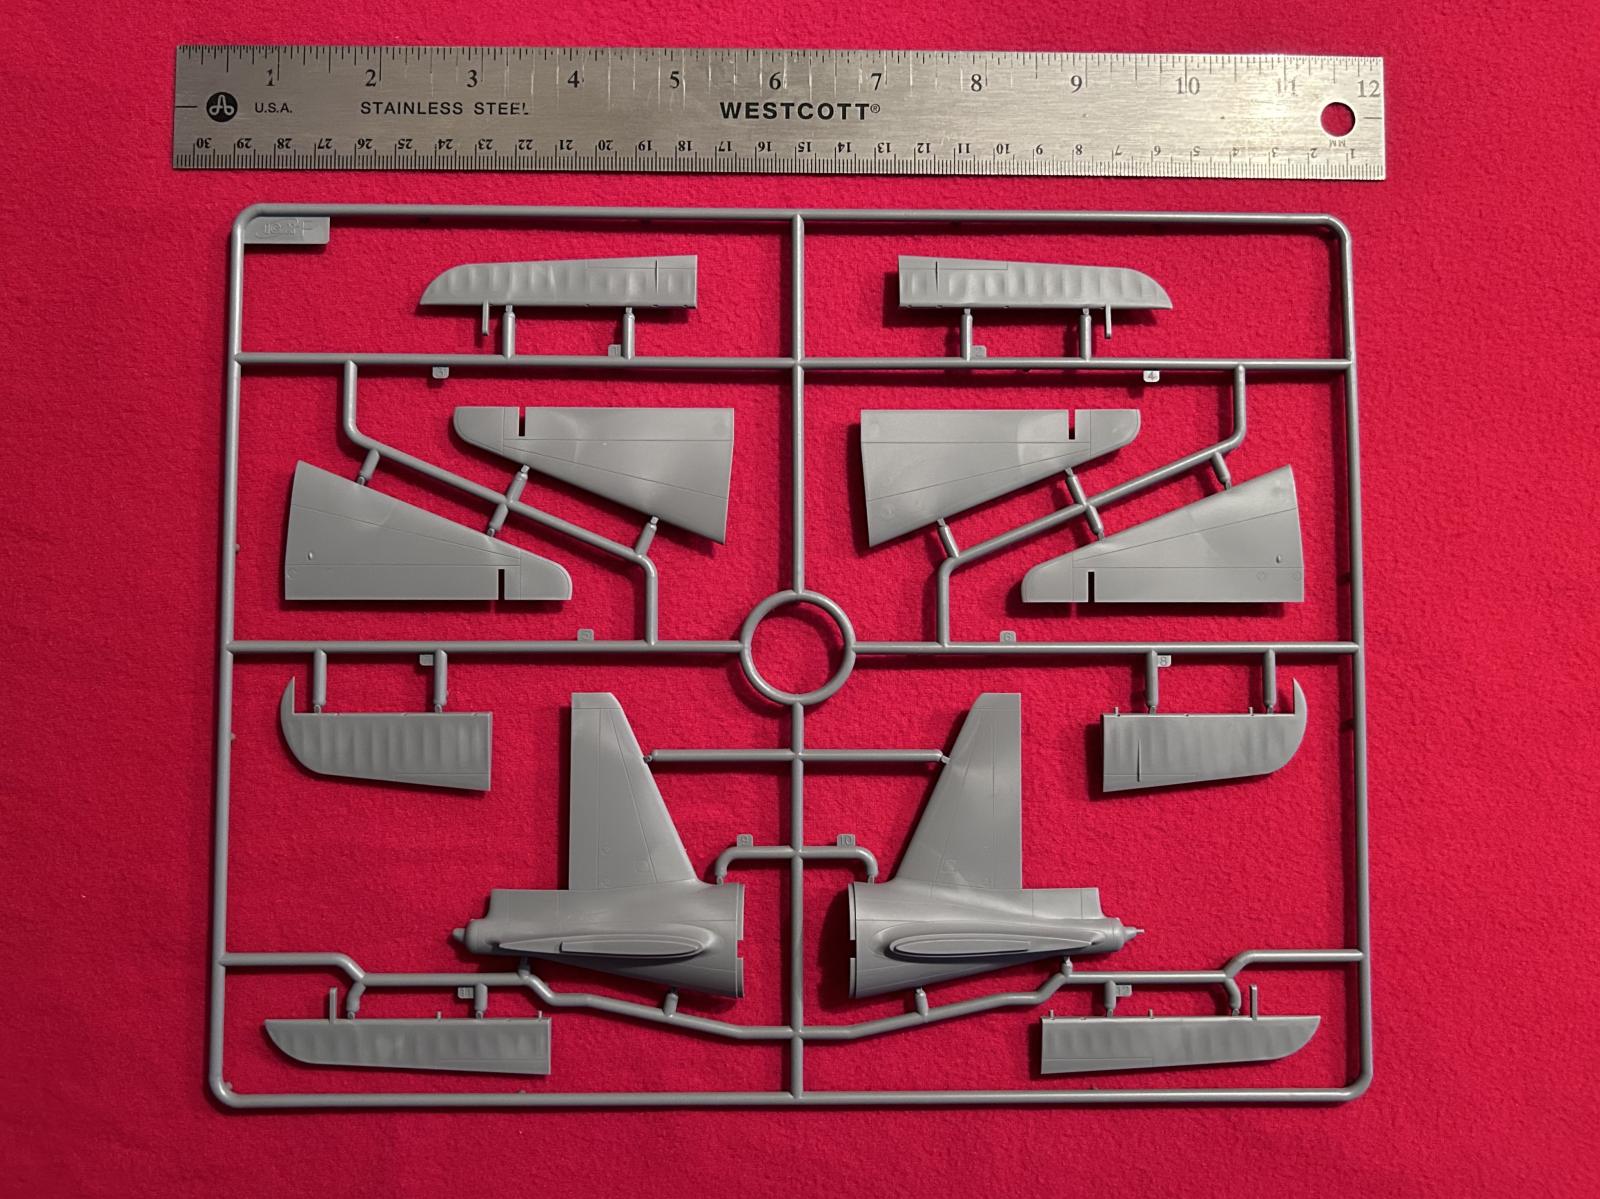
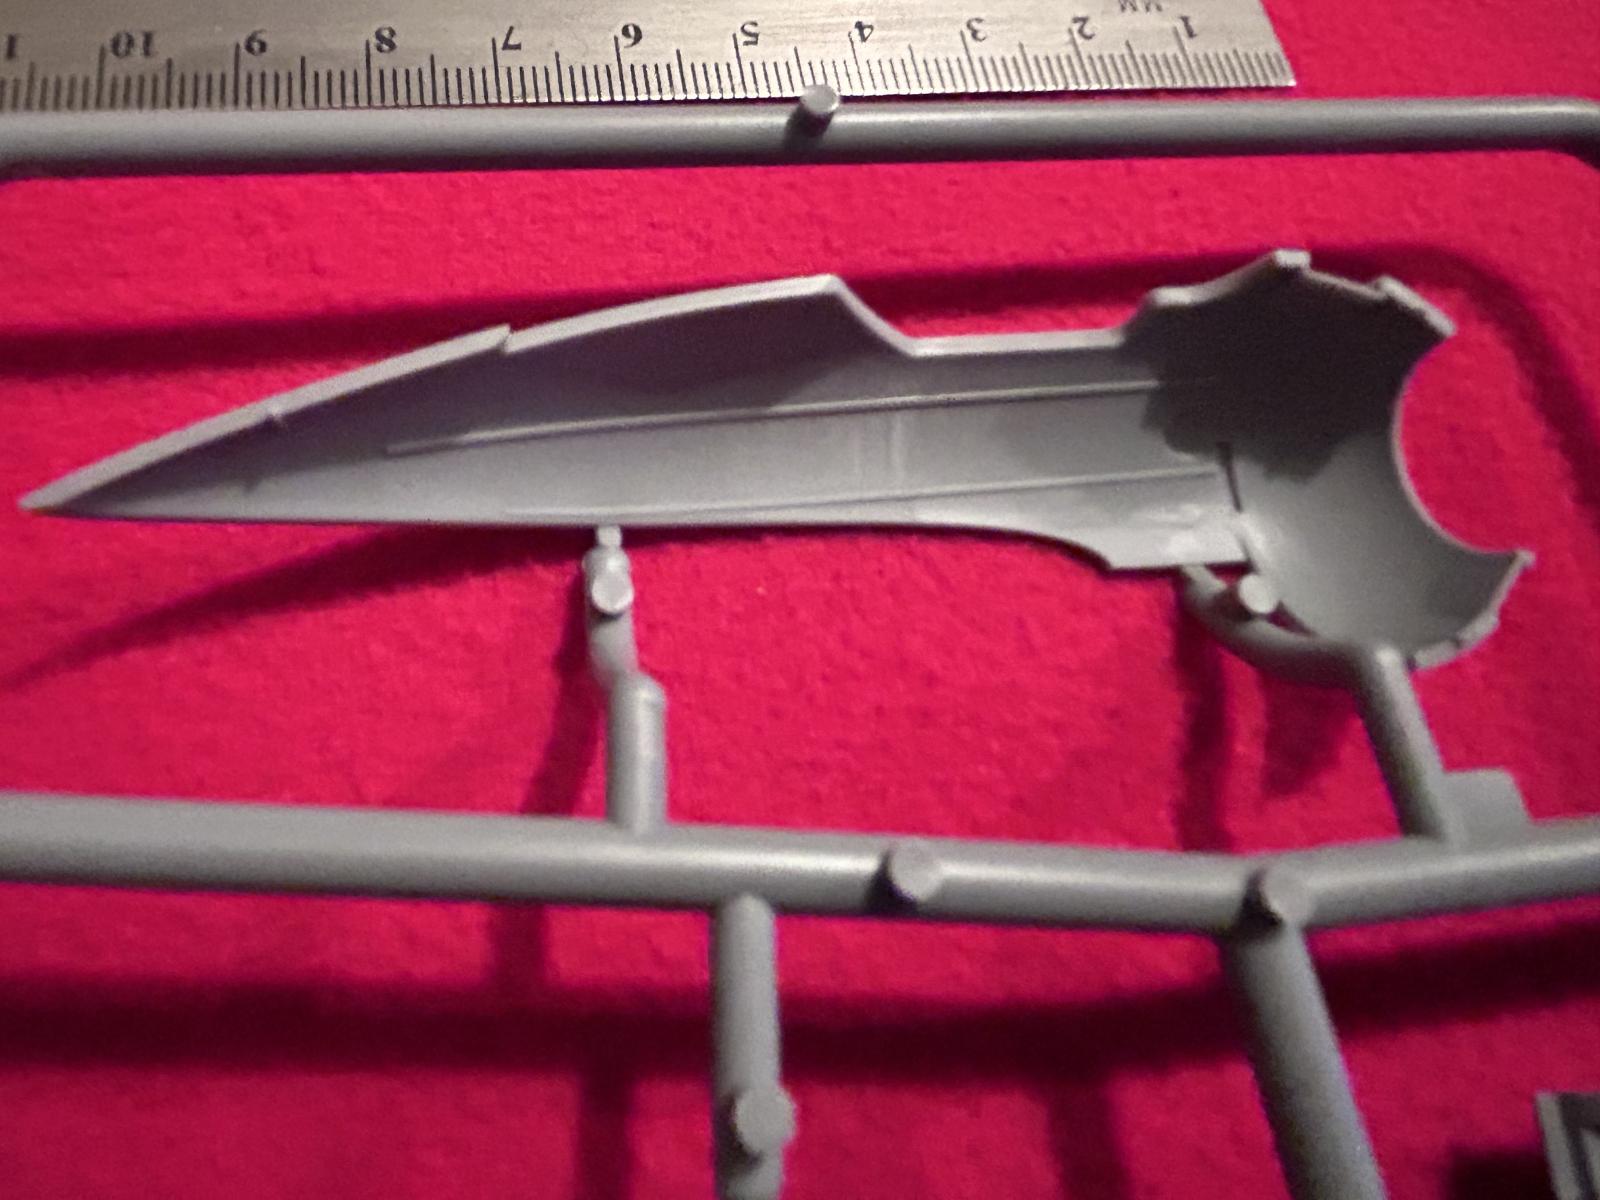
This is the parts tree that contains the separate vertical tail section as the biggest items.
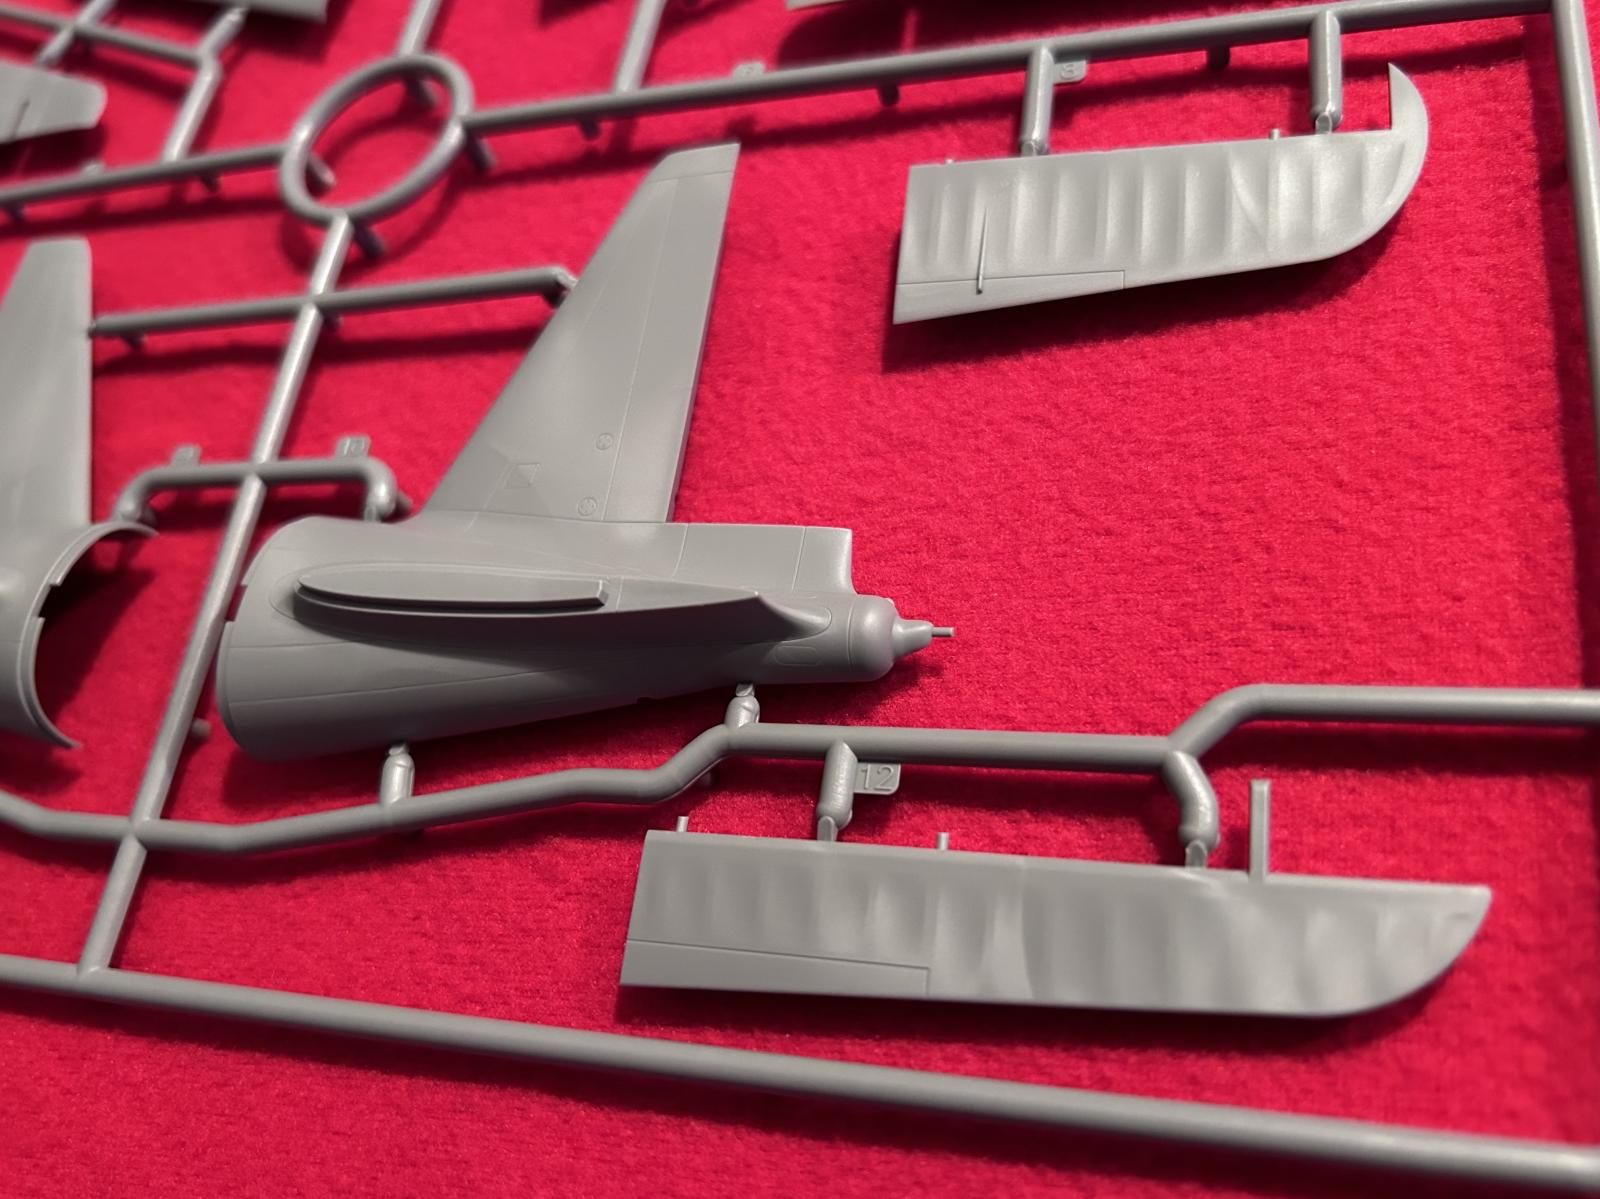
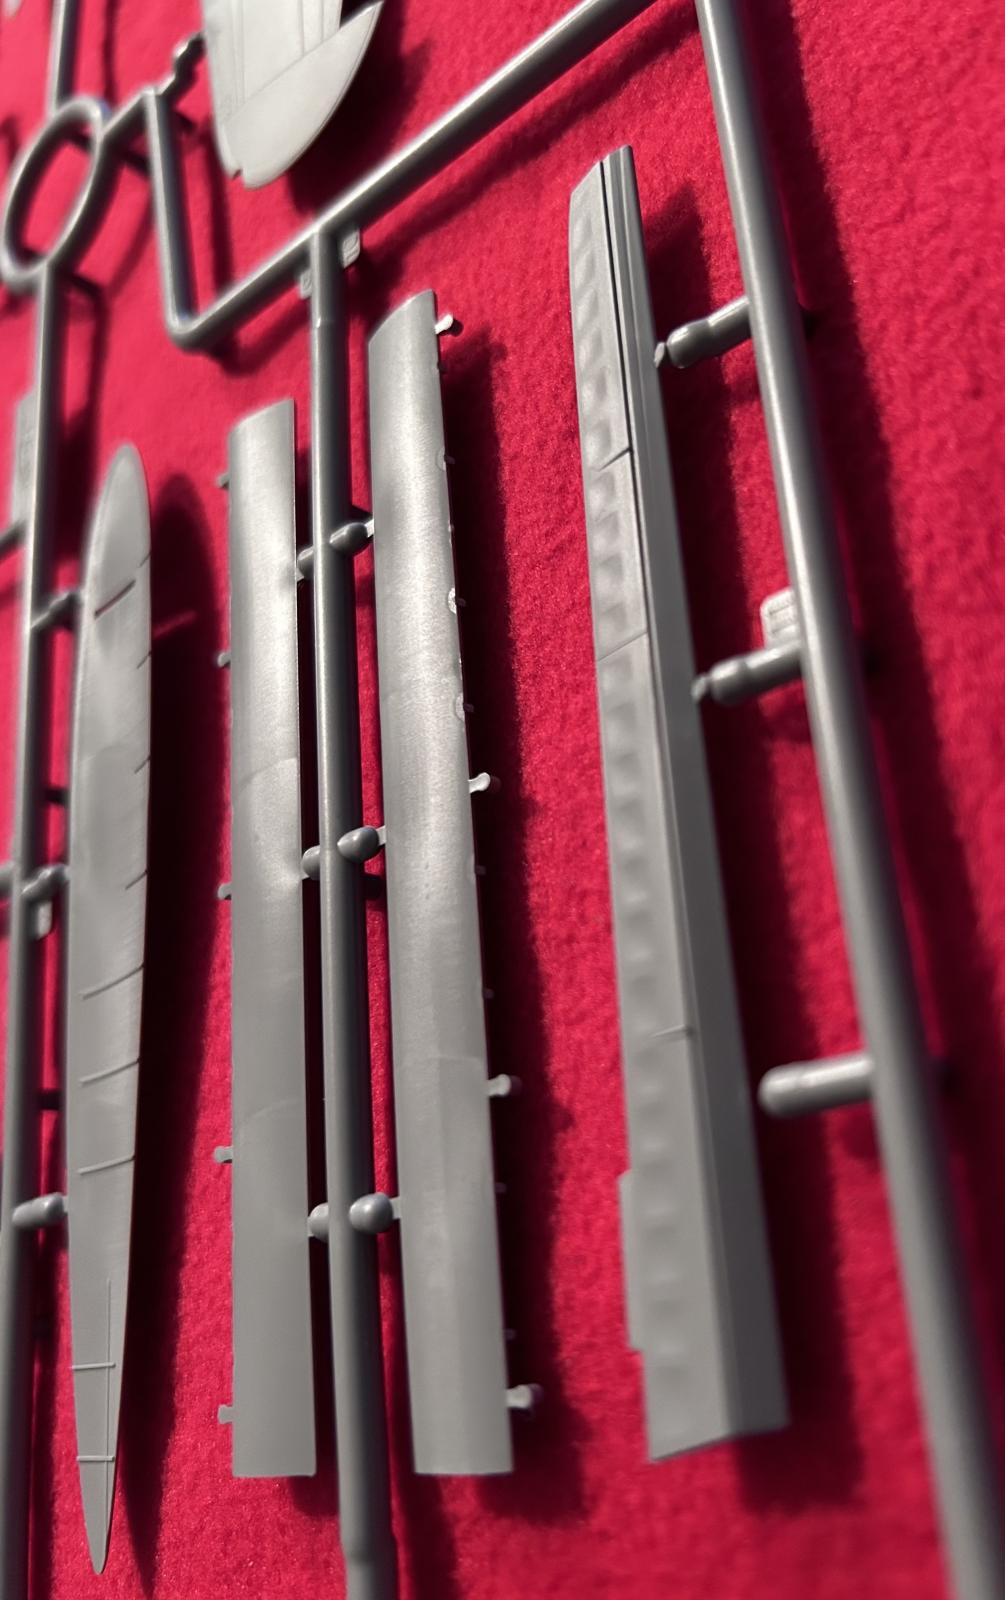
Here you can see the fabric covered elevators and rudder.
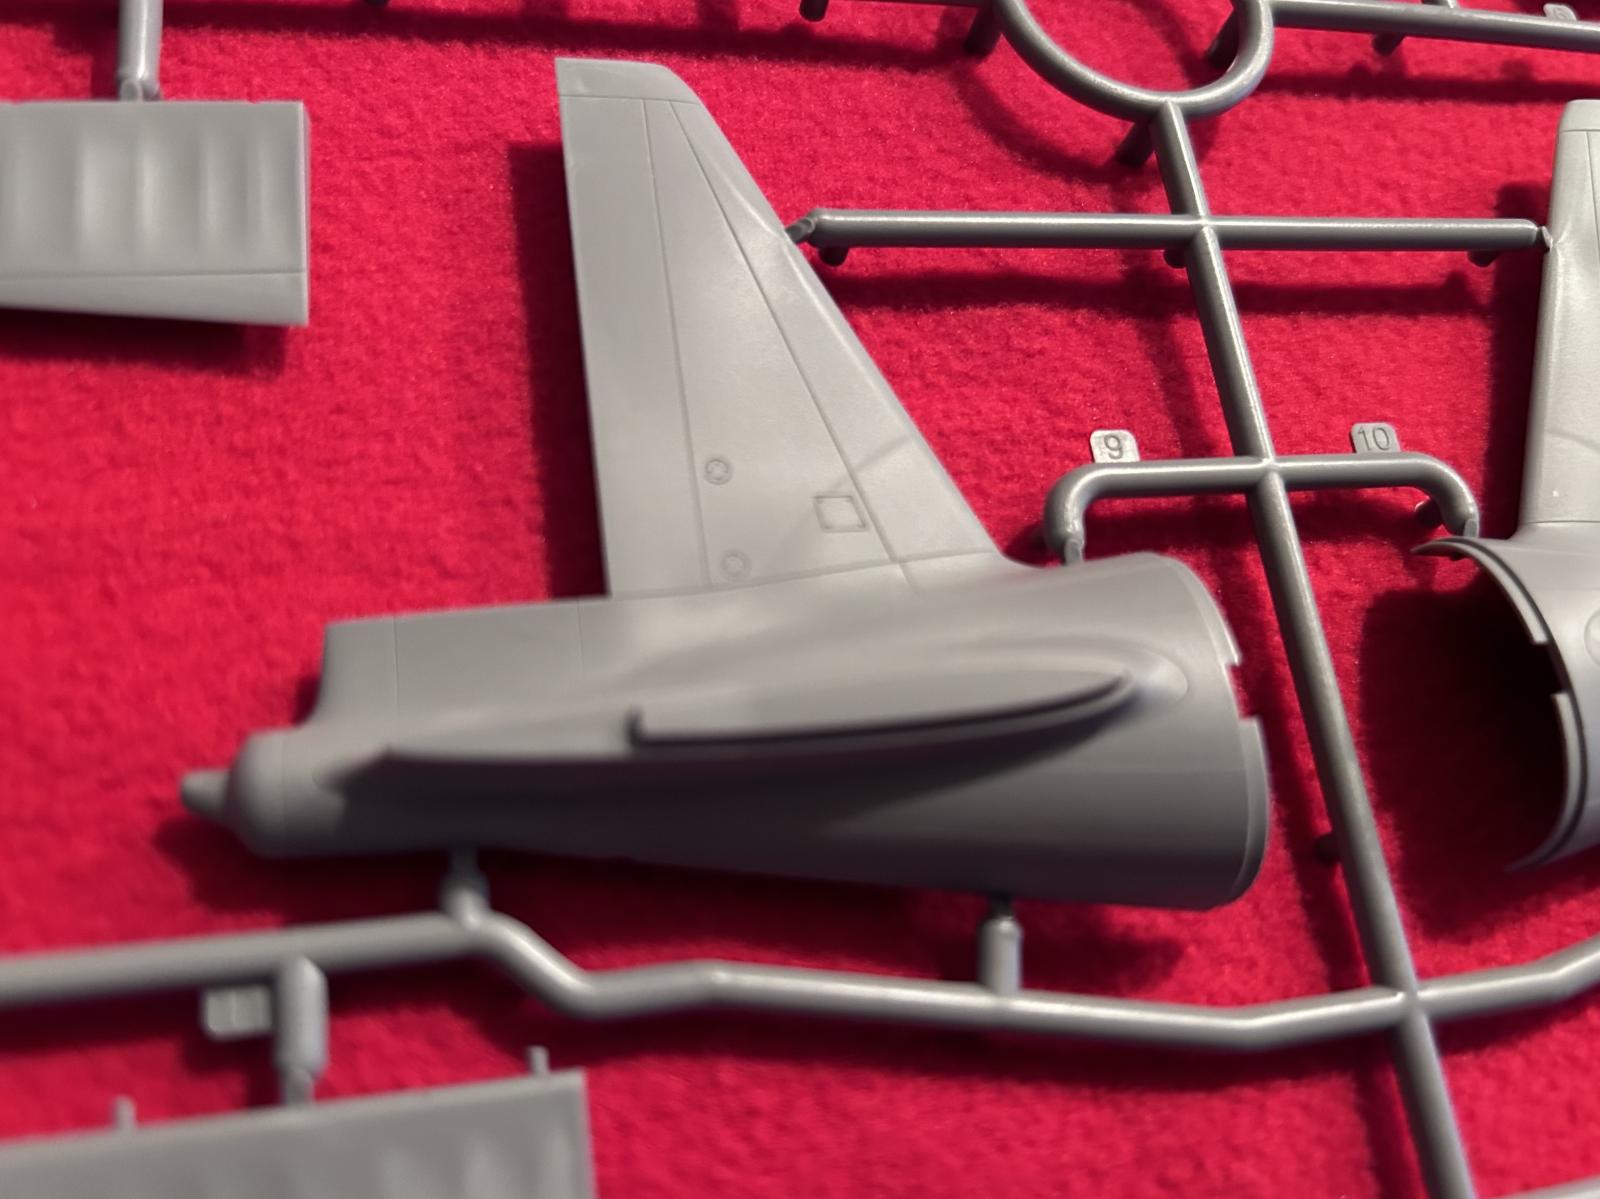
This is a close-up of the vertical fin assembly. The molded in panel lines look really nice to me. I didn't do any comparison with line drawings or the like. I'm not part of that crowd.
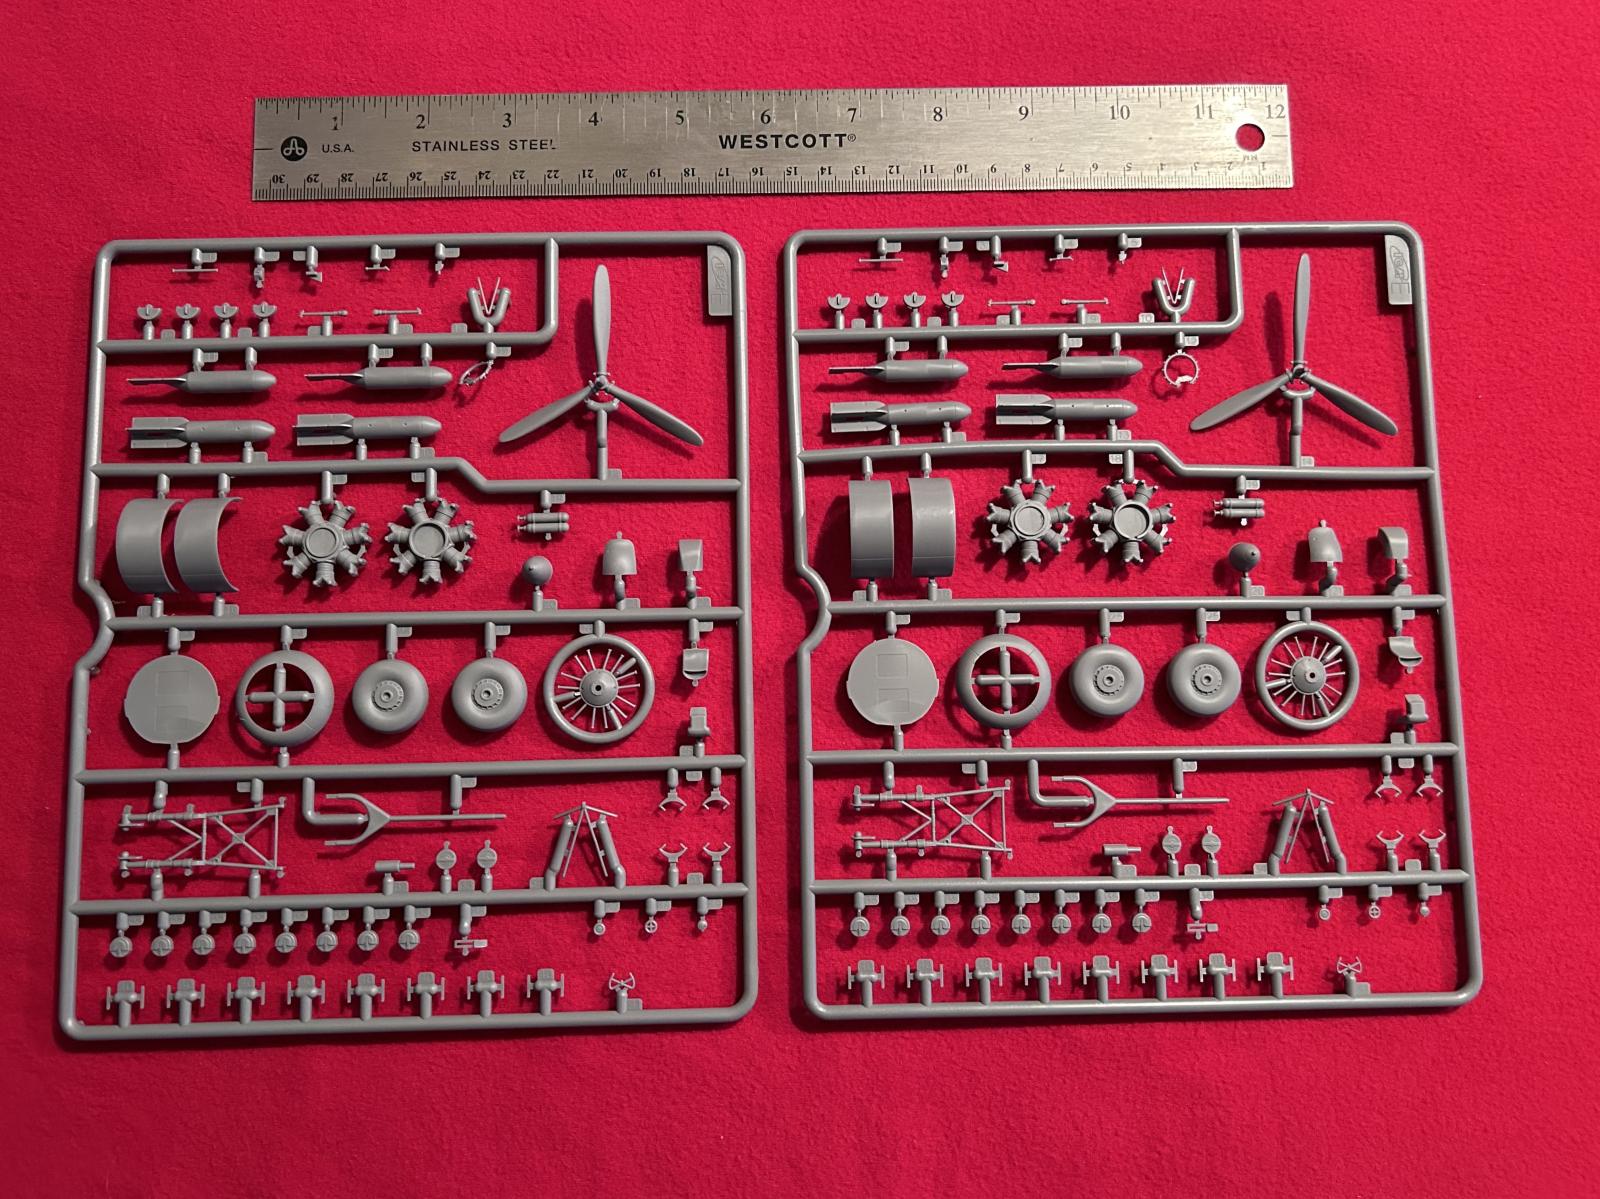
Next up is a pair of these trees. They contain the engines, propellers, cowlings and landing gear parts. They were smart here and made stuff for one side... then doubled it, so you're not seeing double and your eyes are fine. 😉
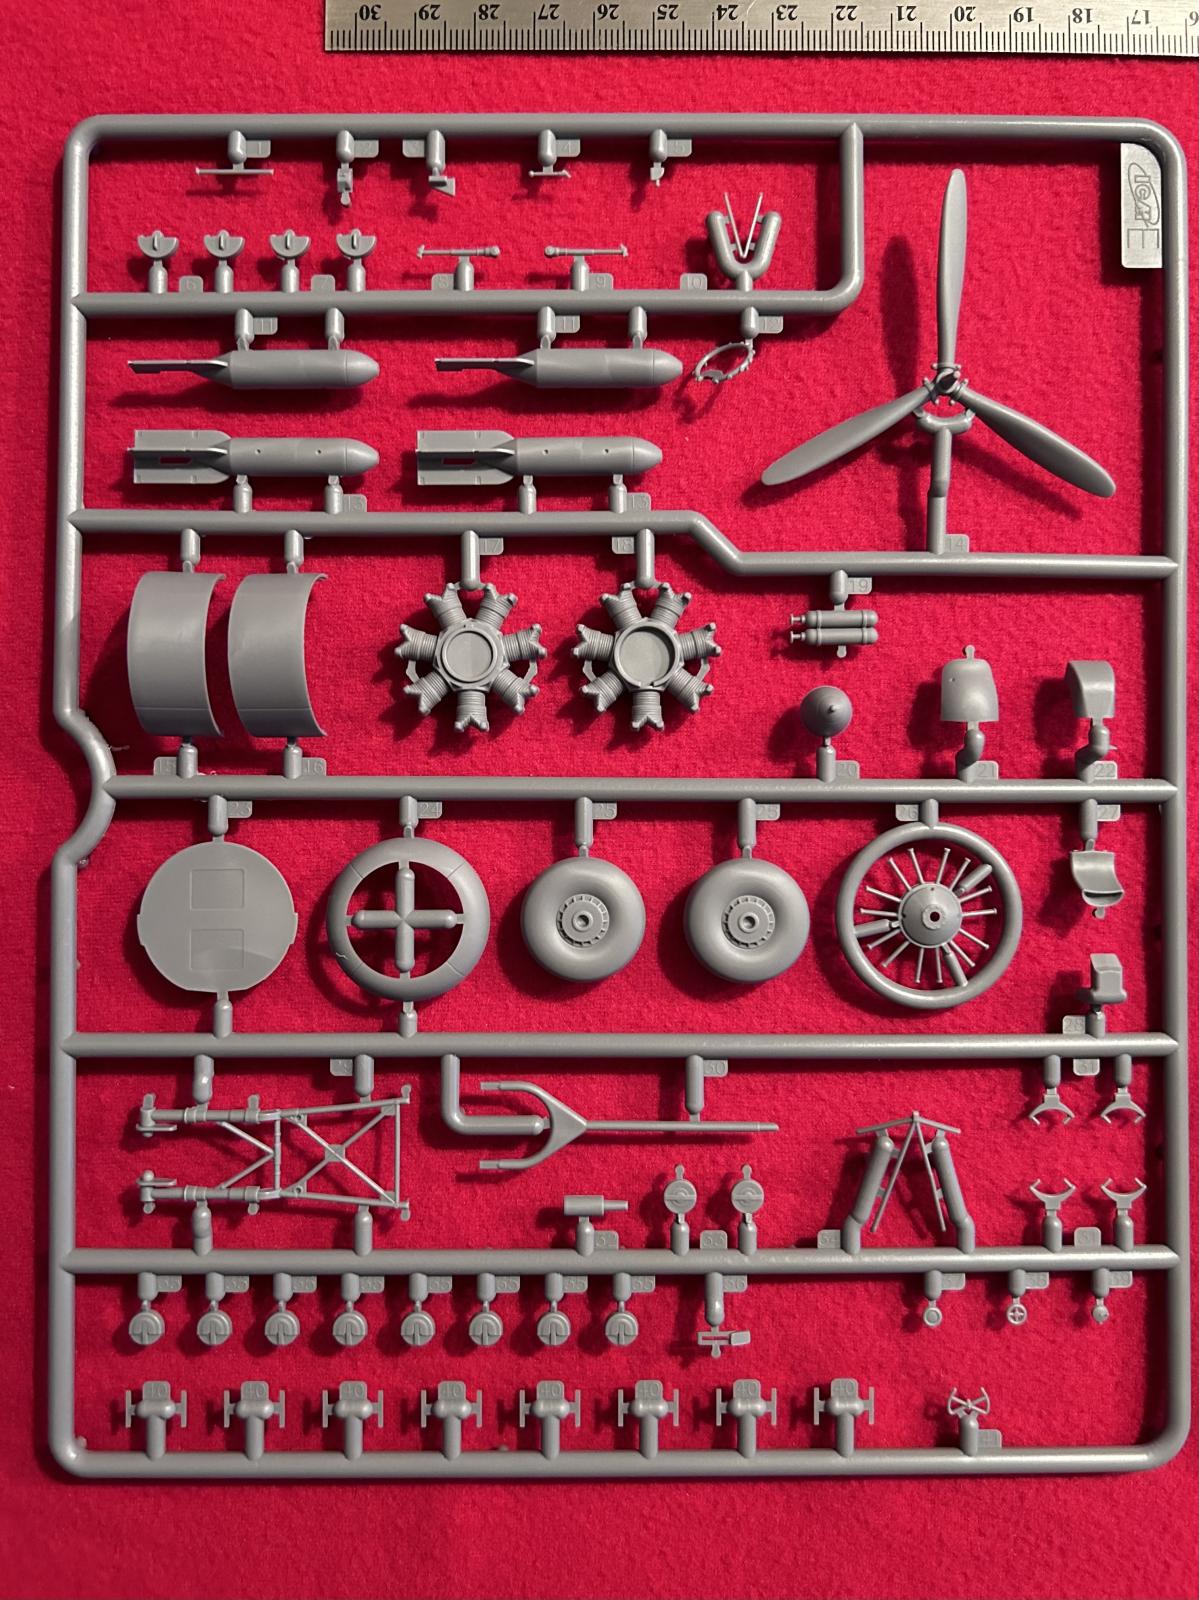
This is a view showing one of these plastic trees.
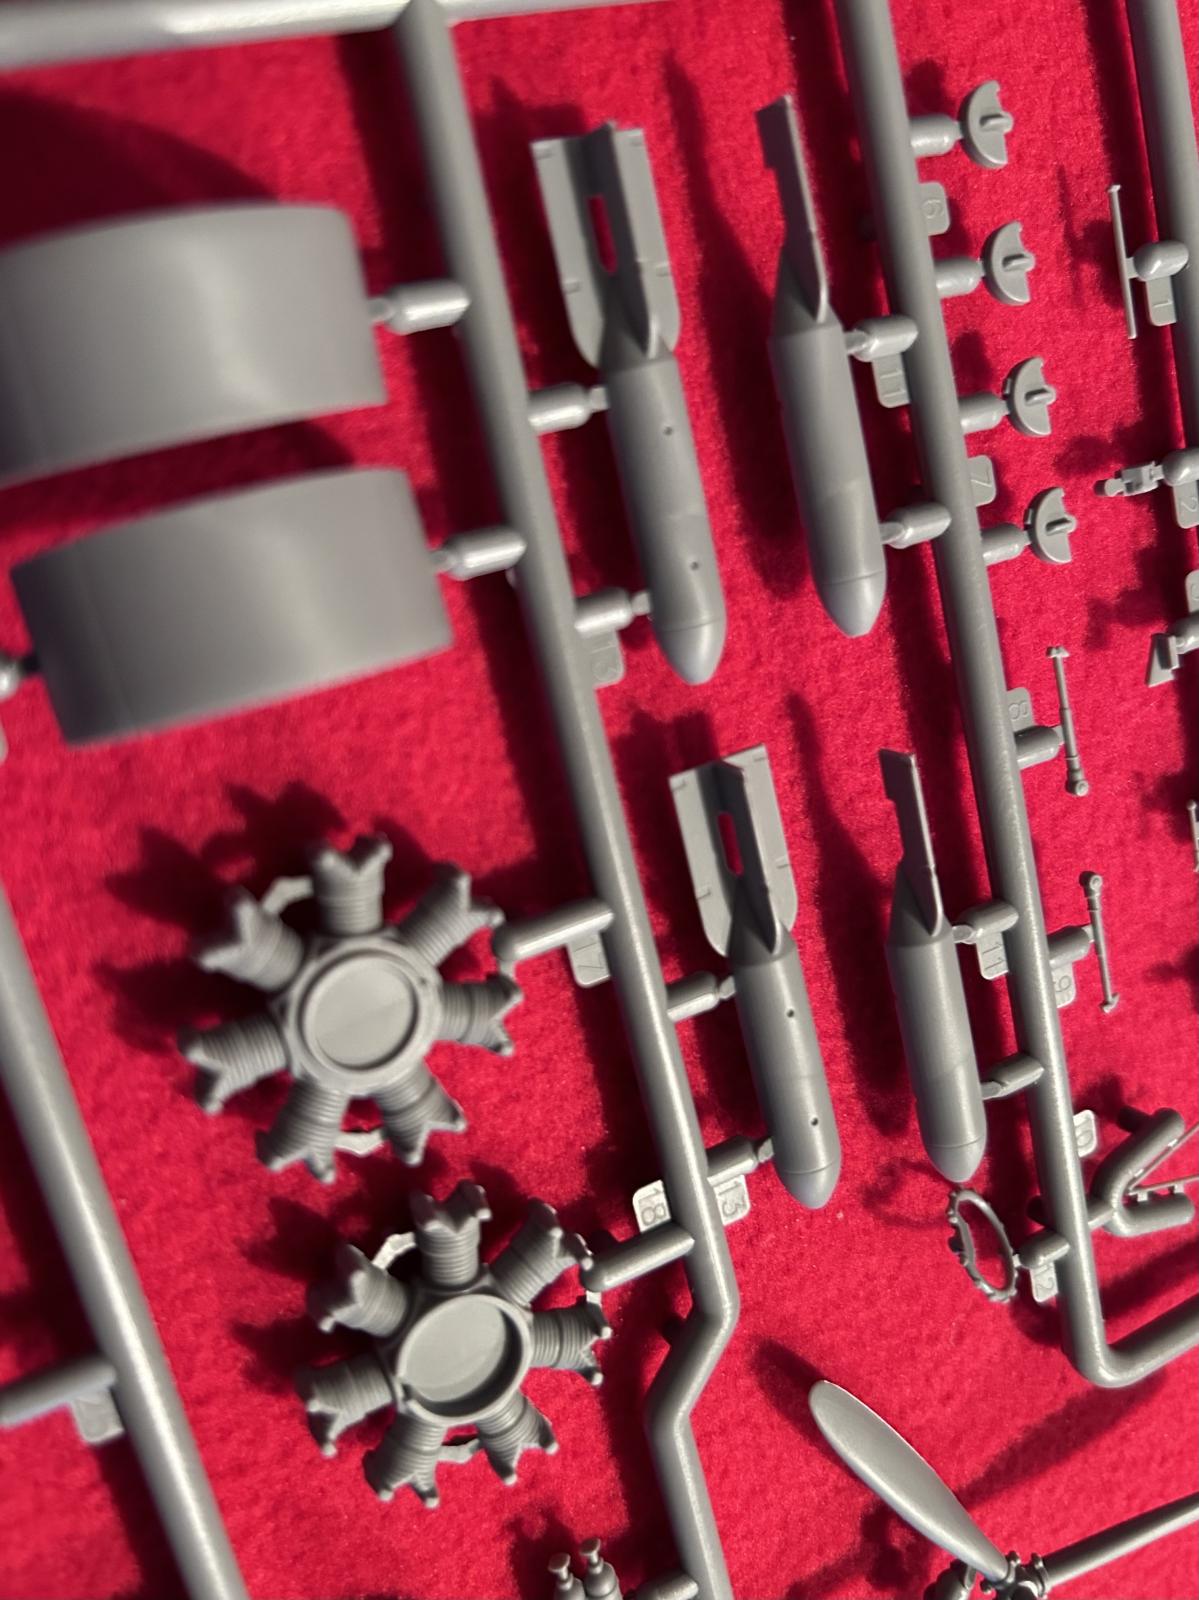
Here I zoomed in on the engines. You can also see some of the bombs, of which a total of four are included.

This is a close up of the "snail drums" that the Japanese MG's were fed from. Going from memory, these held 100 rounds and had to be changed out frequently in the heat of battle. I used to have a T-shirt that said "Happiness is a belt fed weapon". I think these Japanese gunners could agree ! Thankfully for the Allies, these were not belt fed like was typically found on Allied bombers.
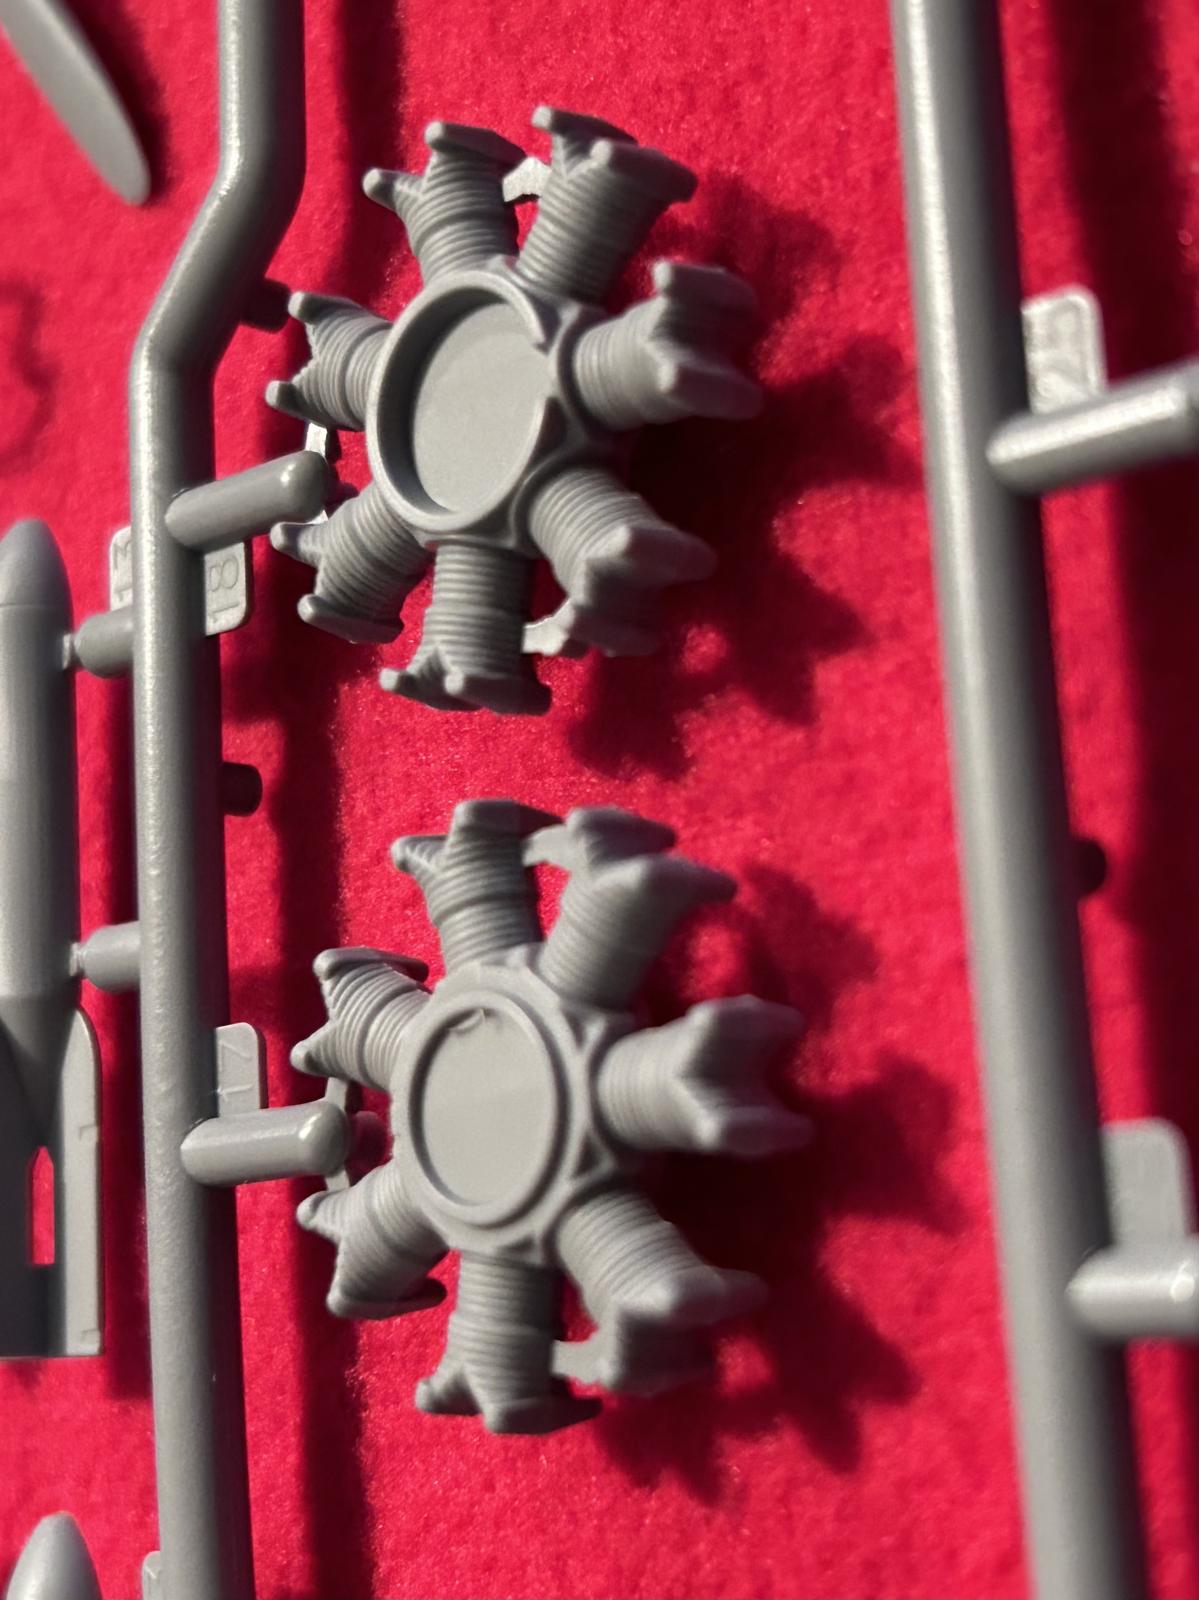
The molding quality of the engines is exquisite. I am very impressed with this kit.
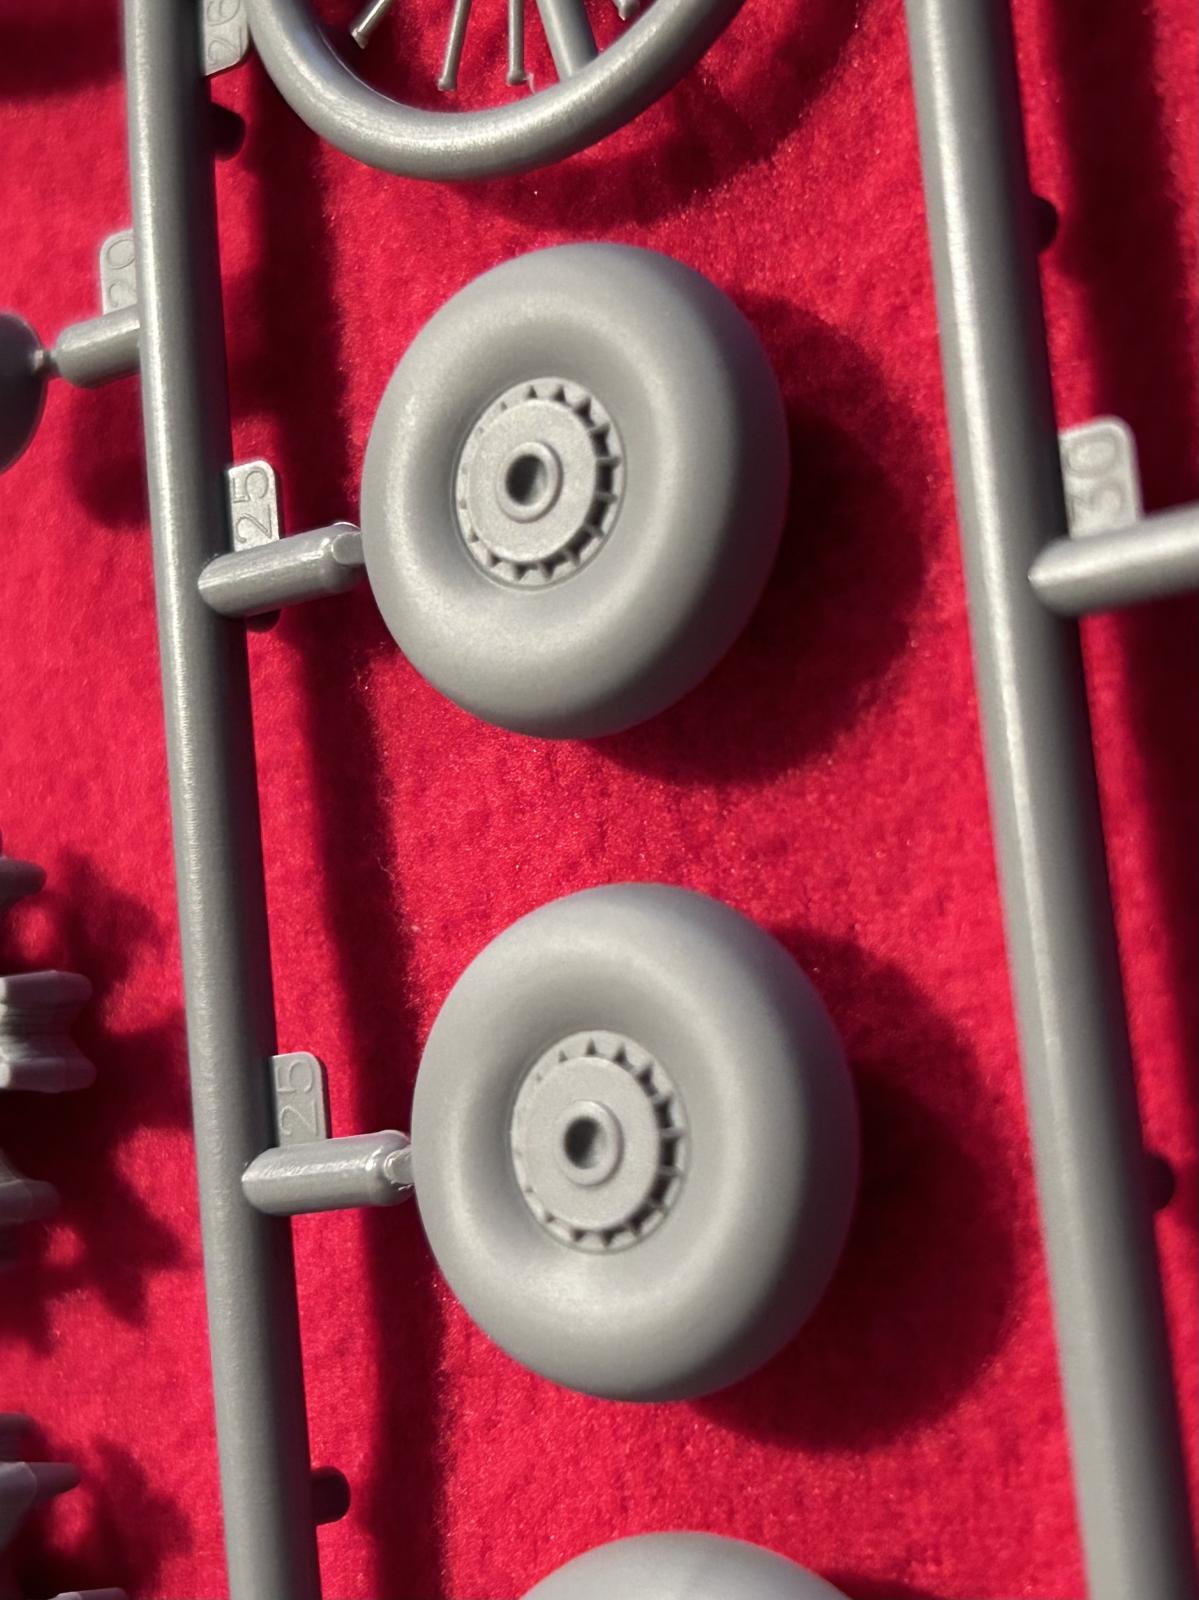
The tires are simple. Plain tread with no design pattern to worry about. The wheel hubs look good.
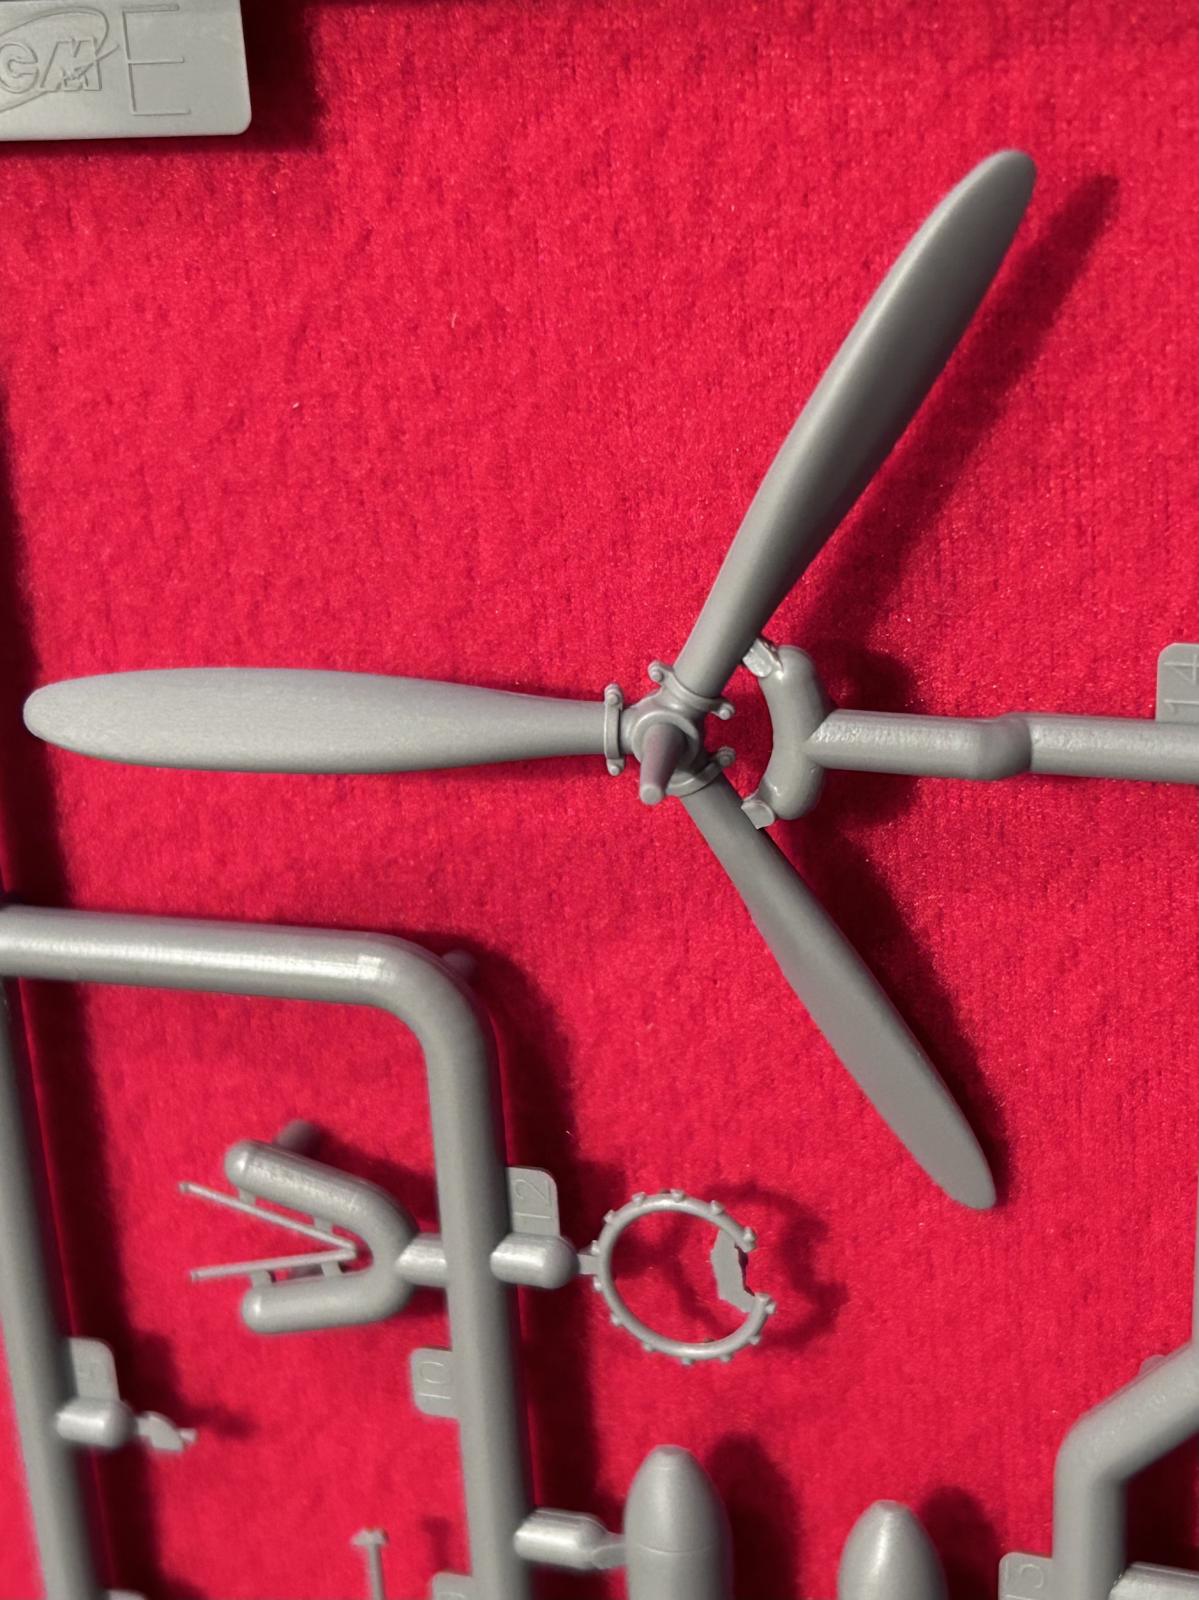
The propellers are also nicely rendered.
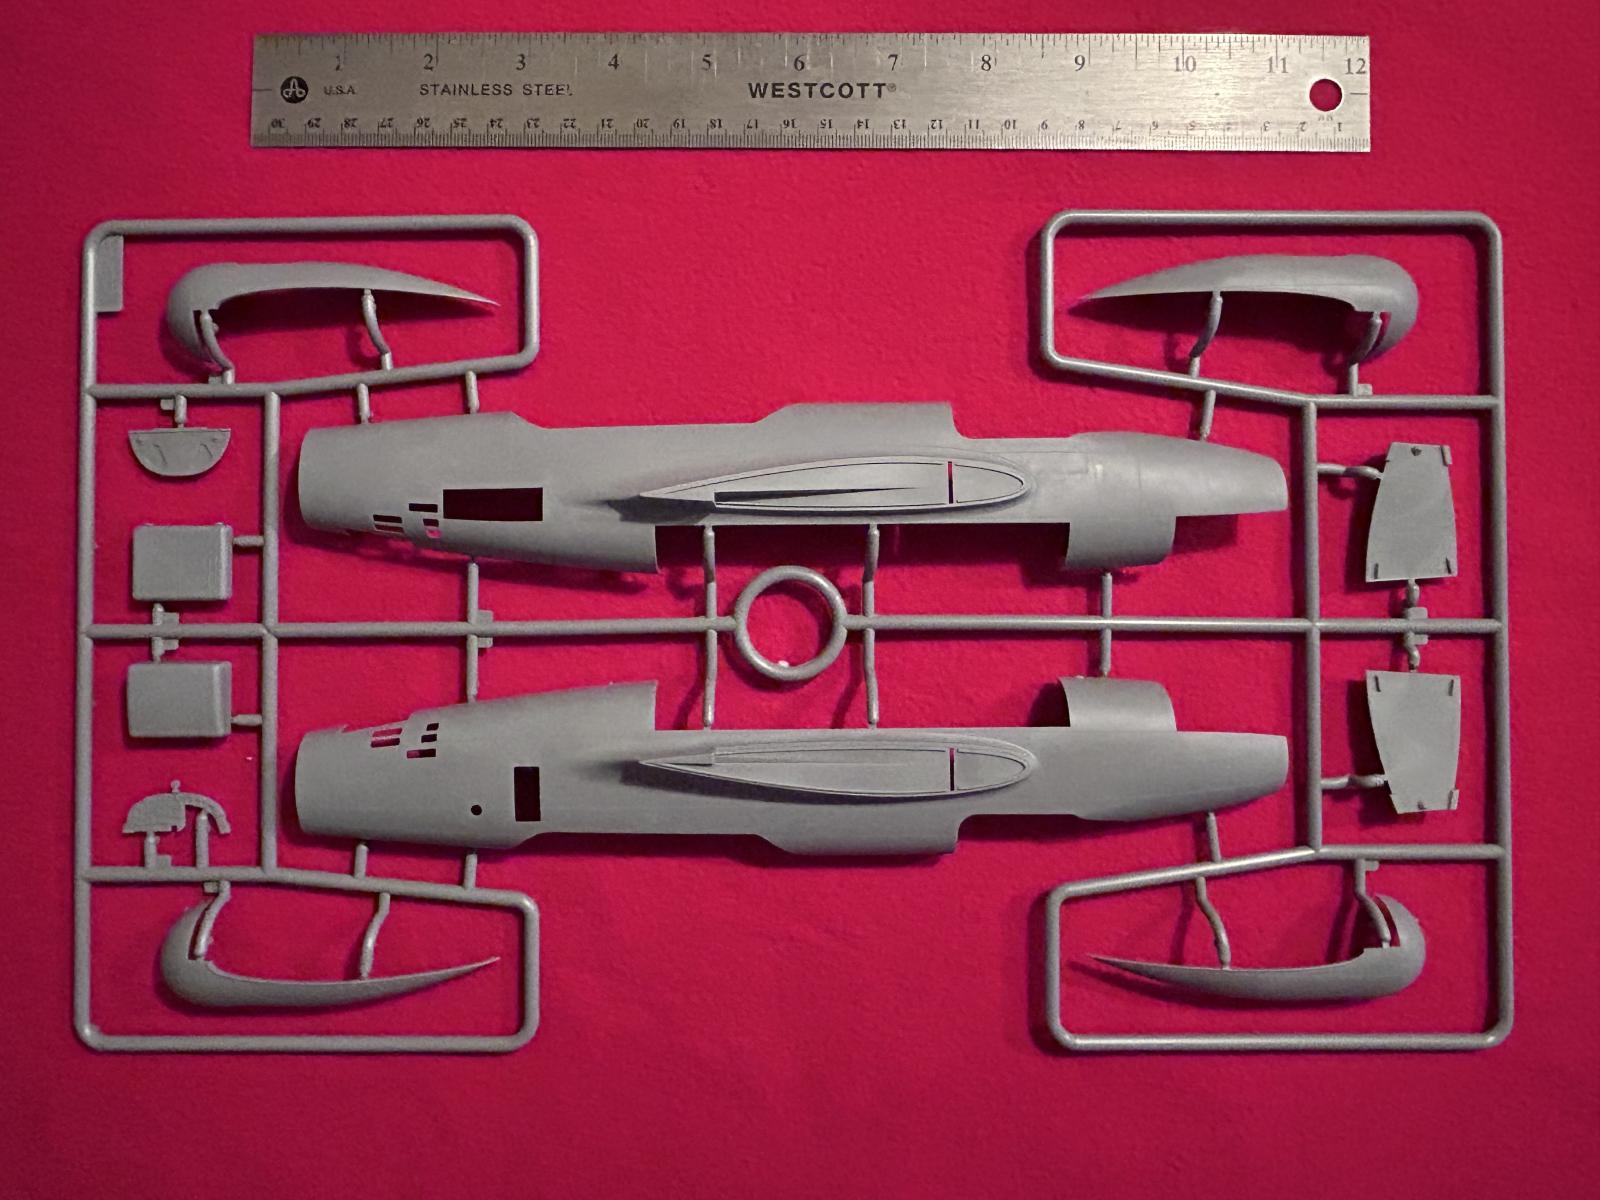
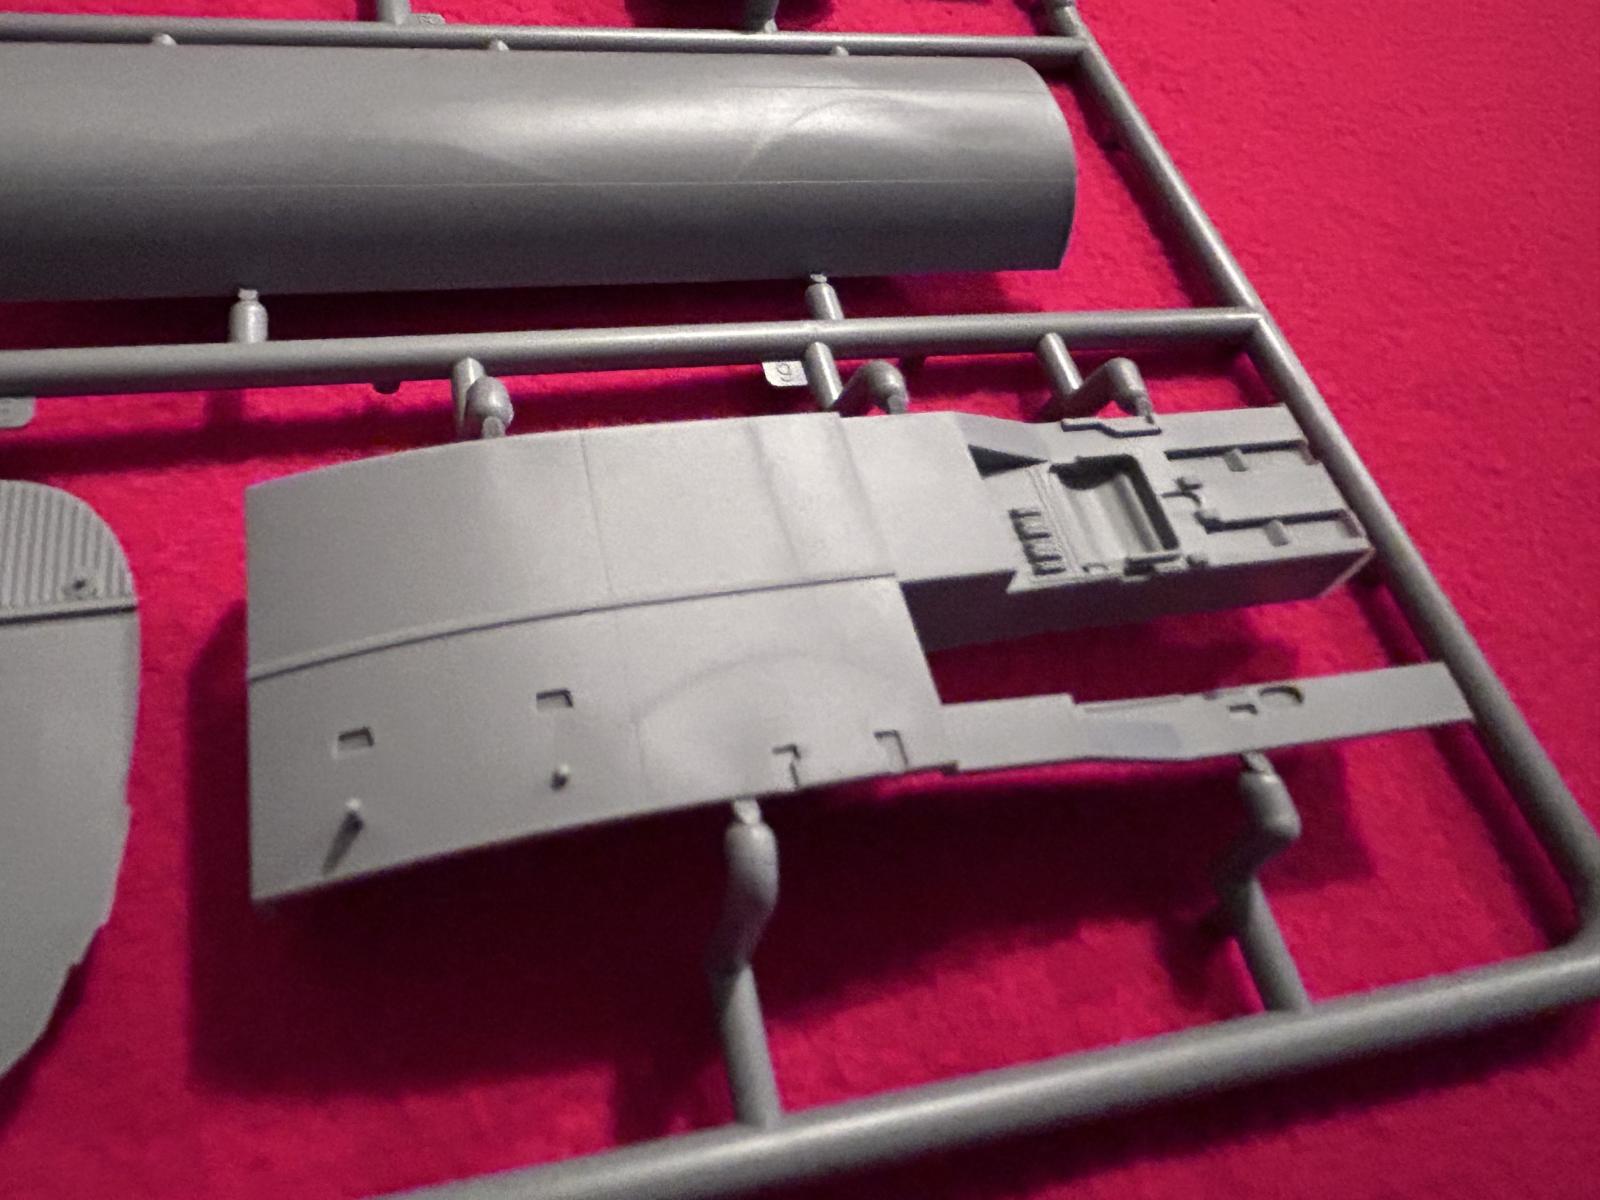
This is the main fuselage plastic parts tree. Again I have placed the 12 inch long steel ruler next to it for a size comparison. This parts tree also includes the engine nacelles.
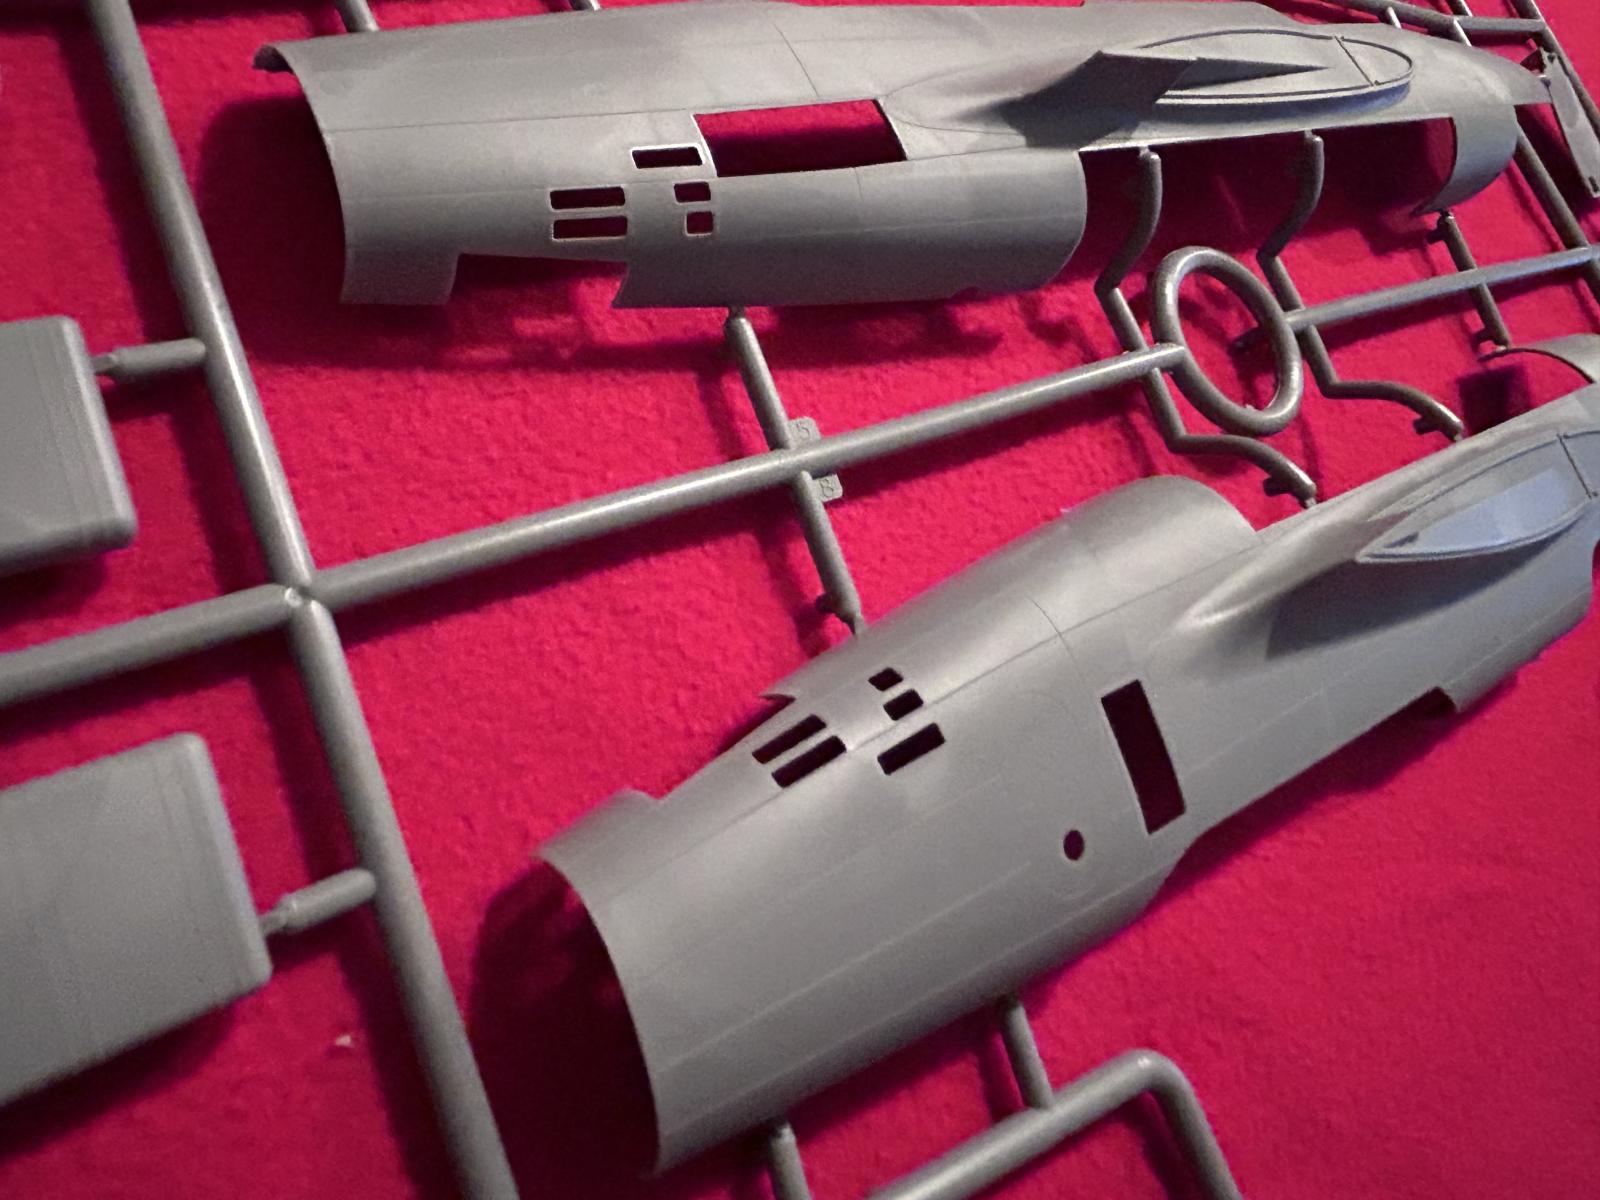
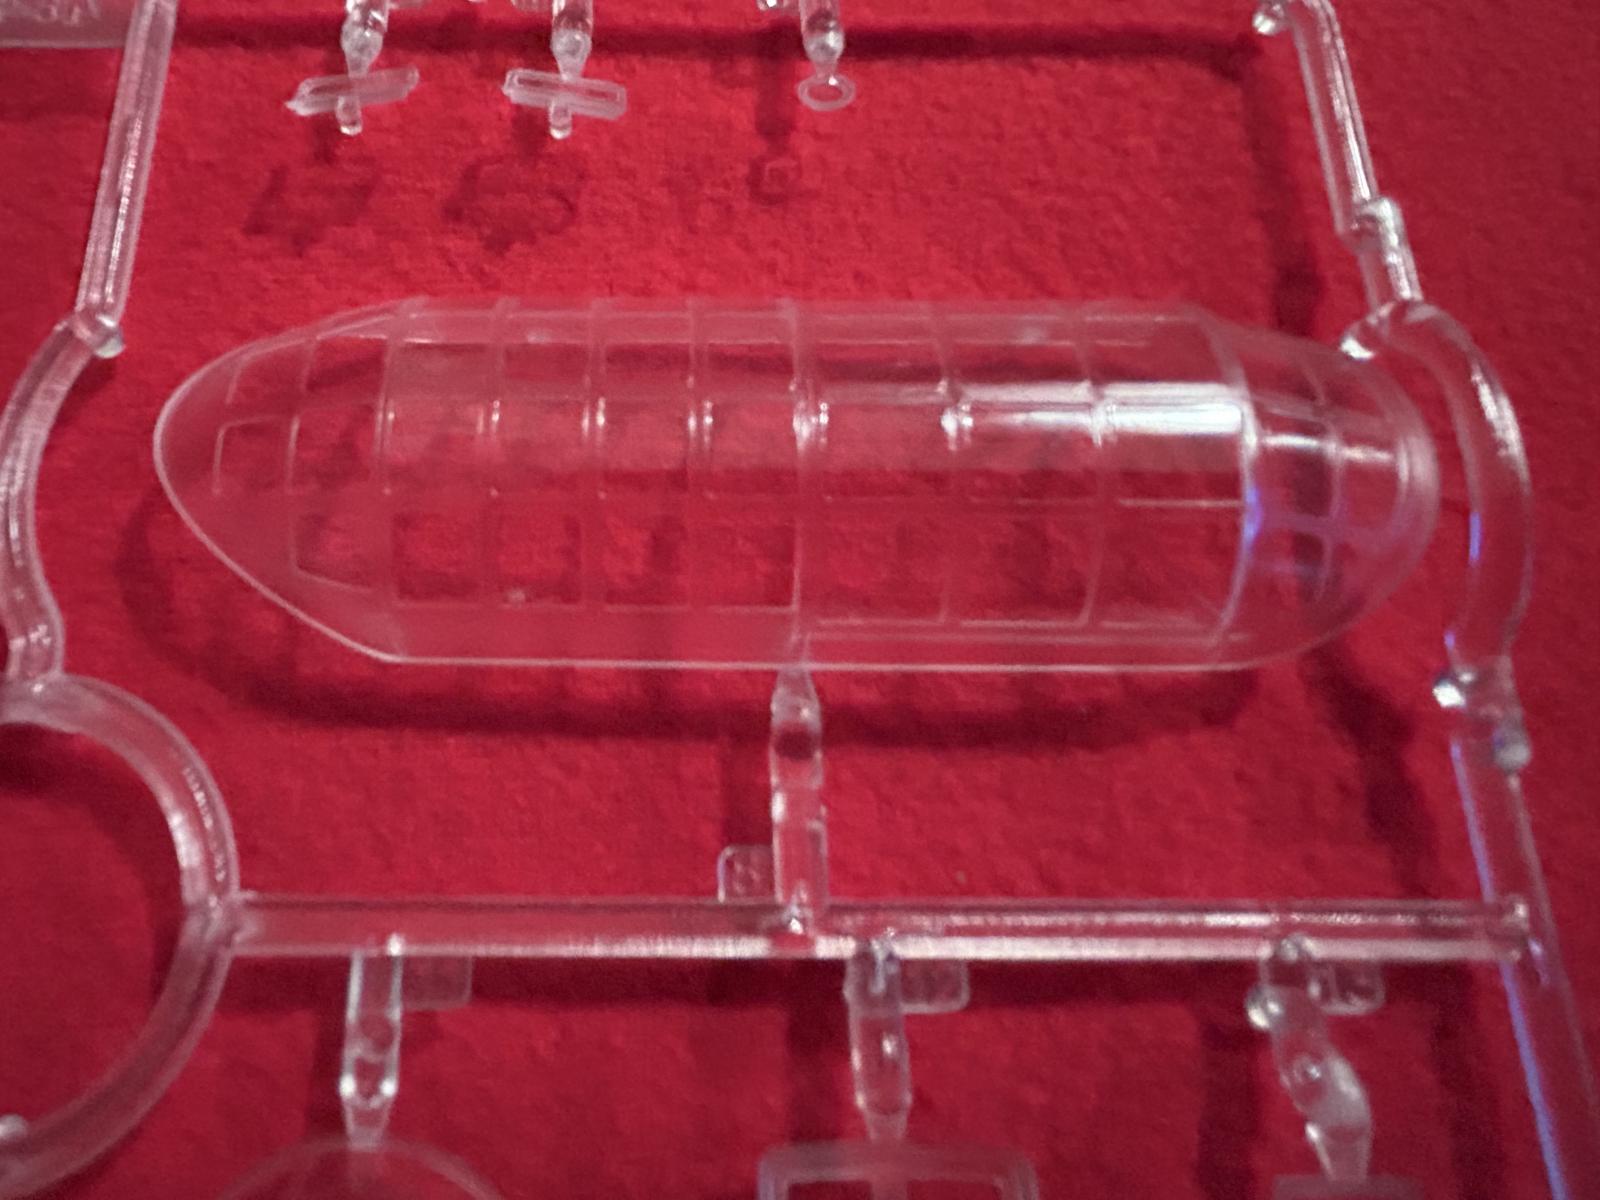
This is a close up of the tiny windows that were present on the rear fuselage. You can also see the quality of the molding here. This kit looks very nice in the box.
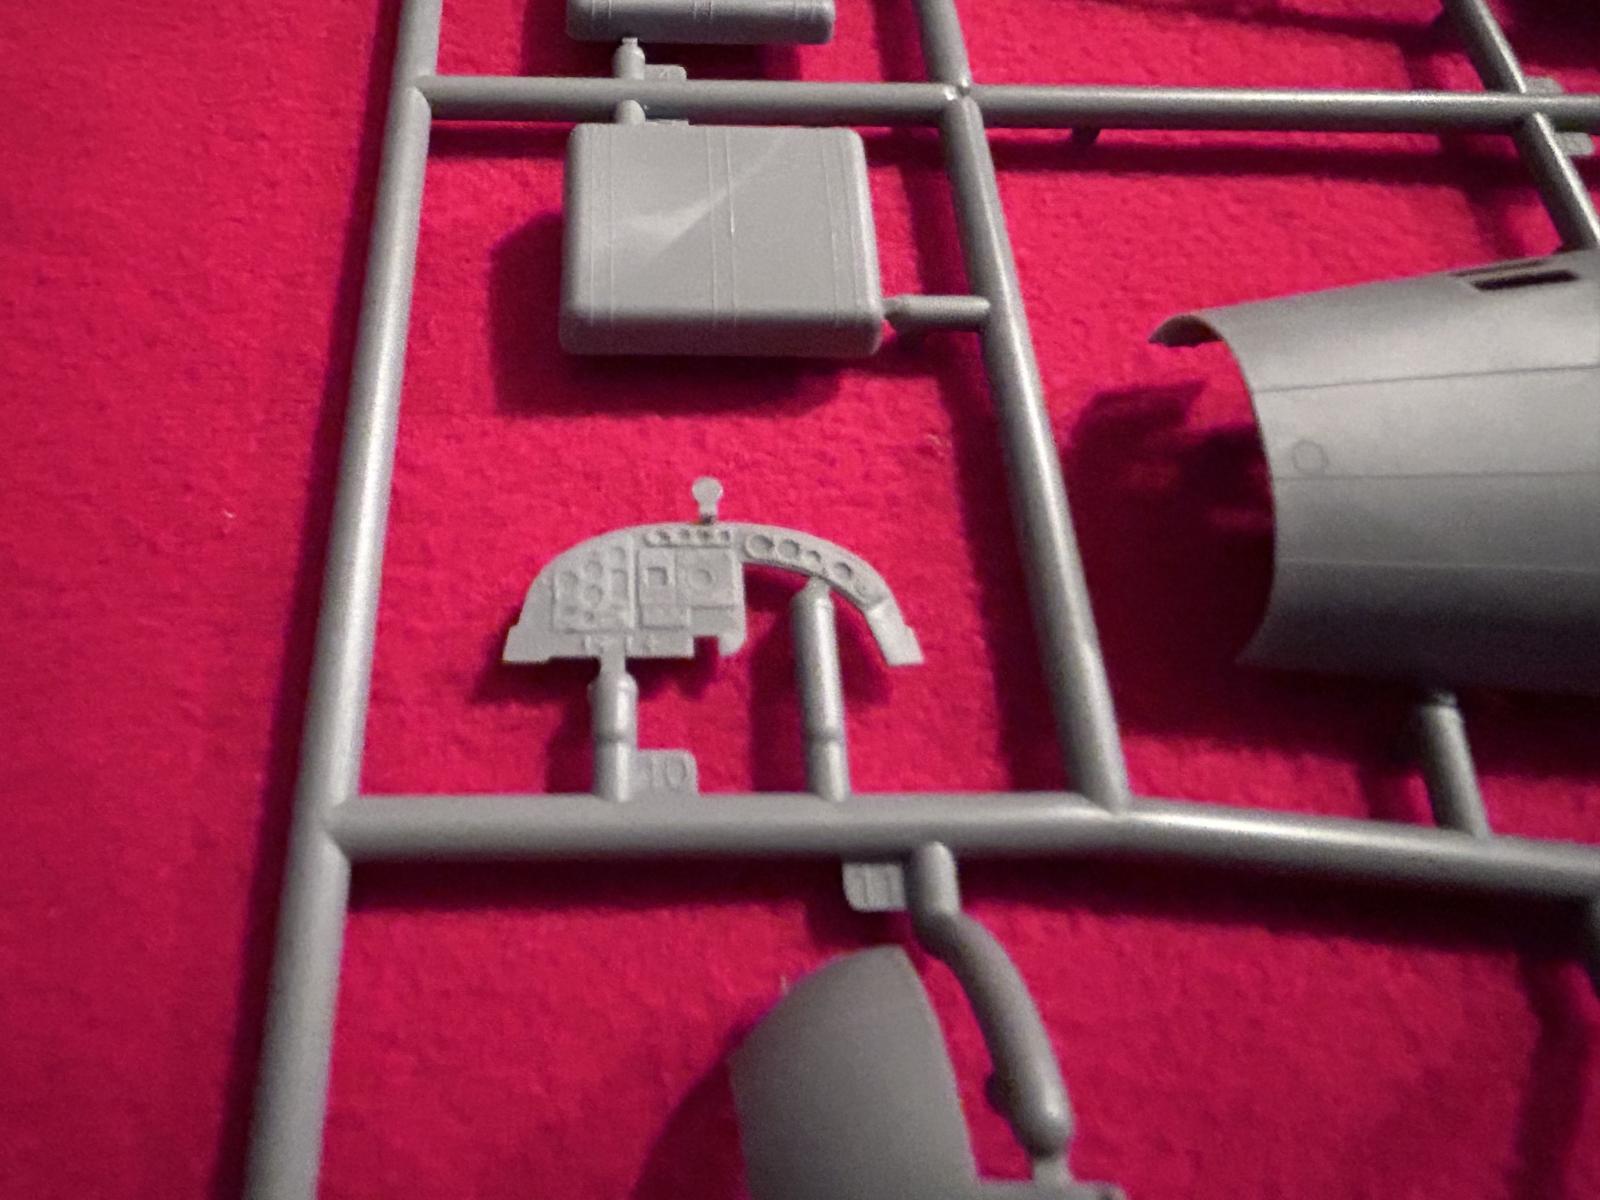
This is a close-up of the IP that I mentioned earlier when talking about the decals. You can see the raised details.
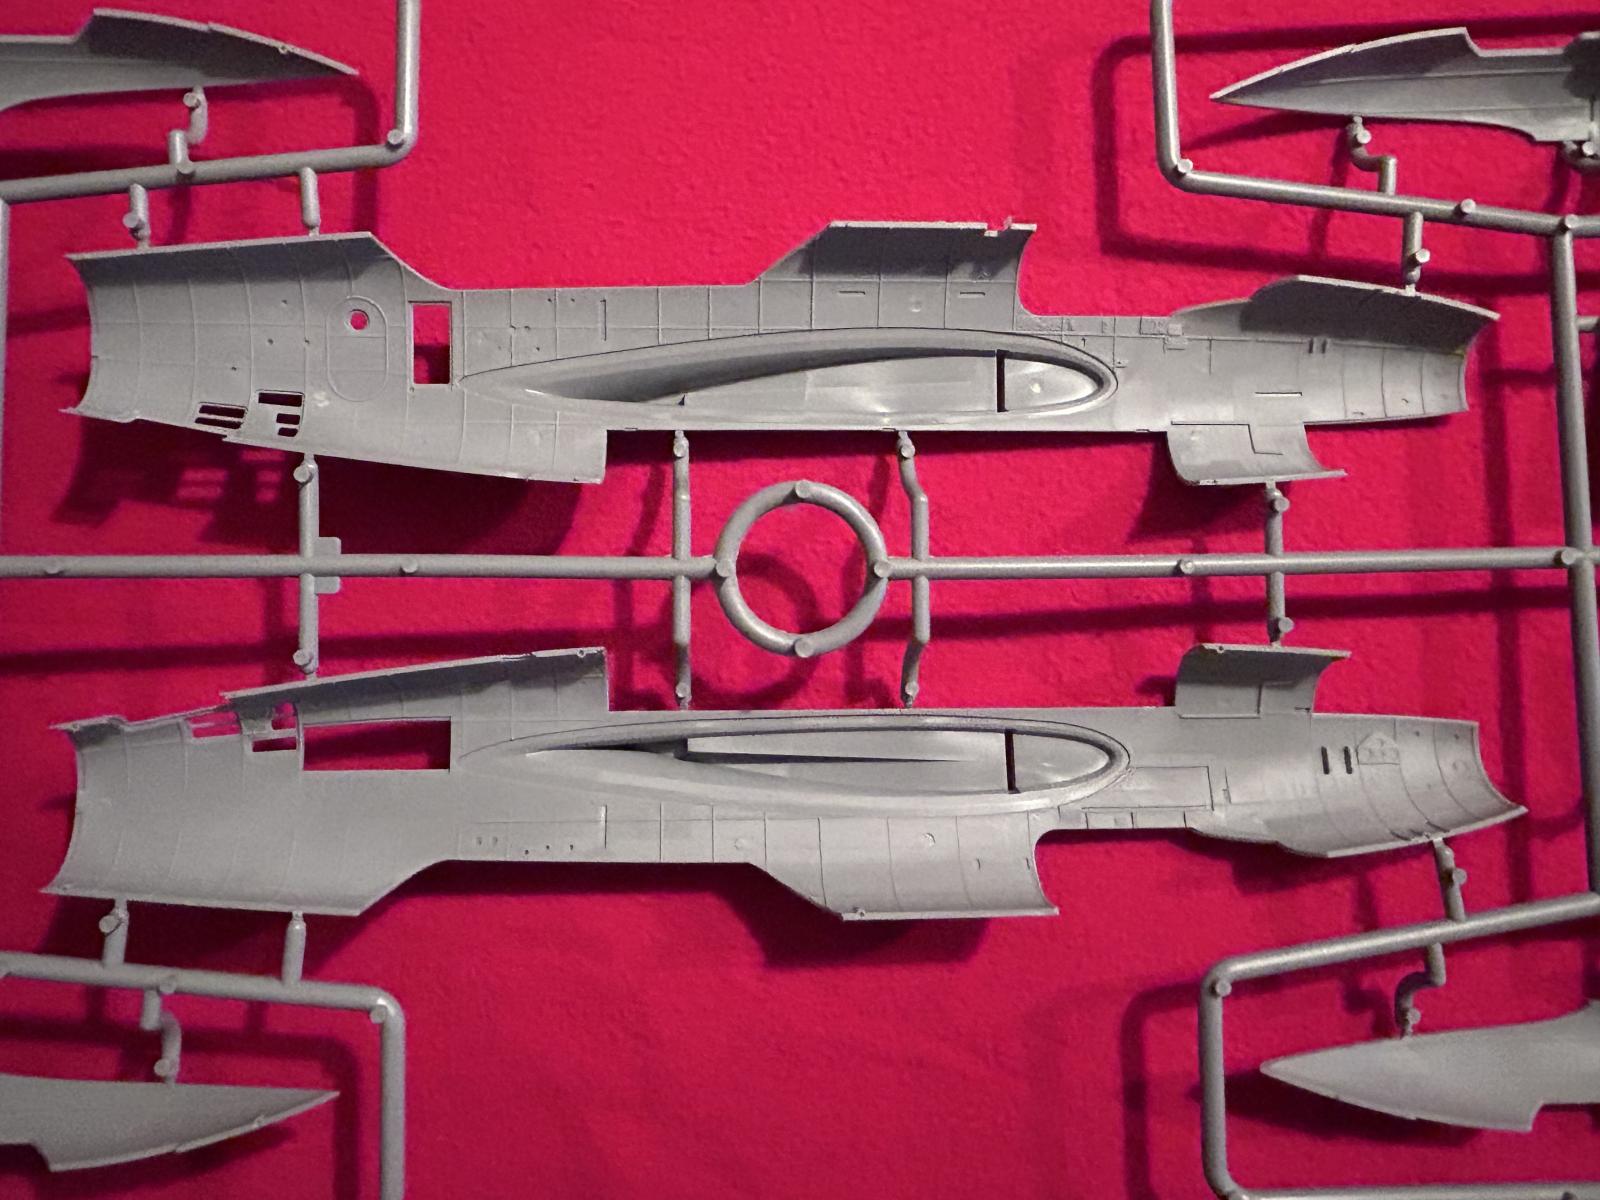
This is the other side of the plastic tree. It shows the details molded into the inside of the fuselage.
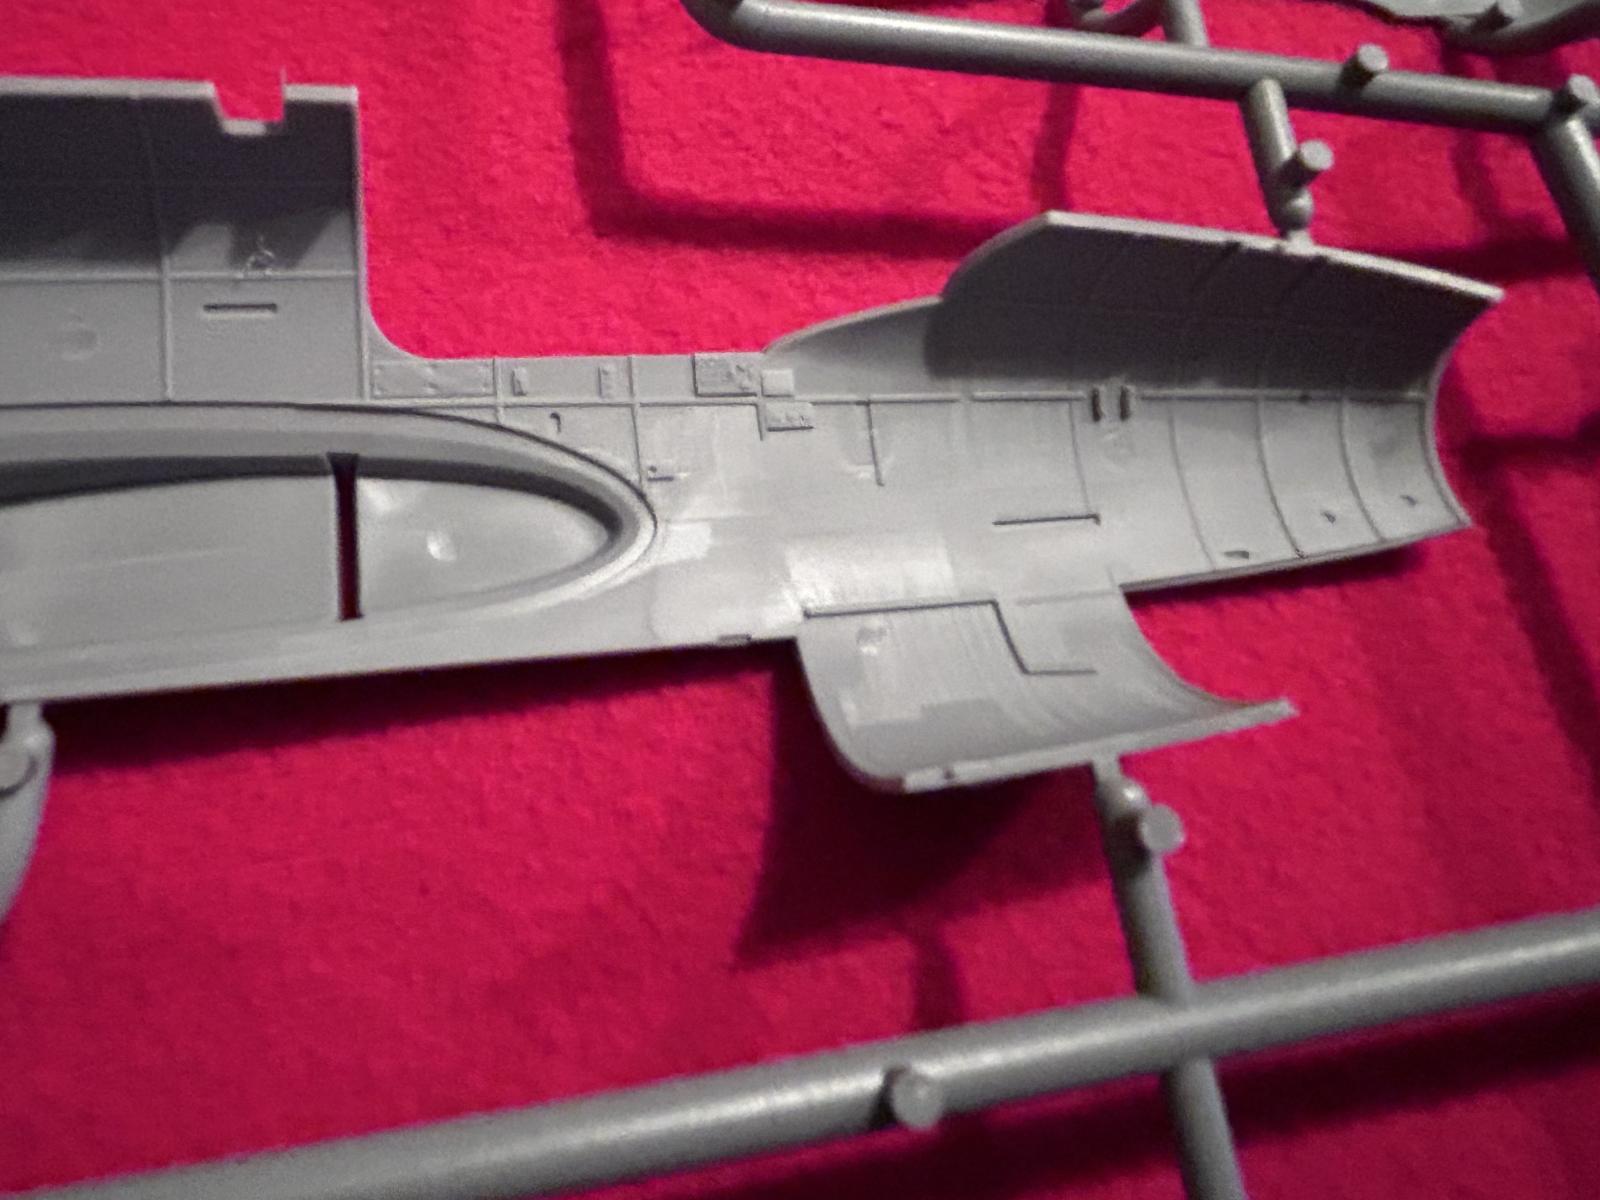
This is the forward section of the fuselage, and shows the cockpit side walls. There are more parts that will be added here, so it will be busy once done.
This shows the details that are present on the inside of the engine nacelles.

This is the other main wing plastic tree. Again I have placed the 12 inch steel ruler next to it for a comparison.
This shows the cockpit floor. The bomb bay is on the other side of this main part.
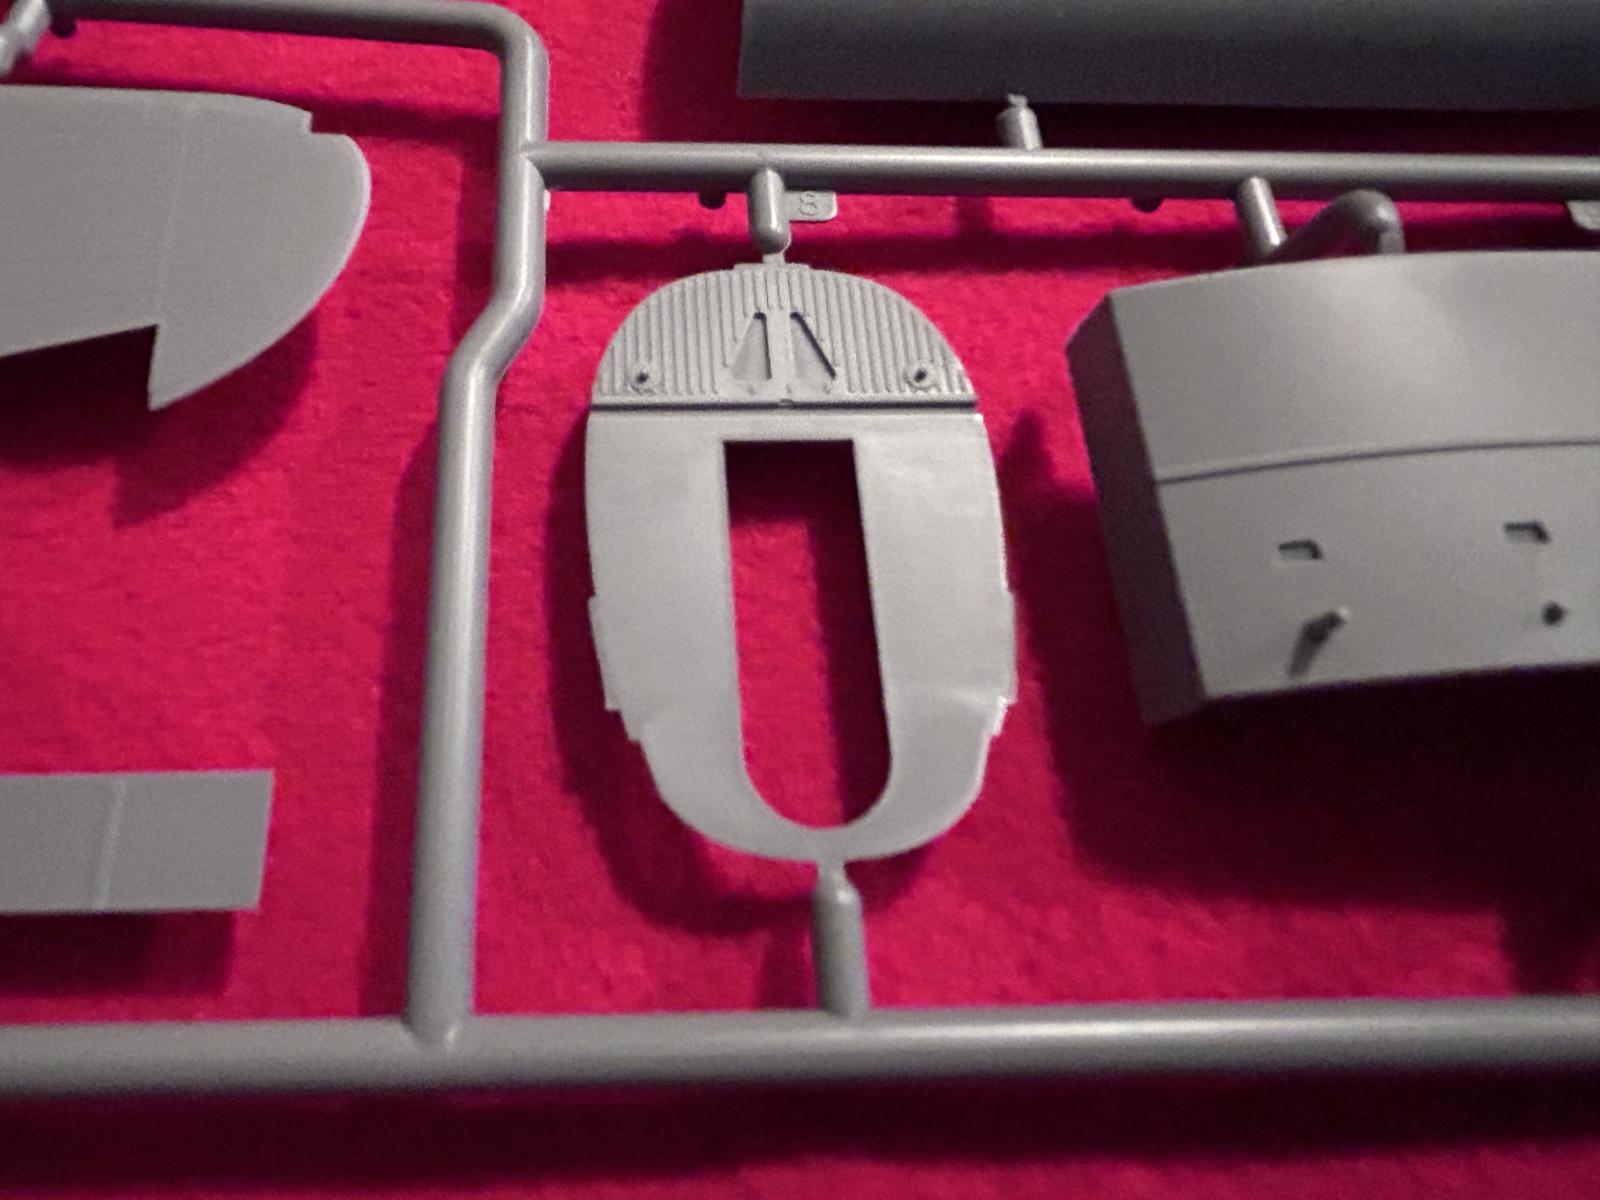
This shows one of the fuselage bulkheads. This bomber used corrugated sheet metal on the interior sections in places similarly to how it was done of the G4M "Betty".
This is the dorsal gunner insert. This will be covered mostly by a clear plastic canopy.

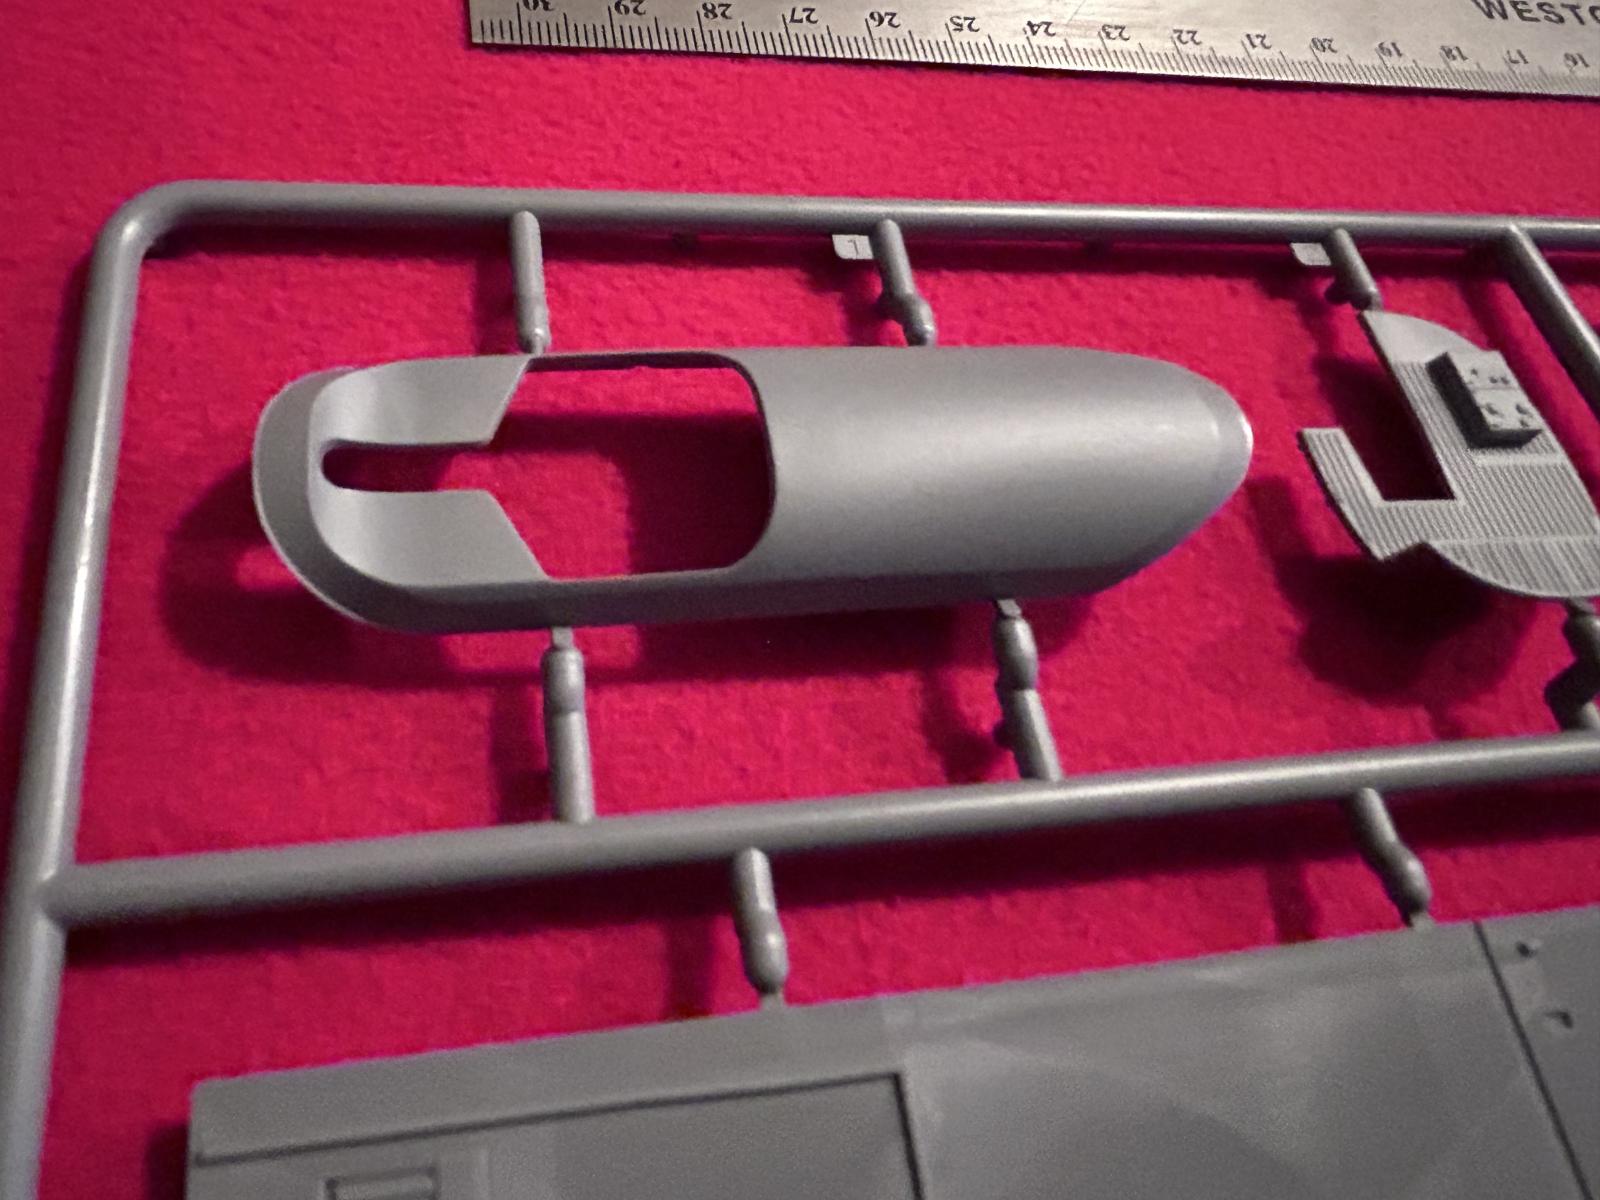
Earlier I mentioned there was a single one piece bomb bay cover. This is what it looks like.
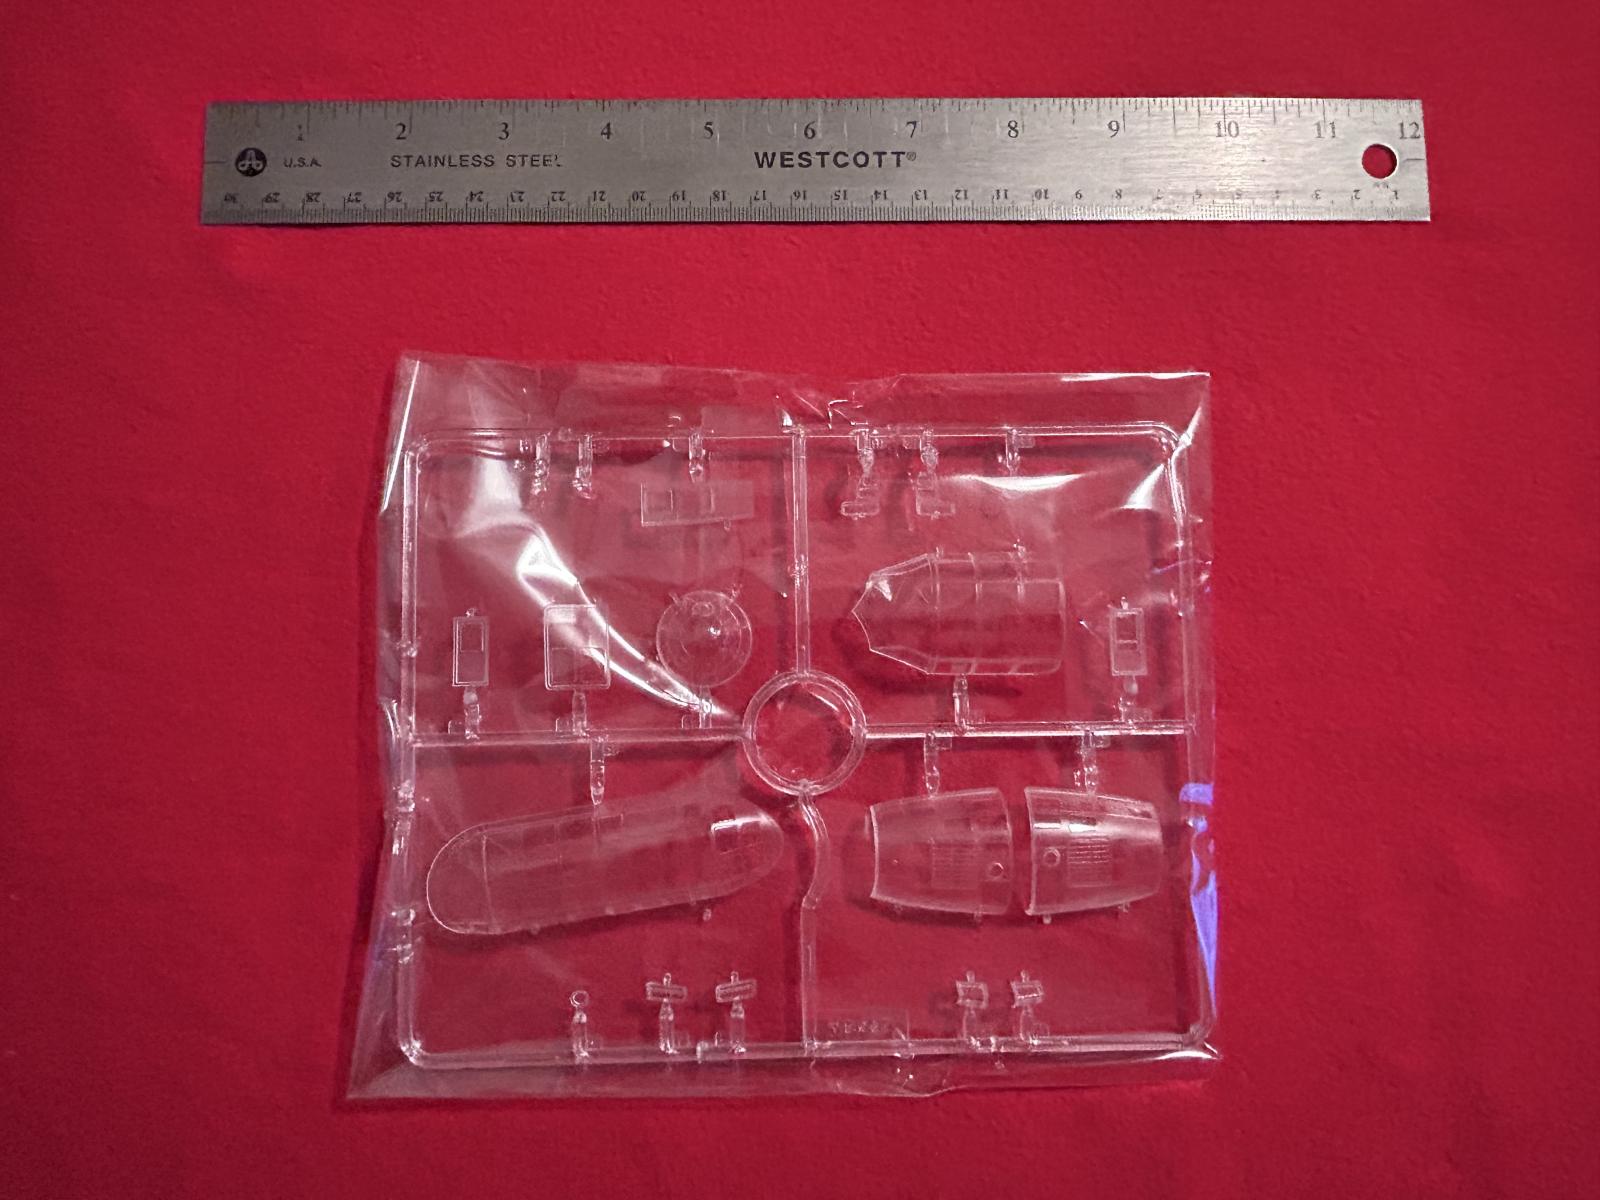
This is how the clear parts are packaged. This small clear parts bag is located inside the main plastic parts bag, so it is double protected. It too is re sealable.
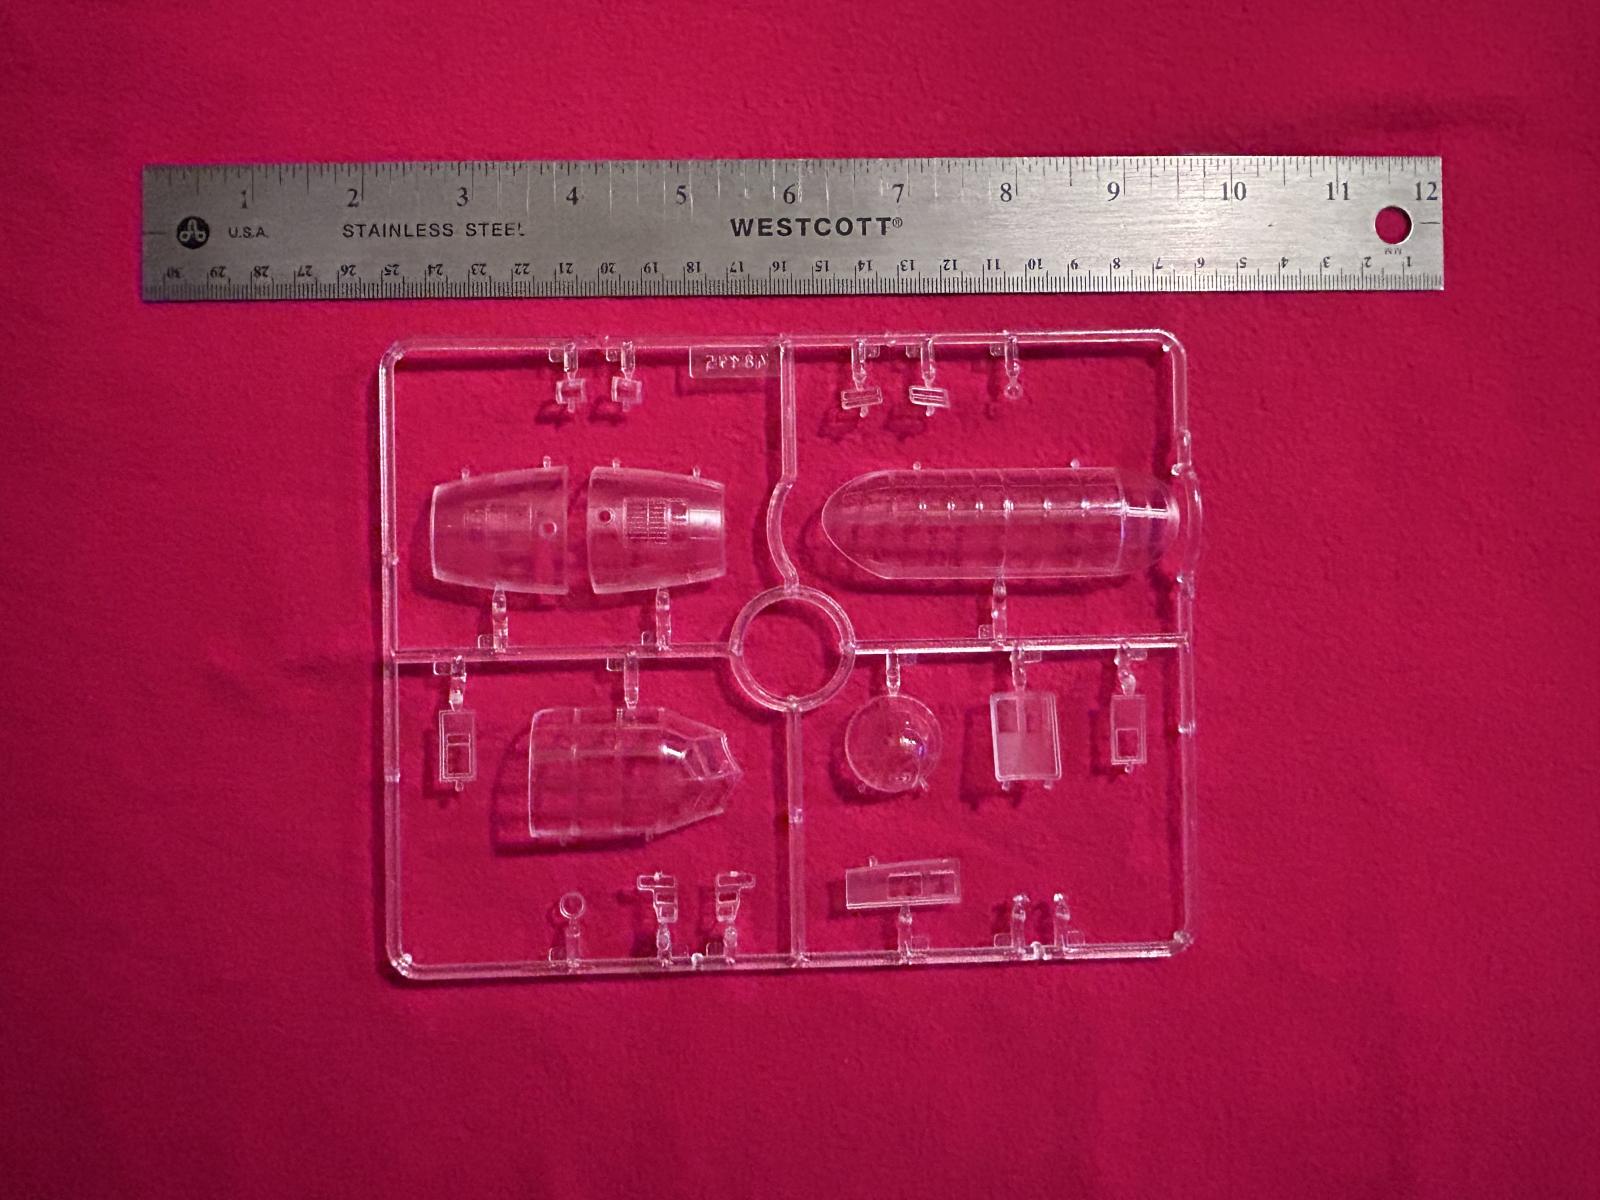
Here are the same parts once removed from the parts bag. Once again, you can see my trusty steel ruler...
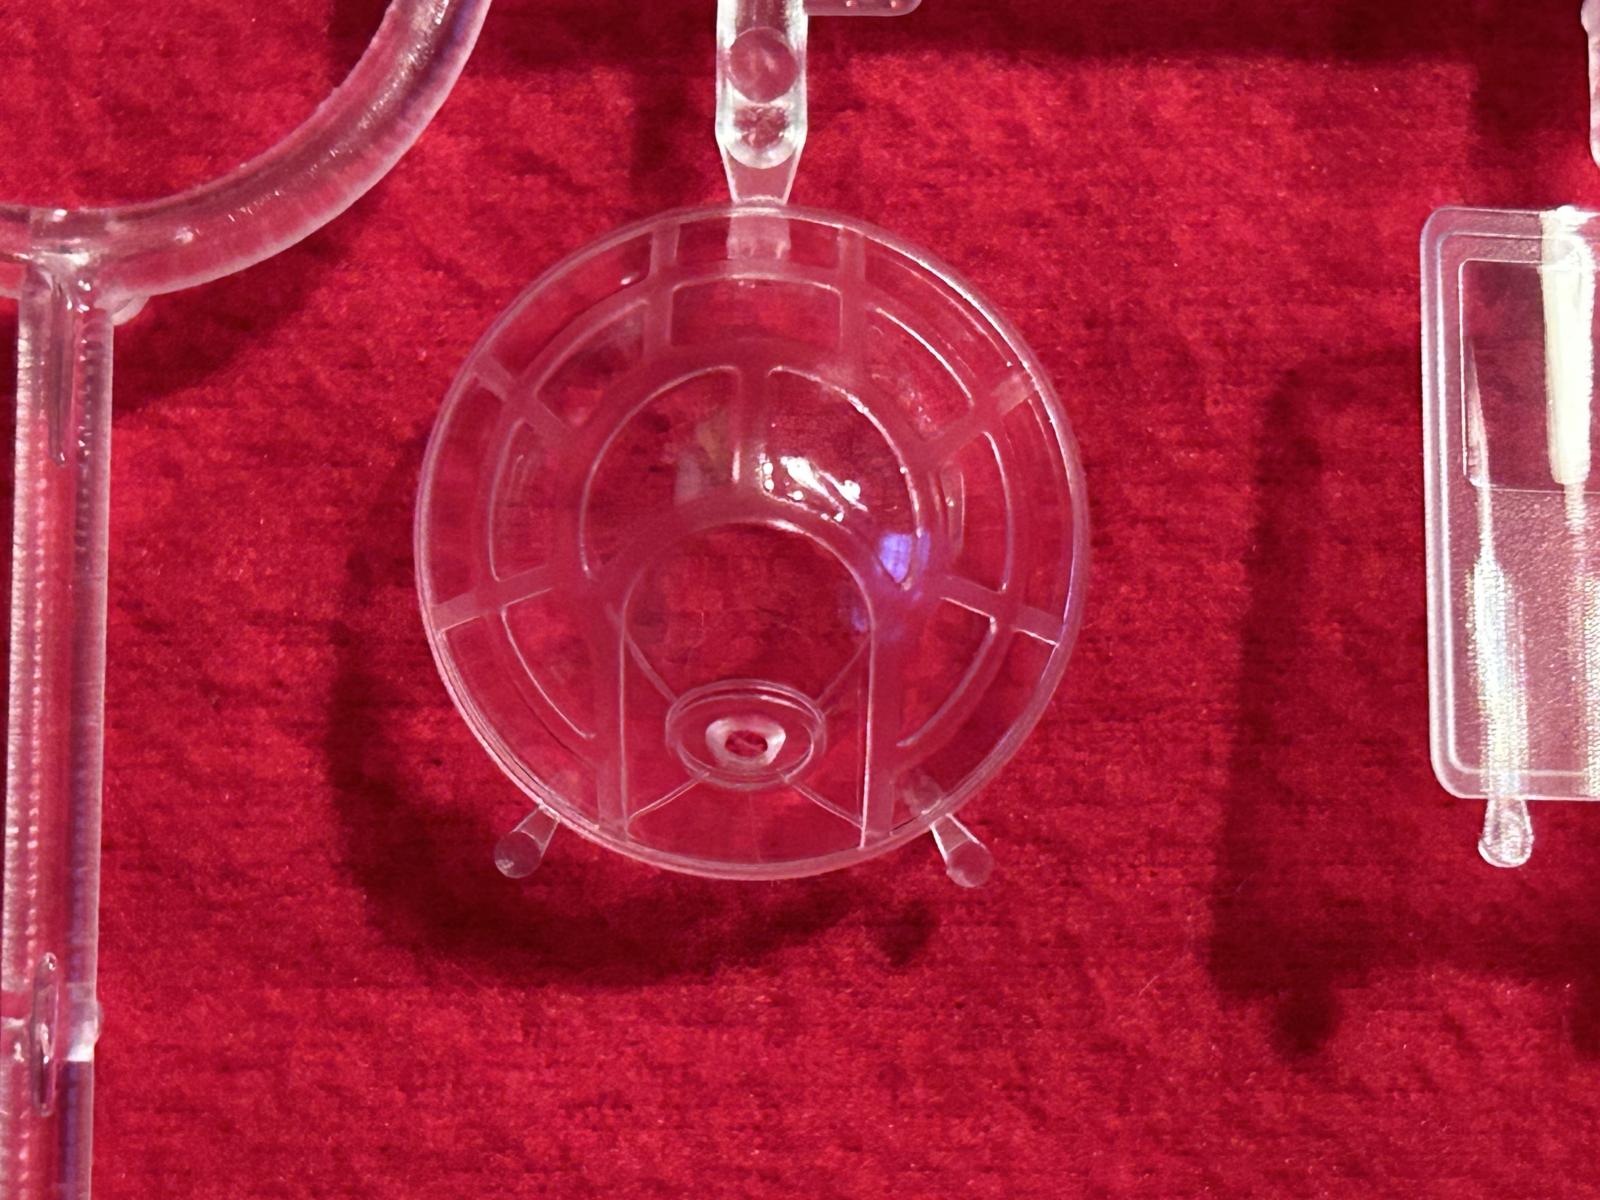
In typical ICM fashion, they have shaded the areas that are to be eventually painted. The actual window portion is crystal clear. This is the main pilot's canopy.

This is the choice of nose sections. One is an early model and the other is a later version. Here you can see the shaded areas I was describing above.
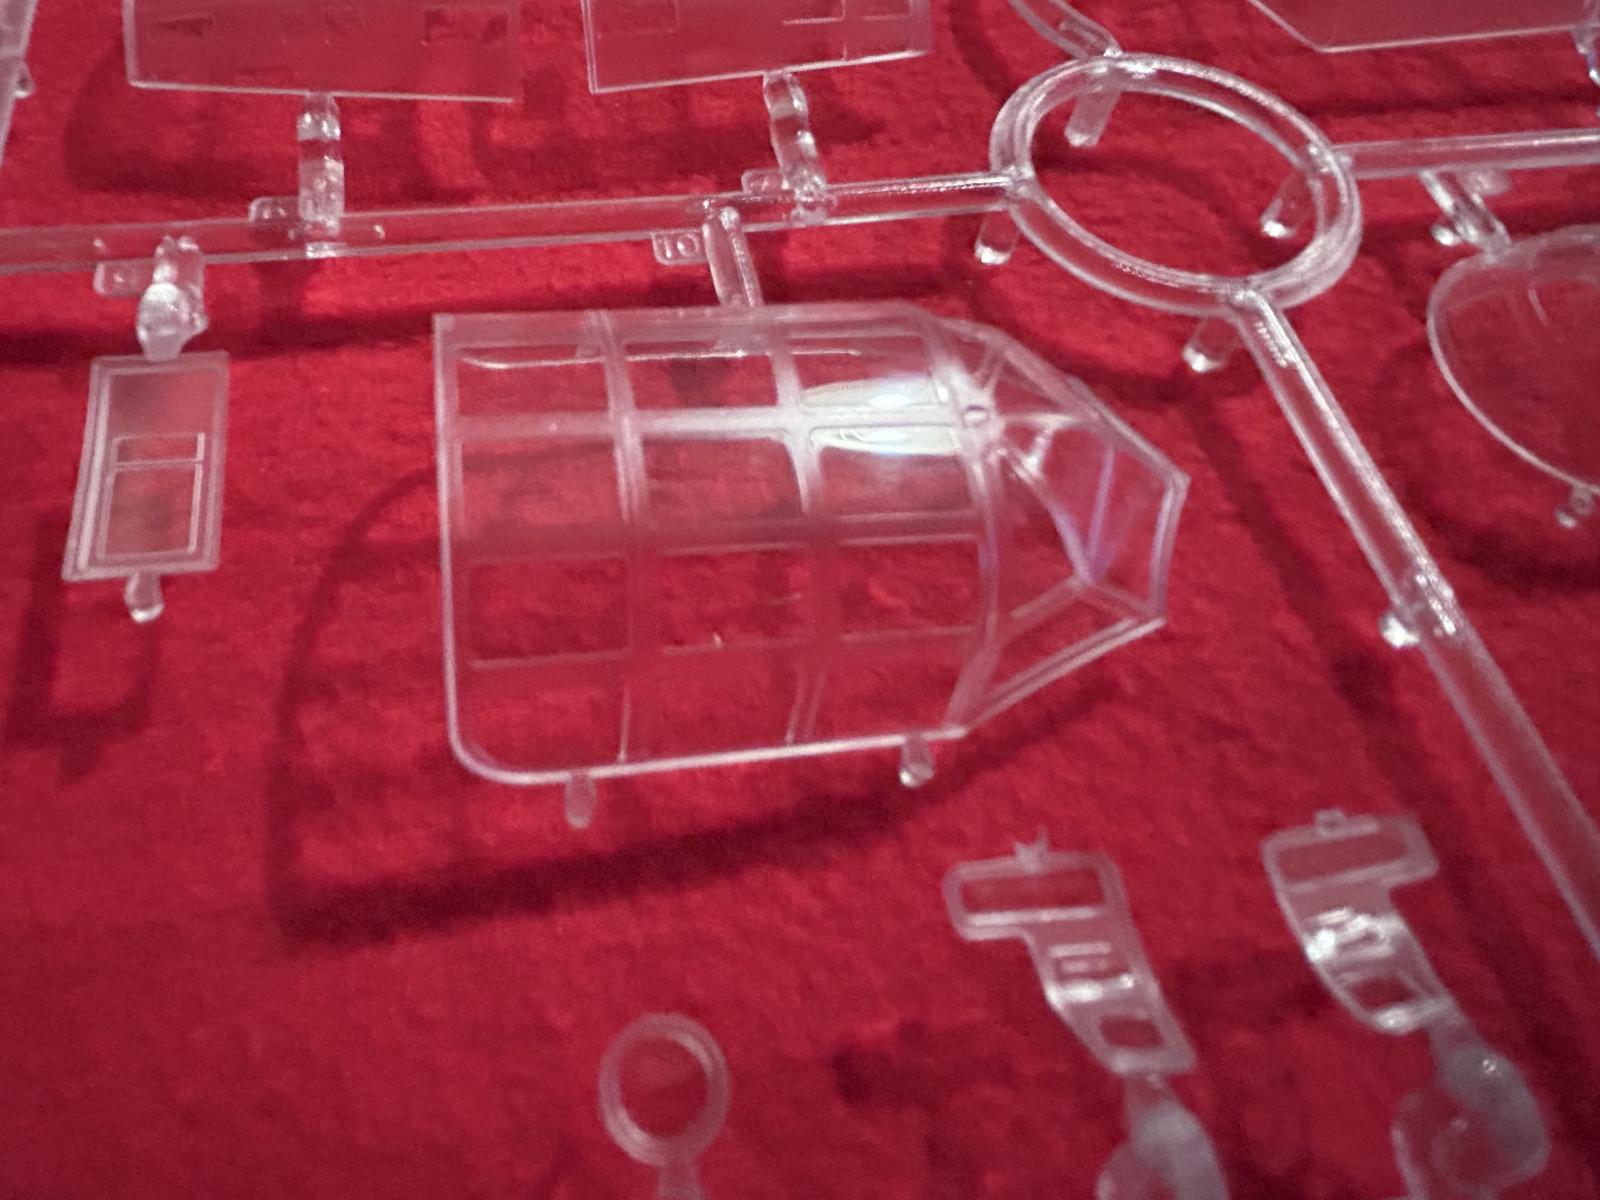
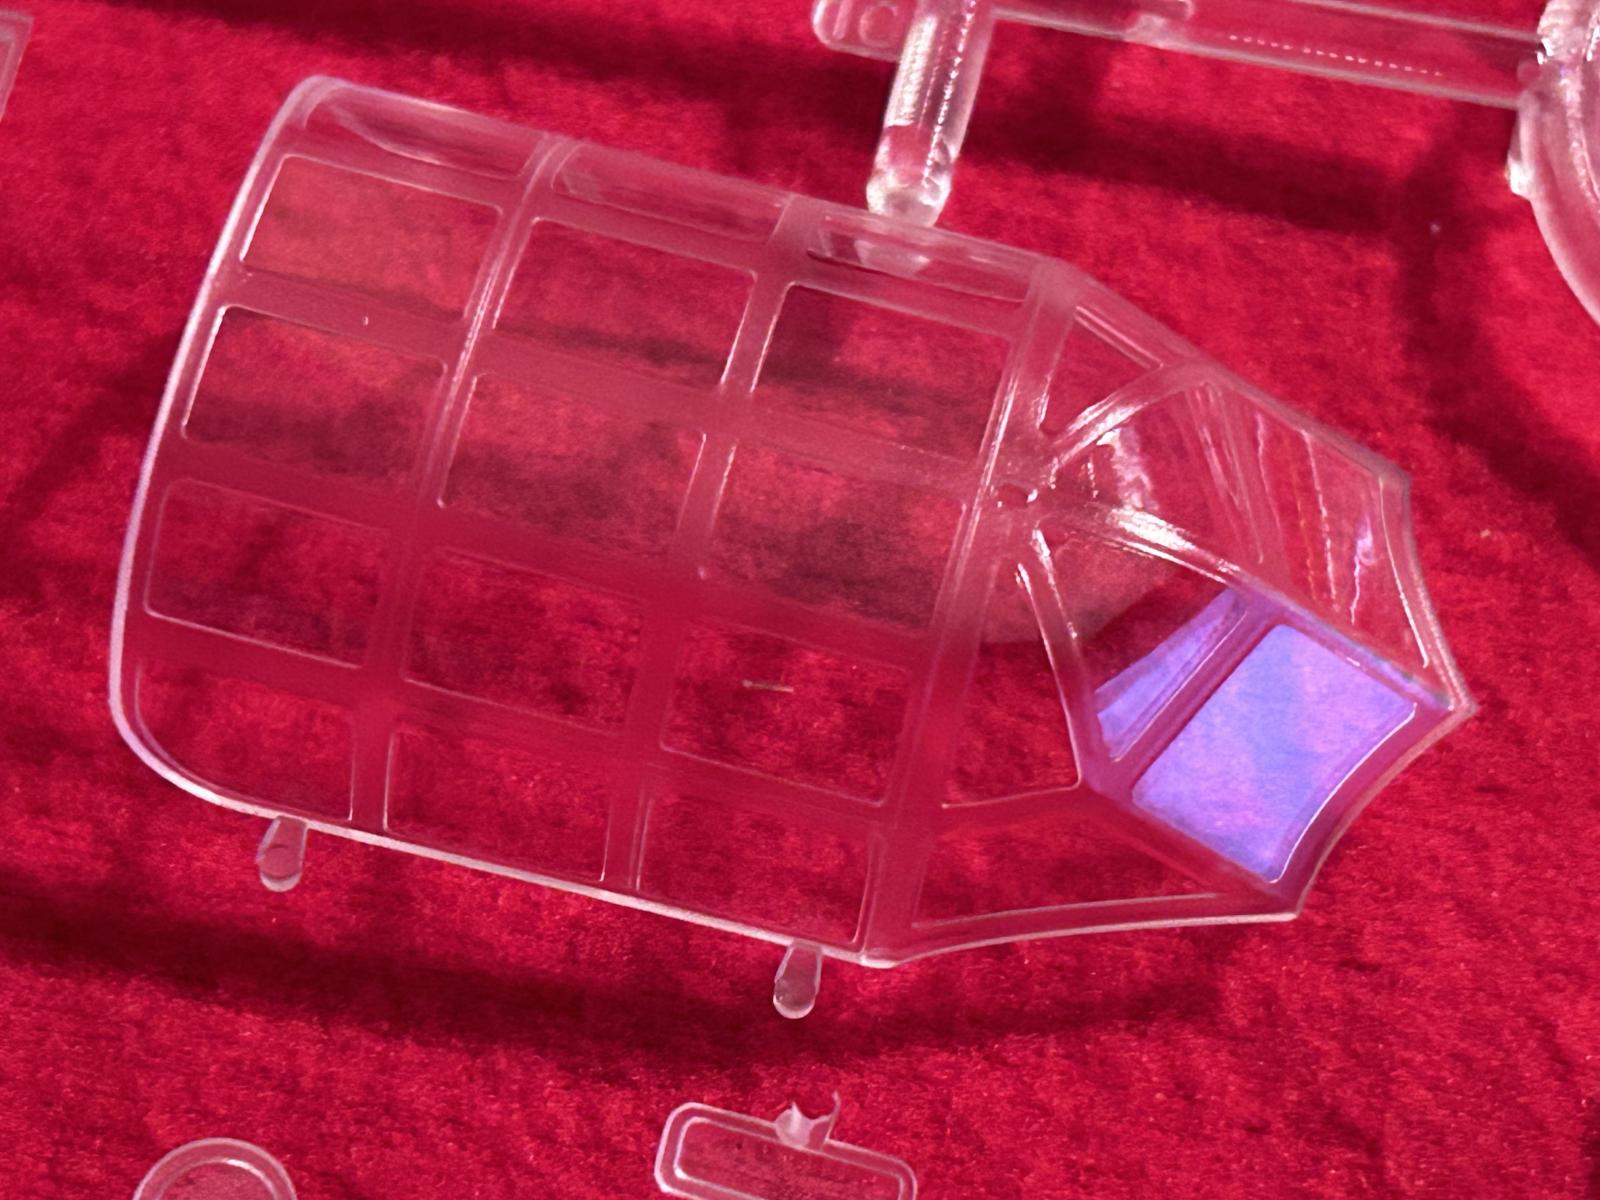
This is the main dorsal canopy. There are a LOT of windows to mask.
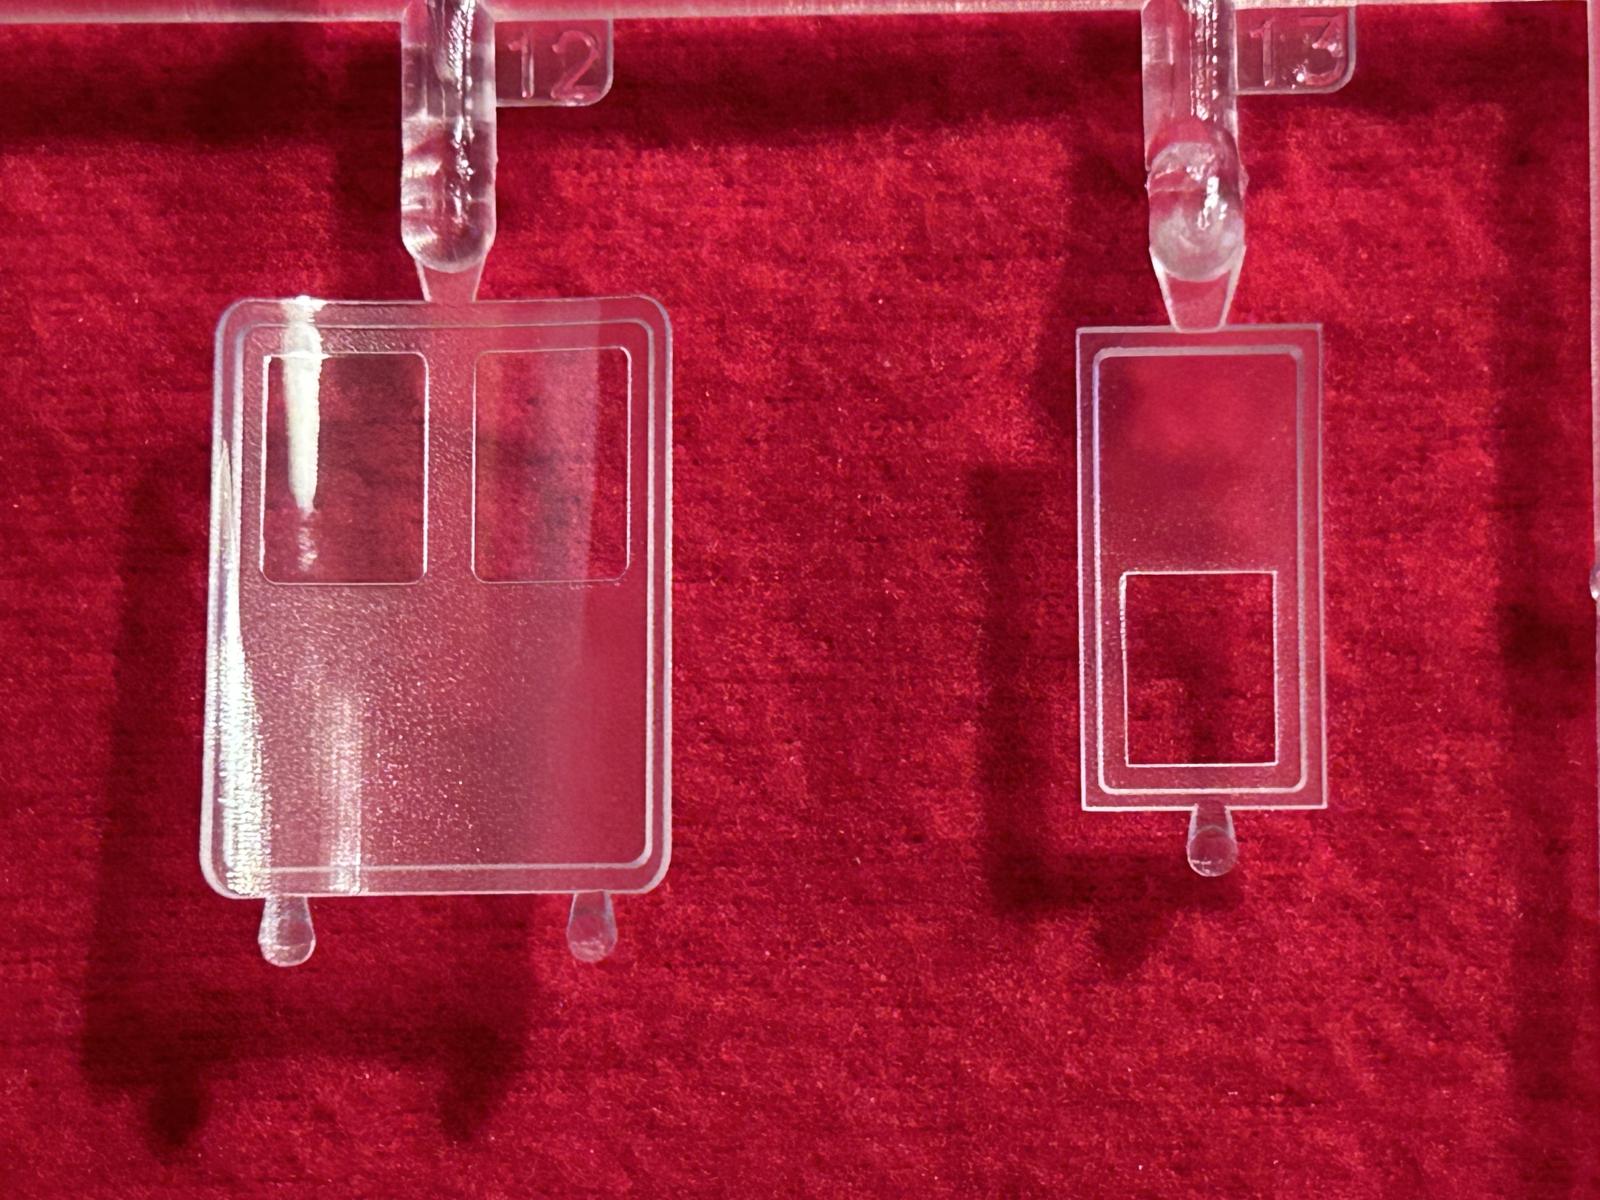
These are the side entry door, and a hatch that can be opened. Here again, the shaded portions are highly evident.
This is the nose cap.
This is a close up photo showing the main canopy.
Overall I am VERY happy with the look of this kit in the box. I wish it would have included a set of masks for the thousands of tiny windows. But they do include a template, so it might not be as hard to mask... (my not so famous last words).
I would like to sincerely thank the people who work at ICM for giving us yet another model that we have wanted, especially in the adverse conditions they are currently experiencing.
I would also like to thank Brandon Lowe from Squadron Mail Order for keeping me informed on the shipping process.
This kit is courtesy of my wallet... so what you see here is really what you get.
I hope that someday we will get a matching new tool G3M "Nell" in 1/48. One can always dream.
This one is going to make it's way onto the work bench ASAP, so please look for a work in progress journal to start any day now as a part of our Empire of Japan group. Lately we have been doing some work on our home, so my bench time has been non existent. Hopefully this will soon change.
If you are on the fence about getting this one, don't be. It looks even better in person. Trust me, you're going to want one of these. No scratch that... you NEED one of these. I can see myself getting another one in time.
Meanwhile, here is the build journal I just started for this one.
https://imodeler.com/groups/the-empire-of-japan-1919-1946/forum/topic/1-48-scale-icm-ki-21-sally/
Please follow along as I build this wonderful looking kit.
Thank you for reading this to the end.
If you have a kit or aftermarket part or decal set that you would like to see a fair and honest review on, please contact me. You can look at my other reviews.
I don't bash things, but instead I show the reader what is provided, and let them make up their own mind.
As always, comments are encouraged.
This looks like a really nice kit, Louis (@lgardner). I have always liked the way the Sally looked and there are many paint schemes for these bombers. The detail looks really good, especially in the cockpit. The amount of glass and masking makes my hands shake, but I am sure you will have no problems. Looking forward to your build.
George R Blair Jr (@gblair)
Thank you George for the kind words. I couldn't resist it, and just like with the Eduard FM-2 I had to get it underway. Here's a link to the build journal if you are interested. It's now a part of the Empire of Japan group.
https://imodeler.com/groups/the-empire-of-japan-1919-1946/forum/topic/1-48-scale-icm-ki-21-sally/
I'm not looking forward to all of the masking either. The details in this kit are incredible. It's going to be very hard to pick out a scheme for this one, because like you said they had a lot of different options.
The Sally looks great! Nice pictures to! Thank you for an awesome review of what seams to be a very nice kit. I don't have many Japanese subjects in my stash, maybe I'll have to add to it with a nice twin engine bomber. I look forward to following your build. I can't wait to see it finished.
Clint Miller (@curtisshawk)
Thanks for the compliments. I have been working on this kit, and it builds up just as nicely as it looks. I have started a build journal for it here on Imodeler. It is part of the Empire of Japan group. Here is a link to if in case you are interested.
https://imodeler.com/groups/the-empire-of-japan-1919-1946/forum/topic/1-48-scale-icm-ki-21-sally/
Thanks, I'll definitely be checking in on your progress.
One of the best in the box reviews I’ve seen, Louis, shame it’s not really my cup of tea.
George Williams (@chinesegeorge)
Thank you George. It's really good to hear from you.
Great review Louis @lgardner It's on my wish list. I put your review up on Scalemates, hope you don't mind.
Robert Paschall (@beauslx)
Thank you for your compliments and for posting it on Scalemates. I don't mind at all, in fact I sincerely appreciate it. I have made a lot of progress today with the build. Please stop by and check it out when you can. This kit is fantastic !
A fantastic review of a fantastic kit, Louis!
Congratulations!
Looking forward to the build!
Spiros Pendedekas (@fiveten)
Thank you my friend ! I have made some very good progress today, so please check out the build journal when you have the chance. I'll be posting the progress in a few. And there's a lot of it...
Take care.
Nicely written review of what looks like to be an excellent kit, Louis @lgardner
Thanks for sharing.
The kit clearly shows quality and lots of details.
Eagerly waiting for the moment that you start building it.
John vd Biggelaar (@johnb)
Thank you John ! Yes my friend, this is an excellent kit. It's got a fit that is a Tamiya quality. I am very impressed with it so far. Please check out the build journal when you can. I have posted up the latest progress. Take care.
An excellent review - very detailed and clear. The small Japanese characters are actually katakana (Japan uses three different alphabets). They basically say 'not safe' 'safe' and as you correctly surmise 'lift here'.
Christopher Amano-Langtree (@christopher)
Thank you for clarifying this. I don't speak or read Japanese, so I always wondered what was written ...I also sincerely thank you for the compliments on the article.
A thorough review Louis. I'm a big fan of all of these Ukrainian kit manufactures given the circumstances. With great risks come great rewards. If your daily life is the same it may explain on why they have been aggressive in making kits that normally our passed buy more established manufactures.
Strong work Lou for those of us who like to paw the plastic but, don't have the resources.
Stephen W Towle (@stephen-w-towle)
Thanks for stopping by. I am completely impressed by all of these Ukrainian model companies. What they are doing is beyond outstanding, especially when you consider the circumstances under which these models are being designed and produced. Plus to keep the quality levels to where they are is even more incredible.
I sincerely appreciate your compliments. Thank you.
@lgardner
Wow, your review of this beautiful kit is the most clear and informative I’ve read untill now, Louis.
I am surprised about the model size, expected to be smaller than a Heinkel, and it seems that ICM did a much better detailed kit than Tamiya did for their 20 year old Betty.
Obviously some areas can be improved, scratched or AM stuff - some Eduard or Dead Design masks will surely be available soon for that extensive glass house this bomber carries- and to my knowledge ICM does not provide masks in any of their kits, only those templates.
The third decal option you chose is the only with some spice to it, but looking at a few online photos you can go for similar green over Ame-Iro green grey using some of the decals in the box or easily painting a couple of tail/fuselage stripes.
This kit is still not available on my usual stores but it’s on my must have list since it was announced.
Hope to see your build on these pages soon my friend.
Btw I’ll be doing an update soon on our Pony section 😉
Thanks for sharing your review with us Louis, two thumbs up!
Pedro L. Rocha (@holzhamer)
Hey buddy ! It's great to hear from you. I have been ultra busy with working on our home. Other than last night and today, I have had zero time for building anything.
However, in order to clear up the work bench for this Sally, I had to assemble the second Eduard P-51 Mustang wing, since it was scattered all over the work bench. This time it was an Overtrees kit for a F6-D/K recon version of the Mustang. I would like to build it as Major Shomo's Mustang in which he earned the Medal of Honor. So some progress has been made on the Mustangs, I just didn't snap any photos of it.
The weather is going to be good for at least the next week, and I will be working on our home, so I will not be doing much more building during this time. Still it would be a good idea to check in just in case I can.
I do think you are going to be very pleased with this kit when you get one. It's every bit as nice as their earlier Heinkel 111 kits are, and probably even better than that.
Thank you for the compliments, and I look forward to your next "Pony Installment". Once I get this Sally completed, I'm going right back to work on our mutual Mustangs.
Take care.
Good job on the review, testament that this is a site to see the plastic, whats in the box etc not just showing the box. Another great subject by ICM, I have one on the way from Squadron as well, and still eagerly awaiting the Marauder. Pedro is correct in that there are no masking set in the kit, just the templates. Now expect follow on variants from ICM as they have already listed 2 other kit coming up on the subject. Now I hope not only a Nell, hopefully a Peggy too.
Chuck A. Villanueva (@uscusn)
Thanks Chuck ! I agree with you on several things. It would be great if we could get a G3M Nell or even a Peggy by a main stream company in 1/48 scale. If the new tool 1/48 ICM Marauder is anything like this Sally kit is, they will have another winner on their hands. Last night and today I built a lot of it. I'll be back to work on our house tomorrow, since the weather is improving.
It's good to know about the masks. I'll come up with a Plan B to see what I can do.
Take care my friend, and I hope you had a wonderful Thanksgiving.