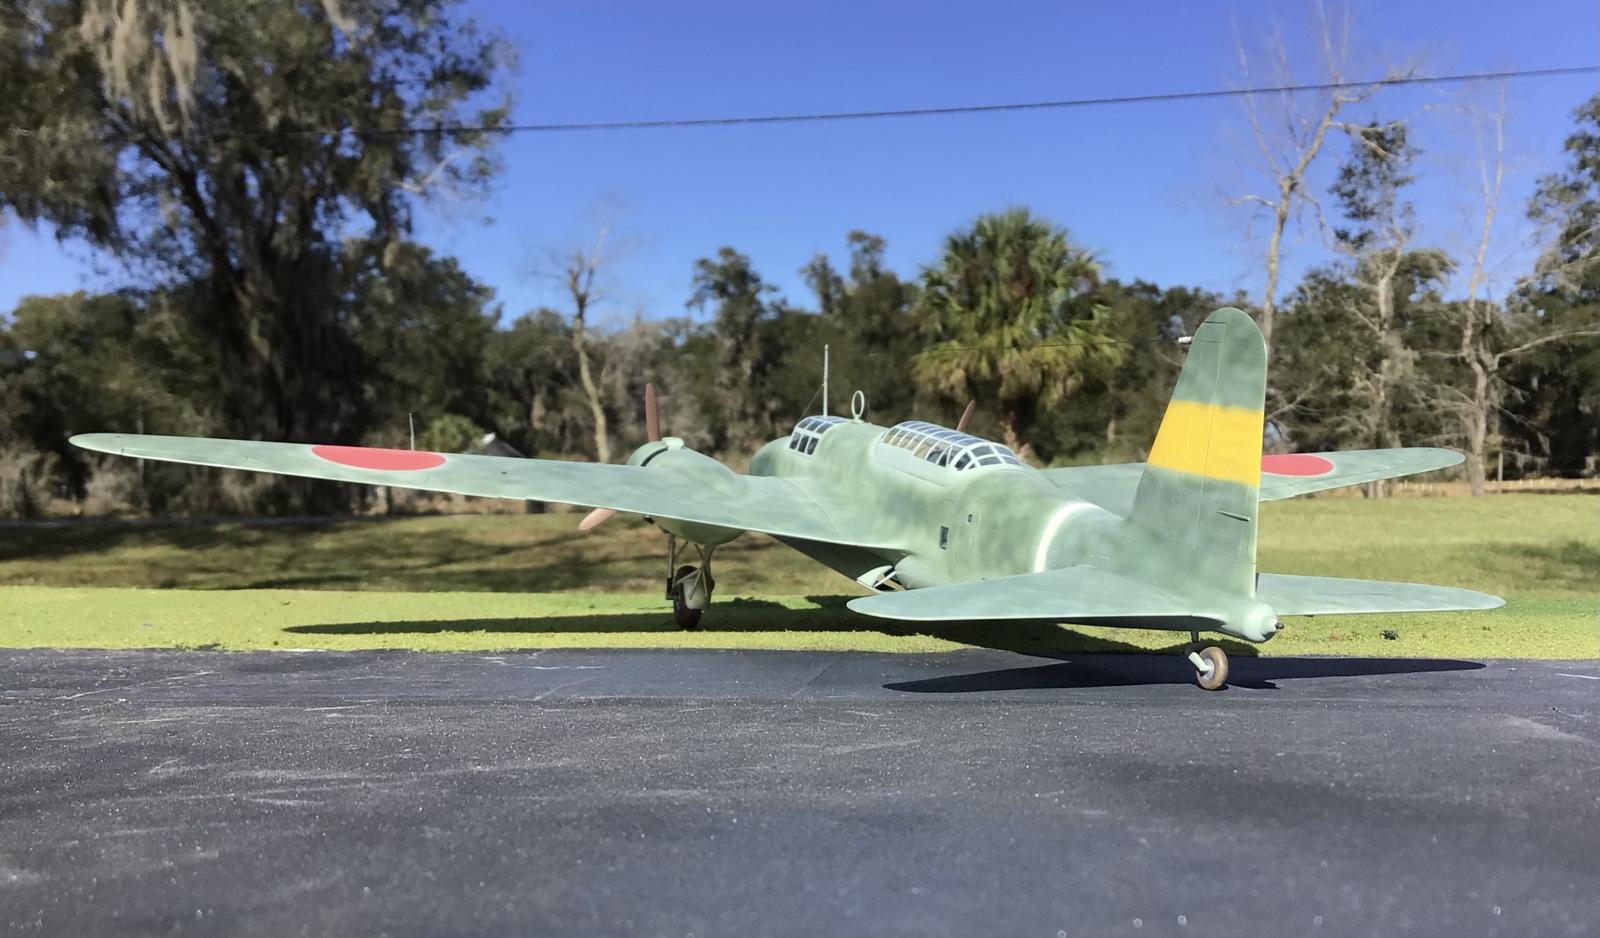
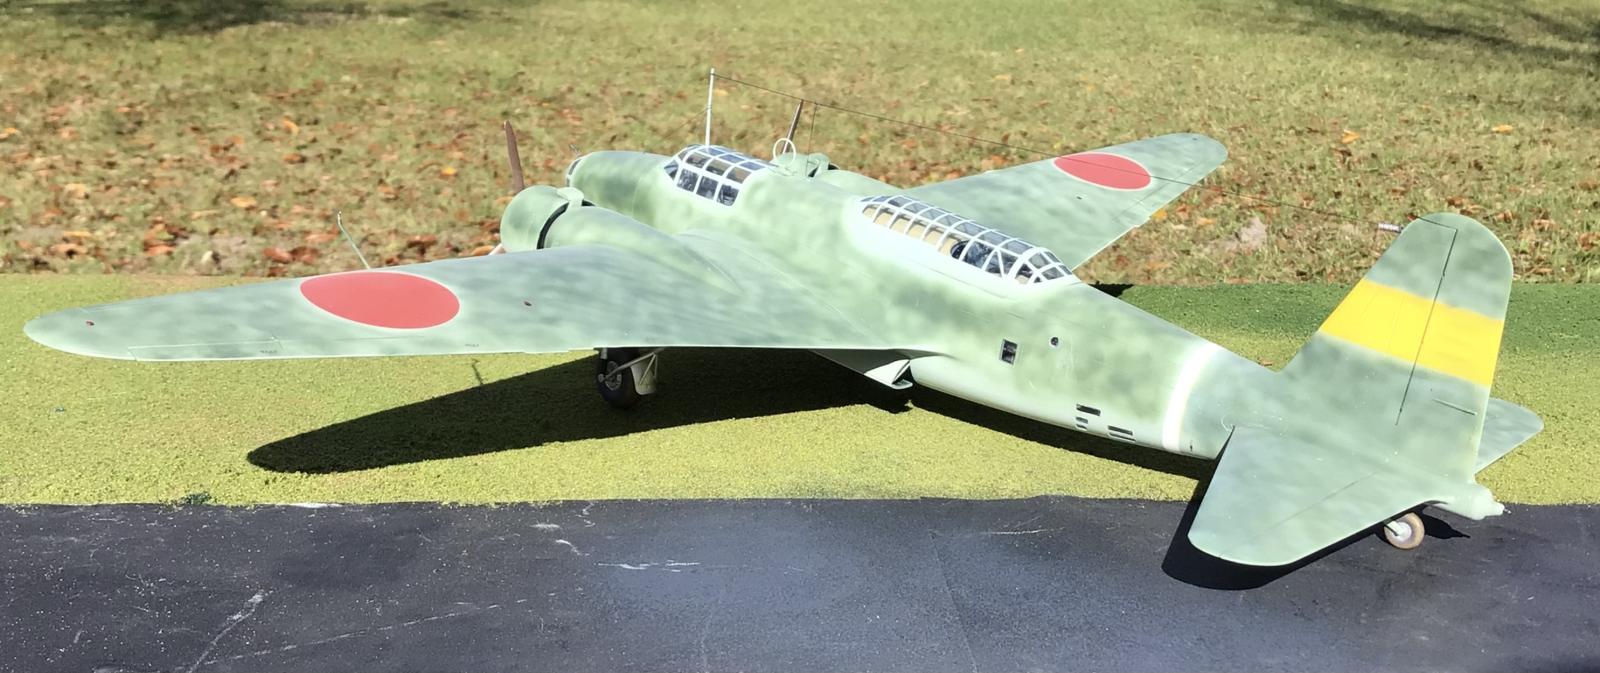
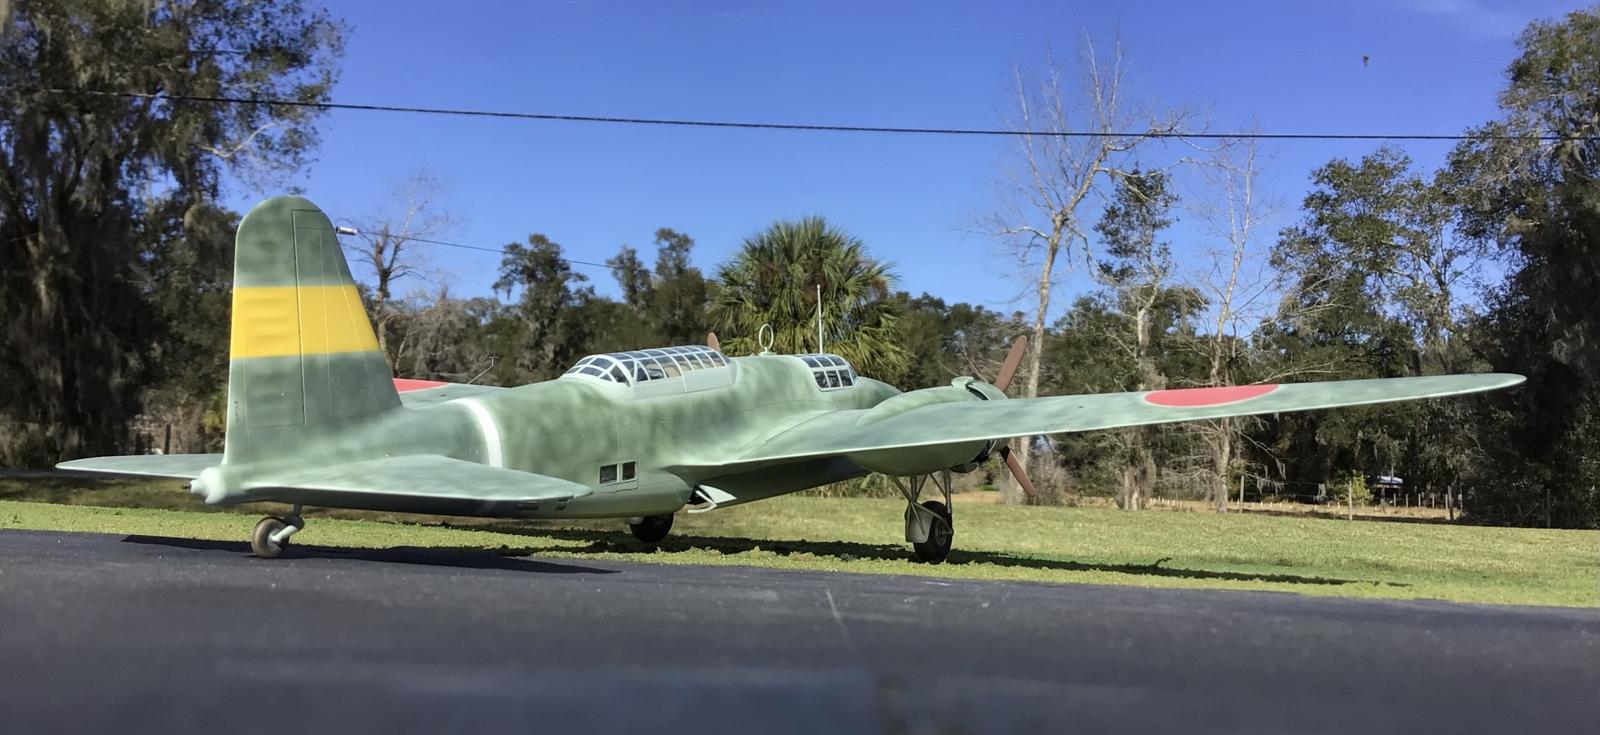
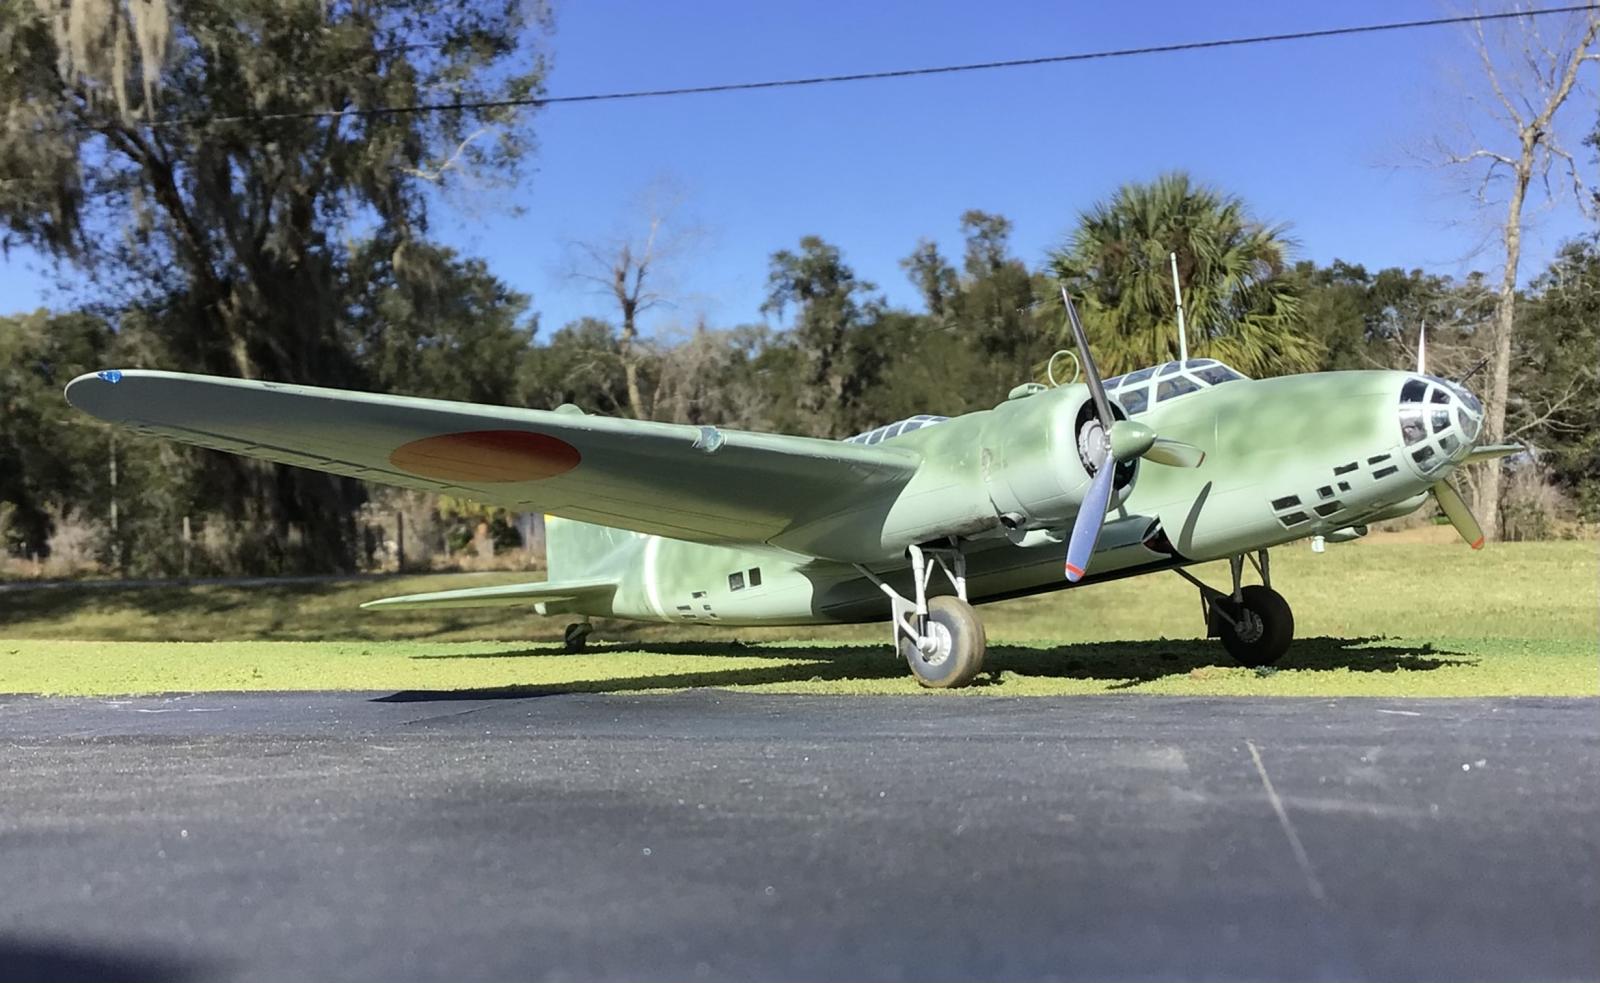
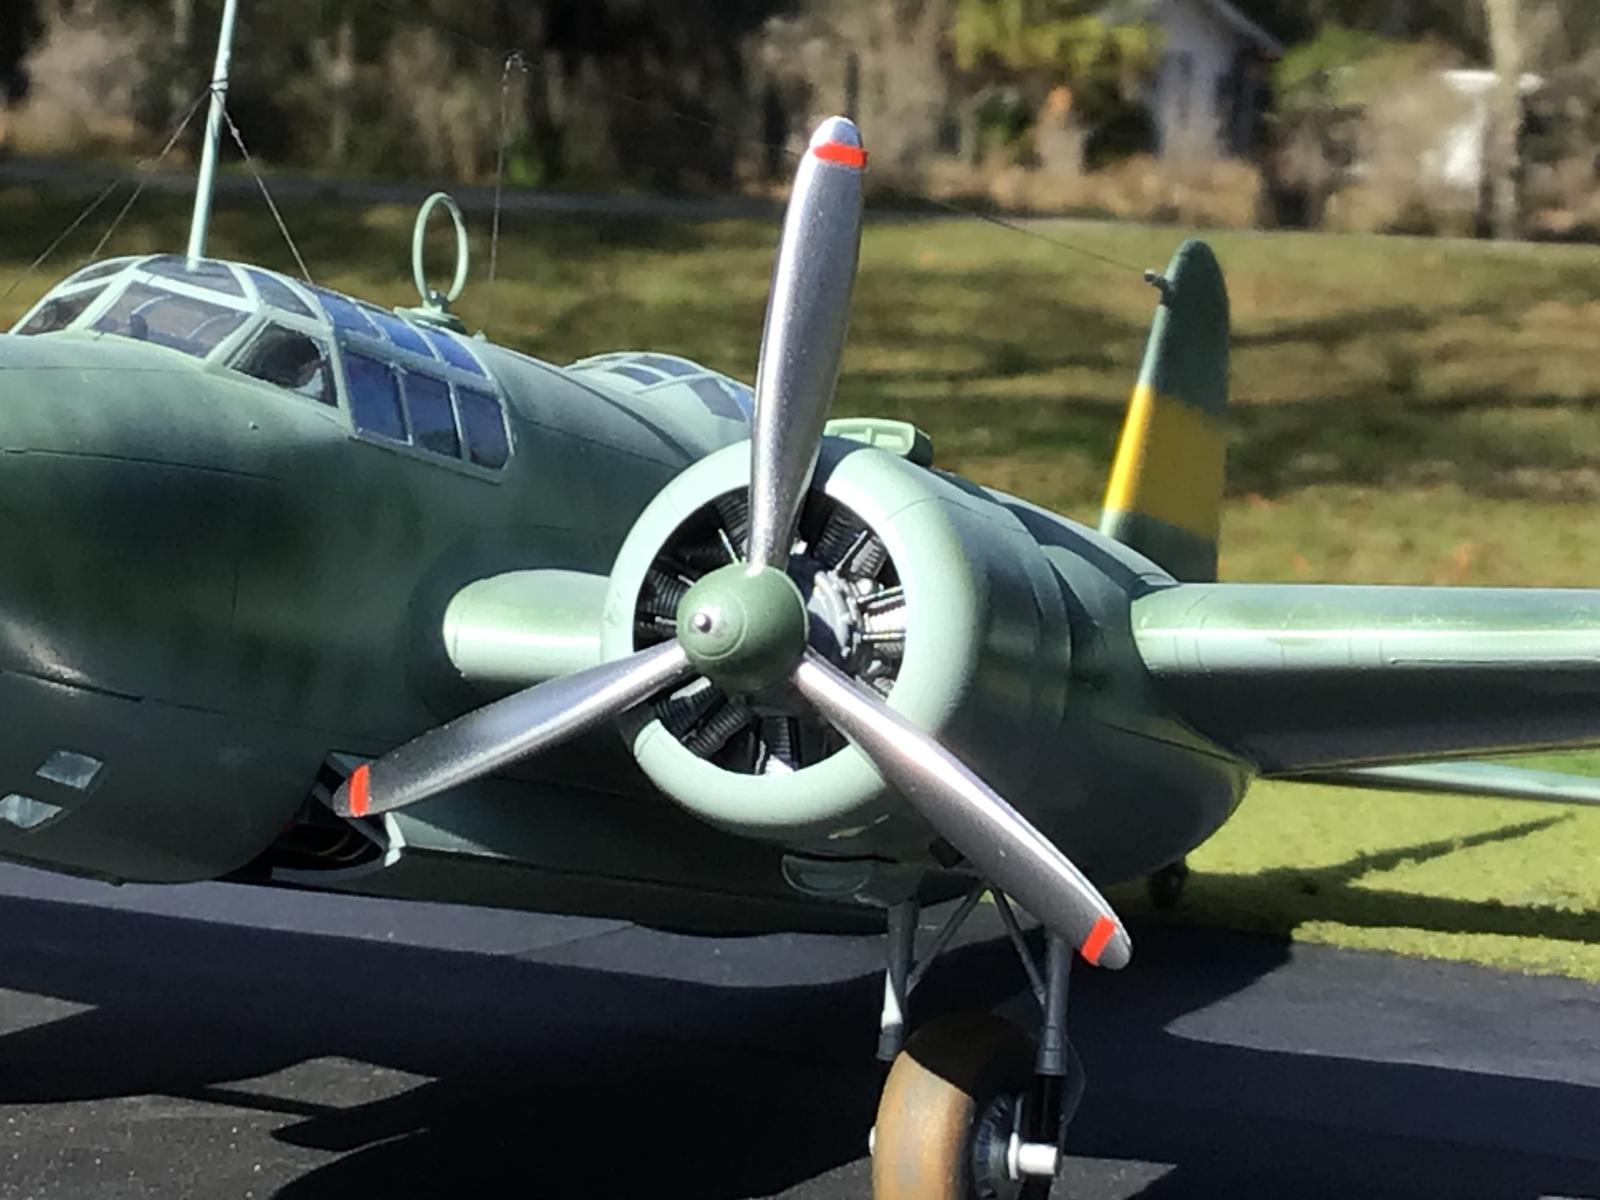
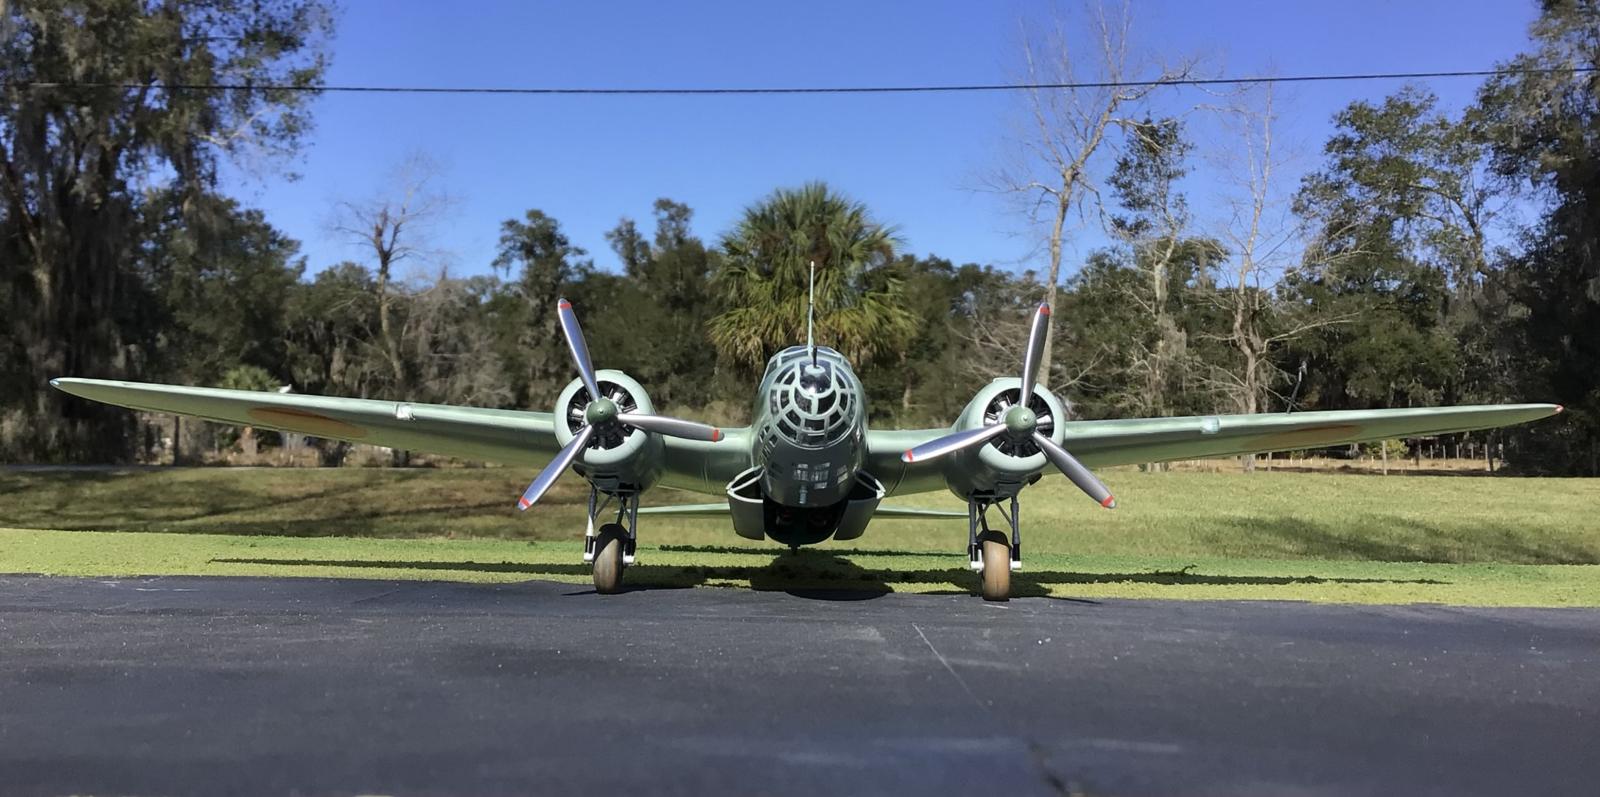
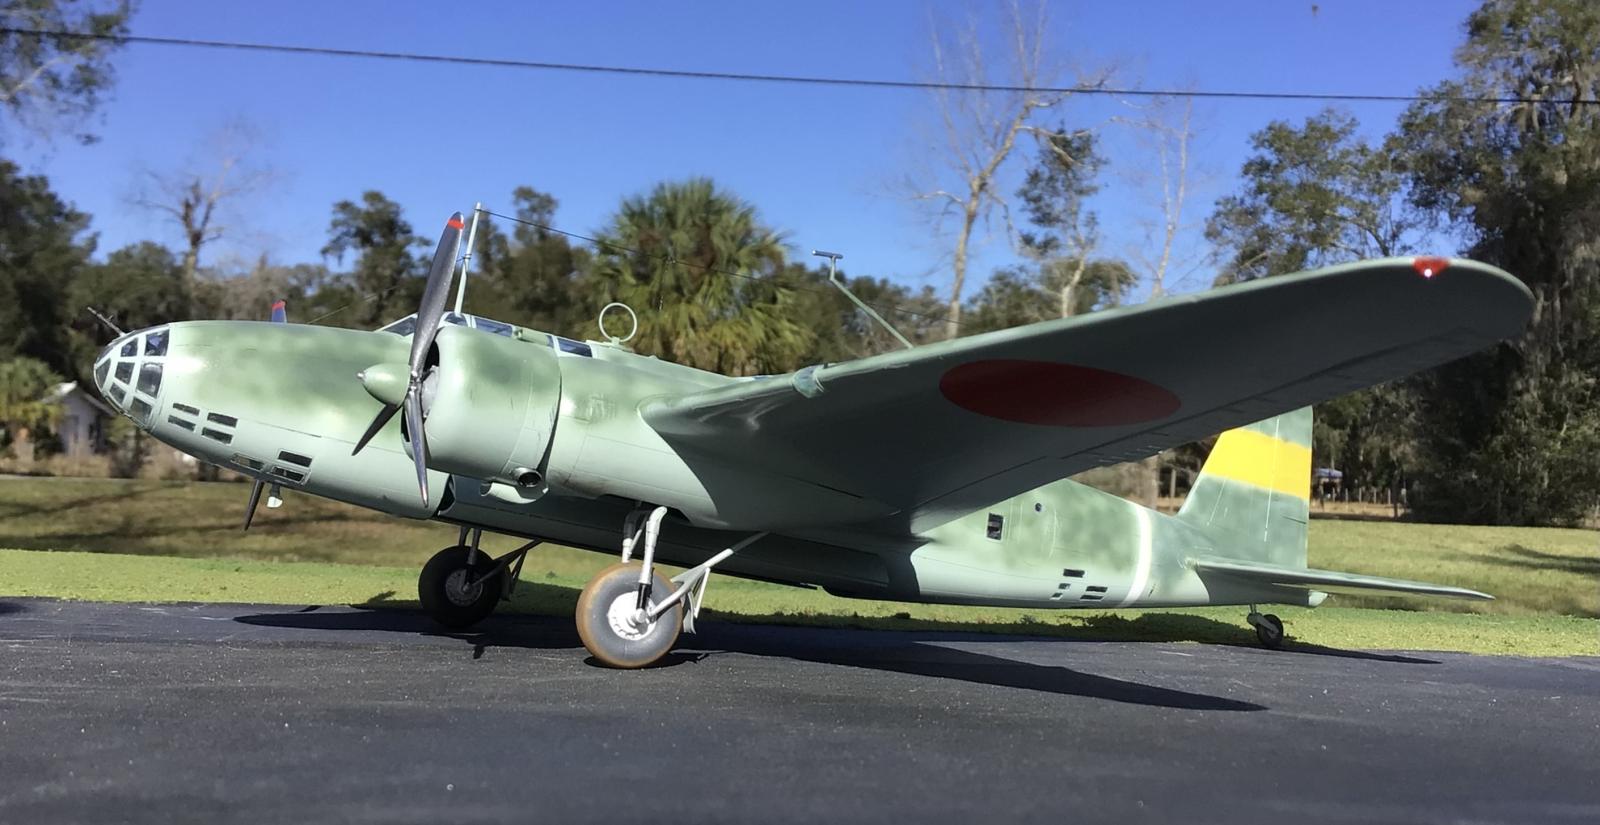
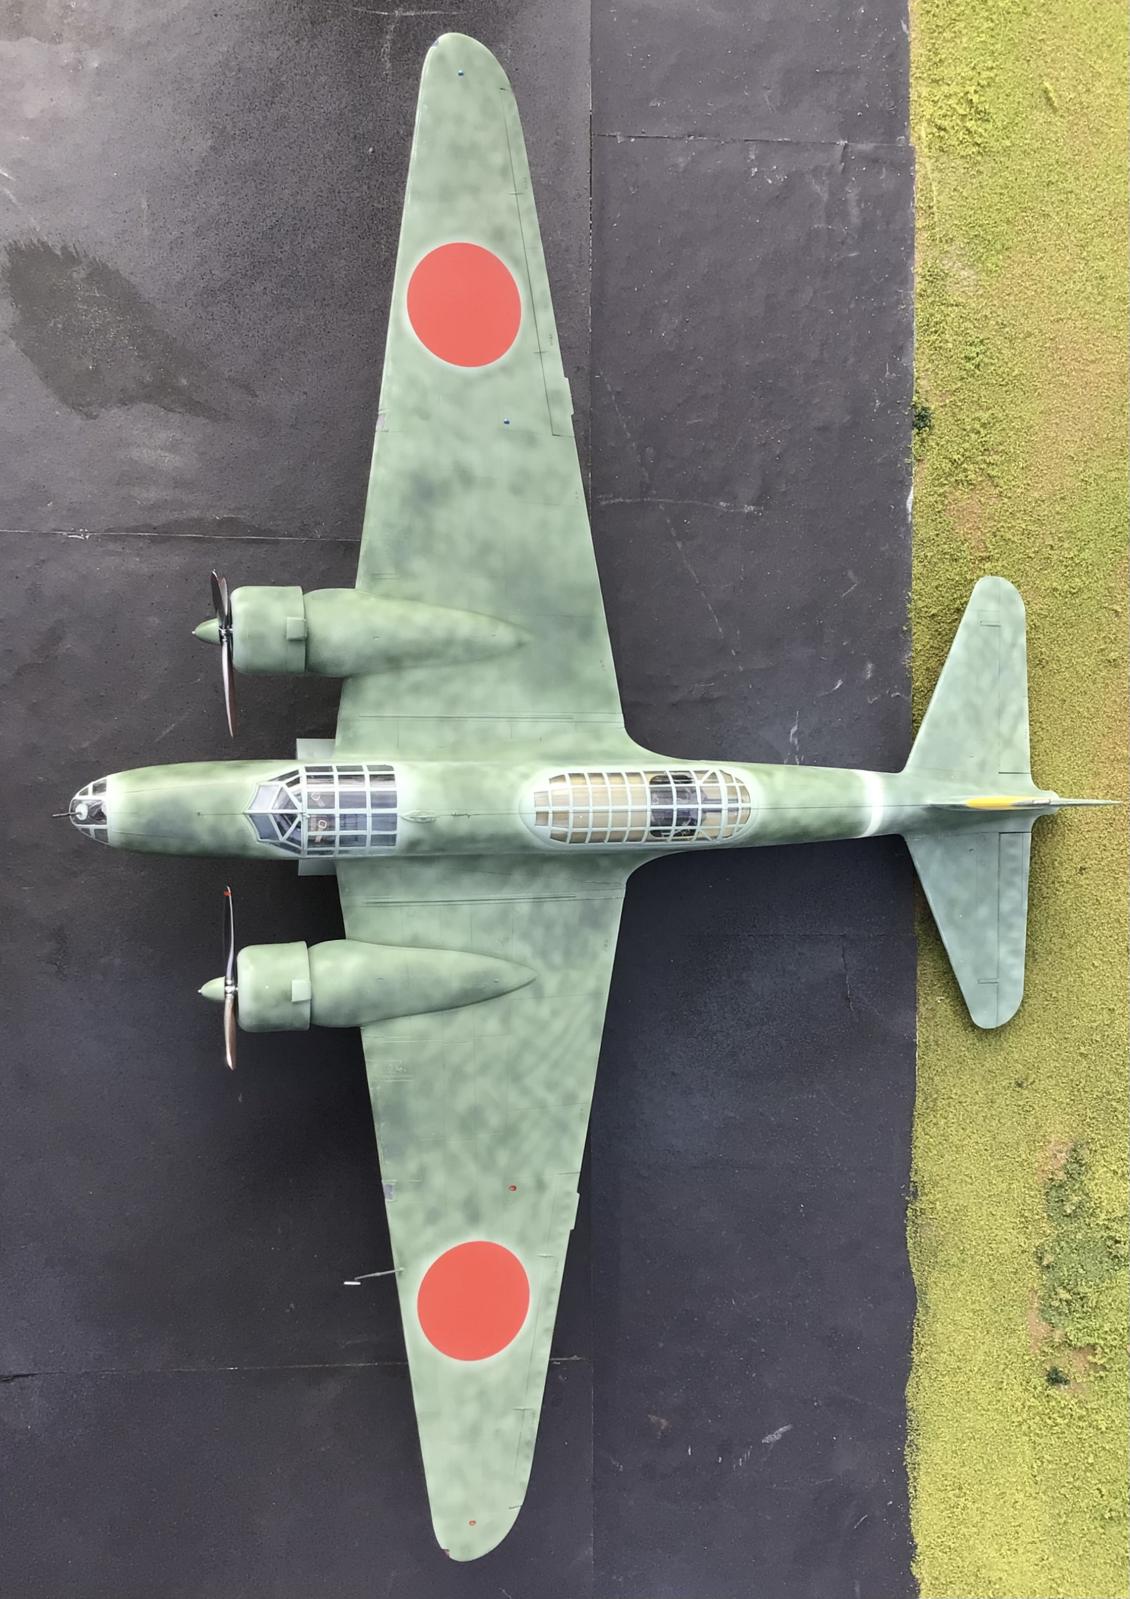
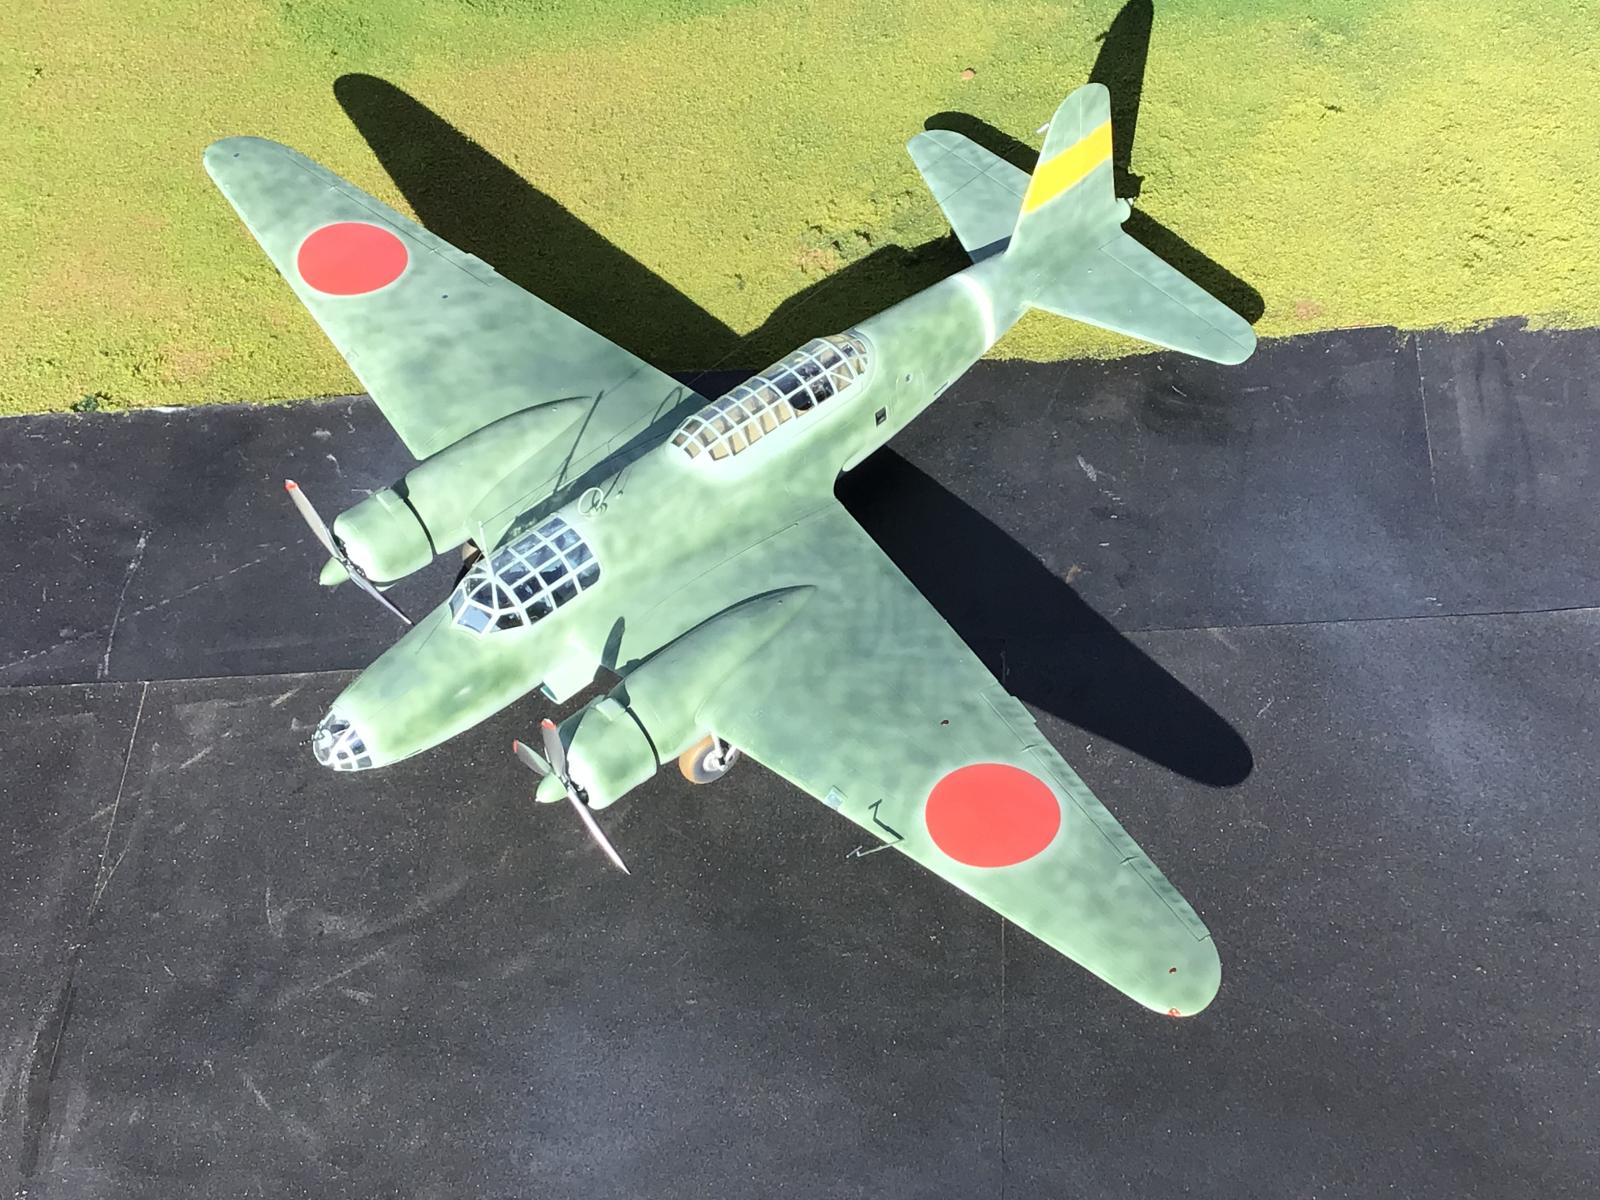
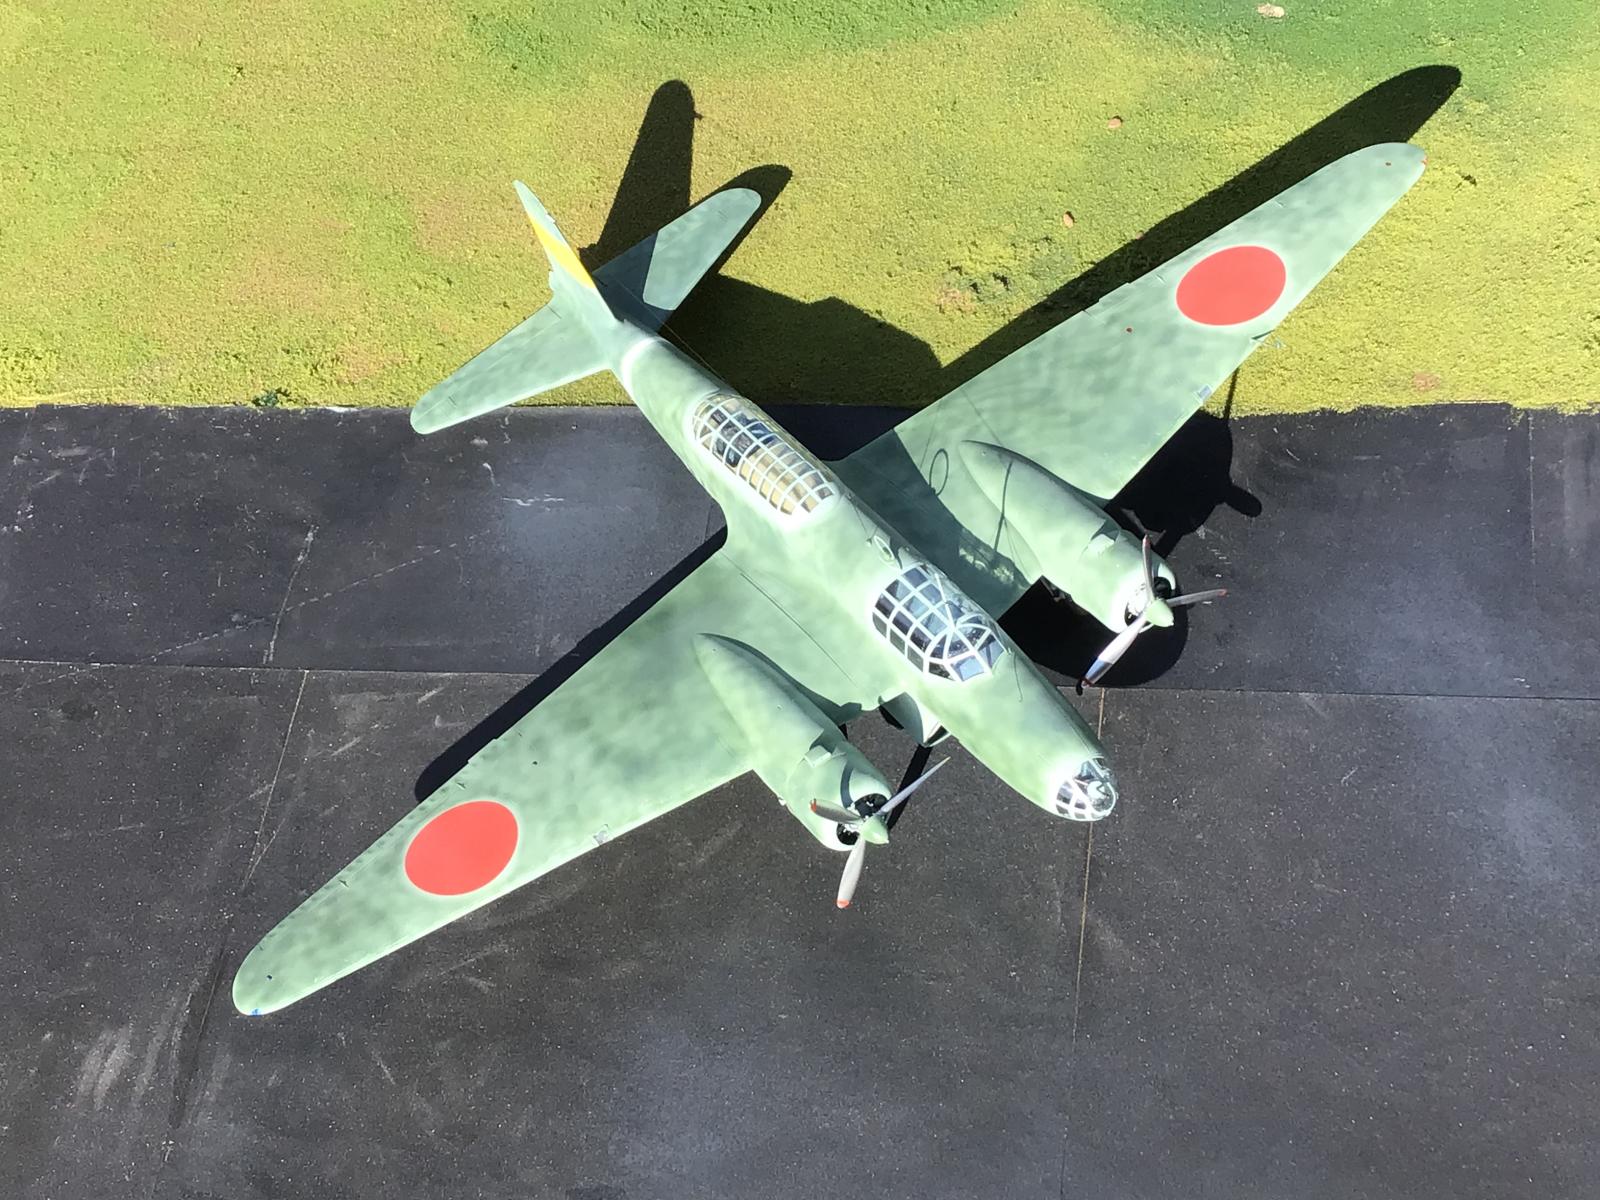
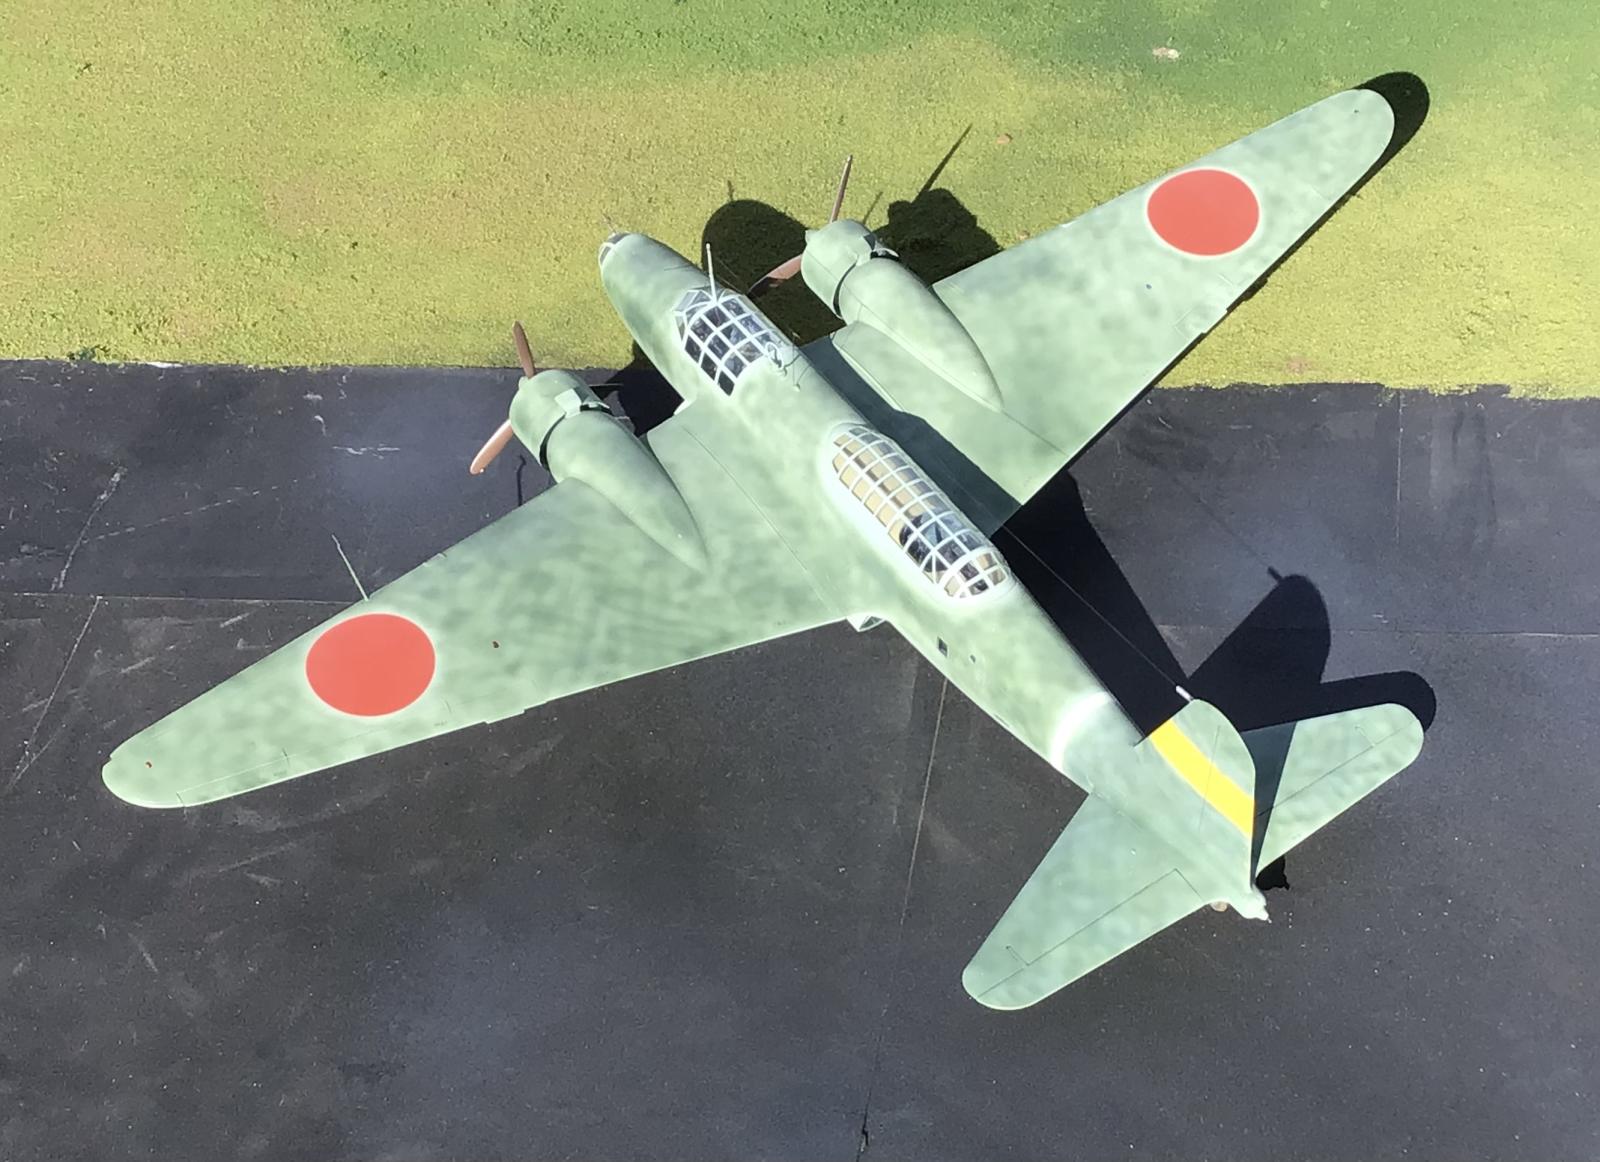
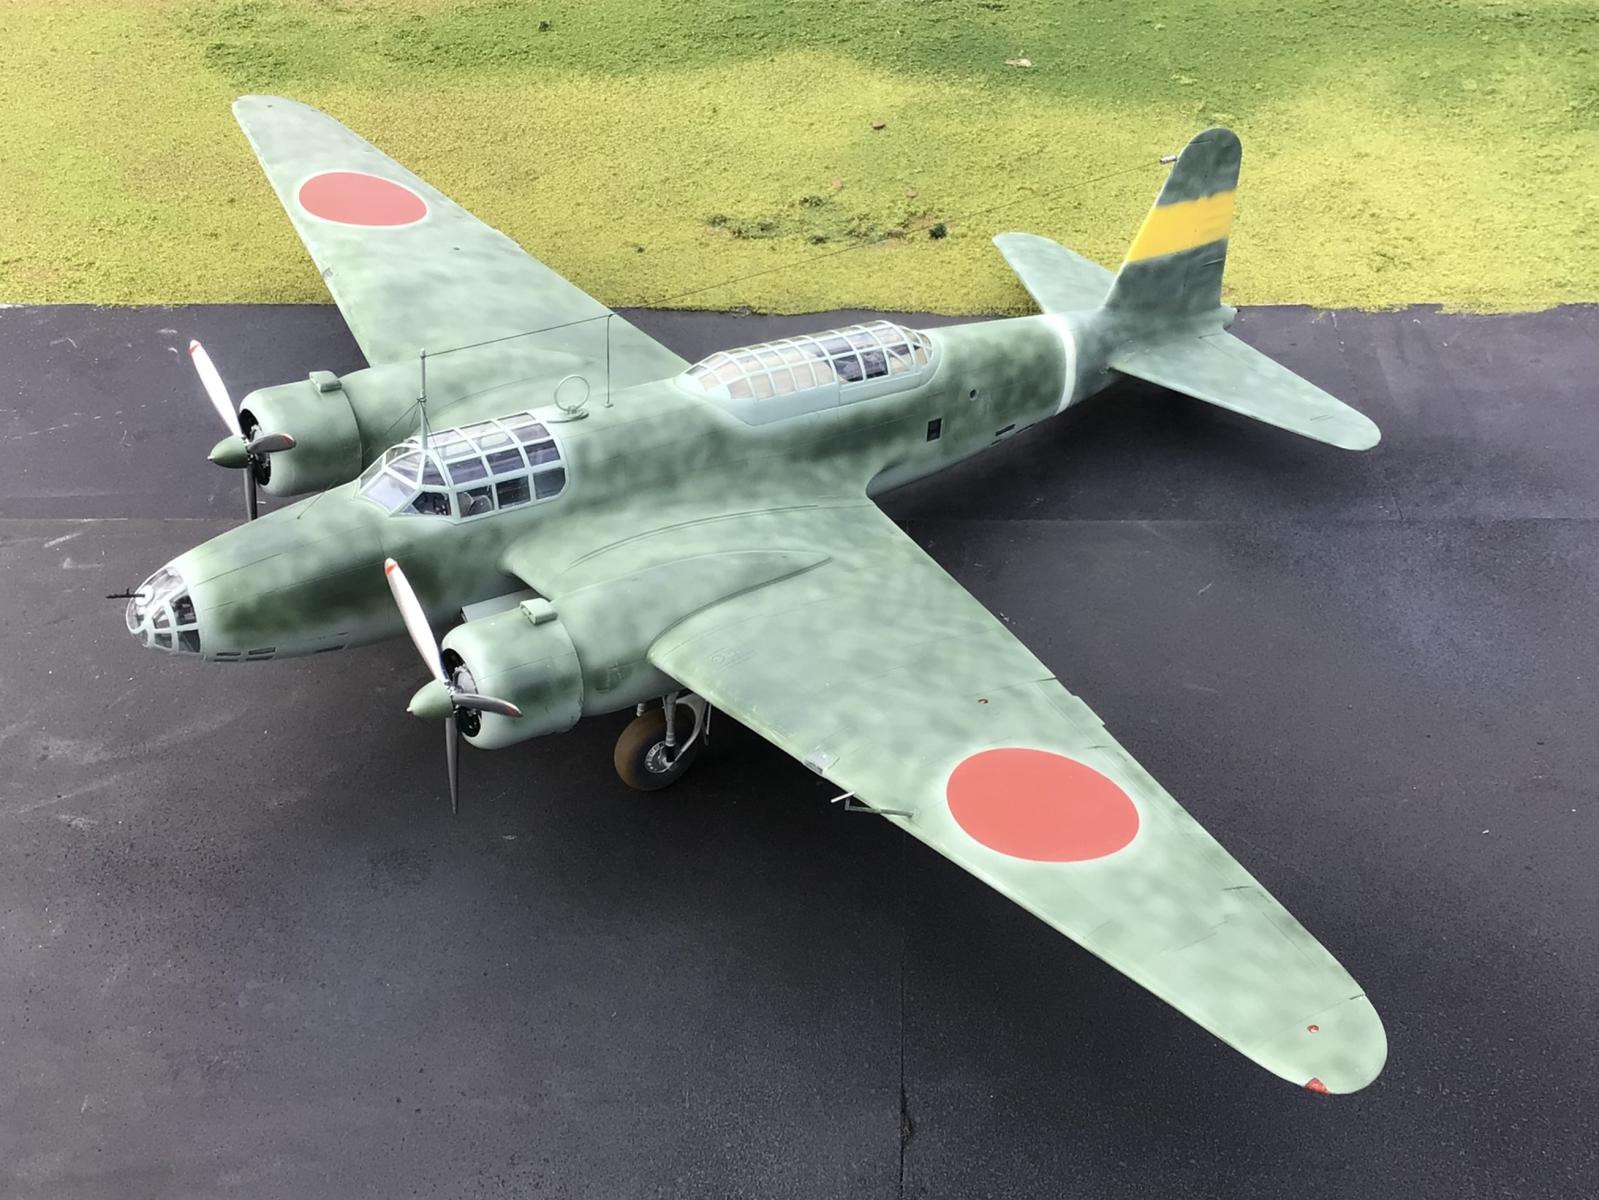
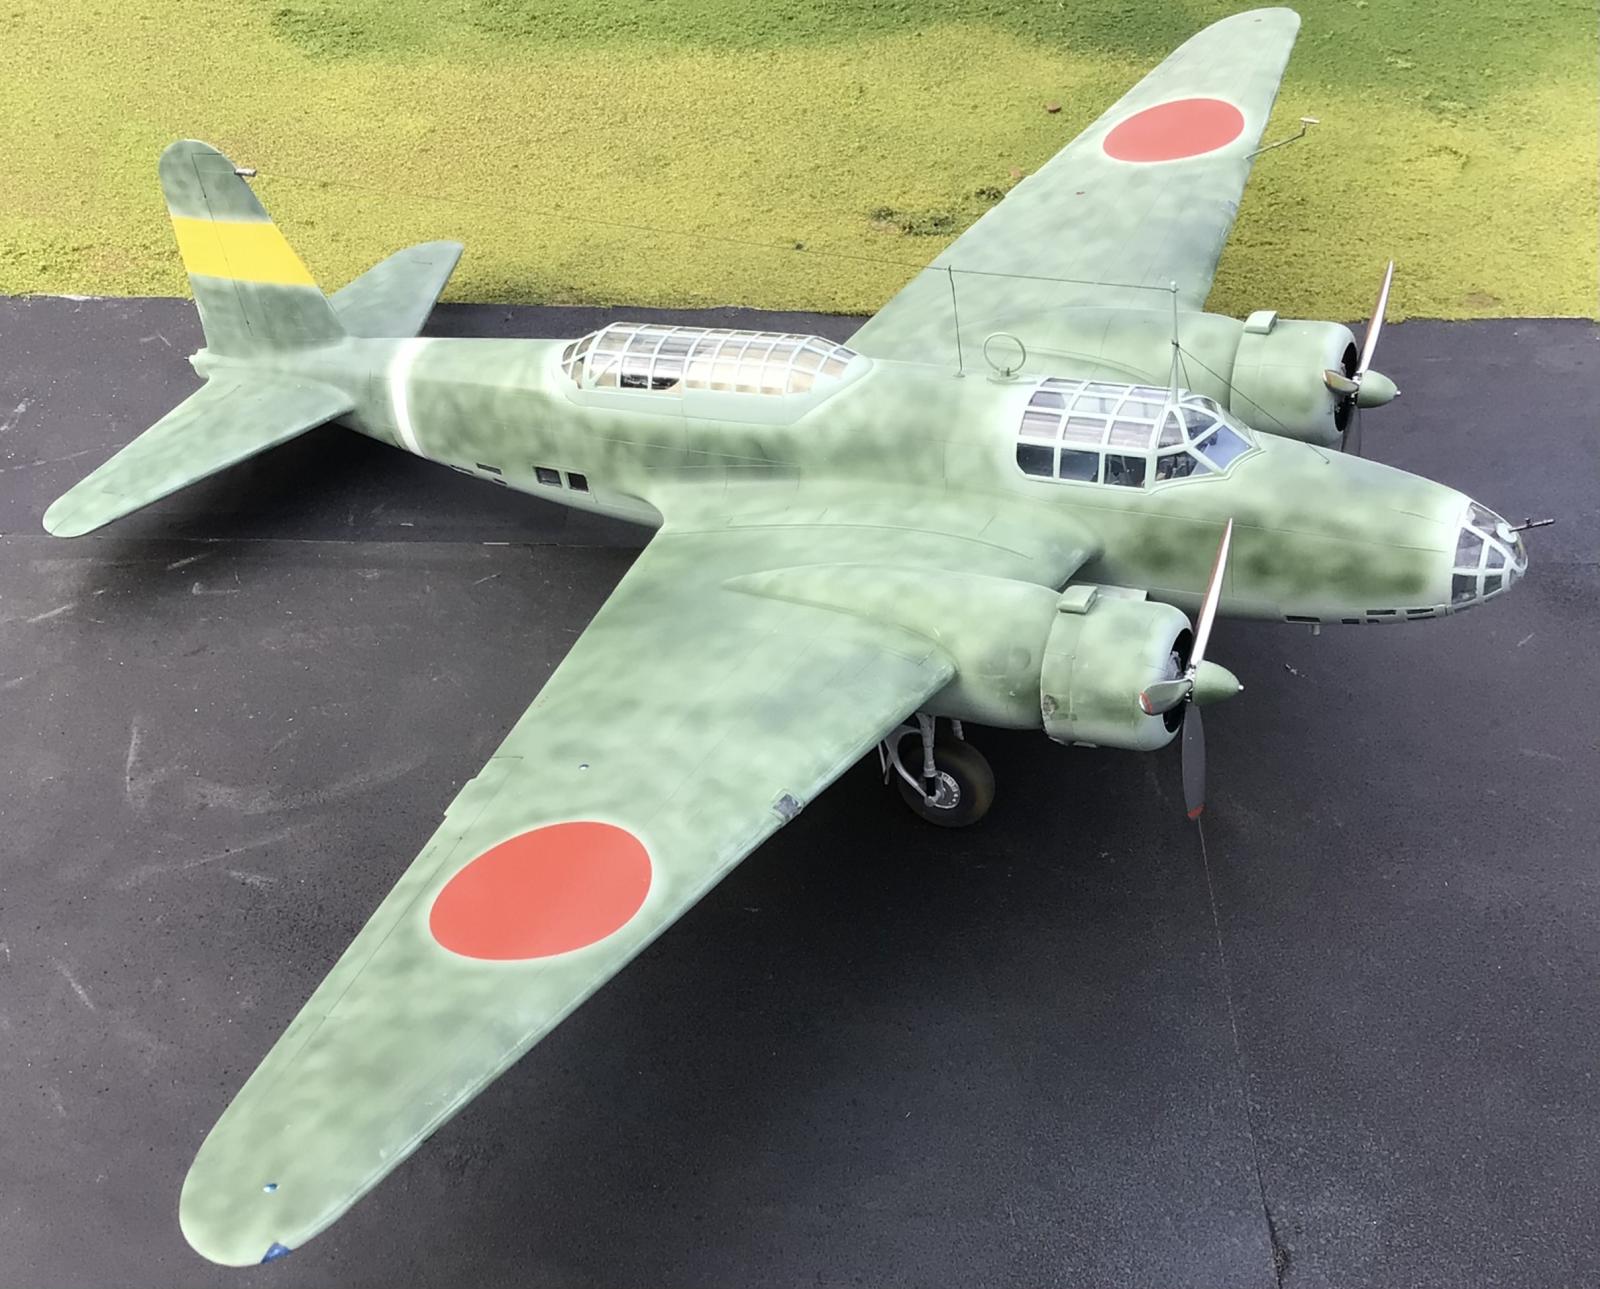
1/48 ICM 48195 Ki-21 Ib "Sally" Japanese Heavy Bomber with 60th Sentai markings.
This article is part of a series:
This is a model I recently built. I knew when I heard it was coming out I immediately placed one on Pre Order with Squadron. I am a huge fan of WW2 era Japanese aircraft. When it finally arrived, I posted a kit review on the kit.

Next I cleared off the work bench and got busy with the building process. A build journal was started and regular updates were made.
https://imodeler.com/groups/the-empire-of-japan-1919-1946/forum/topic/1-48-scale-icm-ki-21-sally/
If you are interested you can see what went into this by following this link here.
The following information was copied from Wikipedia. All credit should go to them for this information about the aircraft and it's history.
In 1936, the Imperial Japanese Army Air Service issued a requirement for a new heavy bomber to replace both the Ki-20 (Army Type 92 Heavy Bomber) and the Ki-1 (Army Type 93 Heavy Bomber). The design called for a crew of at least four, top speed of 400 km/h (250 mph), endurance of at least five hours, and a bomb load of 750 kg (1,650 pounds).
The design parameters were very ambitious for the mid-1930's; few twin-engine bombers anywhere in the world could exceed such performance at that time.
Both Mitsubishi and Nakajima were asked to build two prototypes each, a further proposal from Kawasaki was rejected. The Mitsubishi design was an all-metal mid-wing cantilever monoplane with retractable landing gear, ventral bomb bay and two radial engines.
The first prototype flew on 18 December 1936, with the second prototype, which differed in replacing the dorsal turret of the first prototype with a long greenhouse canopy, following later in the month.
In the resulting competition Mitsubishi's Ki-21 and Nakajima's Ki-19 were found to be similar, with the Ki-21 having better performance while the Nakajima design was a better bombing platform and had more reliable engines.
In order to make a final decision, two further prototype were ordered from both Mitsubishi and Nakajima, with Mitsubishi instructed to change its own 615 kW (825 horsepower) Mitsubishi Ha-6 radial engines for the Nakajima Ha-5 engines used by the Nakajima design and vice versa, while the Ki-21 gained a revised glazed nose similar to that of the Ki-19 and revised tail surfaces.
Thus modified, the Ki-21 proved superior and was ordered into production as the "Army Type 97 Heavy Bomber Model 1A", being ordered into production in November 1937.
Production aircraft began to enter service in August 1938, supplementing and then replacing the Fiat BR.20 bombers which had been purchased as an interim measure.
Several improved versions followed before the production of the type ended in September 1944. A total of 2,064 aircraft were built, 1,713 by Mitsubishi and 351 by Nakajima.
Operational history:
The Ki-21-Ia was used in combat in the war with China by the 60th Sentai from autumn 1938, carrying out long-range unescorted bombing missions in conjunction with the BR.20 equipped 12th and 98th Sentais.
The Ki-21 proved to be more successful than the BR.20, having a longer range and being more robust and reliable.
Two more Sentais, the 58th and 61st deployed to Manchuria in the summer of 1939 for operations against China, with aircraft from the 61st also being heavily used against Russian and Mongolian Forces during the Nomonhan Incident in June–July 1939.
Losses were high during early combat operations, with weaknesses including a lack of armament and self-sealing fuel tanks, while the aircraft's oxygen system also proved unreliable.
The Ki-21-Ib was an improved version designed to address the armament issue by increasing the number of 7.7 mm (.303 in) Type 89 machine guns to five, and incorporating improvements to the horizontal tail surfaces and trailing edge flaps.

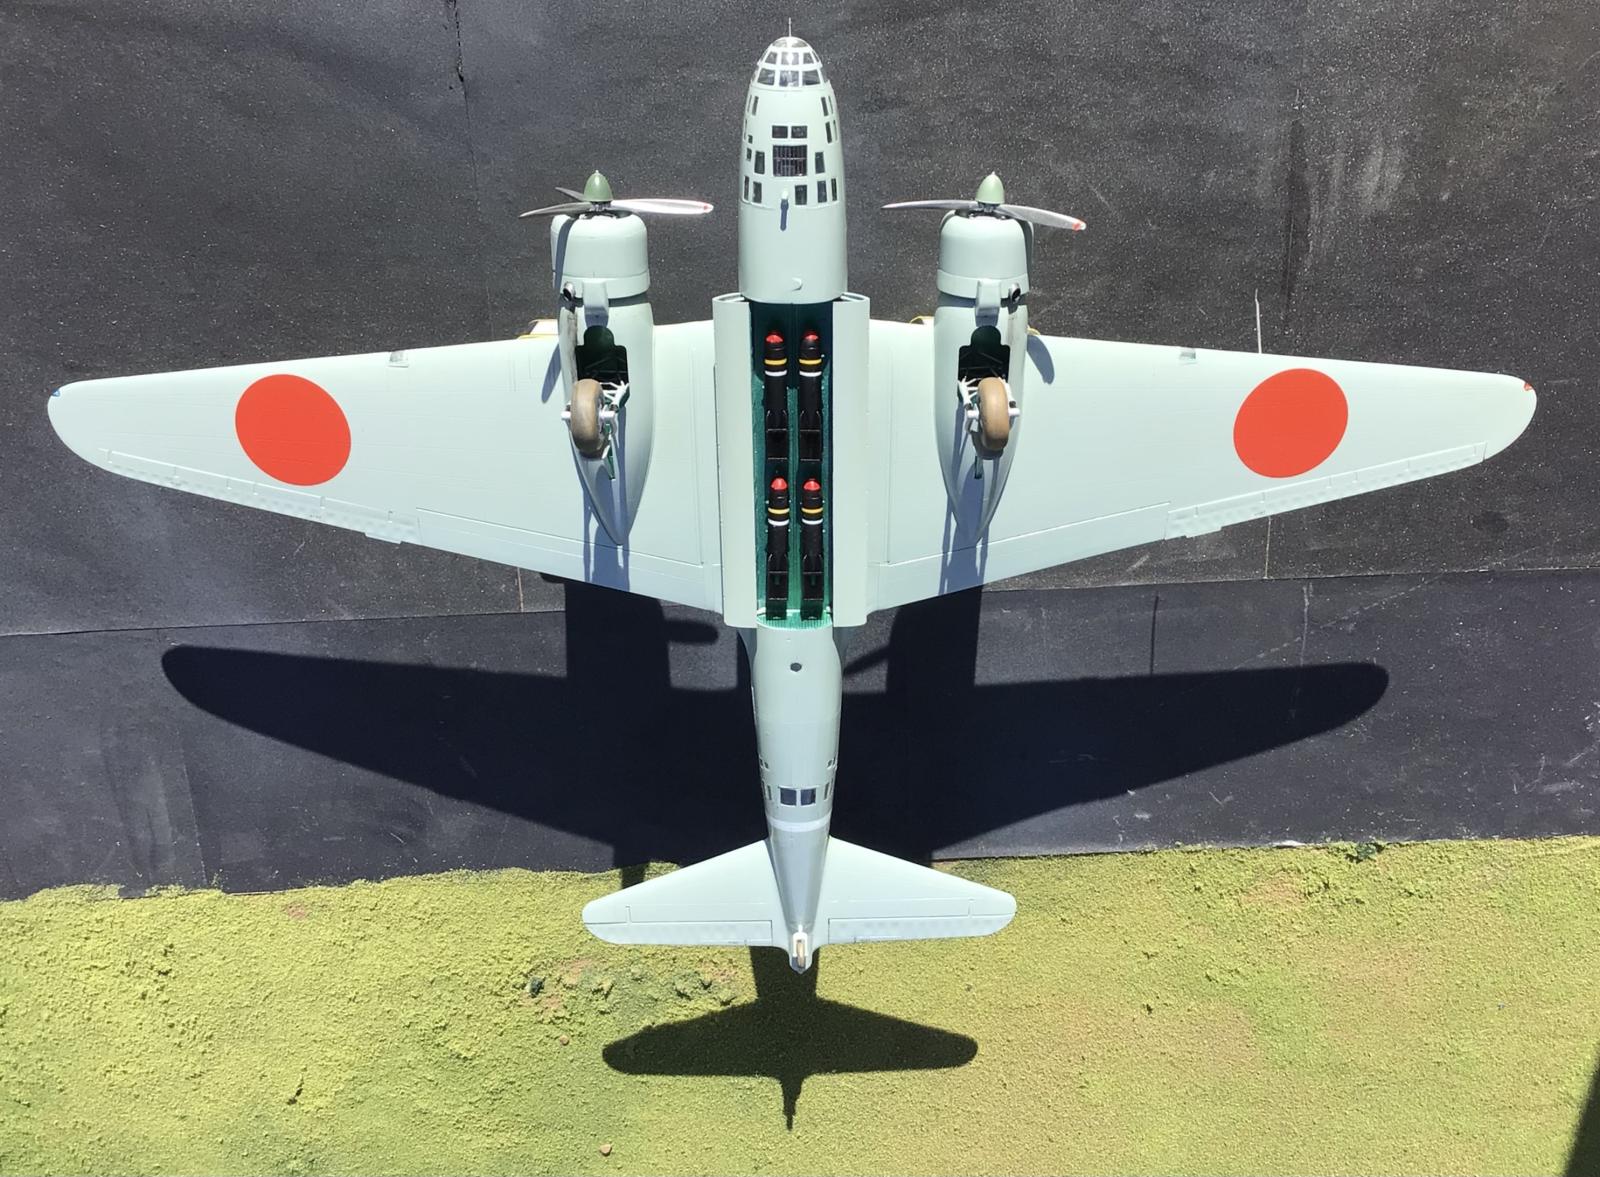
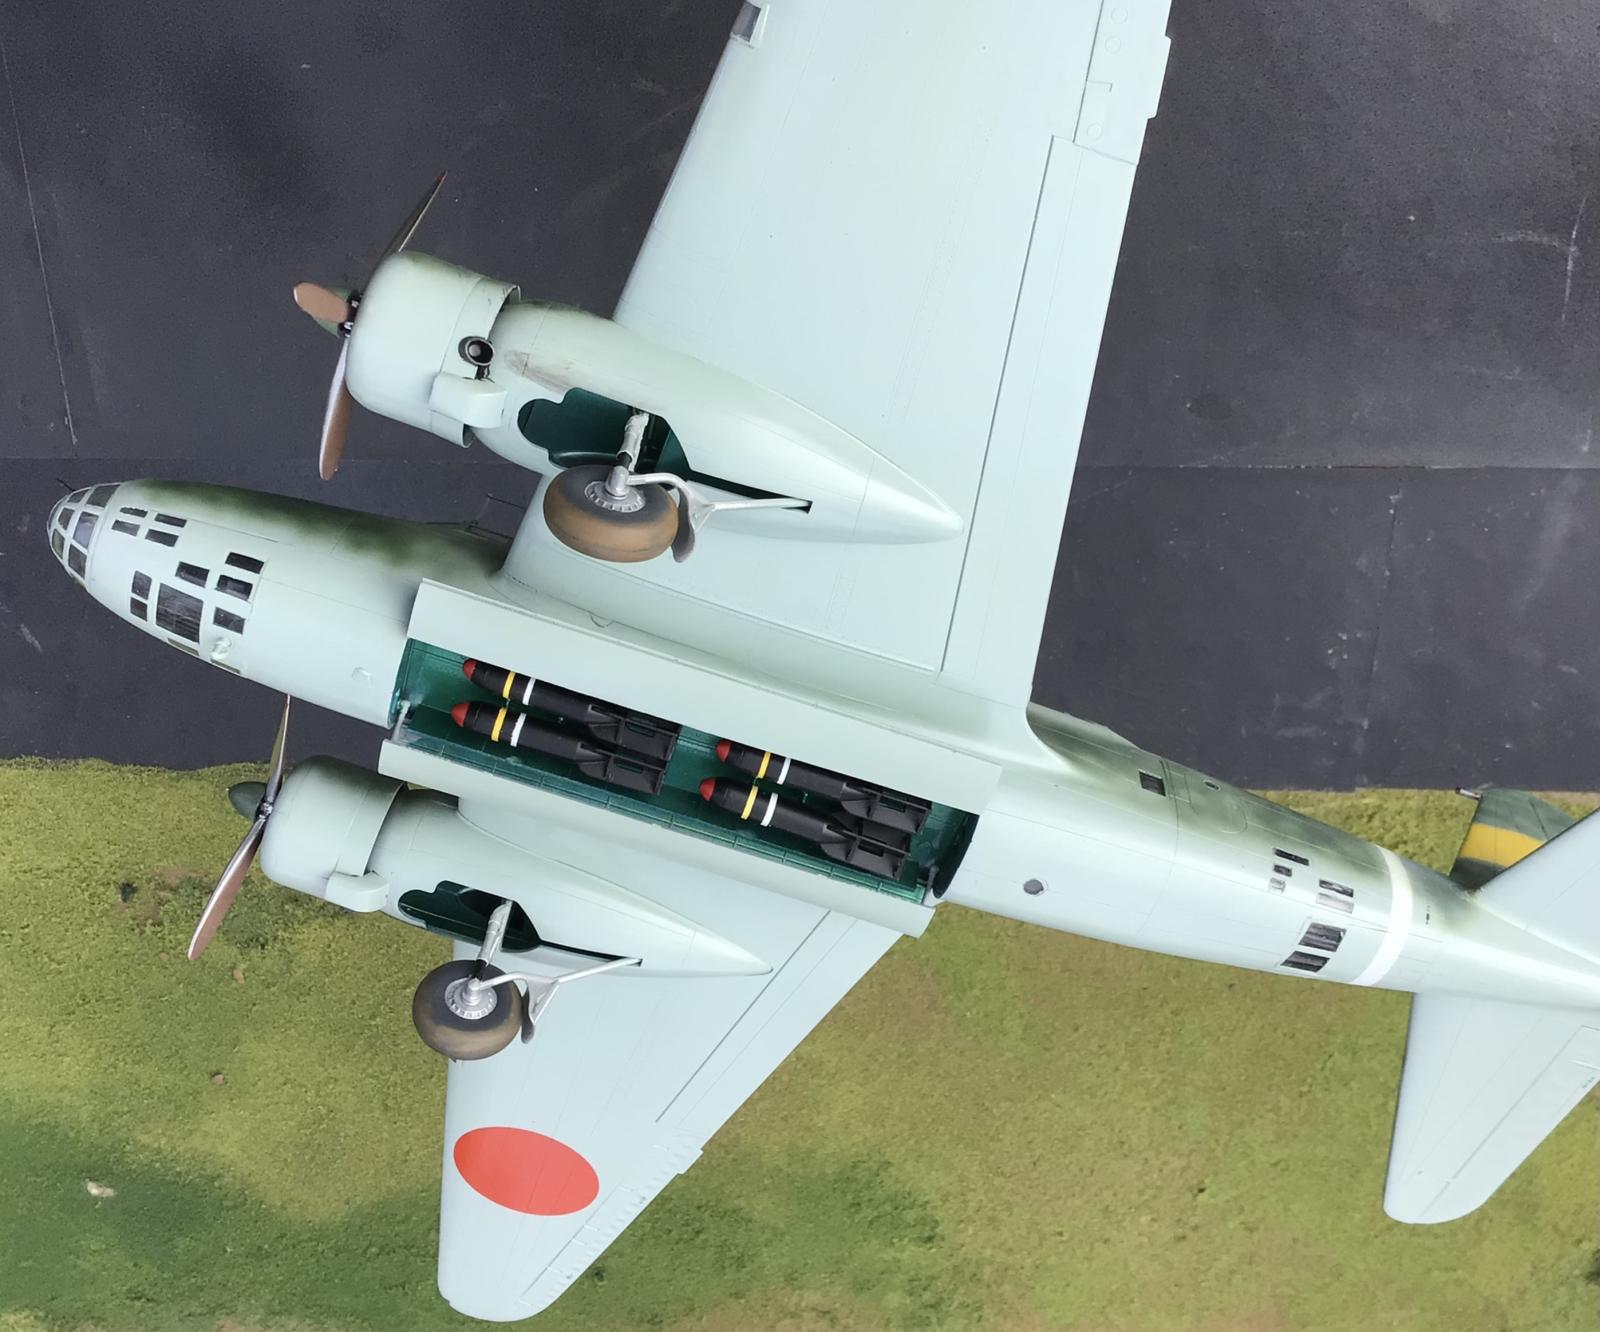
In addition, the bomb bay was enlarged. The tail gun was a 'stinger' installation and was remotely controlled. Also, the fuel tanks were partially protected with laminated rubber sheets.

This was followed in production by the Ki-21-Ic with provision for a 500 L (130 US gal) auxiliary fuel tank, fitted in the rear weapons bay and one more 7.7 mm (.303 in) machine gun, bringing the total to six.
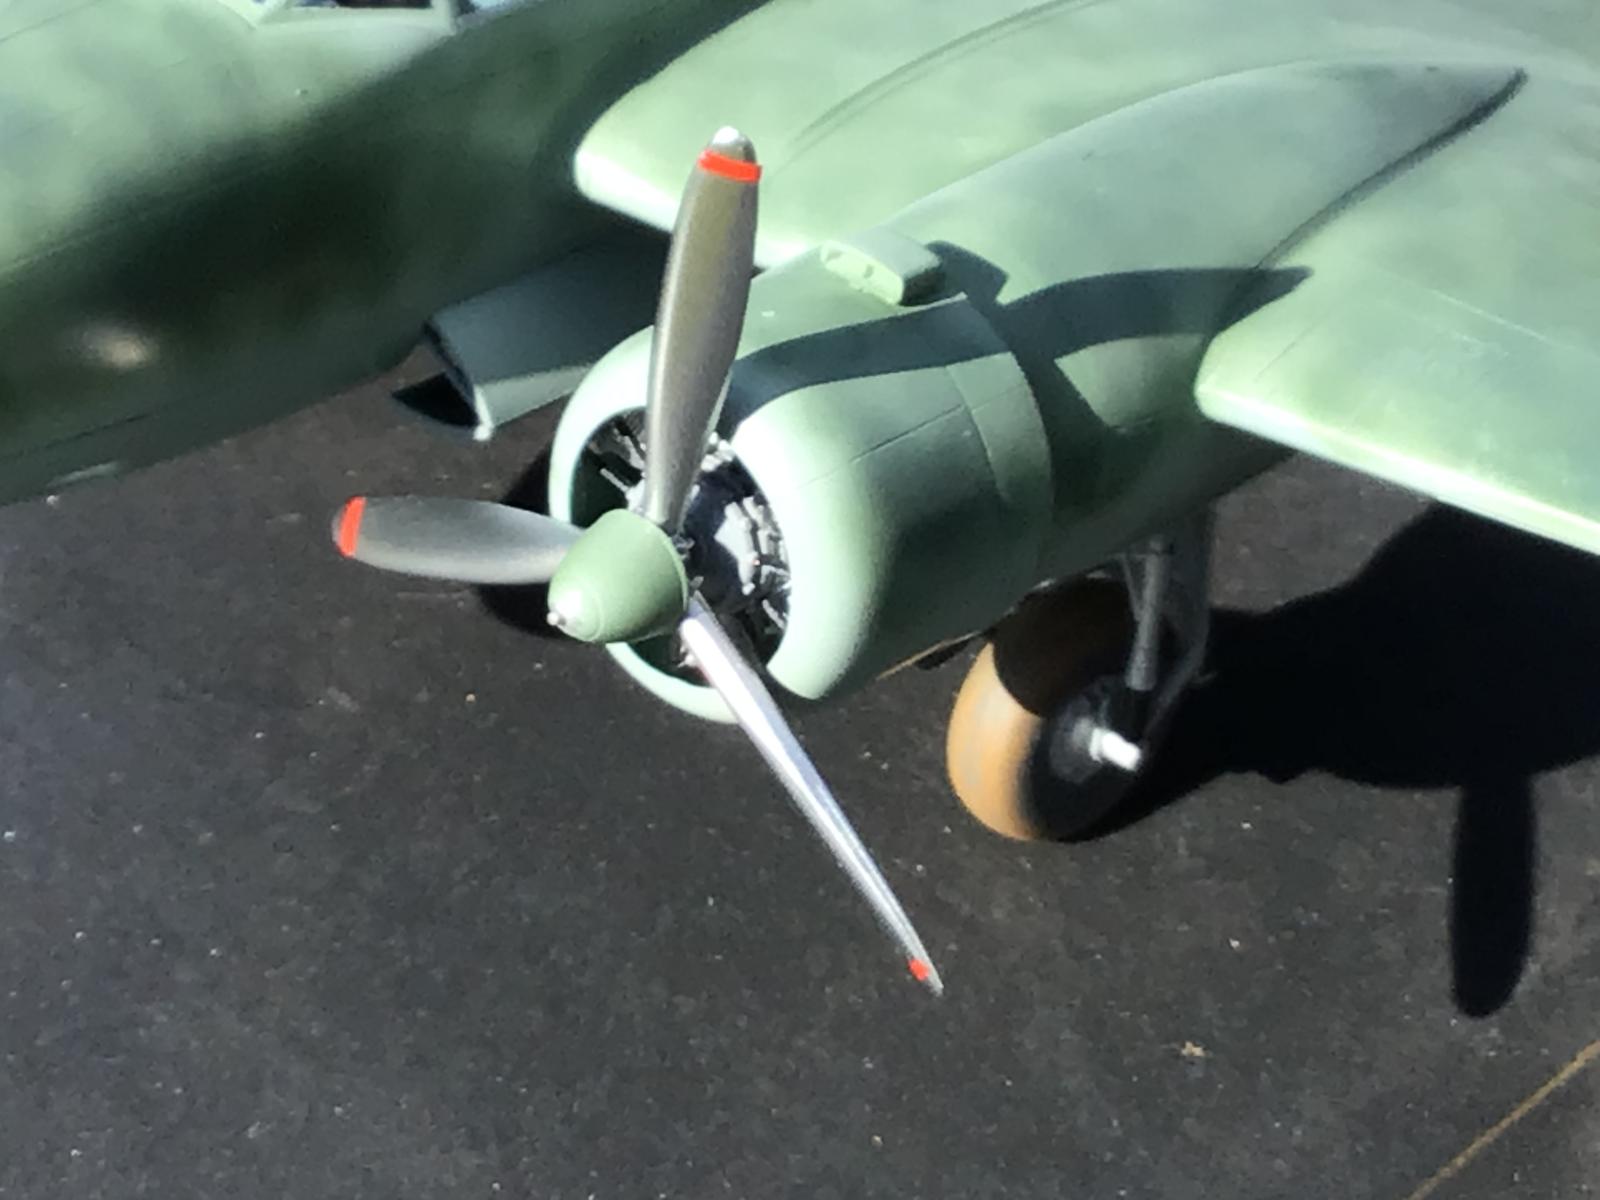
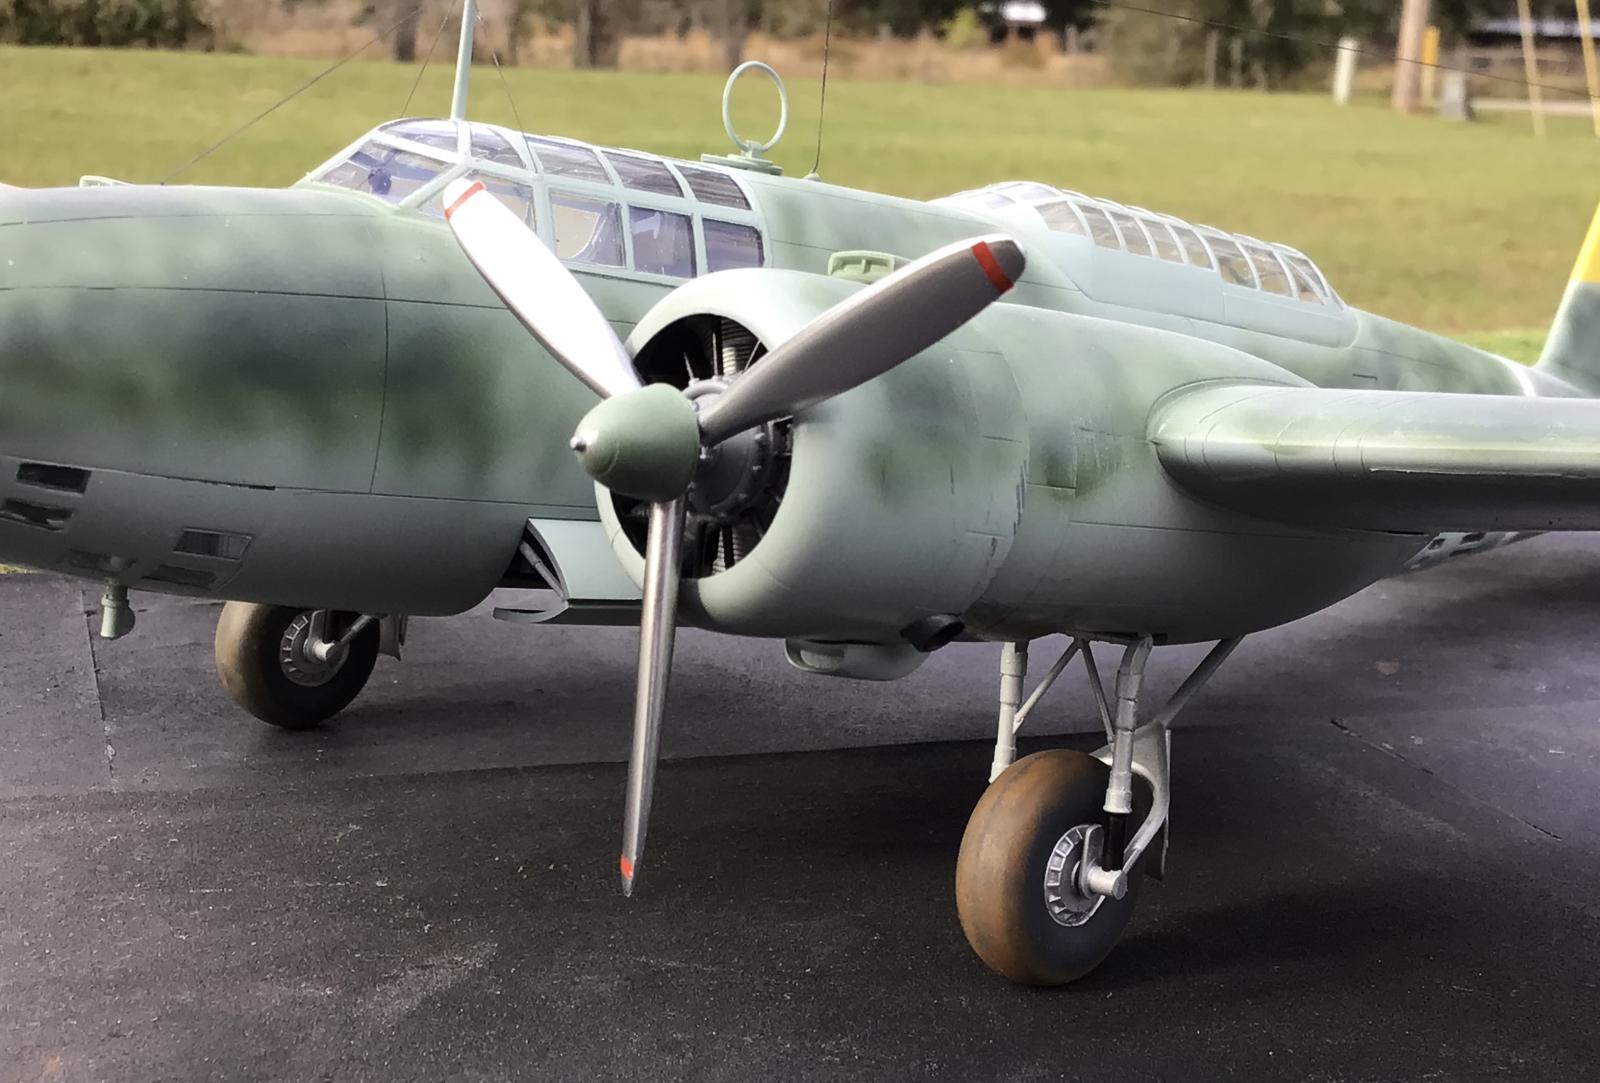
Four 50 kg (110 pounds) bombs were carried externally. To offset the increase in weight the main wheels of the Ki-21-IC were increased in size.
However, by the attack on Pearl Harbor and the start of the Pacific War, improvements in the ROC Air Force caused losses to mount, and most Ki-21-1a, -1b and -1c were relegated to training or second-line duties.
Front line units from mid-1940 were equipped with the Ki-21-IIa ("Army Type 97 Heavy Bomber Model 2A") with the more powerful 1,118 kW (1,500 horsepower) Mitsubishi Ha-101 air-cooled engines and larger horizontal tail surfaces.
This became the main version operated by most IJAAF heavy bomber squadrons at the beginning of the Pacific War and played a major role in many early campaigns.
For operations over the Philippines the JAAF's 5th, 14th and 62nd Air Groups, based in Taiwan, attacked American targets at Aparri, Tuguegarao, Vigan and other targets in Luzon on 8 December 1941.
The 3rd, 12th, 60th, and 98th Air Groups, based in French Indochina, struck British and Australian targets in Thailand and Malaya, bombing Alor Star, Sungai Petani and Butterworth under escort by Nakajima Ki-27 and Ki-43 fighters.


However, starting from operations over Burma in December 1941 and early 1942, the Ki-21 began to suffer heavy casualties from Curtiss P-40s and Hawker Hurricanes.
To partially compensate, the IJAAF introduced the Ki-21-IIb, with a pedal-operated upper turret with one 12.7 mm (0.50 in) Type 1 machine gun, redesigned cockpit canopies and increased fuel capacity.
Although used in all fronts in the Pacific theater, it became clear by 1942 that the design was rapidly becoming obsolete, and was increasingly shifted away from front-line service.
In spite of its shortcomings, the Ki-21 remained in service until the end of the war, being utilized as transport (along with the civil transport version MC-21), bomber crew and paratrooper trainer, for liaison and communications, special commando and secret missions, and kamikaze operations.
Nine Ki-21-Ia/b's were sold by Japan to Thailand in 1940 for use by the Royal Thai Air Force against Vichy French forces in French Indochina but did not participate in the French-Thai War as its crews had not completed training.
Ki-21 of the Daisan Dokuritsu Hikōtai at Yontan Airfield, 25 May 1945
Towards the end of the war, remaining Ki-21s were used by Giretsu Special Forces in strikes against American forces in Okinawa and the Ryūkyū Islands. One of the noted operations was an attack on the Allied-held Yontan airfield and Kadena airfield on the night of 24 May 1945. Twelve Ki-21-IIb's of the Daisan Dokuritsu Hikōtai were dispatched for a strike, each with 14 commandos. Five managed to crash-land on the Yontan airfield.
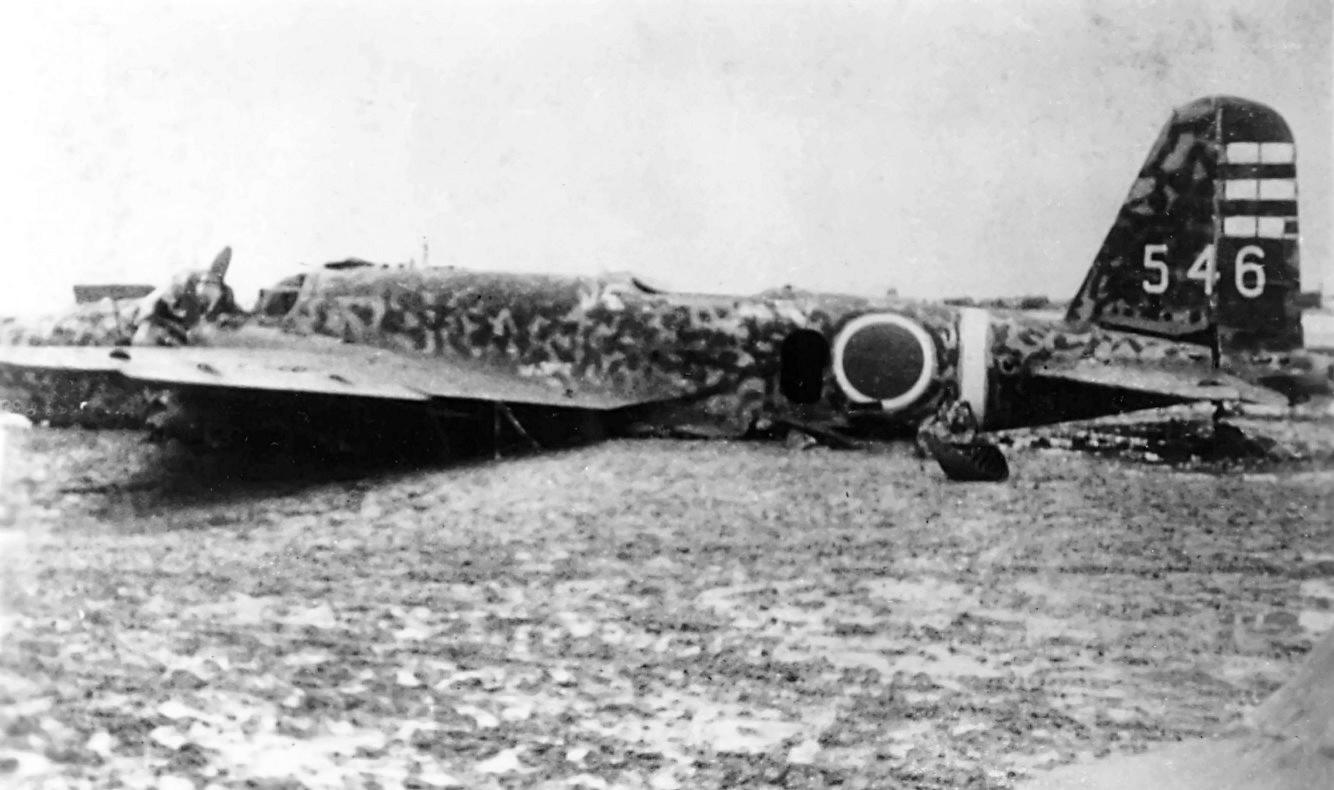
Only one plane landed successfully. This is a photo of this same plane.
The surviving Japanese raiders, armed with submachine guns and explosives, then wrought havoc on the supplies and nearby aircraft, destroyed 70,000 US gallons (260,000 L) of fuel and nine aircraft, and damaged 26 more.
A number of Ki-21-Ia were modified to serve as military transports for use by Greater Japan Airways, which was under contract by the Japanese Army in China for transportation.
Designated "MC-21", these aircraft had all armament and military equipment removed. Used primarily as cargo transports, each could also seat nine paratroopers.
Aircraft built from the start as transports were given the separate designation of Mitsubishi Ki-57, with equivalent civil aircraft being designated MC-20.
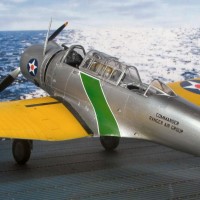
My very first model kit I built as a child was the now ancient Revell P-40E "Flying Tiger" kit.
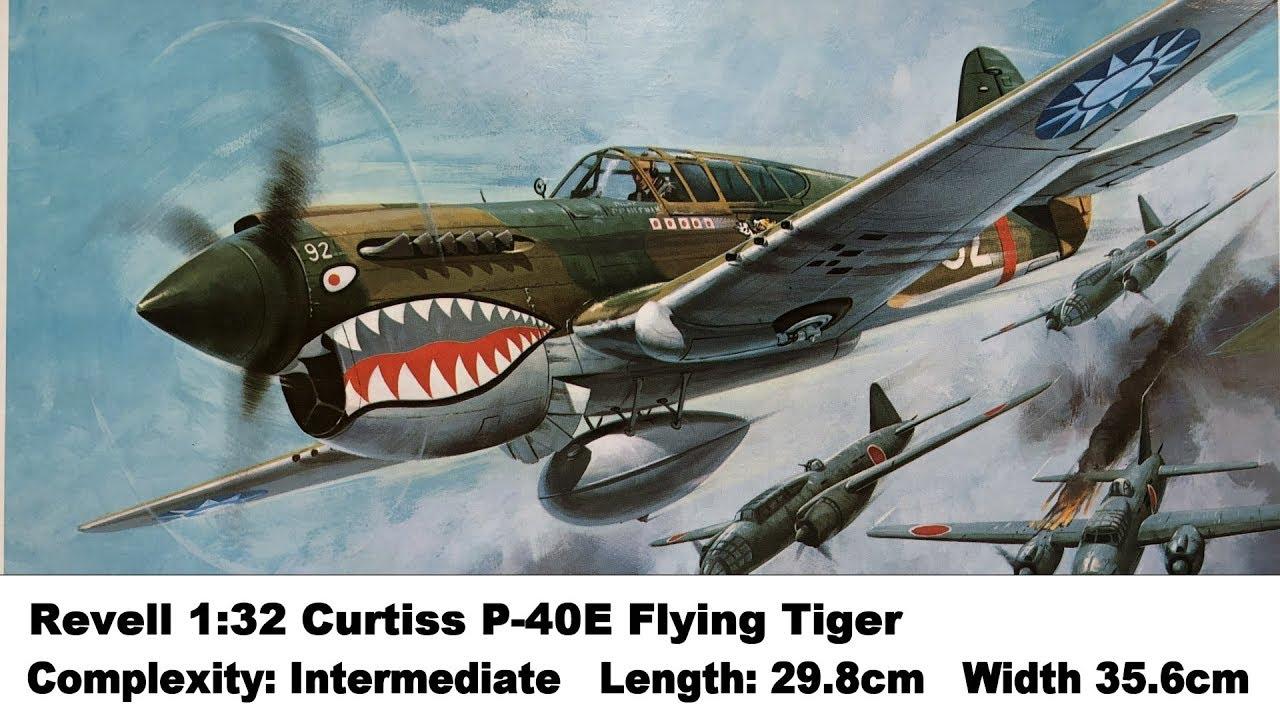
This is the box art for the original kit. I can remember this happening as a child, when I was sitting at my desk in school, and daydreaming that I was flying my very own P-40. In my daydream, I was diving through a formation of twin engine bombers just as depicted on the box art.
I should have been paying attention in class... 😉
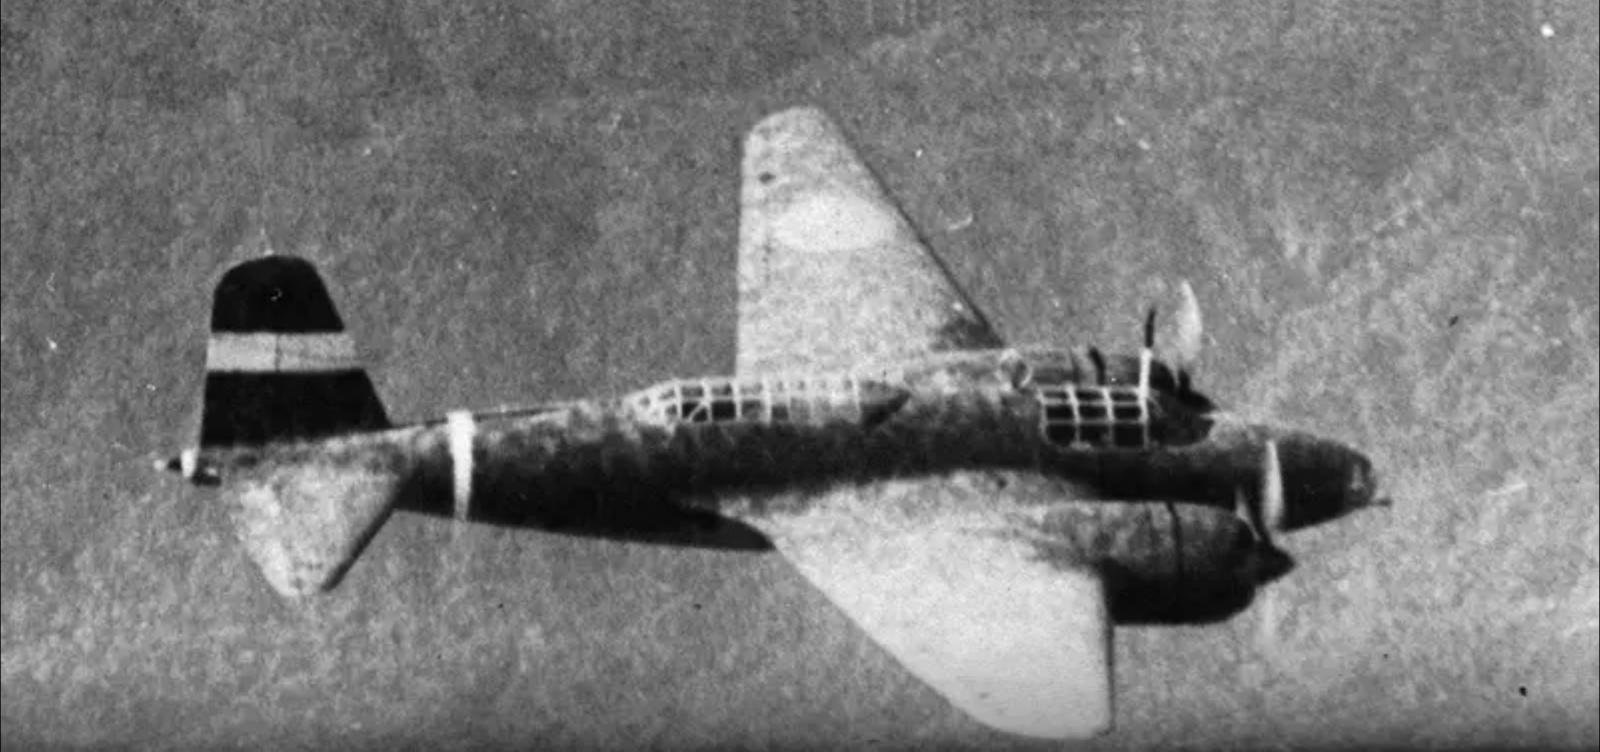
The original AVG Flying Tigers occasionally intercepted Japanese bombers that were flown by the 3rd, 12th, 60th, and 98th Air Groups, otherwise known as a Sentai.
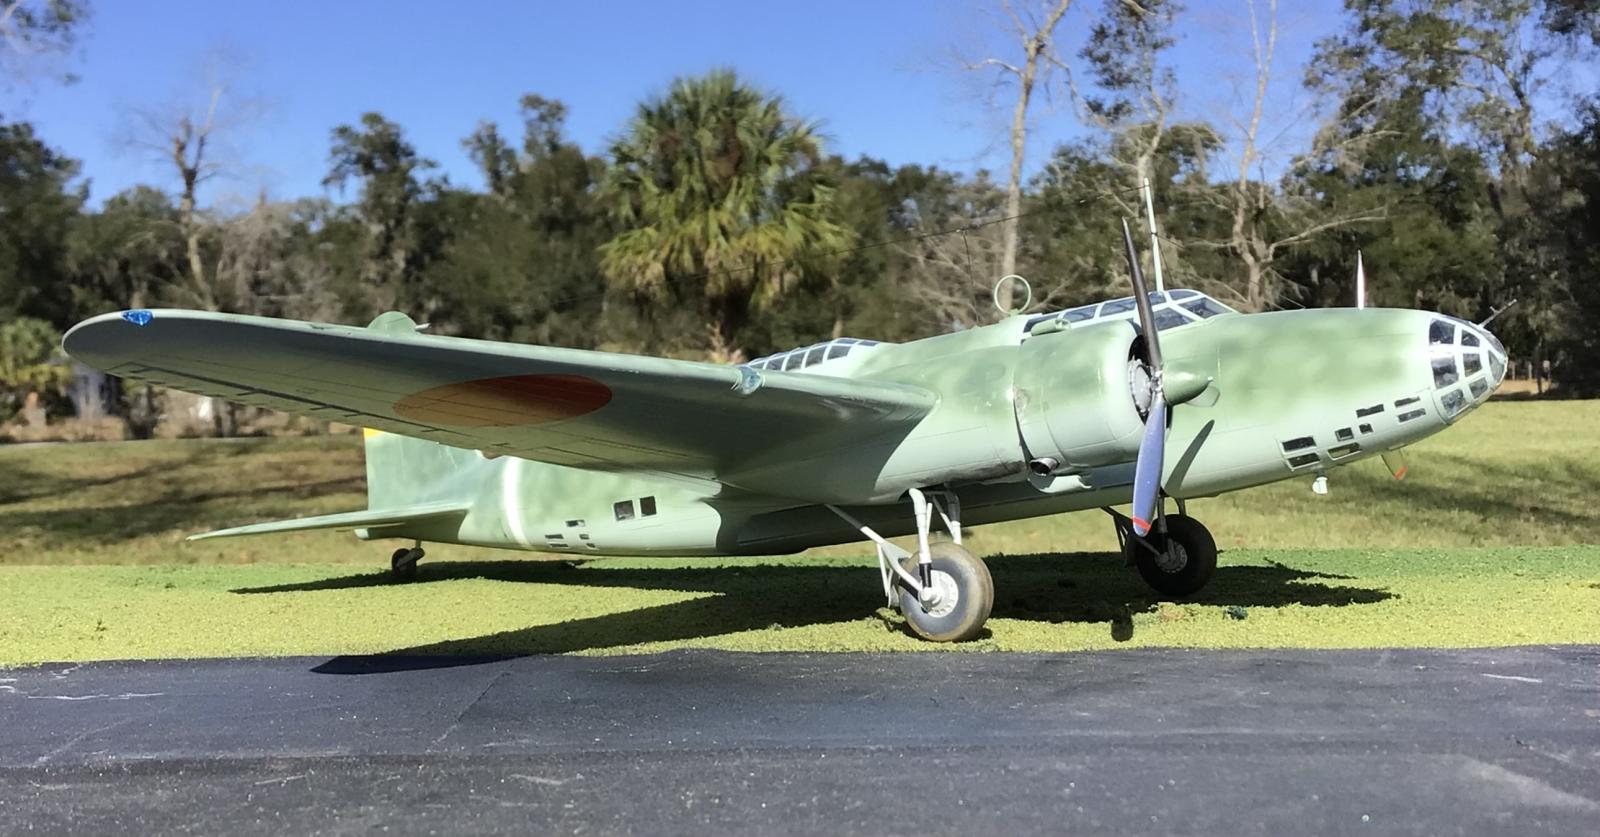
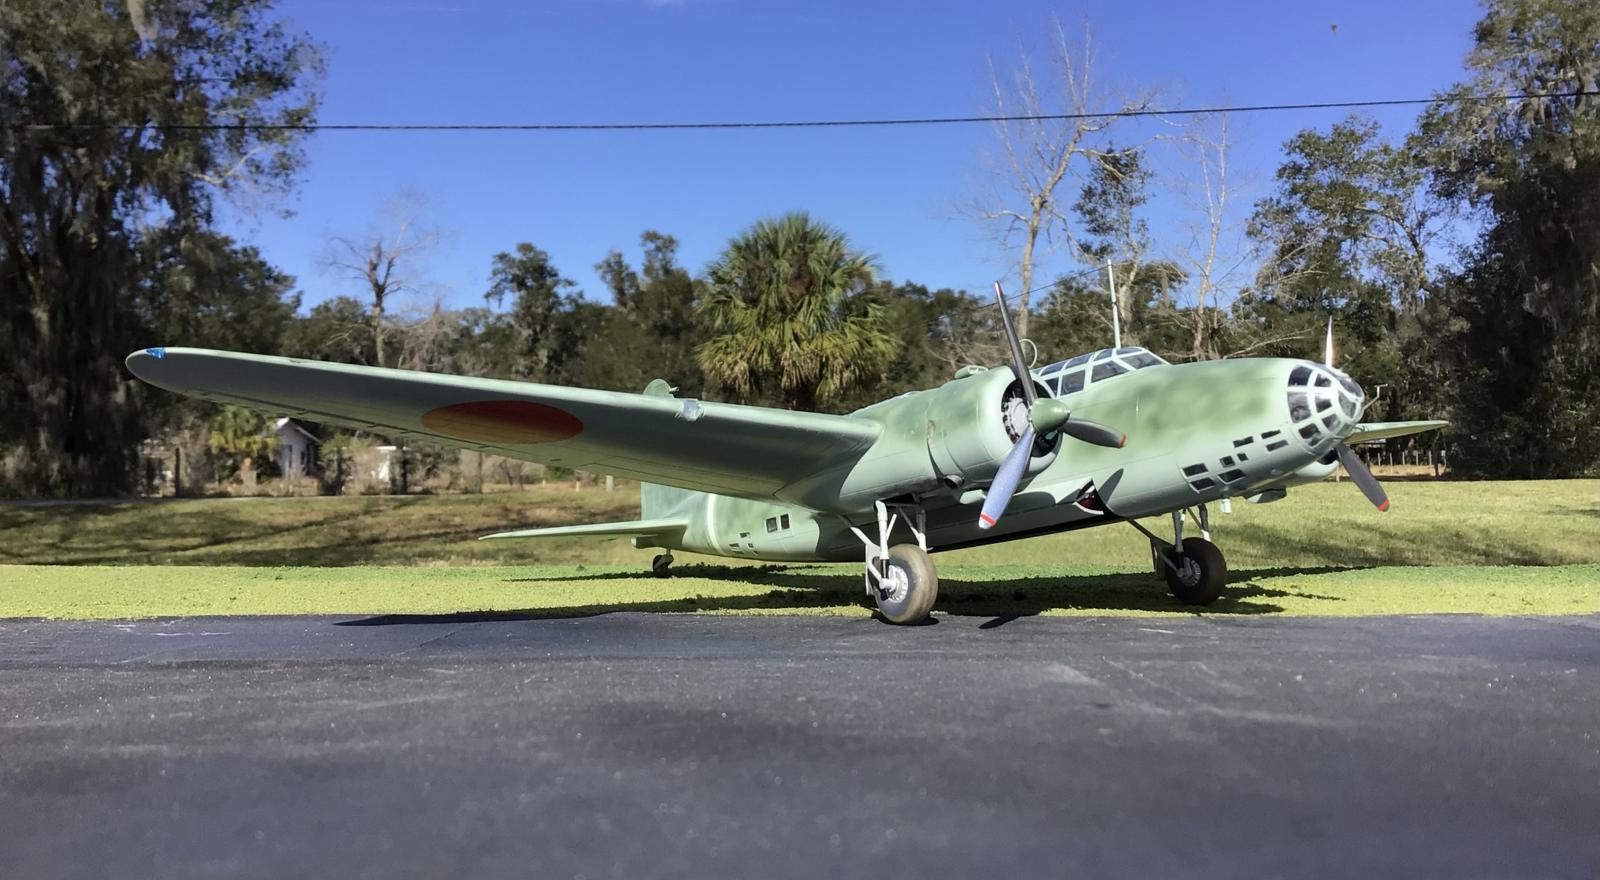
So I knew I had to build a model of a bomber that was flown by this group. I chose the 60th because their Group symbol was a simple one to make. It consisted of a wide single horizontal stripe. The color of the stripe denoted which Squadron, or Chutai the aircraft belonged to.
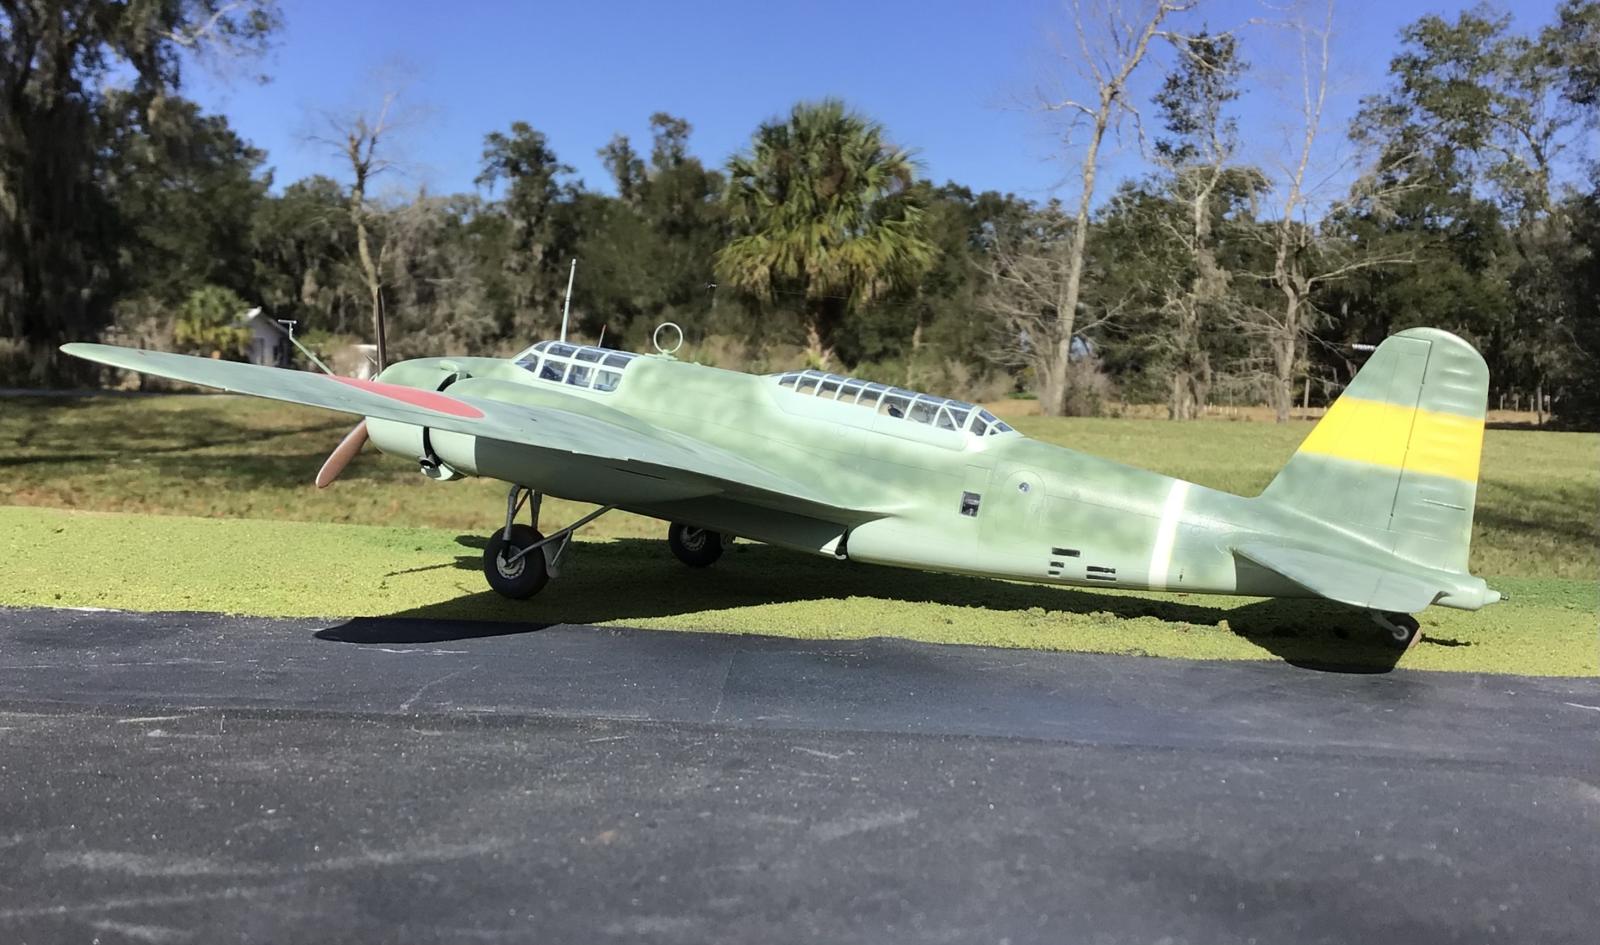
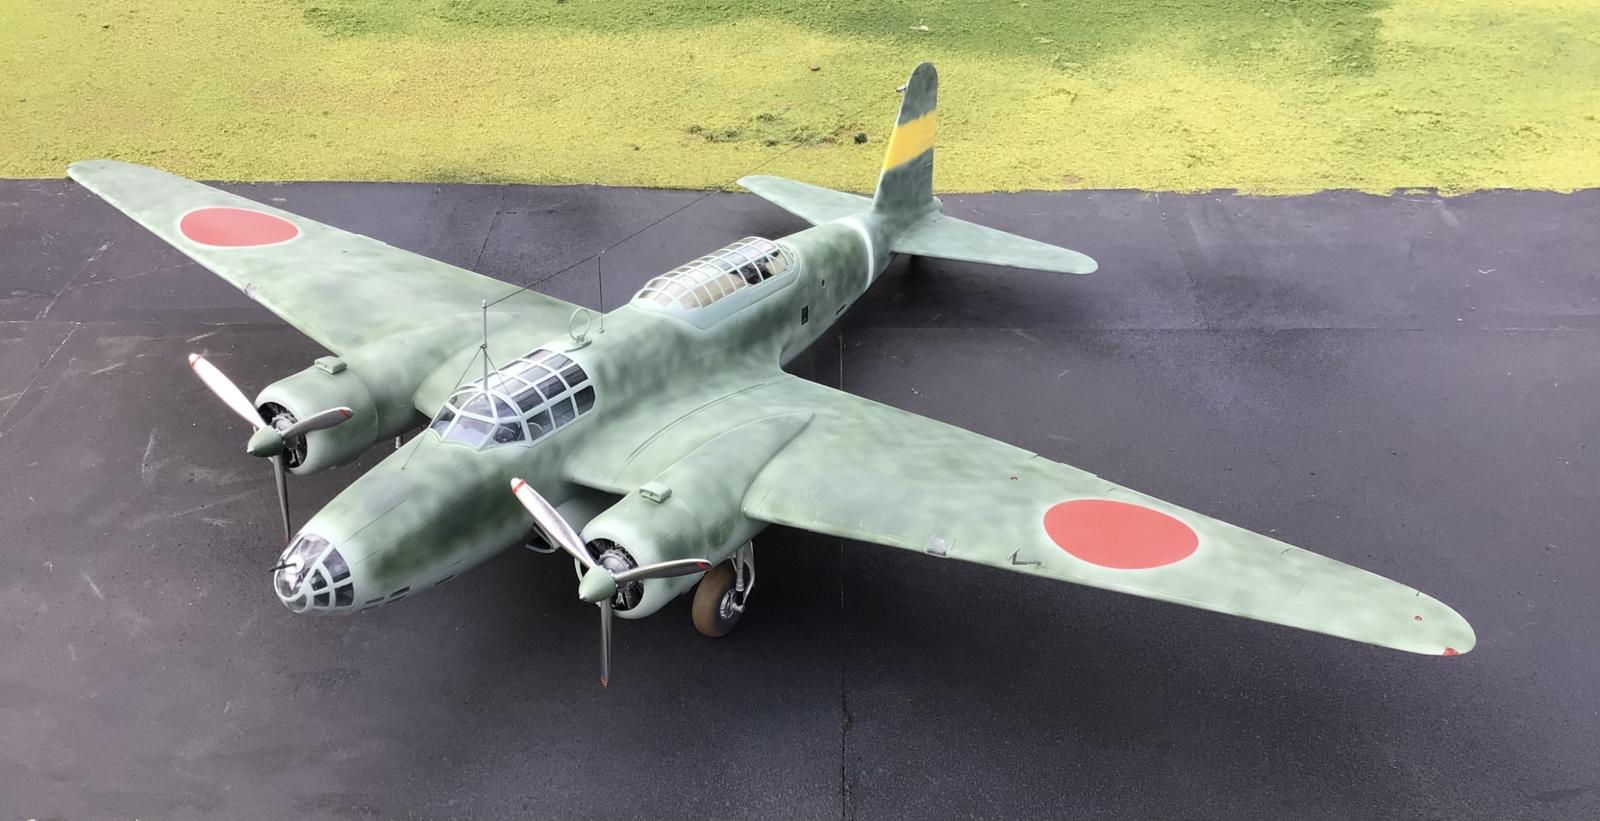
Most were likely left in the overall paint scheme of Green Gray, but I wanted something different than this. These aircraft left the factory in the color painted overall.
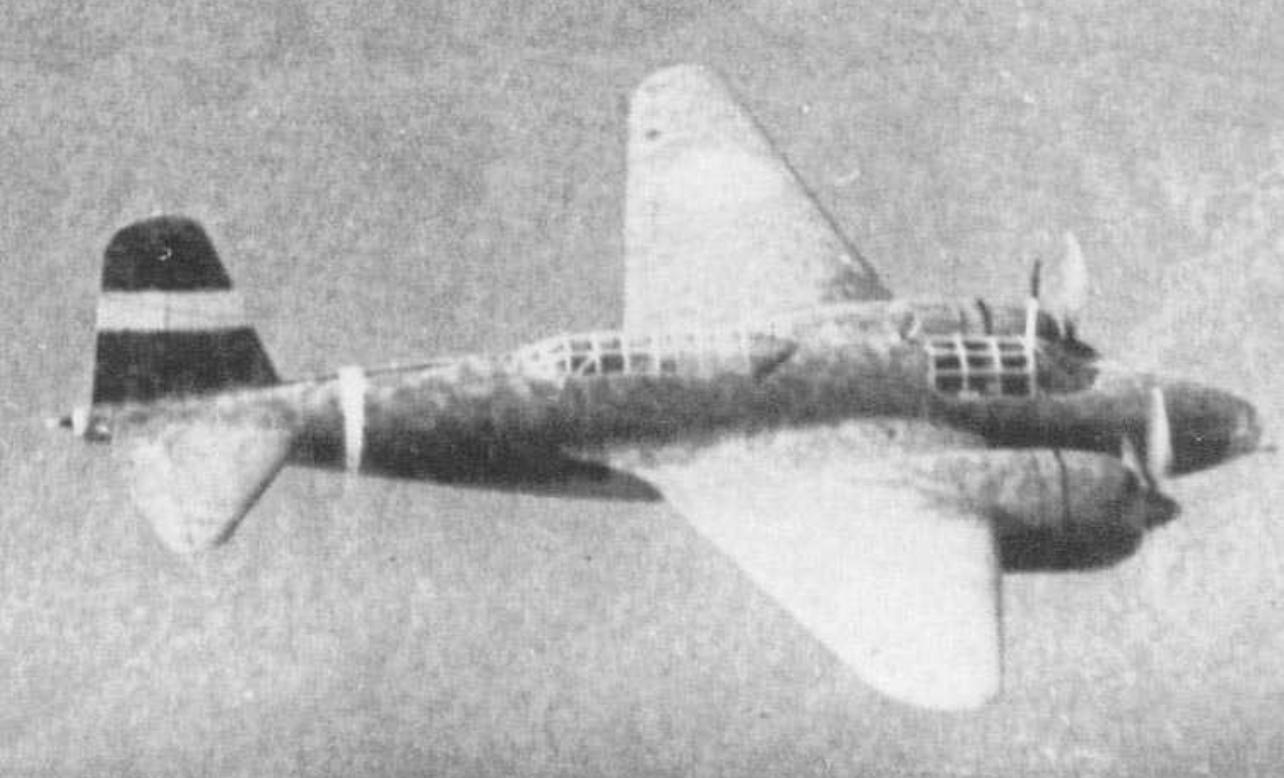
I was lucky enough to find these pictures of bombers from this same group. They also have been camouflaged in the field with a Dark Green color that was sprayed on top of the original overall Gray Green color.
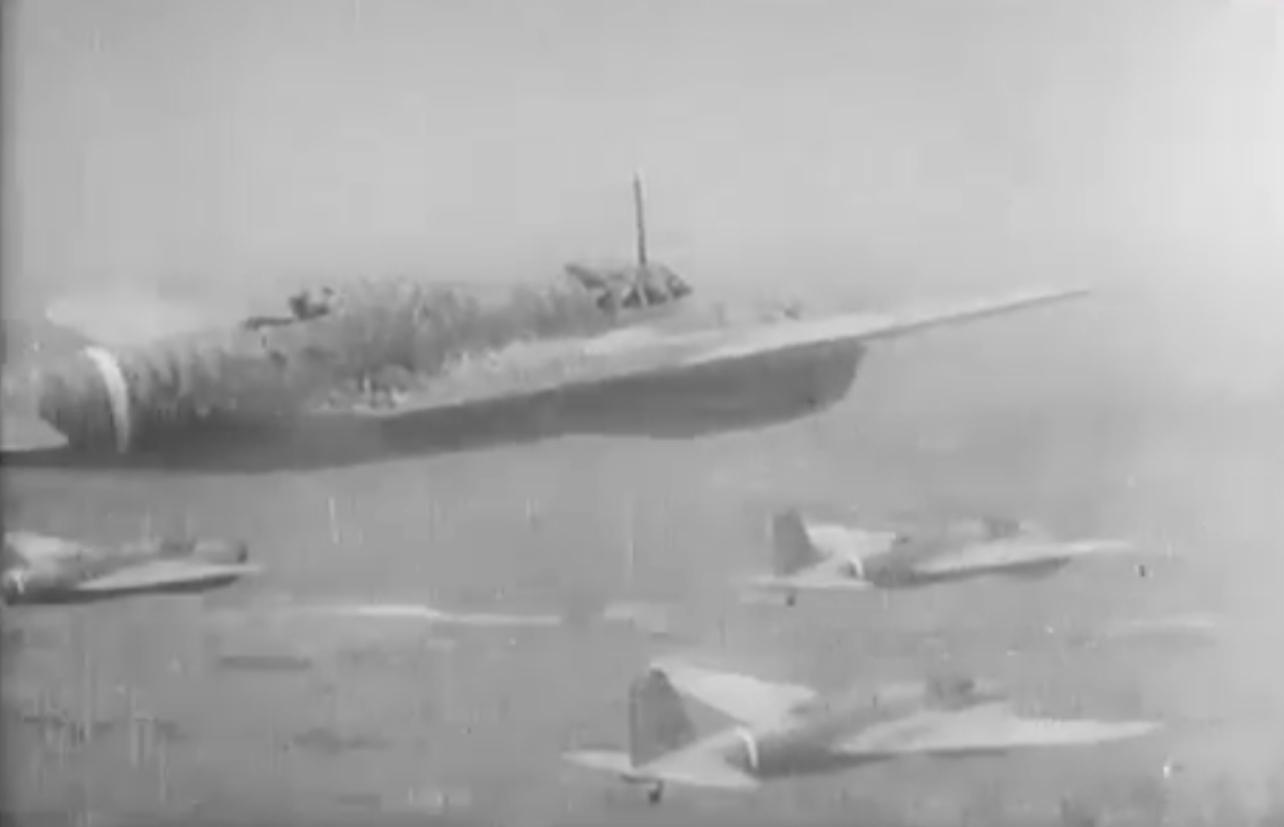
http://arawasi-wildeagles.blogspot.com/2016/07/mitsubishi-ki-21-sally-60-sentai-video.html
http://arawasi-wildeagles.blogspot.com/2021/09/mitsubishi-ki-21-sally-video.html
If you are interested in watching a few short videos, that show these aircraft in action, please follow these links. They are a little over 2 minutes long, and you can see some of the men who flew these planes into combat.
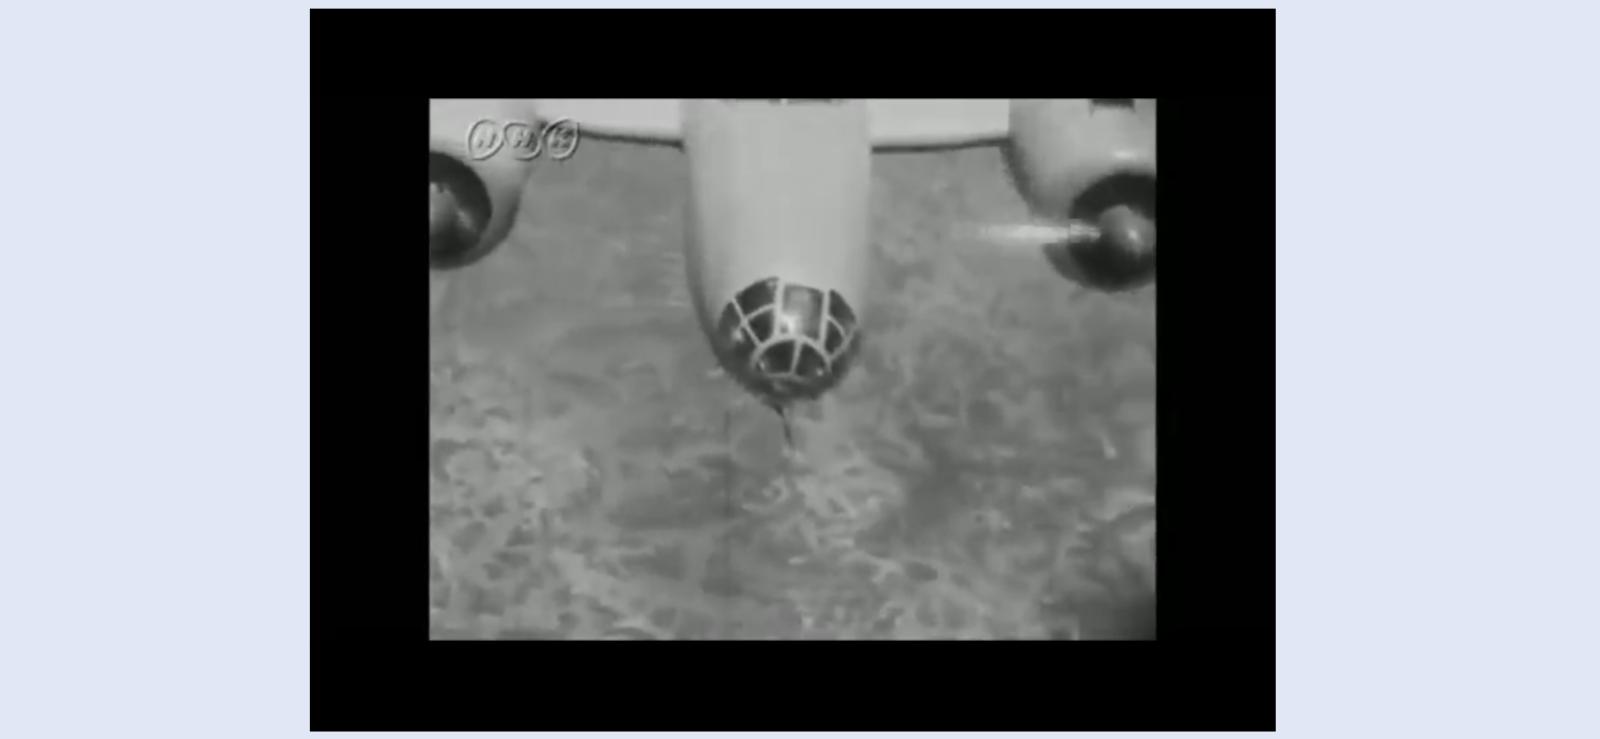
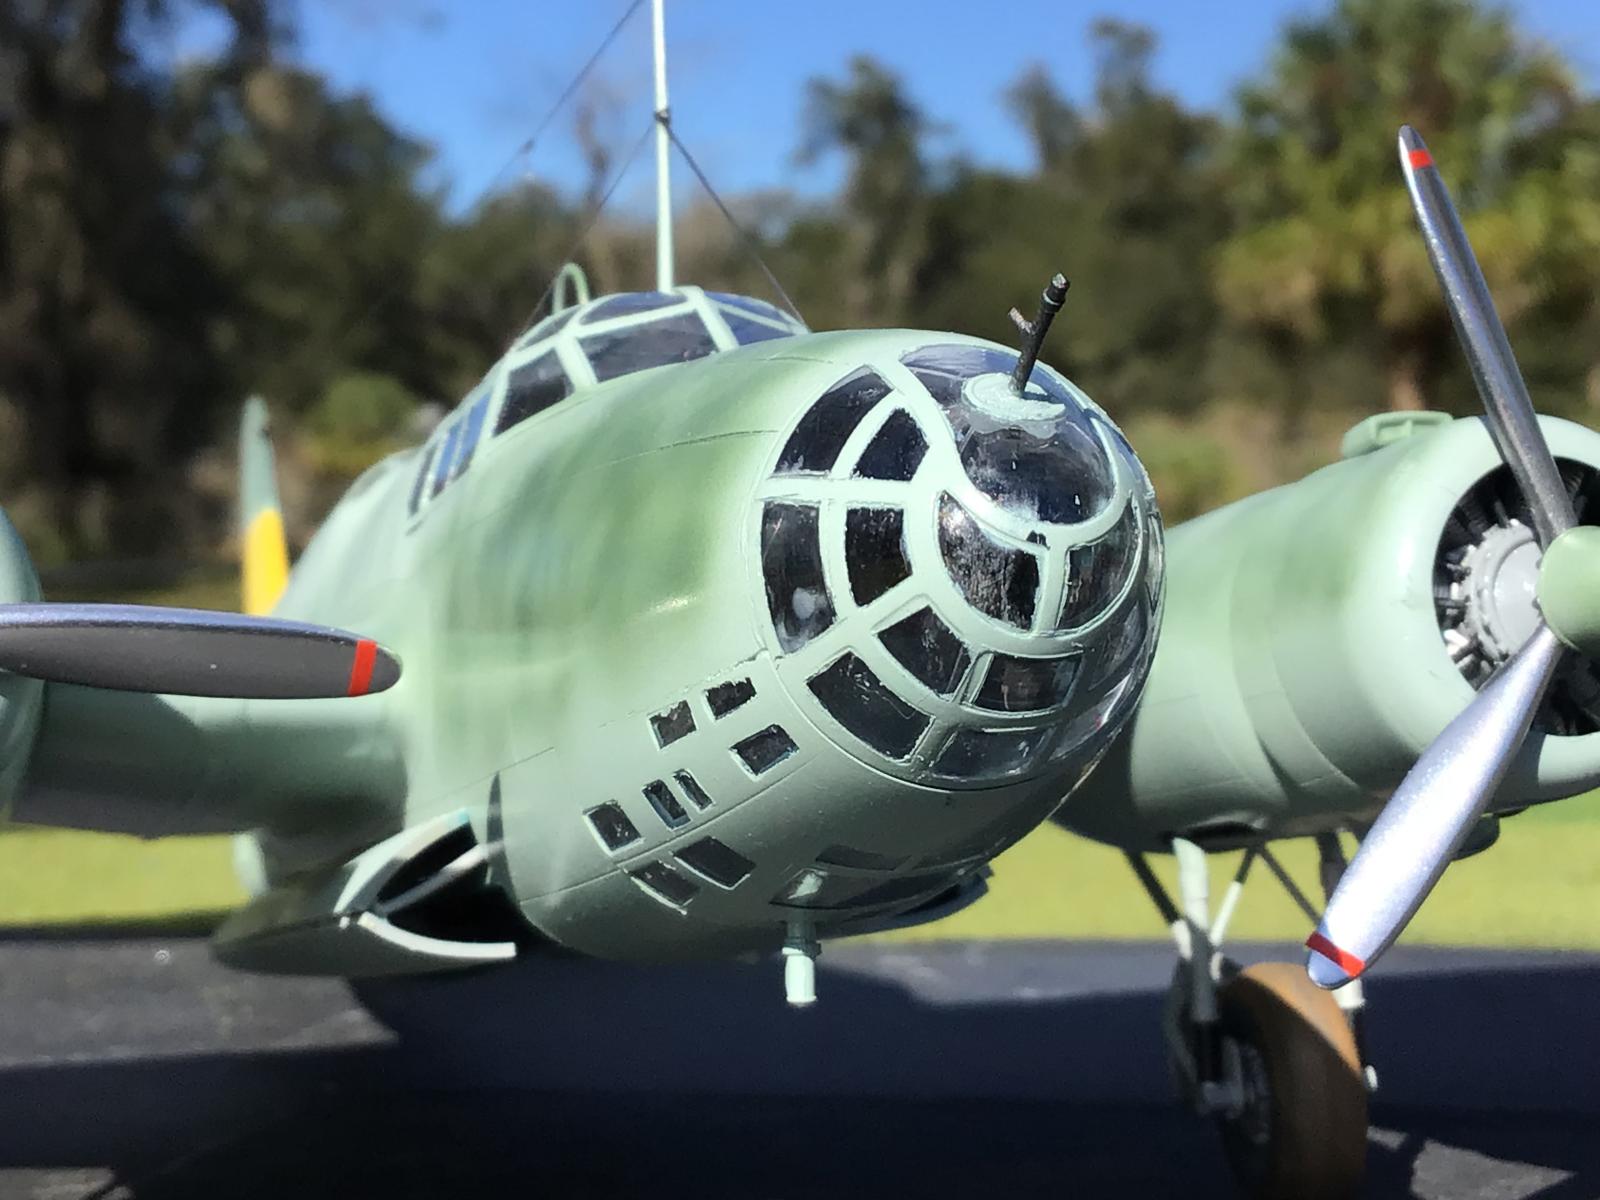
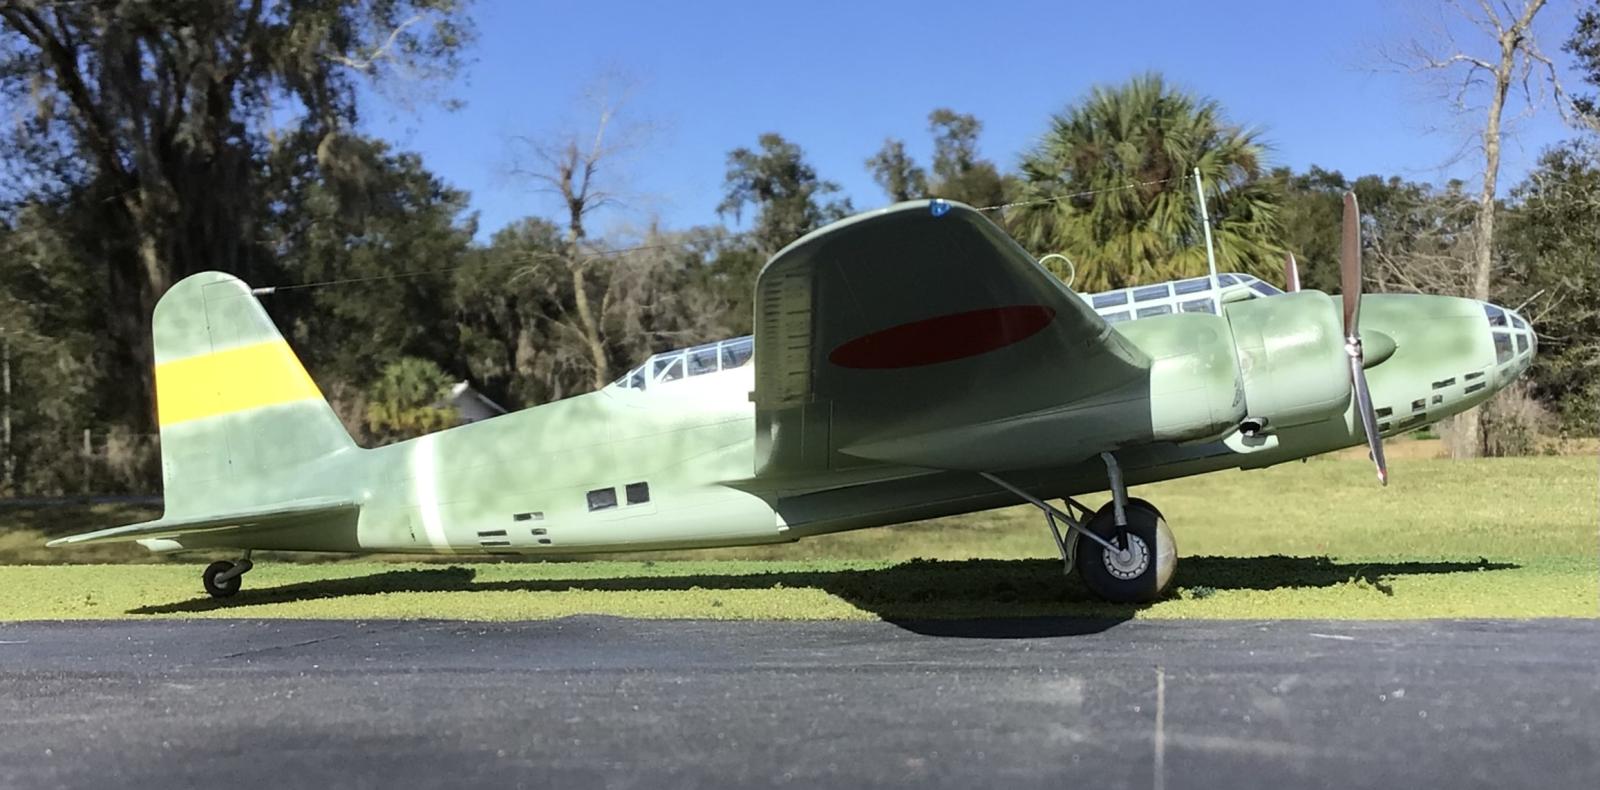
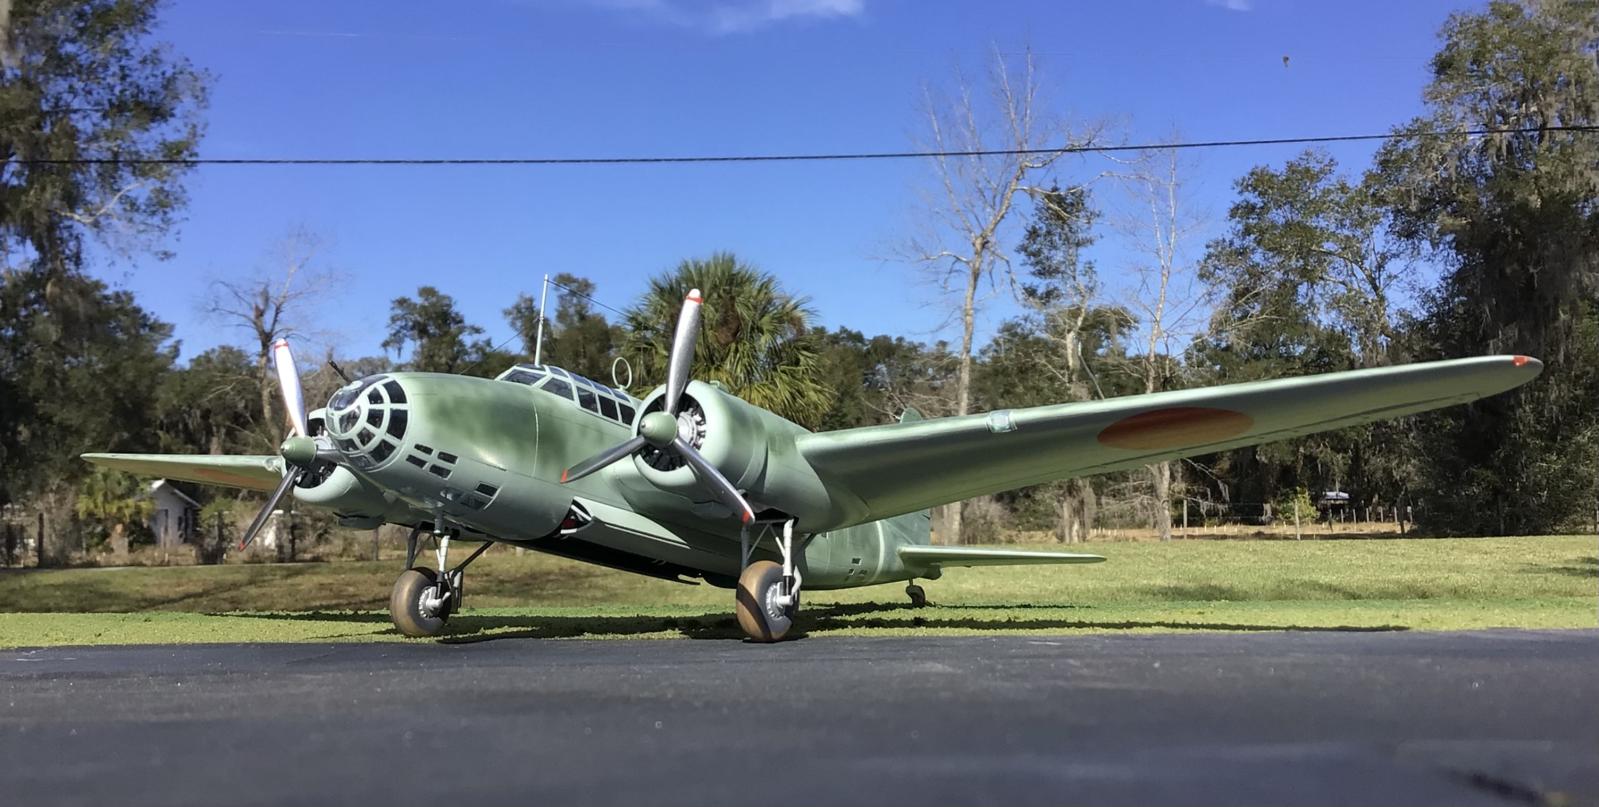
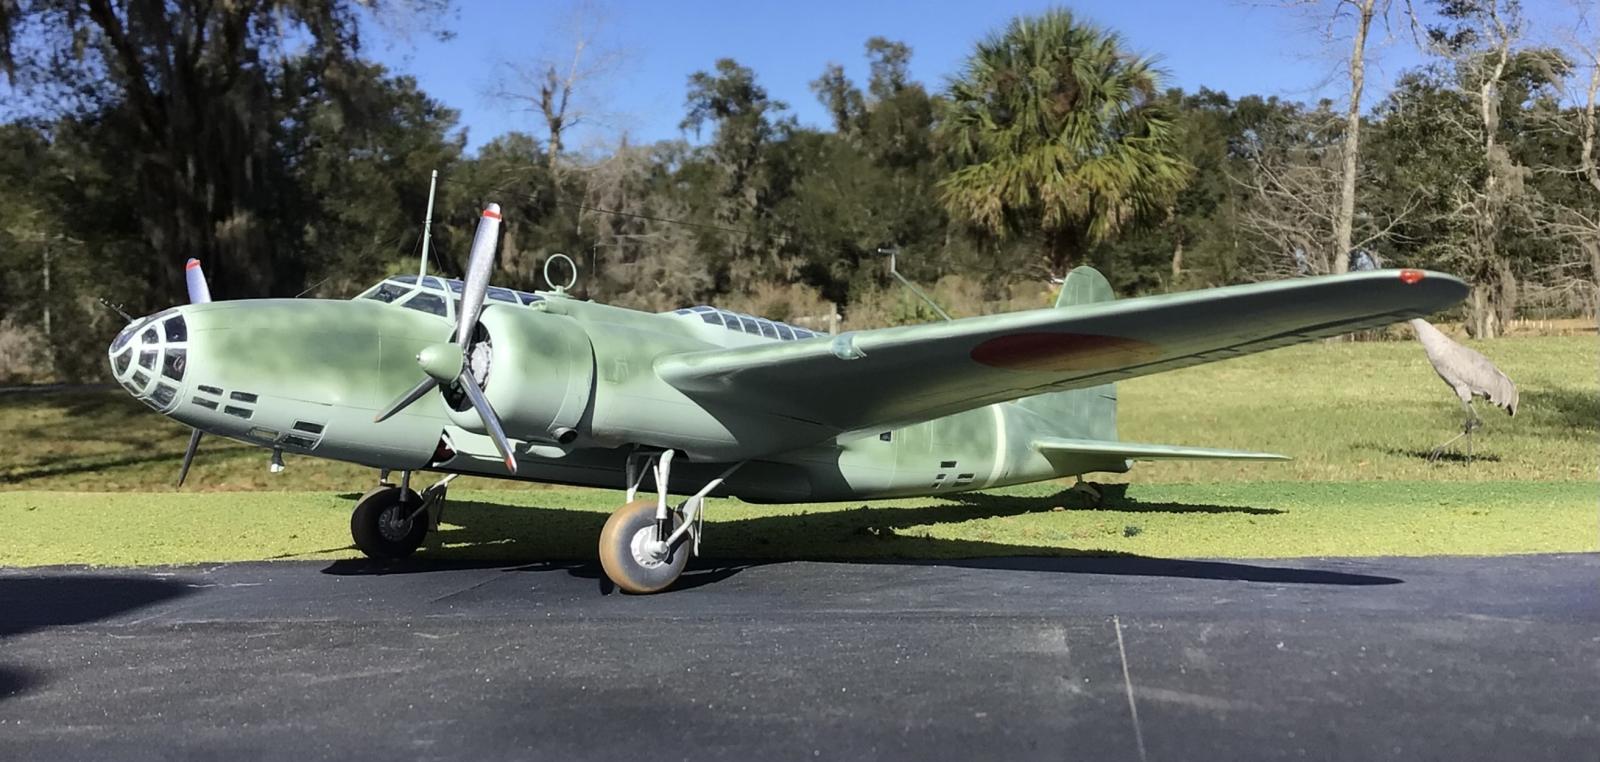
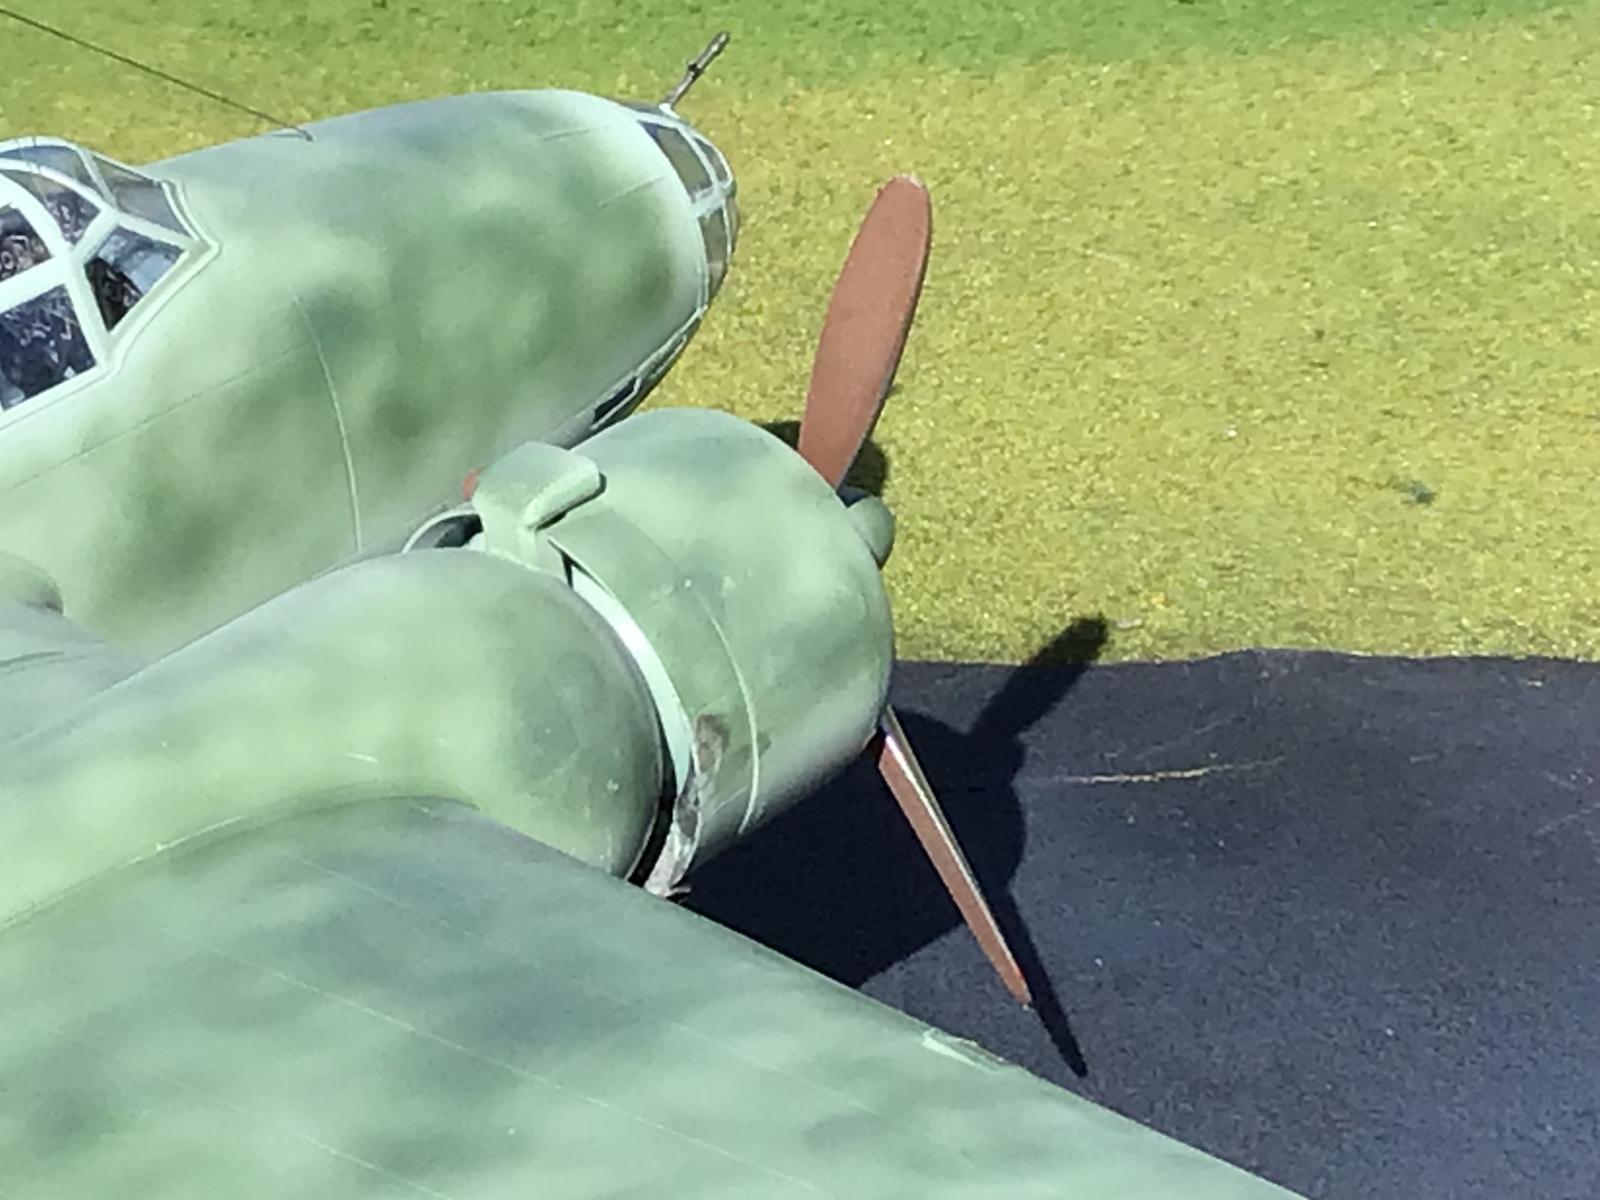
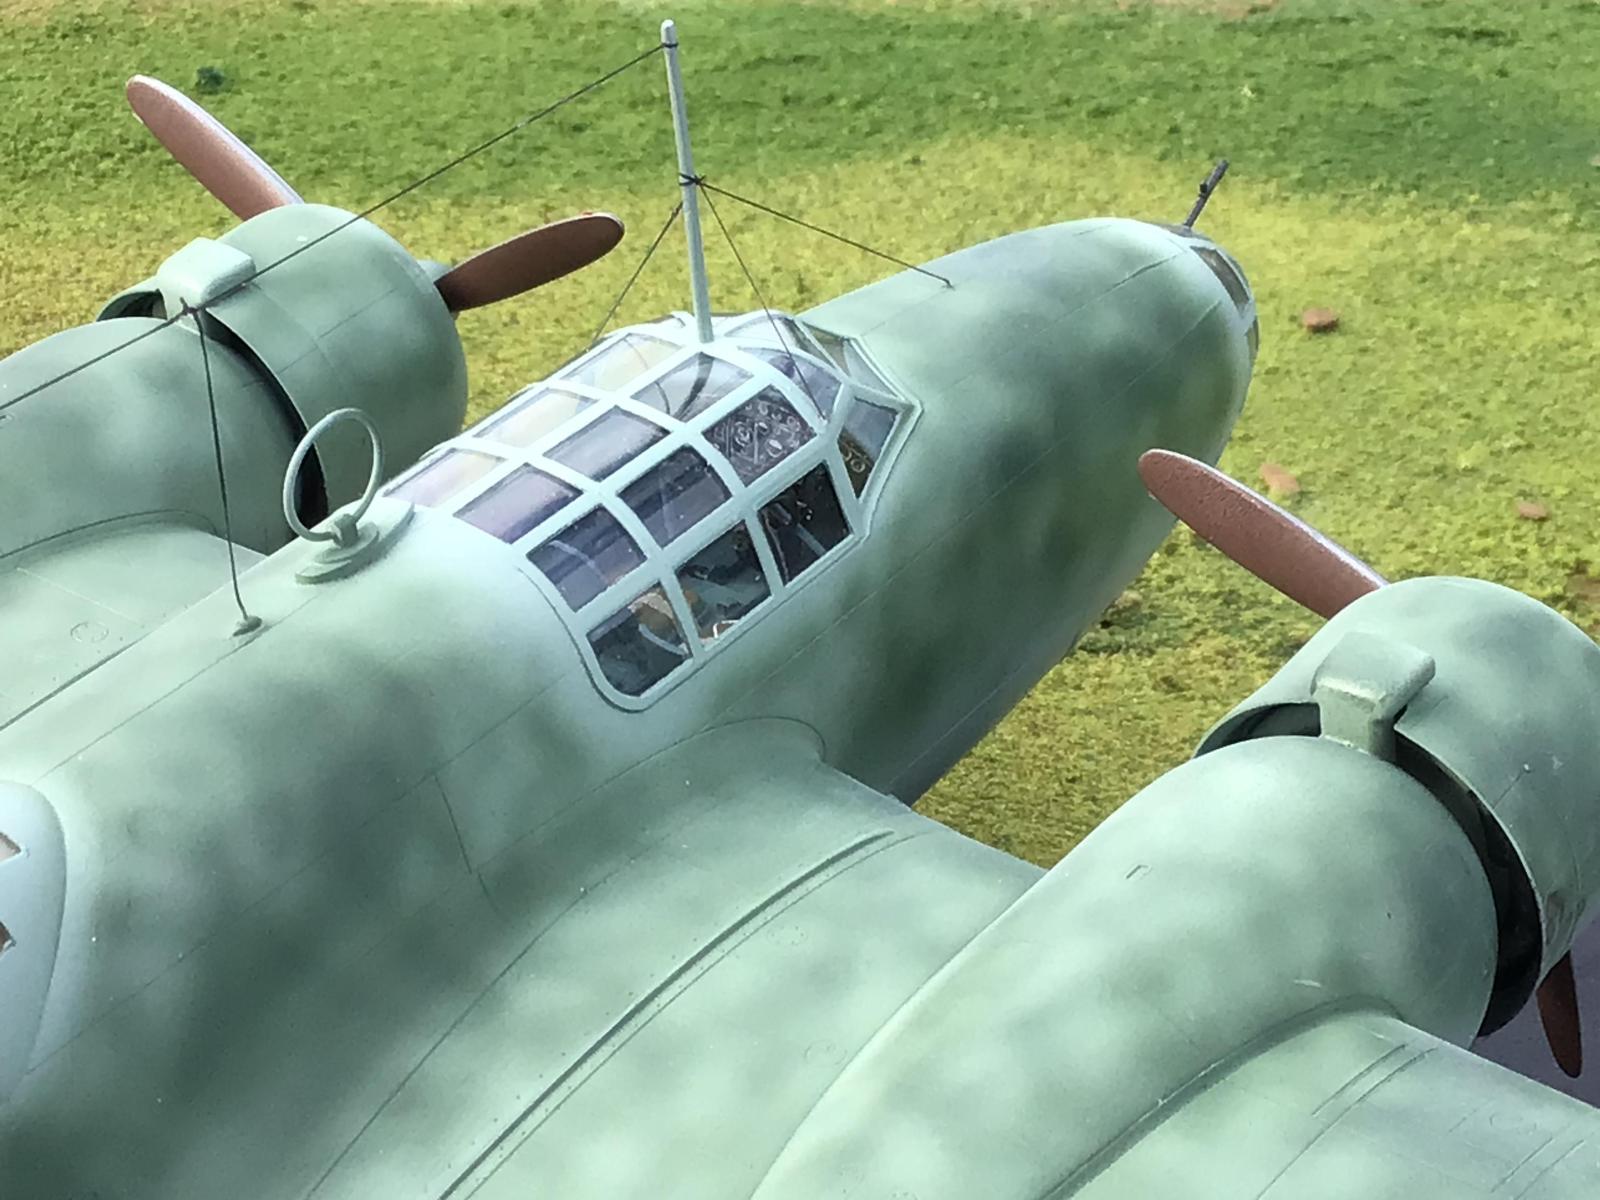
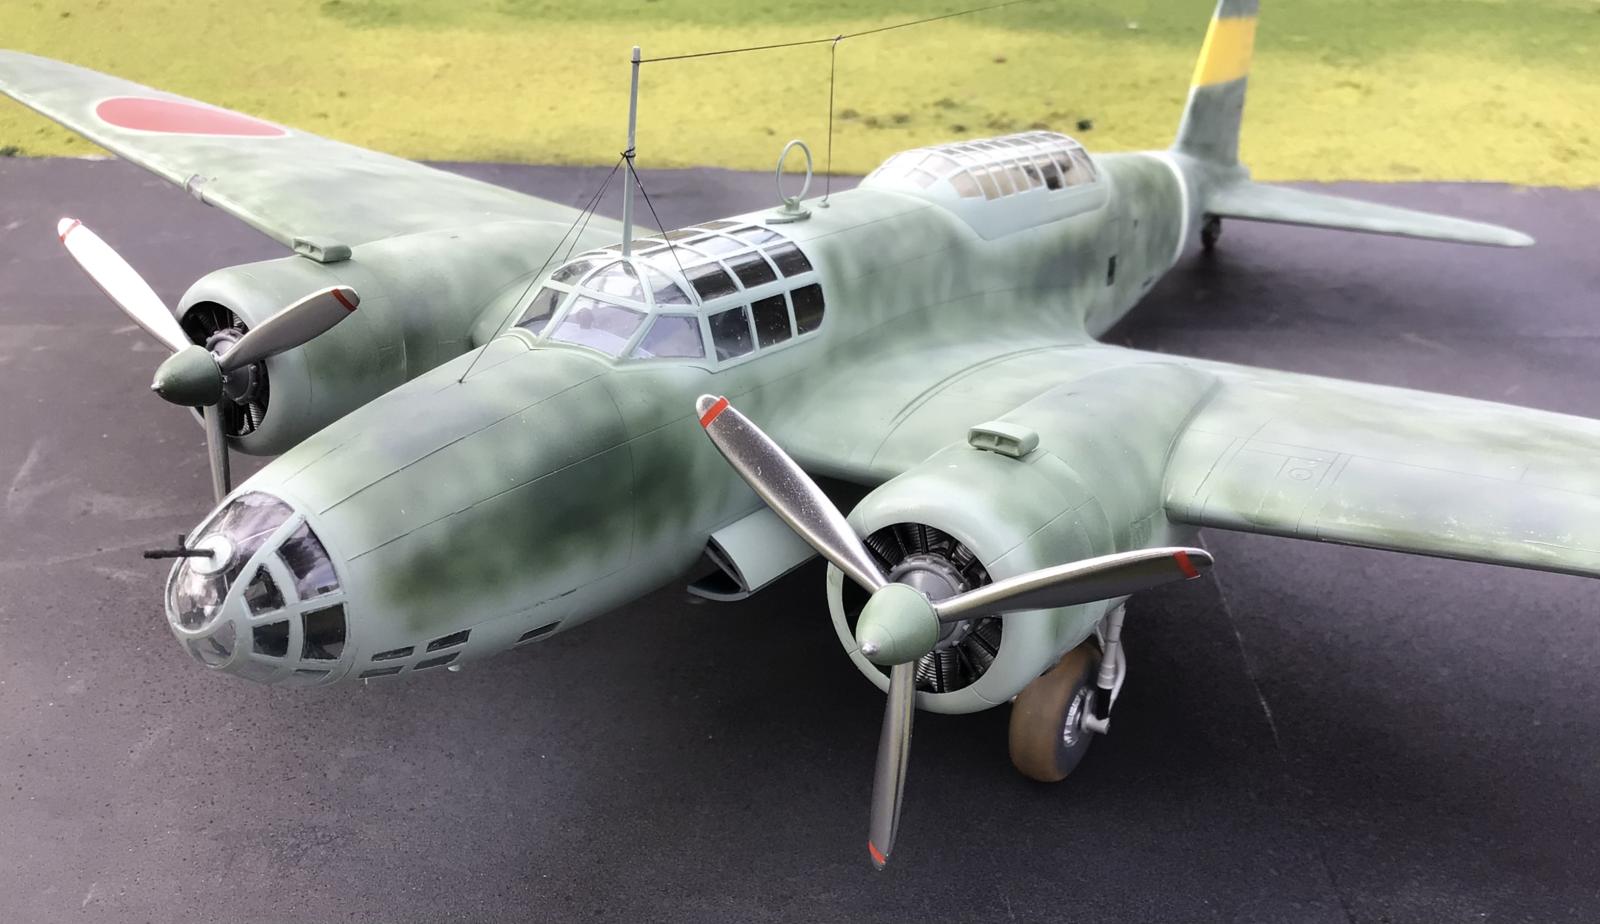
I was not sure if I had installed the nose cone correctly.
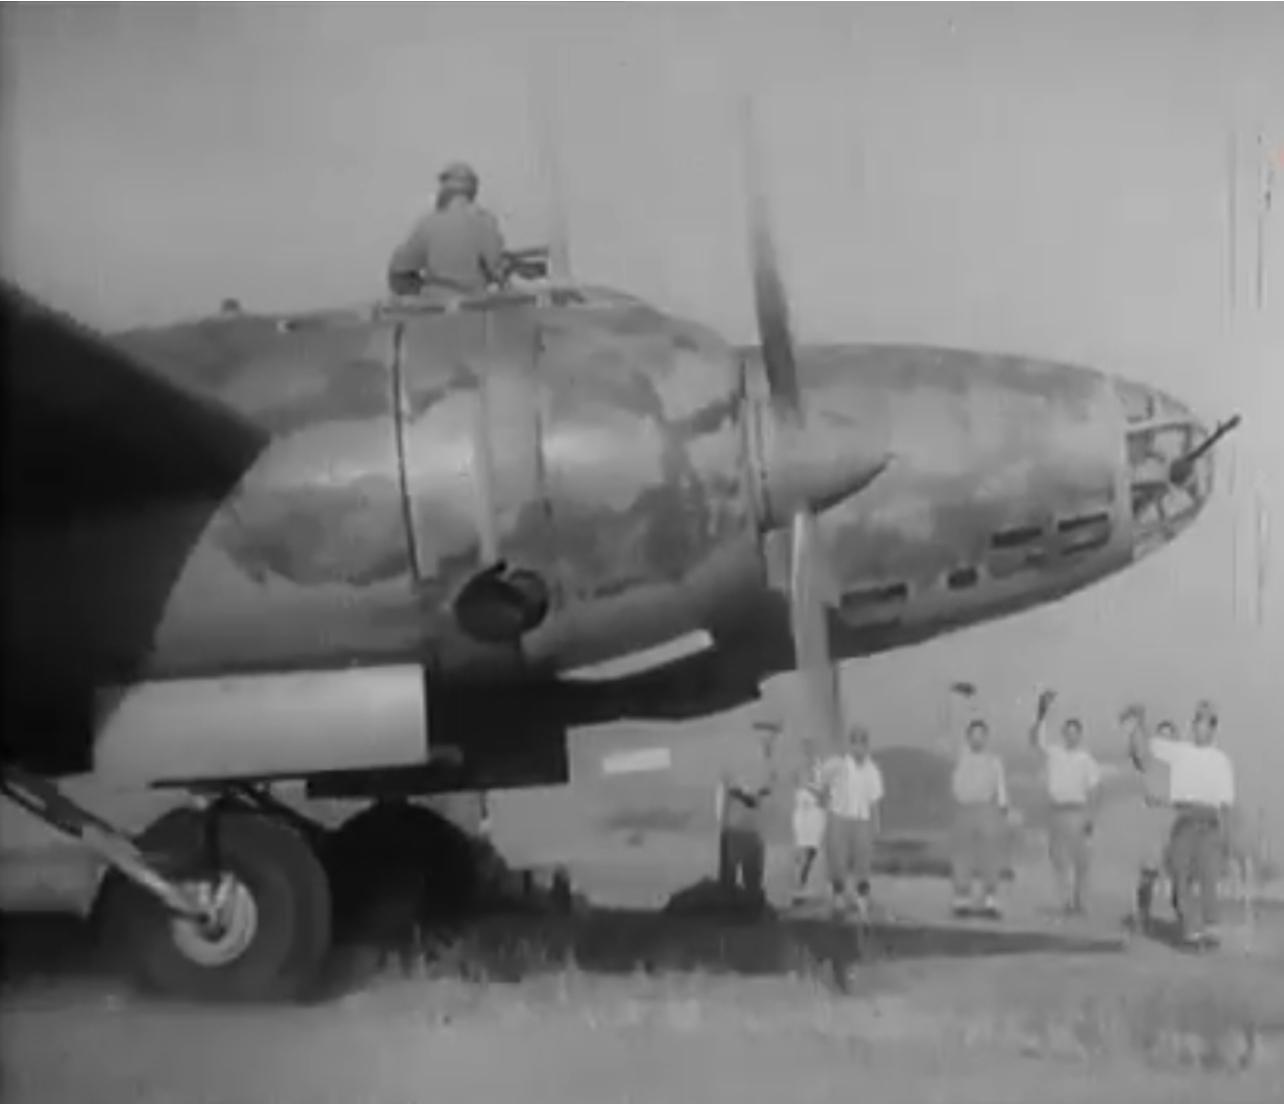
Thankfully this picture was able to show that I had. I grabbed this screen shot from one of the videos mentioned above. The entire nose glass had the capability to be rotated like how it was done on the German Heinkel 111.
If you look closely at the image above you can see that the glass is rotated and the weapon is not centered.
This would explain the various differences we see in some pictures of the real plane.
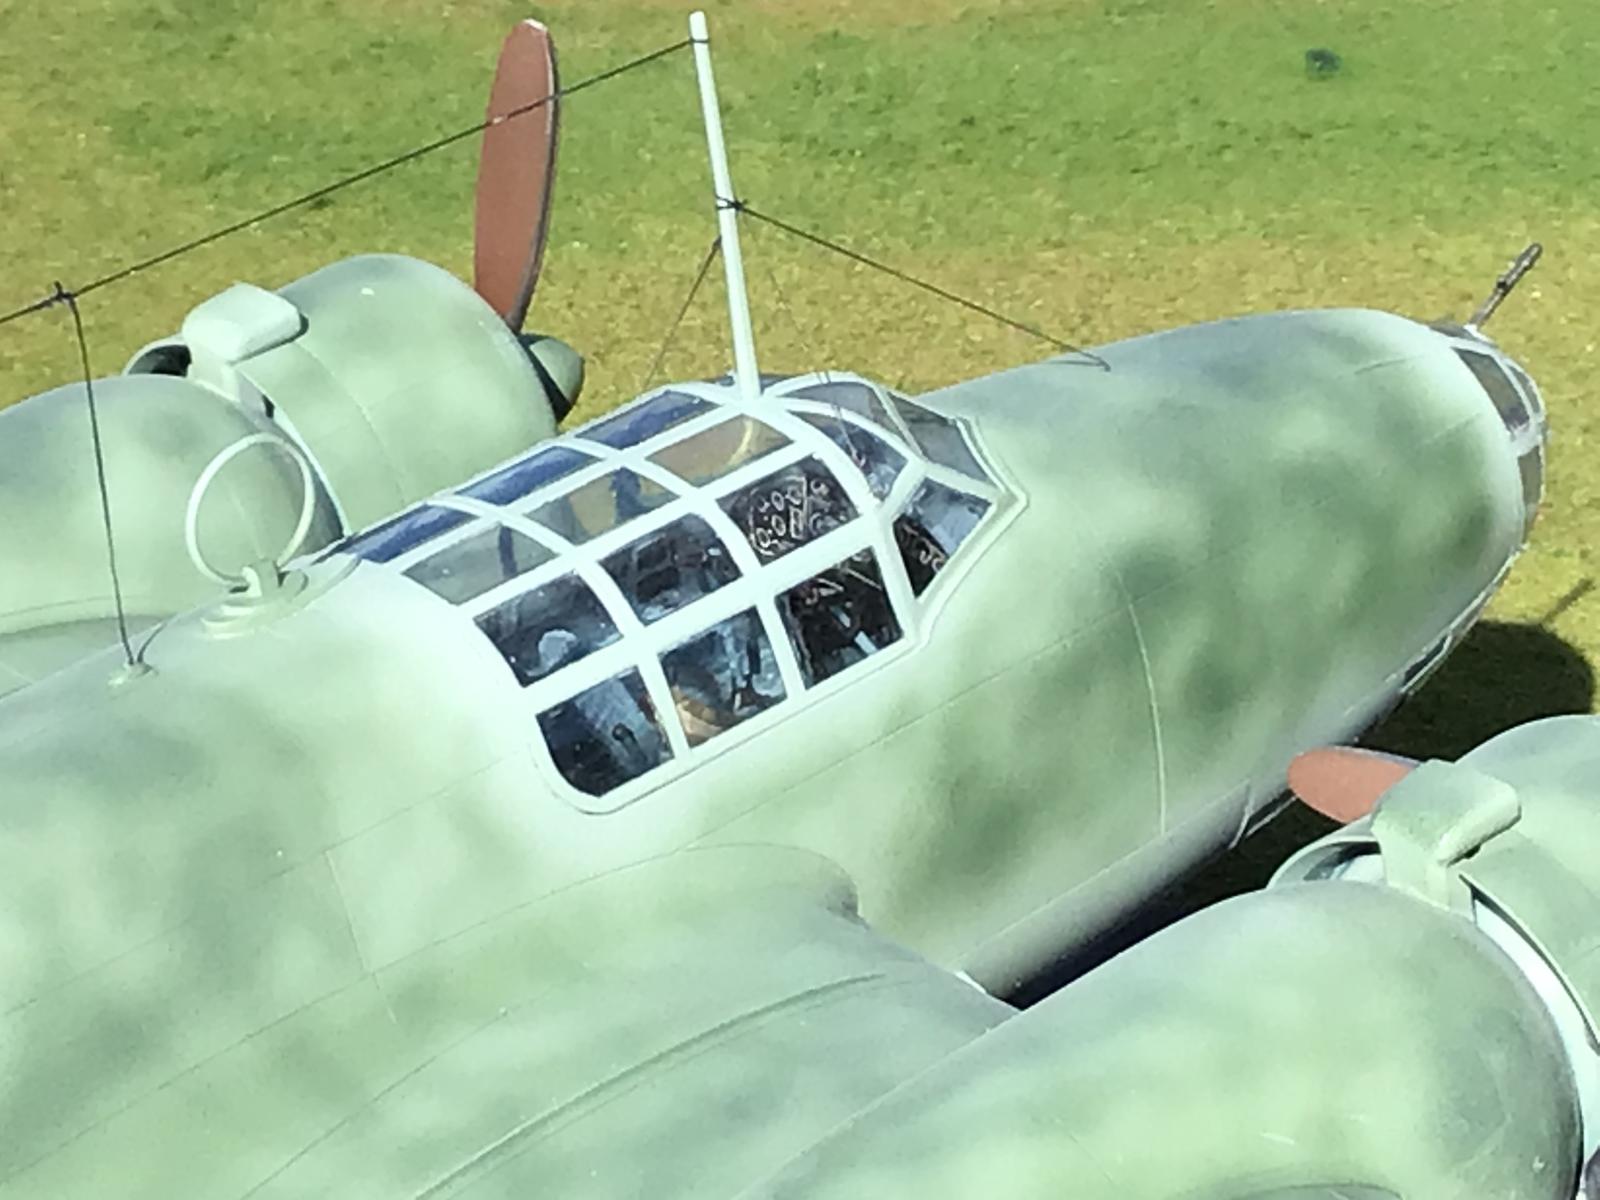
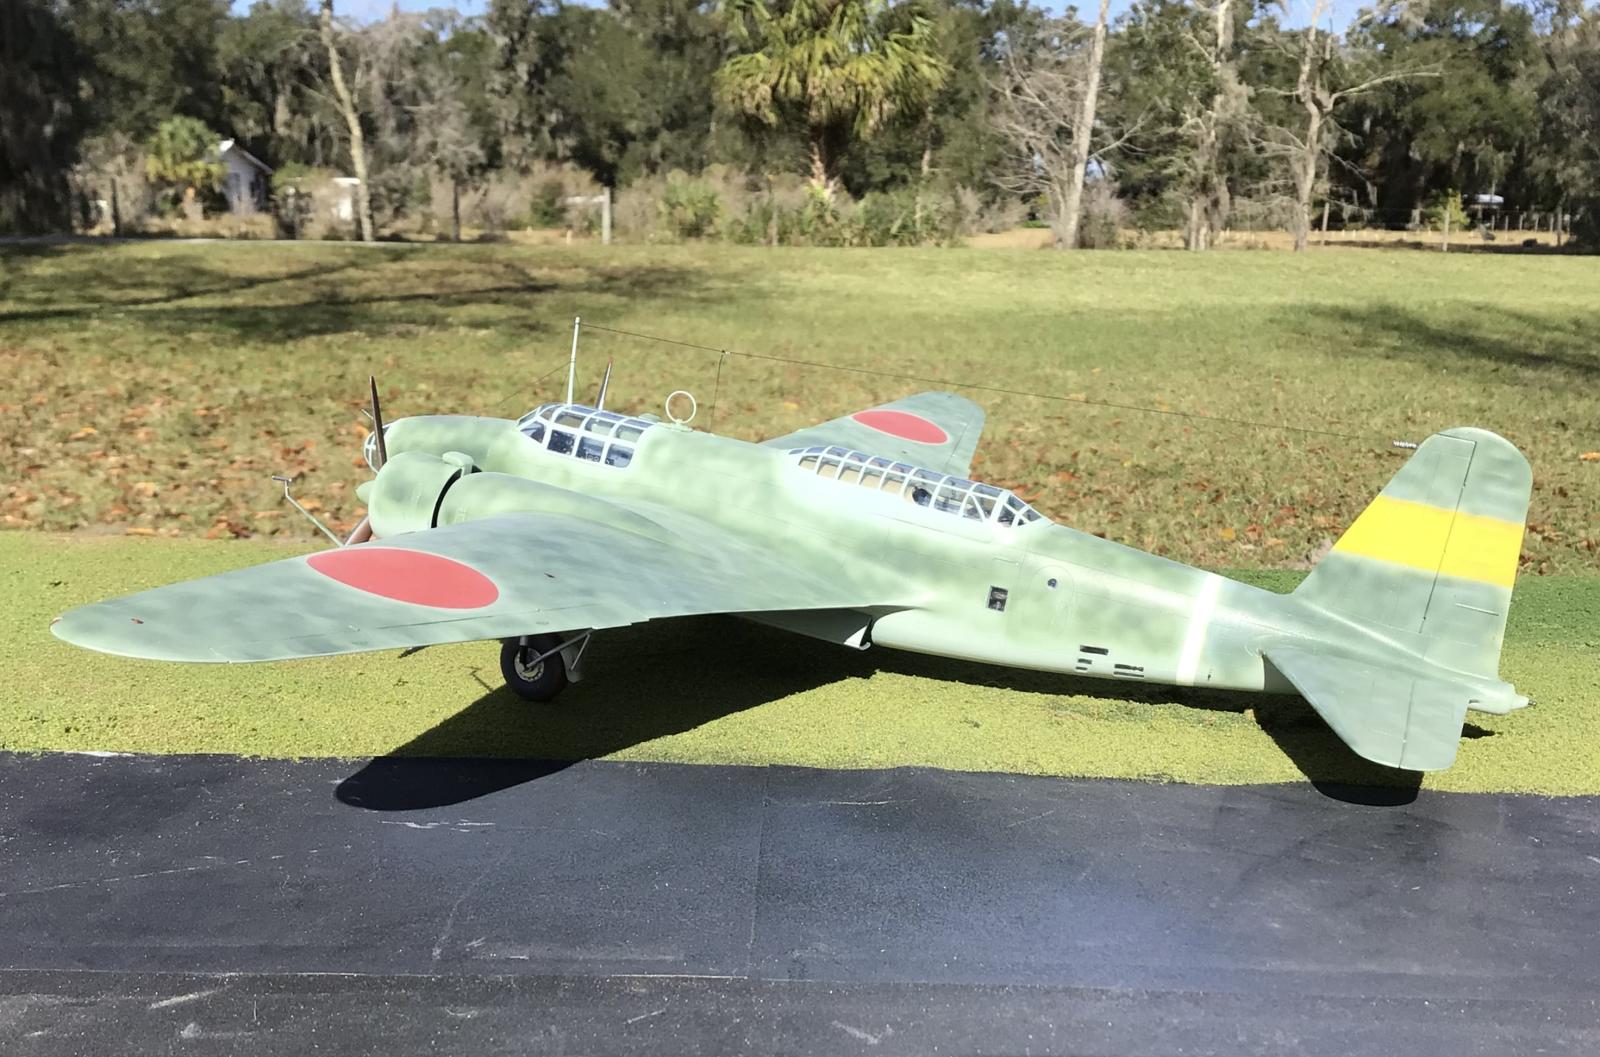
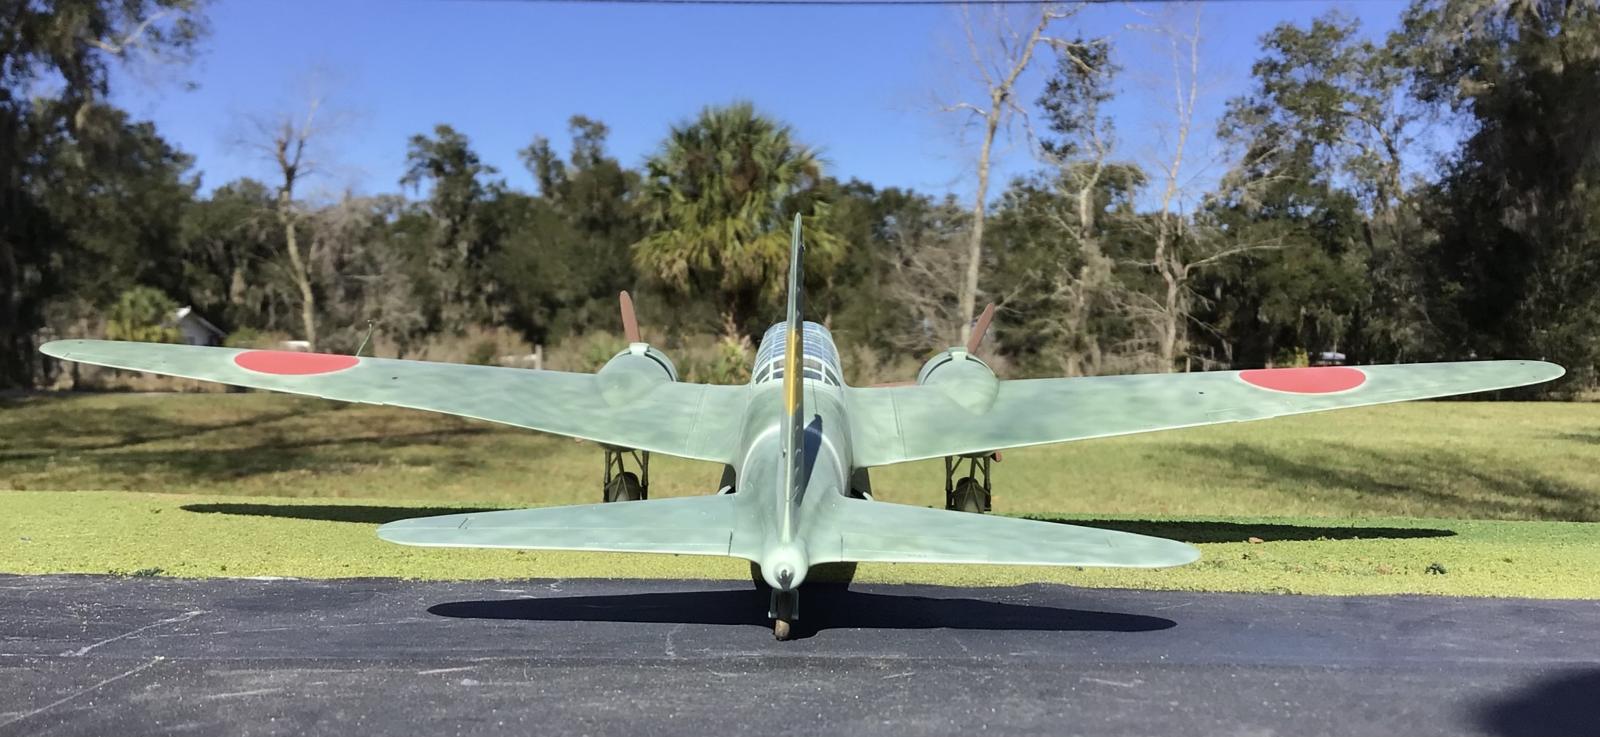
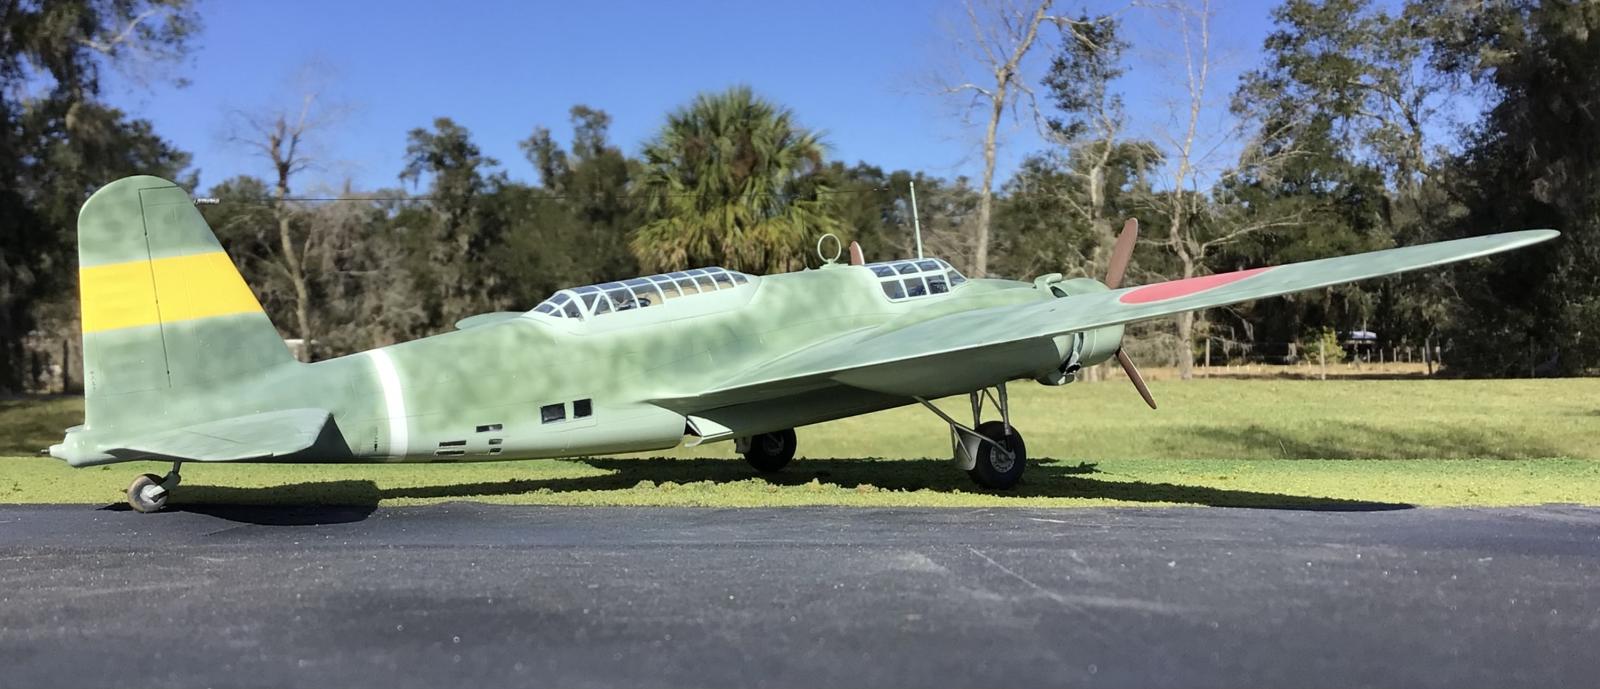
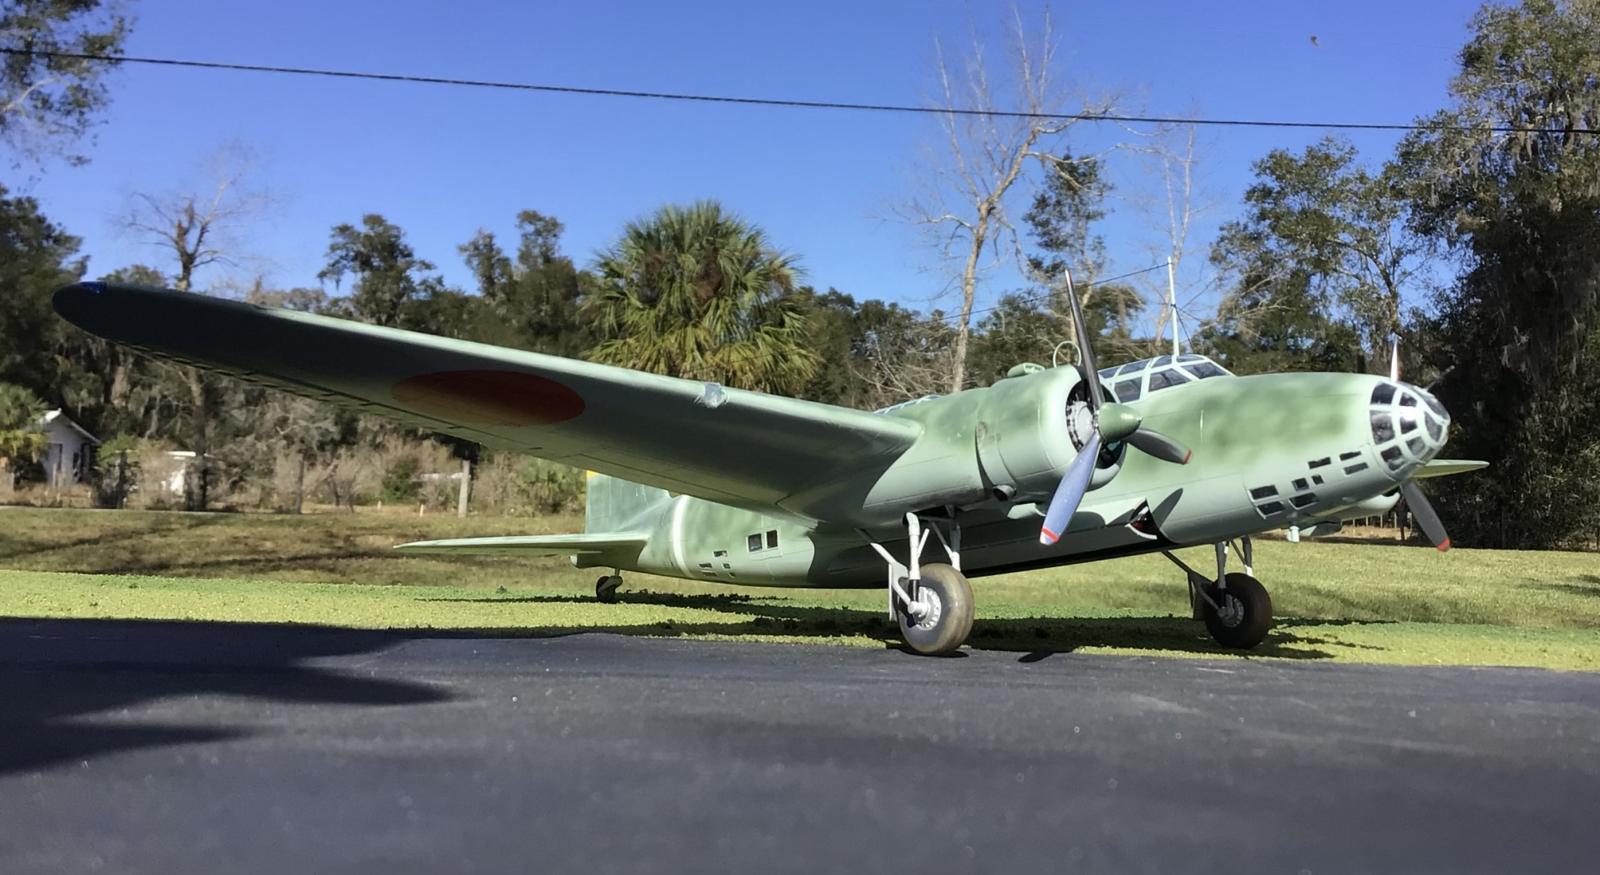
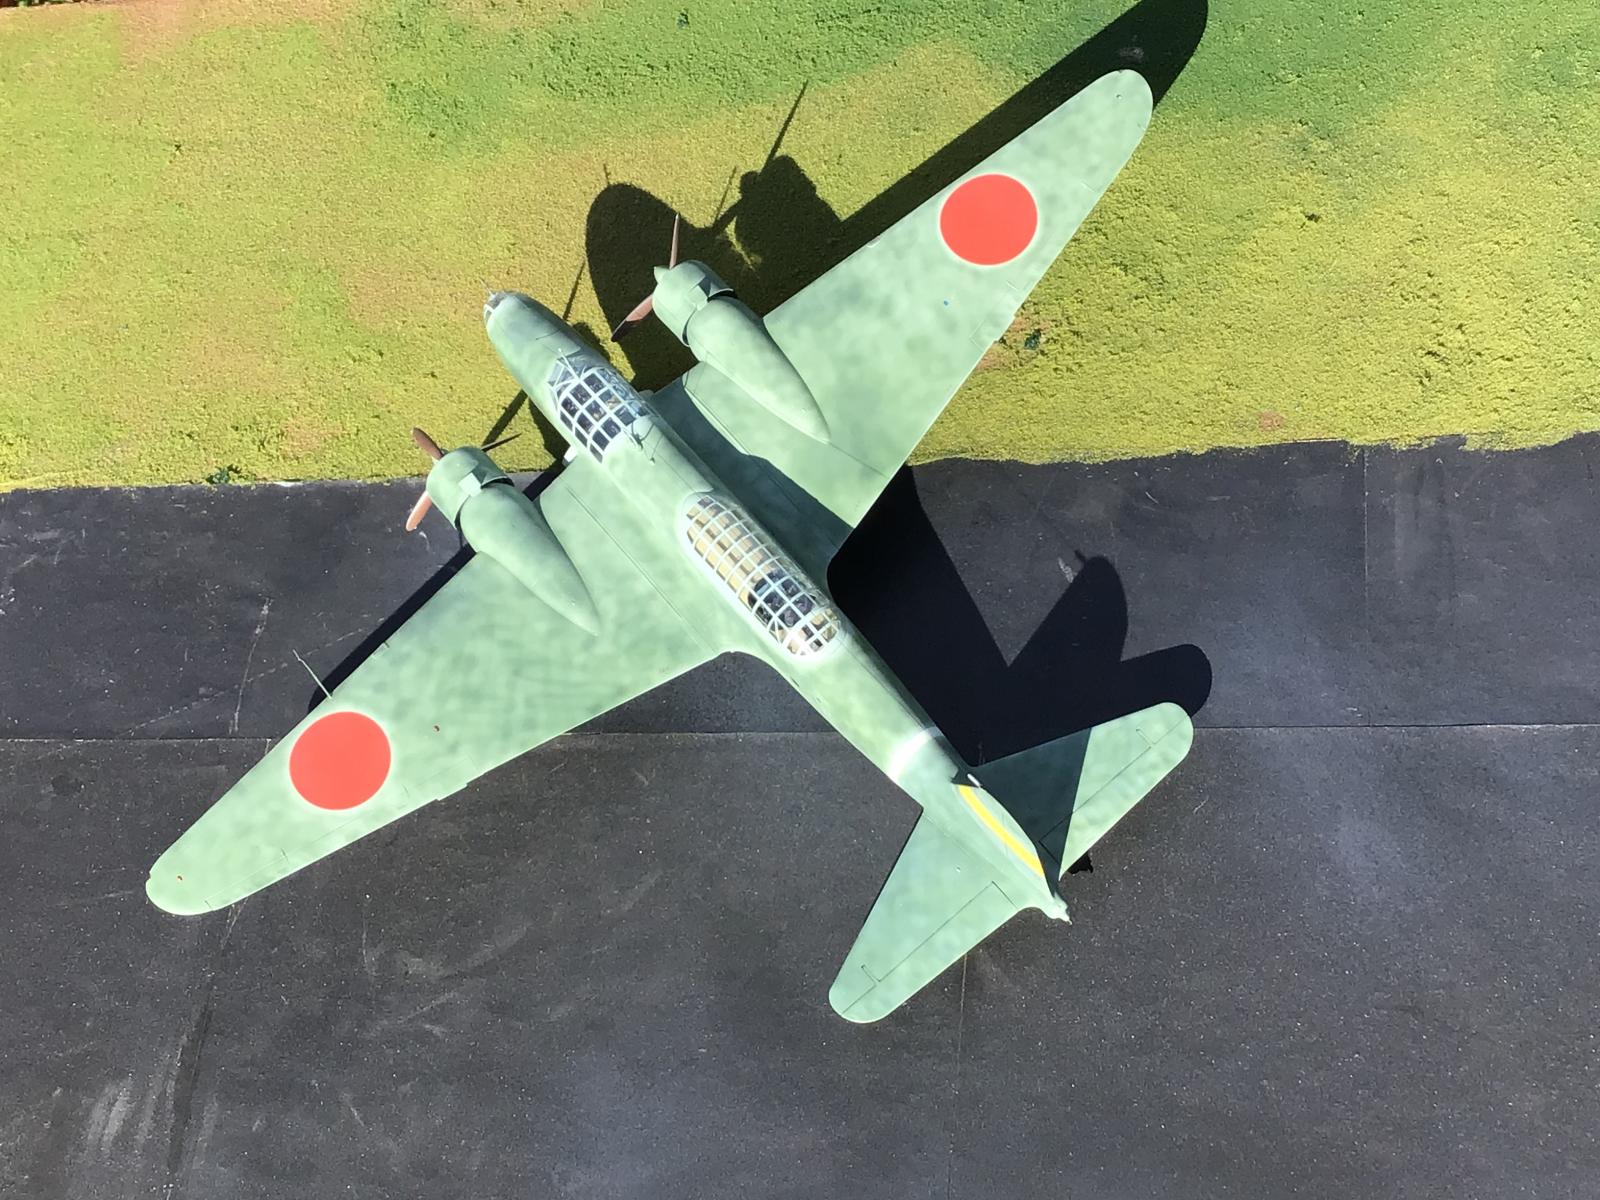
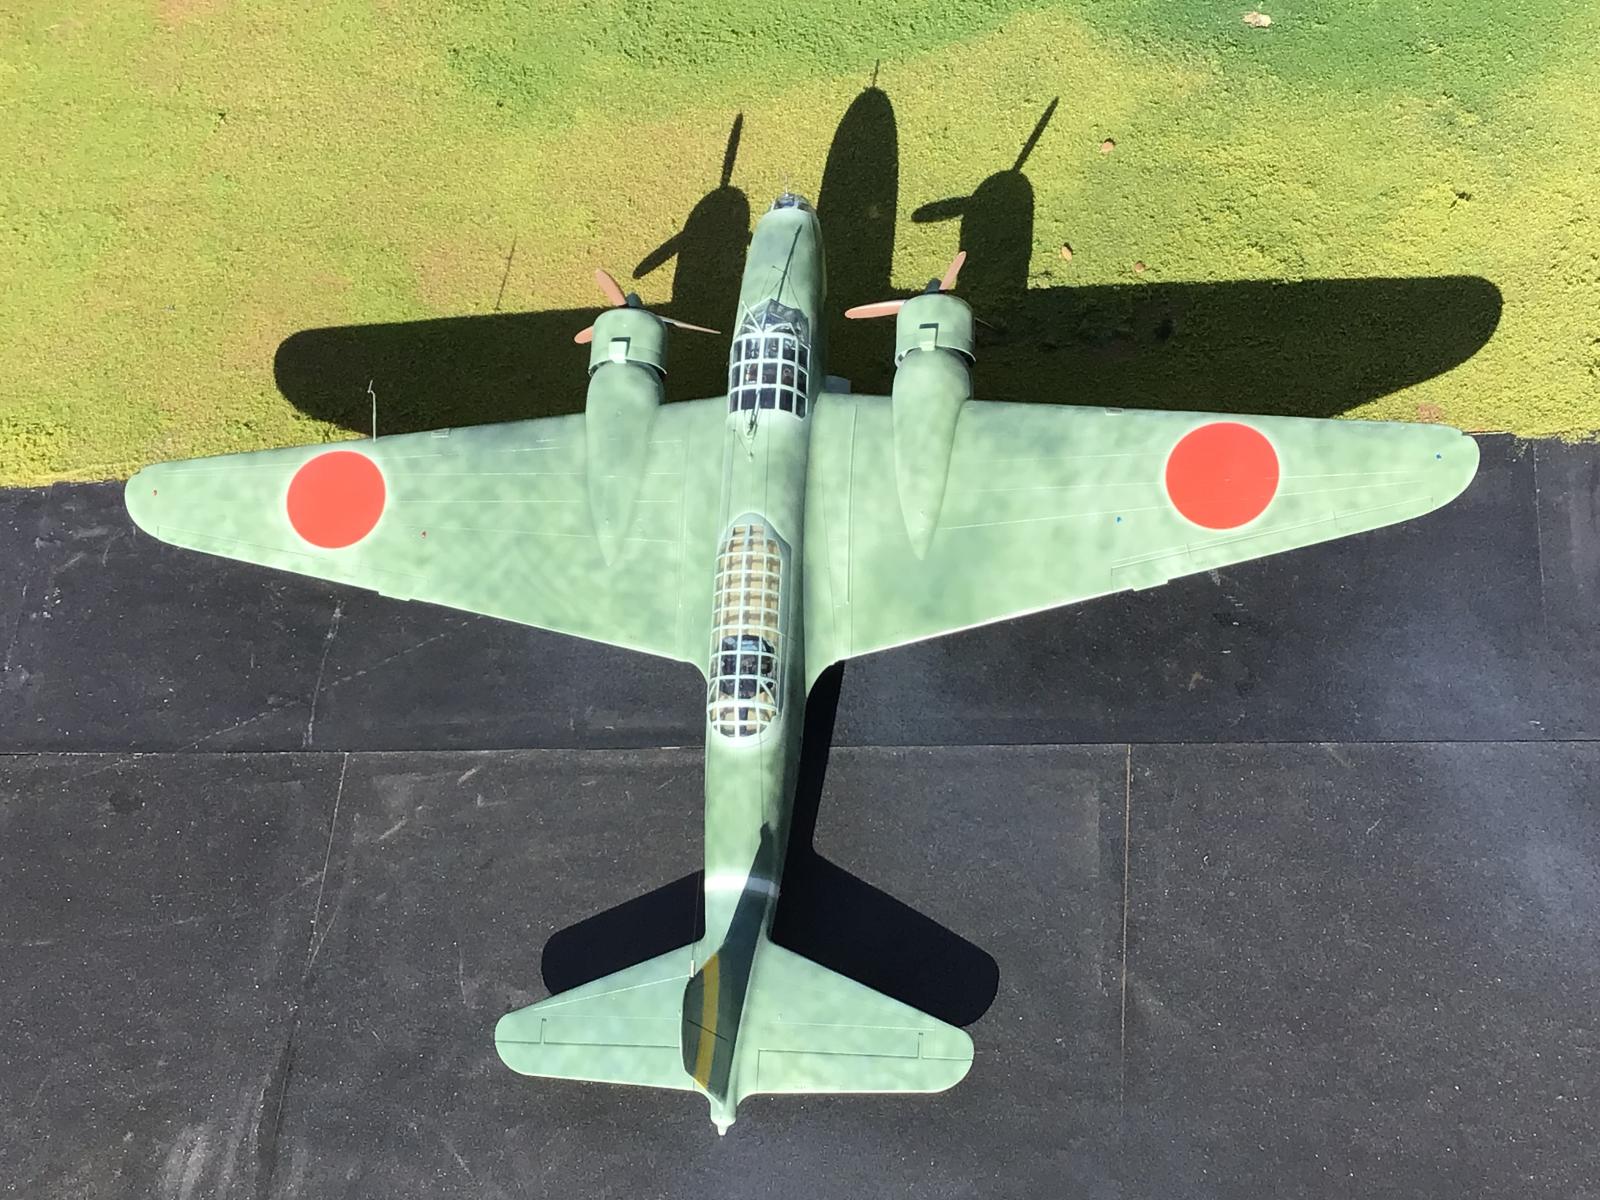
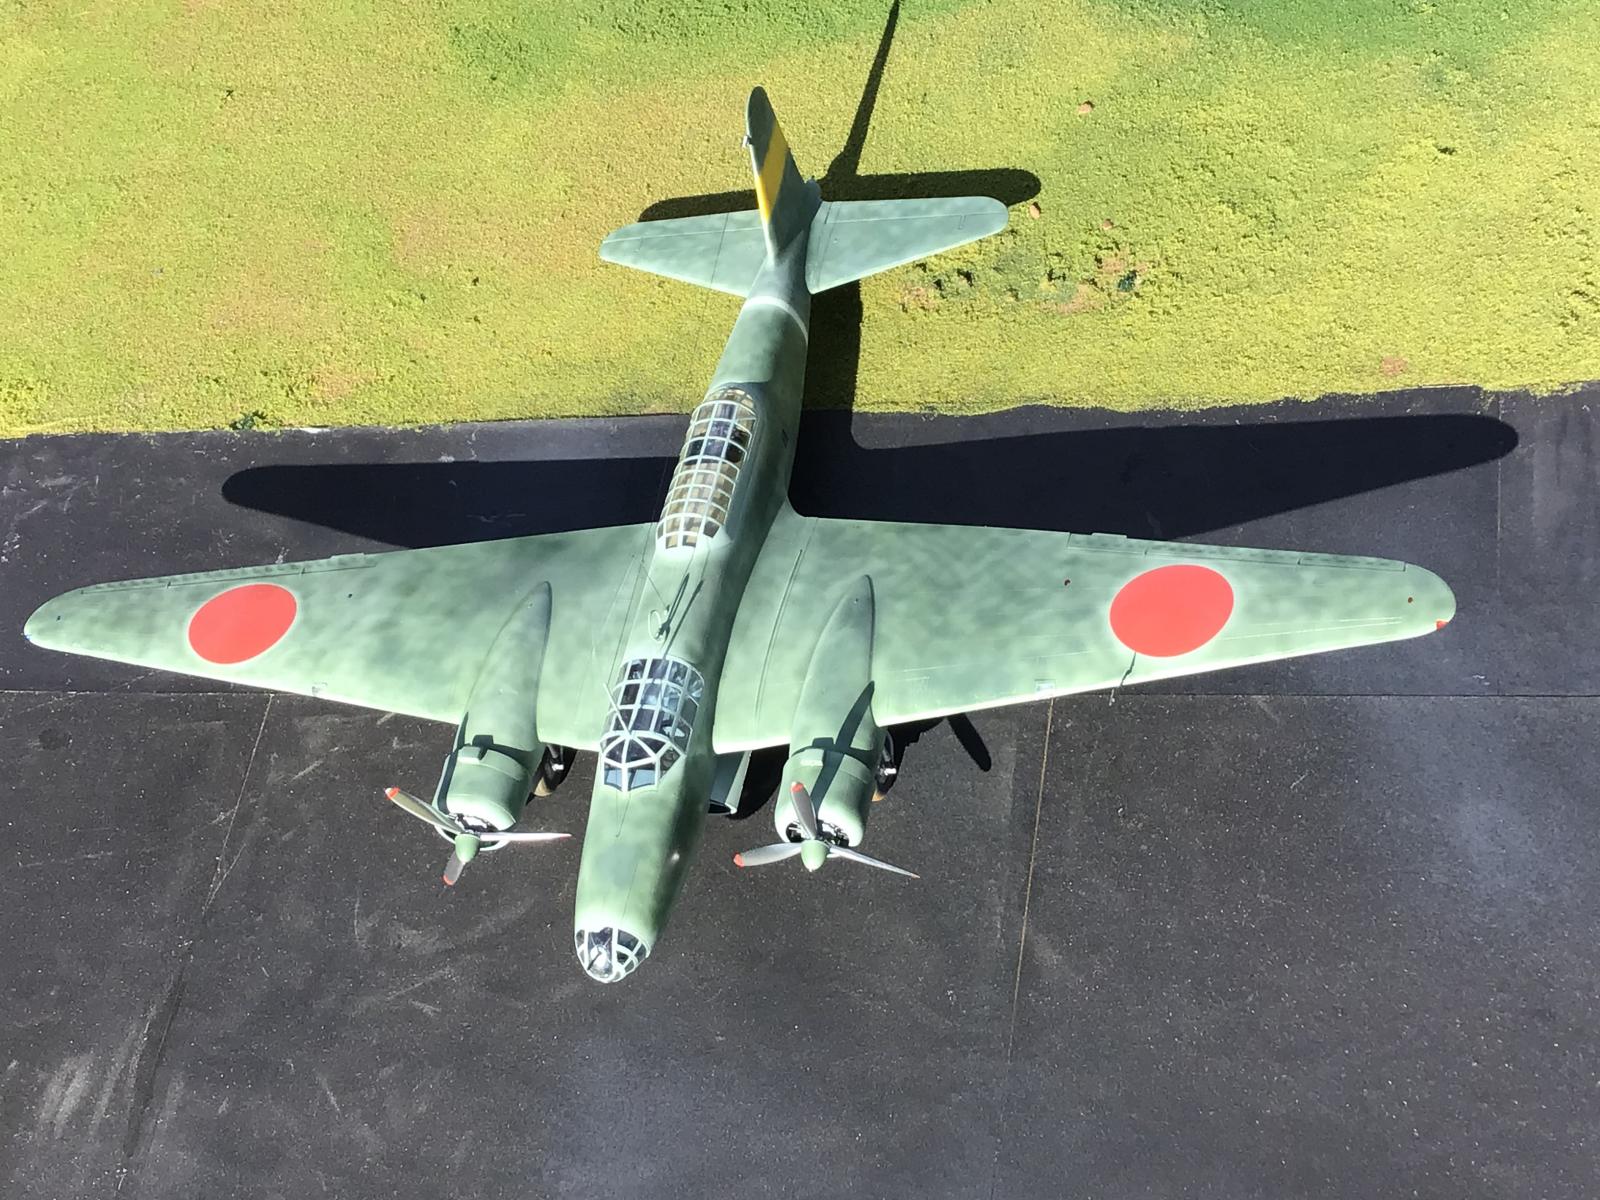
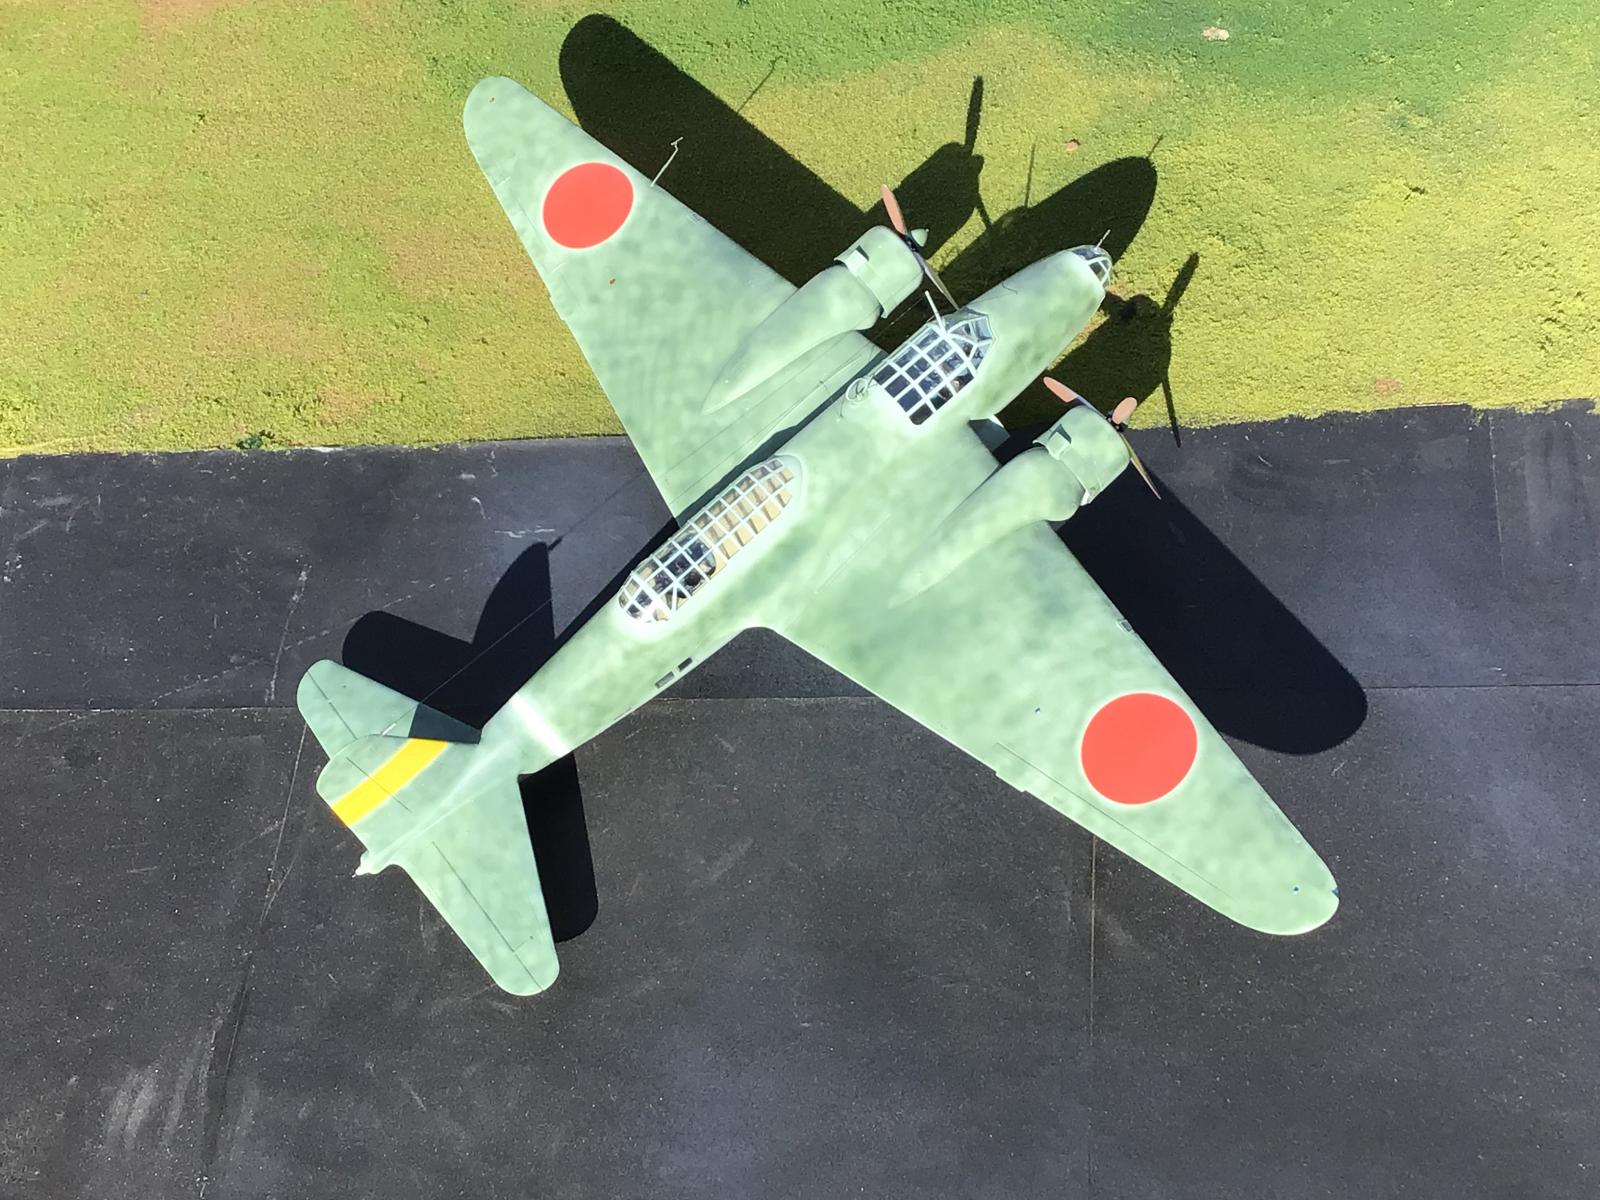
The canopy parts are crystal clear. Unfortunately there are also a lot of them. This masking off the canopies and windows took some time, but things seemed to move along well once I got in the groove of doing it.
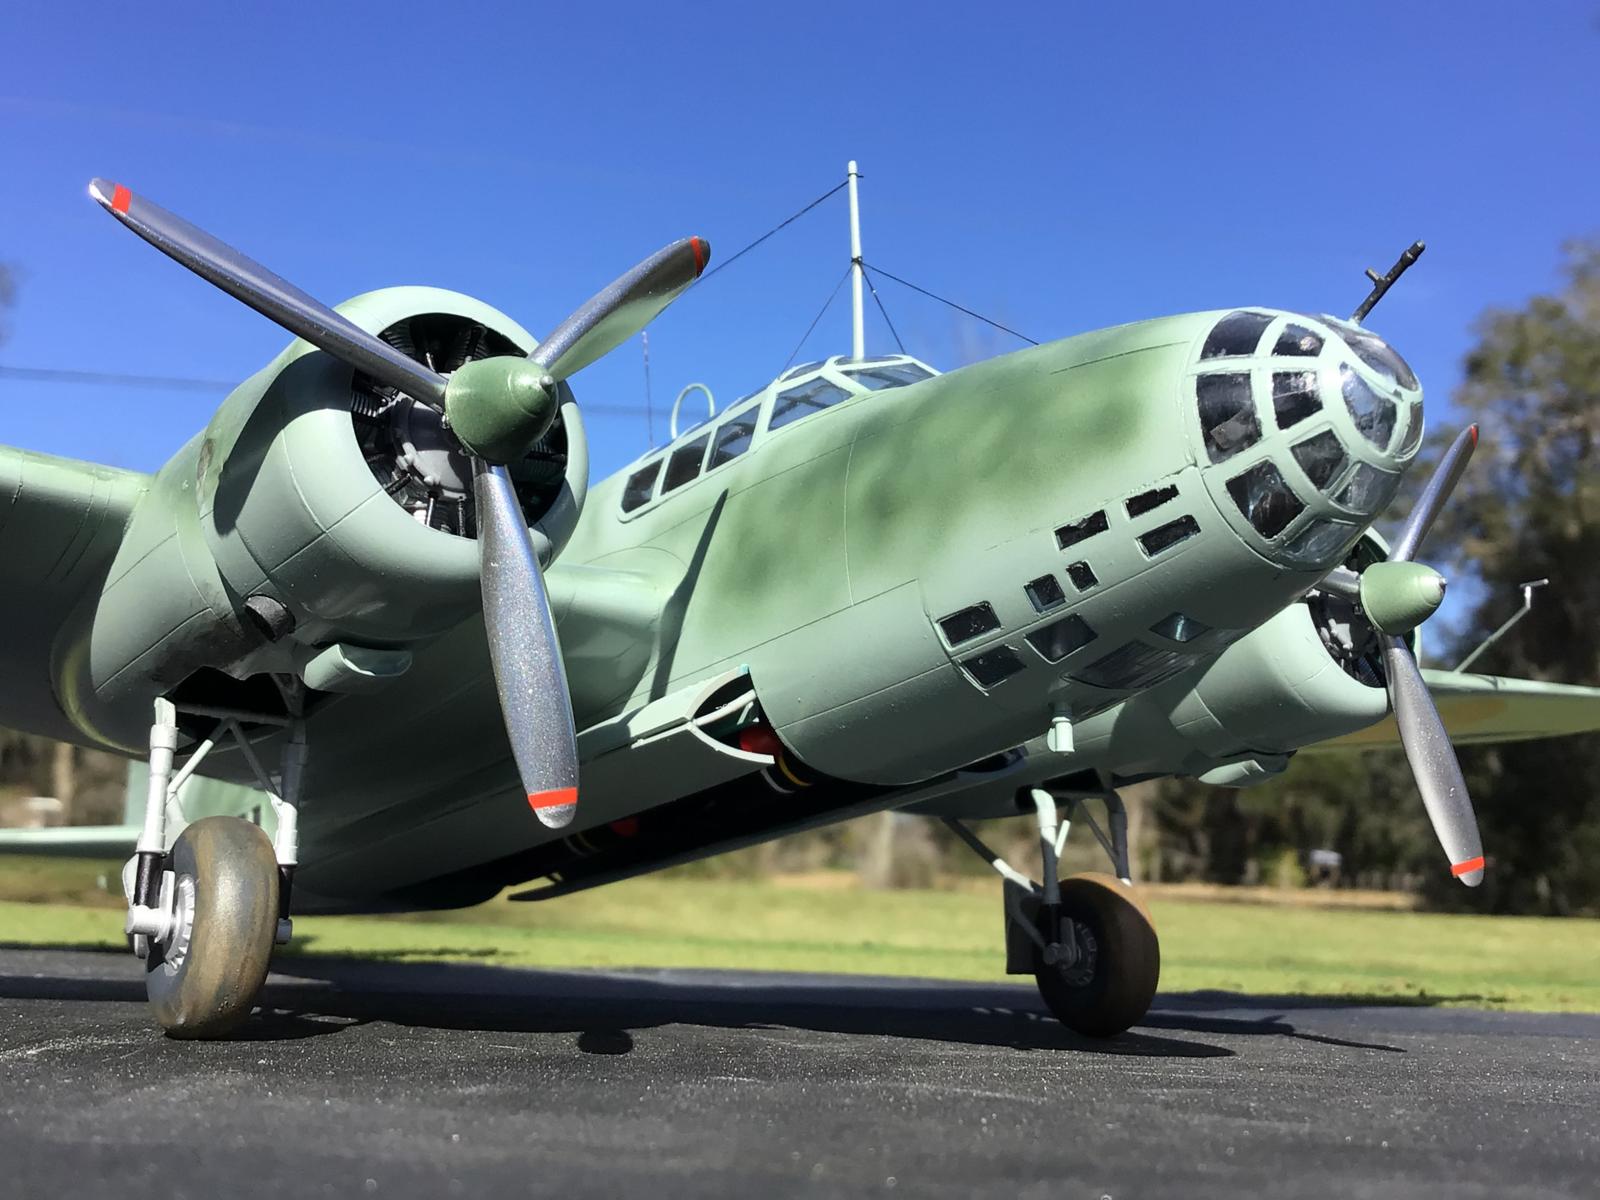
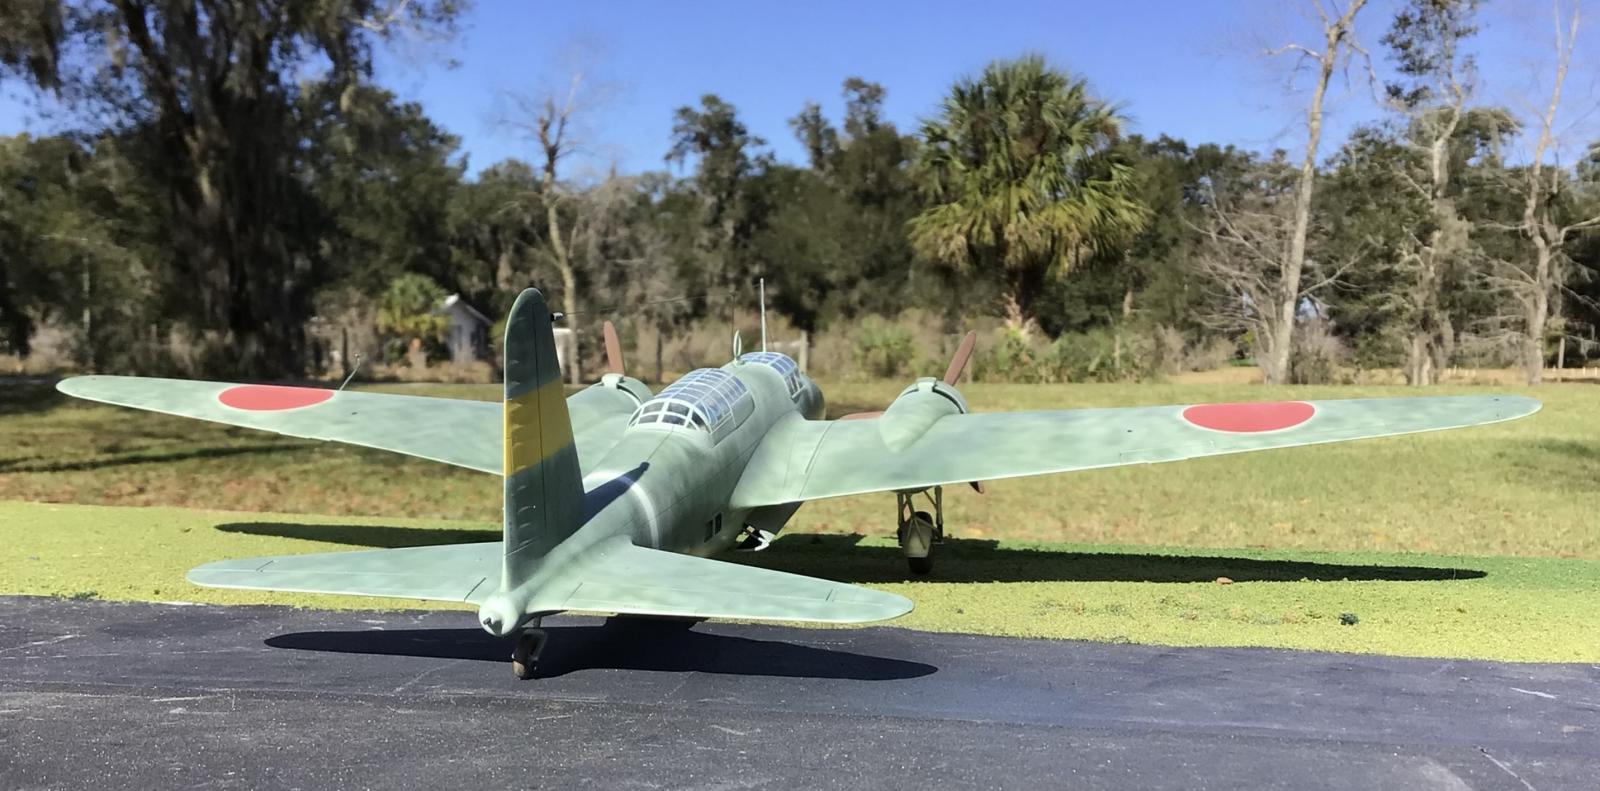
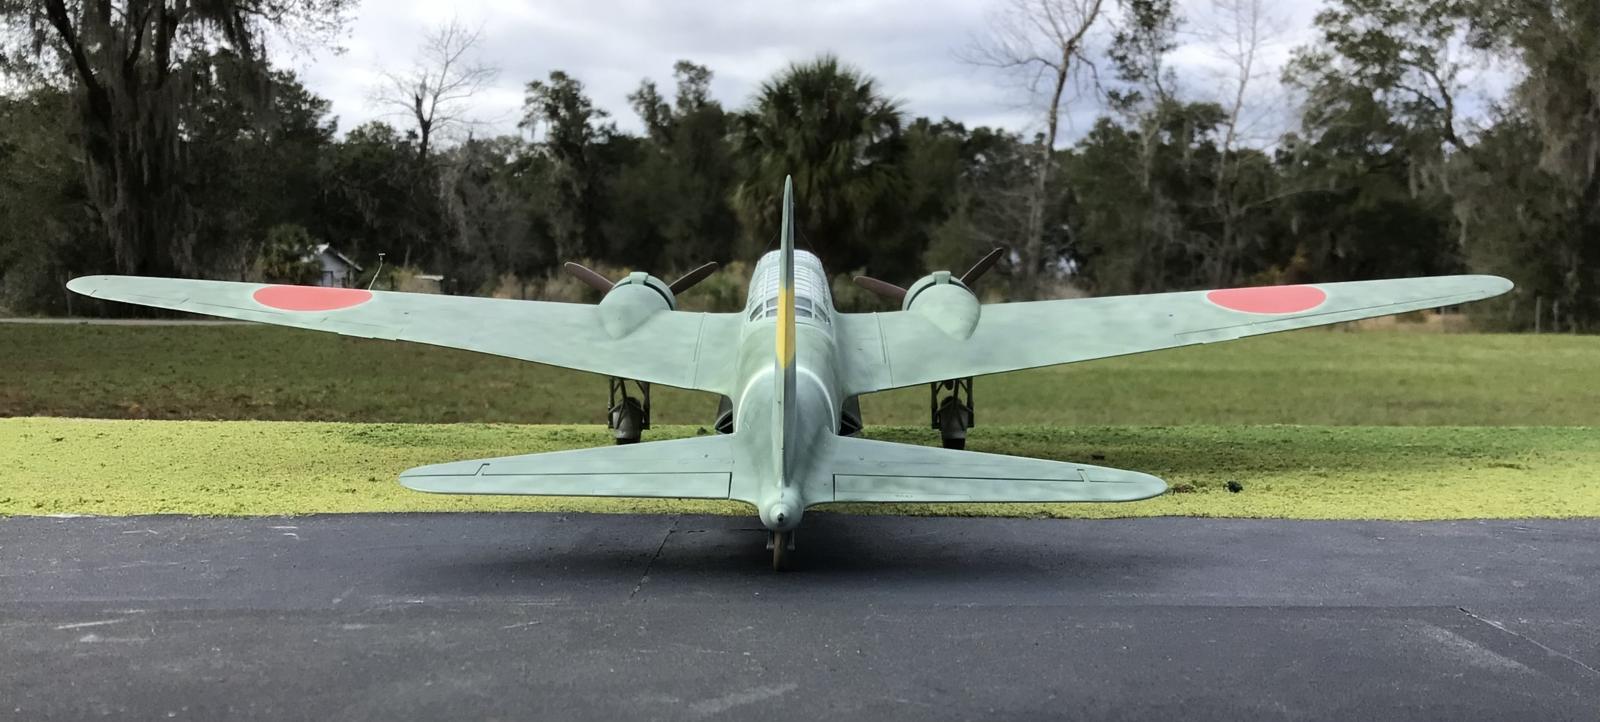
I used EZ line to make the radio antennae and supporting cables. The EZ line was held in place with CA glue.
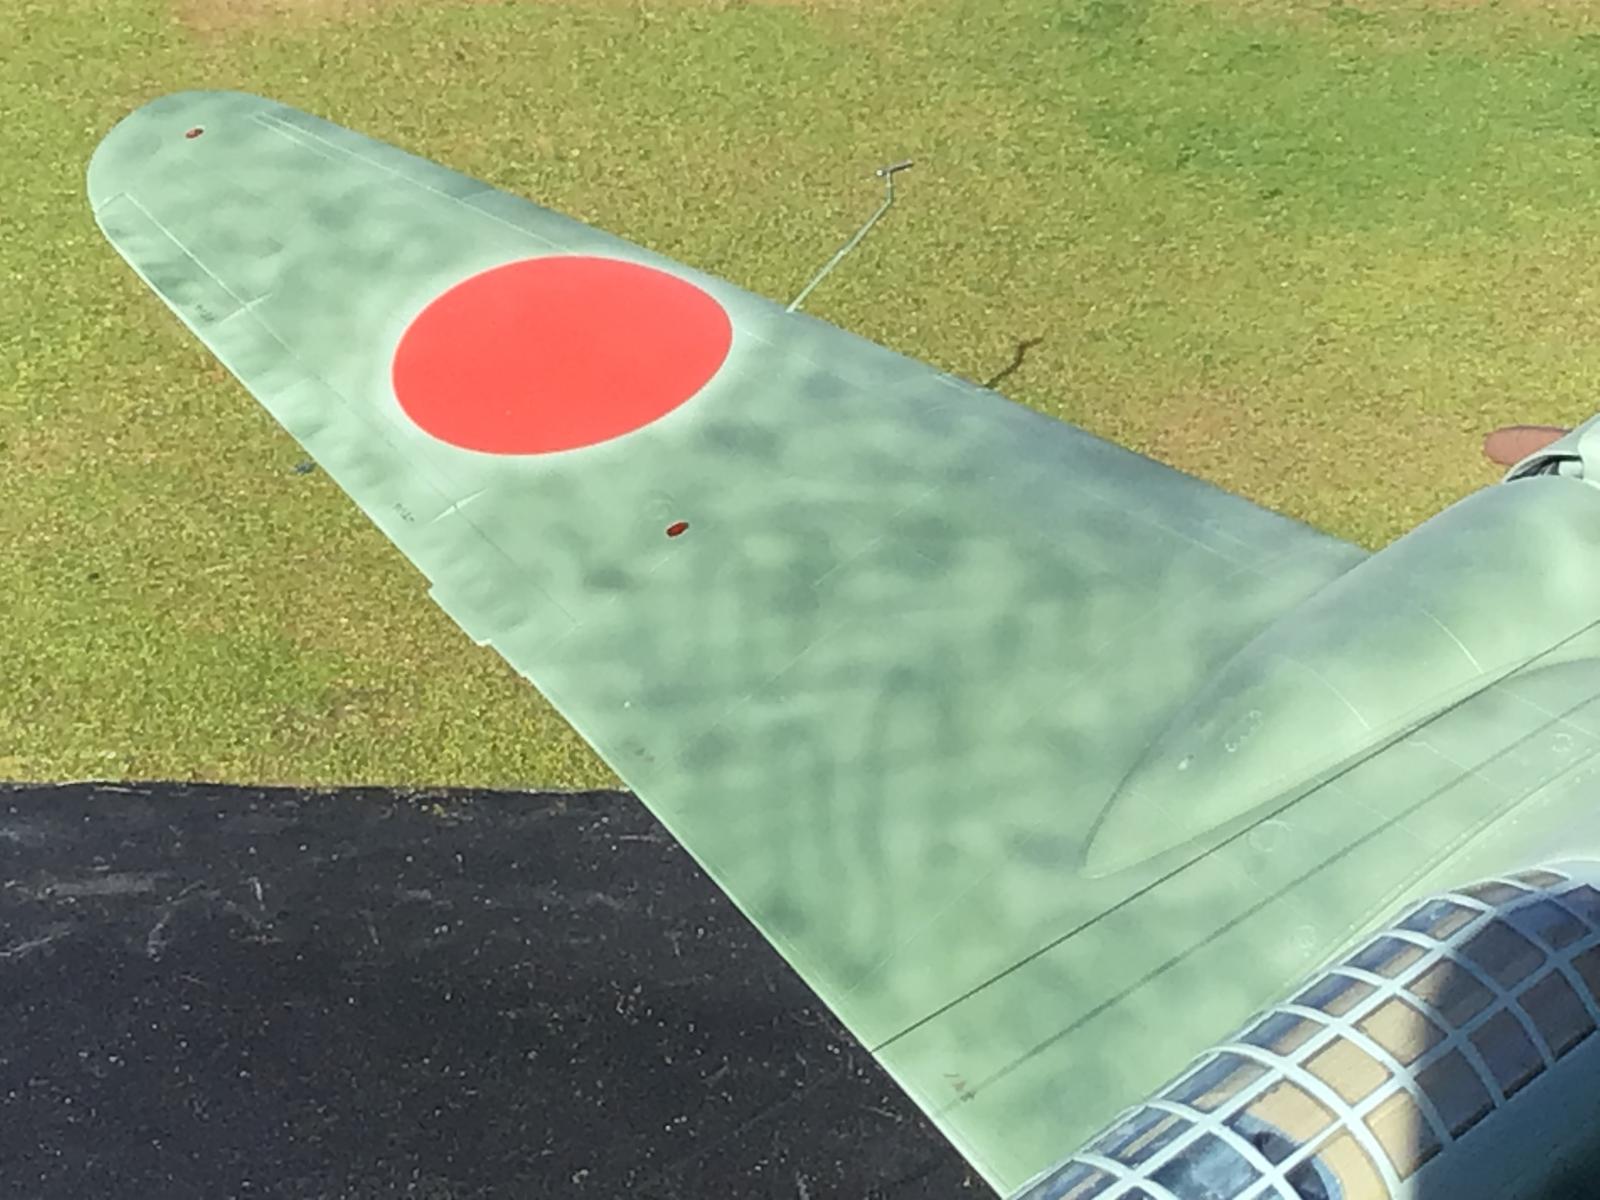
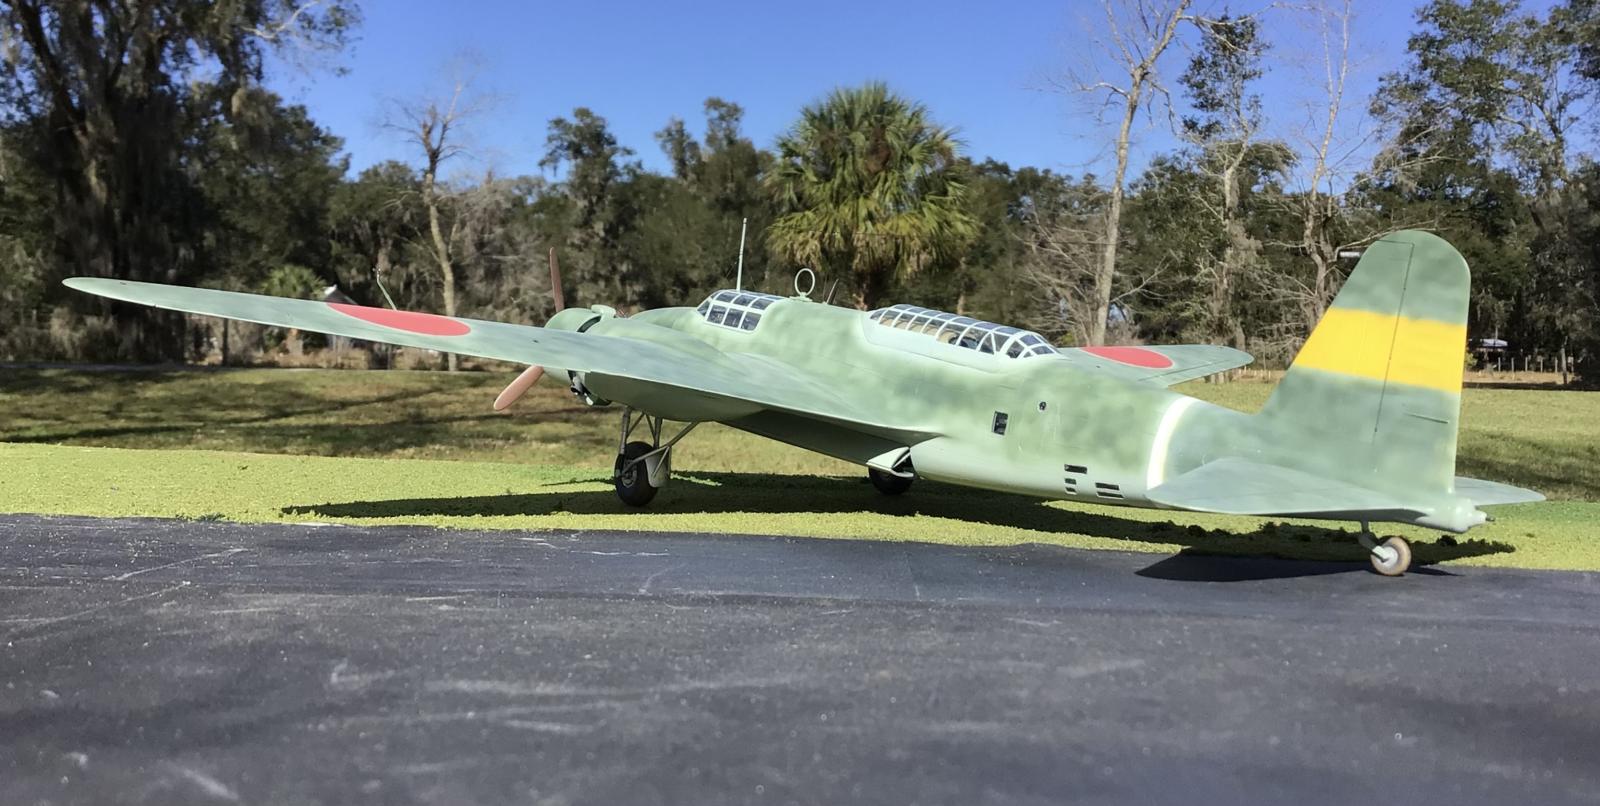
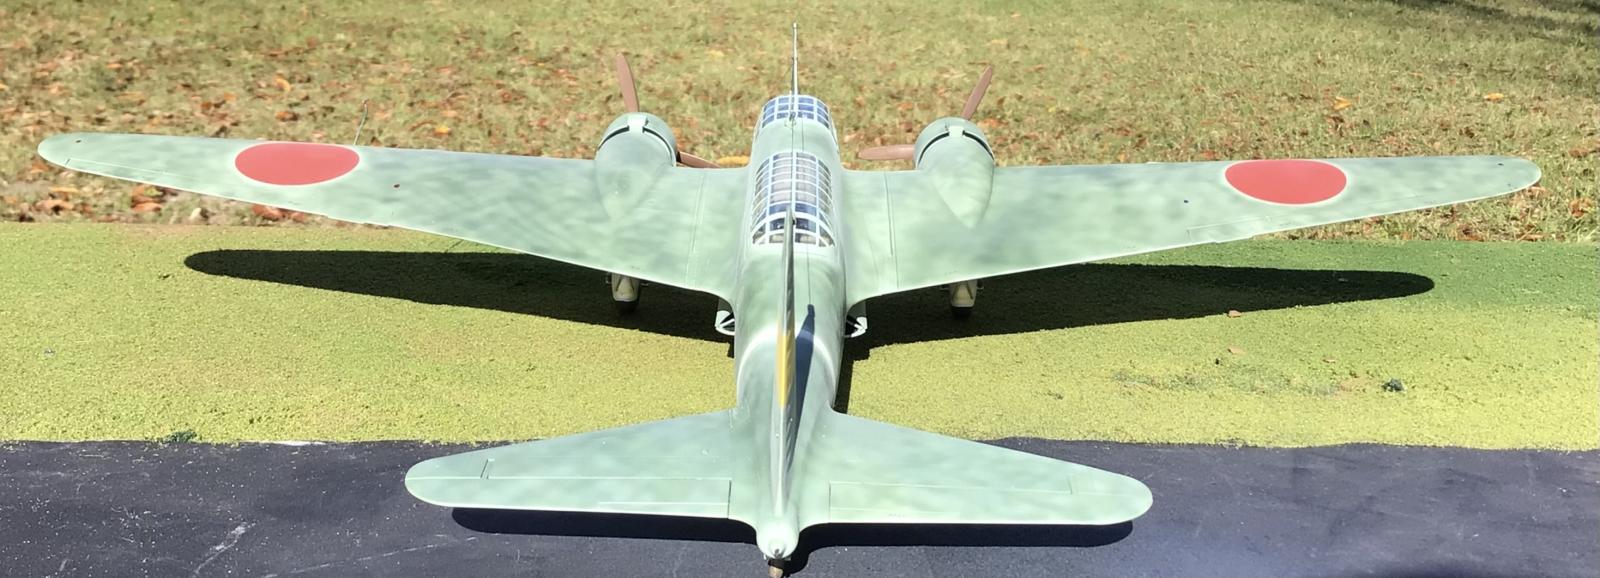
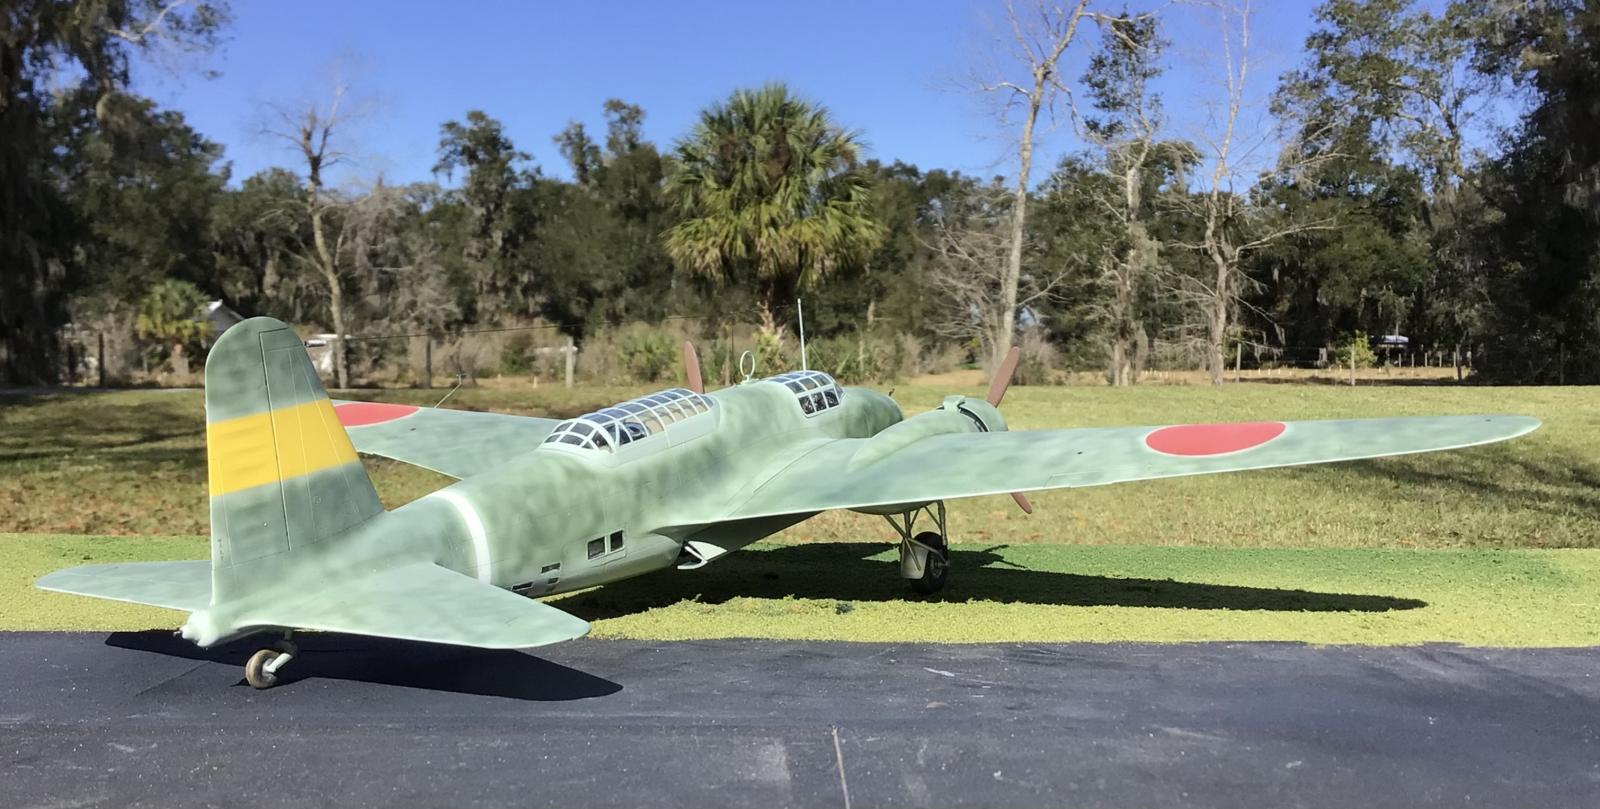
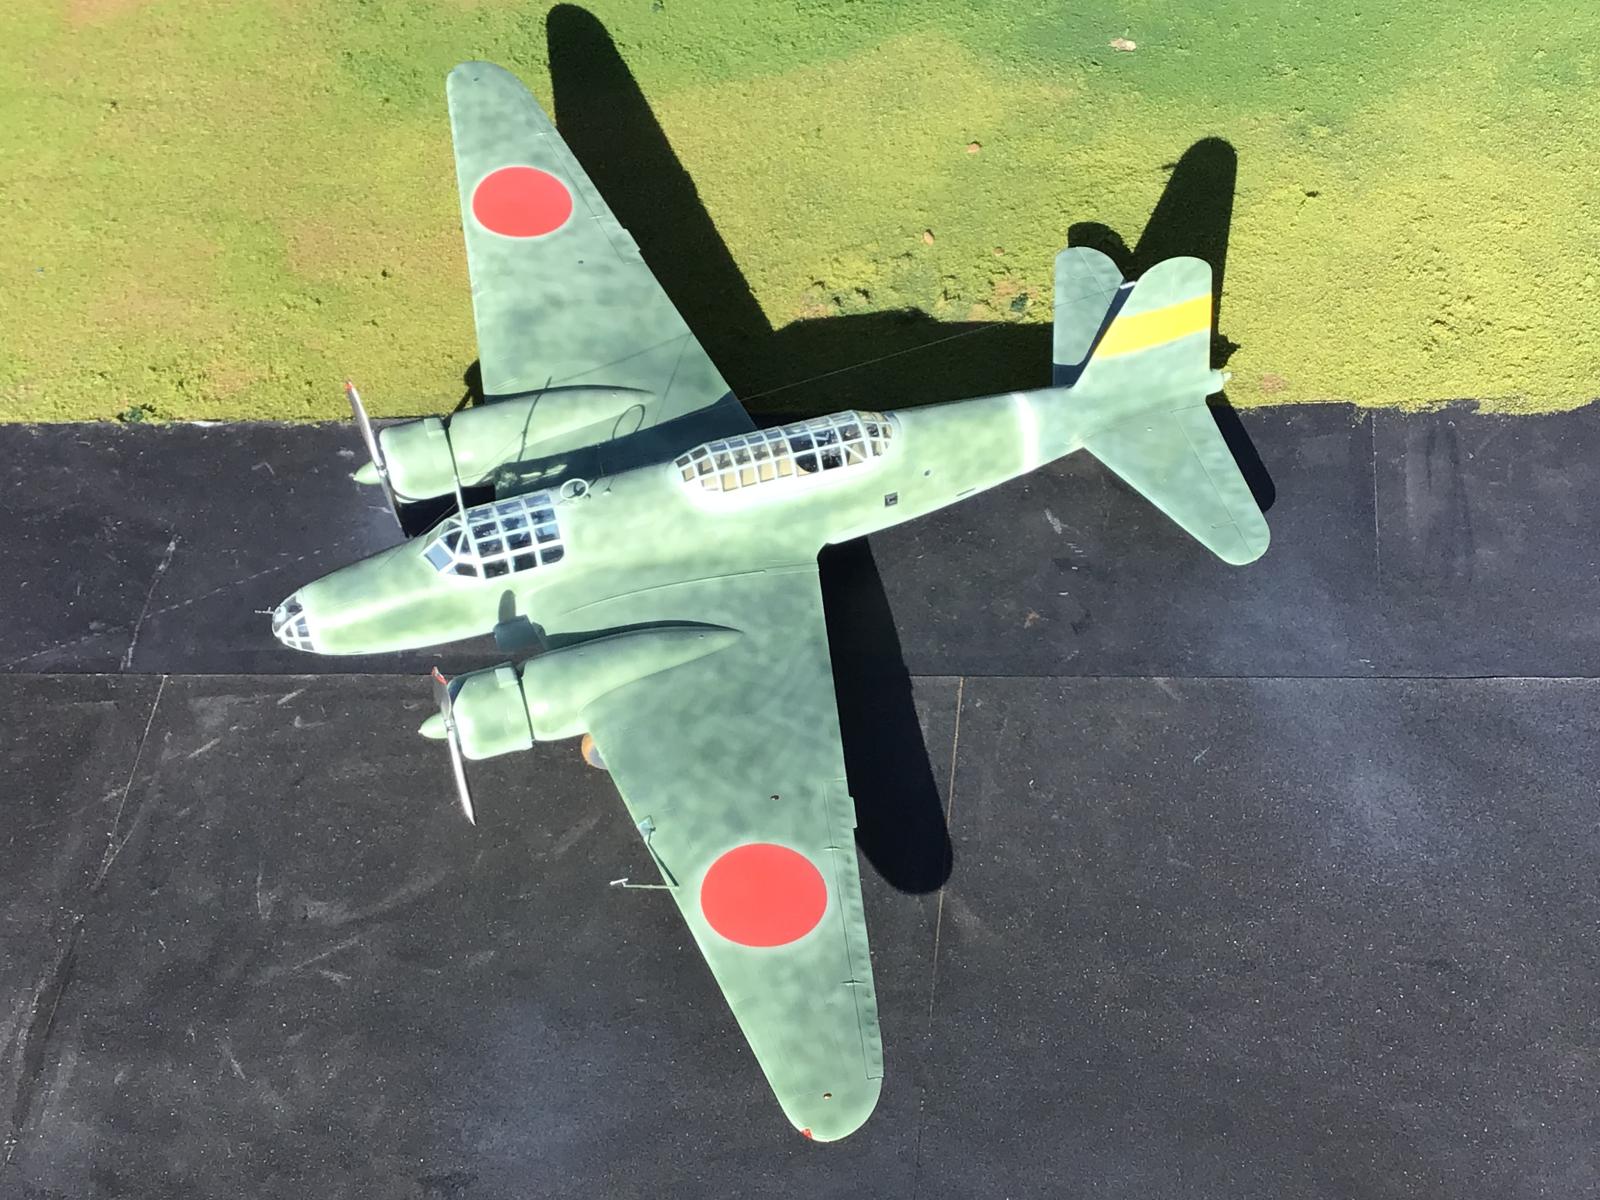
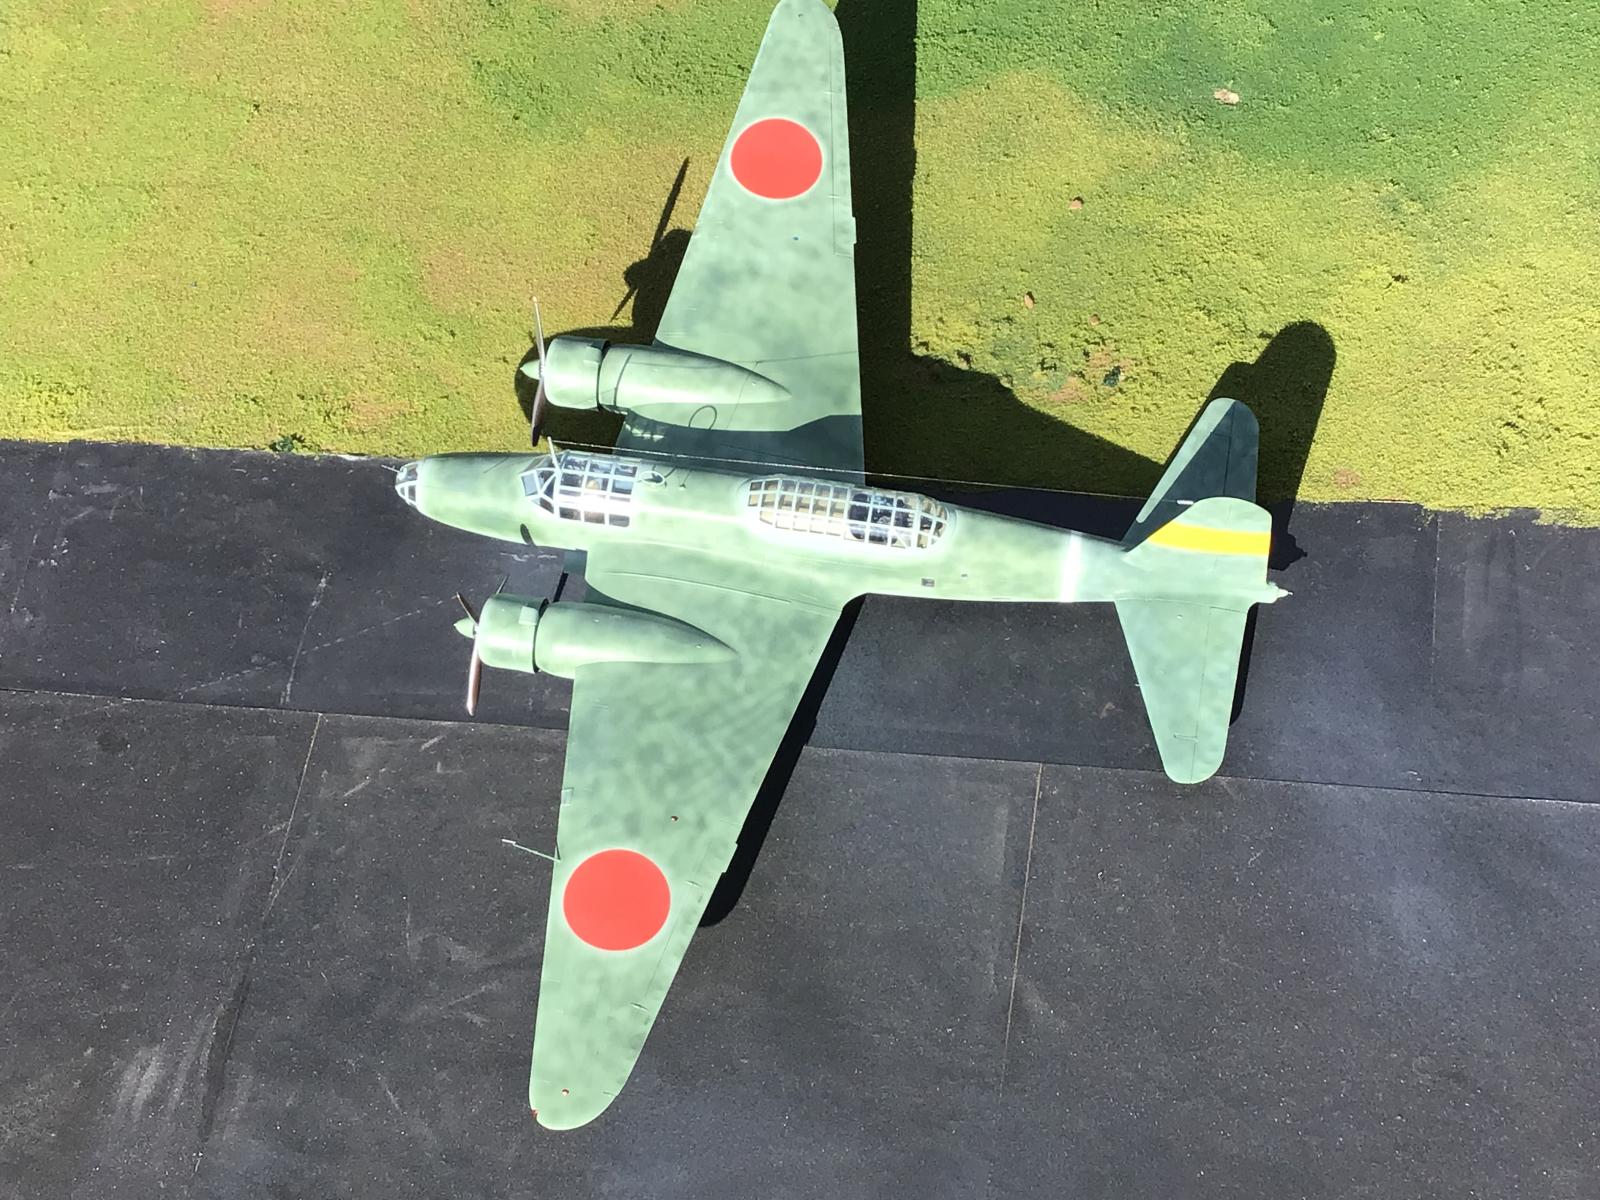
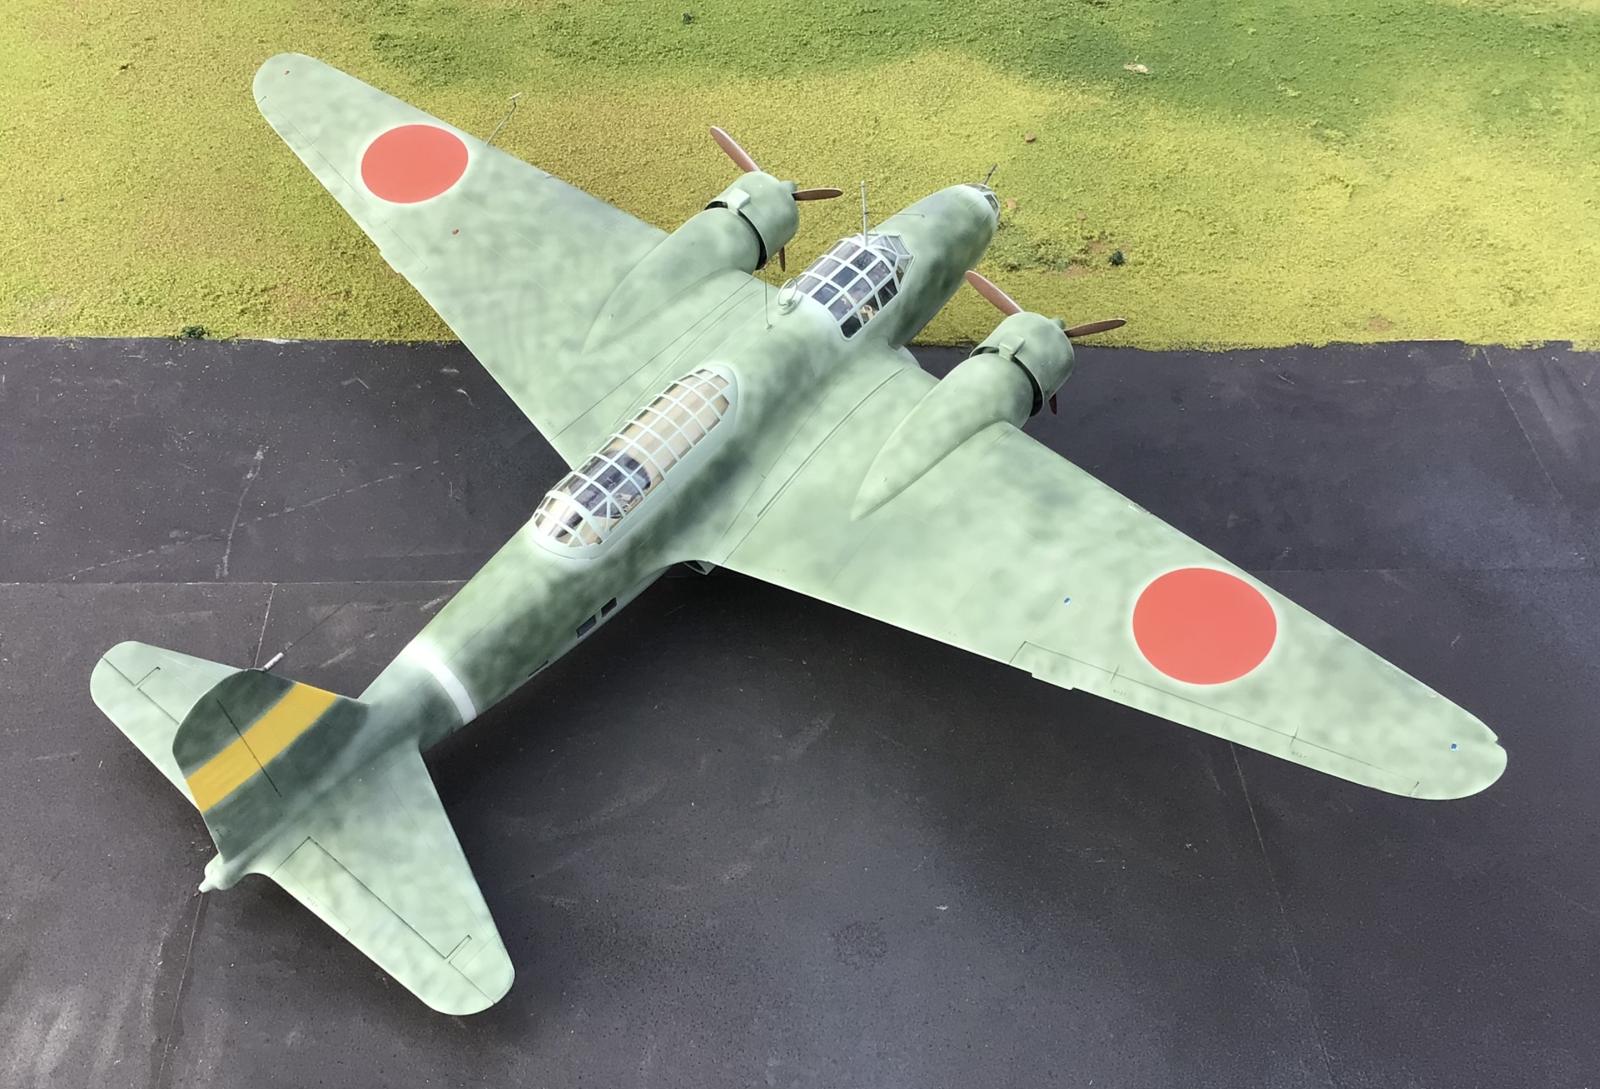
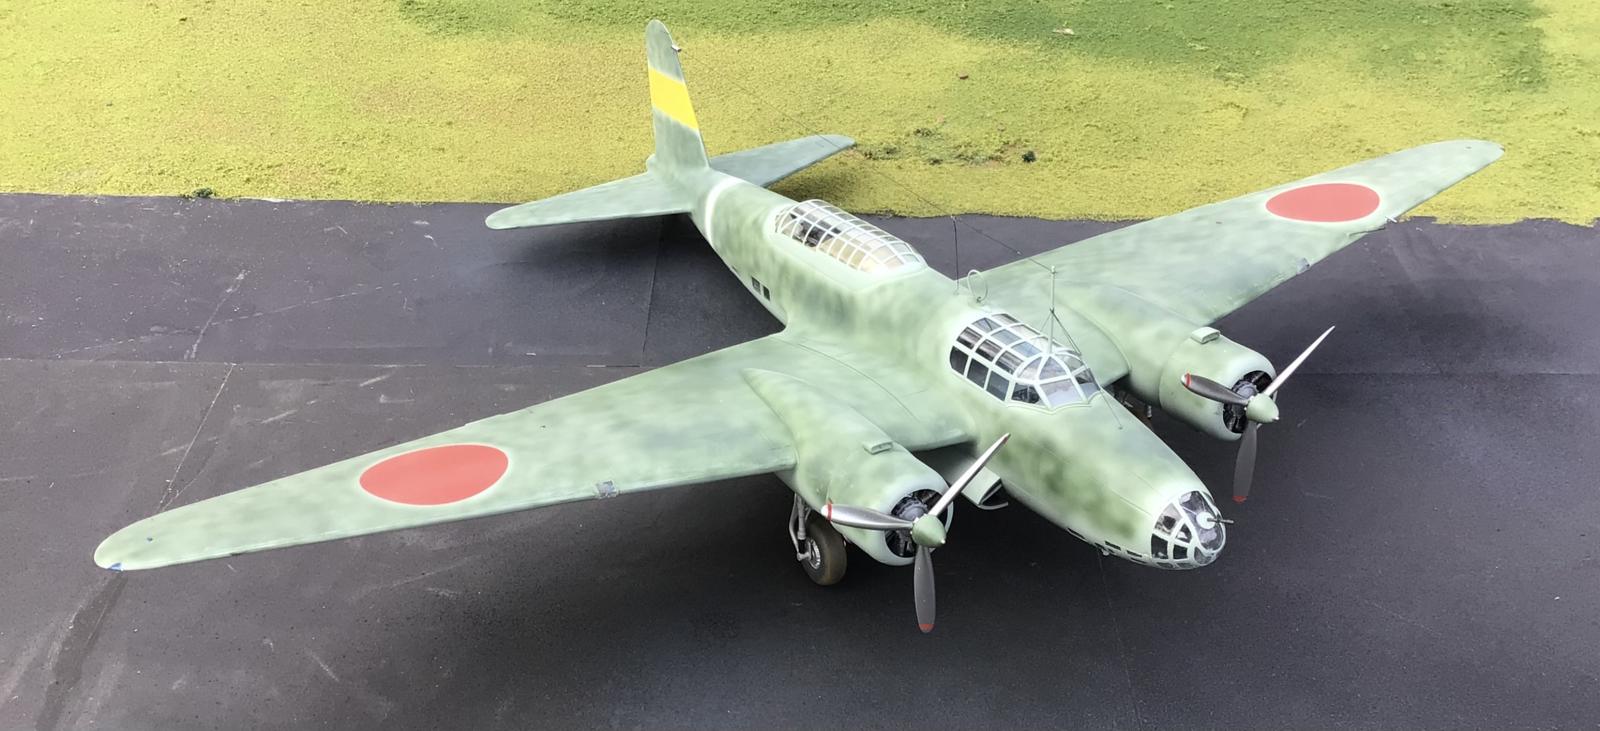
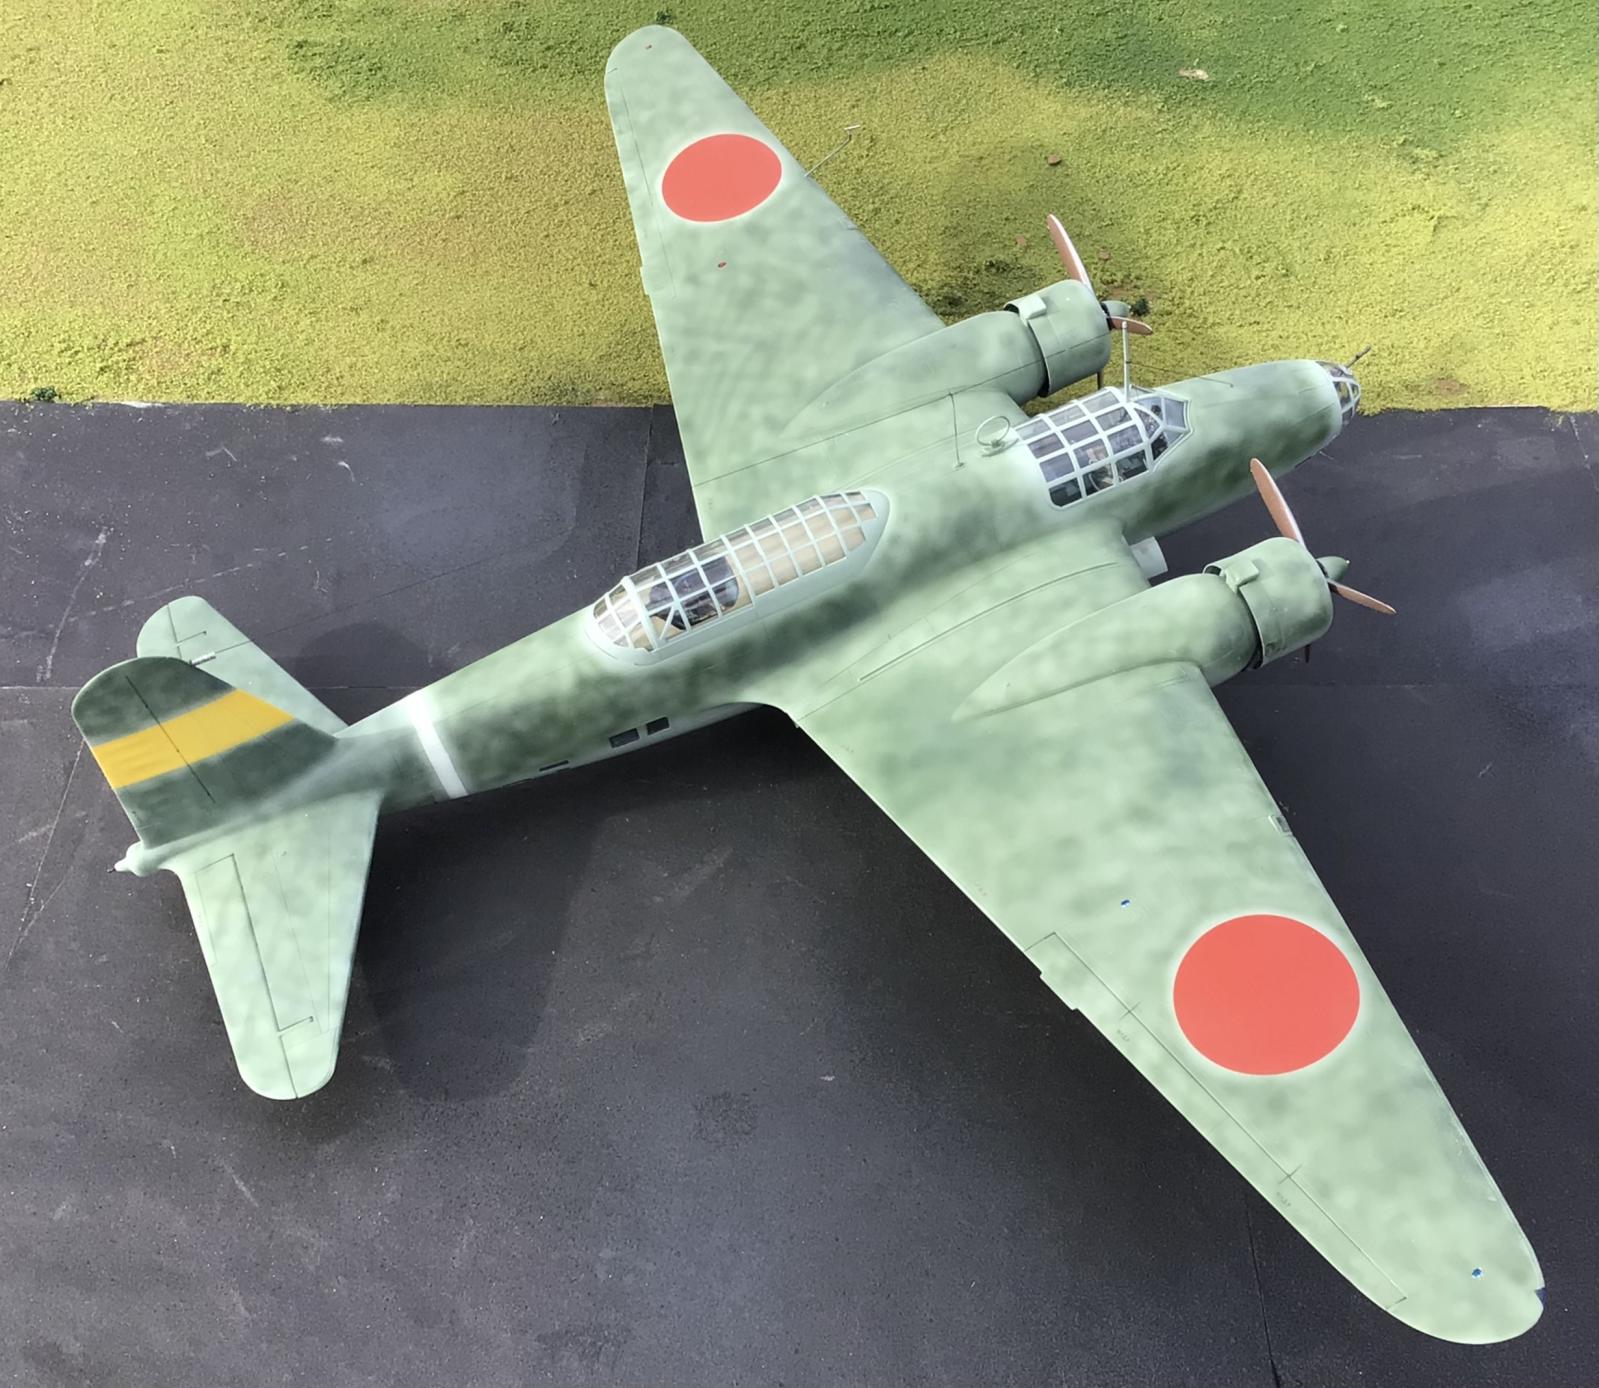
The base Gray Green color was sprayed on first. The decals were added next. Then I started spraying on the Dark Green in a manner where it covered the base, but just enough to do the job. I also used several different spray techniques to make it look as if several different people were actually painting the Dark Green on at the same time. So you will see various squiggles and mottles present.
I sprayed over some of the factory applied maintenance stencils. I did it just enough so that they were still legible... if you can read Japanese that is. 😉
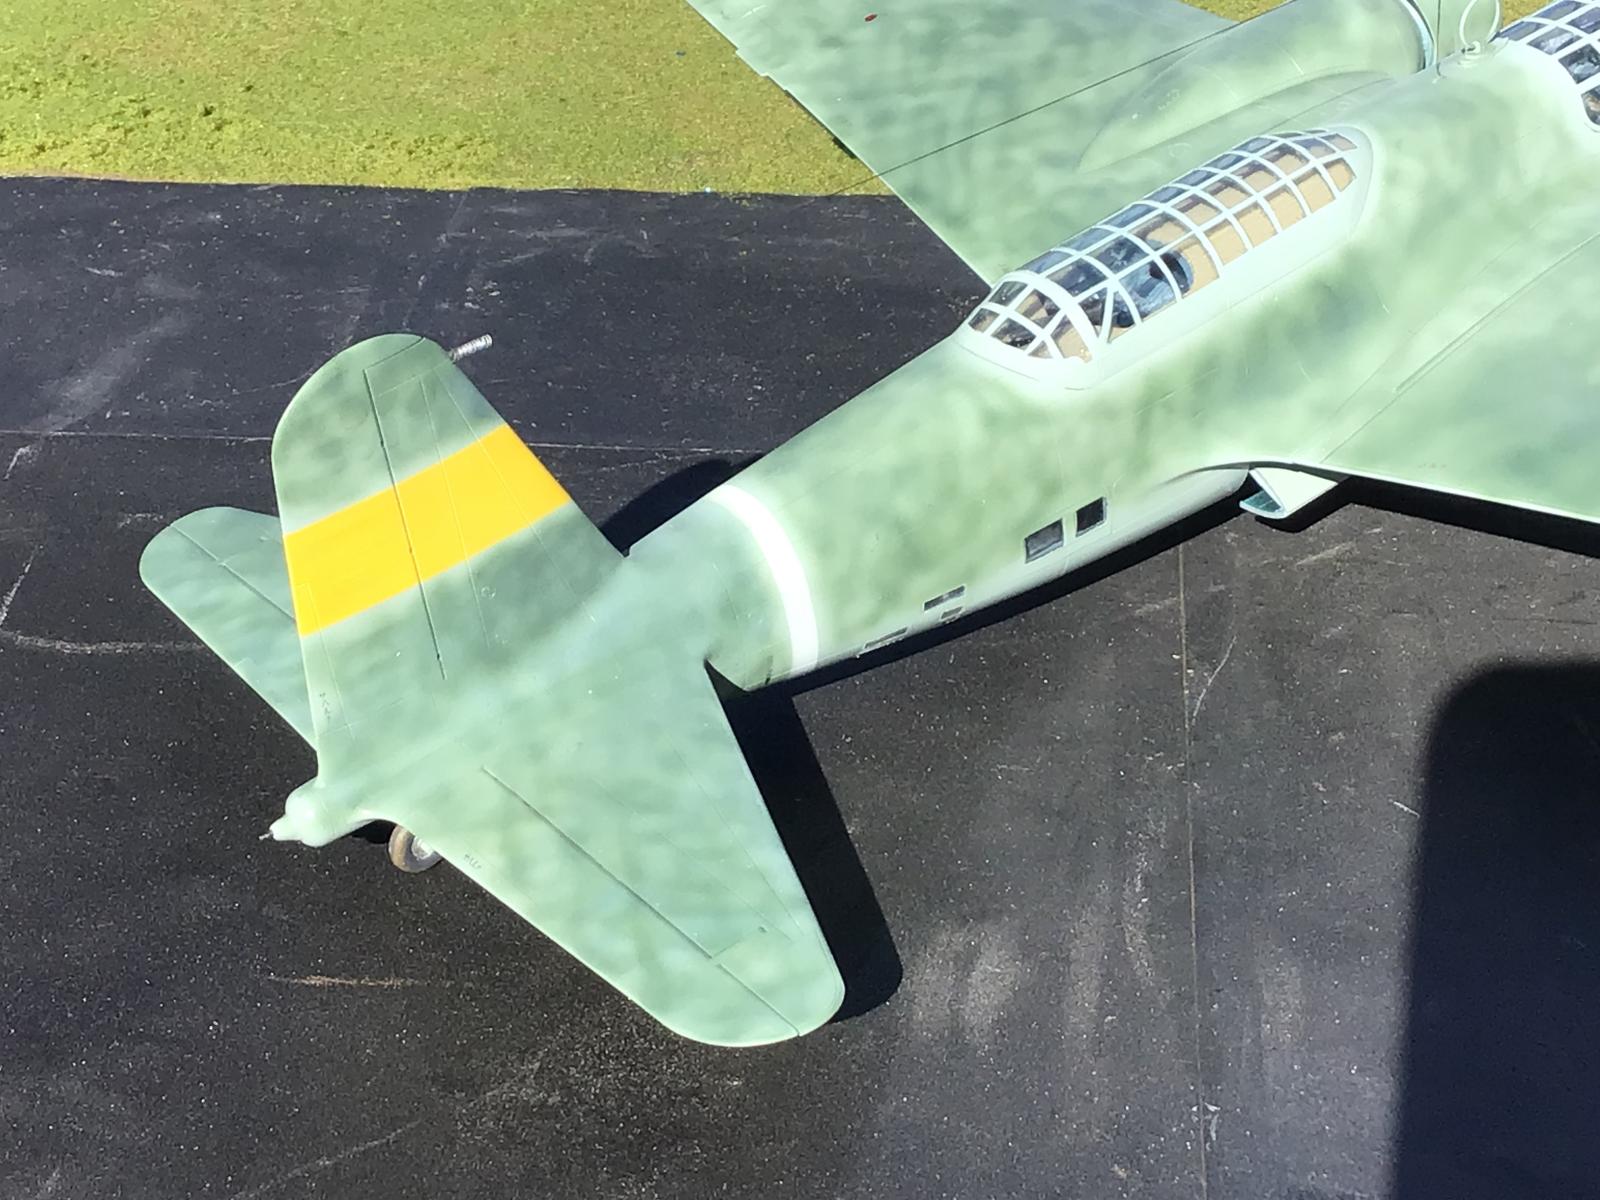
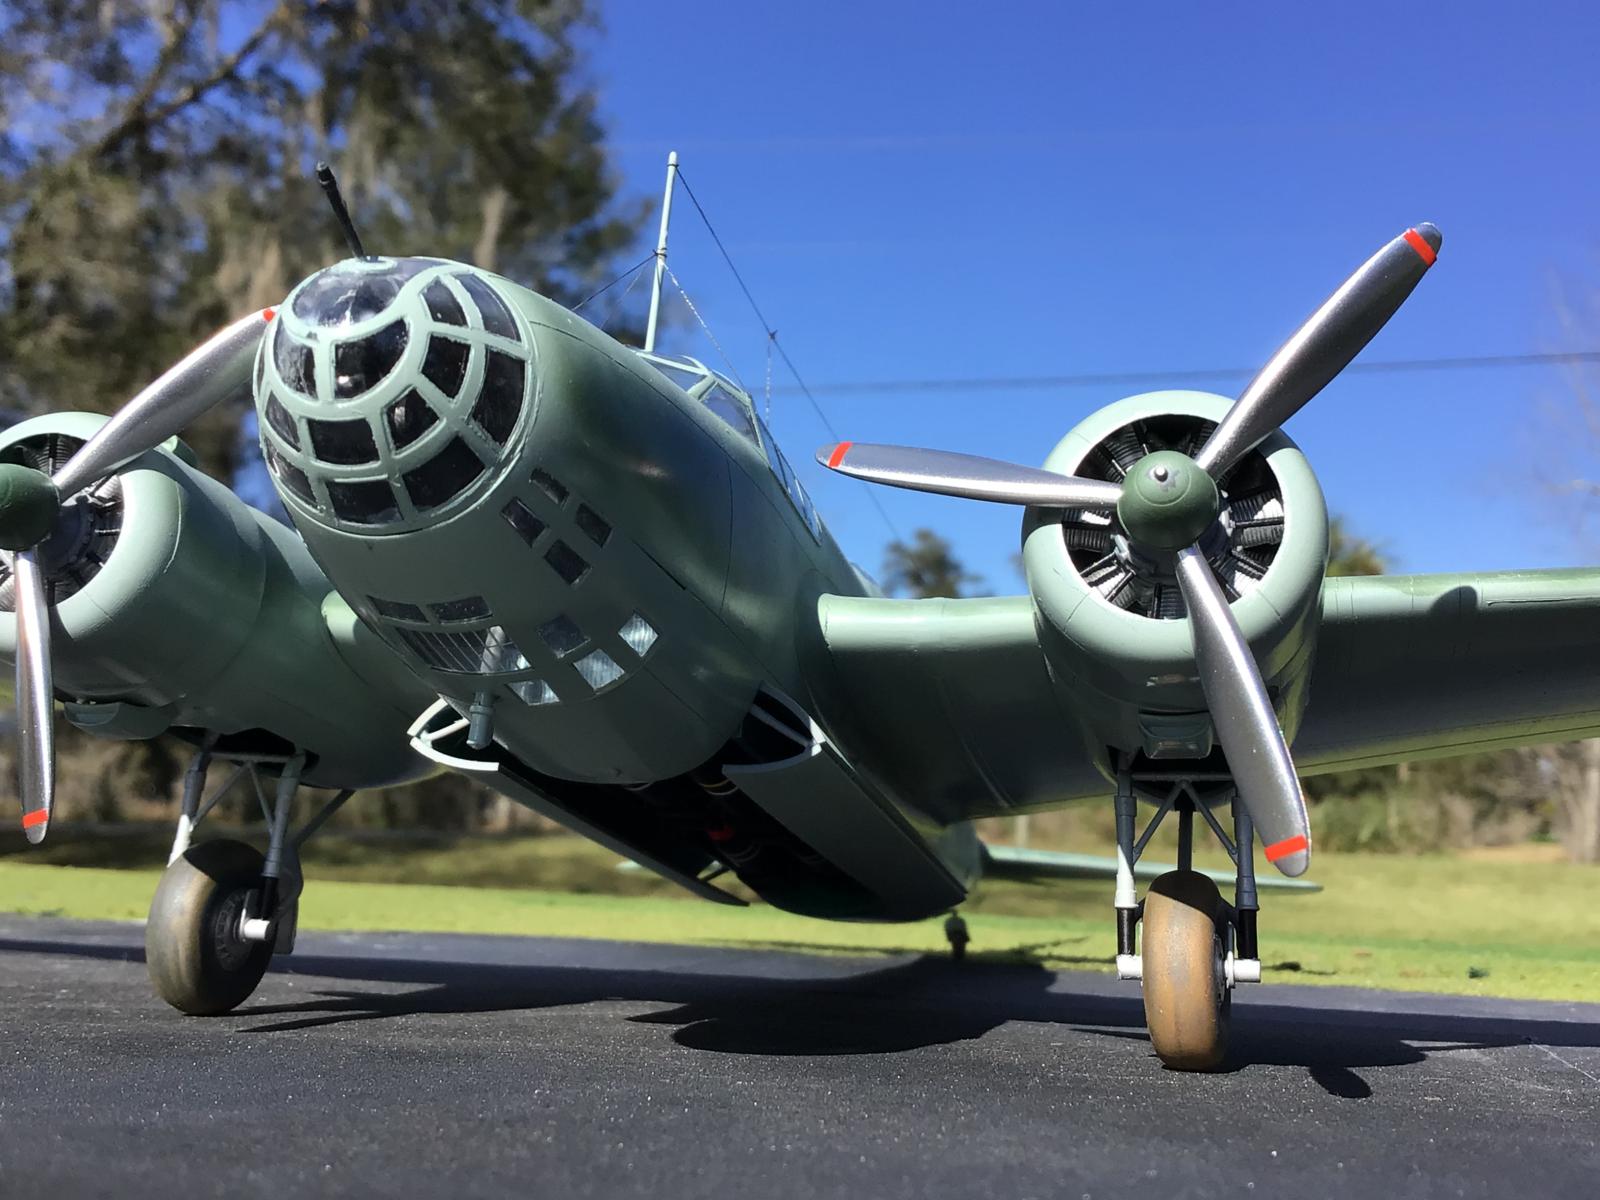
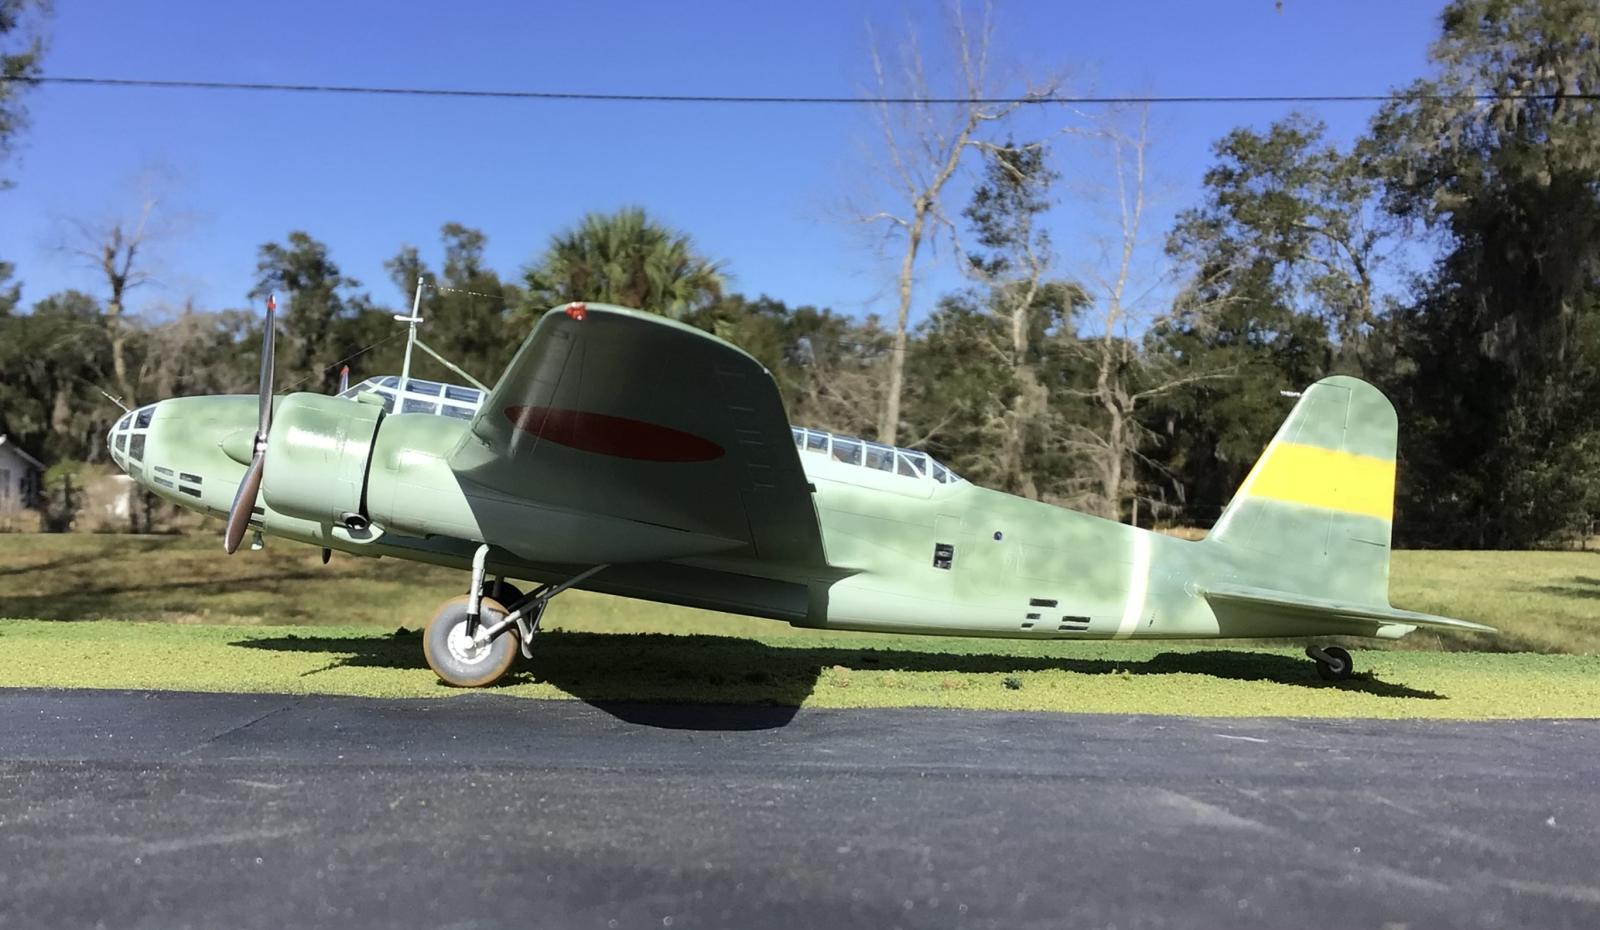
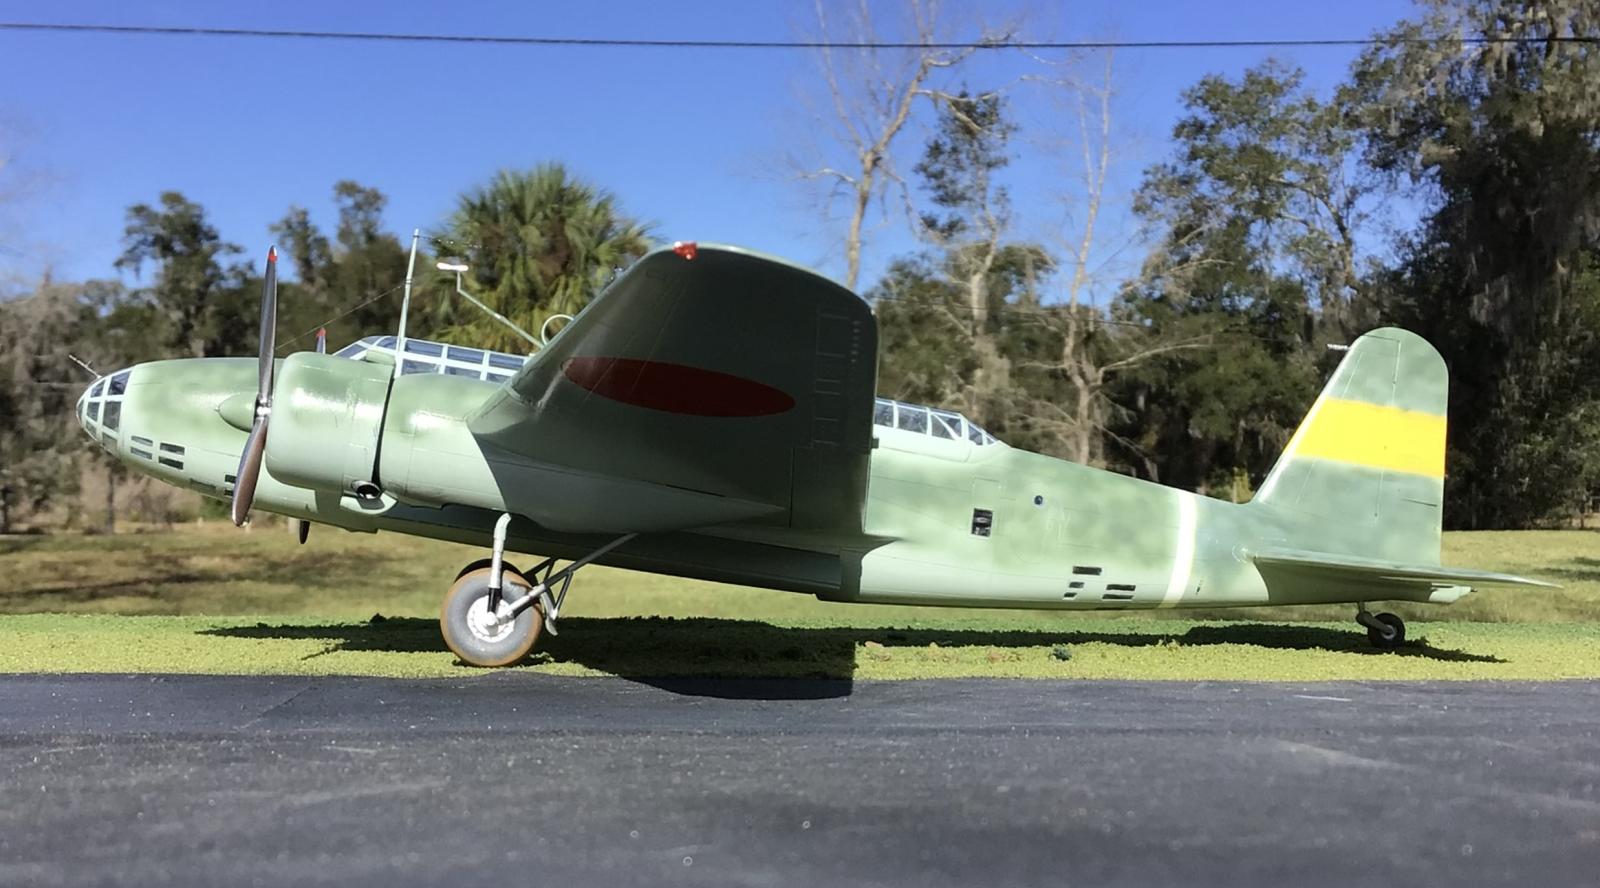
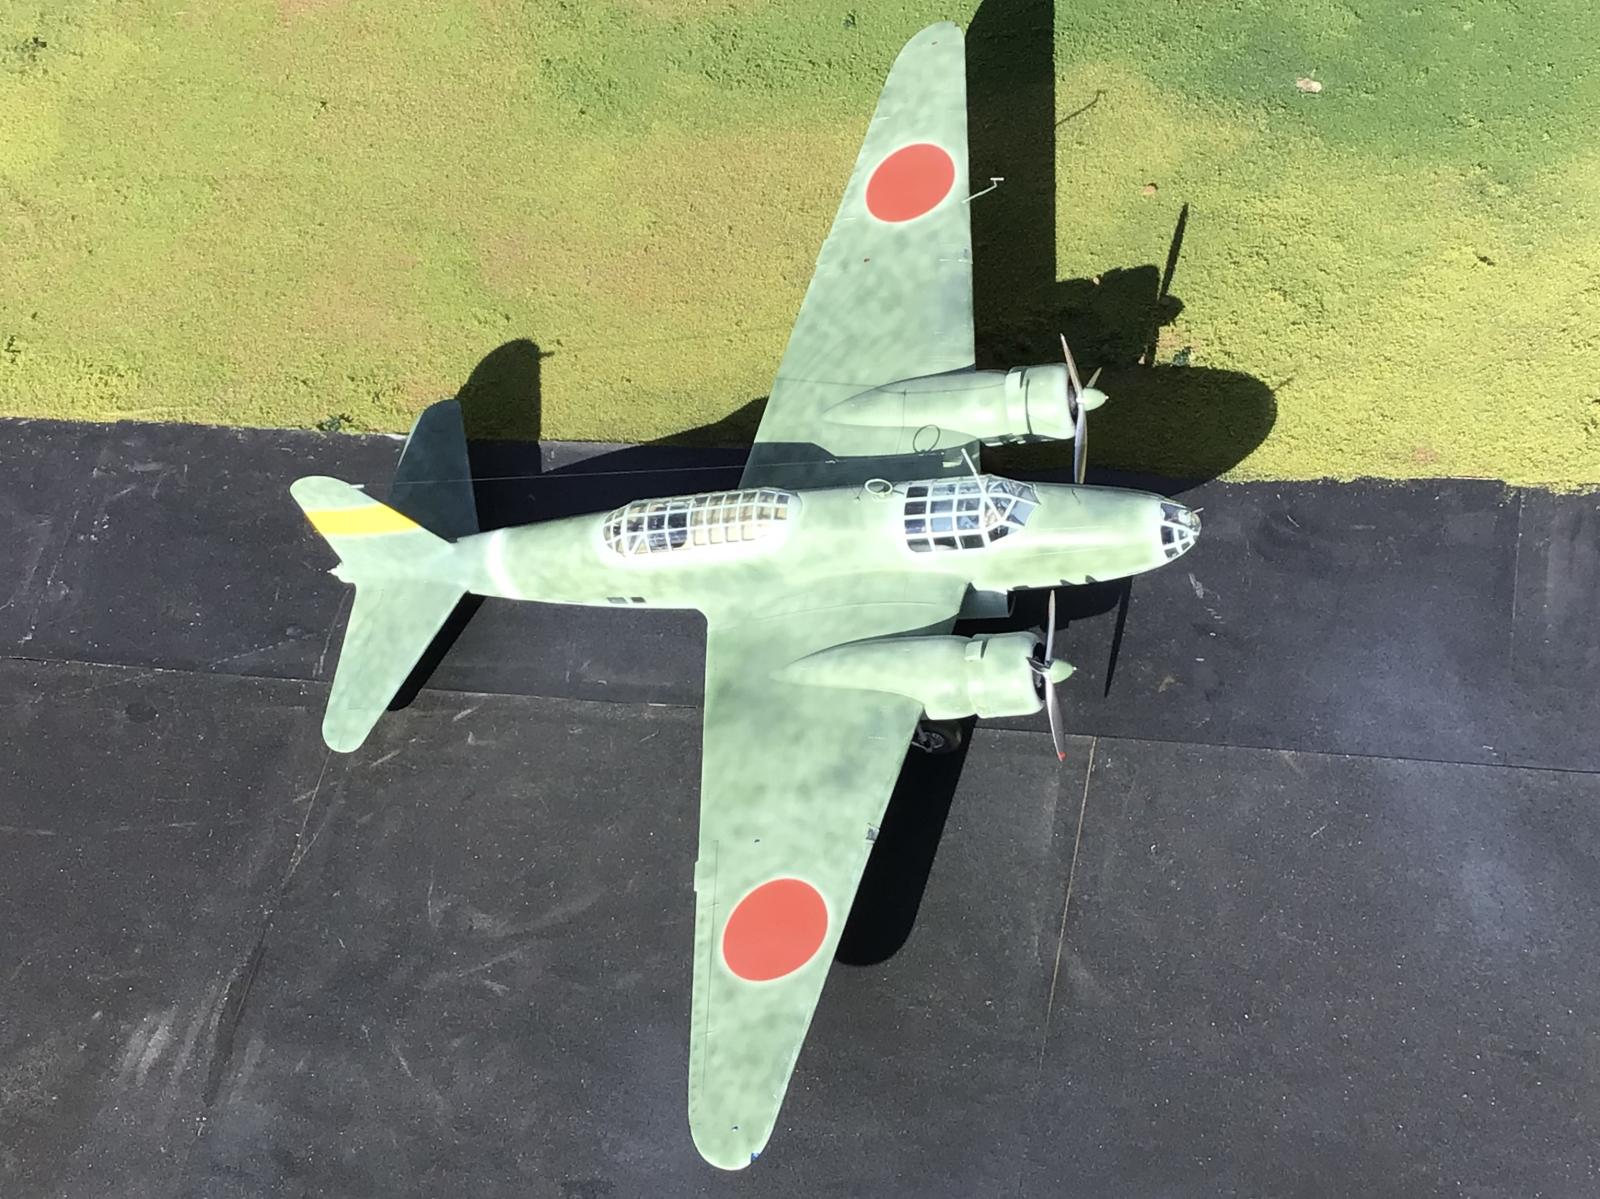
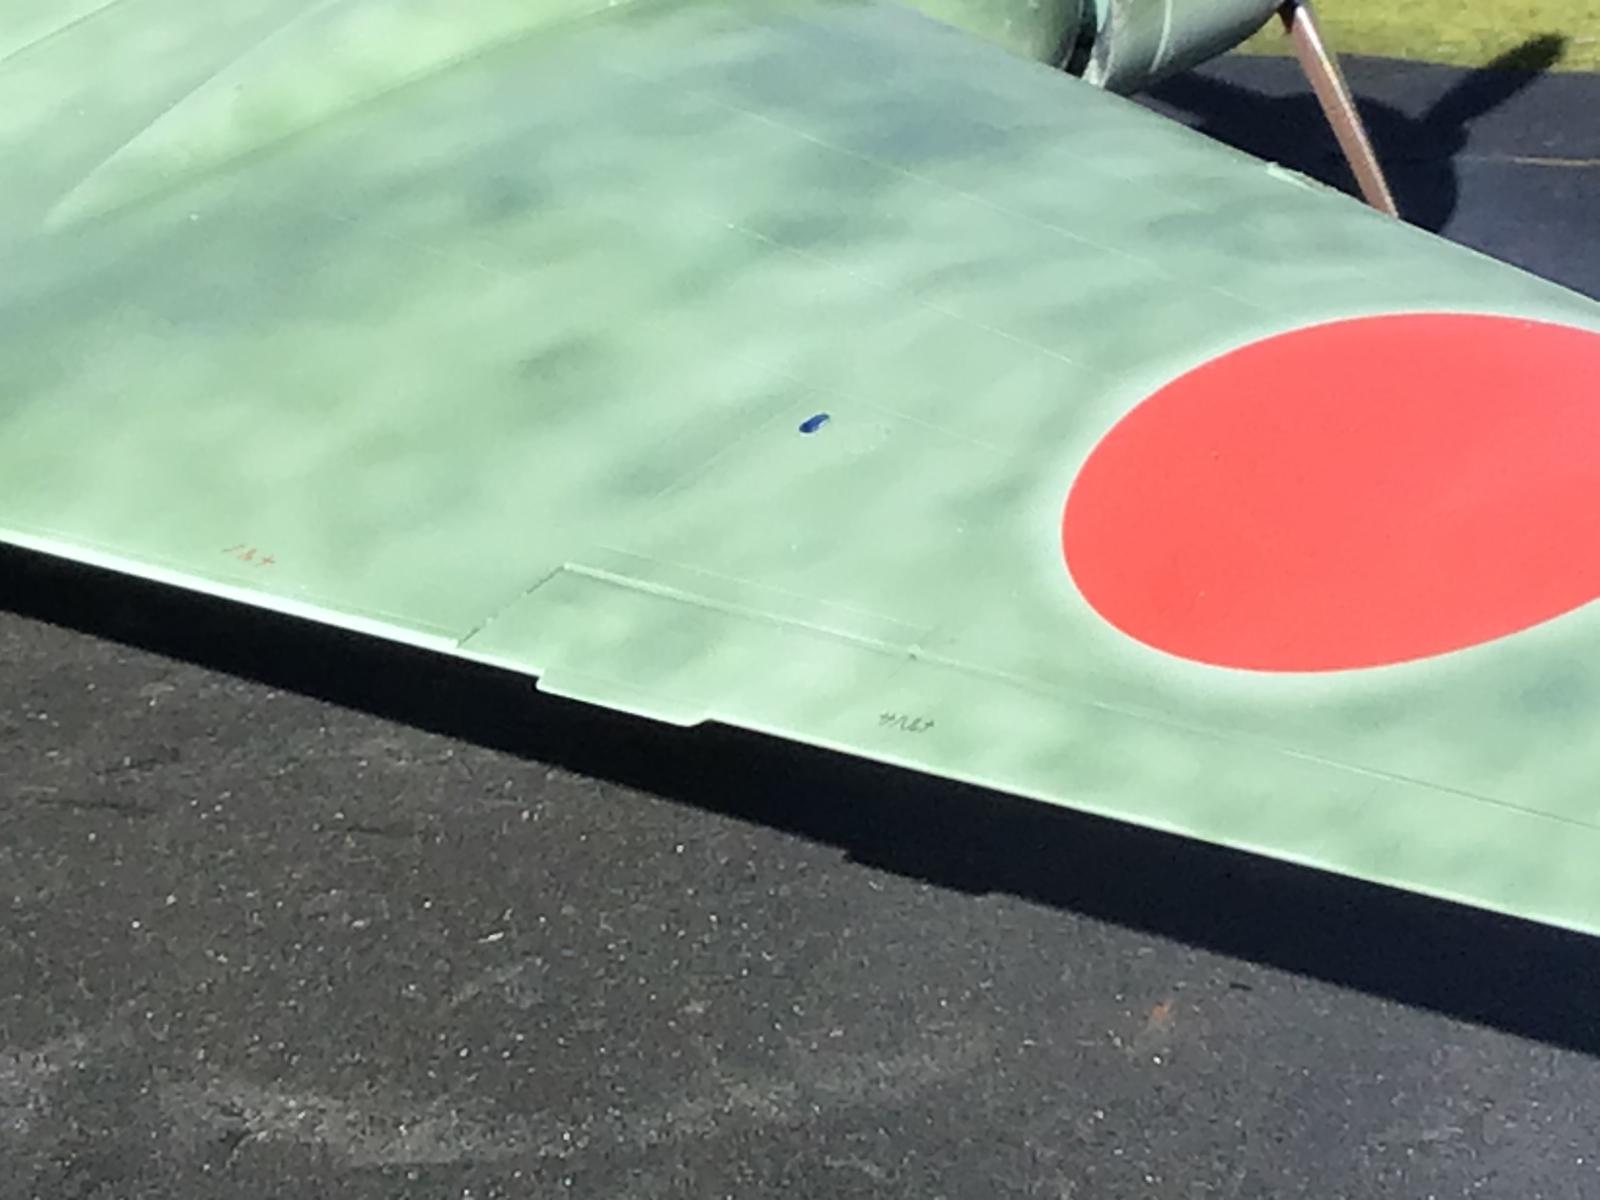
The "combat" white stripe was painted around the rear of the fuselage. When I painted the Dark Green, I sprayed as close to the stripe as I could. I also managed to get a little over spray on these markings, but this is how they were done in real life.
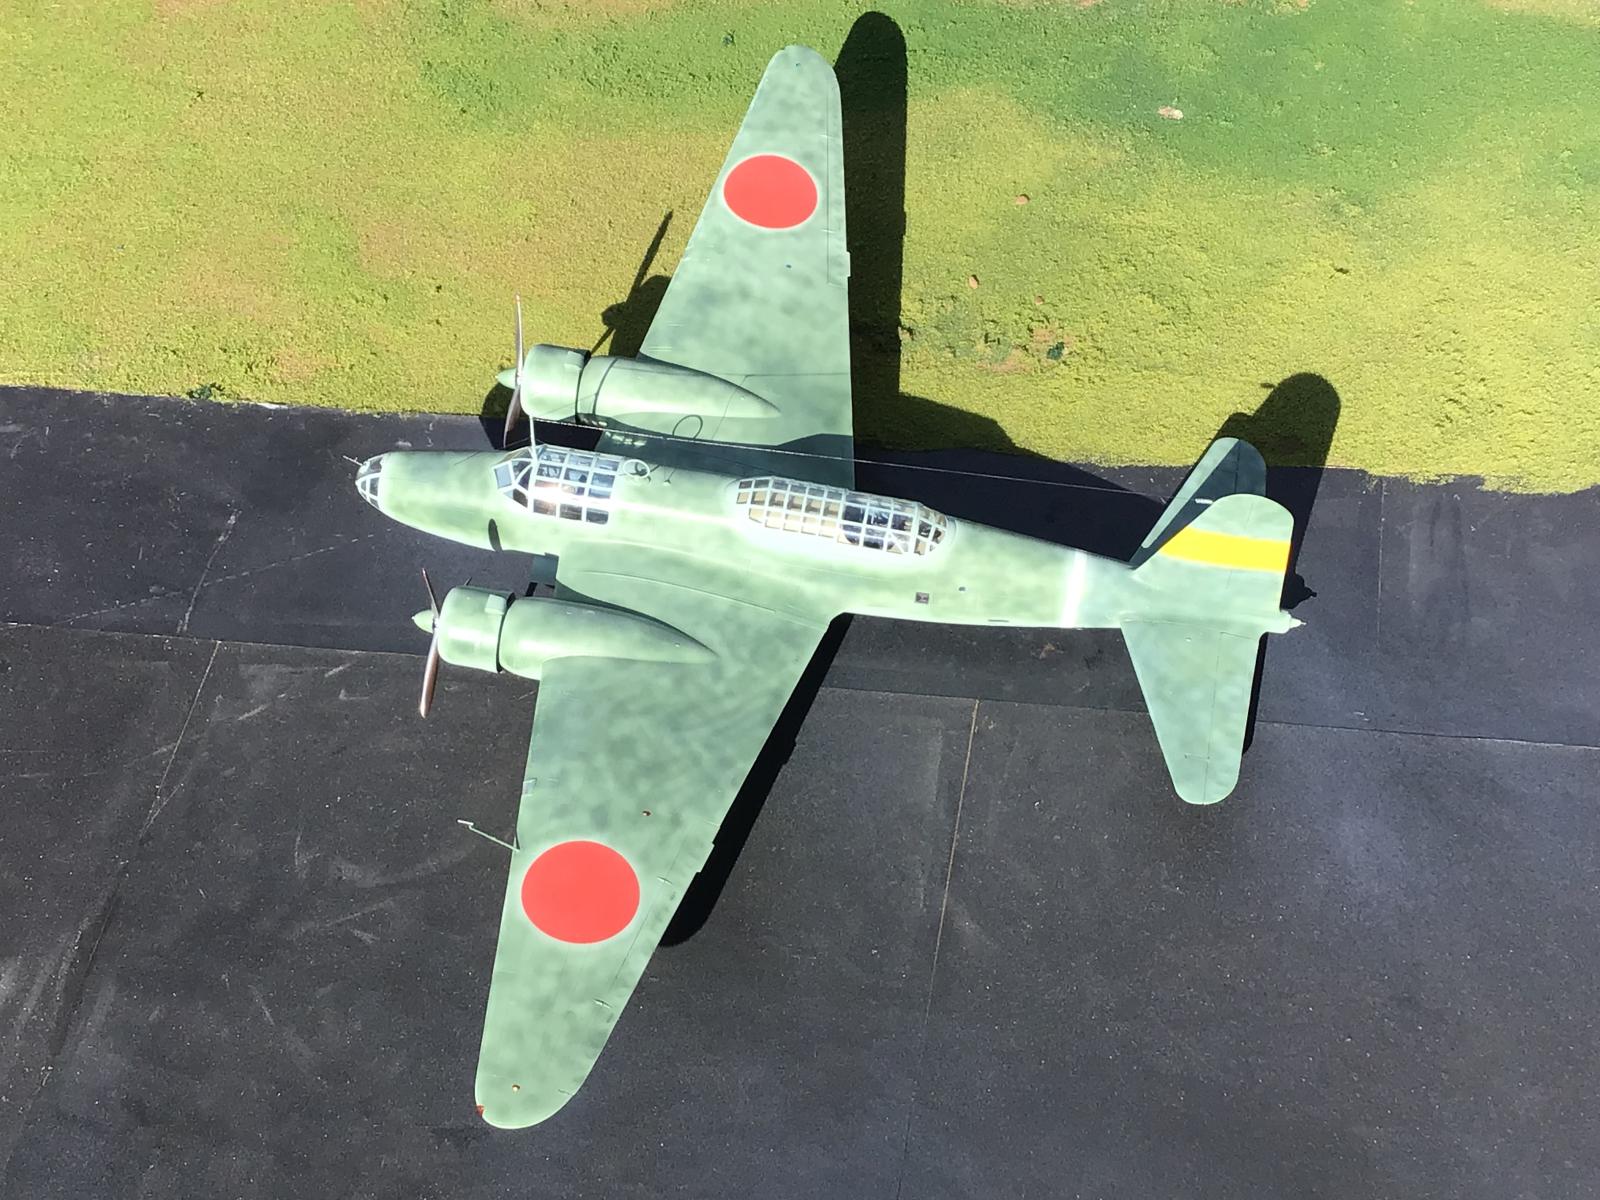
The wide Yellow band was also painted on. These different colors tell us which Chutai (or Squadron) the plane was serving with. These colors often went as follows.
Chutai #1 White
Chutai #2 Red
Chutai #3 Yellow
The Headquarters Chutai would have been using a Blue color.
Occasionally these colors were switched around, but this is the usual shown here.
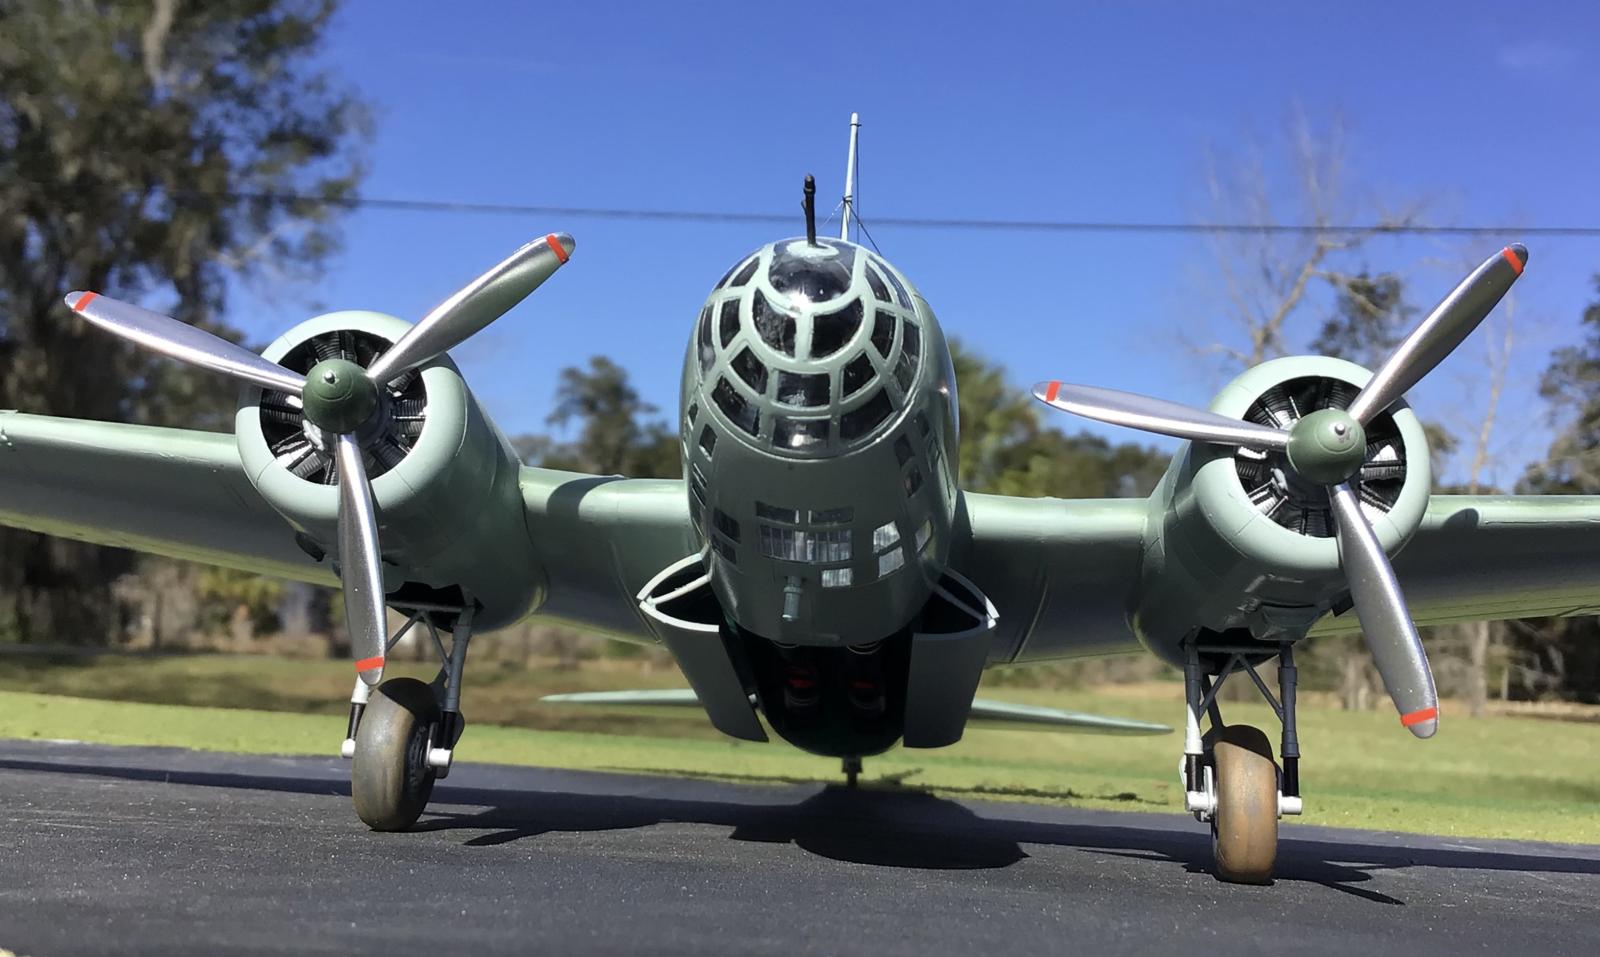
The model was an absolute joy to build. It fit exceptionally well, and the only problems I experienced were self induced.
I highly recommend the kit to anyone who is a fan of WW2 Japanese aviation, or one that studies the Pacific Theater part of the War.
I am hoping that ICM will eventually release another version of the bomber, the ones that had a turret mounted on the top of the fuselage. These aircraft were used extensively throughout the South Pacific region, and have some of the coolest looking camouflage schemes. I want to build one wearing the snake weave pattern if / when this happens...
So if you are reading this ICM, we would greatly appreciate it if you can do this and make us a Sally with a turret...
We are very grateful for everything you do for the model building world, especially with the current situation going on in your country. Your B-26 looks to be another wonderful model.
As always, comments are encouraged.
Thanks for looking.
Nice work and a great result, @lgardner.
Tom Cleaver (@tcinla)
Thanks Tom !
Very well done Louis, very unusual scheme and aircraft that will soon appear hopefully. I wonder the size compared to a Betty. Having the Tam Betty already on the shelf, it seems the wings are longer and slender compared to the stout round fuselage of the Betty to the slender Sally. Good read, nice pics. Overall an outstanding build. thanks for sharing...
Chuck A. Villanueva (@uscusn)
Thanks for the compliments. Dimensionally, the Sally is almost as big as the Betty is. The fuselage is not as plump however. I'm glad you enjoyed the article. Take care my friend.
Nice work, Louis!
John Healy (@j-healy)
Thank you ! I sincerely appreciate it.
G’day Louis (@lgardner),
I’m hanging out for the IIb.
It was great fun following your build blog and the above story and end result looks great.
Liked!
Michael Turner (@michaelt)
Hello Michael,
I hope they will release the IIb, but I'm not going to hold my breath for it. The ones with the turret like you mentioned, seem to have the coolest looking "in field" camouflage schemes. I have been considering grabbing another one of these early ones however, and painting it up differently. There are a few nice looking books by Avonmore that I might be getting. These cover the Japanese bombers and such. Thanks again for the kind words.
G’day Louis (@lgardner),
I have several of the Avonmore books, but not that one.
They are well worth getting for the unit history and unit markingdms descriptions.
The artwork is usually supported by a photo but sometimes needs you own assessment of the interpretation.
I’ve met the author twice at Model Expo events (and bought signed books each time) and he is a enthusiastic researcher who grew up in Papua New Guinea, hence the focus on that region.
He also researches records from both sides of the conflict to give as unbiased report as he can.
More than well worth the money.
Michael Turner (@michaelt)
I have 4 of Michael Claringbold's books. I am very impressed with each one of them. What I especially like is how he tells both sides of the story, and it is based on facts using the various unit logs that have been ignored by most of the Western writers.
I also like his illustration work to, but like you mentioned, a person should look at the original photo and make their own conclusions.
I agree completely, these books are an excellent value for the money spent. If you ever have the chance to meet with him again, please let him know I am a big fan of his and to keep up the great work.
Thanks again !
Great job, Louis!
gary sausmikat (@gwskat)
Thanks Gary ! It's great to hear from you. Take care buddy.
As ever, Louis, a lot of learning when reading (and watching videos) one of your excellent postings of a finished kit. This article is exceptional. The subject is wonderfully well researched and the build shows all the experience and an expert craft we’ve become used to. Epic on all levels!
Paul Barber (@yellow10)
Thank you for the wonderful comments. I sincerely appreciate them. I usually dig into the various colors that were used on a particular subject, and this one was no exception. It would have been a lot more fun if I had a masking set to use, but I did it the old fashioned way. I should look into getting a scan and cut machine. ICM provides us with a nice masking illustration pattern. I would only have to scan the pattern and cut it. Presto !
Thanks again my friend. Take care brother.
@lgardner
It took you some time to get the right photographs Louis, but I won’t blame you, these are very sharp and do full justice to the beautiful “Sally” model you made from ICM.
All I can say is that I would not have both the skill but even more the patience to cut all those window masks from the template base…Uff, too many clear plastic to cover.
Thumbs up my friend!
Pedro L. Rocha (@holzhamer)
The weather has not been favorable for taking pictures lately. I managed to get these photos taken a little while ago, but finding the time to post the article was another. The Sally that ICM has provided us with deserves to be built and photographed properly.
Thank you for the wonderful compliments.
ICM does provide the builder with a masking template, but I didn't use it. Instead I went full on "Old School" and masked the windows off by hand. I really do need to look into getting a scan and cut machine. It would be fantastic to have on hand, and very useful for other builds too. Markings and insignias look better when painted on, and you don't have to worry about them silvering either.
I goofed a few of the nose windows. You can see how the paint bled under the tape on several of them.
Thanks again... now it's back to work on some Mustangs ! and a pair of F-16's 😉
Great work on this model and the article !
Jay Mitchell (@ssgt)
Thank you Jay. I sincerely appreciate this.
This is a wonderful Sally, my friend Louis! The kit might be great but it takes your skills to come up with such a fantastic result. Your build thread was, as usual, a joy to follow, research was superb, as was the writeup!
Congratulations!
QC1 and QC2 loved it, you have our greetings!
Spiros Pendedekas (@fiveten)
Hello again my dear friend. Thank you very much for the kind words, and it pleases me to hear that QC1 and QC2 enjoyed it too. You have some wonderful sons, and have been blessed with a magnificent family.
Yes sir, I always try to carry on with due diligence when picking out colors for my models. I think it helps to make them look more original and true to life. I'm happy to hear that you enjoyed the build thread as well.
Take care, and please let your family know that we were asking about them.
Thanks again. 🙂
Now this is definitely one of your best builds, Louis @lgardner
Details and paintwork are superb all over.
It must have taken you quiet some time to get the complex antenna wiring this nicely.
Great article and a very learningful build thread with excellent research.
Well done.
John vd Biggelaar (@johnb)
Thank you John. It is very nice to hear from you, and I sincerely appreciate your comments. The antennae was time consuming, but not nearly as involved as the one from the PV-1 Ventura was. It still took some time to get it done properly. Looking at it now, I would do it just a little bit different the next time.
Thanks again for everything, and I am happy to hear that you enjoyed the build journal.
Take care my friend. 🙂
Awesome build and ditto photography!
Really like the background you used in the pictures.
Alfred van Paaschen (@alfred)
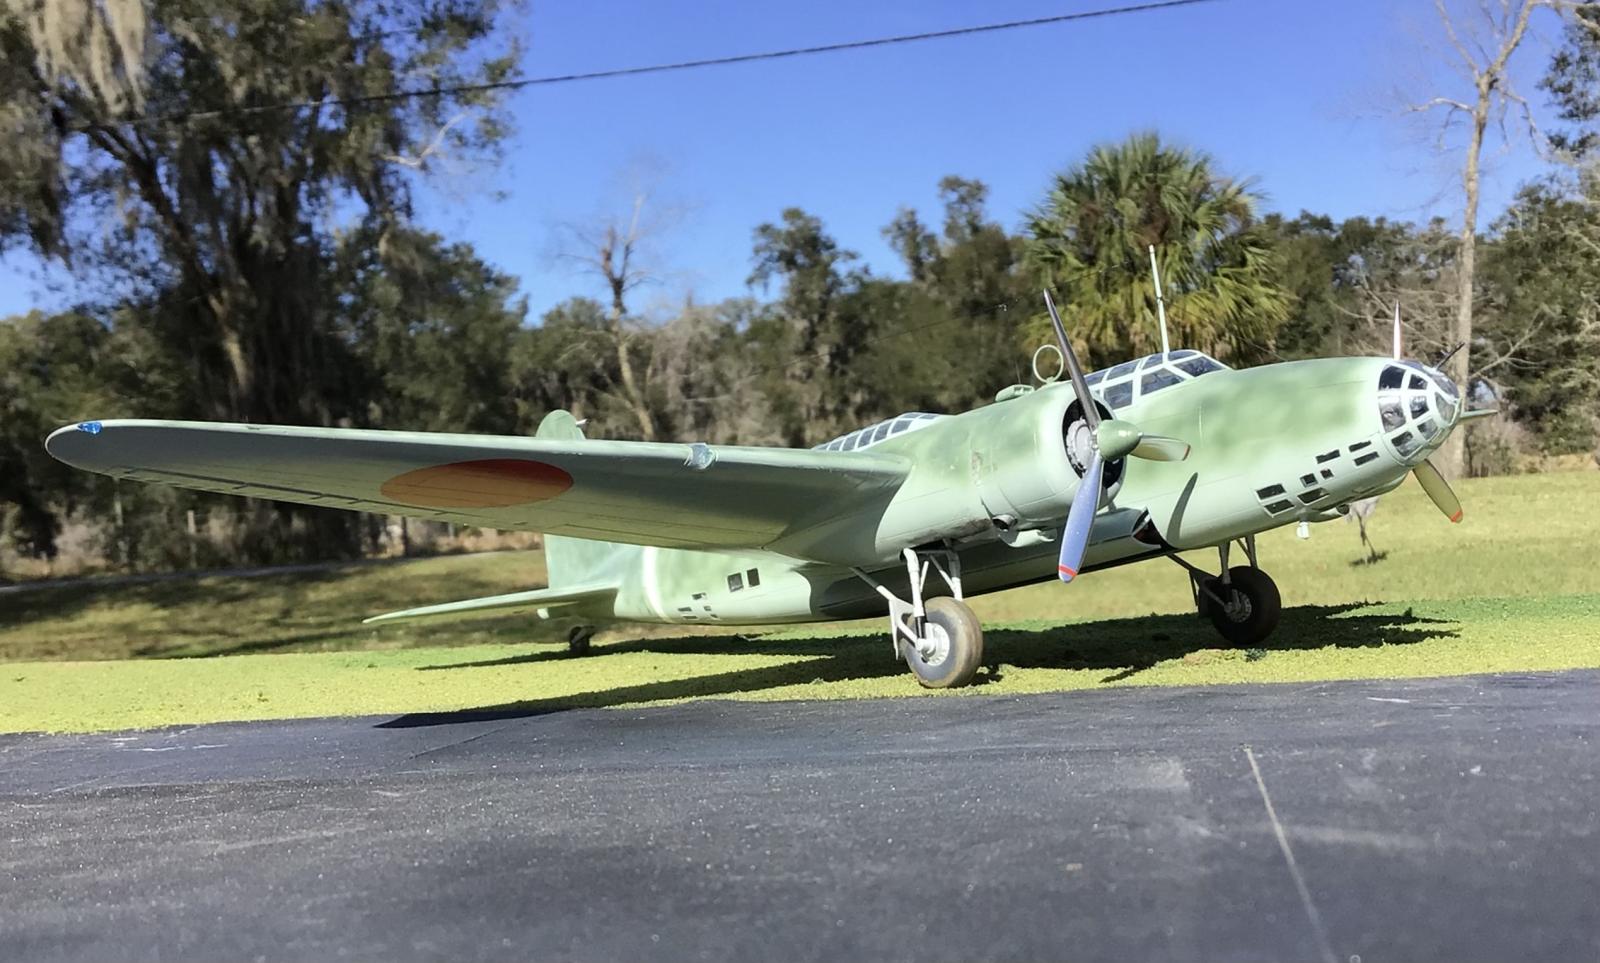
Thank you for the compliments. I am very fortunate to have a palm tree growing across the street from our house. It makes for a decent Pacific theater background that I use on occasions like this one. I made the base the model is sitting on. Right now I am building another base with PSP or Marston mats on it. I also have an aircraft carrier deck photo base underway. Then I will have to experiment with different backgrounds to use.
Louis @lgardner
You made me bring off the shelf William Green's Famous Bombers of the Second World War to read their chapter on the "Sally" and it seems that Wiki got it pretty much correct. One wonders if Mitsubishi owned a glass company, all that glass on a plane. Yikes, and you masked it all off. Wow.
Well done on the airplane, glad you enjoyed the build. It looks good.
David Odenwald (@kahu)
I have some of William Green's books, but they are mostly about the Luftwaffe stuff. As a rule, Wiki seems to get things right, but occasionally mistakes can be found.
Masking the glass was the worst part of this build, but once I got in the groove of doing it, things actually progressed quite well. I was actually shocked at how quickly it went. Going from memory, it might have been two evenings worth of masking.
However, if I were to build another one, I would definitely look into getting some masks cut for it. A scan cut machine would definitely be worth looking into as a future acquisition.
Thanks for the compliments.
Lou, you did a deep dive on this kit. A very thorough review and build blog, not to mention your article. Photographing a model in bright sun light really gives an opportunity for showing all the fatal flaws or it shows to good effect what can be done with a model. Which you have done with a great Tropical back round as far as what Florida can provide. The build screams Mitsubishi Ki-21 and the header photos and the views taken to represent a individual standing on the tarmac or a forward air base shows the model to good effect. Choosing to do a bomber with green squiggles (free-hand painting) on the topside and painting near the "Meat Balls" takes courage and the yellow tail stripes was done to perfection. Great to see a Ukrainian company and a Floridian do a Japanese subject in kit form. The world is flat with the advent of computers and folks sharing info. I have better understanding of what used to be a unicorn of a kit but, know can be had as main stream kit.
Fingers crossed.
Stephen W Towle (@stephen-w-towle)
Hello again ! Yes sir, this was a trip down the rabbit hole for me. I did a lot of reading and online sleuthing even before the kit arrived.
Thank you for the compliments. The flaws I have with this kit are all self induced. I had an oops moment when some glue accidentally wicked into the side glass on the nose section. I don't think this was a fault of the model, more like a problem I caused.
We are blessed to have a wonderful natural outdoor background to use for taking pictures of the models I build. Having a palm tree strategically located here / outside has it's uses, and makes it look more like the model is actually somewhere tropical like the regions where it was in operation.
I scratch built the photo base, and have several more underway. One will have some Marston mats / PSP planking on it. The other two will be aircraft carrier decks, one Japanese, and the other WW2 American. I wanted to paint the model the same way the Japanese originally did it. I thought I could get away with it using my air brush. I got lucky this time... 🙂
Yes sir, the stars, the sun and the moon were in alignment during this build. I have had some models that fought me every step of the way. Not so much on this one. Sometimes you get the bear... other times the bear gets you. This time I have a nice bear throw rug.
I would build another one in a heartbeat !
Thanks again, it's always nice to hear from you.
Take care buddy.
Beautiful paint work and the photography is excellent, first photo looks like a real one on the flight line!
Robert Knaack (@robgenev665)
Thank you Robert. A comment about the model looking like the real plane is the best I could ask for. Take care.
That's an outstanding article and model, Louis @lgardner! 👍 I thoroughly enjoyed both! 😃
Gary Brantley (@garybrantley)
Hey Gary,
It's good to hear from you. Thank you for the compliments, and I'm happy to hear that you enjoyed this. ICM has presented us with a wonderful model. They might just entice me to get one of their new tool B-26 kits soon. I have also enjoyed their He-111 and Do-17Z. I have a Ju-88A5 from them too, but as of yet I have not started cutting plastic on that one... .
All of their new tool stuff fits exceptionally well. Ironically I was looking at one of their Mistel planes, with a Ju-88 and the "parasite" 109 perched on top.
Outstanding painting!
capt. R (@lis)
Thank you ! When did you get promoted to Captain ? Congratulations 🙂
Last week my Friend😀
Congratulations on your promotion, capt. R @lis! 👏
Outstanding build, Louis. I've got one waiting to come out of the box, so thank you for doing all the research and sharing it all - very helpful!
Chas Bunch (@chasbunch)
Thank you for the kind words. I think you will really enjoy building yours. Just be careful when you are installing the clear parts. Glue can accidentally wick onto an area that should remain clear on some of the side glass parts on the nose section. I tried to explain any of the trouble spots during the build journal.
Thankfully these are far and few between. This is an excellent model. Have you decided on which plane you will be building ? I recently found a neat looking night time scheme that was used over China. If I was to ever do another one of these, that is probably what I would go with.
https://imodeler.com/groups/the-empire-of-japan-1919-1946/
When you start working on yours, please feel free to start a build journal in our Empire of Japan group. You are always welcome to at any time.
Thanks again for the compliments, and take care. 🙂
Terrific result with this Sally, Louis, it’s all very good but I especially like the paintwork.
George Williams (@chinesegeorge)
Thanks George. Painting this one was a lot of fun. I added the decals first, then proceeded to carefully spray the camouflage around the markings. I was nervous at first, but then it was smooth sailing.
Very interesting subject and really like your paint work.
Rod
Rod Bettencourt (@rodbettencourt)
Thank you Rod. I tried to duplicate how I thought it would have been painted in the field. These twin engine WW2 Japanese bombers have always held my interest.
I'm a huge fan of the Sally - love all the unique Pacific theater field-applied schemes they wore. I've got 3 more in the stash (2 Revells and 1 MPM) to do, now that I've had fun with the ICM version. Yours looks great - picked a scheme similar to one I want to do next. Those ICM kits are the bomb, are they not!
Greg Kittinger (@gkittinger)
Hello Greg ! It's great to hear from you. Thank you for the compliments. Yes sir, this is an incredible model, and I couldn't be more pleased with it. ICM has given us a fantastic and well detailed model.
I'm very impressed with your Ki-21. It looks incredible ! Your signature mounting / display using a clear acrylic rod gives it away as to who built it.
When you decide to start building your Revell or MPM kits , would you consider doing a build journal as an addition to our Empire of Japan group ?
https://imodeler.com/groups/the-empire-of-japan-1919-1946/
They would look right at home here...
Also how did you like the review I did on the new MiniArt P-47D ?
Thanks !
Hey Louis! I'll try to remember to add to that group thread when I decide to tackle that, or any of my other Japanese aircraft.
Since I only build 72 scale, I don't read reviews-only of other scale models, unless it is a build review and includes finished photos of the built subject. I don't remember if your review of the kit included that - if it did my comments should have been there!
Hope all is well in your end of the world!
Greg Kittinger (@gkittinger)
Hello again Greg. Yes things are going as well as can be expected here in our little slice of heaven. I don't know if you made a comment or not, but I didn't include any pictures of a completed build with the review. Sorry, but I had forgot that you only build 1/72 scale. I didn't realize that when I sent you the 1/48 Hellcat decals a few years ago.
I really should go back and edit the kit review article, and include a few pictures of the finished model. That is an excellent suggestion, and I thank you for it.
Take care my friend.