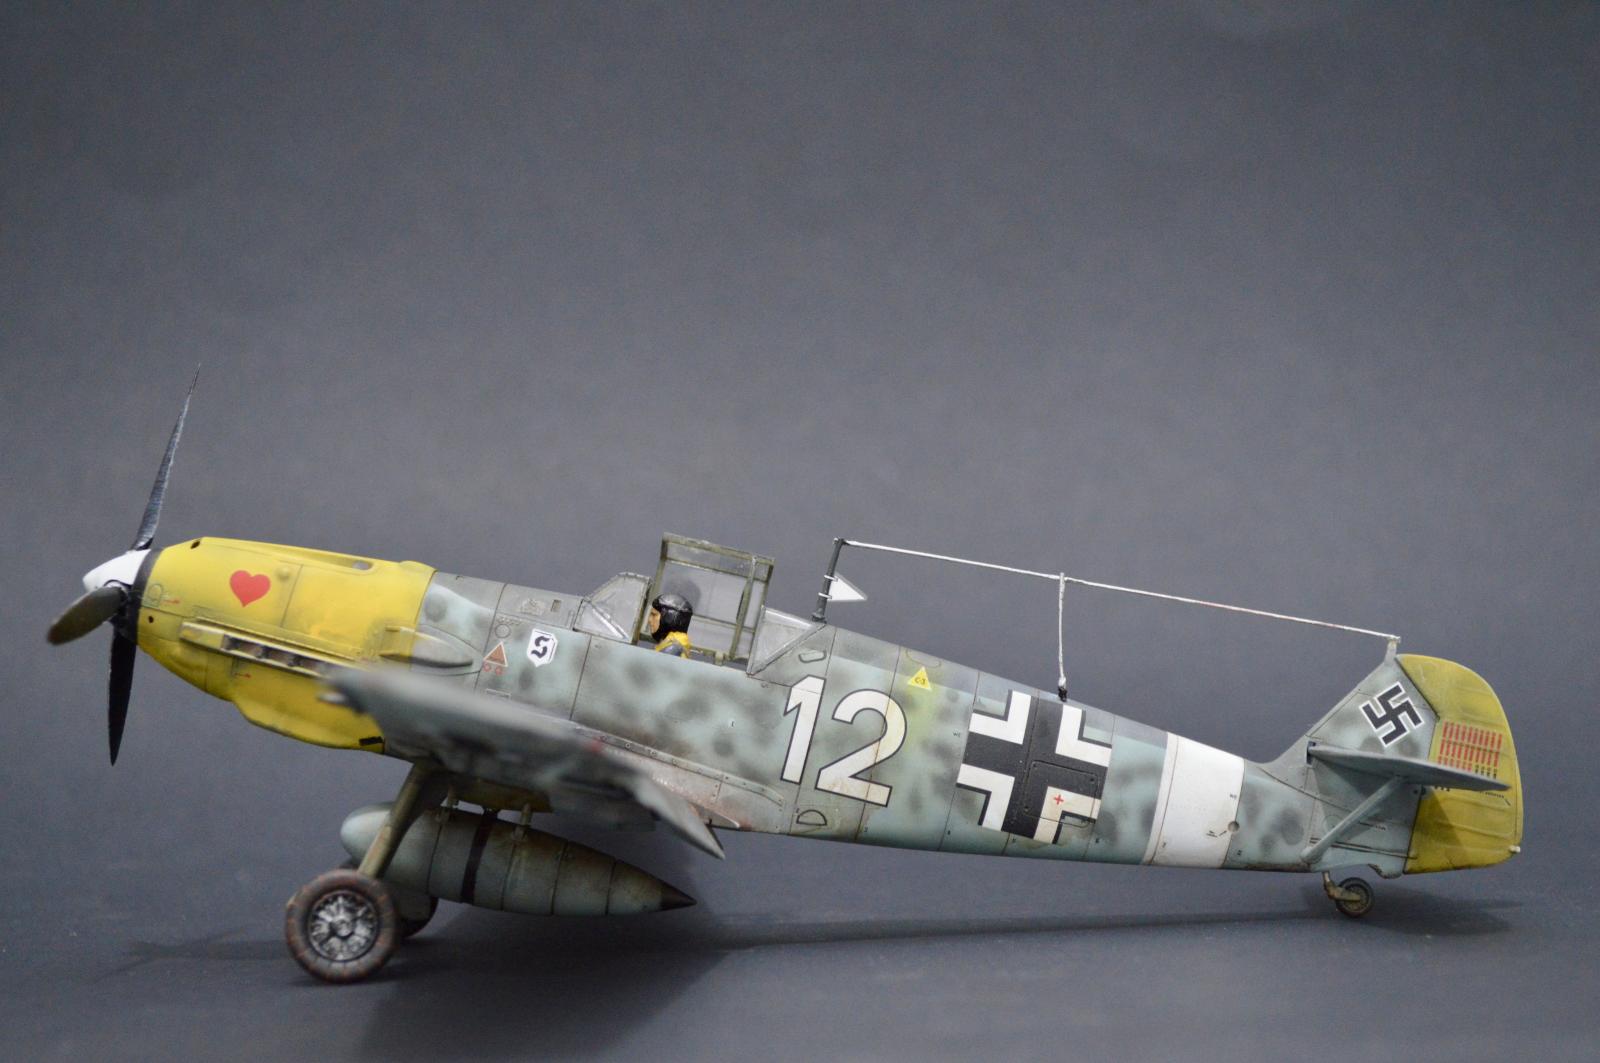
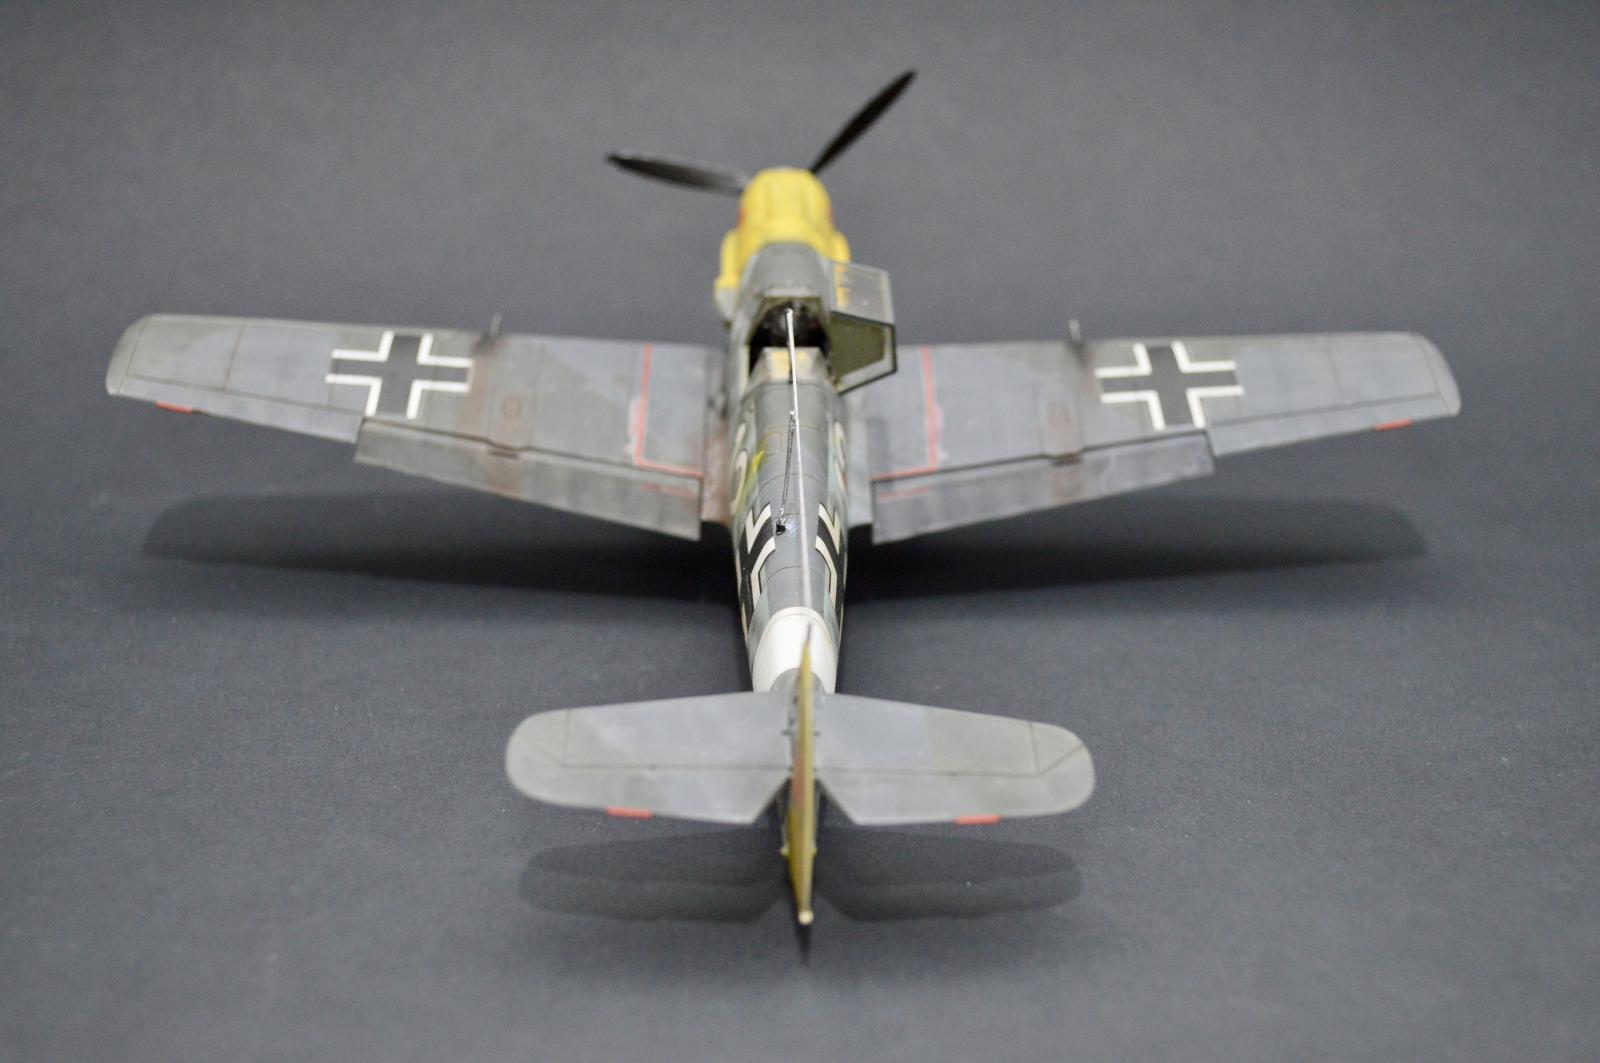
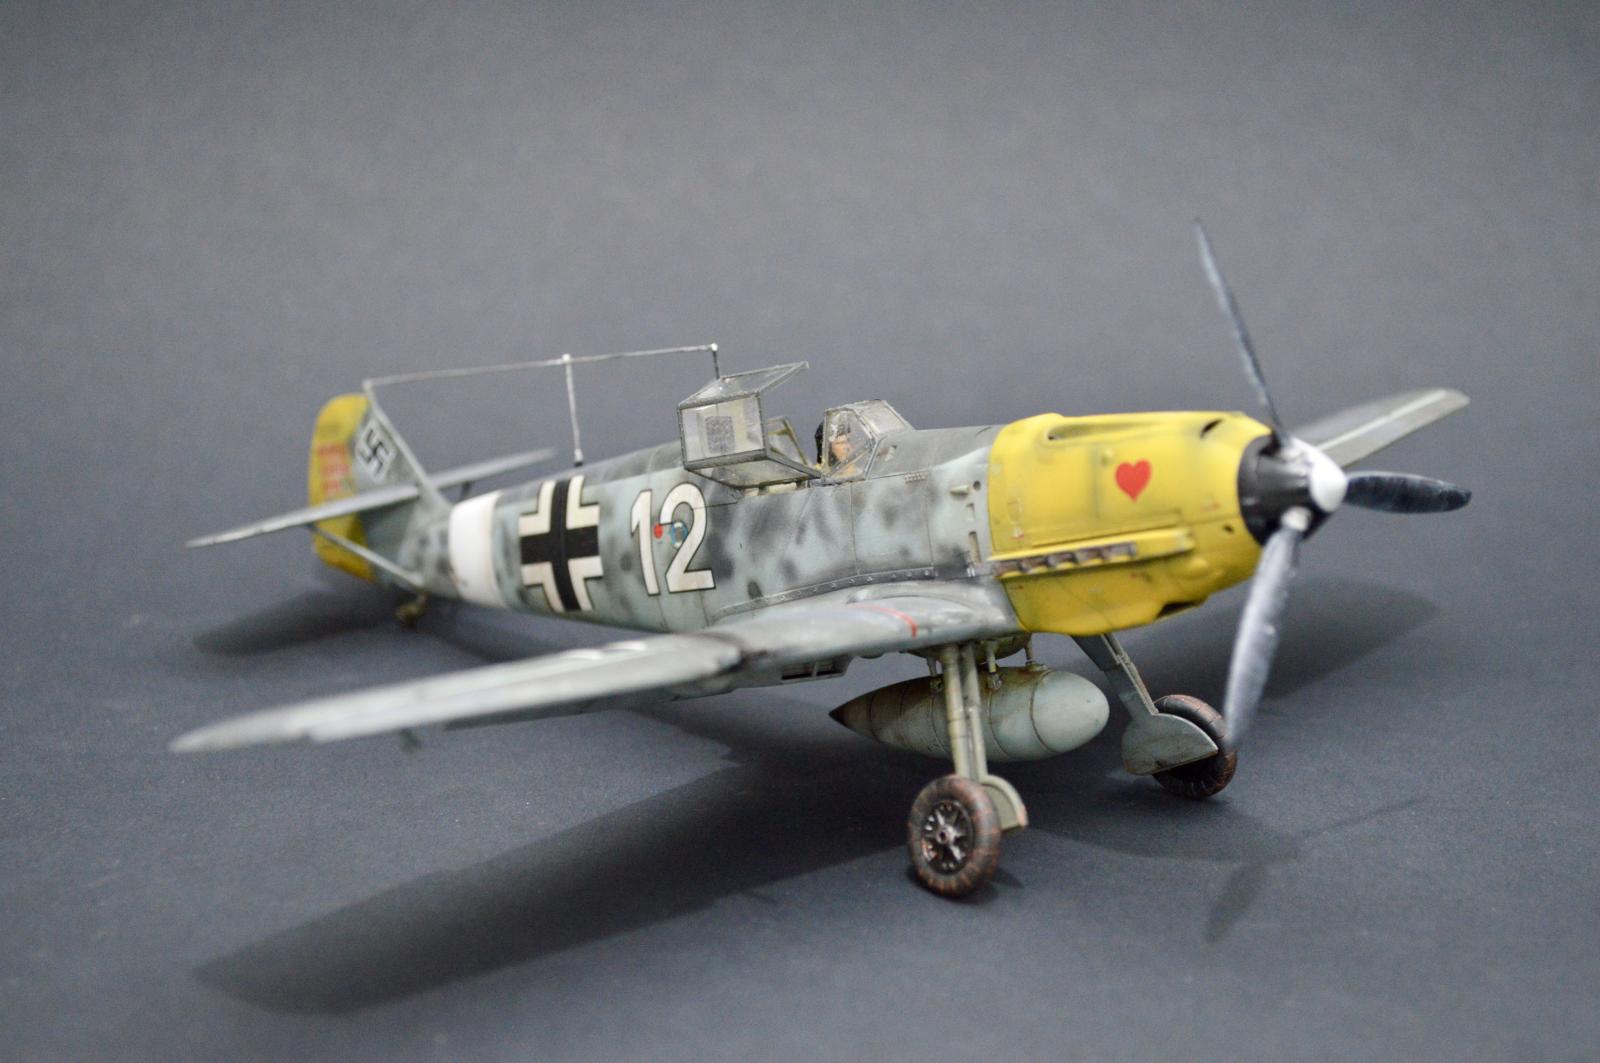
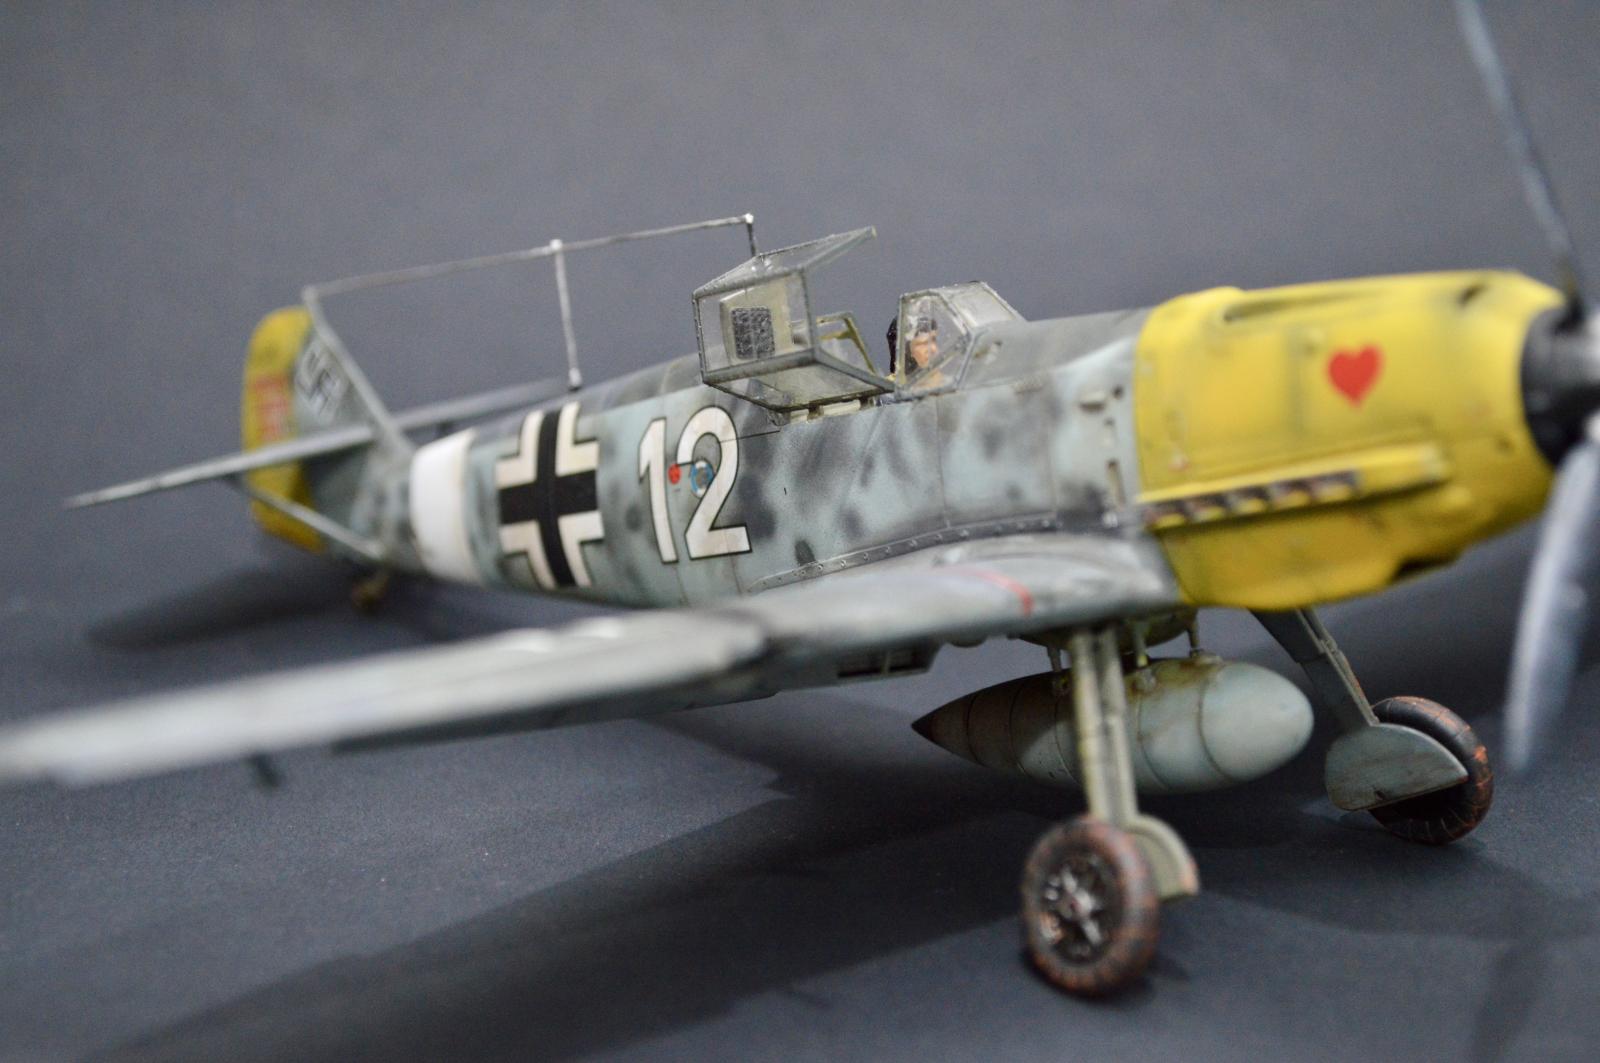
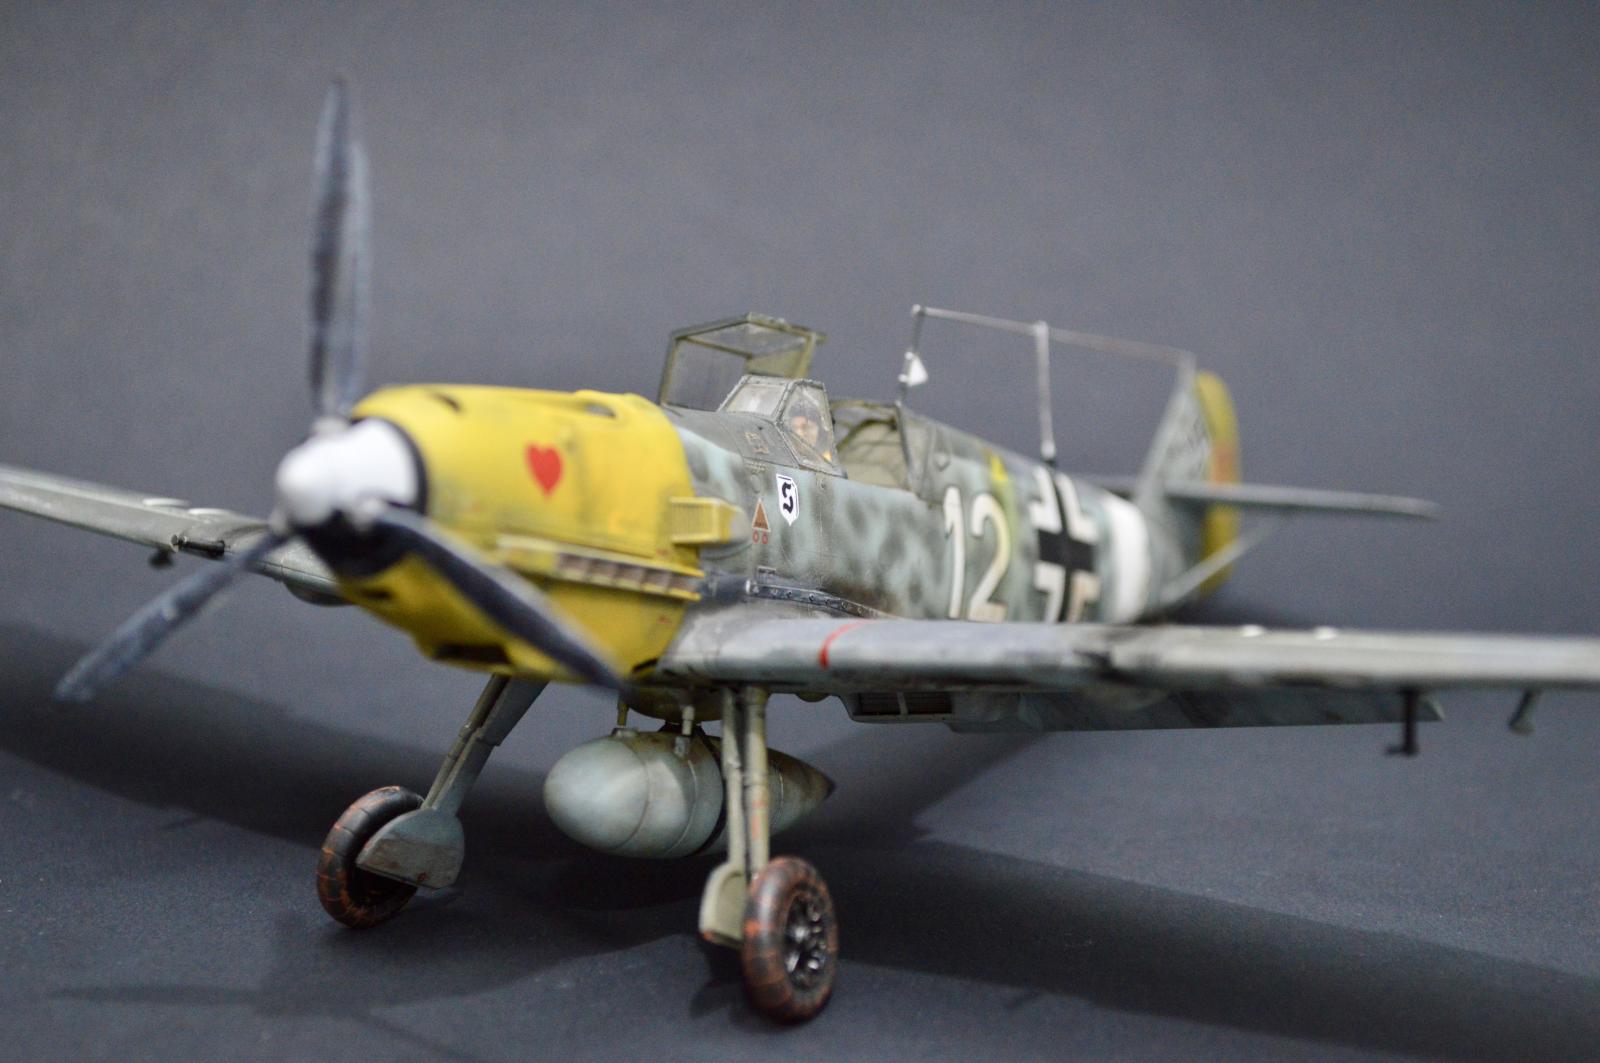
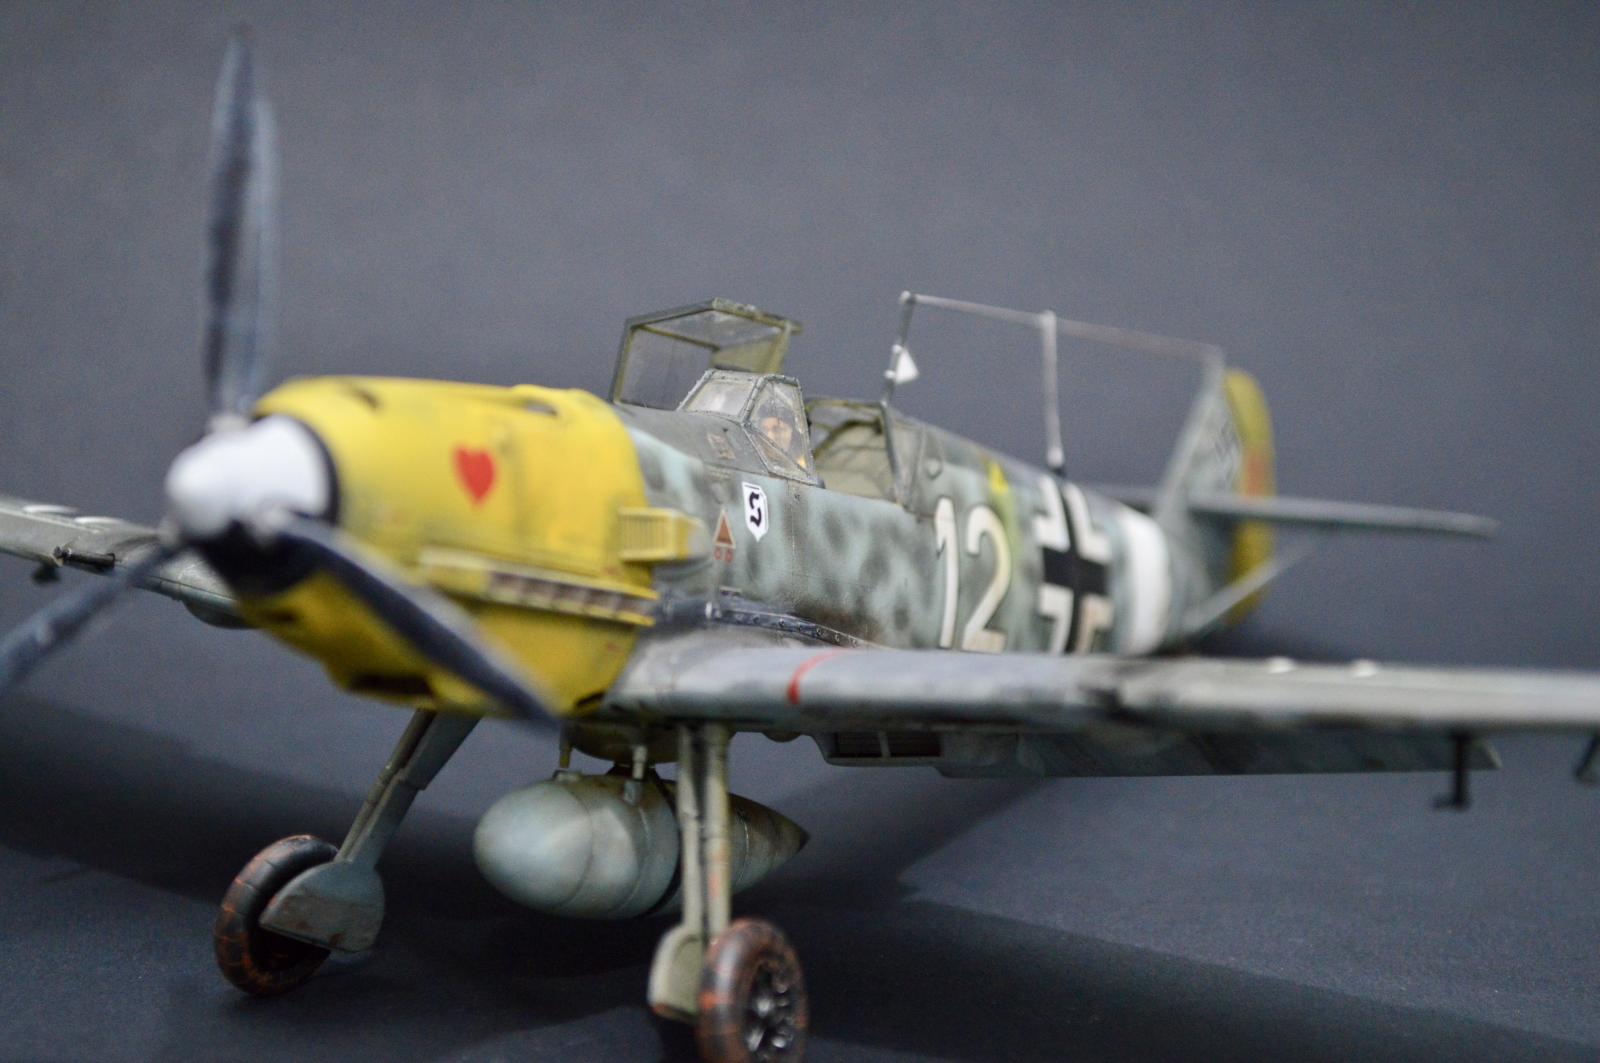
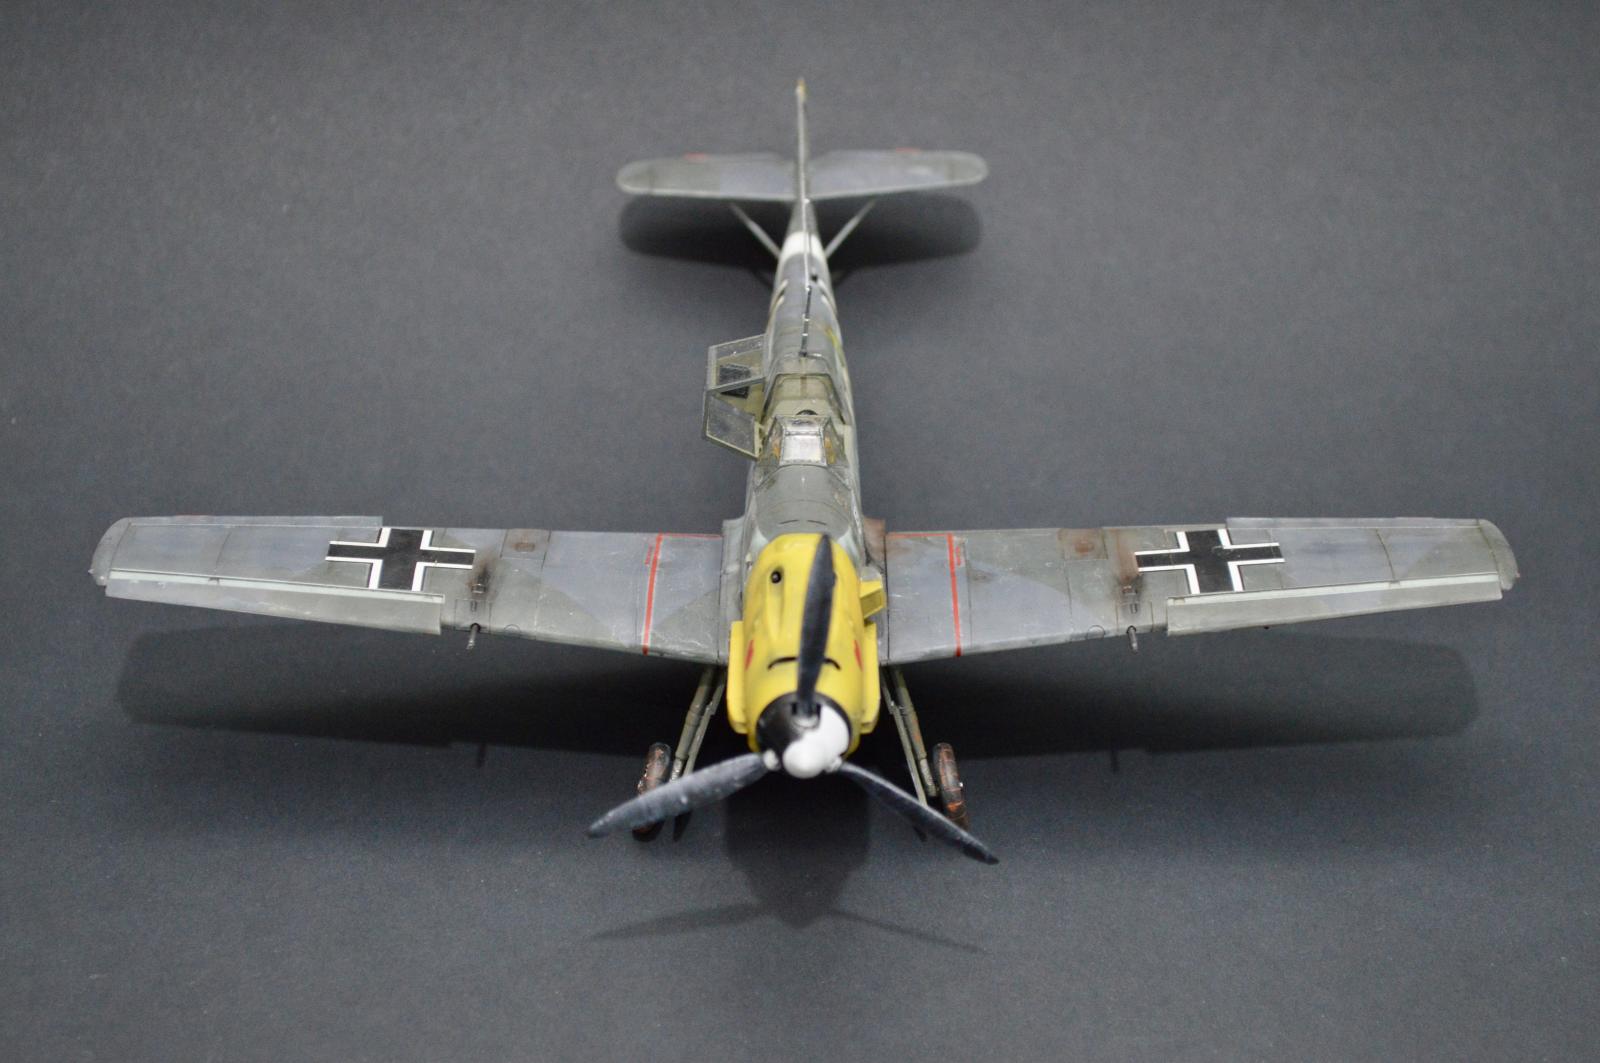
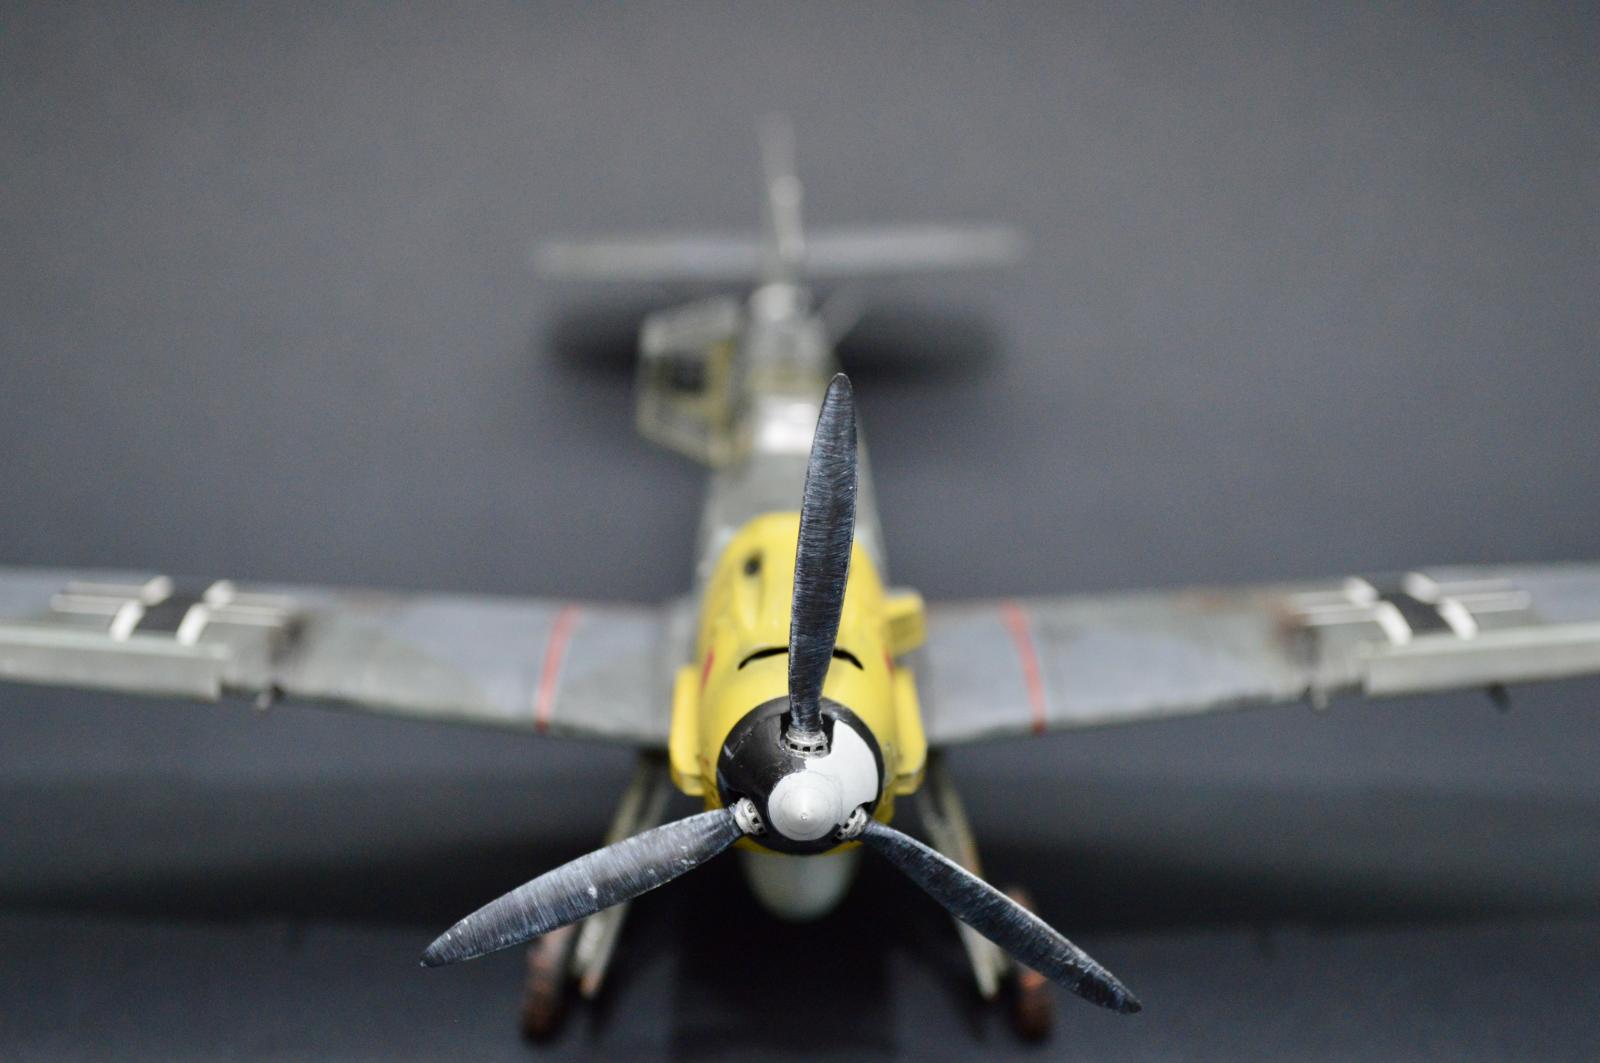
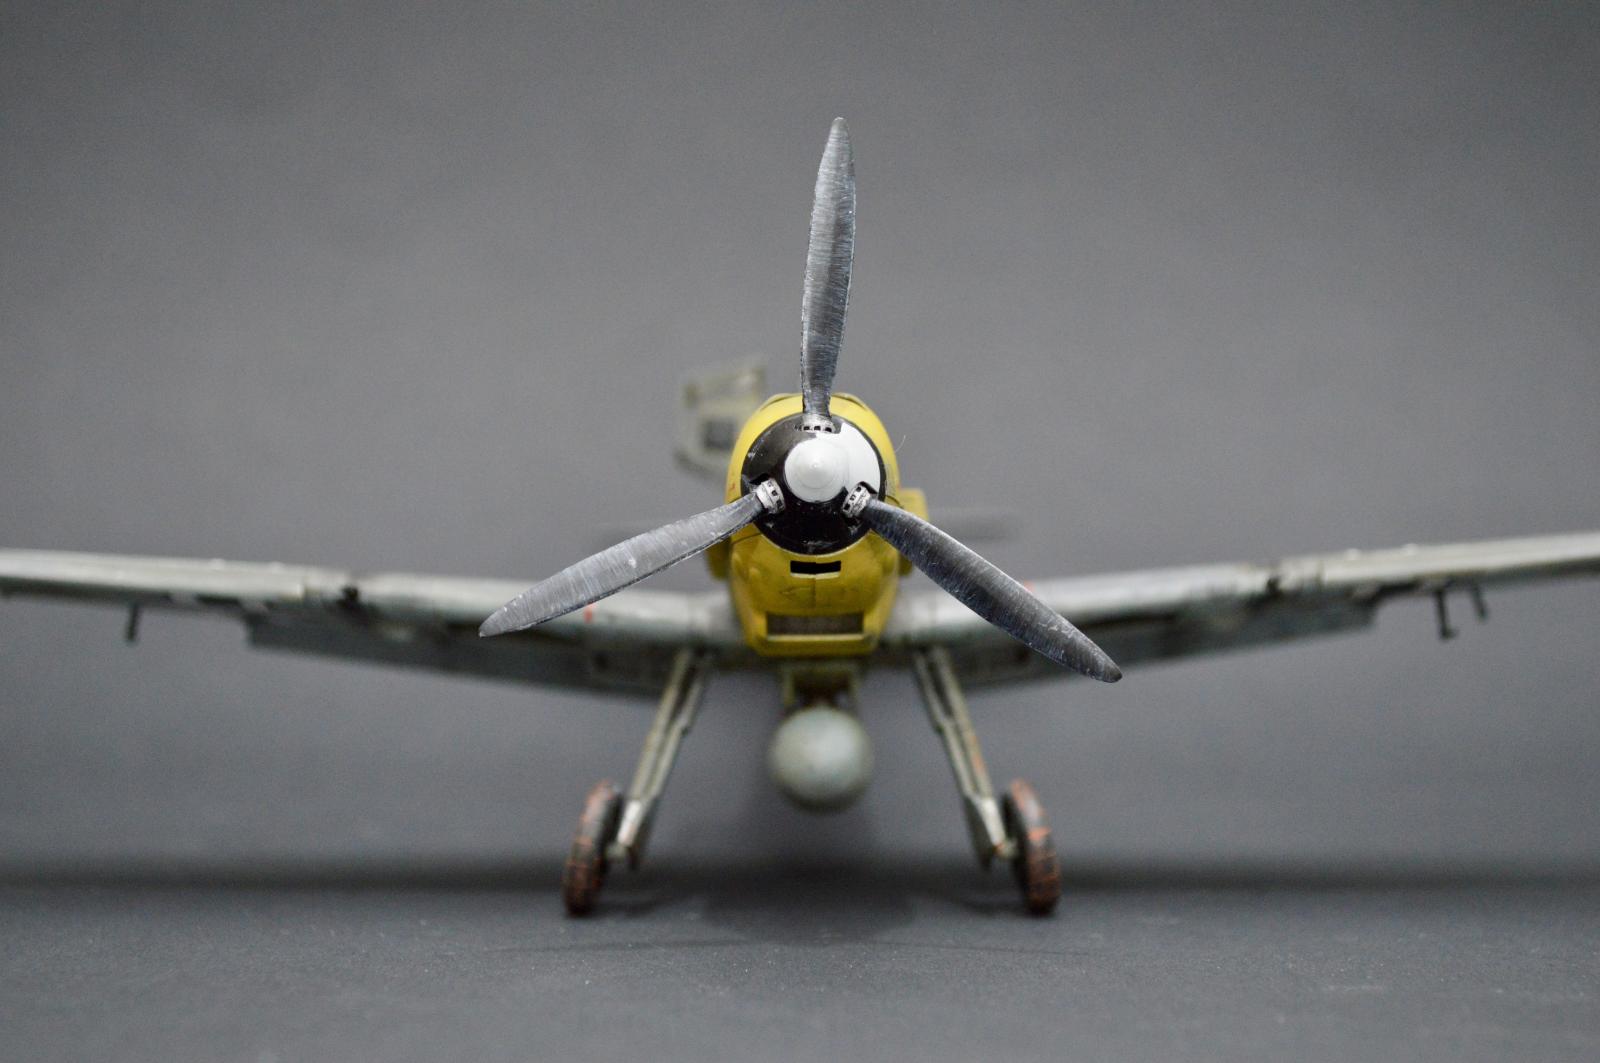
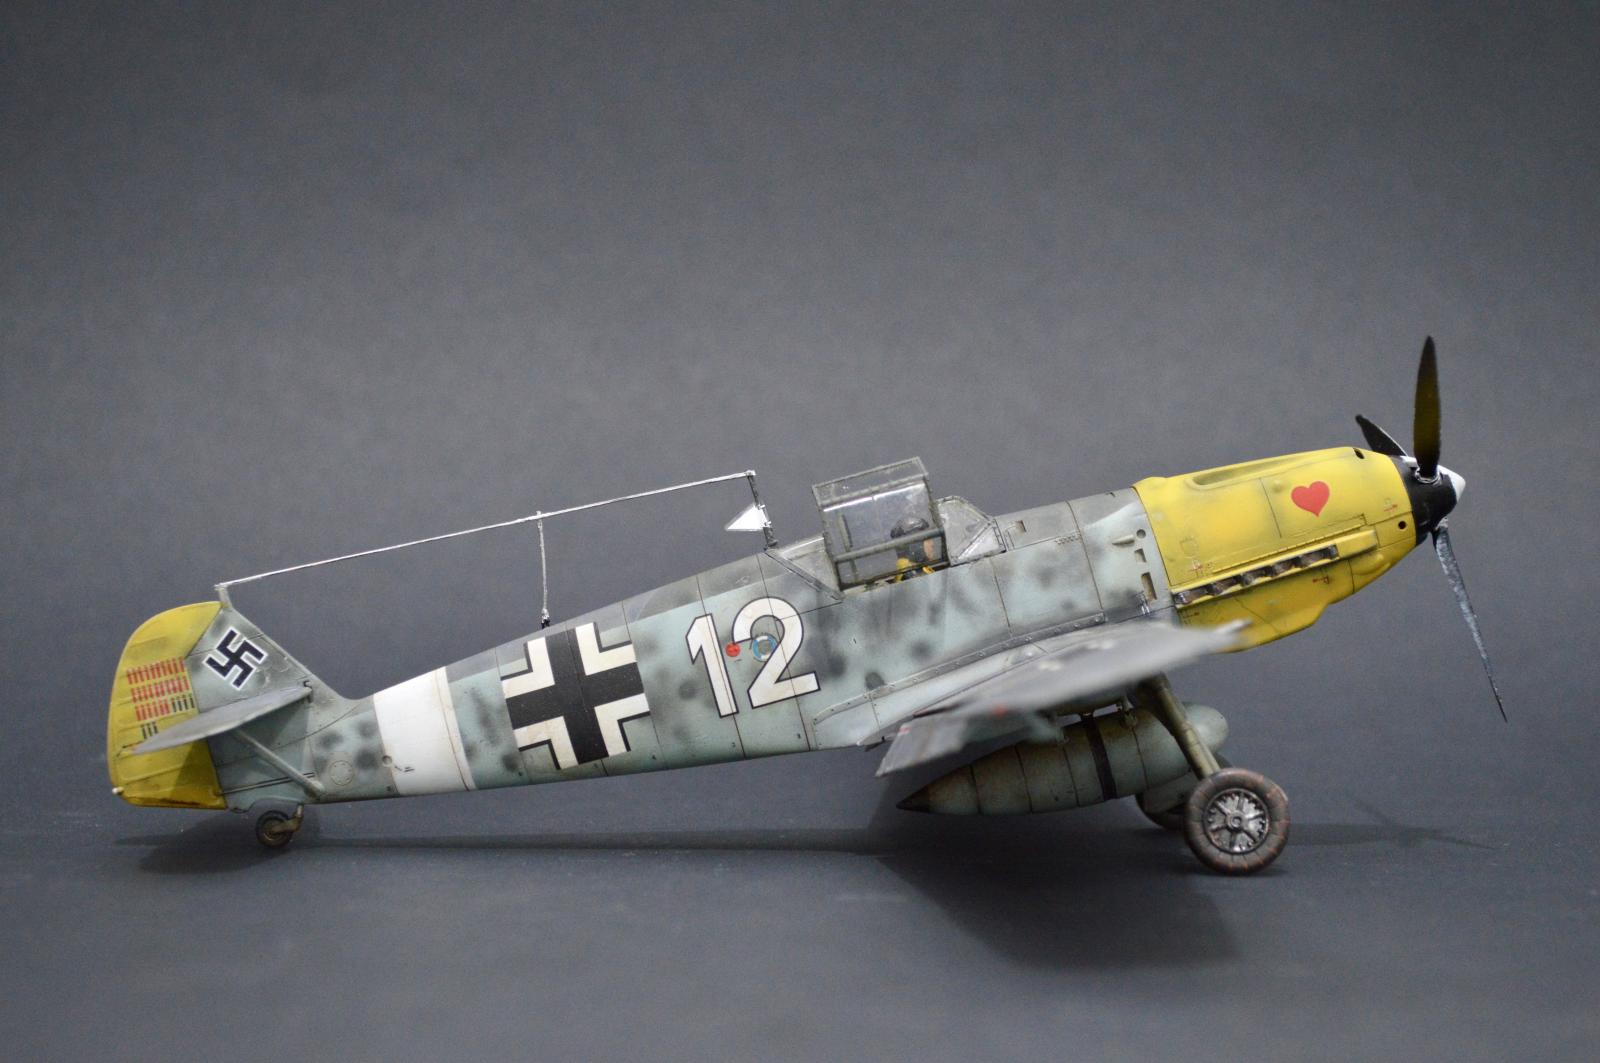
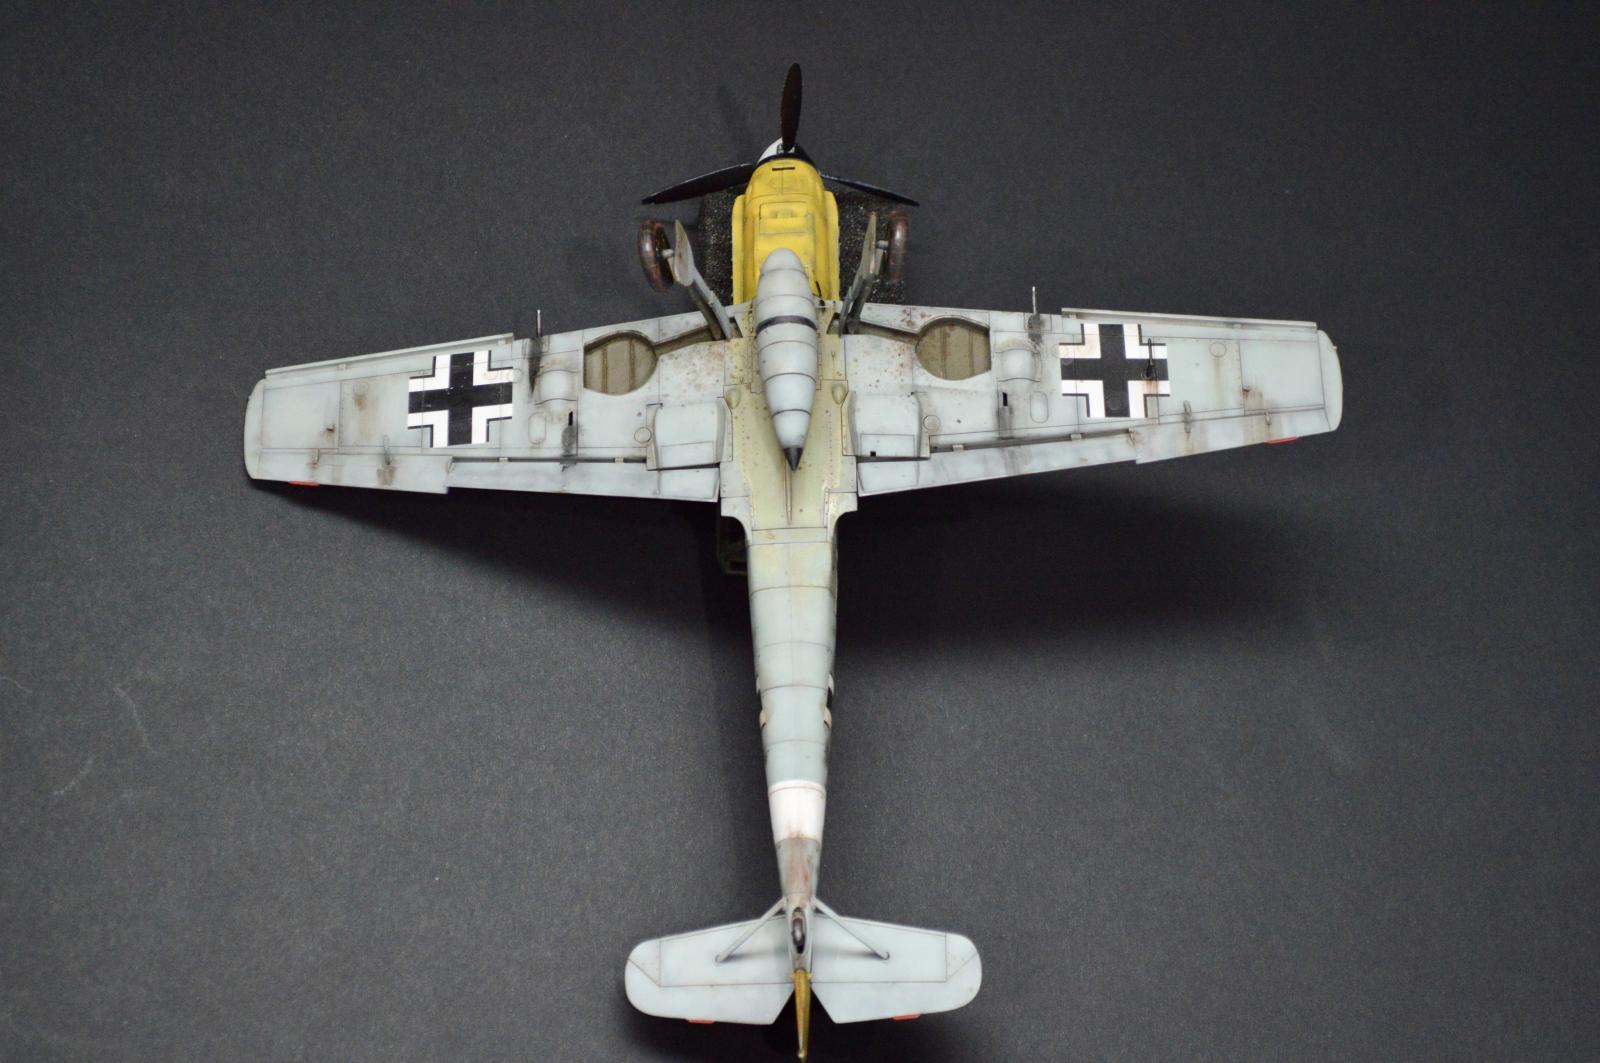
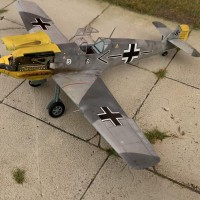
Tamiya 1/48 Messerschmitt BF109E7 JG26 White 12
Hey guys,
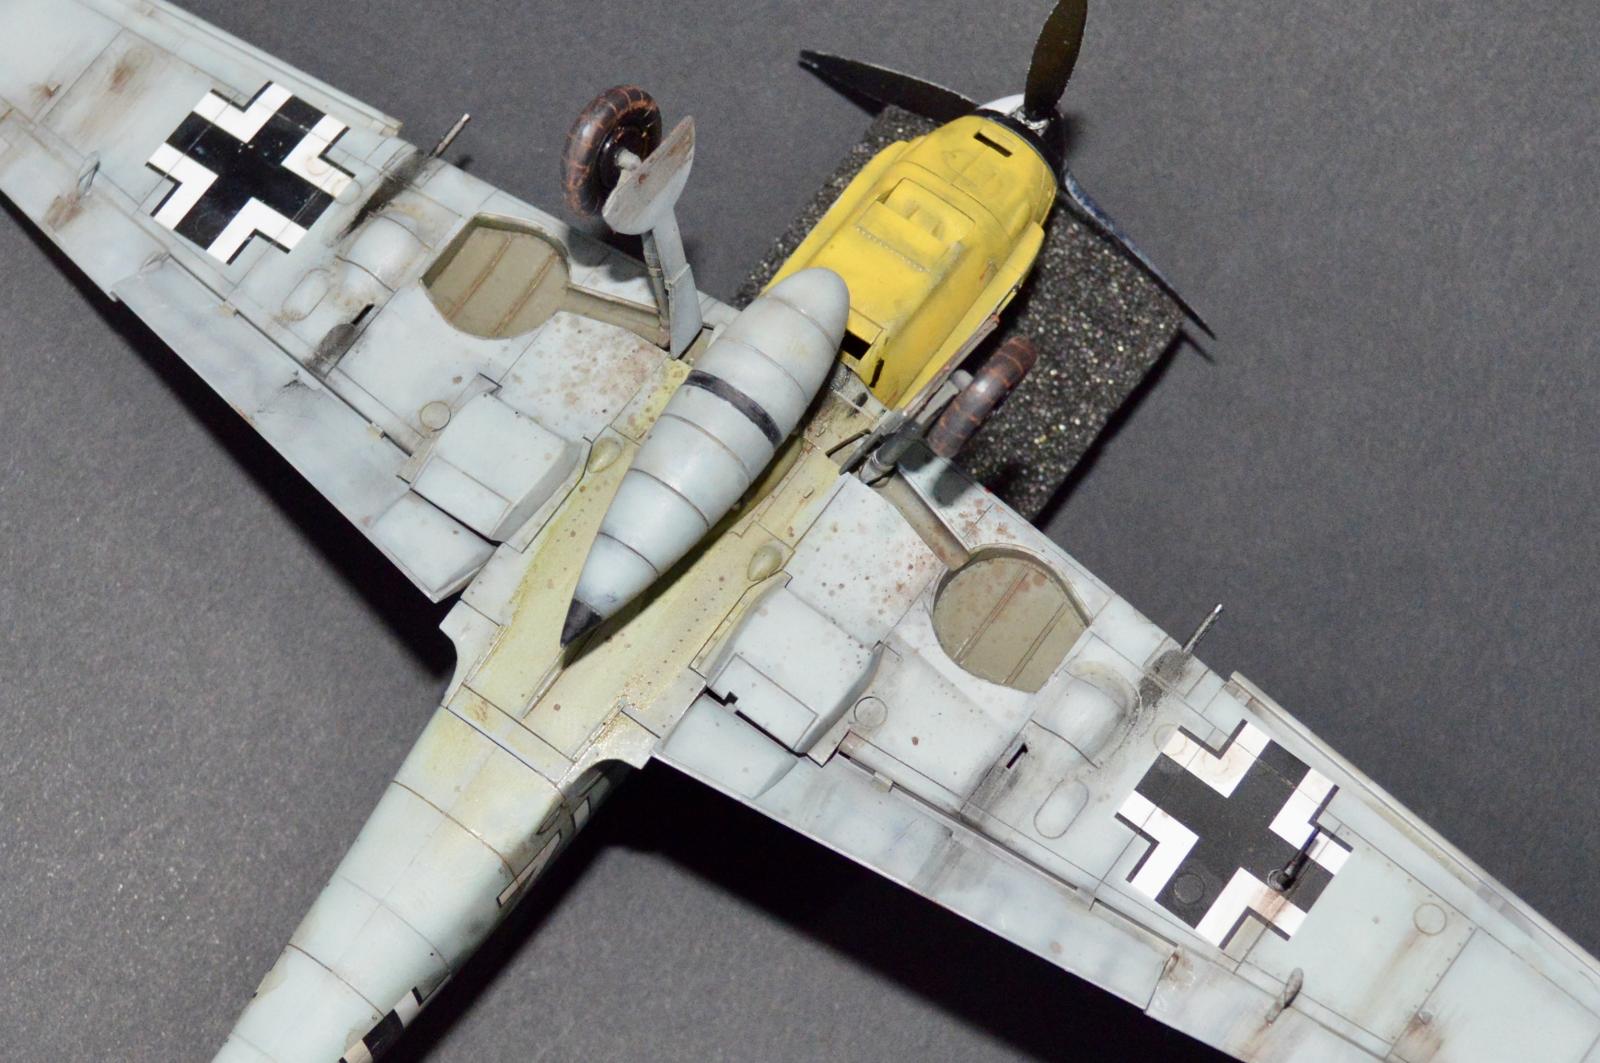
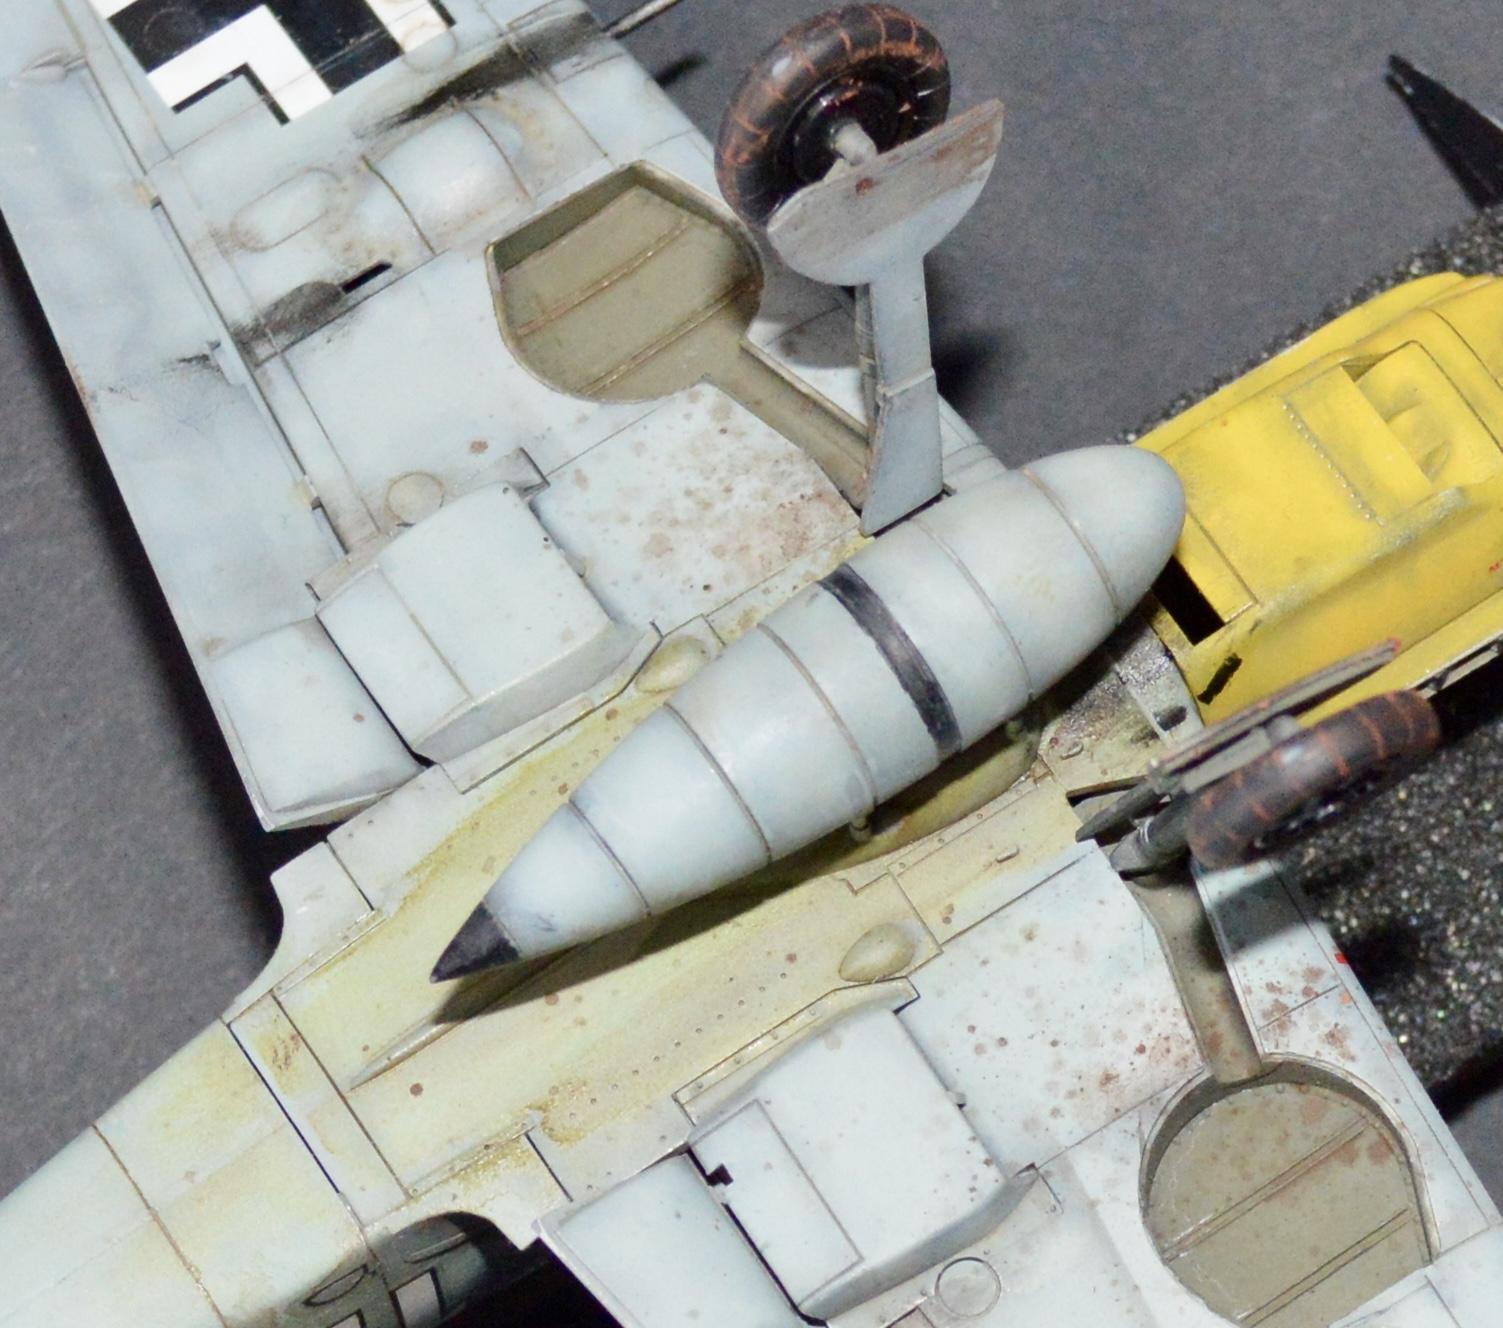
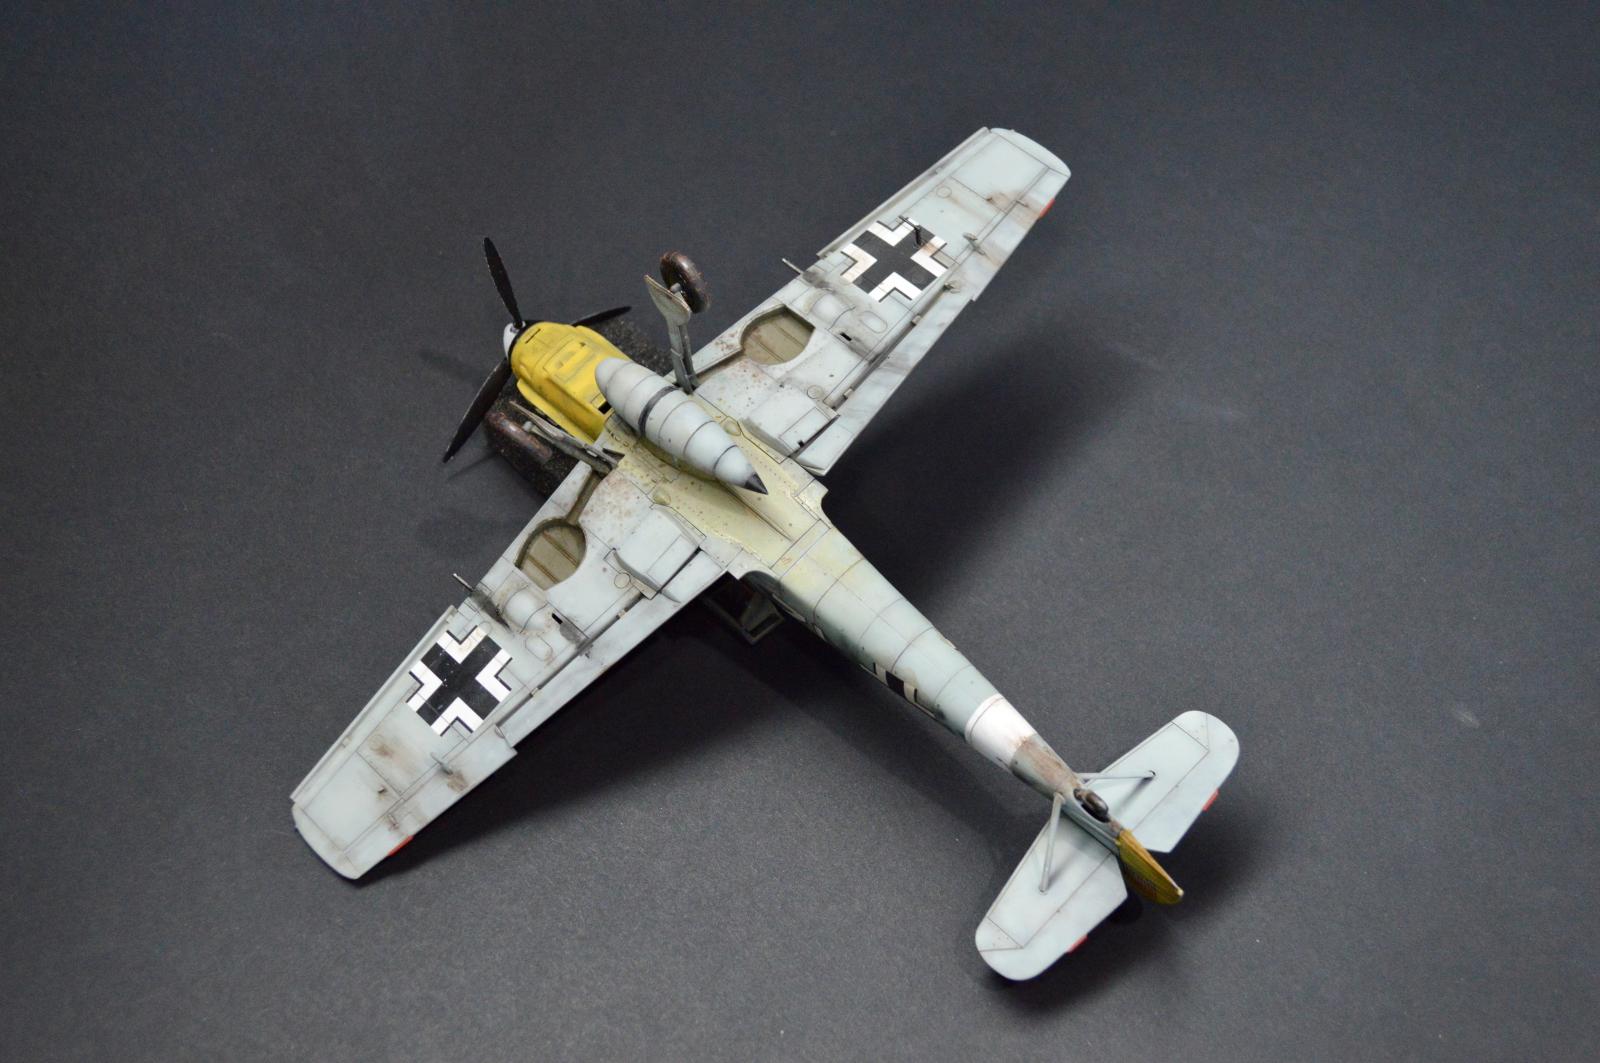
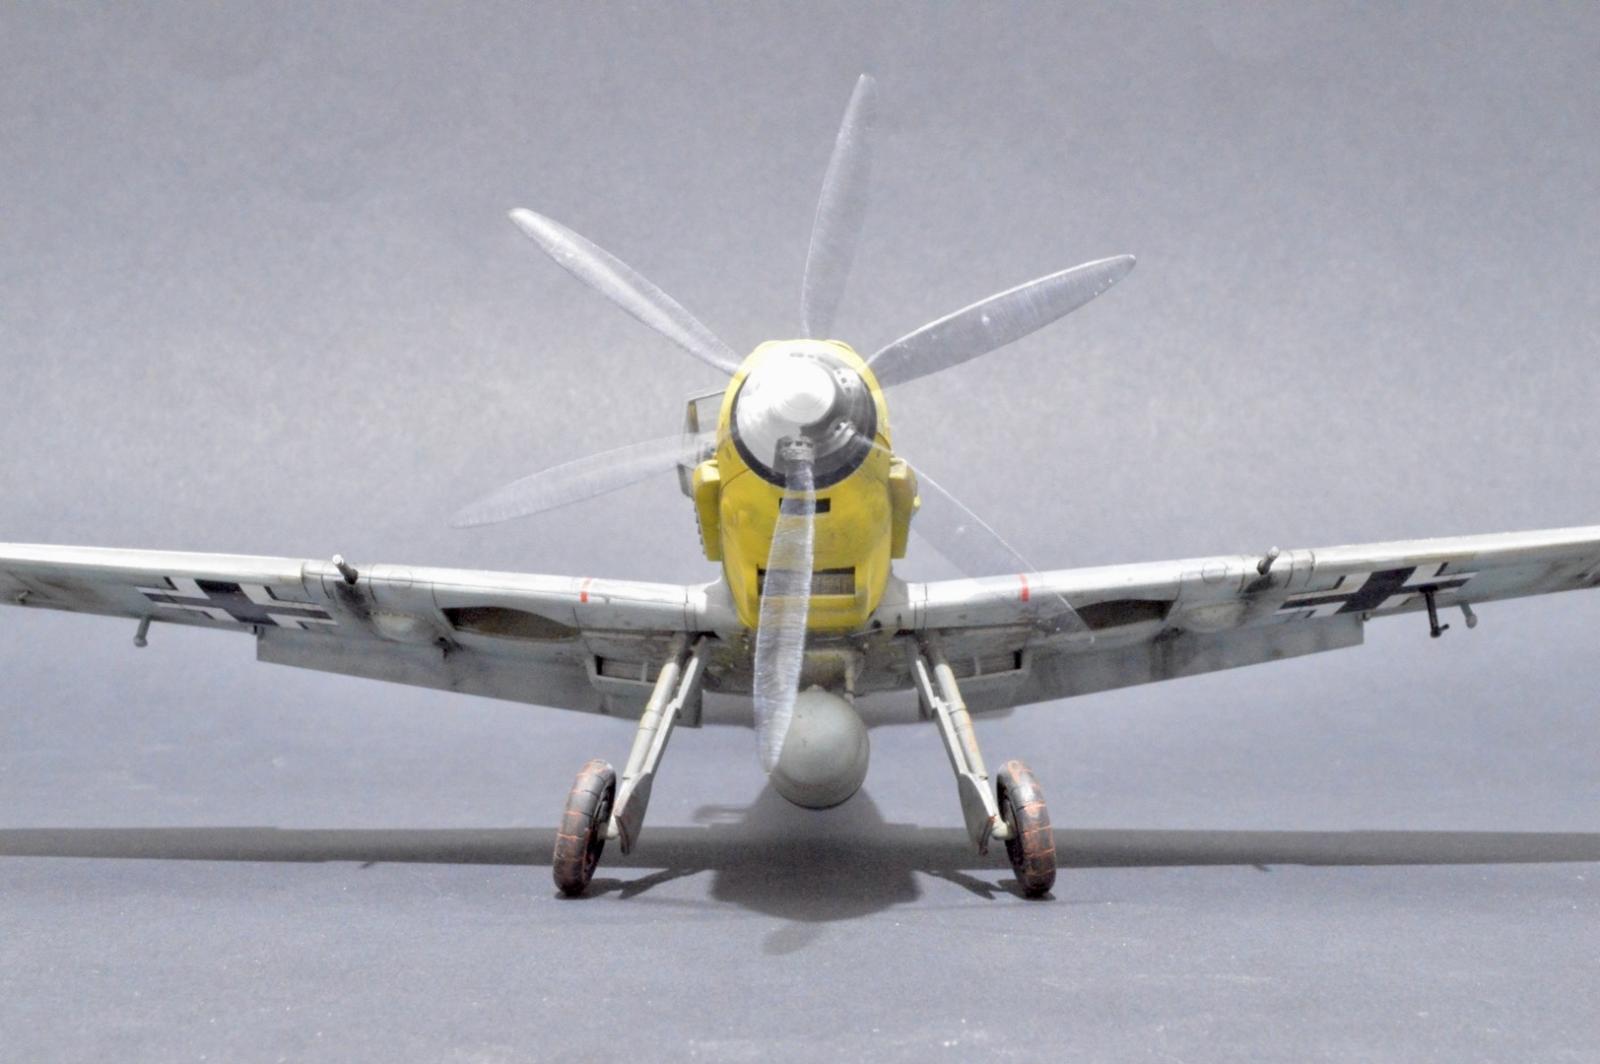
Very excited to share my second build with you all. I know, yet another Schmitt ha hah.
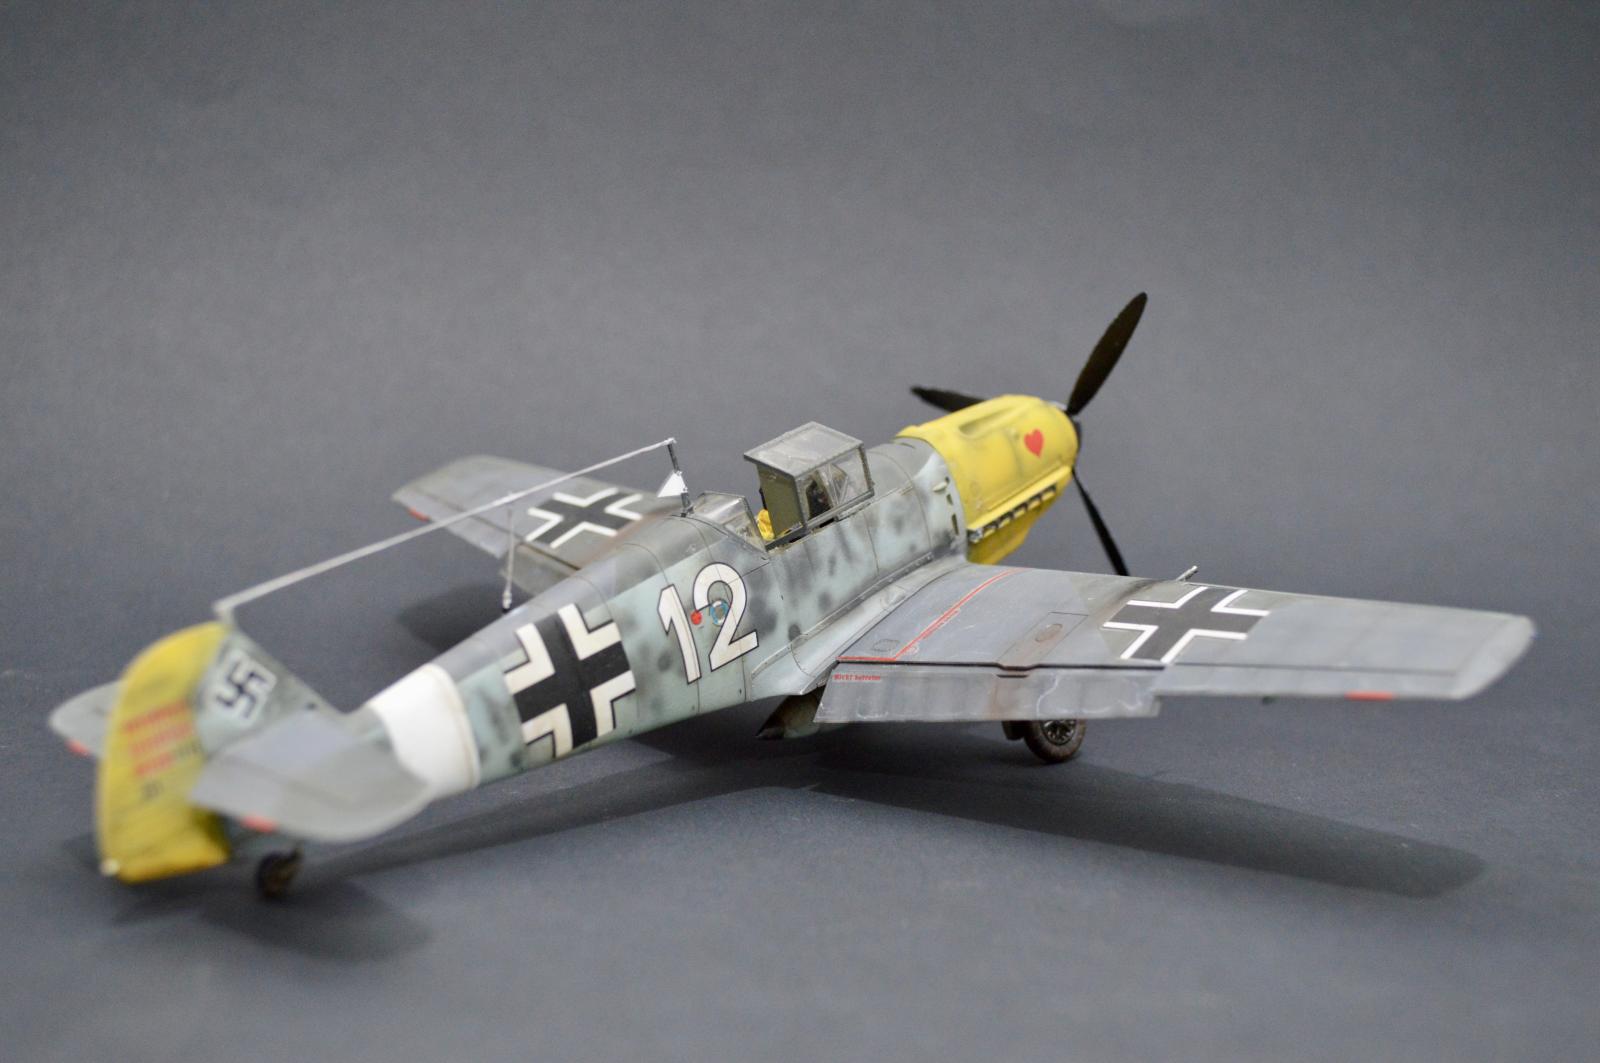
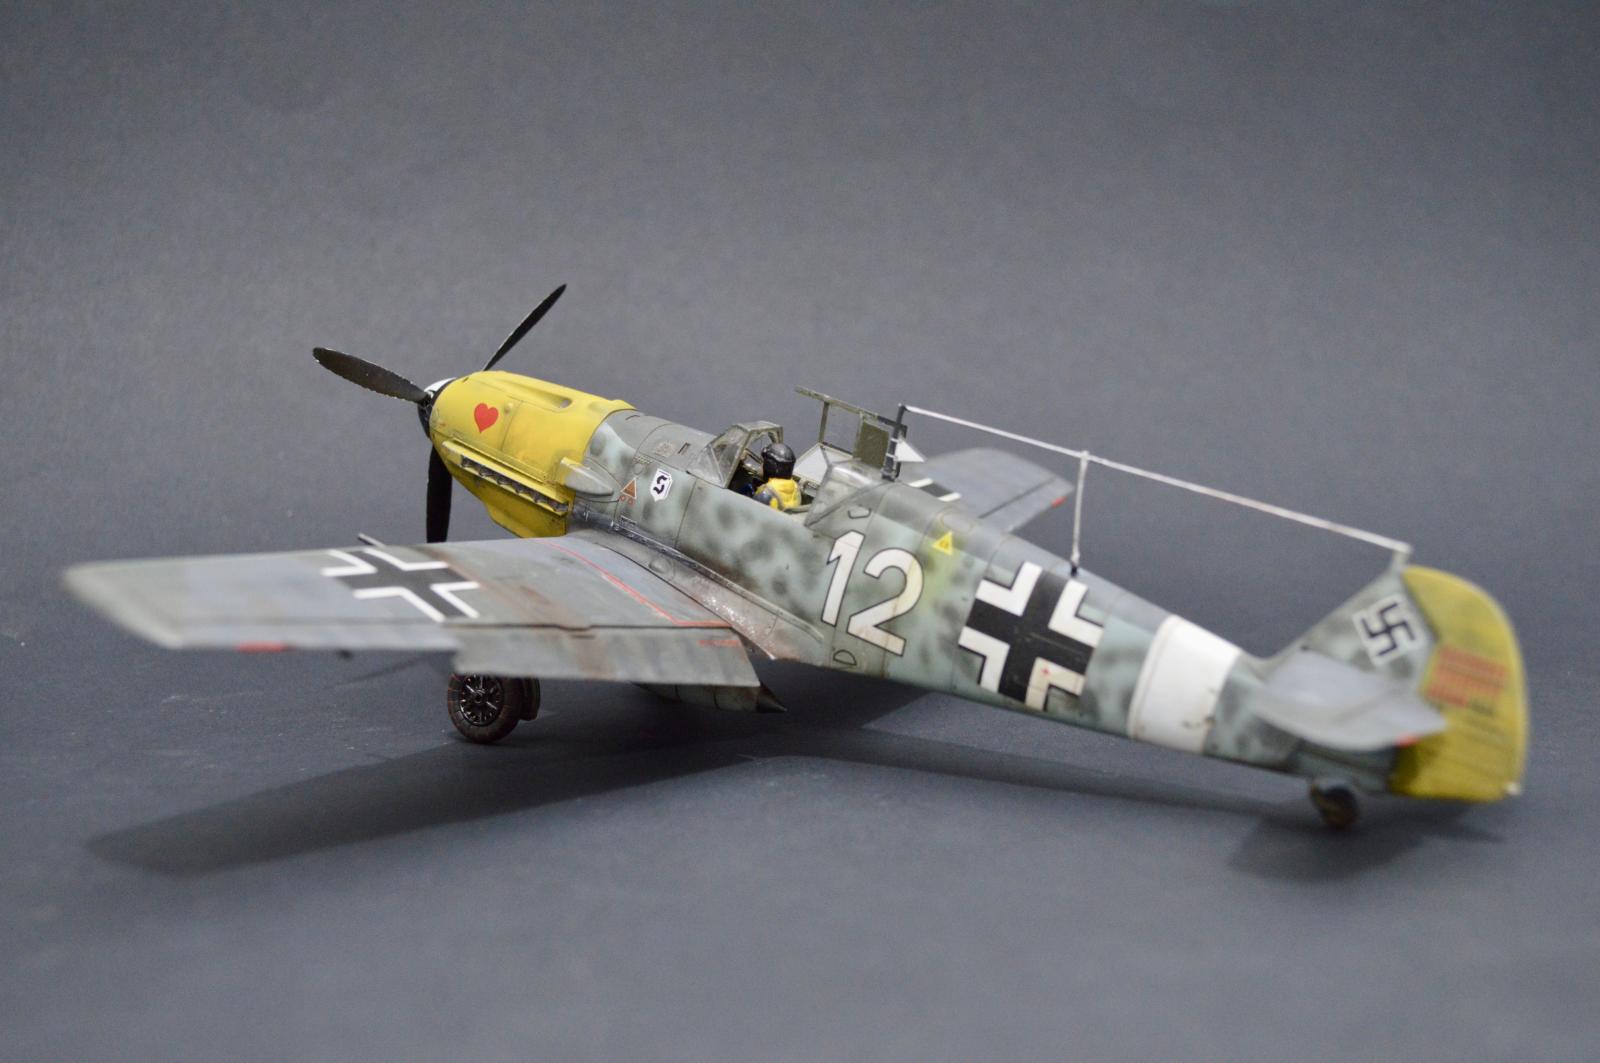
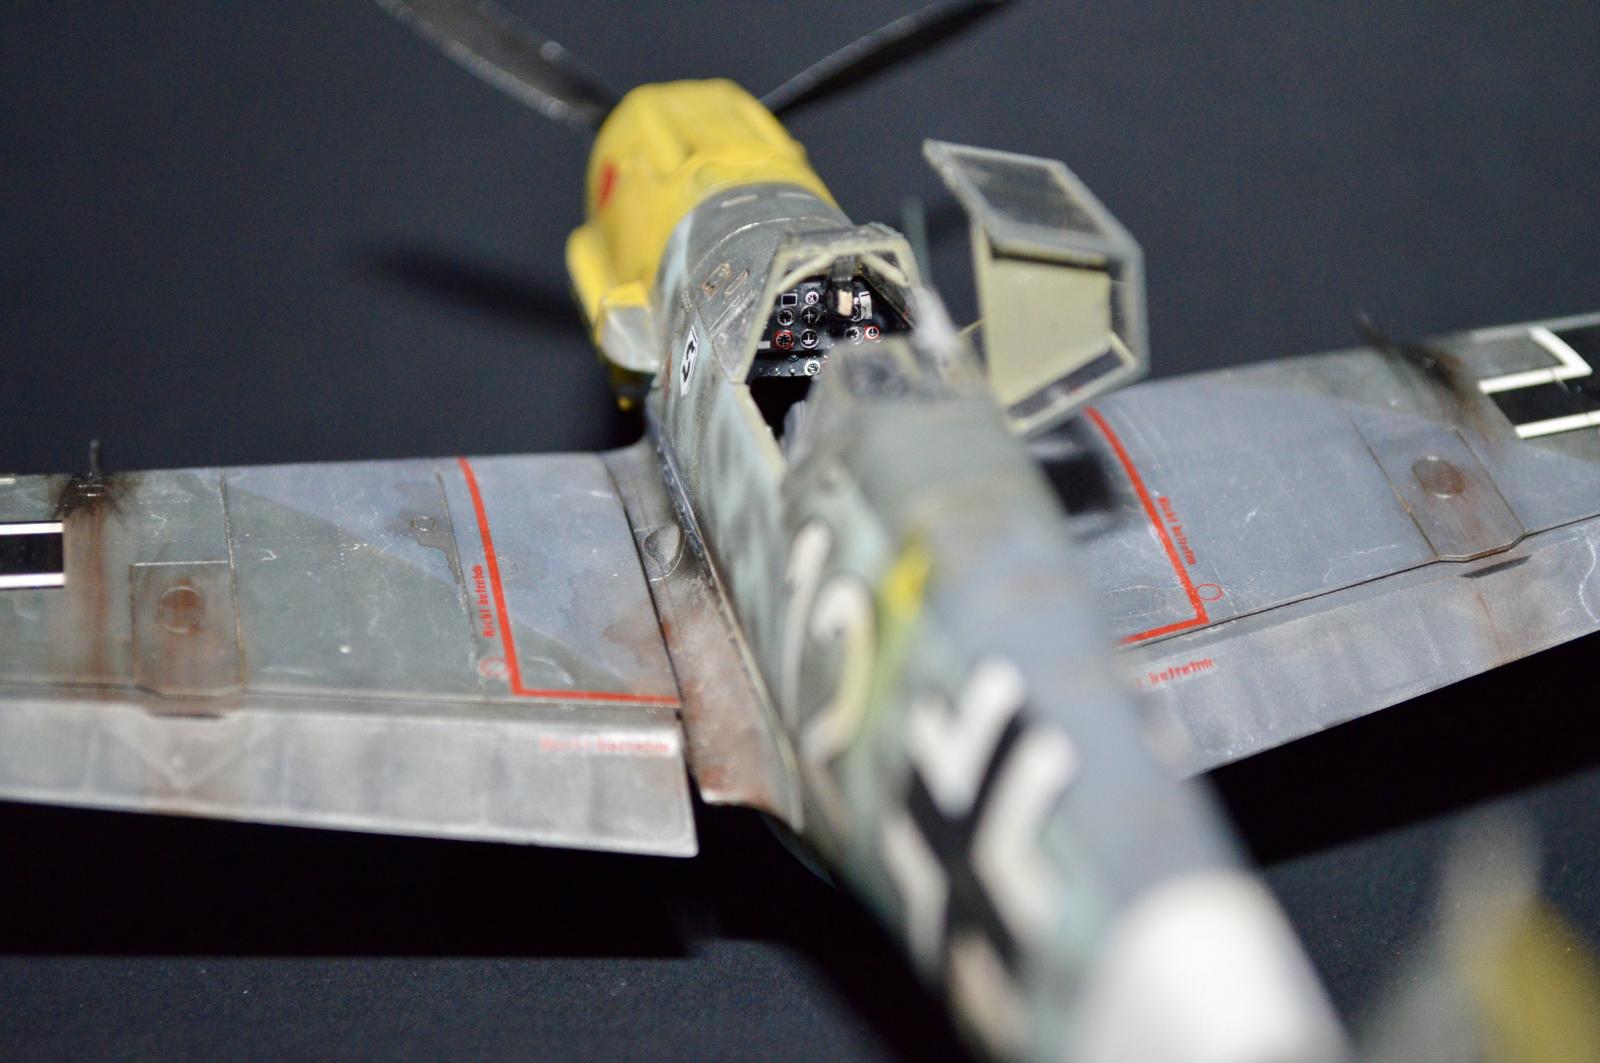
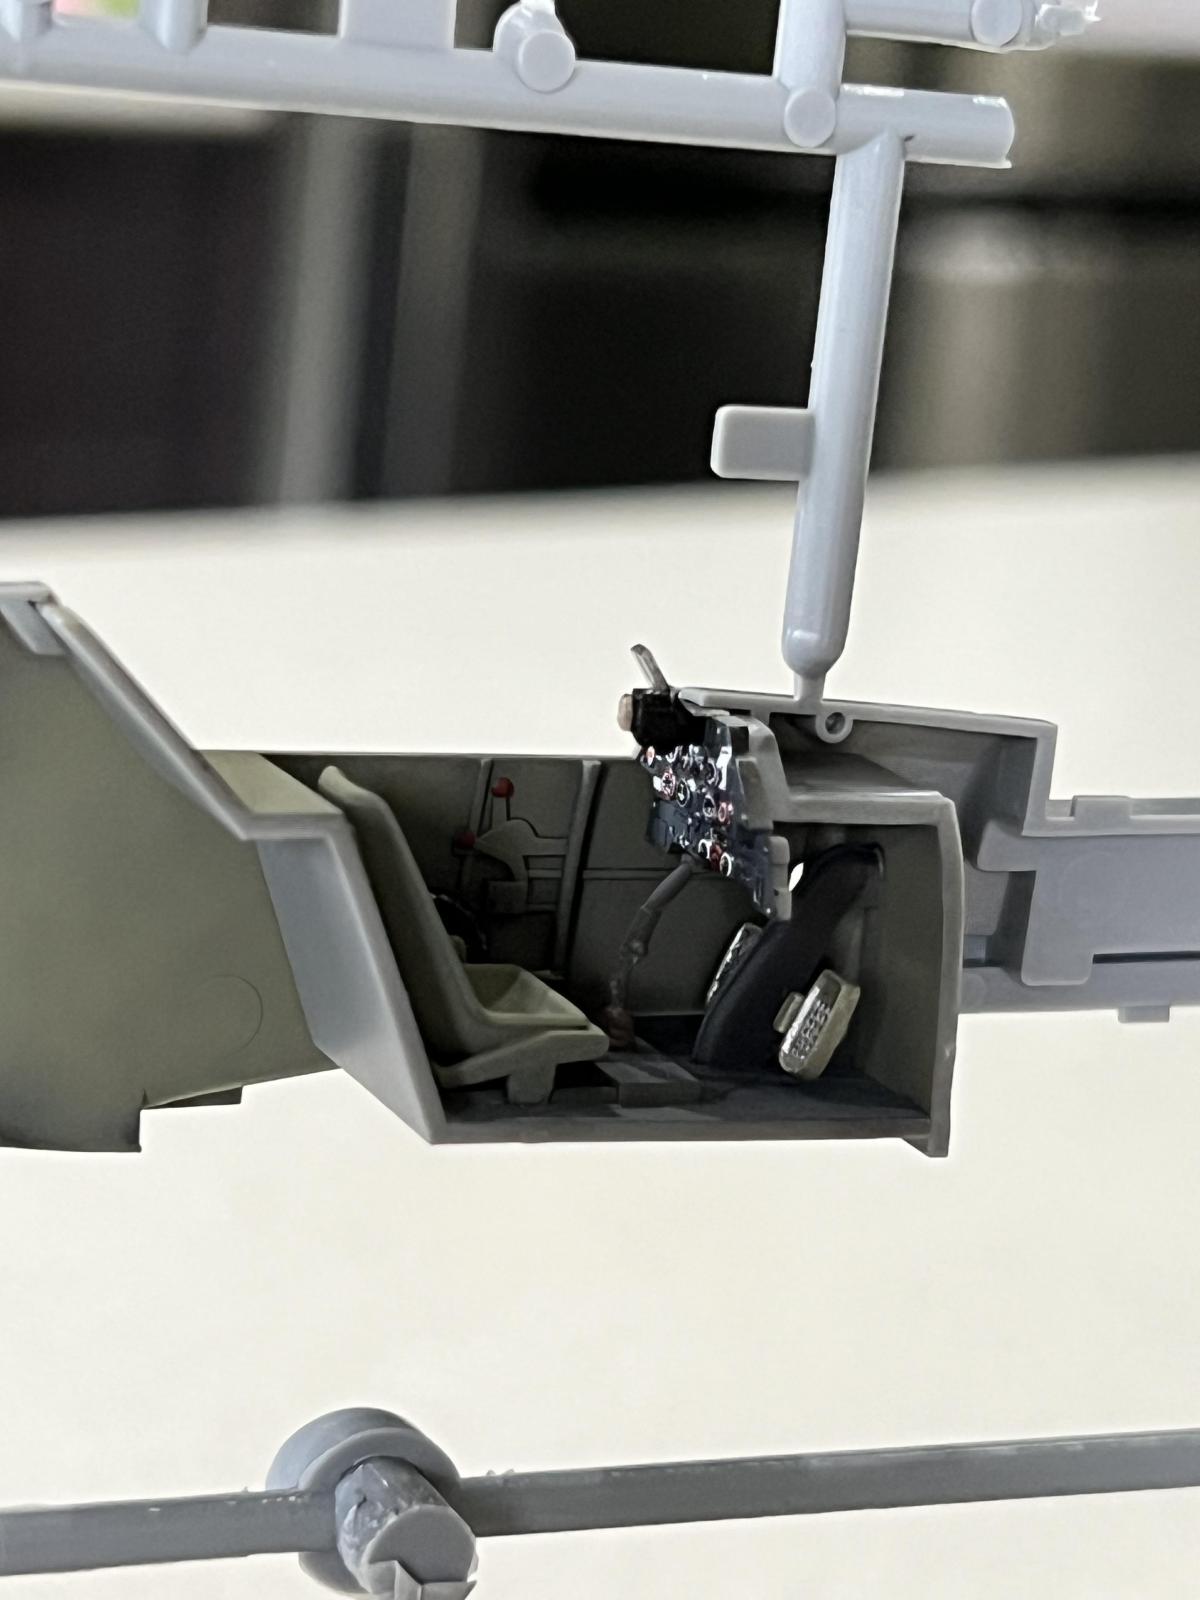
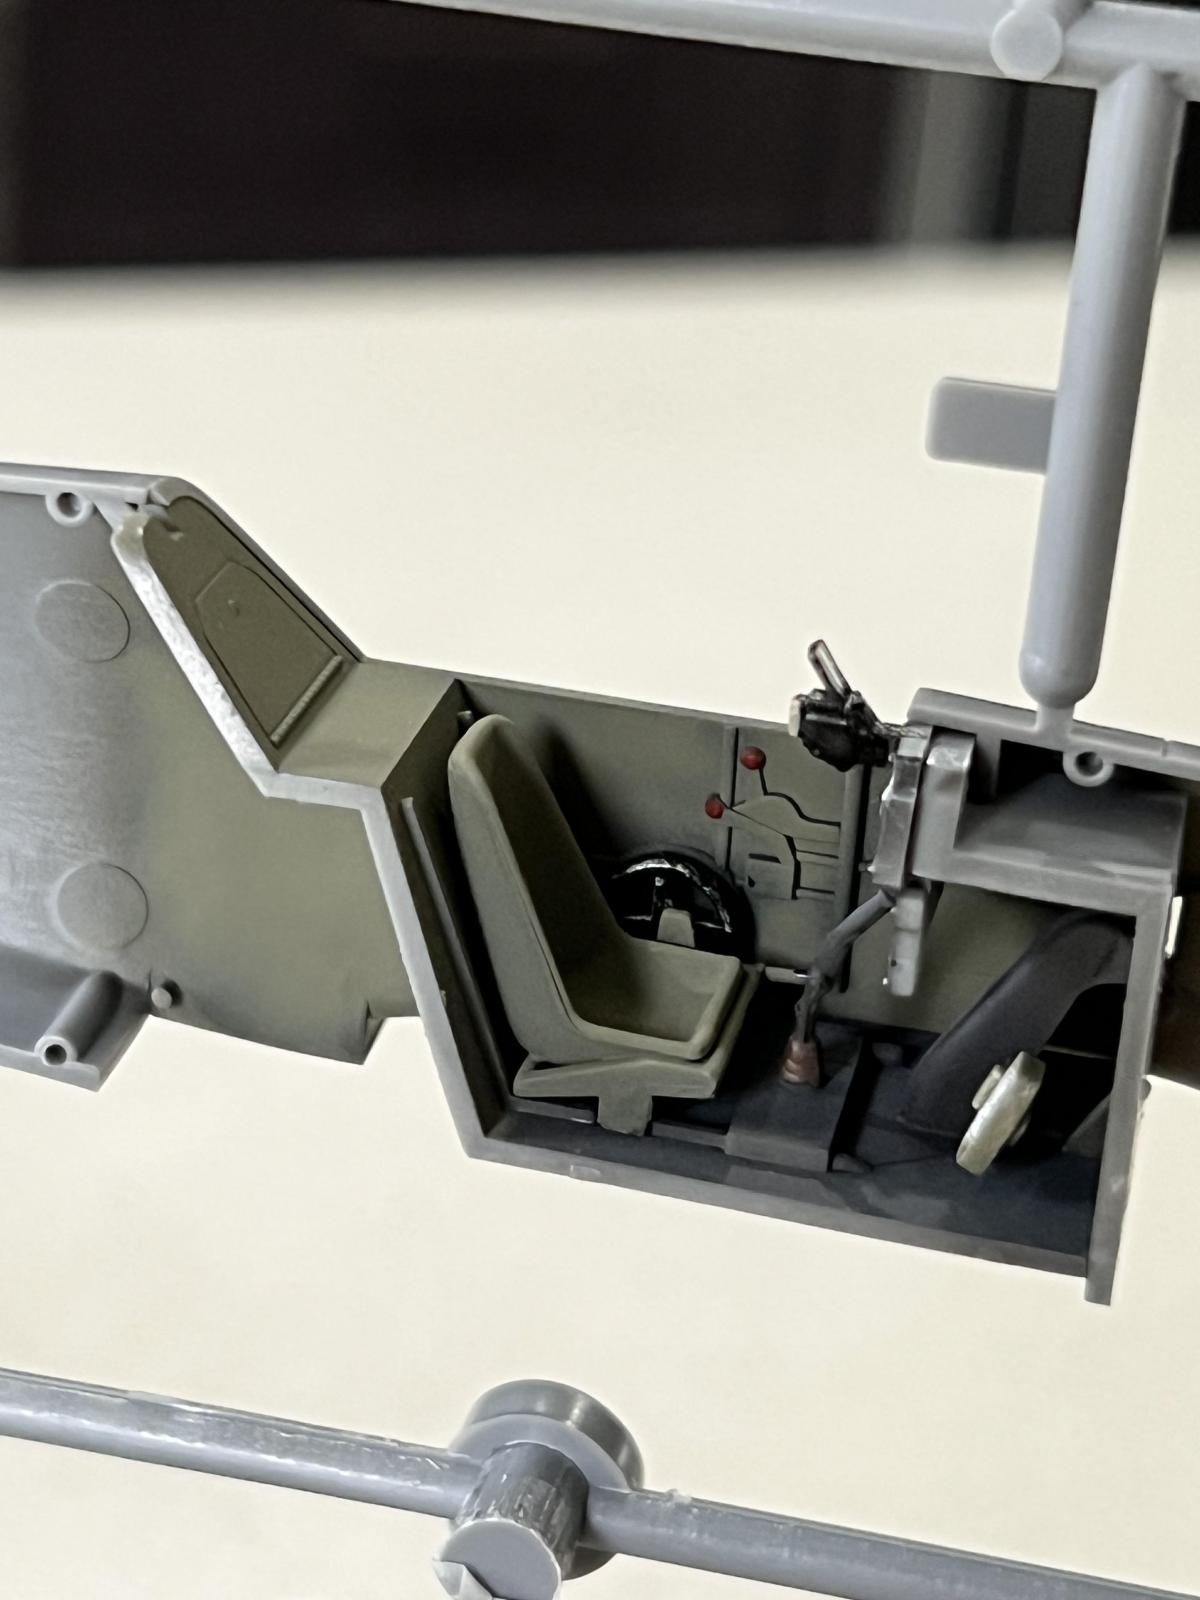
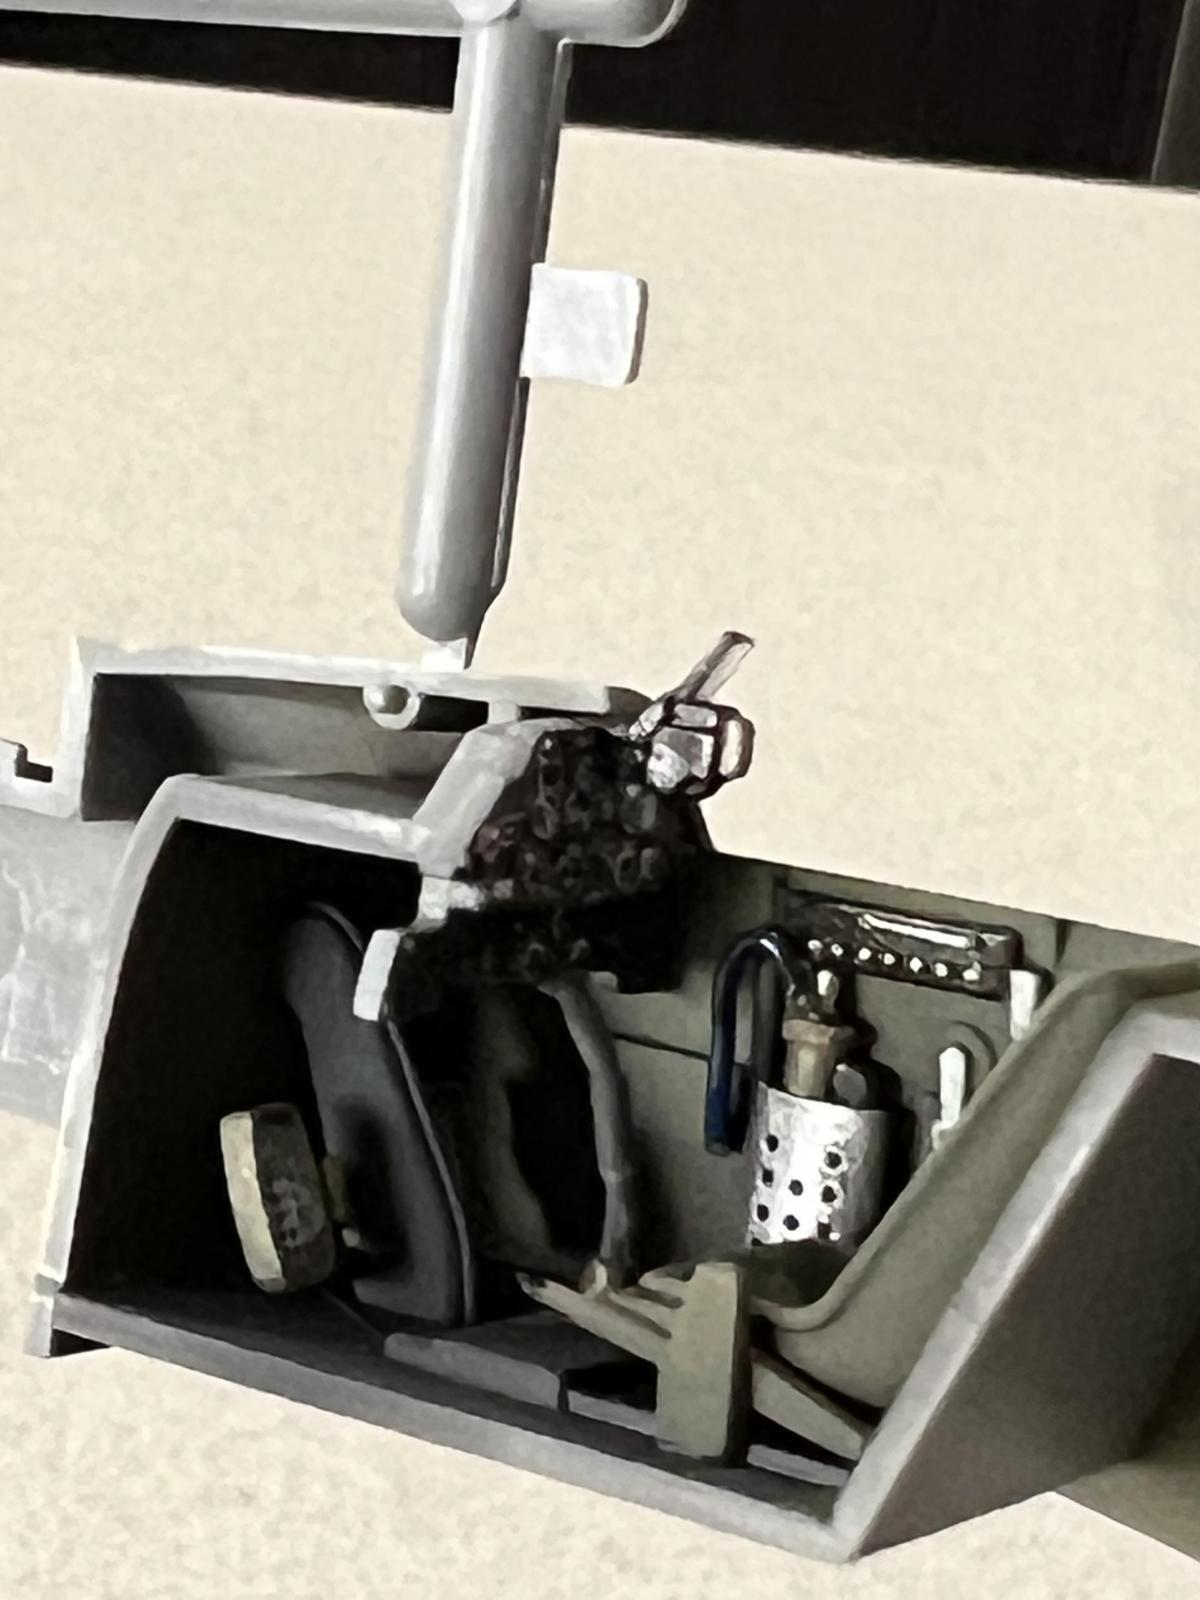
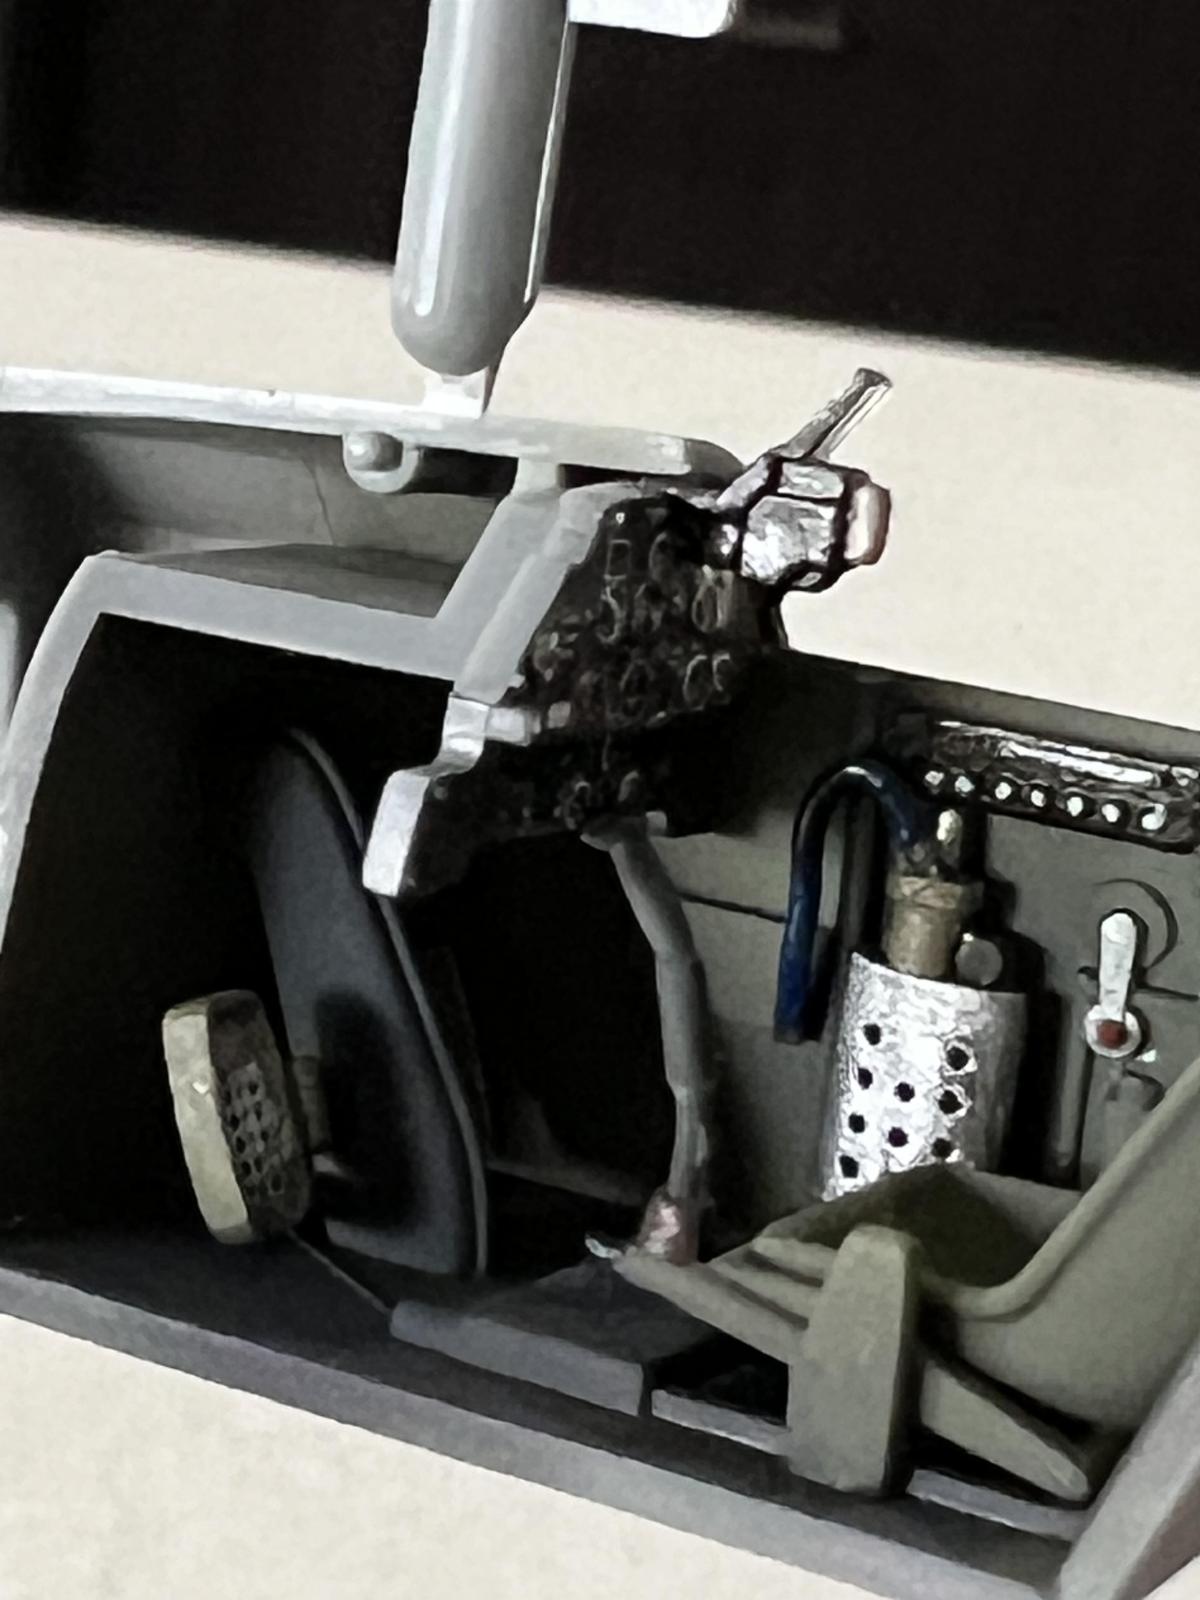
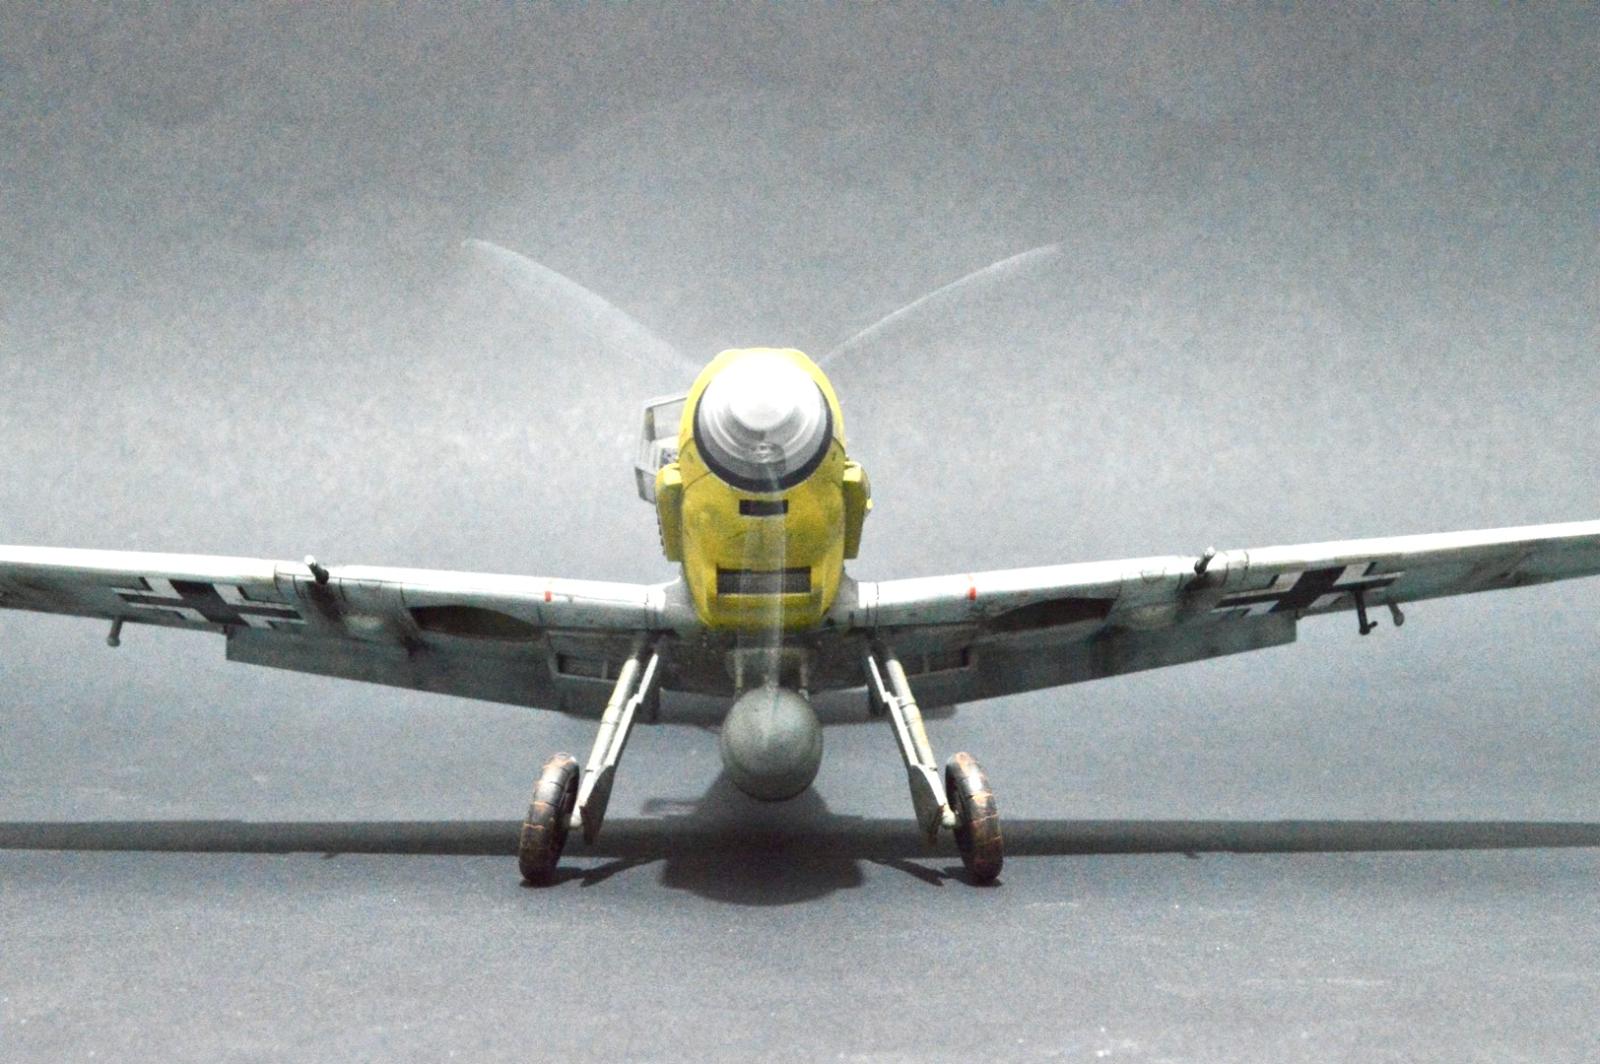
This has been a fun project with some challenging firsts...first time adding riveting detail using a rotary riveting tool, first time attempting the mottled paint effect, first time creating the wire antenna effect with sprue plastic. I also did some scratch building, such as the pilots grab bars in the forward canopy, the pilots air hose in the cockpit and the support struts in the air intakes.
Anyway, I love how this has turned out. I hope you like it too guys. Over to the photos...
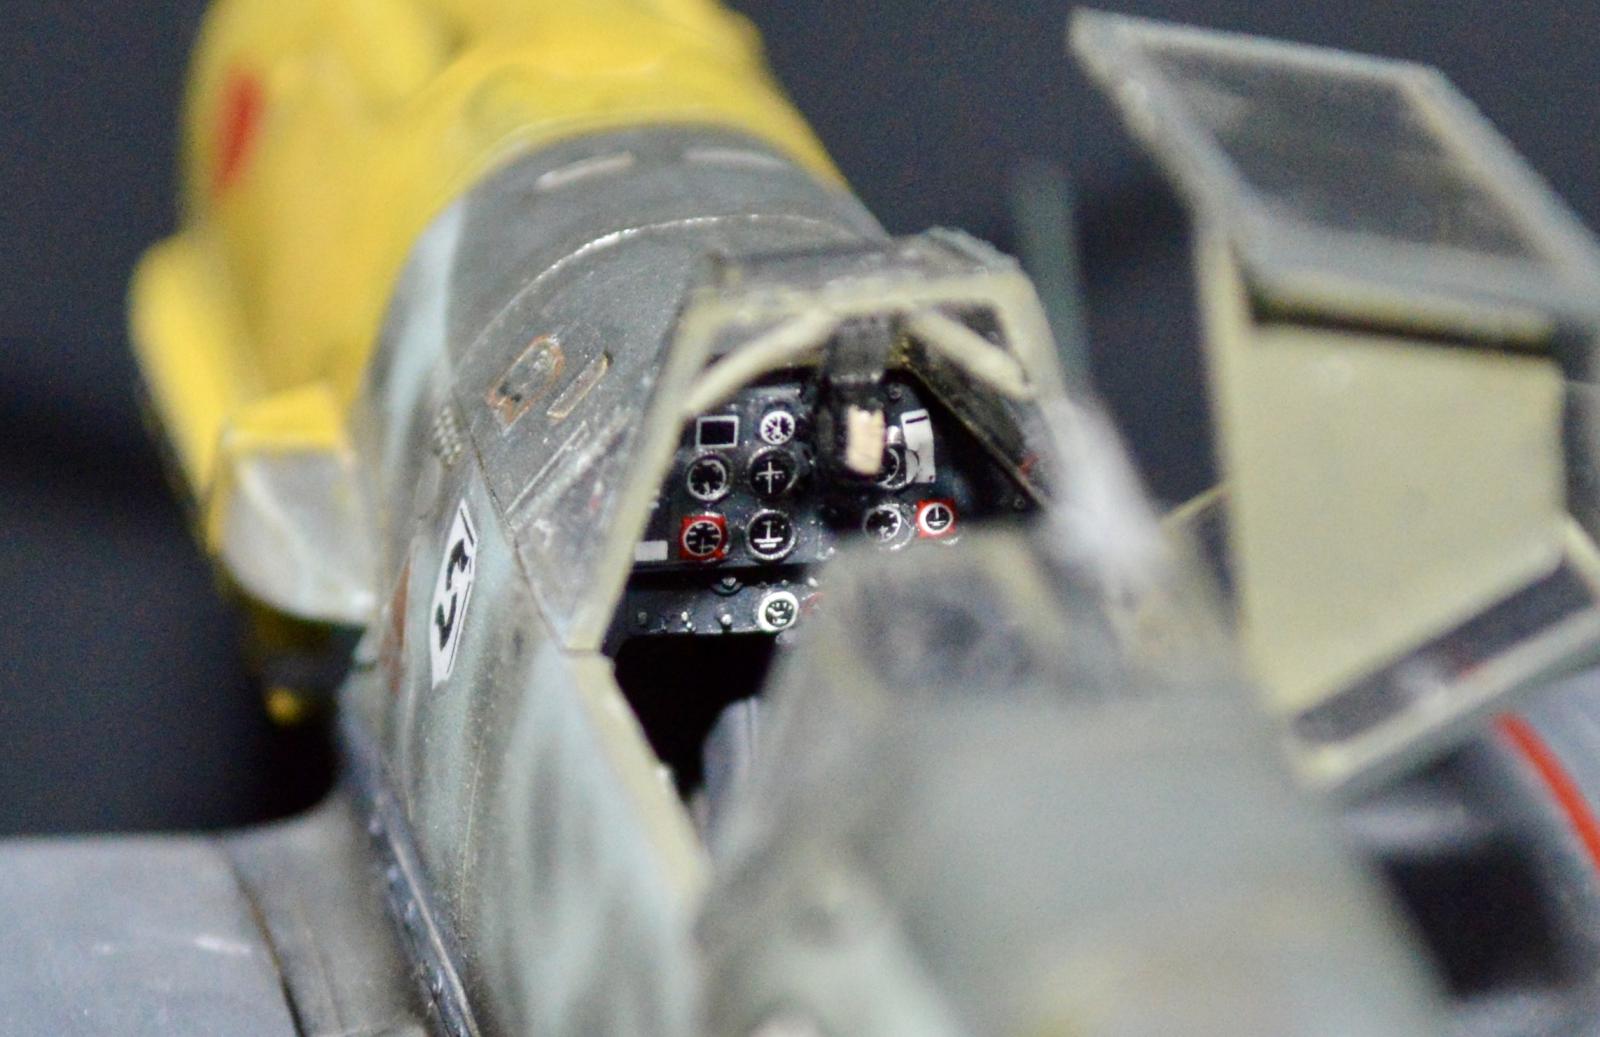

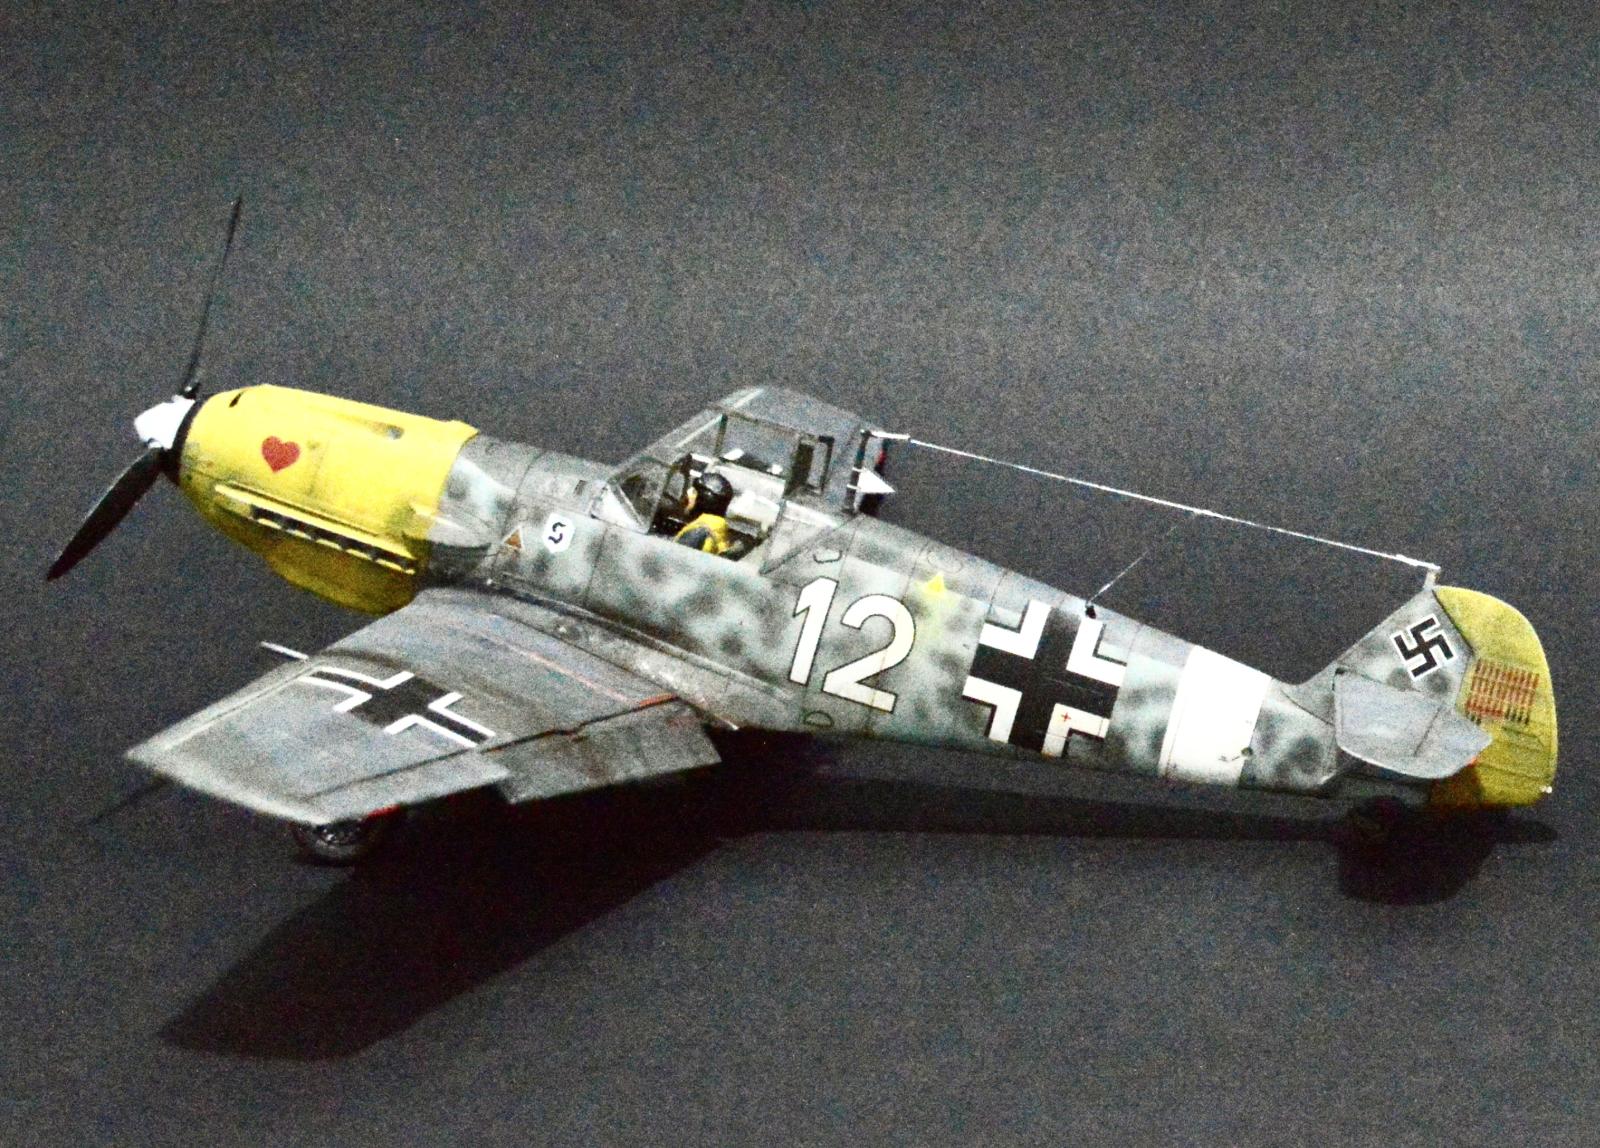
Nice '109, Scott...great job! I'd say your mottling and overall weathering, oil stains, etc. came out excellent. Is the cockpit panel/dials out-of-the-box, or did you use any after-market stuff? Tamiya makes solid products, but your changes are excellent.
Hey Joe @jroamer.
Thank you for your kind appraisal 👍🏻
Yah the cockpit detail is out of the box.
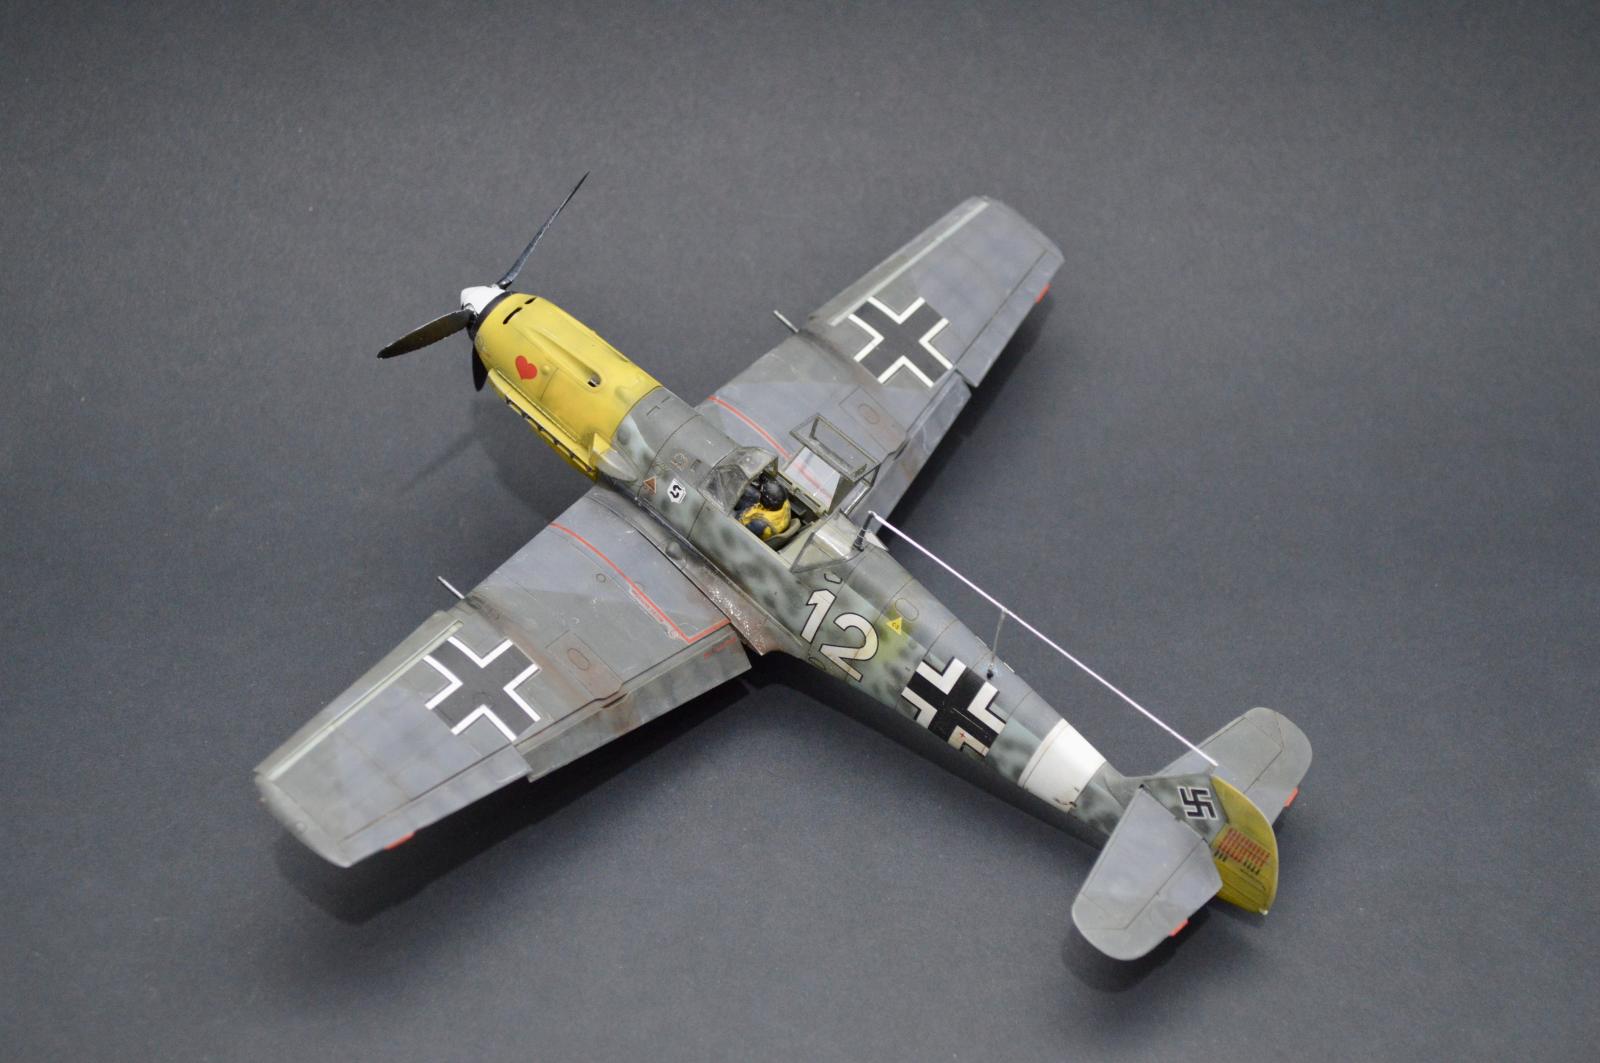
I’ll add some extra photos of the cockpit before the fuselage came together. It seems a shame that I make the cockpit look great, for it to disappear 😂😂😂
Nice work/detail on the cockpit, Scott! I hear 'ya. I'm building a Meng 1/35 AH-64 Apache, put a lot of effort into LCD displays, knobs, harnesses, etc., and even with the doors open it will be tough to see and appreciate. LOL, if someone gave me a buck every time I went to my wife, "Hon, check this out..." during my builds, I'd be a rich man today. 😃
😀 😀
Can't wait to see you post your Apache. Ever since seeing the Wings of the Apache movie back when I was a kid, that helicopter has wowed me. Saw it recently as a ground exhibit at the Australia International Airshow.
Not sure if they still operate it, but the British Army were using one of the variants - possibly the Longbow version?
Excellent job on the Tamiya Emil, Scott!
A superb result!
Thank you, Spiros, (@fiveten). I'm stoked with it.
Very nice, Scott @scottiya! 👍 Good looking '109 you've got there! 👏
Thank you Gary (@garybrantley) - I appreciate that!
This is your second model? Congratulations then, it’s a very solid build, definitely you caught the Emil “looks” quite well
Thank you for saying that Pedro (@holzhamer). Very encouraging words thank you.
Good work on this Tamiya kit.
Thank you George @chinesegeorge 🙂
Excellent build Scott. Keep going with sticking plastic, your models look great 😊
Ha ha for sure, just don't shut down the Cement Glue and model kit factories! Thank you Guy @thom I appreciate your kind words.
That’s a nice 109, Scott. Great airbrush work. I prefer the Tamiya 109E kits over the Eduard, Hasegawa, and Airfix offerings.
Thank you John (@j-healy).
Other than the Airfix kits I did as a kid (and that's over 30 years ago yikes), I haven't yet built anything other than the last 2 Tamiya kits I've done in the last 6 months. I'm certainly going to carry on with them, but I think ultimately, they seem to have a narrow range and so to build something Tamiya don't have, I will eventually look elsewhere, possibly more Airfix.
That is a gorgeous looking 109, especially your camouflage or mottling. I hope one day I’ll be as proficient with my airbrush. You should be quite pleased with your work! Well done !
Hey Dan @wig41,
Thank you for that. I am very pleased with how it's turned out I have to say. Looking forward to doing more of this kind of work.
A very nice piece of work, Scott!
Really like the extra mile you did on the cockpit. A pity most of it will not be visible once you’ve put everything together, but to know it’s there is enough for most modelers right?
Great mottling as well.
Hi Alfred (@alfred),
Thank you, kind sir, for your feedback. Although the photos show the pilot in the seat, I didn't glue him into the seat. I hope that flexibility to remove him, will open up the space to see more of the cockpit. Trouble is I'd need the lighting of a football stadium to show it off ha ha. But as you say, it's enough for me to know that it's there 😀
Ya muppet...🤣🤣🤣. It didn't dissappear, it looks great.
Often the first thing you see climbing into something is the panel, and if your canopy works you will see even more so great job all round. It draws the eye. Look, it works on the Lancaster in 1:72 so yours looks good👍
Yea, I have started using a rotary riveter. Makes sense where there are flush rivets although most wouldn't complain either way chap. It's surprising how many lines of rivets were on these things.
One suggestion if it's OK? Get hold of some ushi line or easy line. It's a form of very fine lycra filament.
The stuff is very strong and stretches, so you can anchor it with whatever you have (pva, cyano etc) and apply a very slight tension.
You can also slide micro tubing down it for rigging screws, joiners, junctions, insulators, all sorts of c**p that happens round wire antennae Scott. A small roll lasts ages (unless you are into 1:24 bi planes 😳😆). Also comes in handy for rudder cables etc.
I know this link is out of stock but its out there, just don't try using it with a draught or a fan running🤬😳🤣
Stretched sprue has its uses but fine guitar wire and lycra thread work well for most antennae.
https://www.scalemodelshop.co.uk/45m-rigging-bobbin-standard-uschi-van-der-rosten-4005-p17587/
Hey Chris @chrisballard,
🤣🤣🤣
Thank you for your suggestions. I will definitely look into the antenna wire materials. I do agree with what you're saying. The wire does look a little over scale but I had to give it a go right 🤣🤣🤣
Cheers my mate.
Yep, sometimes you do. The problem is that it's neigh on impossible to get the stuff thin enough then taught enough. The stretchy stuff sorts that.
Gotcha mate 😀👍🏻
Just dug out some nylon fishing line (I don’t fish but I had it for some other use). Anyway it’s 0.45mm. And its way too thick. Similar diameter to my drawn wire. But now I have a sizing reference too as well as the links to the materials you recommended.
Thanks again mate.
Scott, I think the first spotted camo turned out very well. Also very nice details. Great, I like it.
Great job all around Scott.I second the use of Uschi van der Rosten rigging thread. I mistakenly purchased the Superfine, meant for 1:72 but I think it works.The only problem I find using this is that it is like trying to glue spider web to an antenna post. This stuff sticks almost instantaneously to CA like a frightened limpet to a rock
https://www.uschivdr.com/products-in-detail/rigging/
Hey George Henderson (@blackadder57).
Thanks for the advice and link mate. Cheers
Really nice - you got skills! Looking forward to more...
Thank you Greg Kittinger (@gkittinger).
I'm really looking forward to doing more - Christmas is coming. Let's see what lands ha ha.
Thank you for your support Greg 🙂
You can never have enough 109's, Scott @scottiya
Especially not if they're yellow nosed Emils and build like the way you do.
A wonderful result.
Aw thanks John vd Biggelaar (@johnb).
Great Emil build, the camo looks good.
Thank you Chas Bunch (@chasbunch) 🙂
Great work, especially since this is only your 2nd post! Your camo turned out awesome and you did a great job of realistically weathering as well. Keep if going! Thanks for sharing
I really appreciate your comment David Butler (@dbutlr). Thank you so much for posting 🙂
Thank you Milan @milantesar
🙂 ... Greetings ... 🙂 :
Great job on this model Scott.
Your mottle effect is a work of art in itself.
Greeting @DE4EVER 🙂
Thank you very much for your kind review. I appreciate it 🙂
Super nice Emil, your molting look great, superb job all around.
Another alternative to EZline is smoke colored "invisible" mending thread, it's super fine and works great for 1/72nd and 1/48th. But as far as durability goes, the different EZline products work best, there super stretchy and less prone to breaking.
Hey Clint (@curtisshawk),
Thank you for your words of encouragement - I'm humbled 🙂
And thanks for the recommendations for the aerial wiring too. I did consider using some fishing line, which I have as a bird deterrent in my outdoor area up in the rafters, but I figured it was too thick for this purpose.
That is an awesome looking bf-109, Scott. The paint job, mottling effect and weathering all combine to make one beautiful build. Bravo! @scottiya
I am truly humbled John @jdtruby thank you so much 🙂
Very nice paintwork on this.
FWIW, there's an easy way to deal with decal silvering, an event we all deal with. Slice the decal several times with a sharp #11 blade, then flood the decal with setting solution. It gets the air bubbles under the decal (the cause of the silvering) out of the way and when it's set, you can't see any of the cuts. Future reference.
Hey Tom Cleaver (@tcinla)
Nice tip thank you 😀
I do use Mark Fit on the decals but the slicing strategy is new to me. I’ll be sure to log that one ffr 👍🏻👍🏻