Kurt Tank's Masterpiece: The FW Ta-152H-0 in 1/32 by Z-M

Professor Kurt Tank, the man behind the design of one of the Luftwaffe's most successful fighter planes, the FW190 series, saw an early need for improving the high altitude performance of his creation and started design studies for various engine/wing combinations to create what would become known as the "hohenjager" or Special High Altitude fighter. After a number of studies with modifying the FW-190A with series of turbosuperchargers Prof. Tank opted to create a whole new aircraft using parts of the FW190 and use the new Jumo 213E inline engine. The resulting development was an elongated FW190D with long graceful wings, ability to pressurize the cockpit for high altitude and Methanol-water injection to boost engine power, which actually saved Prof. Tank's life when he was jumped on takeoff by 4 US Mustangs while testing an early Ta152. After kicking the MW50 boost and firewalling the throttle he left the Mustangs in the dust! Such was the promise of this new and potent fighter! In the end, however, total Ta-152 production amounted to 67, not including all the prototypes and pre production aircraft, and due to the deteriorating war situation, many had production defects that kept them on the ground. Those that were flown, however, proved to be formidable adversaries and an allied pilot tackled with one at their peril!
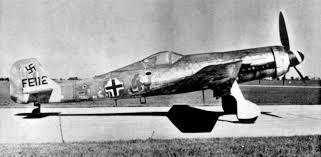
In 1991 I was fortunate enough to tour the Silver Hill facility of the National Air and Space Museum and saw the only remaining example of this superlative aircraft, albeit in pieces spread around the shop and soon after Trimaster (later DML, Dragon) released their series of newly molded 1/48 scale kits of the FW series, which included the Ta-152H and C series! I build just about everything they released, as at that time most of the models of the 190D series were pretty crude, and the Trimaster kits included newfangled features like accurate shapes, full engine and cockpit detail and recessed panel lines! Of course I built the entire series and promptly swore I'd never build another DML kit again after the Go 229 disaster...
In 2009 a heretofore unknown Japanese modelmaker introduced it's first kit, a 1/32 Shinden, followed by my personal Holy Grail, the Ta-152! So of course I bought one as fast as I could, before the reviews came out and waited to see if any articles would be published. At that time most of the reviews were either negative or neutral, and I've learned since that the best review is the one you discover for yourself. So here I am 14 years later deciding to finally give this kit a go...
I bought the first issue of this kit, the 152H-1and the photoetch and resin tire and Pilot sets to go with it. It included sprues in black, silver and gray and for the most part the moldings looked rather soft for a kit in this price range. I understand that later issues and the 152H-0 have been molded in gray. I had been reading reviews about some of the parts and assembly fit and the nightmares that ensued when trying to assemble the wing to the fuselage. I collected all the articles I could on this kit and dove in head first!
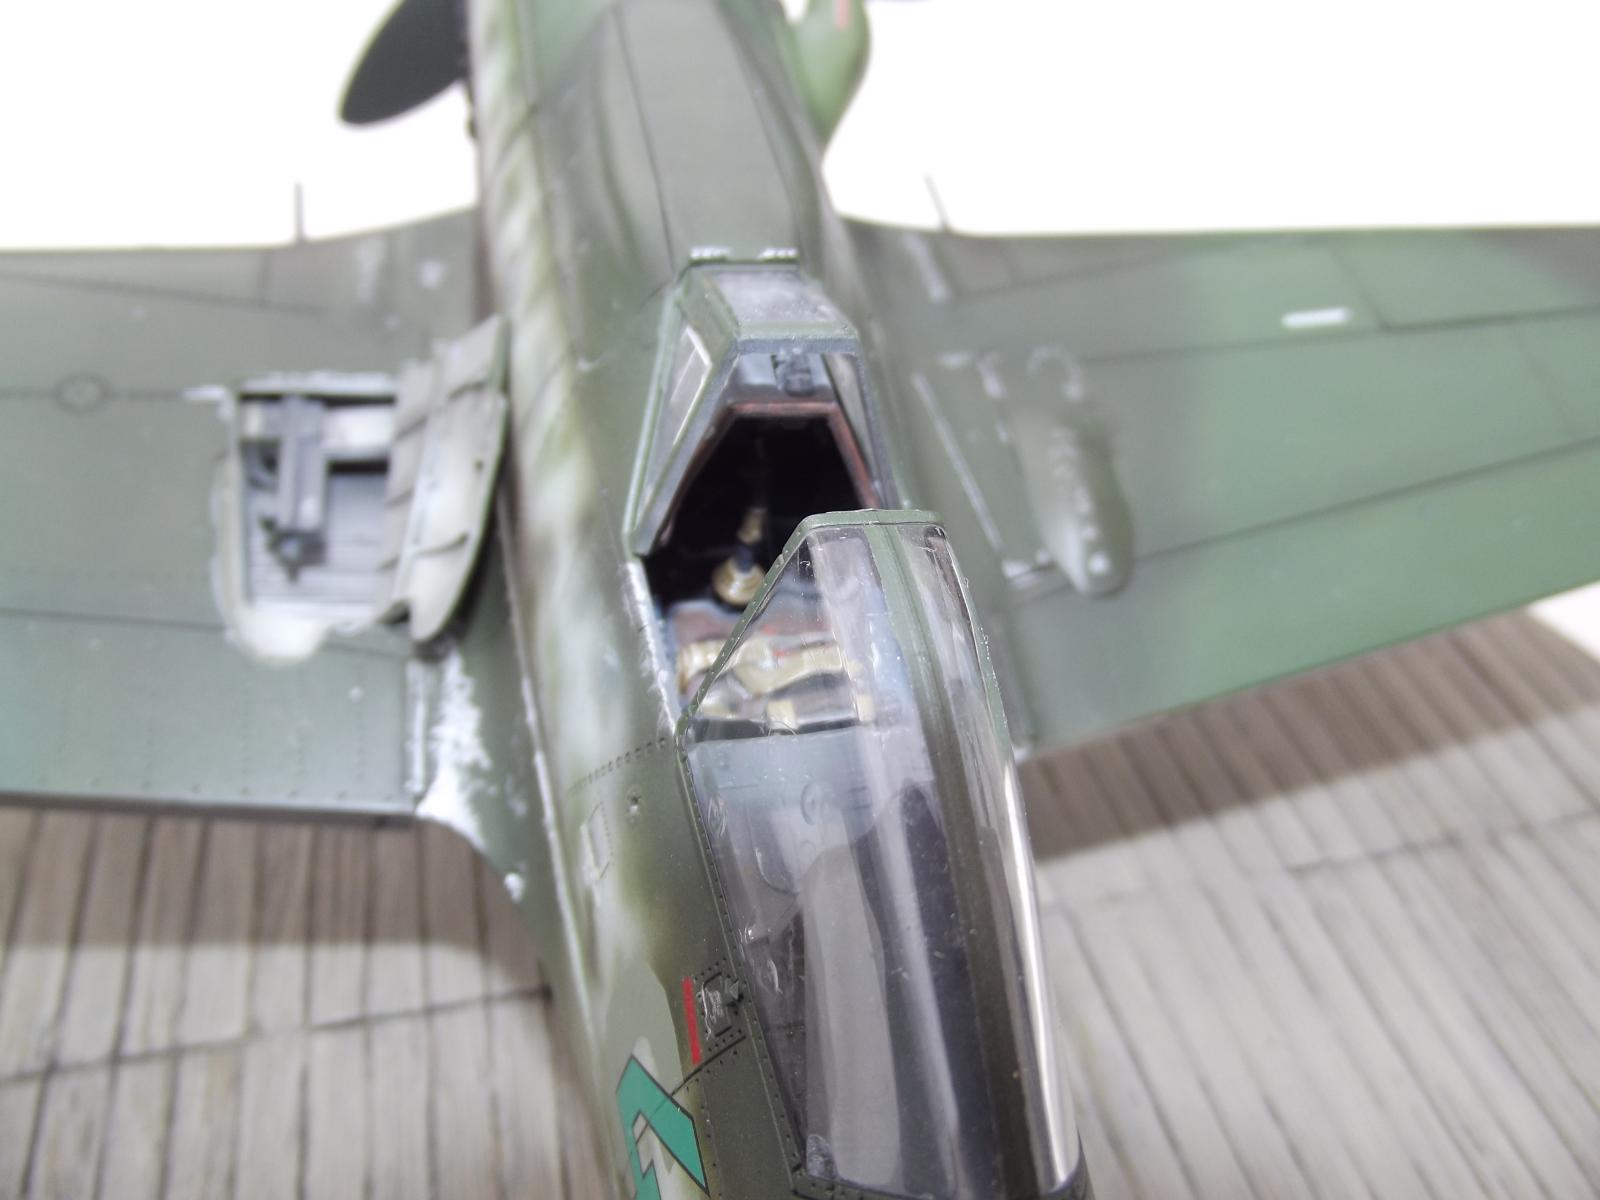
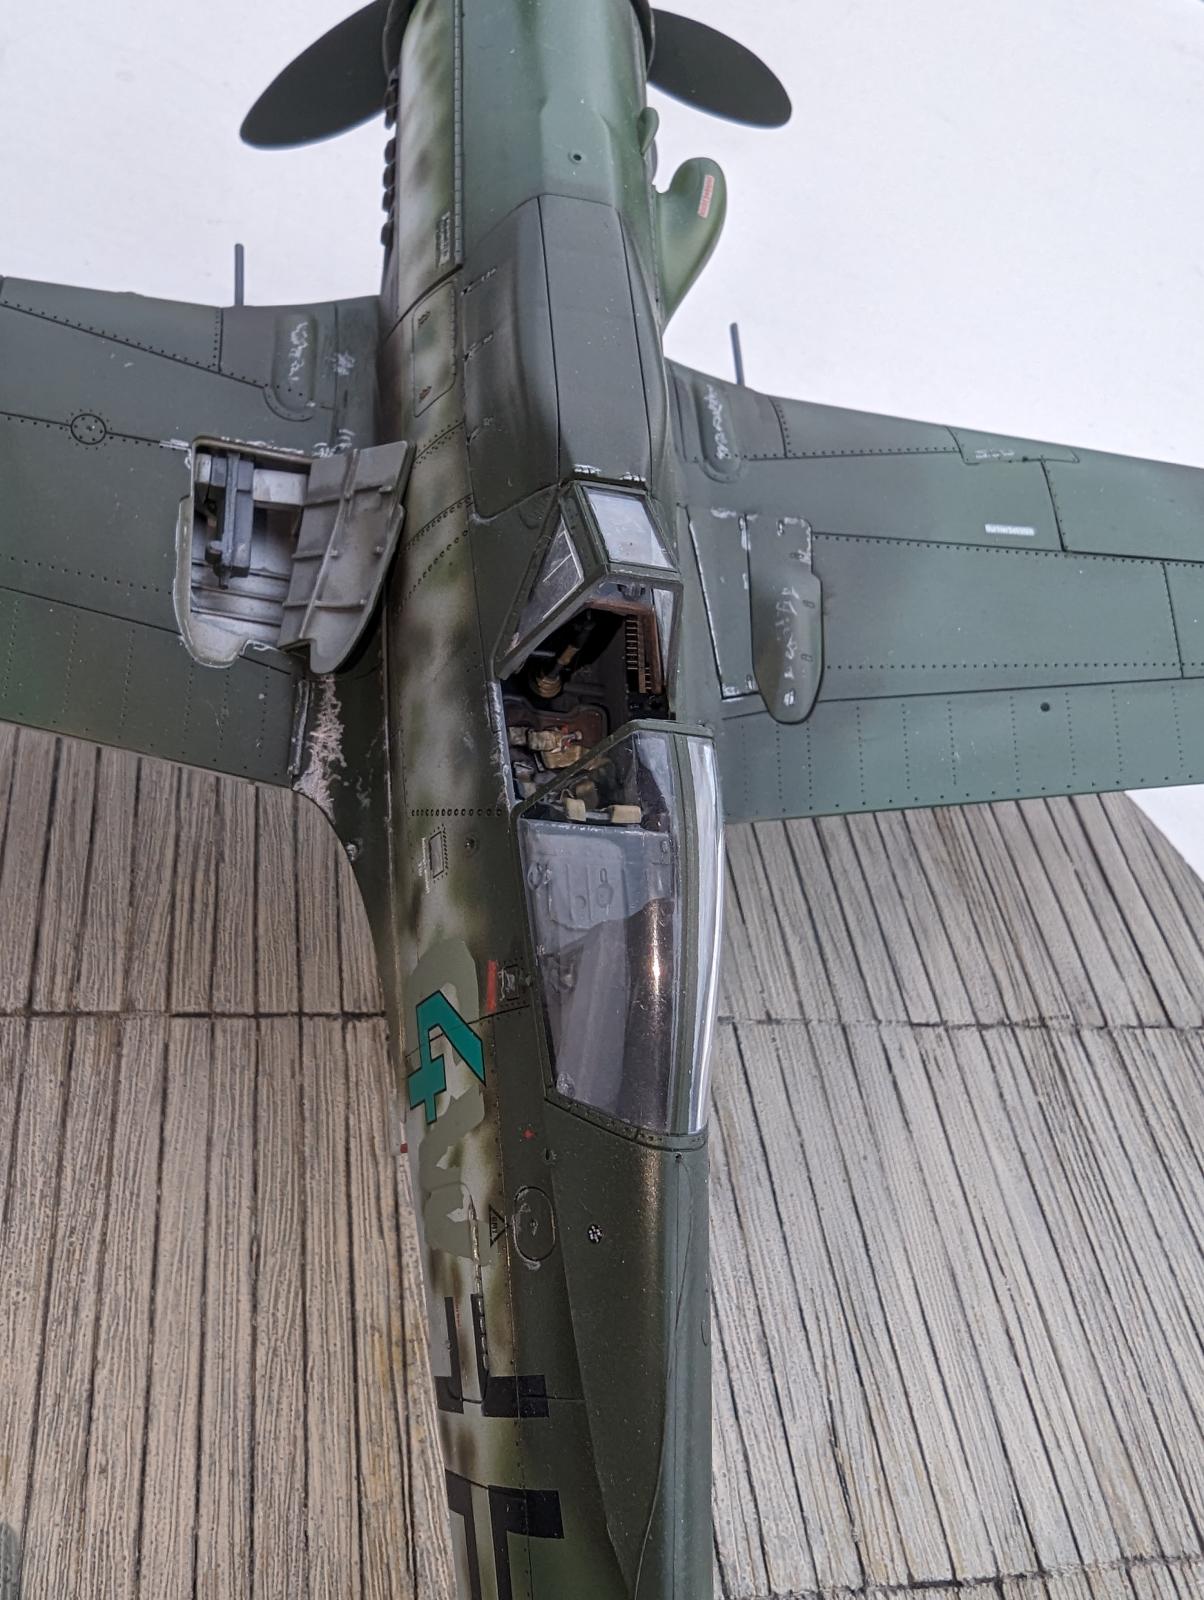
After initially painting some of the parts prior to assembly I noticed the "softness" of the parts went away, and revealed some very nice detail, especially the pilot seat with the molded in harness and the engine itself. I decided after looking at the seat to use the one with the harness molded in and test my detailing skills, and it actually turned out very nice. I used the Eduard-provided detail for the rest of the cockpit and was pleasantly surprized at how well the details and fit was working out.
In reviewing the instructions before starting the build, there was something that bothered me about the assembly sequence...build the cockpit, then the engine, then assemble the cockpit into the fuselage puzzle, add the tail section, assemble the wings, then add the wings to the fuse...then add the engine?! As it turns out, there are 8 different glue points that the engine has to contact to complete the assembly as per the instructions, and that would mean that either you stretch the fuselage in different ways to make all the pins match, cut some pins off, or...as I did...cement the engine assembly to the firewall, let the cement set hard, and Then add the wing assembly! That worked out great, now I have a rock-solid wing/fuselage joint and everything fits as designed to.
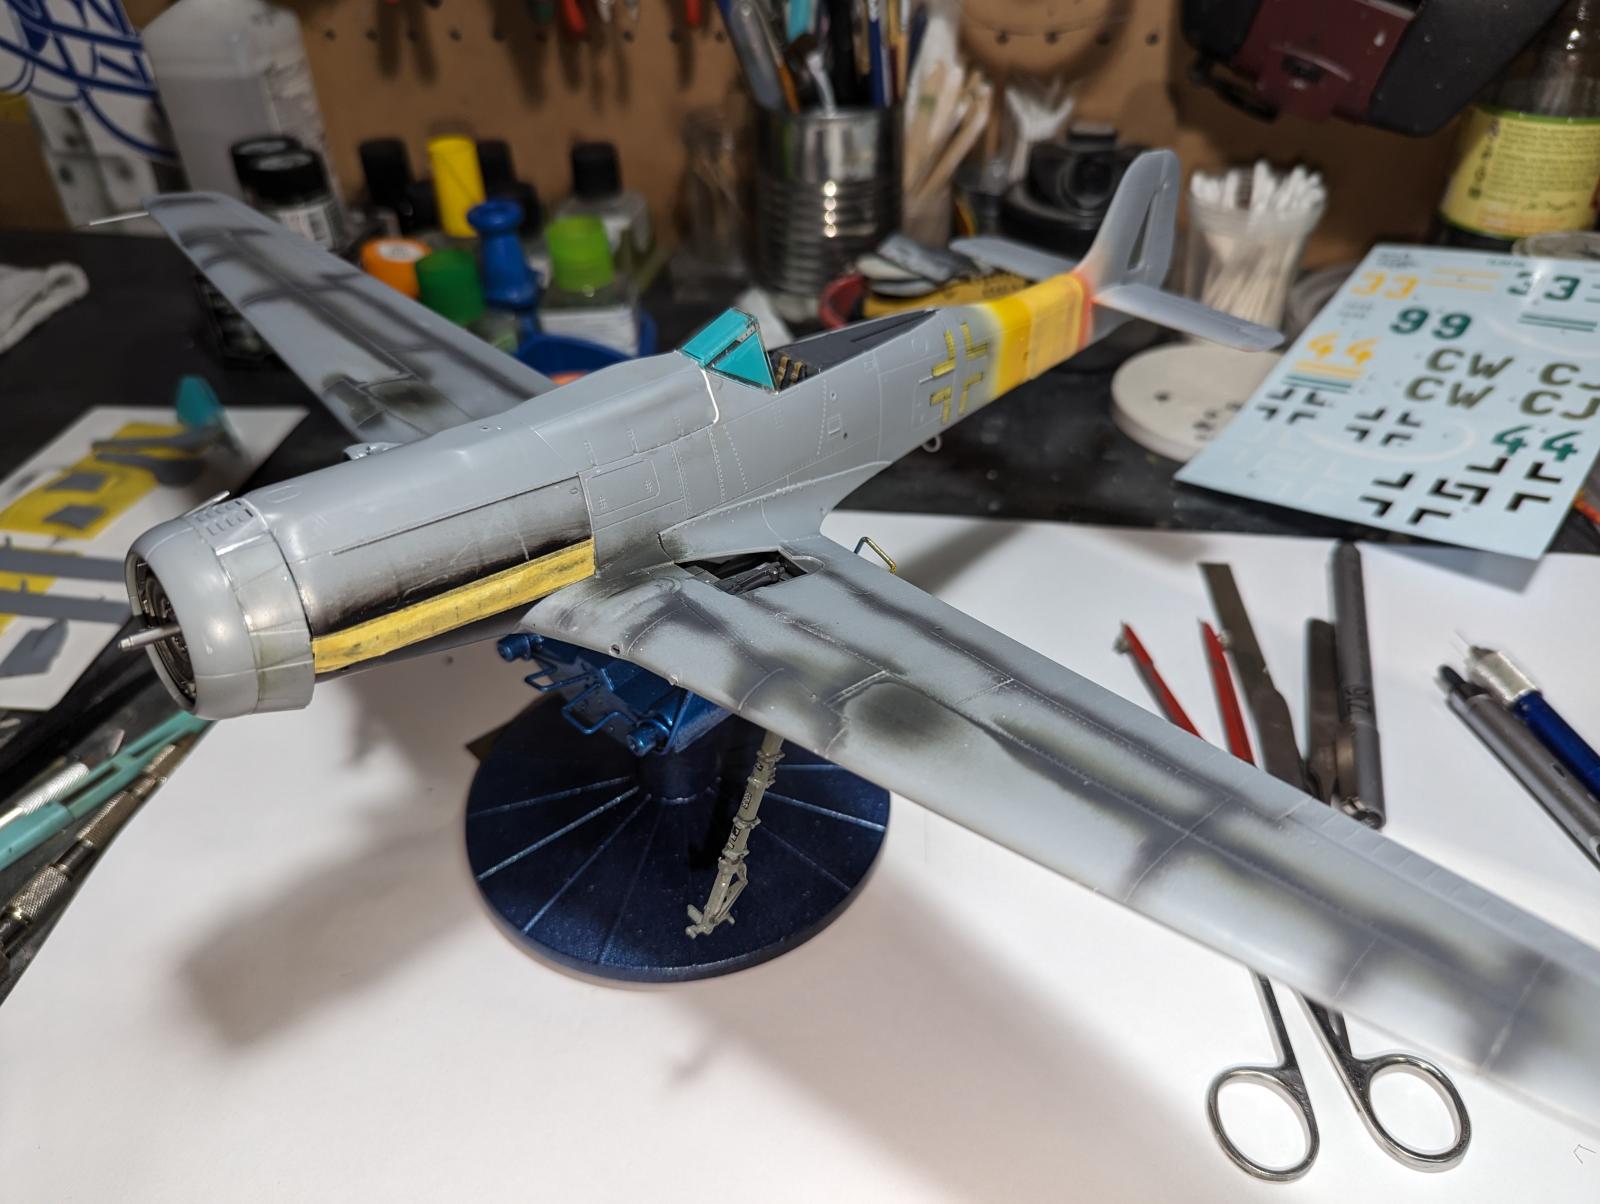
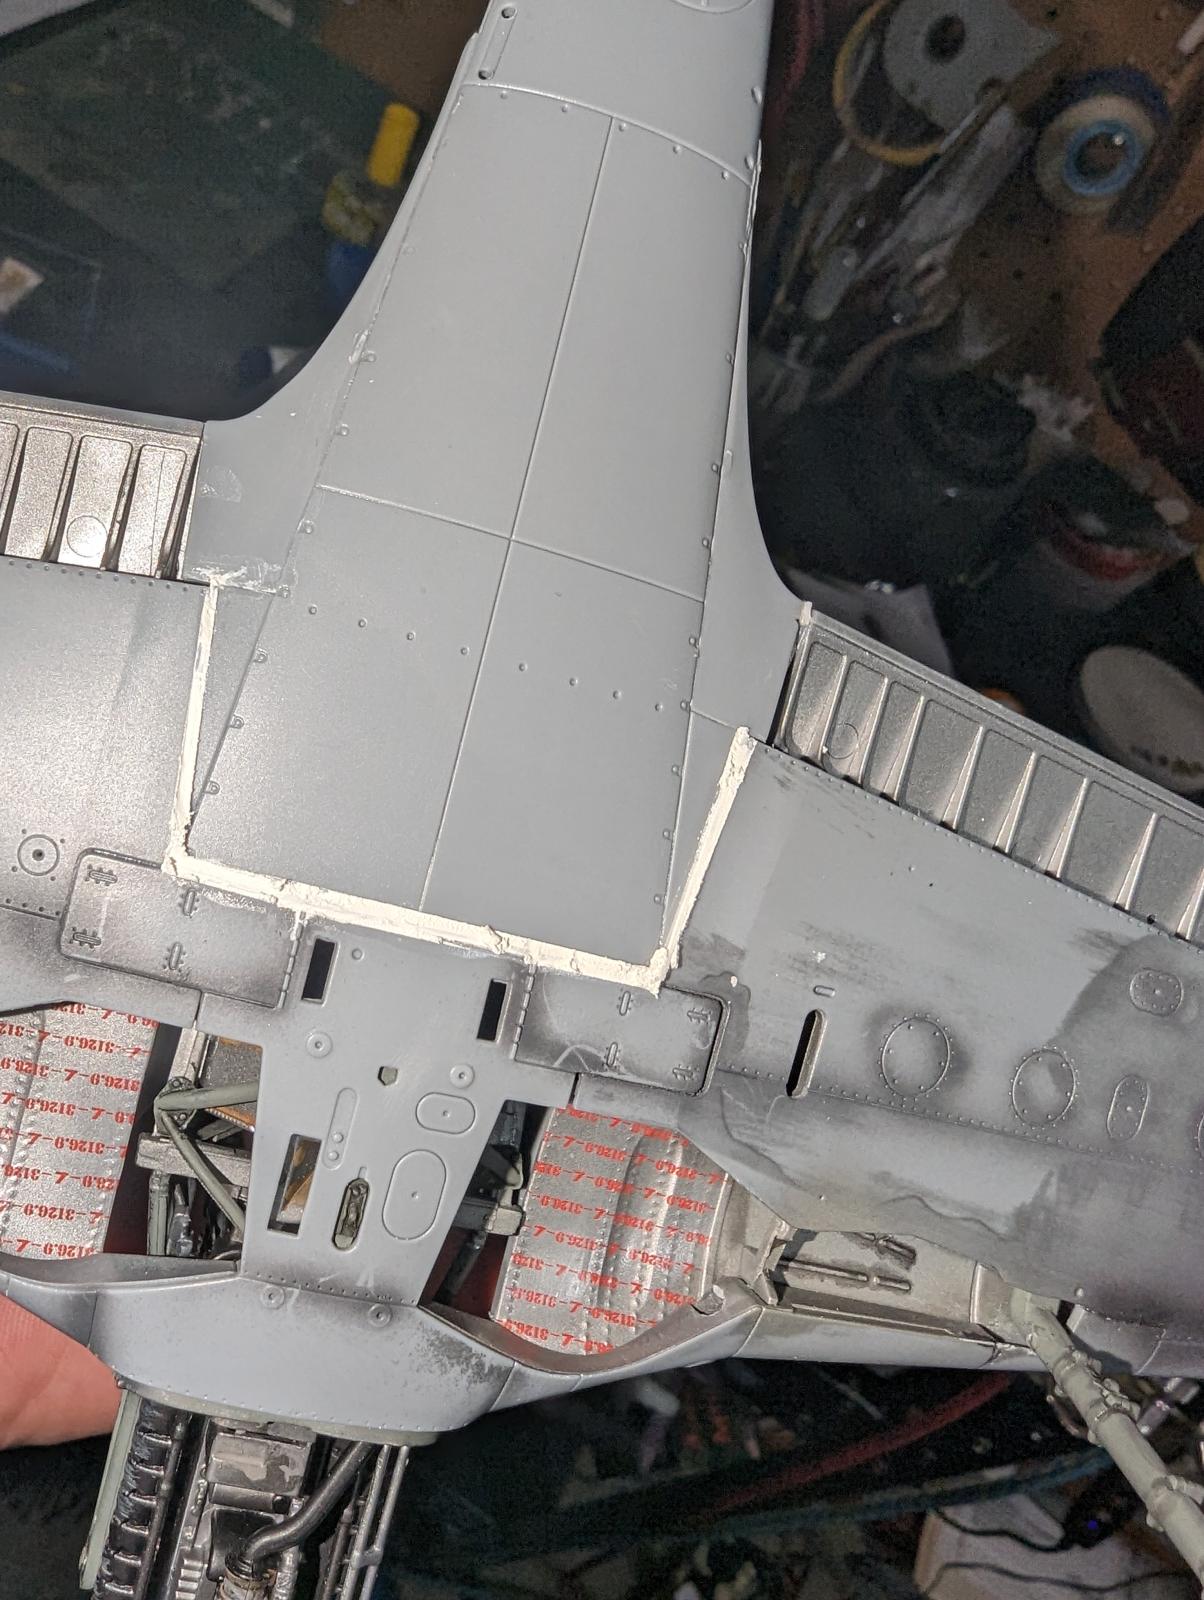
On to the wings... ZM chose an unusual design for the wing, with an internal spar structure to which various panels are attached to create a full-span wing. Given the wingspan and scale, this approach is fine, as the assembled wing is stout with no flexing. The trick is to take your time and have lots of clamps available to eliminate any gaps, and soon enough the wing is complete and ready to offered up to the fuselage.

And that's where the worst part of this kit rears it's really ugly head...be prepared to use styrene shims and MIliput epoxy putty to fill the canyons between the wings and the fuse underside! This is a feature pointed out in many articles so I wasn't too put off by this, just disappointed that a kit this expensive had such poor fit in such a critical area.
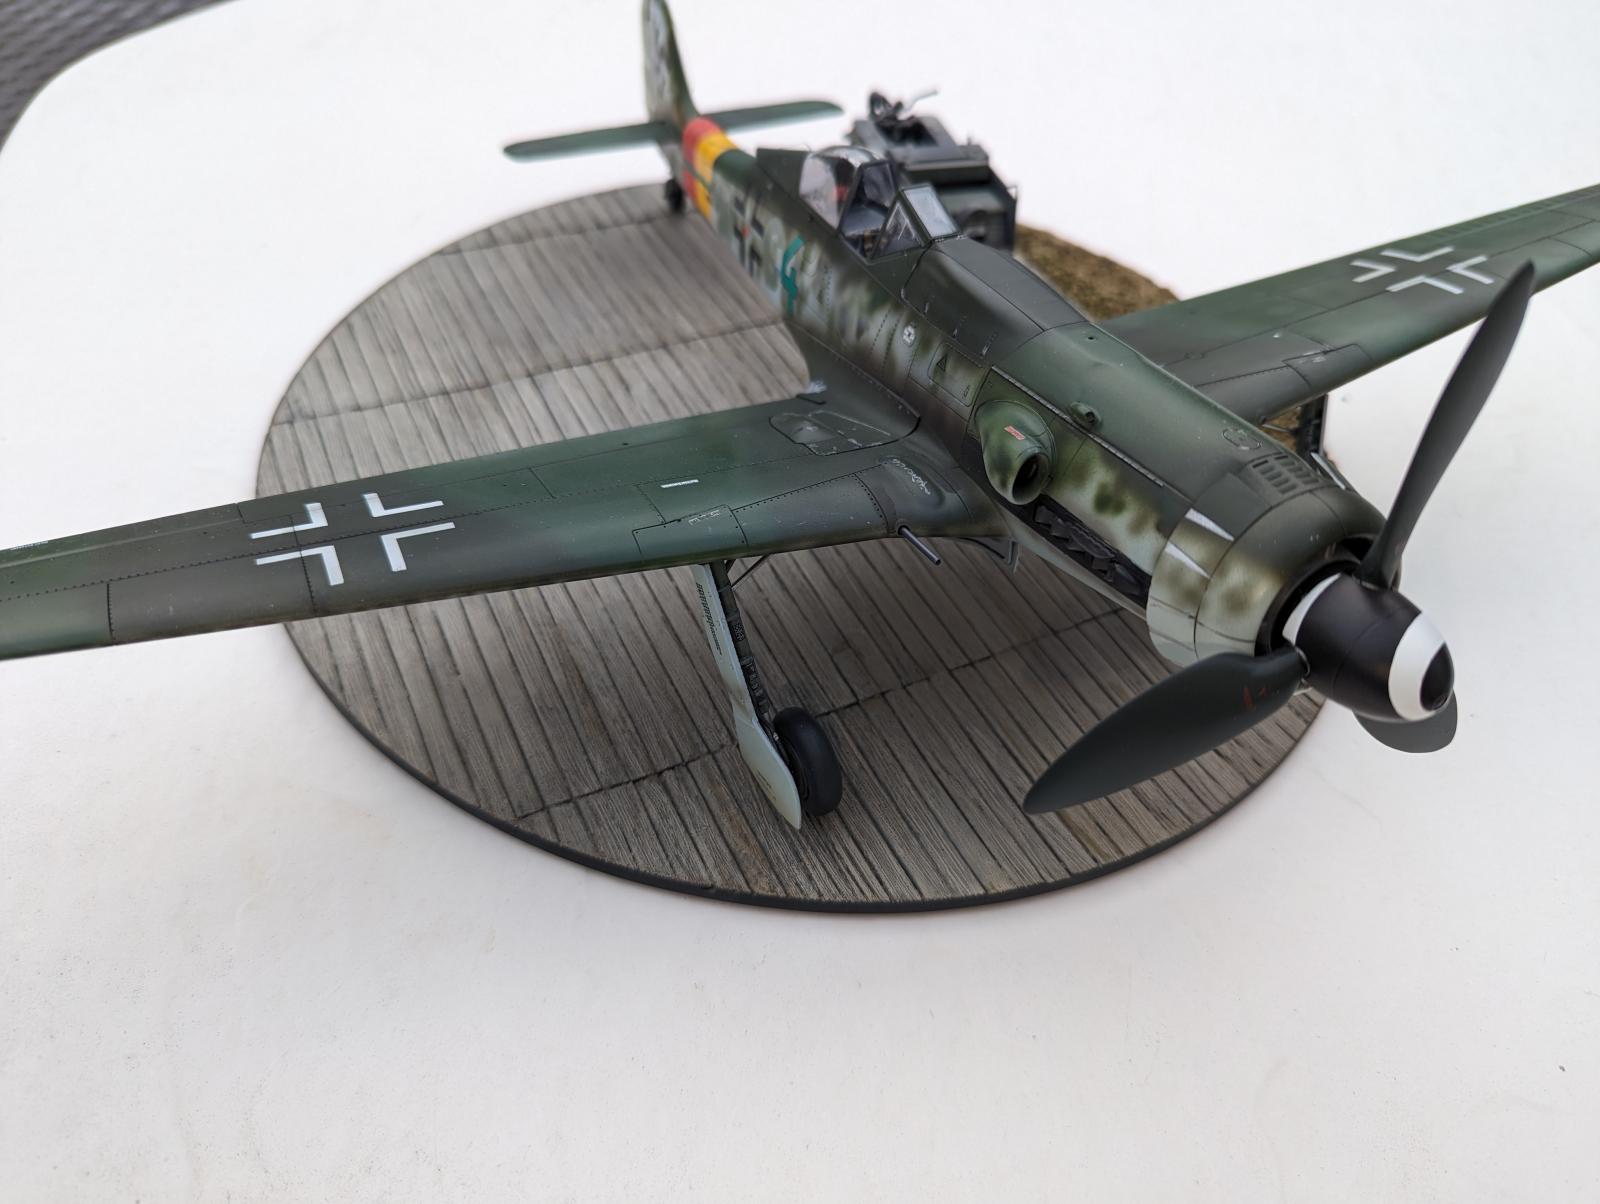
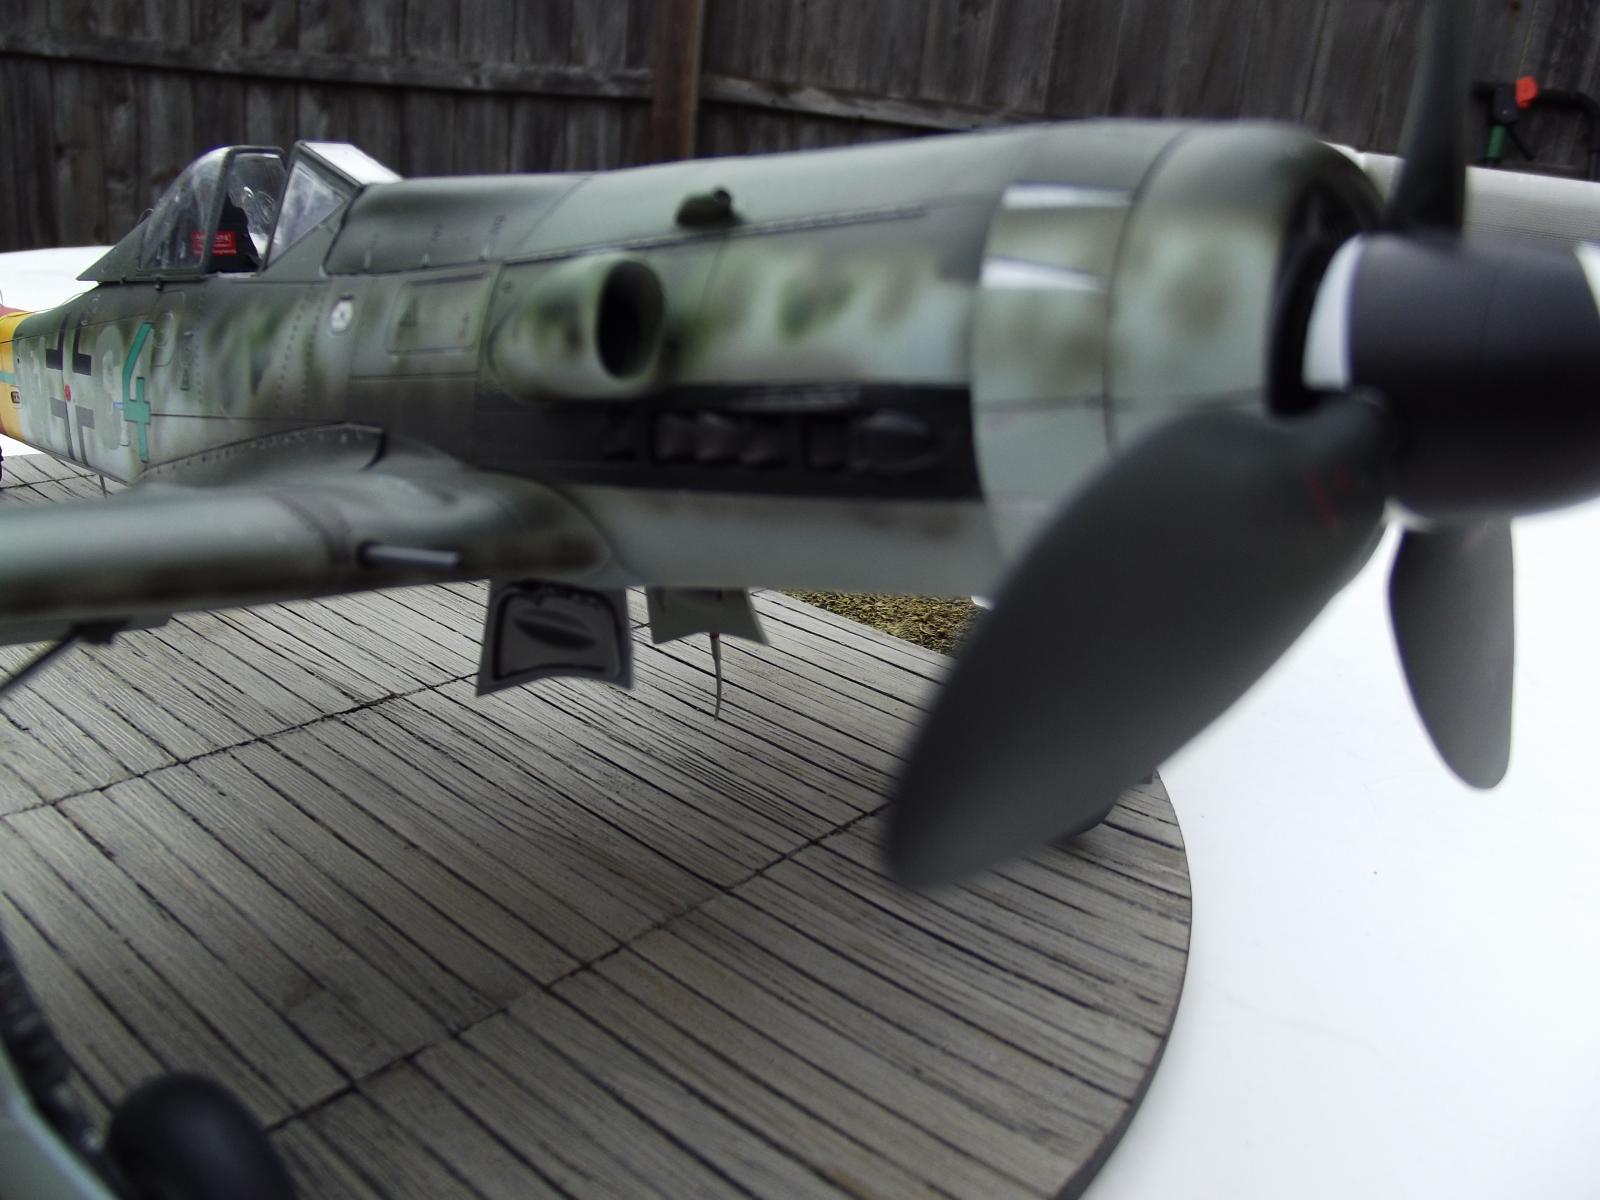
Moving on, I found that the Radiator shroud, part A-30, cements directly to the front of the engine, and if you decide that only one of the engine panels is to be left off, or fully cowled, fit each cowl carefully to the shroud so they seat properly in the grooves in the shroud so the assembly is straight. With this kit, if one part is even slightly kinked or out of place, the whole assembly will be off.
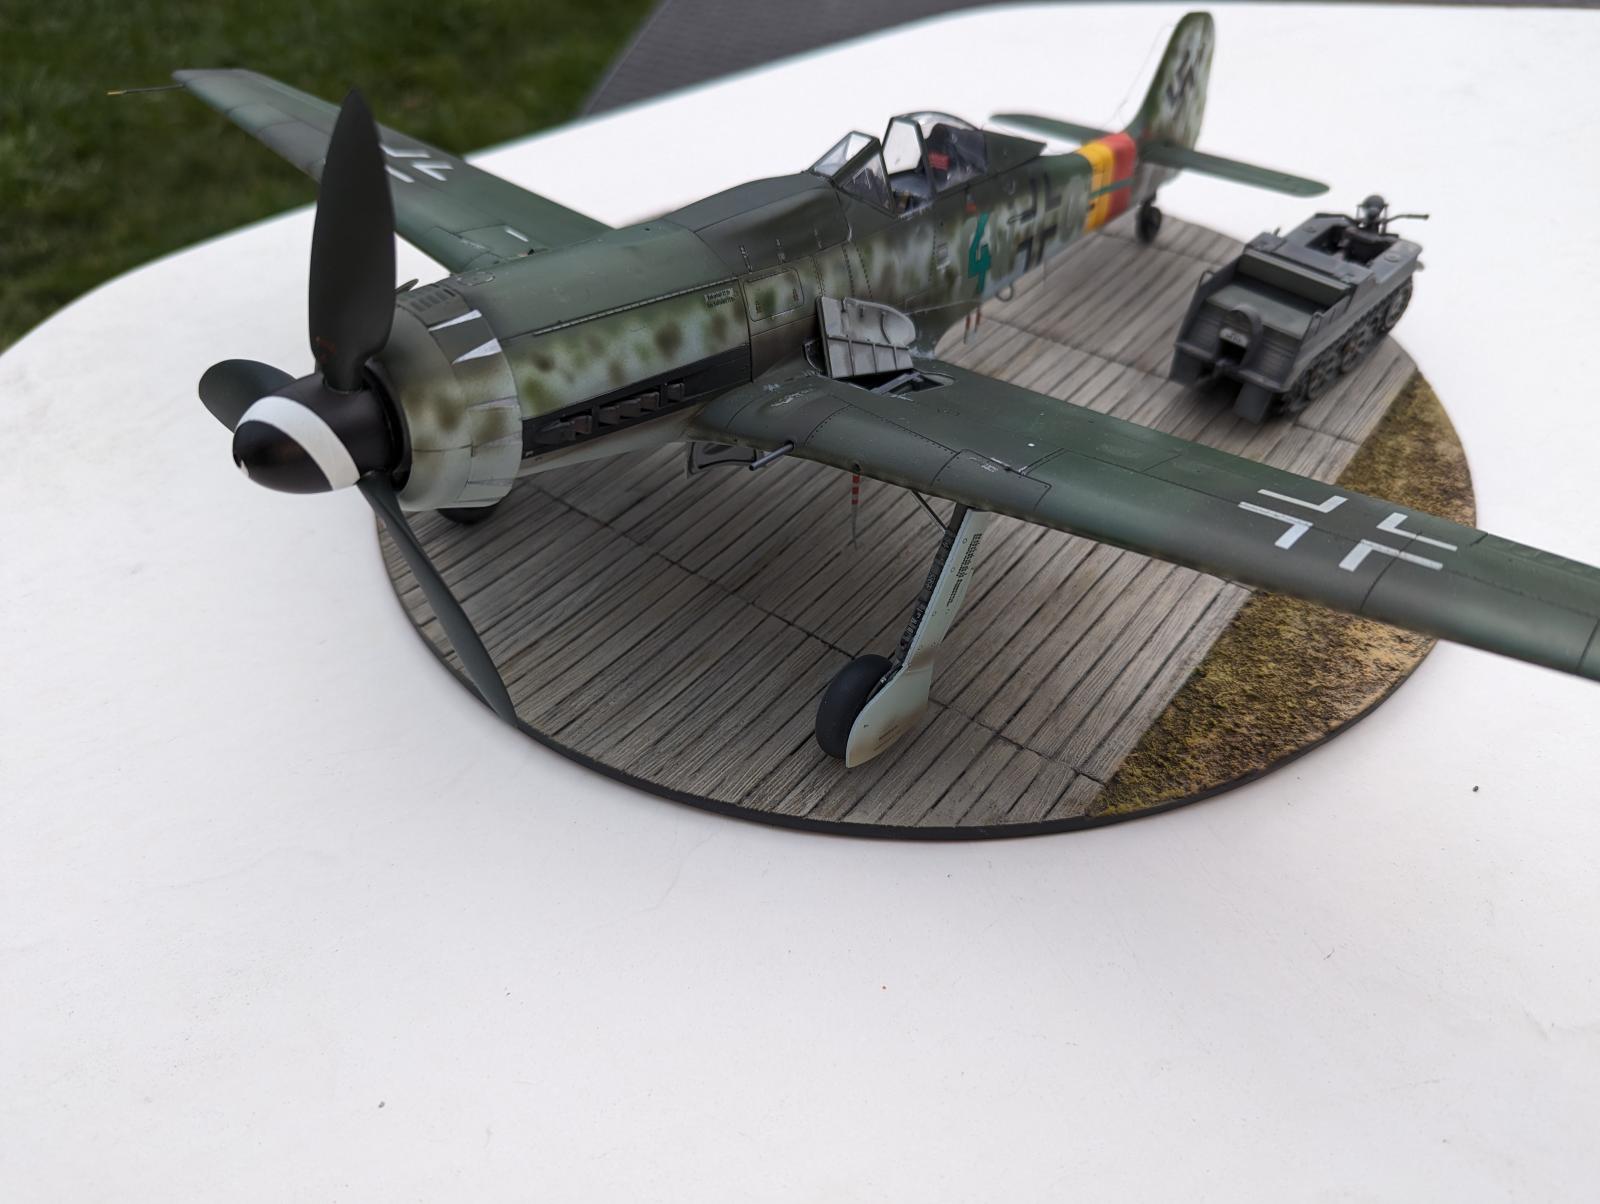
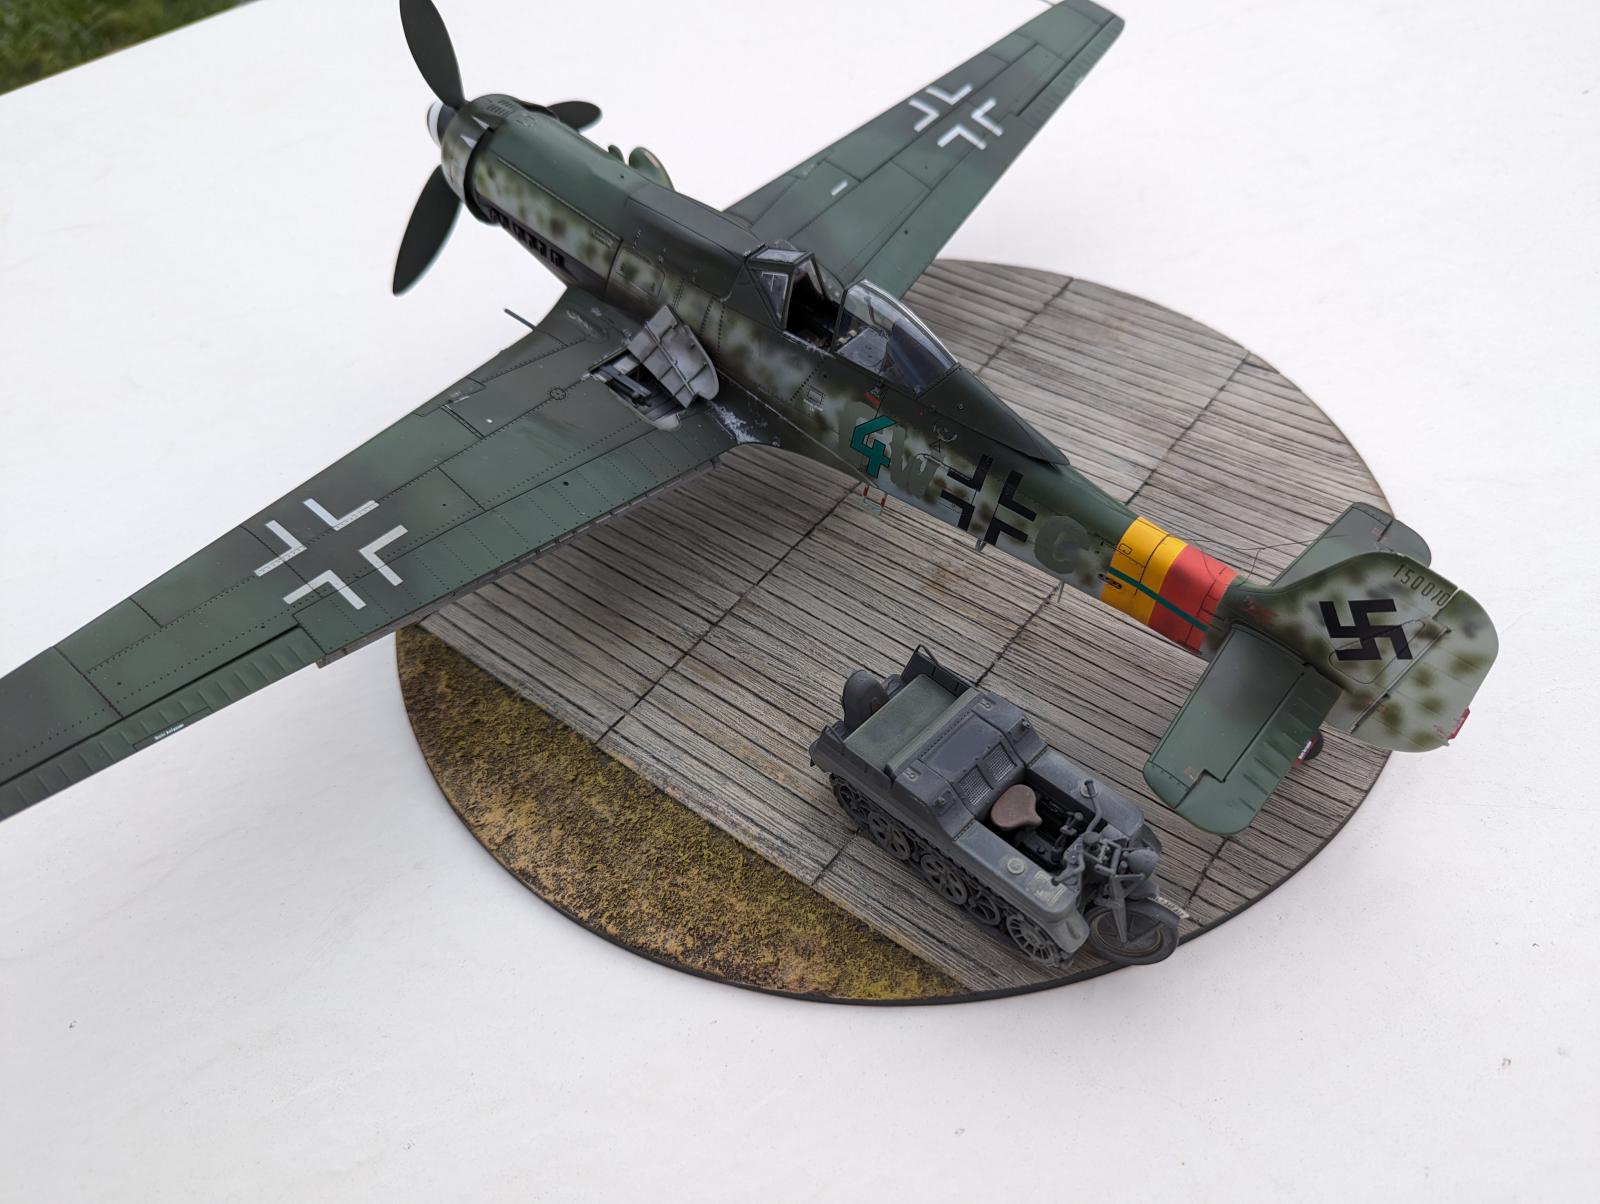
The rest of the kit assembled quite well. I did cut the screen out of the turbine intake, as it was added after the plane's arrival in the US to prevent birds from nesting in it and should not be on an operational plane. Look at any airplane left outdoors or abandoned and you'll see what I mean...
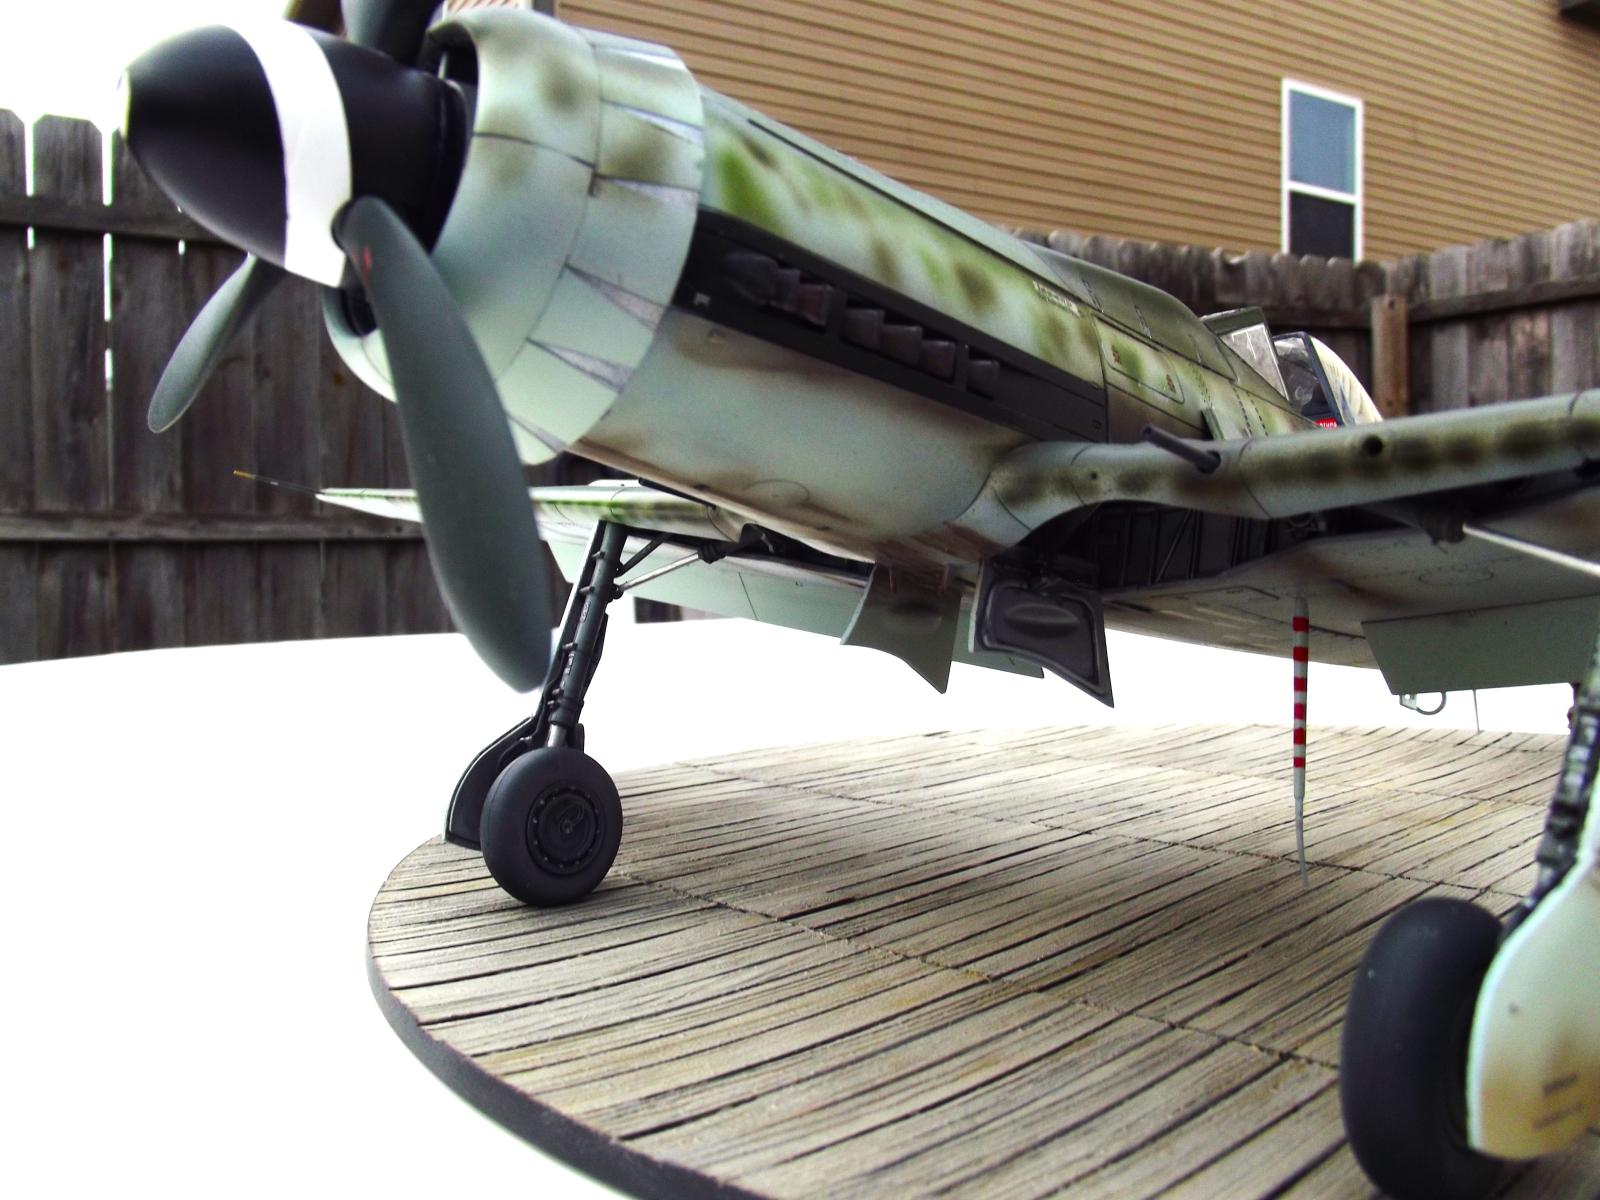
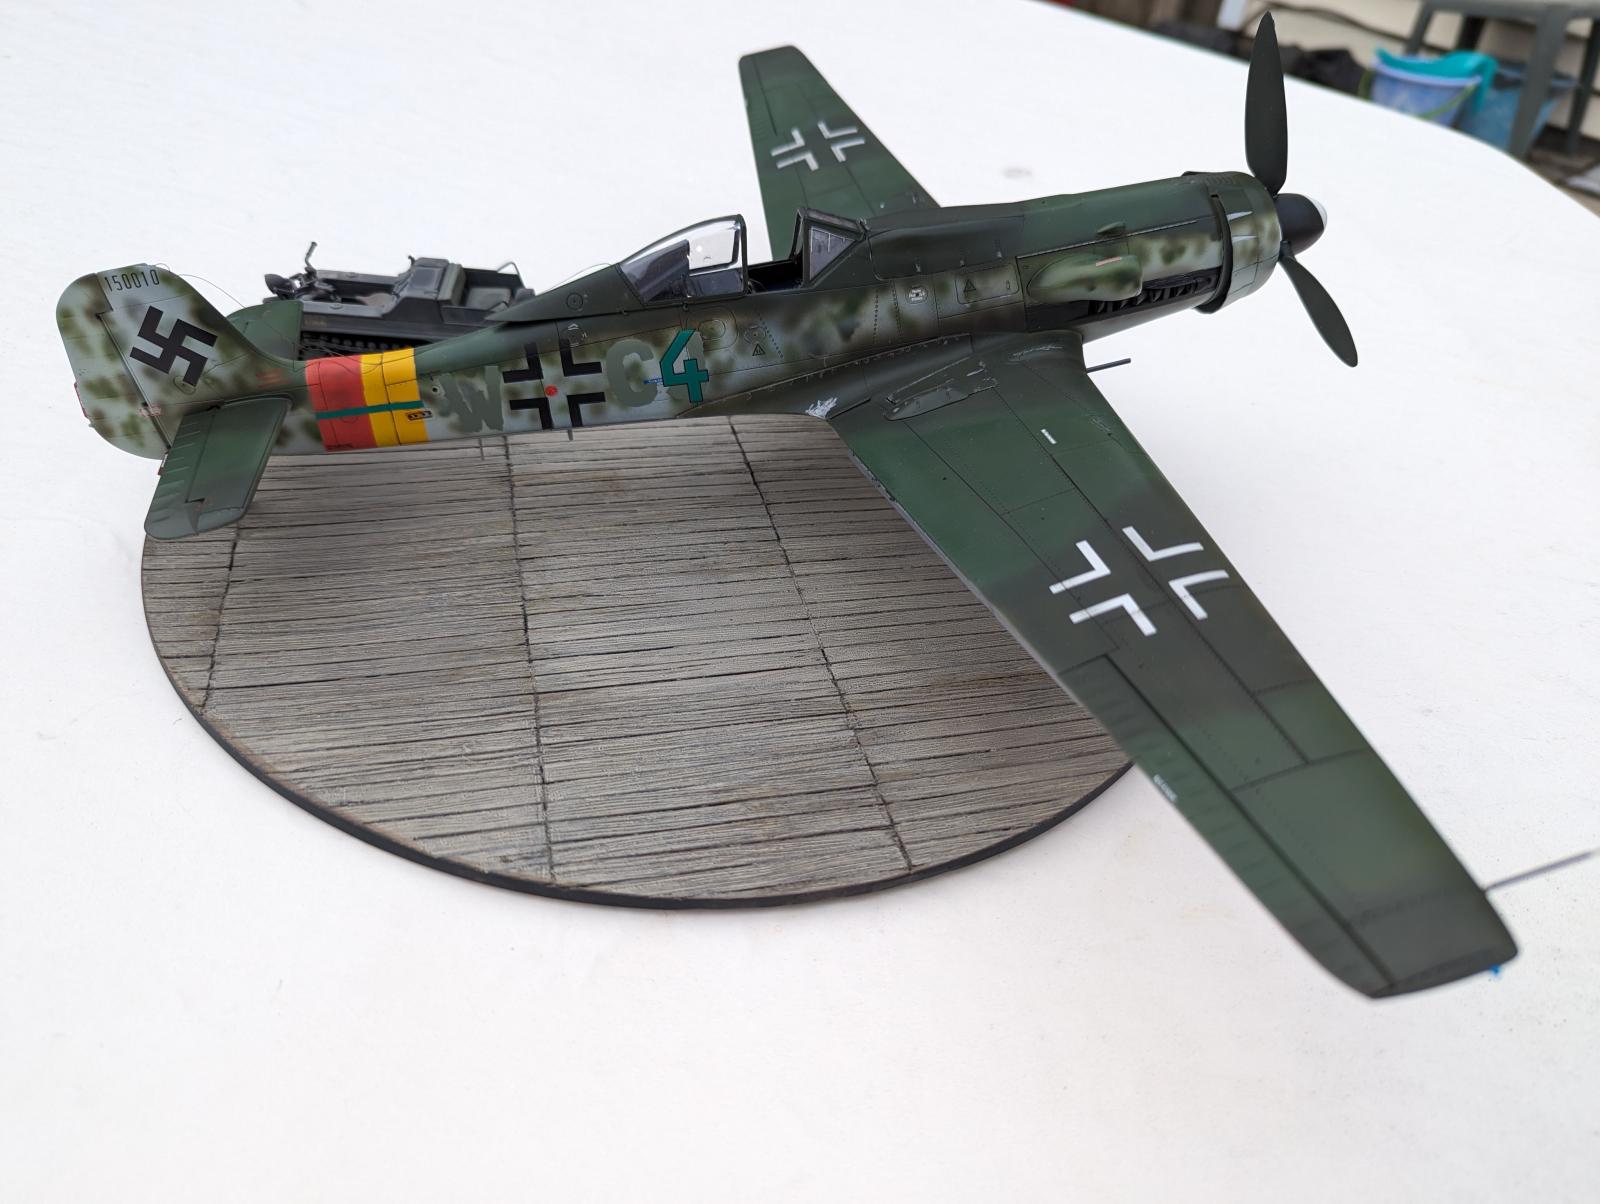
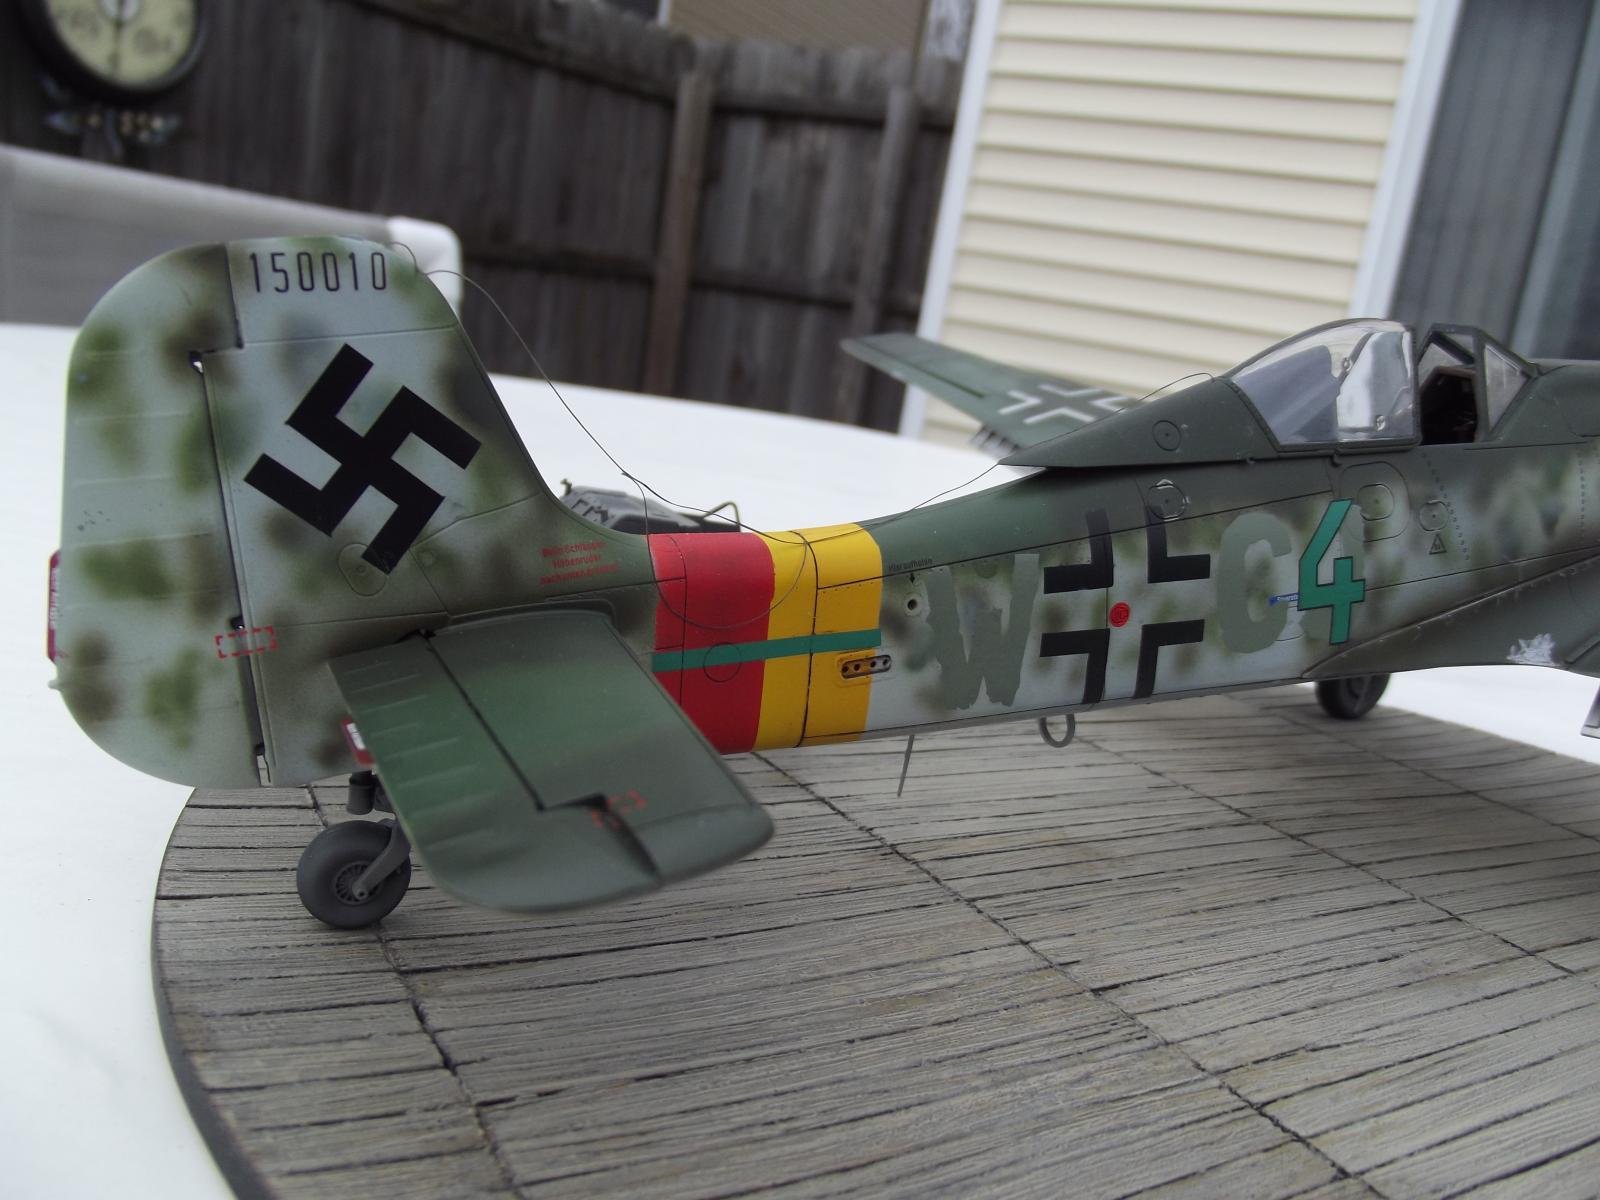
I decided to try and paint my own national marking, so I used a Tamiya 1mm grid tape sheet and carefully marked cut and applied the crosses to the previously painted fuselage and upper and lower wings. I also hand sprayed the Spiralsnauze on the spinner. I have been using AK RealColors RLM colors for my Luftwaffe aircraft for a while now and pretty much swear by them, since the spray great and give a really nice tight finish. I used 2 different RLM 76 colors to simulate parts that came for different factories, and according to my references (Airframe & Miniature #3 The Focke-Wulf Fw-190D and Ta 152, the only real ref you need!) the upper fuse and wing colors were freehand sprayed without masks, which is how I sprayed my bird. I chose the RLM 82/83/76 scheme. As it turns out, AK RC has an 83 color in its lineup the is actually a blue, but I found that they also have two separate RLM81 colors, and 81 version 2 is actually Dark Green, so I used it with the 82 Bright green and couldn't be happier with the result. I also painted the red/yellow Jg301 Geschwader bands, mixing the red to match the orange hue as close as I could get. The rest of the kit went together rapidly, although as I was curious about the 'ease" of adding the main gear to the wing, I found I had to kind of wrestle with the position of the cams that fit into the wing spar. I tried that right after the wing was assembled and after a little finagling they went right in and snapped in place...and once they are in place, they Ain't coming out!
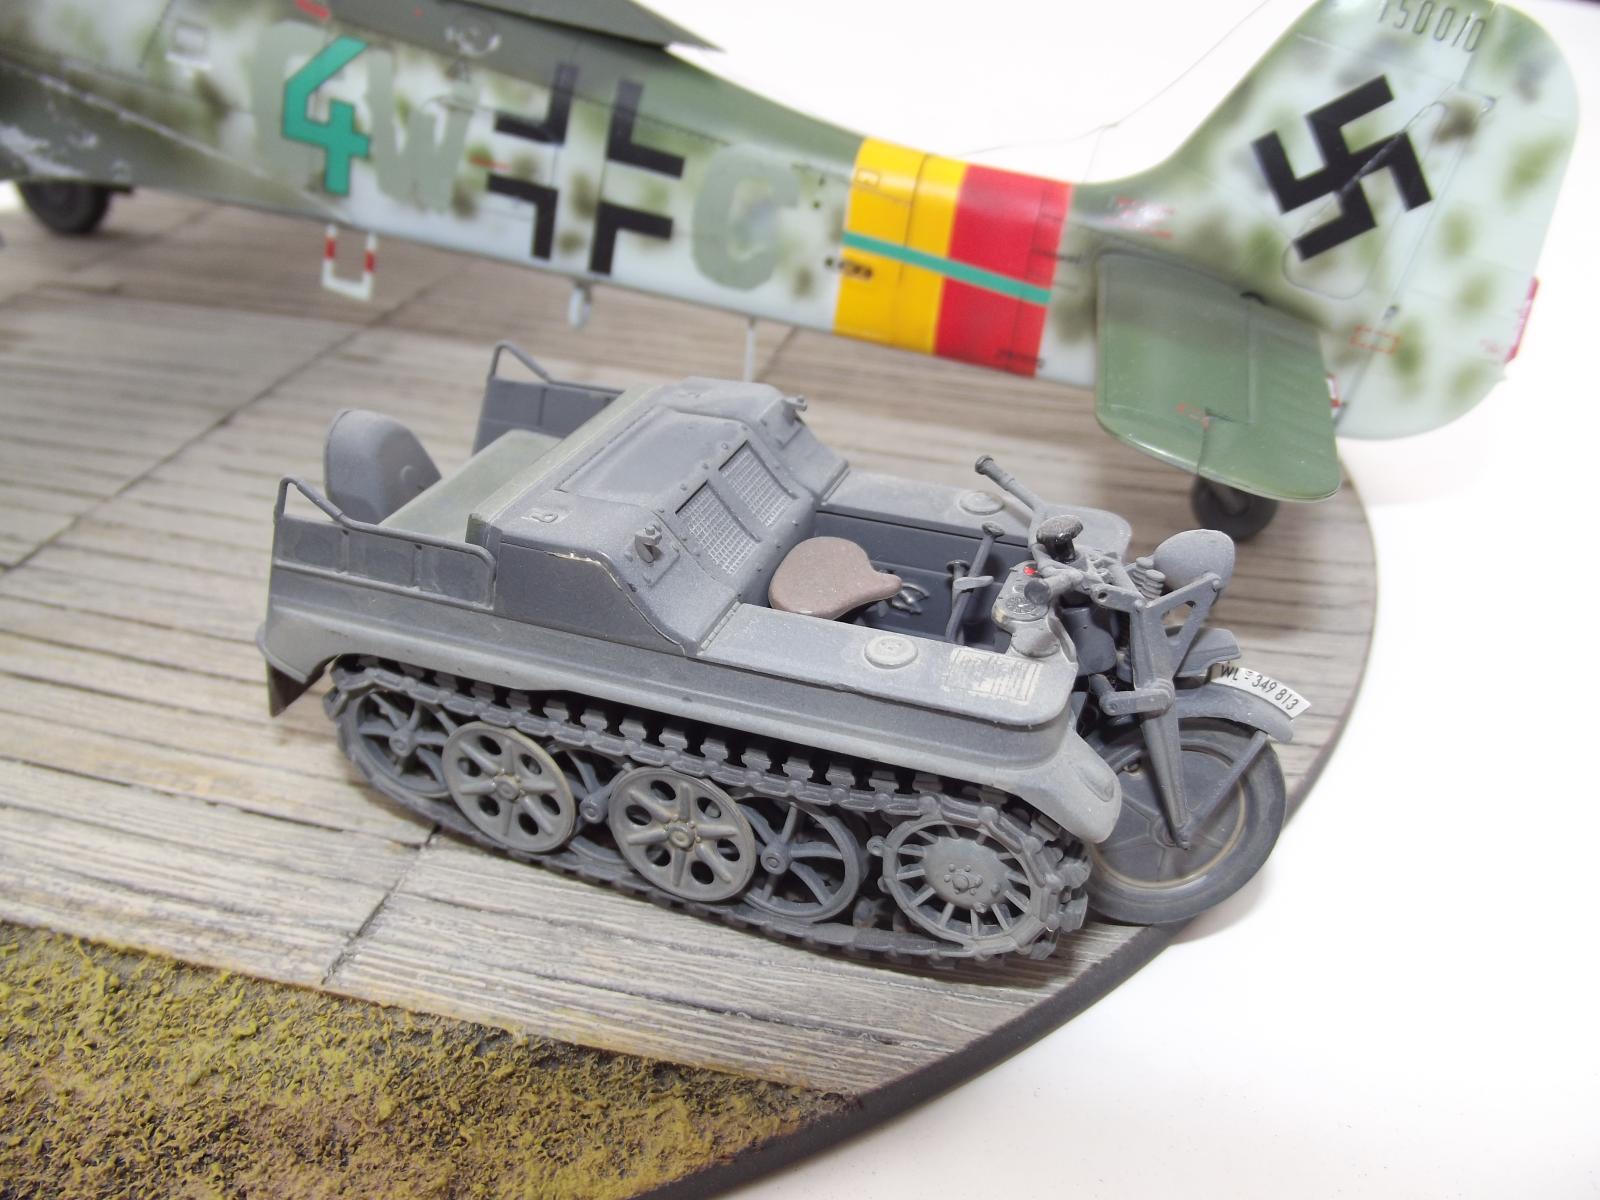
I used the EagleCals #134 Ta152H set to represent "Green 4", from 11./Jg301 with its prominent Stammkenzeichen CW+CJ painted out on each side of the fuselage and flown by Willi Reshke. This is the plane that was brought to the US after the war.
Overall this was a very enjoyable build and I know have it prominently displayed in my growing 1/32 Luftwaffe collection.

A real beauty! Well done!
THanx so much!
You did a marvelous job bringing this one together. @jebenite1
Excellent result, Juan @jebenite1
Presented with a nice to read article as well.
Happy New Year
Wonderful job on the good but challenging at areas Z-M kit, Juan! You tackled all the kit's idiosyncrasies in an excellent manner! Great writeup, too, very informative.
Congratulations!
G’day Juan (jebenite1),
The Ta-152H is my favourite aircraft and I built the 1/48 Dragon back in ‘92. It was my 2nd 1/48 aircraft and helped convert me from building 1/72.
Your build is well worth the perserverence
Awesome!
Excellent construction of an all time classic but also demanding kit . Very good and informative text as well , plus fine photos .
Nice one, Juan. You have done a magnificent job on this Ta-152. The paint is especially good.
Happy New Year!
You did a great job on that kit, the finish looks very realistic. Thanks for sharing.
Superb modelling Juan. Great subtle finish. Must say AK RC are my go to paints. Think they give a great finish 👍
They absolutely do! I was hooked the very first time I used them, although every once in a while I find they sometimes peel off if I'm not care on my surface prep before spraying or masking.
Excellent build! Another example of "too few. too late" for the Luftwaffe.
Outstanding Juan, really nice. The ZM kits can be tricky because of the way they go together, but if you want to know the intament workings of the particular aircraft your building, the ZM kits are the way to go. You gave the best advice when said to take your time and fit everything carefully! Beautiful work my friend, great build!
Nicely done Juan, and a great explanation of how to build this kit with the least amount of trouble. She looks great.
Thanx to all for the comments, I neglected to mention that the Kettenkrad and the base the plane sits on are also from Z-M!
This really was a fun build, just requires some careful study and fitting before commiting the glue and paint. I have the 1/48 version from Z-M as well and have read some not so nice reviews of the build, so I shall charge Undaunted into that one as well!
A great example of the almost limitless variations of colors and schemes in German aircraft. Really make them fun to research and plan. Excellent result here.
Beautiful work, Juan @jebenite1! 👏