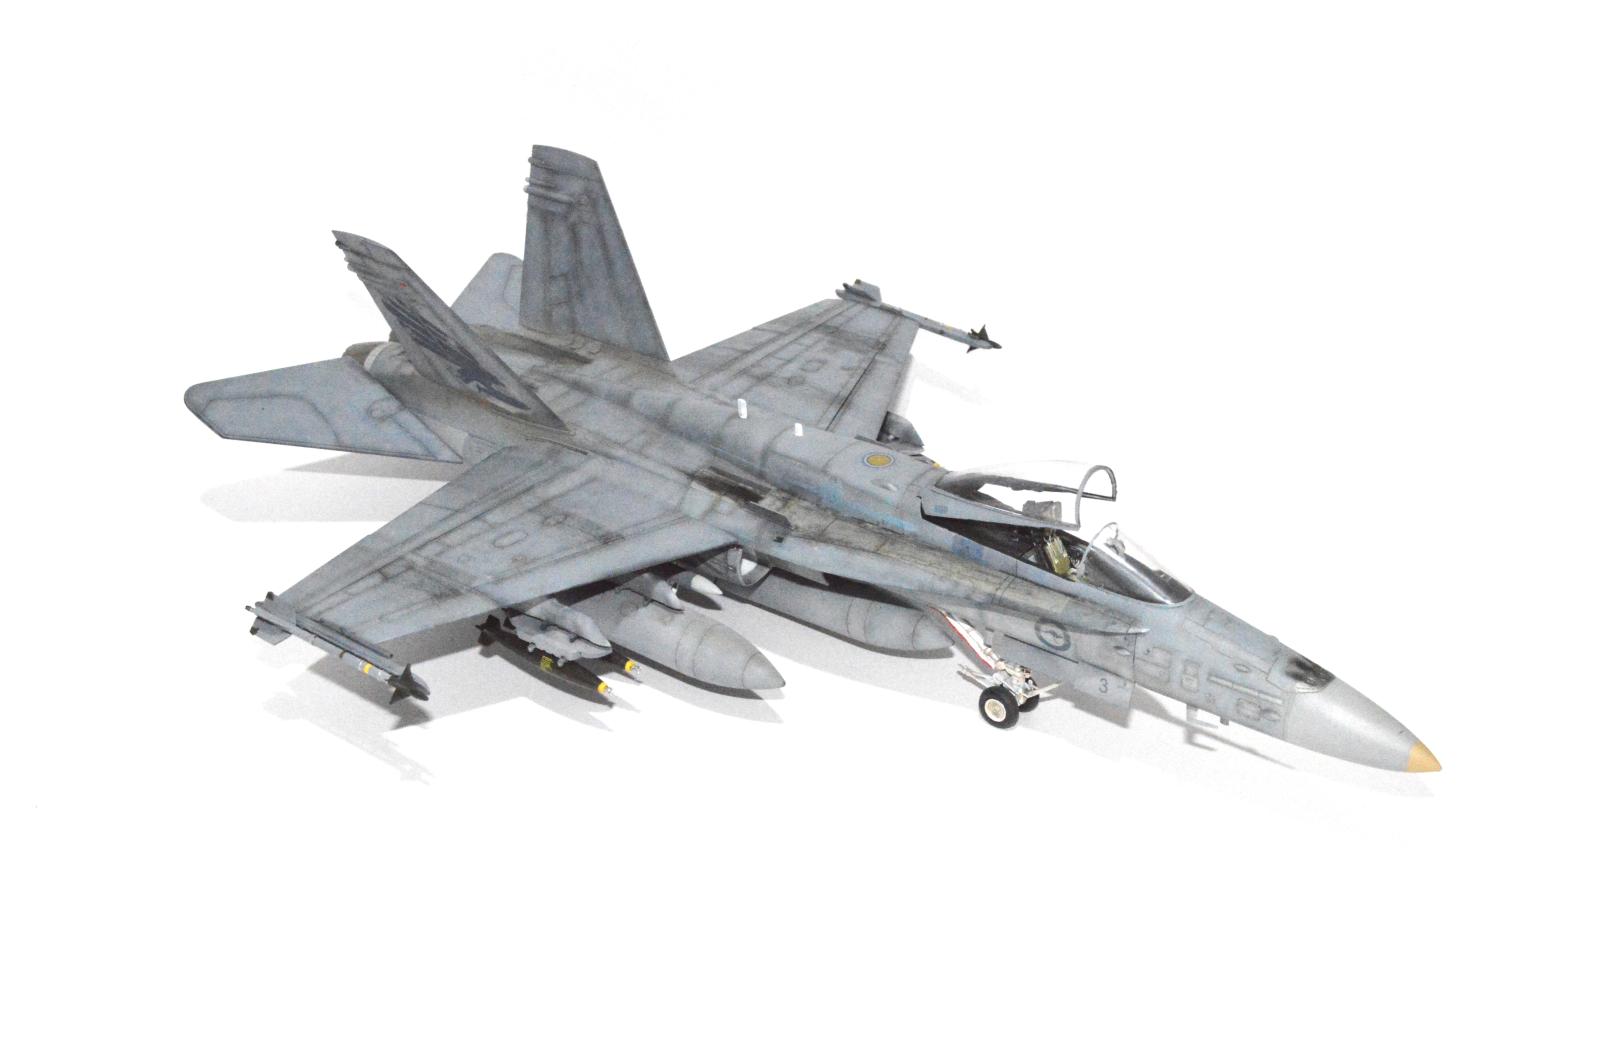
RAAF F/A-18C Hornet (HobbyBoss)
With great pride I'd like to show you my first jet fighter model since childhood 😀
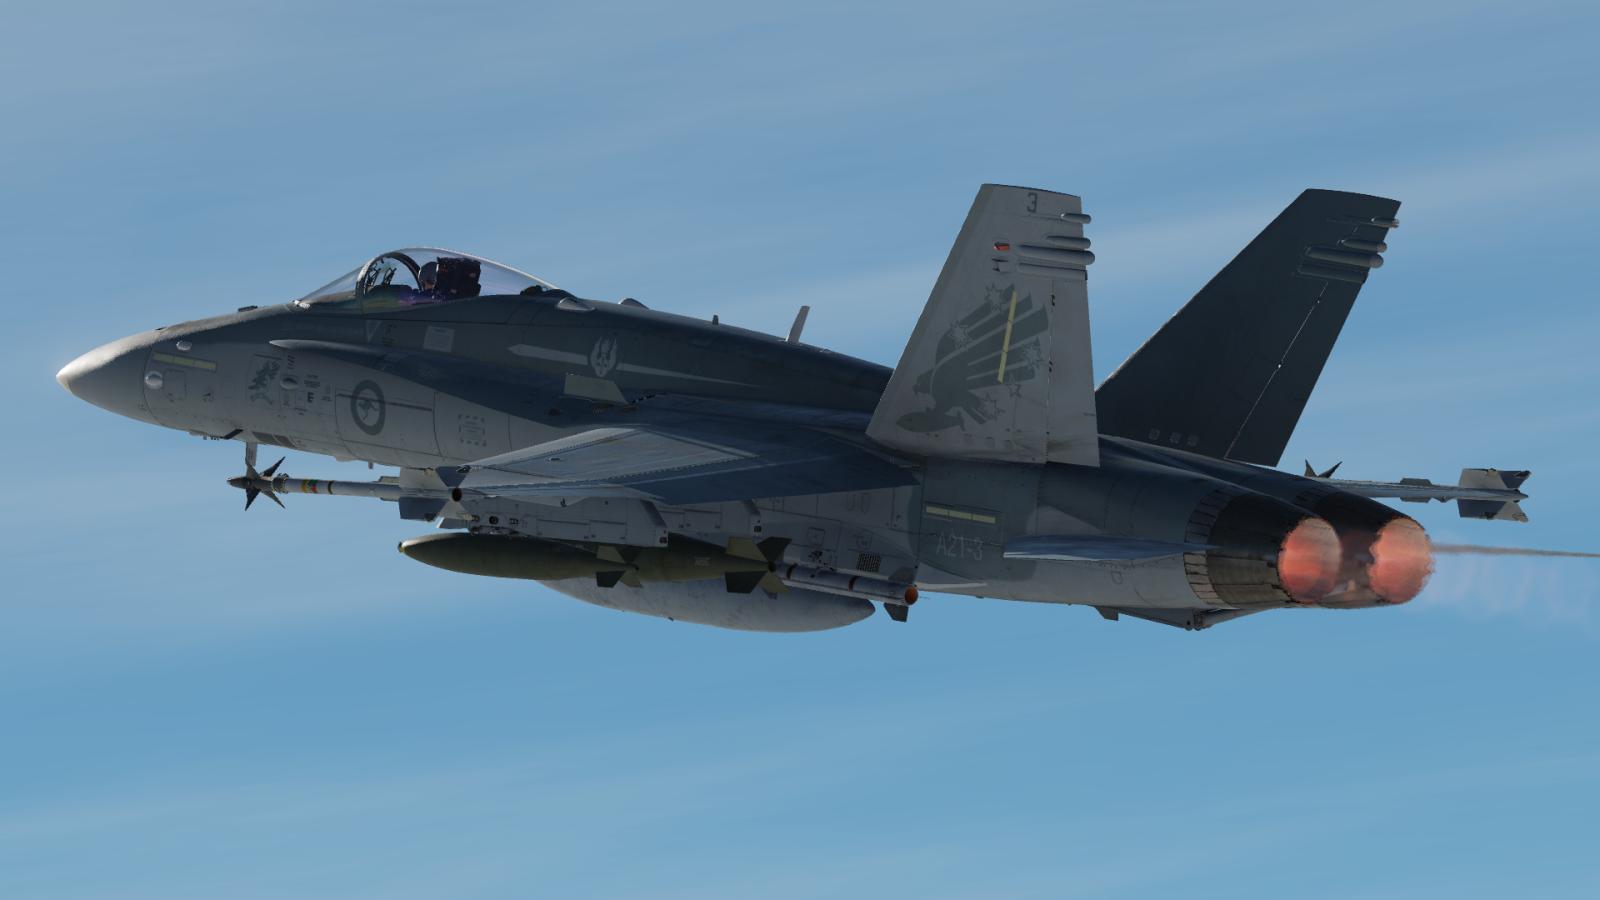
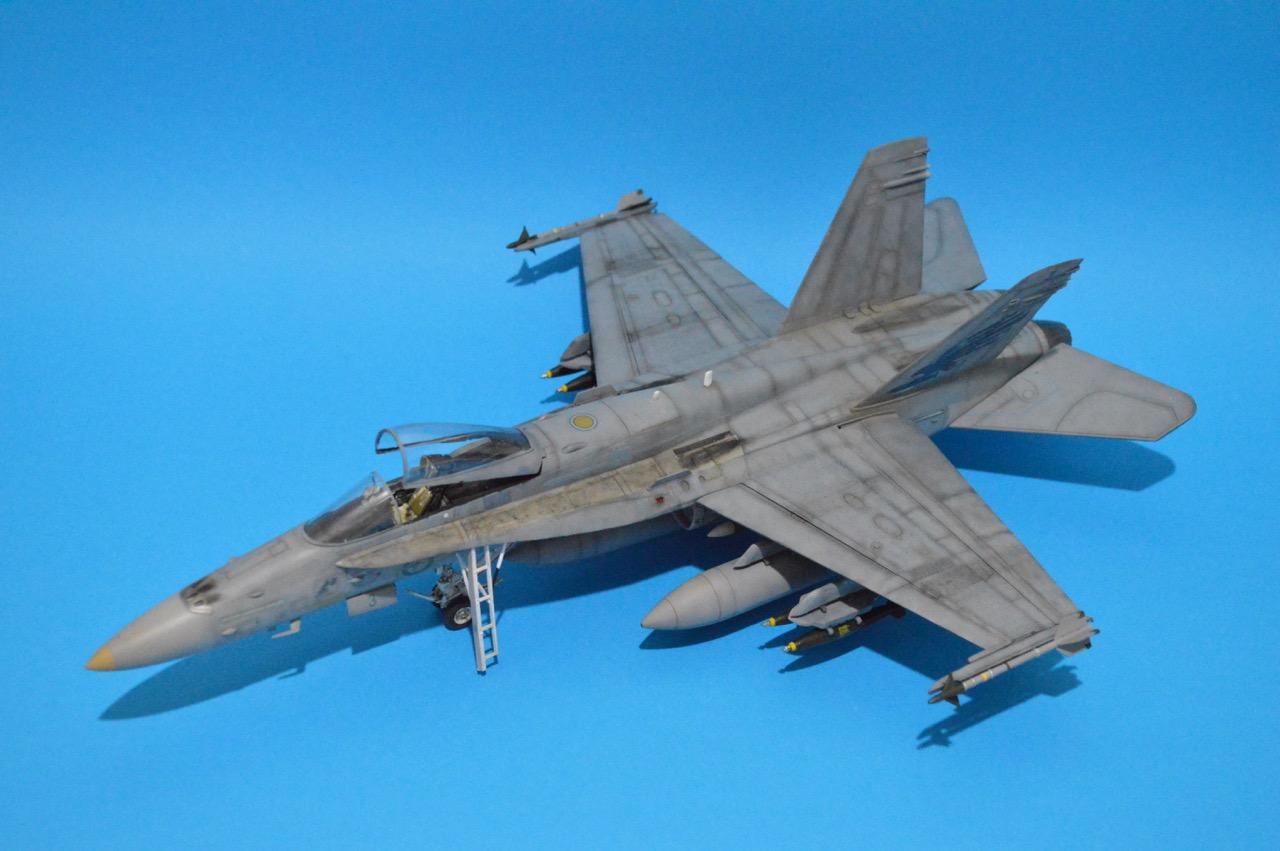
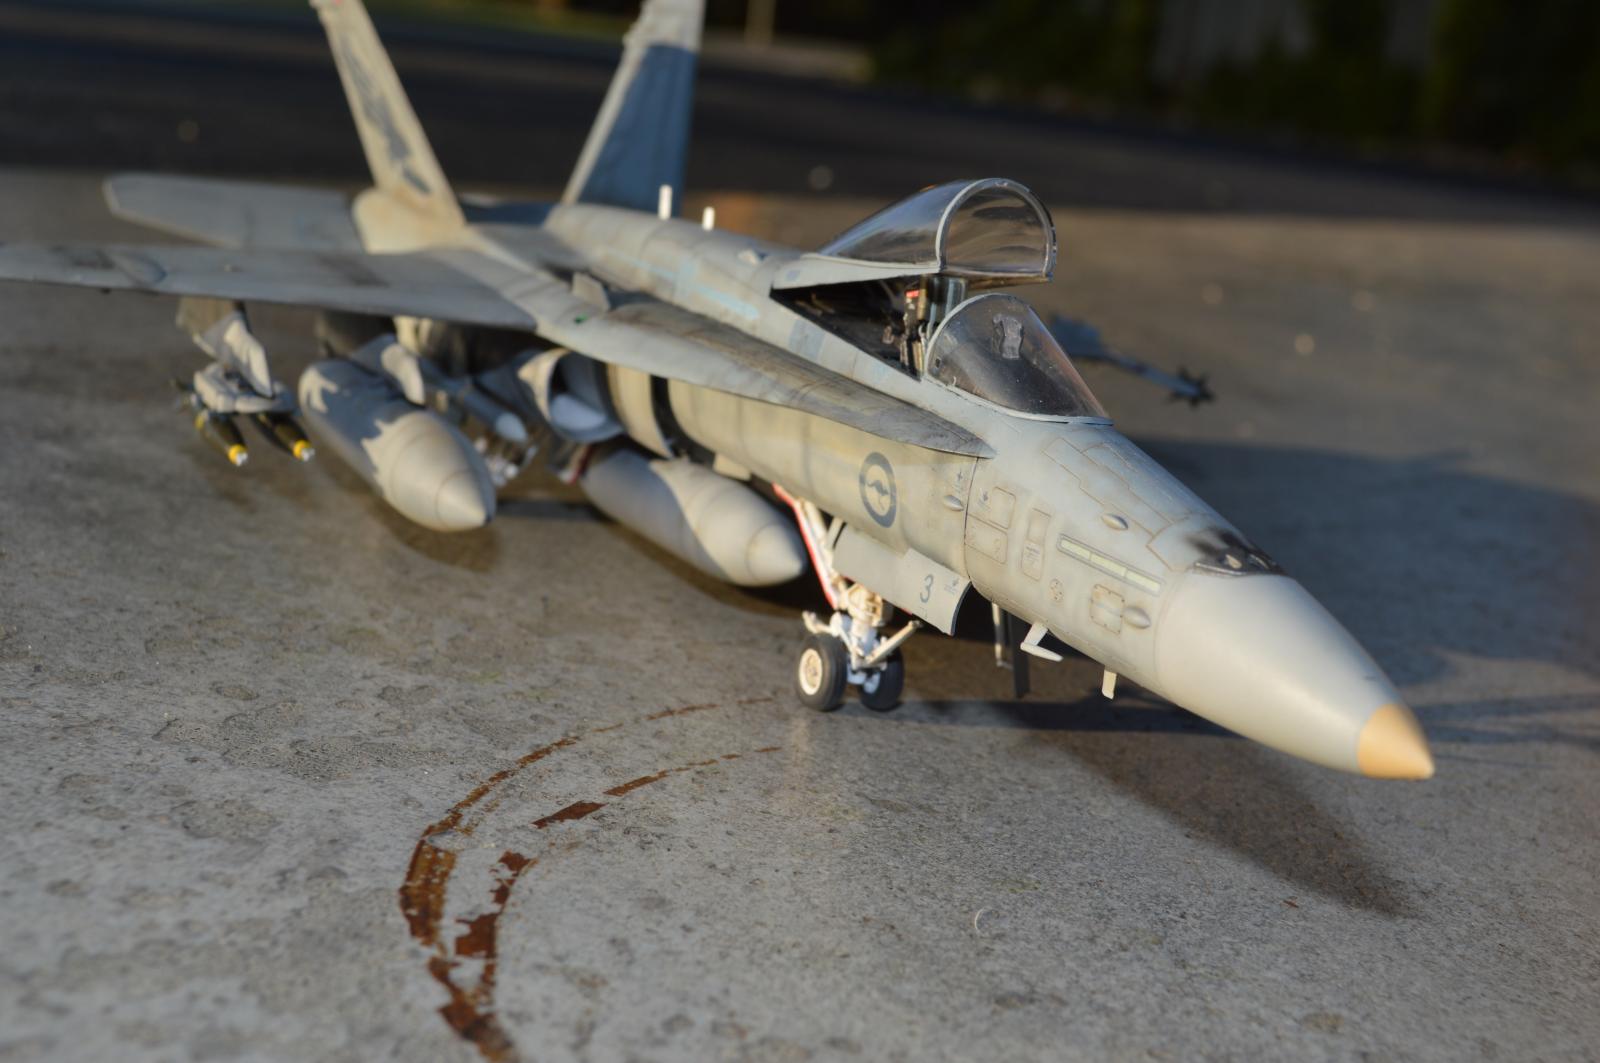
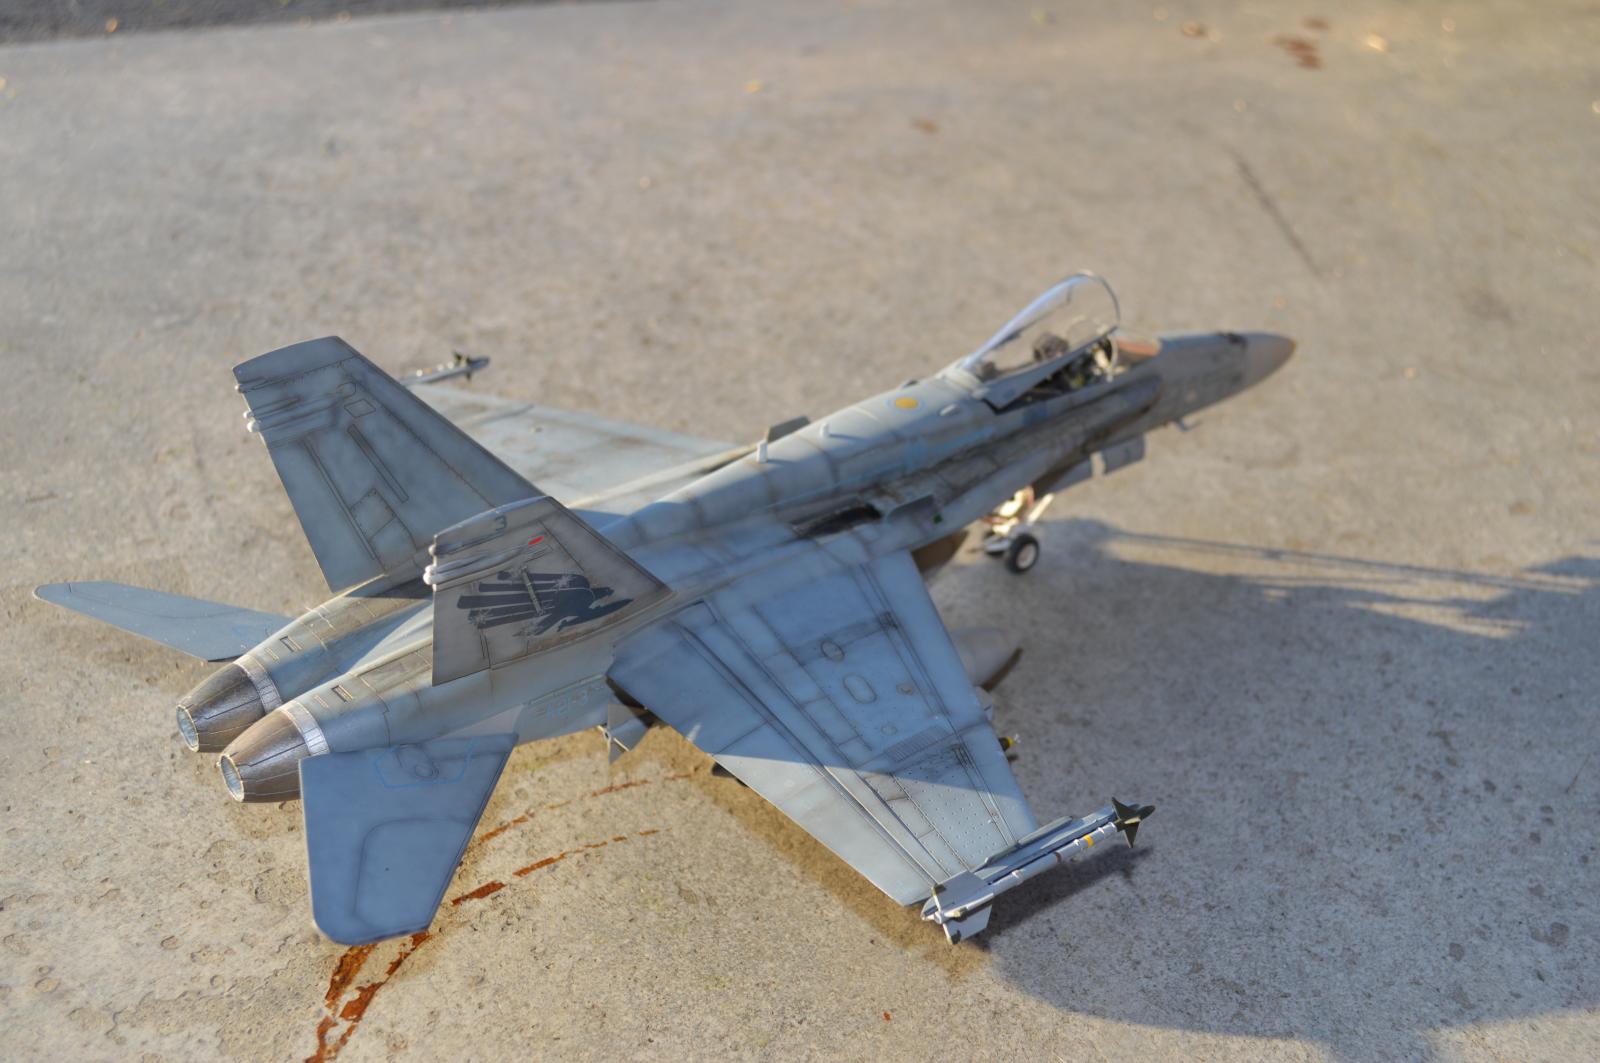
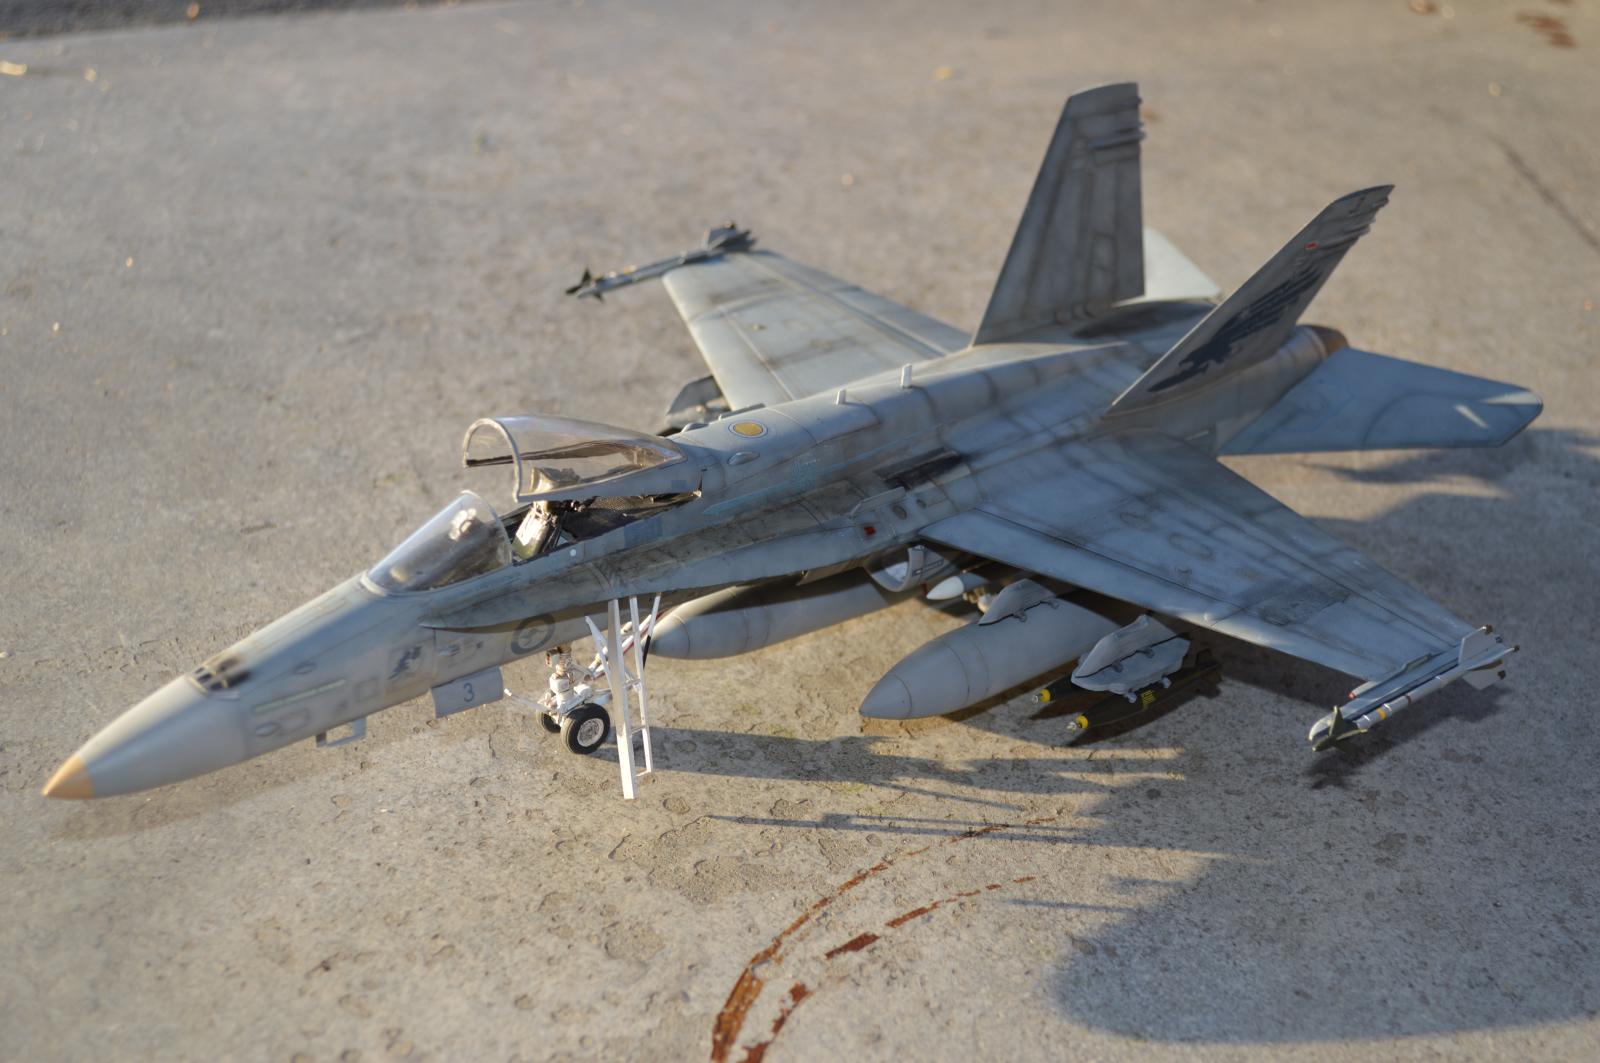
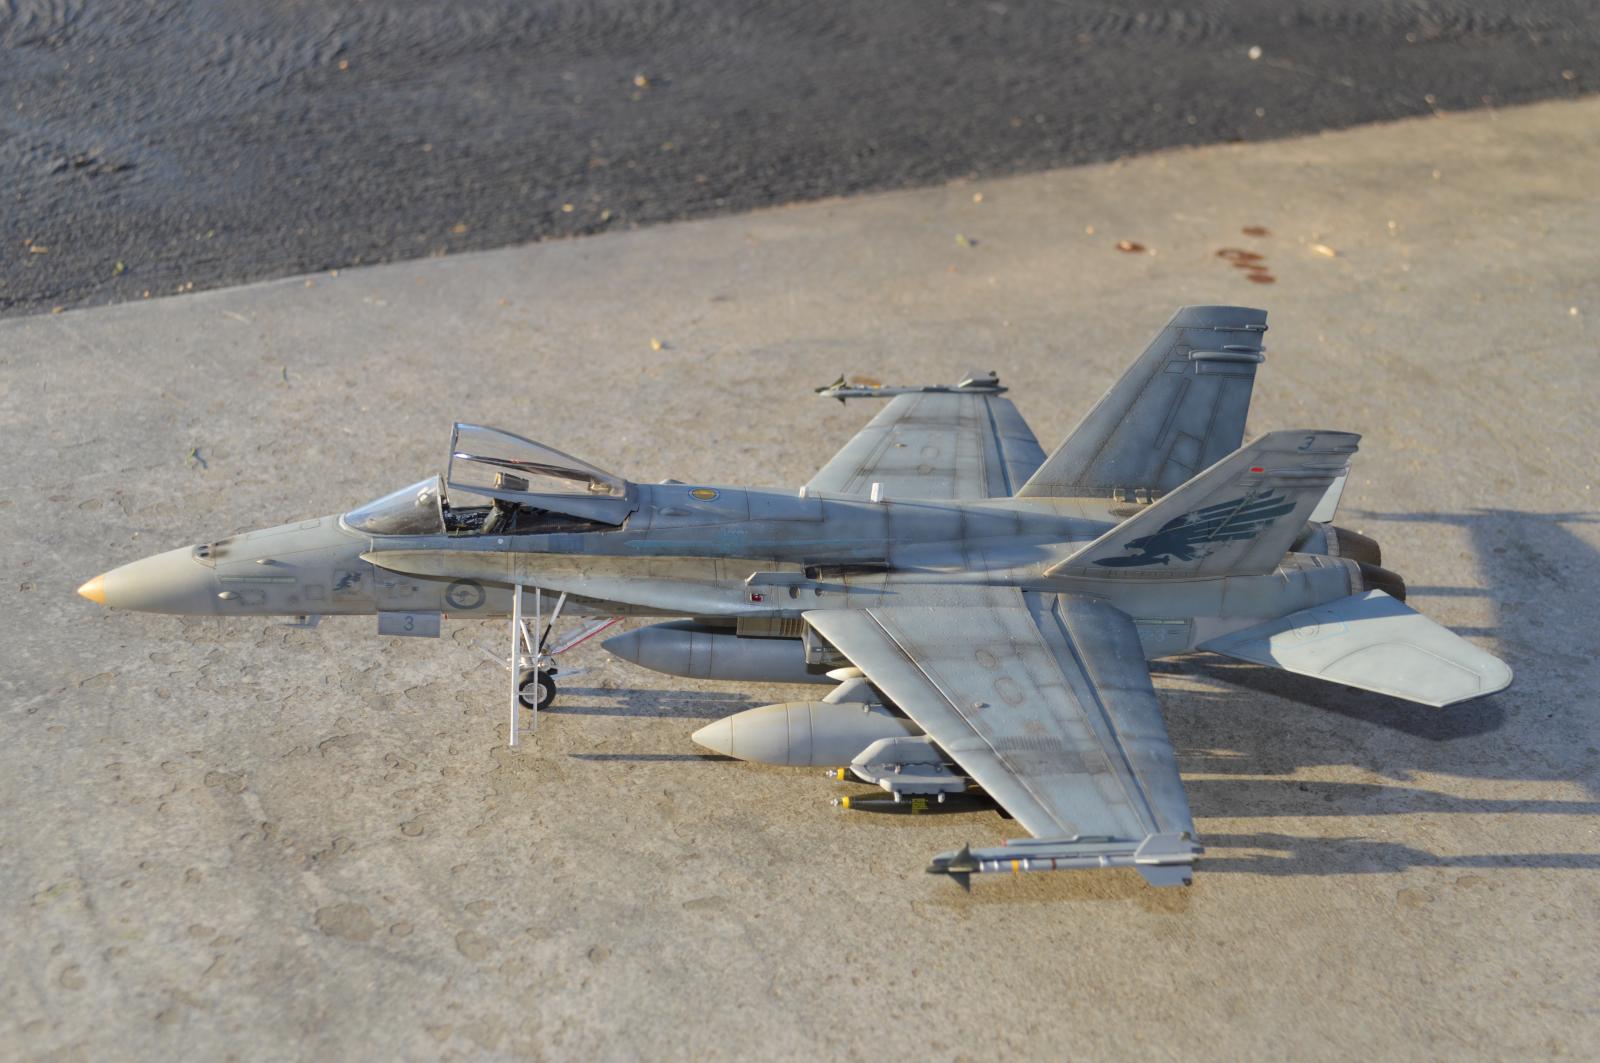
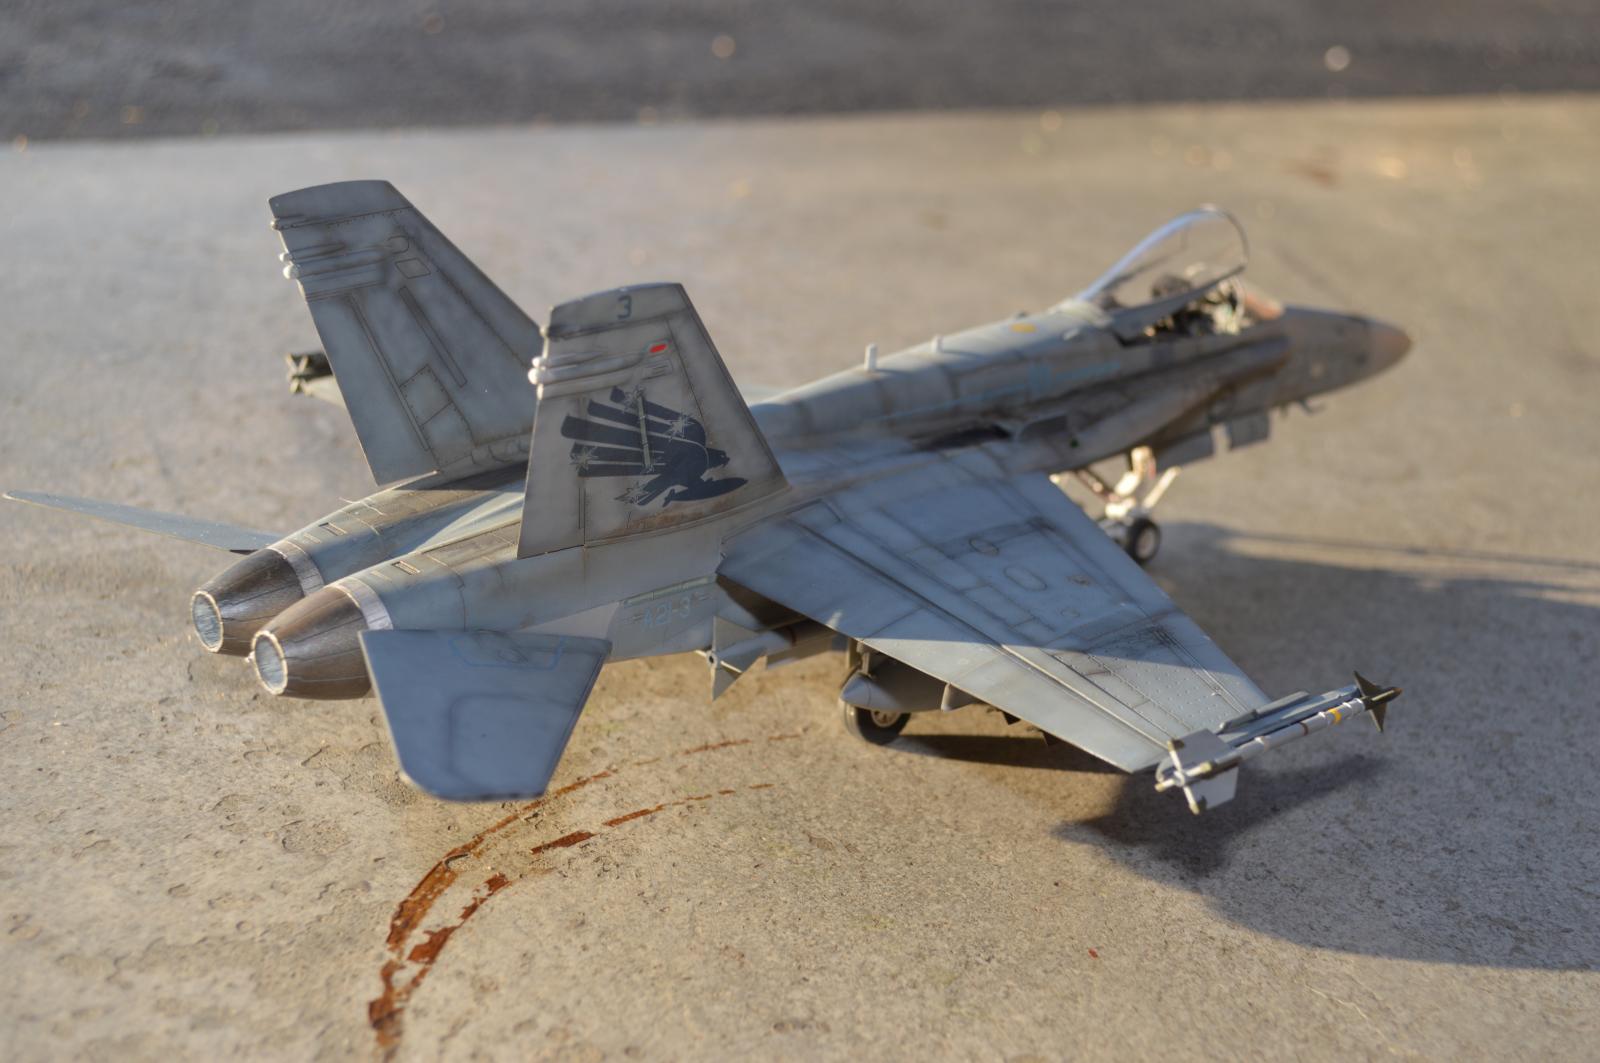
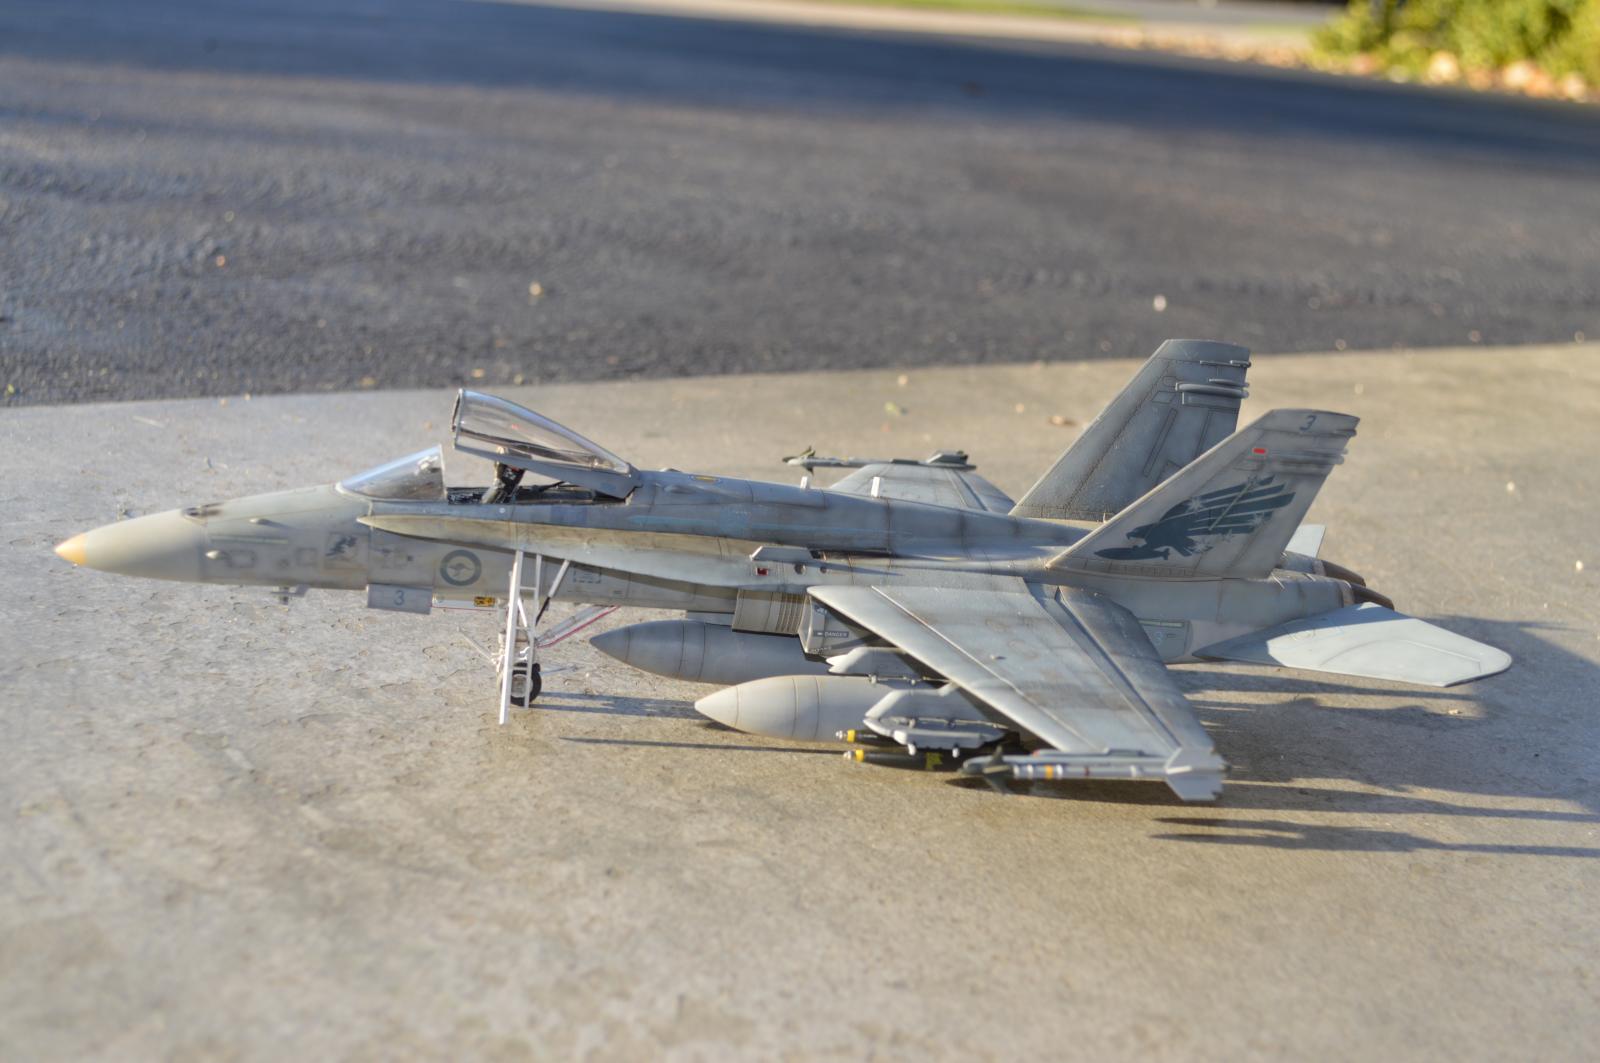
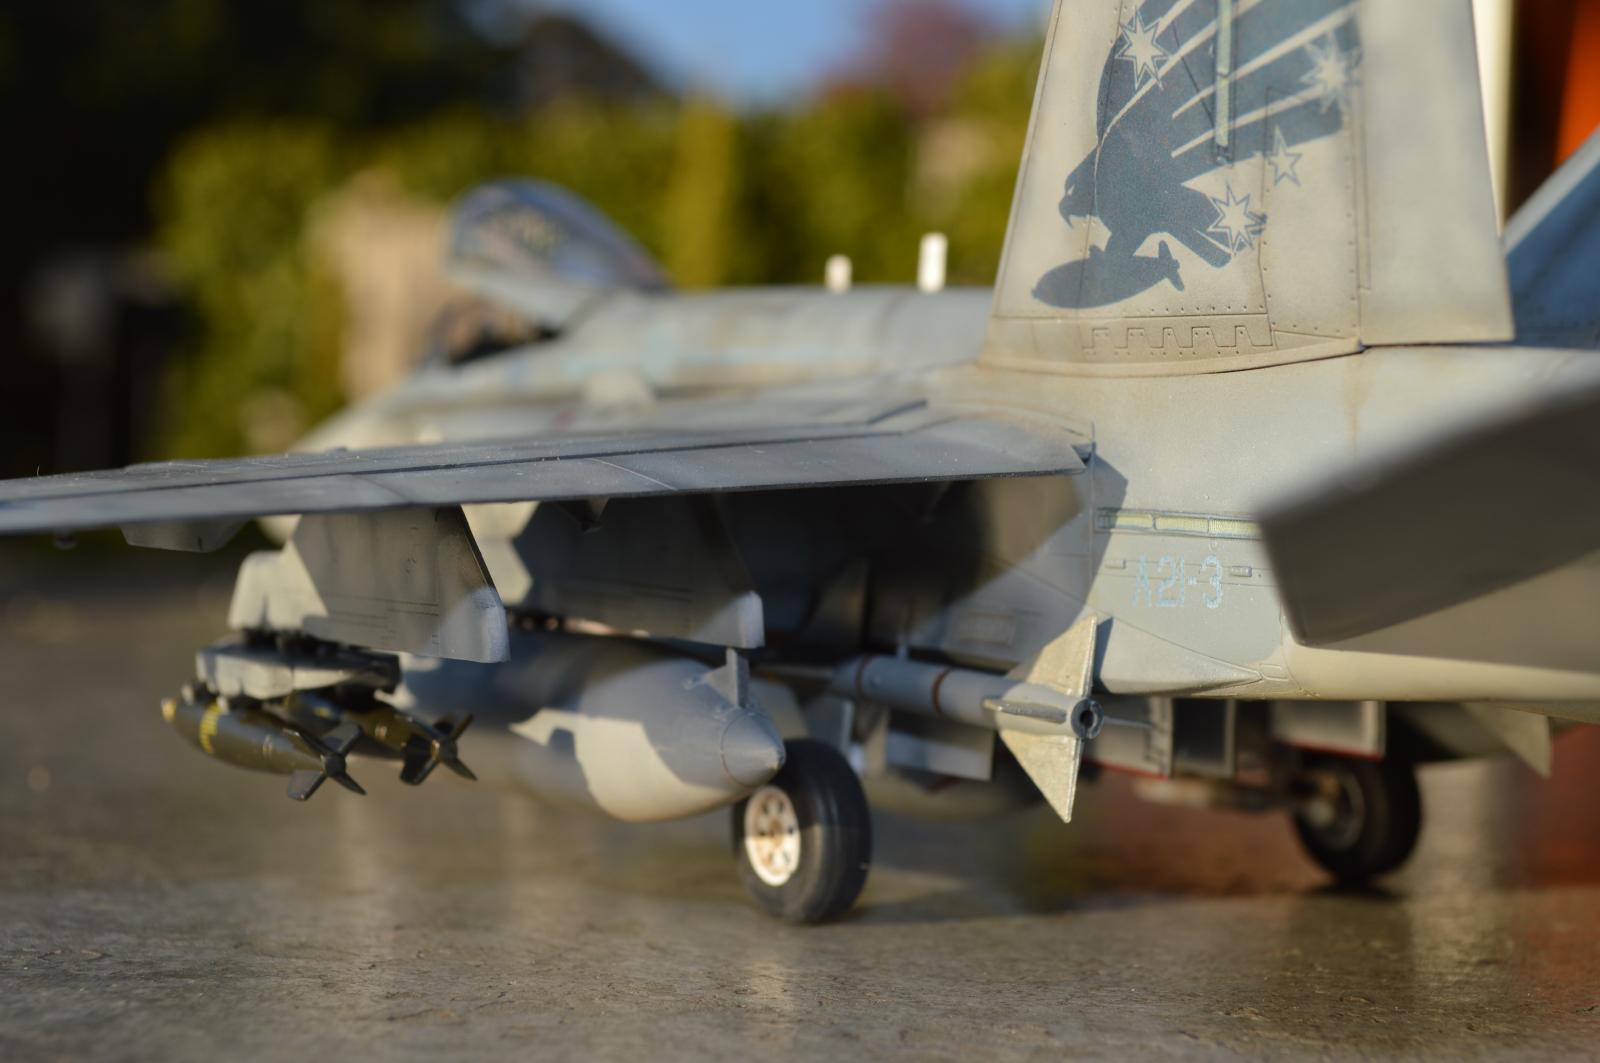
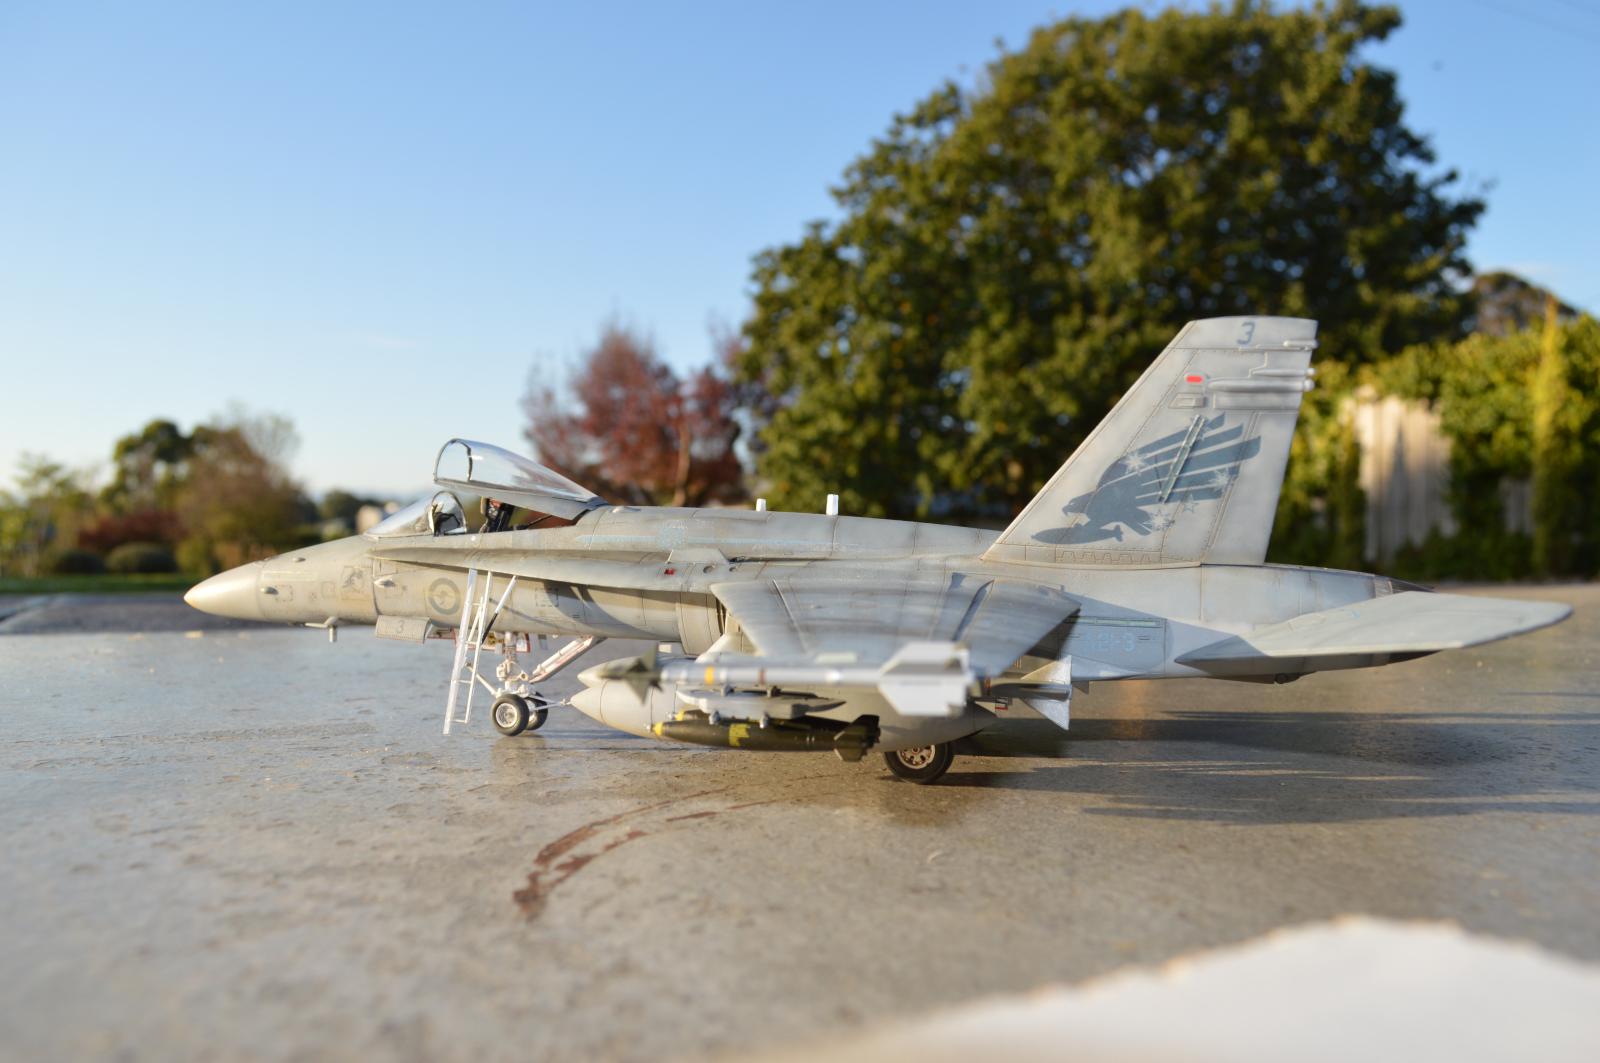
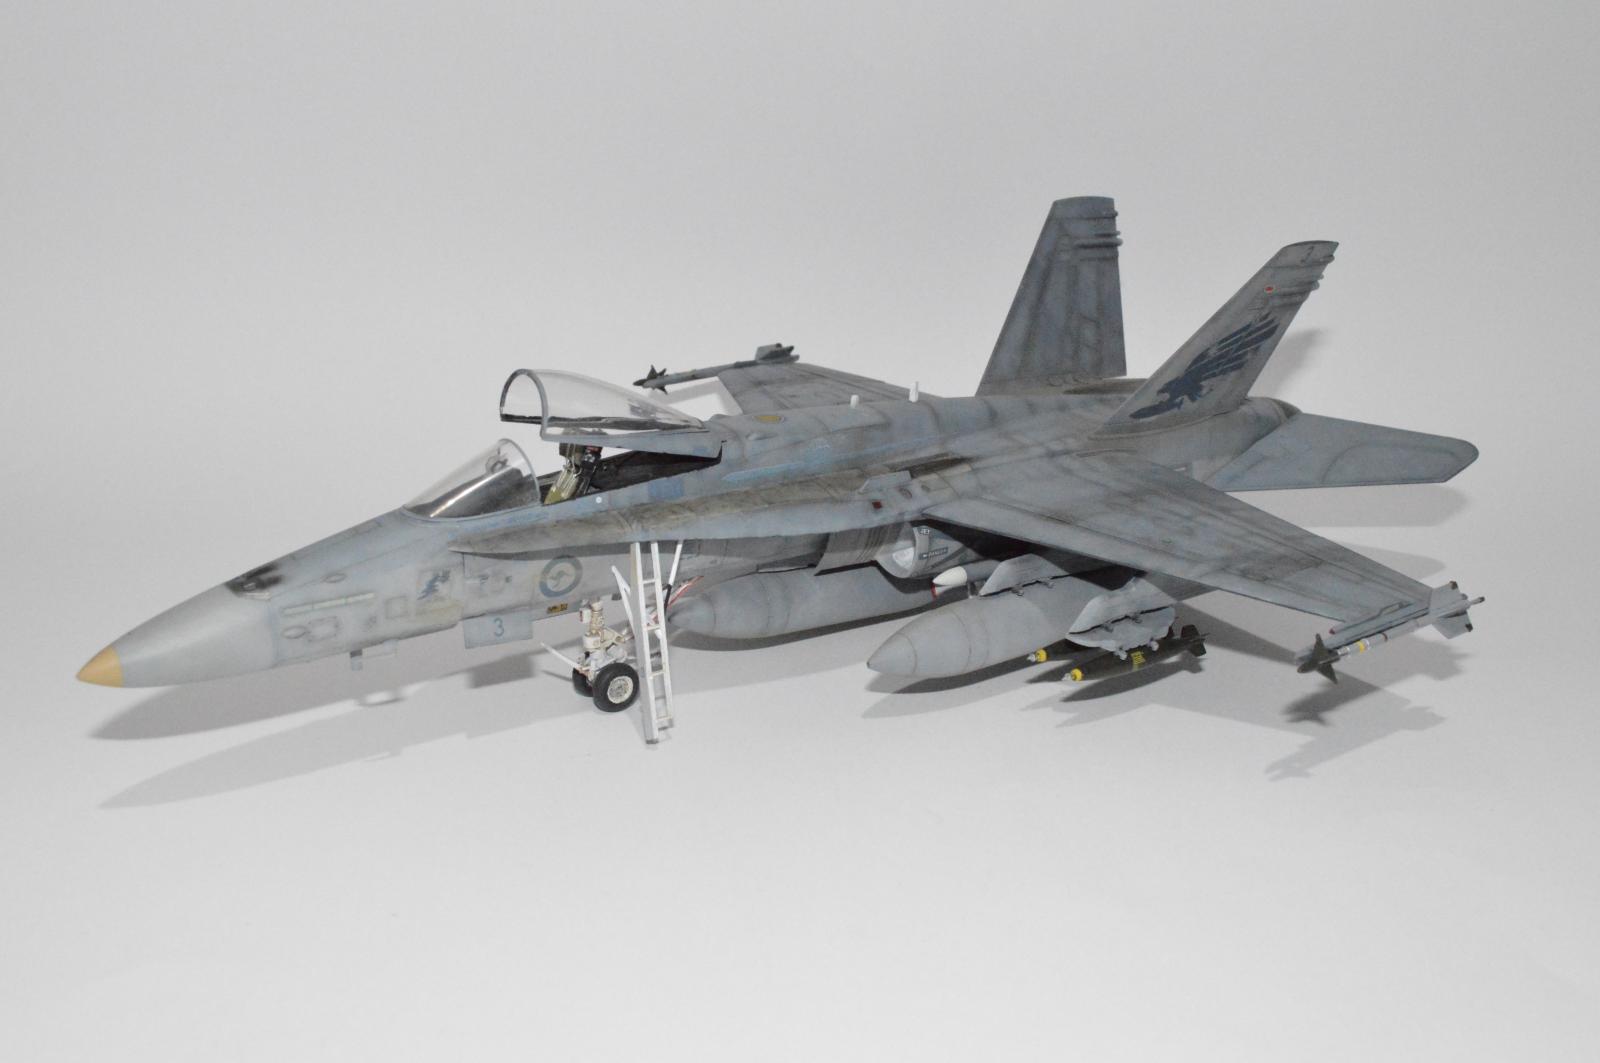
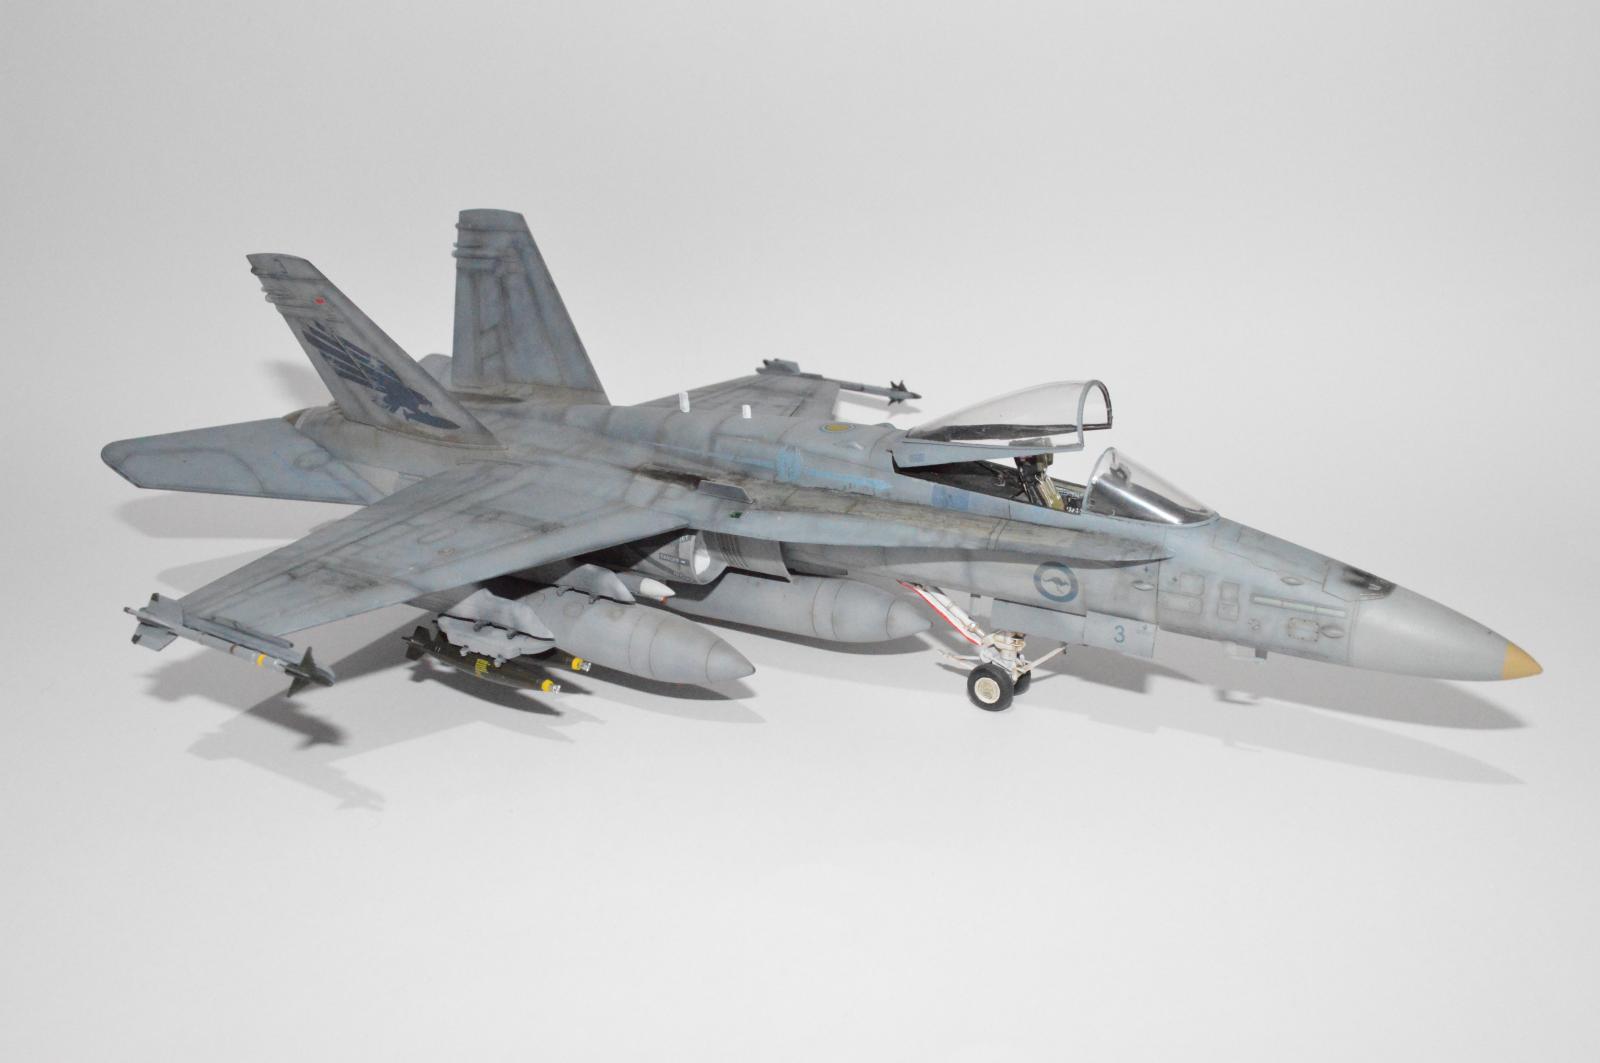
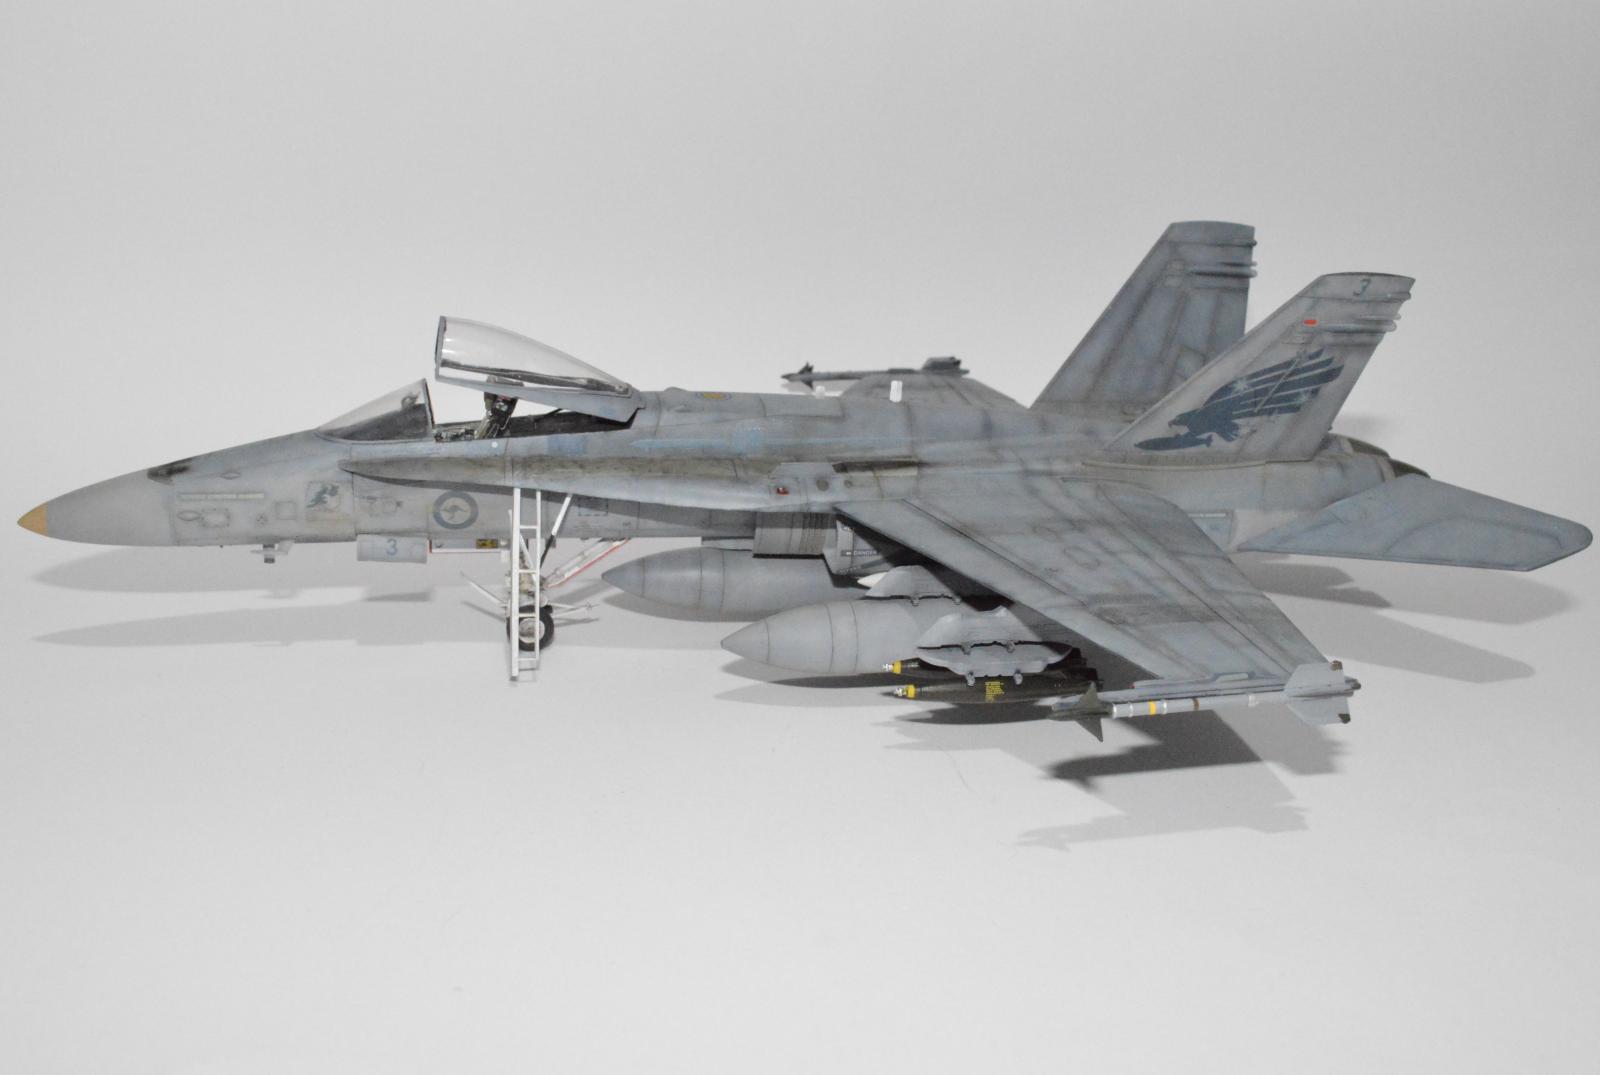
Introducing to you my 3 Squadron Classic Hornet, serial # A21-3 of the RAAF (based at RAAF Williamtown, NSW Australia). This model is a breakaway from the actual HobbyBoss aircraft depicted in the kit. Here's a quick story…
The Kit
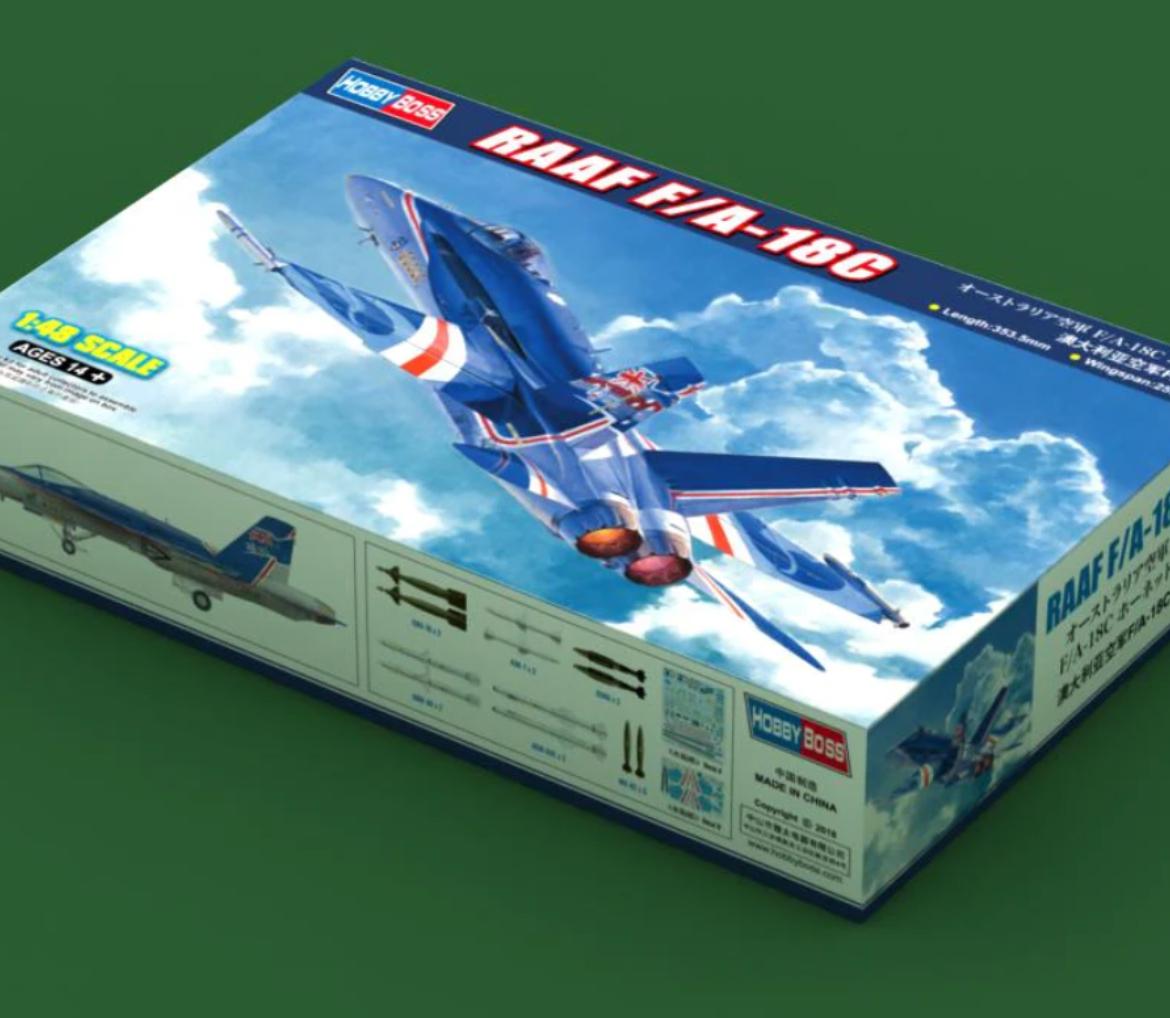
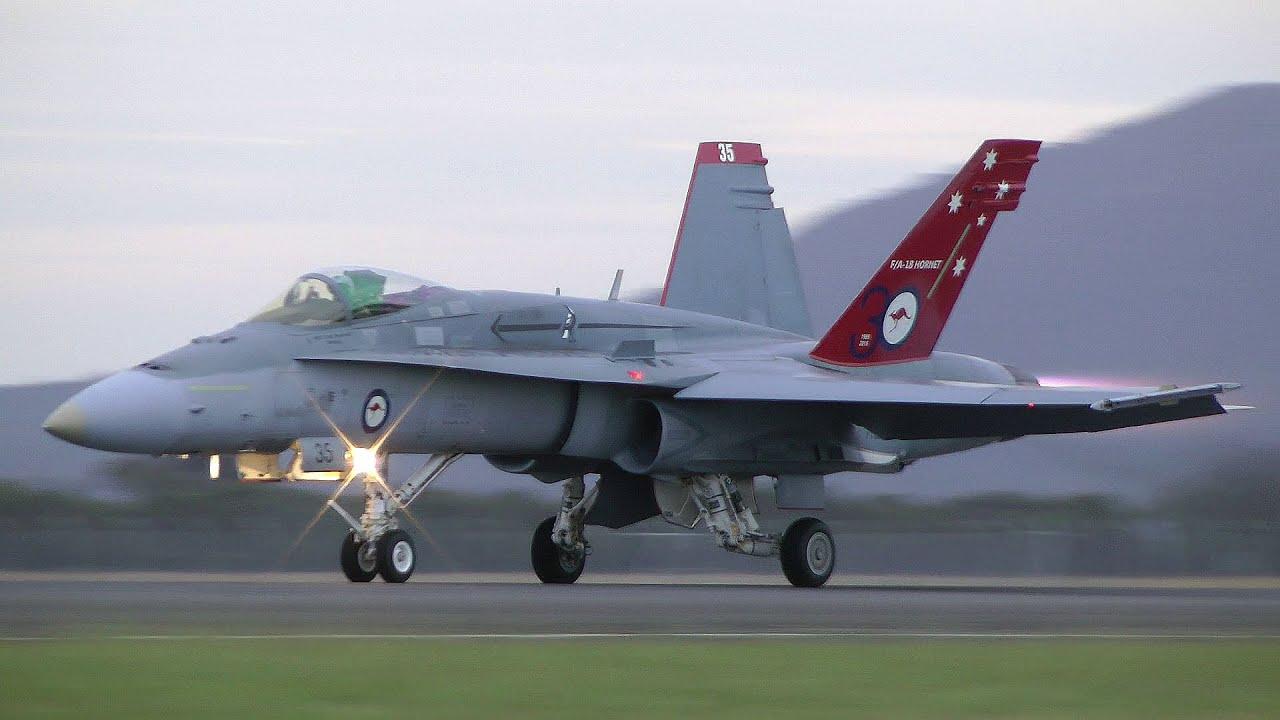
This HobbyBoss kit has two RAAF Hornet versions available, one the 20 Year Celebration version with the blue scheme, and the 30 Year Celebration scheme with the red tail fins. I originally opted for the red tail scheme version, as I simply like the look of it more, as it still resembled a fighter/attack Hornet, rather than an air display version.
However, in the 11th hour, I realised that HobbyBoss' decals were incorrect. Come on HobbyBoss - details!
Basically the RAAF roundels on the port side were wrong (technically correct but wrong). The standard RAAF roundel comprises the red Kangaroo facing to the left. However, the RAAF mirror the roundel on the port side of their aircraft, so that the Kangaroo faces to the front of the aircraft (facing to the right).
I don't know about you guys but I couldn't bring myself to place decals on to my model that were so fundamentally wrong.
After sourcing a set of decals for the same aircraft that were correct and failing, I fell upon a set of decals at Dekl's, for RAAF 3 Squadron. Ironically, the actual aircraft serial number depicted in the decals was already in my set of reference photos 😀
So with great excitement I bought this set of decals.
https://www.dekls.com.au/product/Decals_F%2FA-18_Hornet_3_Squadron_RAAF_A21-3_Scale_1%2F144_1%2F72_1%2F48_1%2F32/79
The Build
This HobbyBoss kit is both the first HobbyBoss kit and the first Hornet that I have ever built. I wouldn't say it was terrible, but it will never be the best either. Other than the decals error, a few other things came up such as the pilots control stick seemed to be over scaled, as it was way too tall. And I wasn't that keen of the butt joint of the nose section to the main fuselage, but in the end it did offer a good panel line so in the end it was ok. To be honest I was expecting the kit to be far worse than it was.
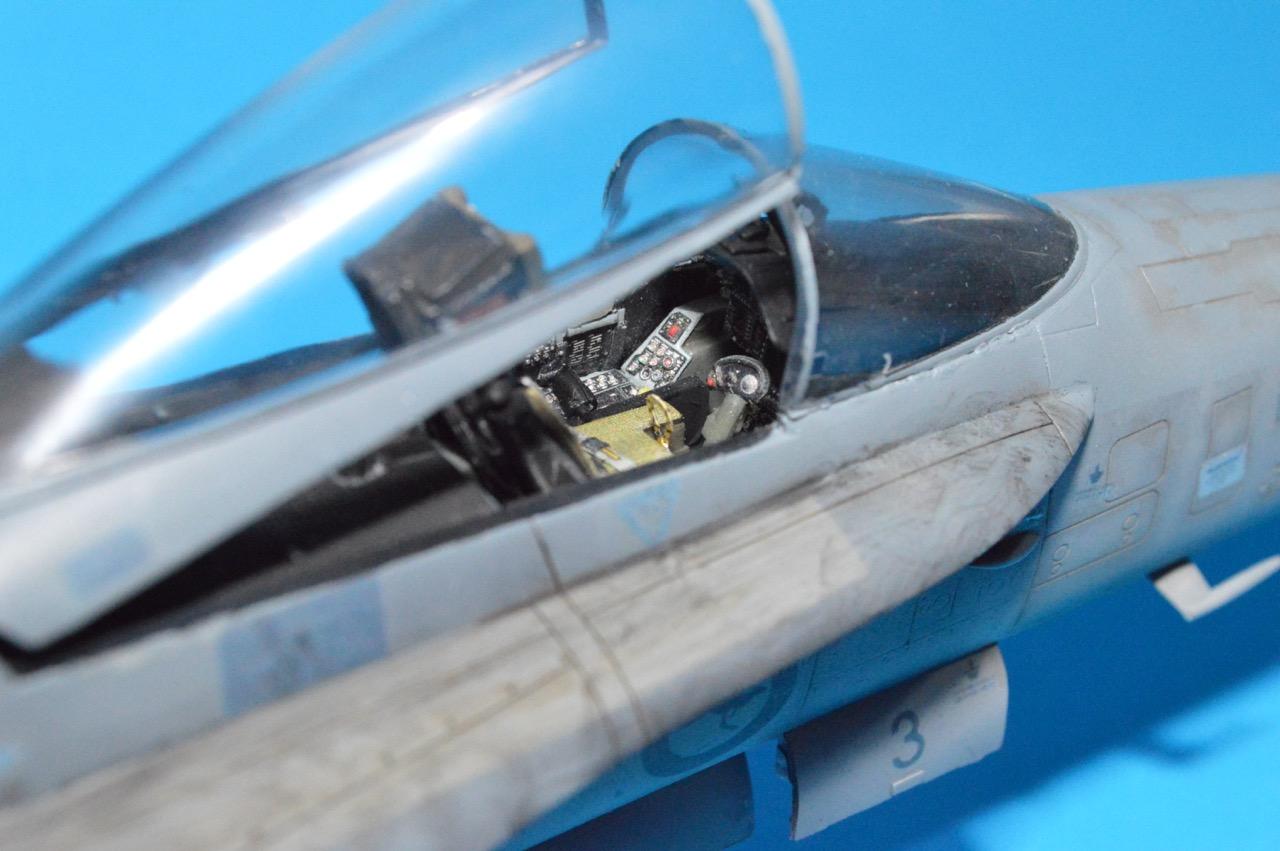
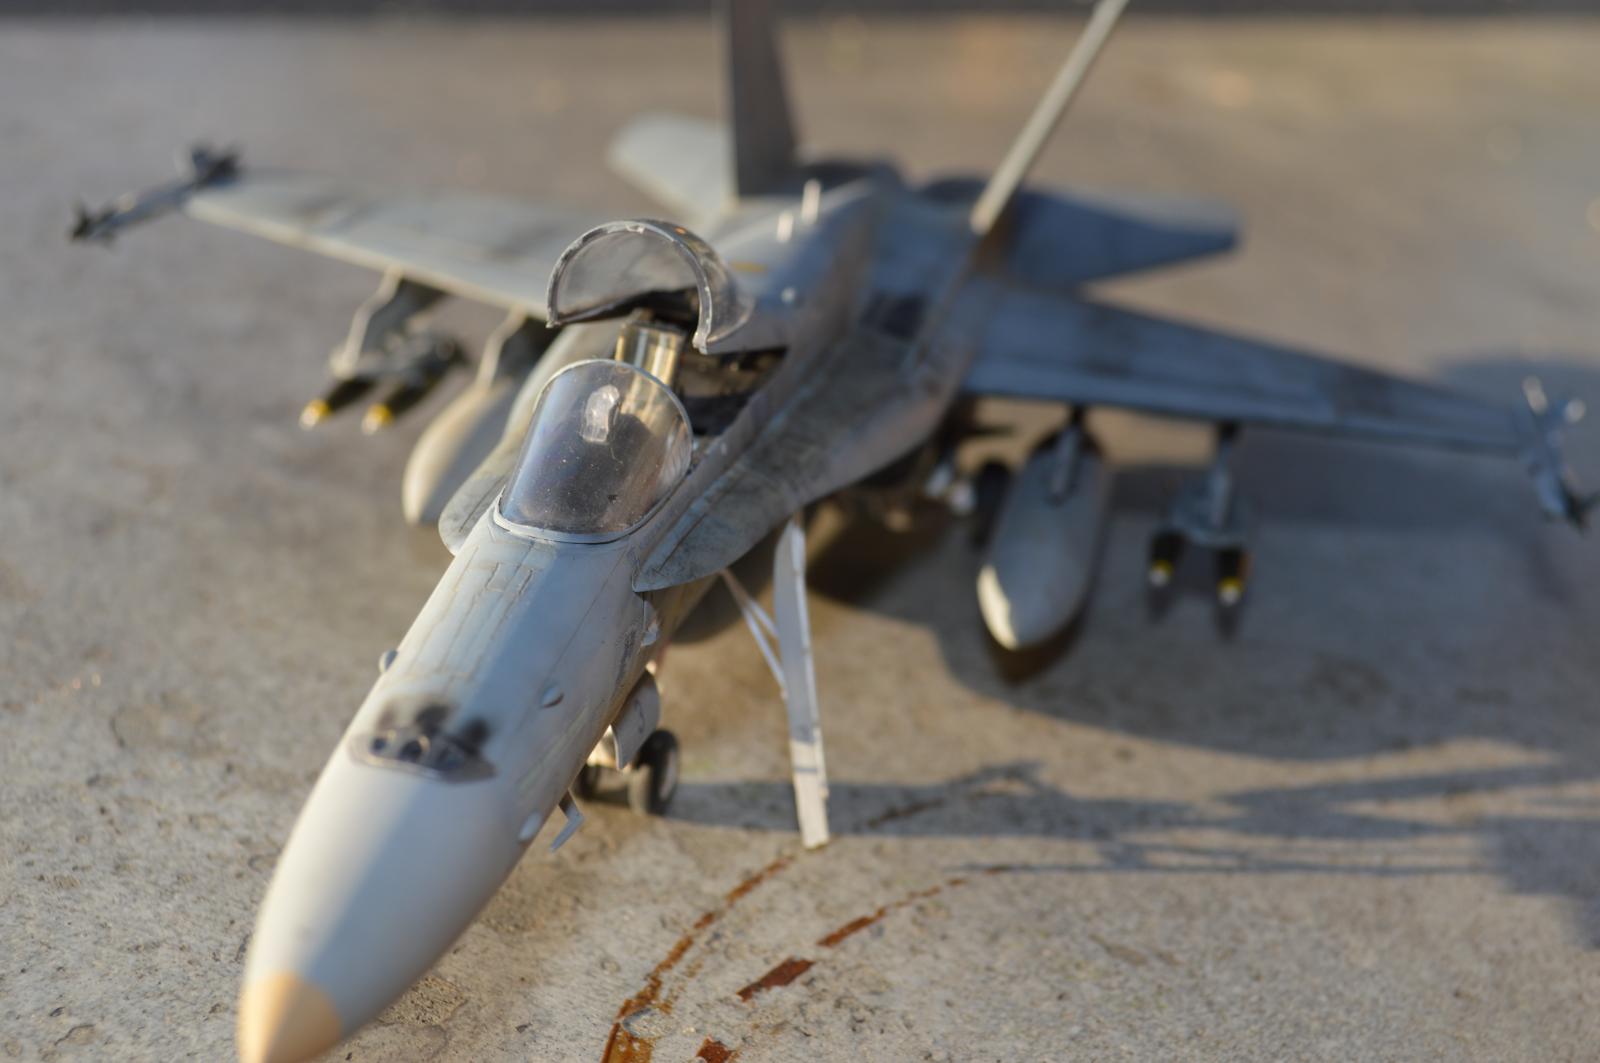
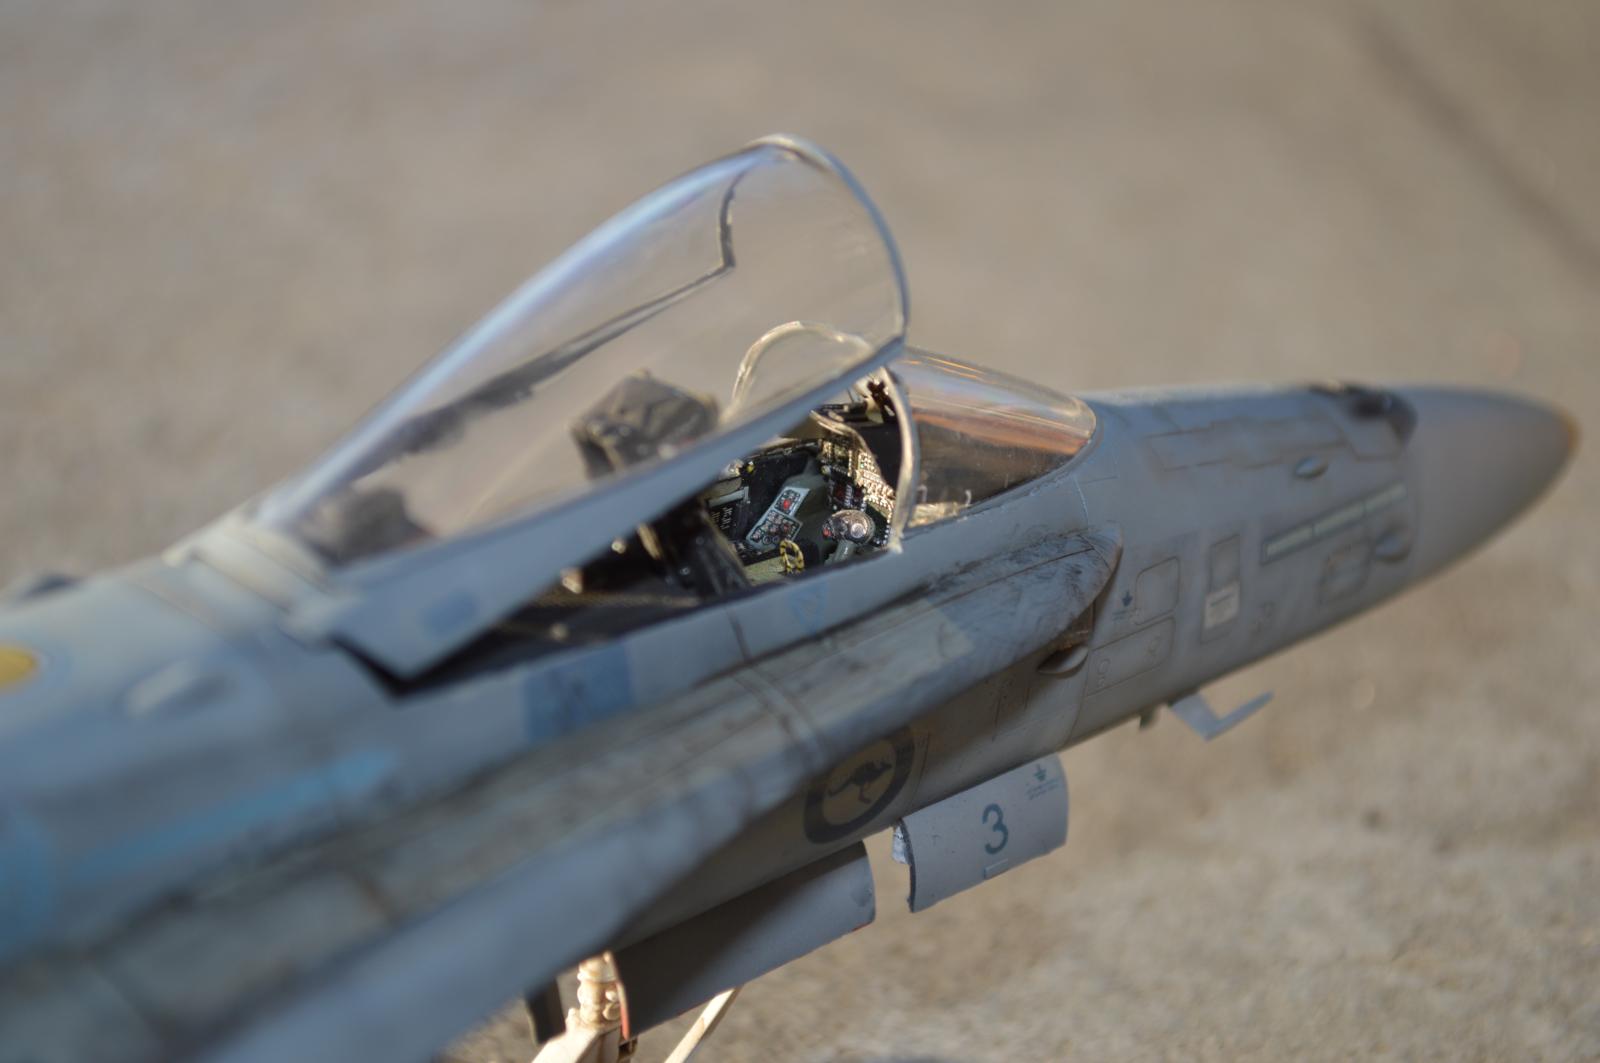
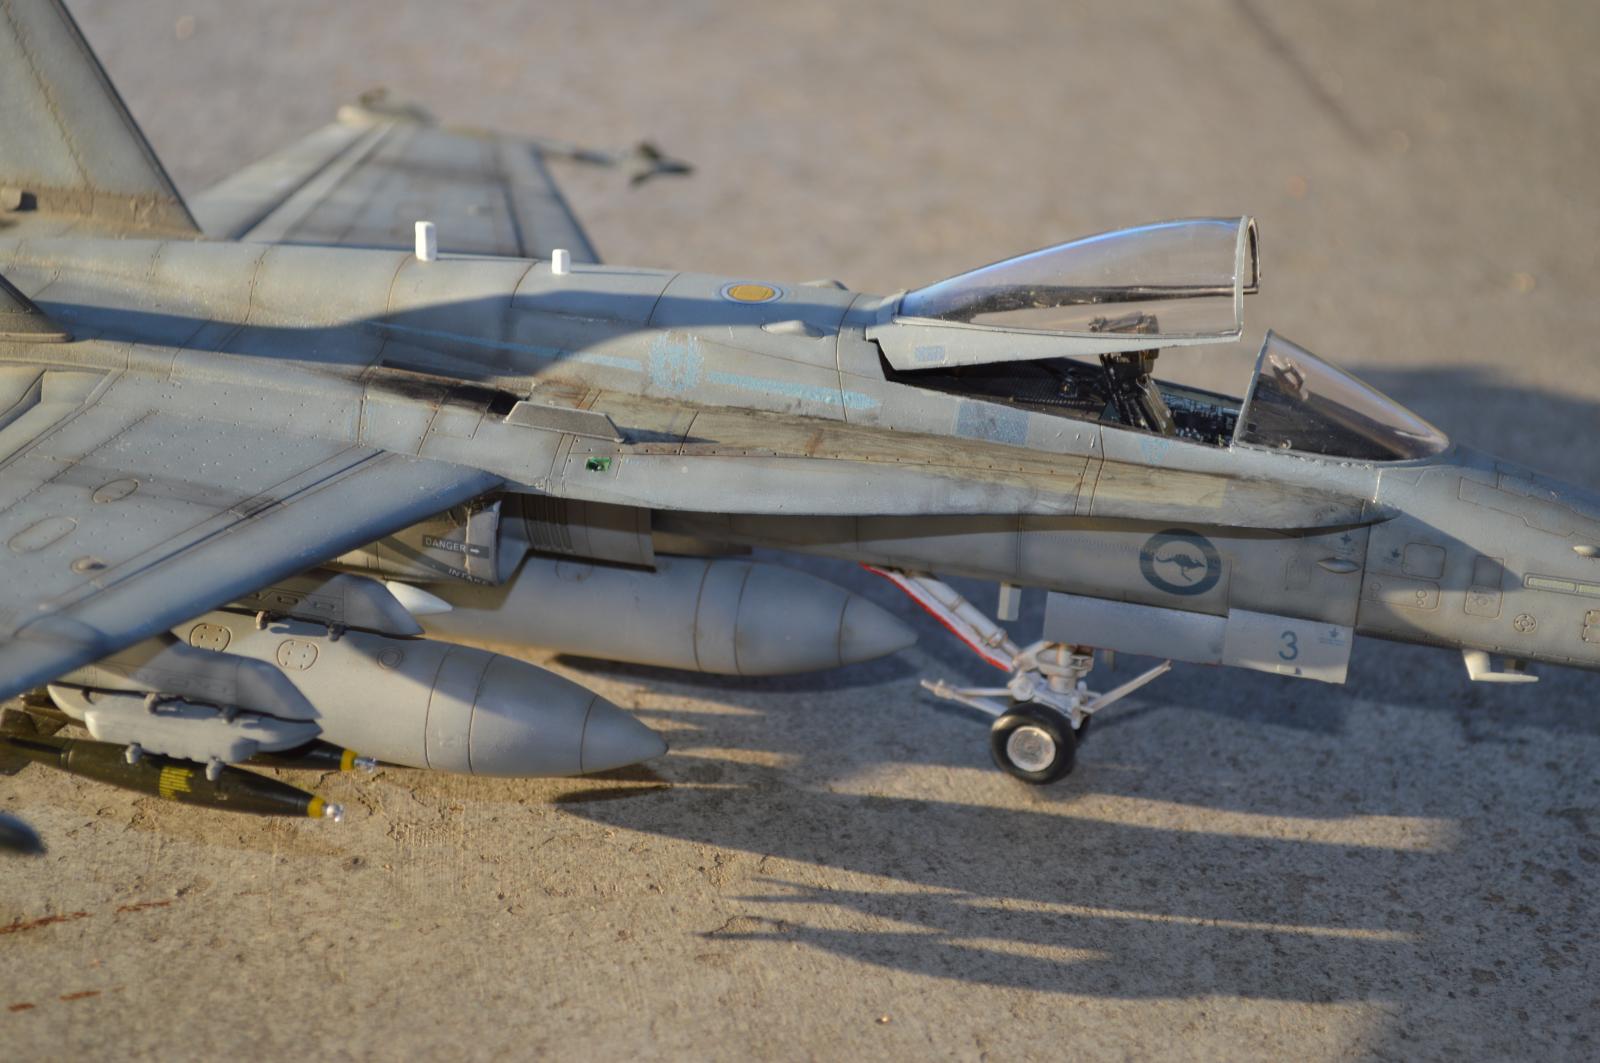
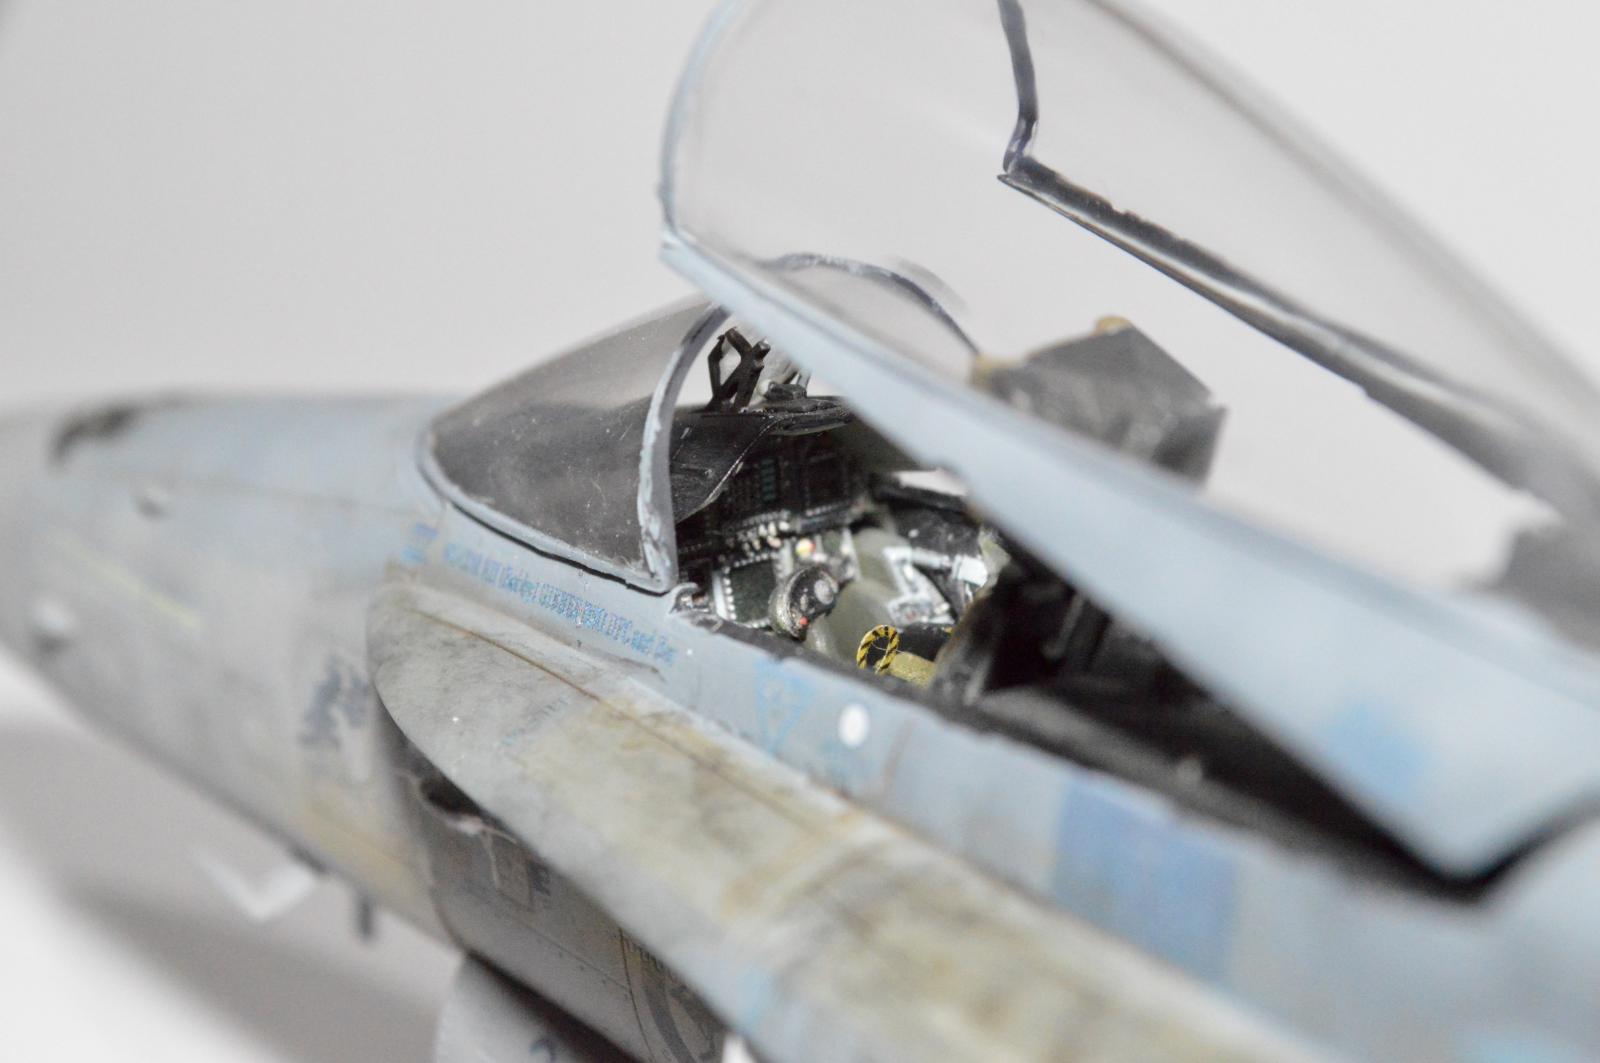
I opted for Quinta Studio 3D interior decals as a cockpit upgrade - https://www.scalemates.com/kits/quinta-studio-qd48280-f-a-18c-hornet-late-bunos-163985-and-up--1478725
I'm so pleased with the end result of that. So much better than what the OOTB cockpit would have looked like.
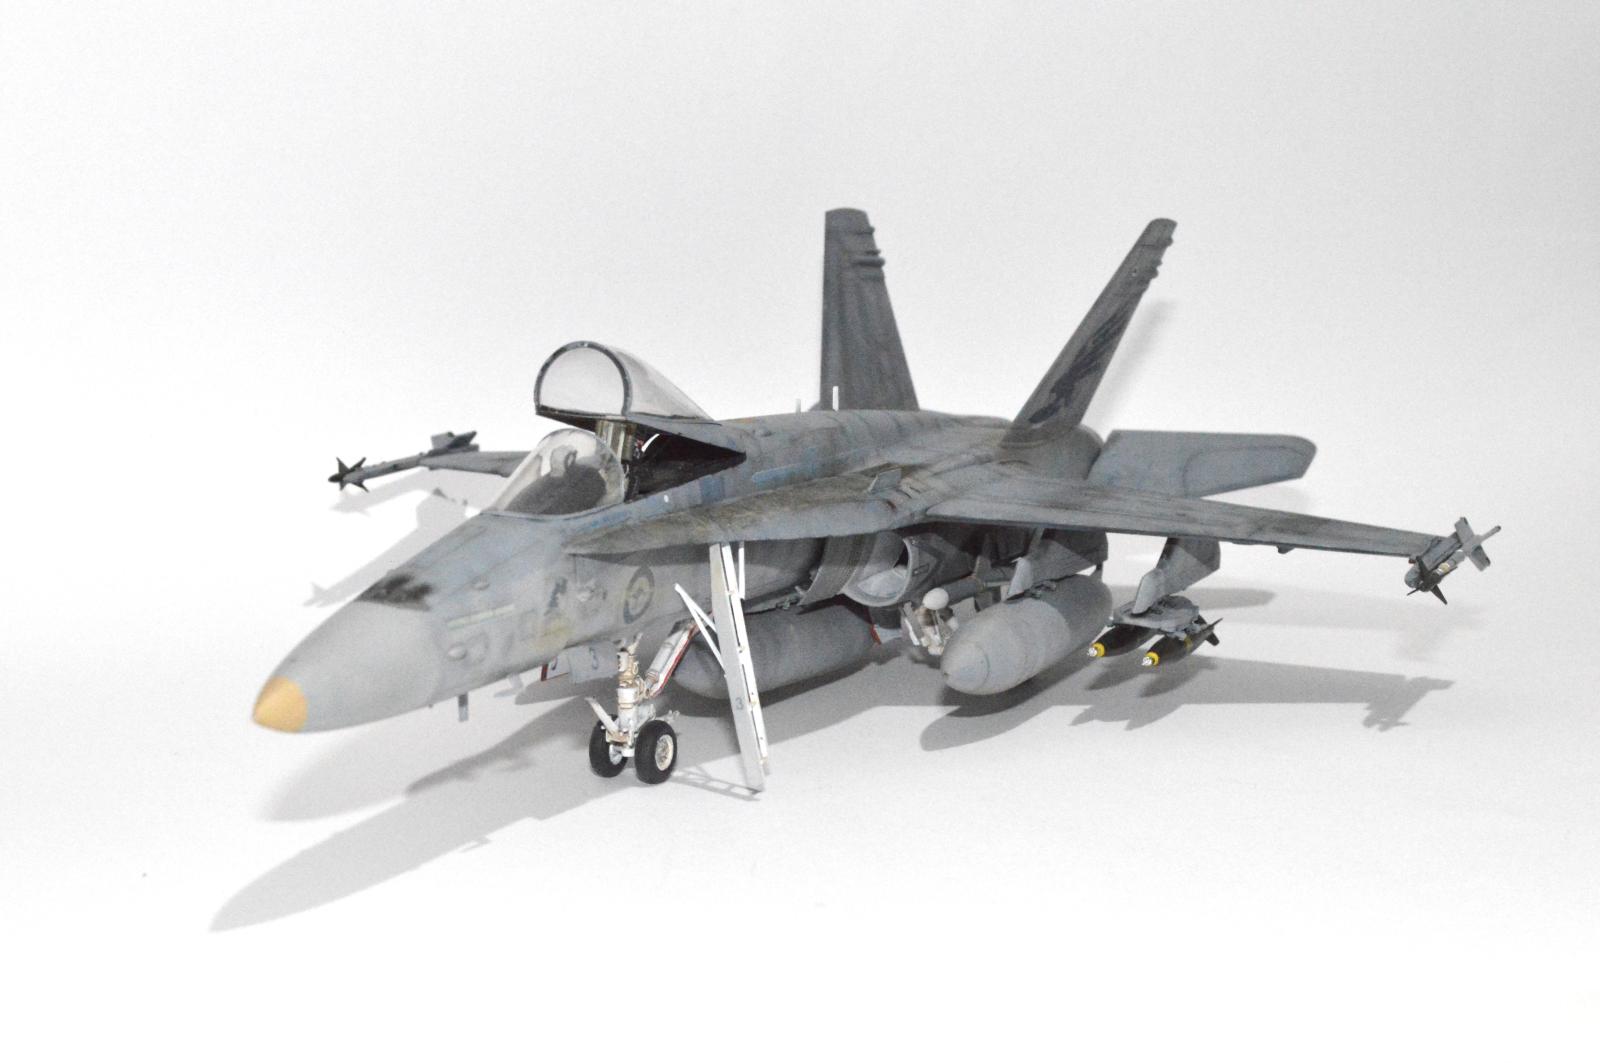
The build was relatively straight forward although the landing struts seemed very finicky and a challenge, but that's what we want right?
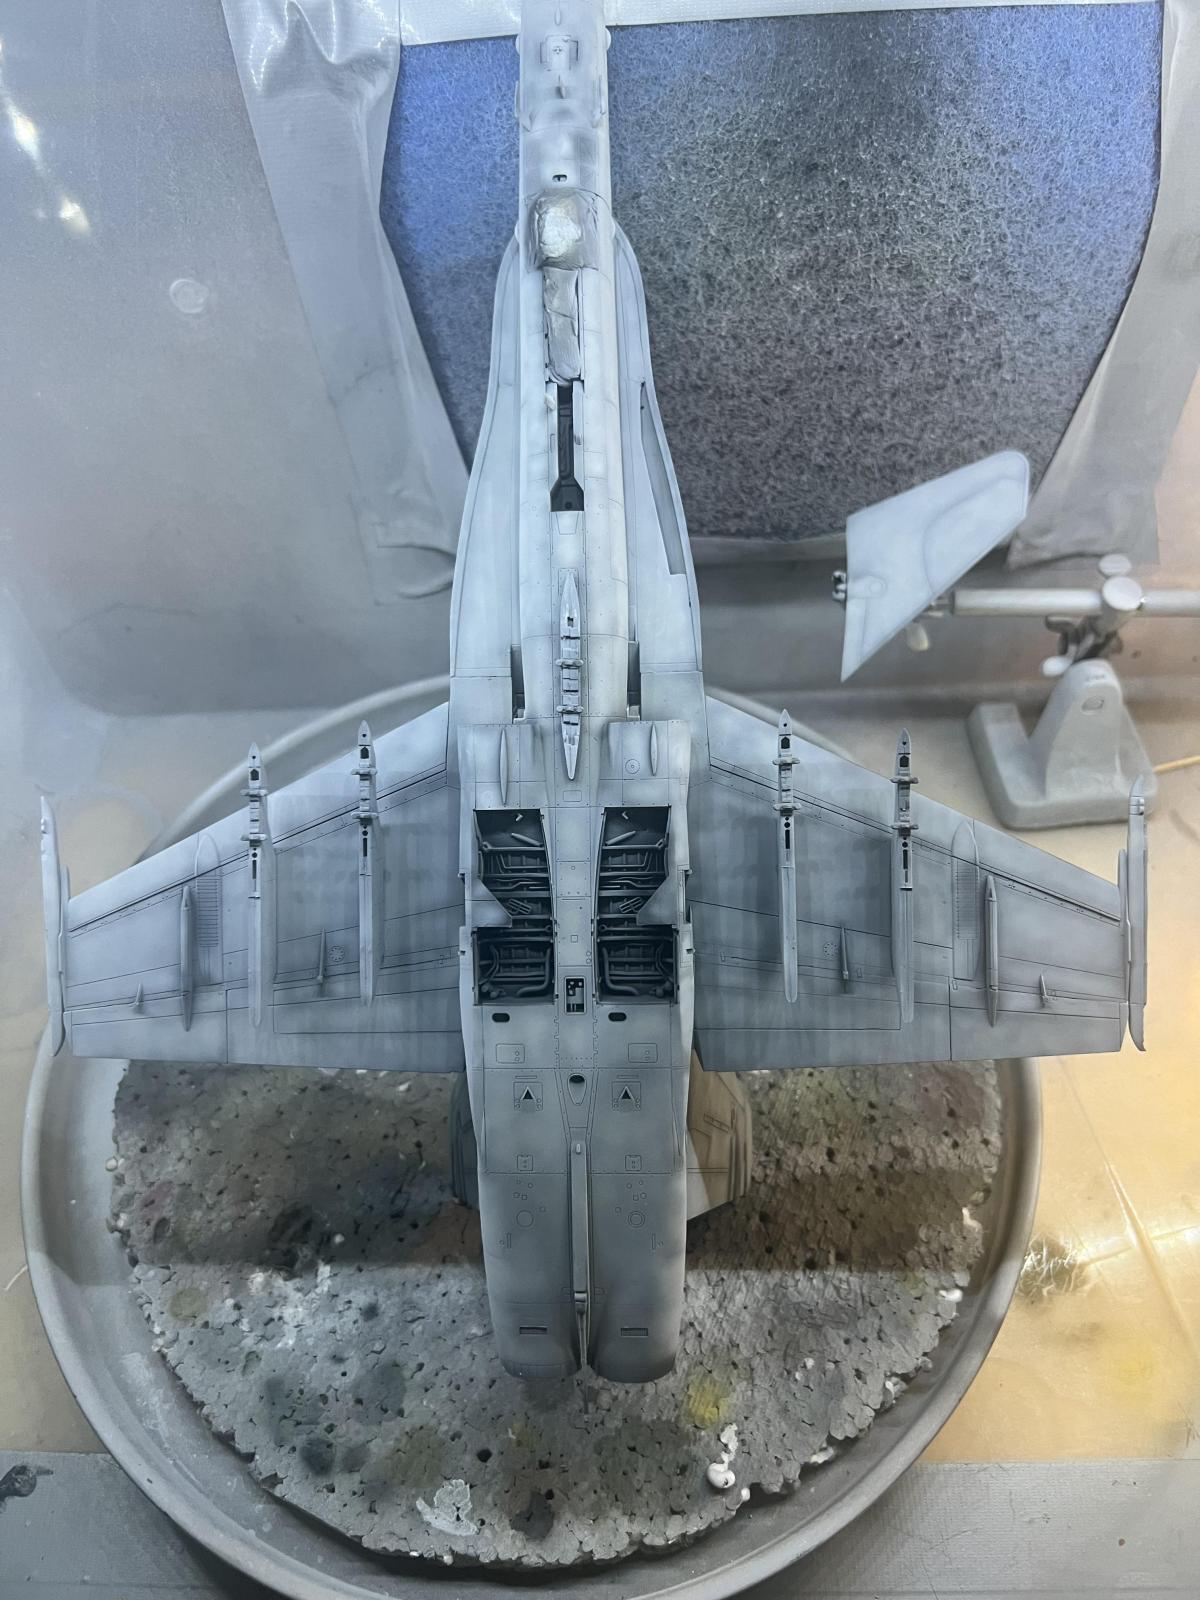
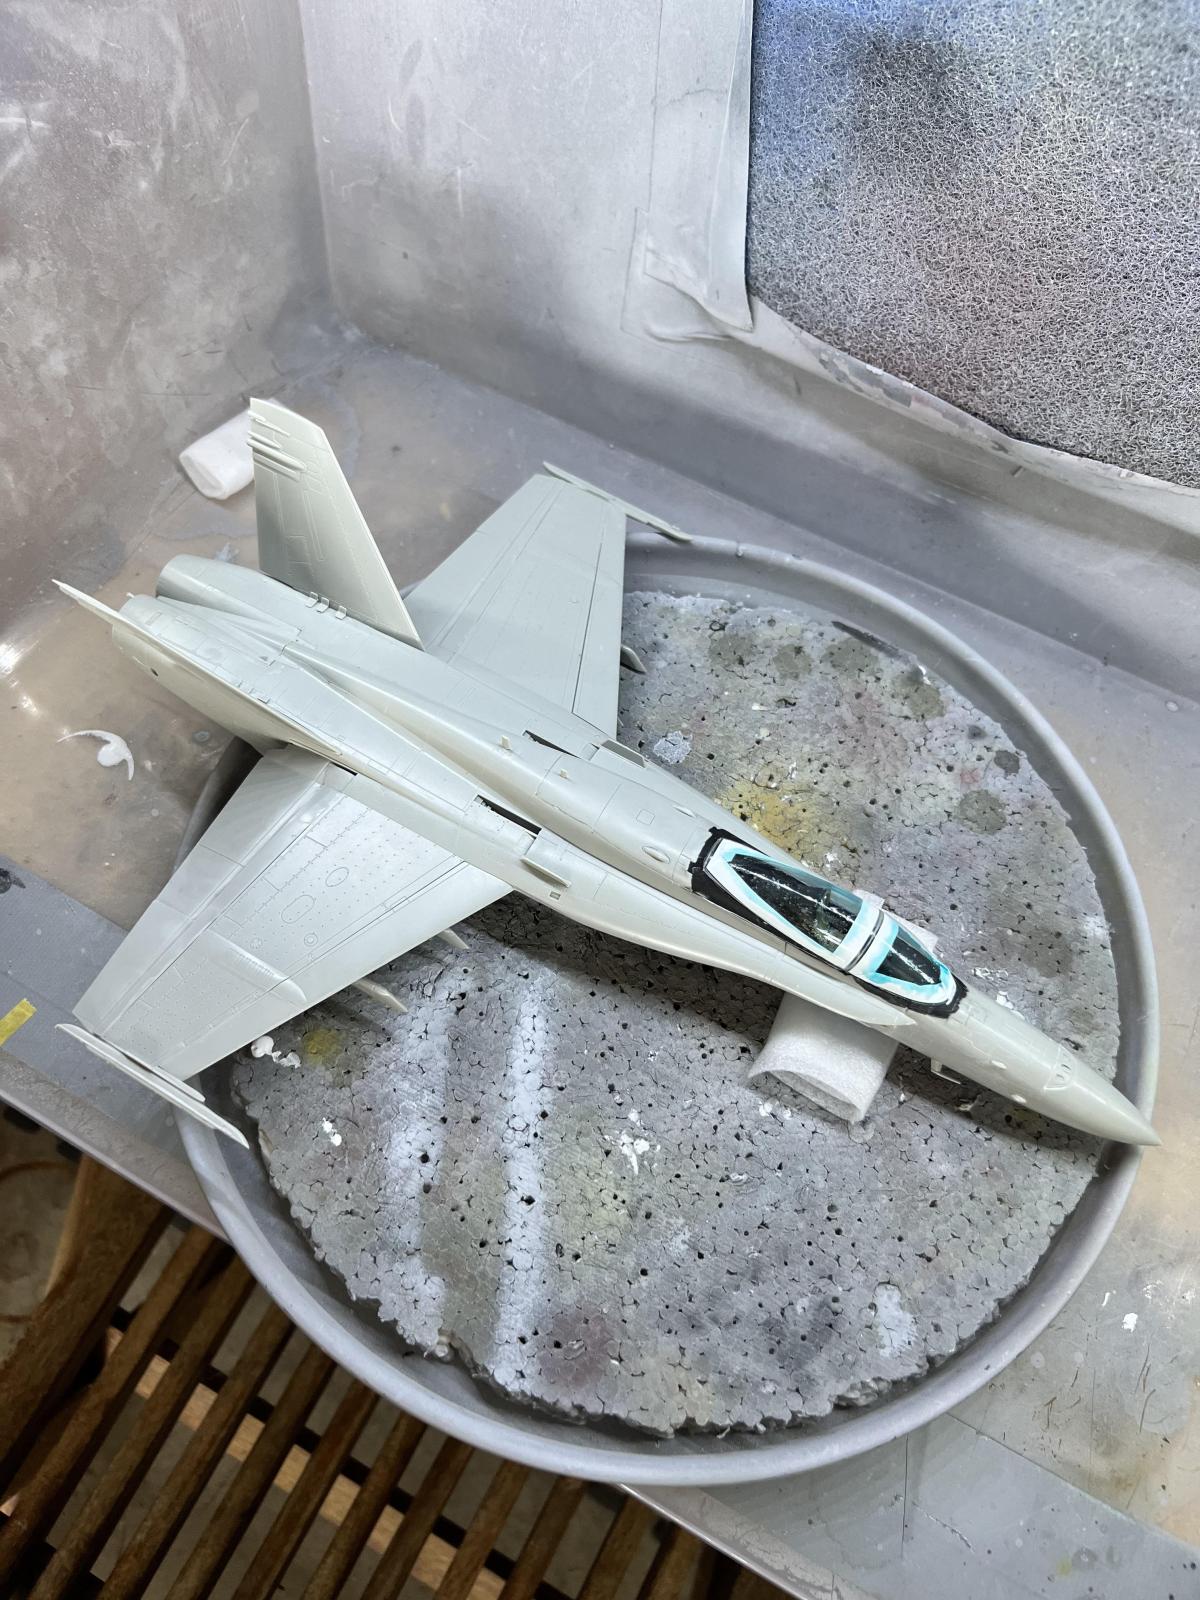
I primed / black based the main airframe using Mr Finishing Surfacer 1500 Black mixed 50:50 with Mr Colour Levelling Thinner and the end result was fantastic.
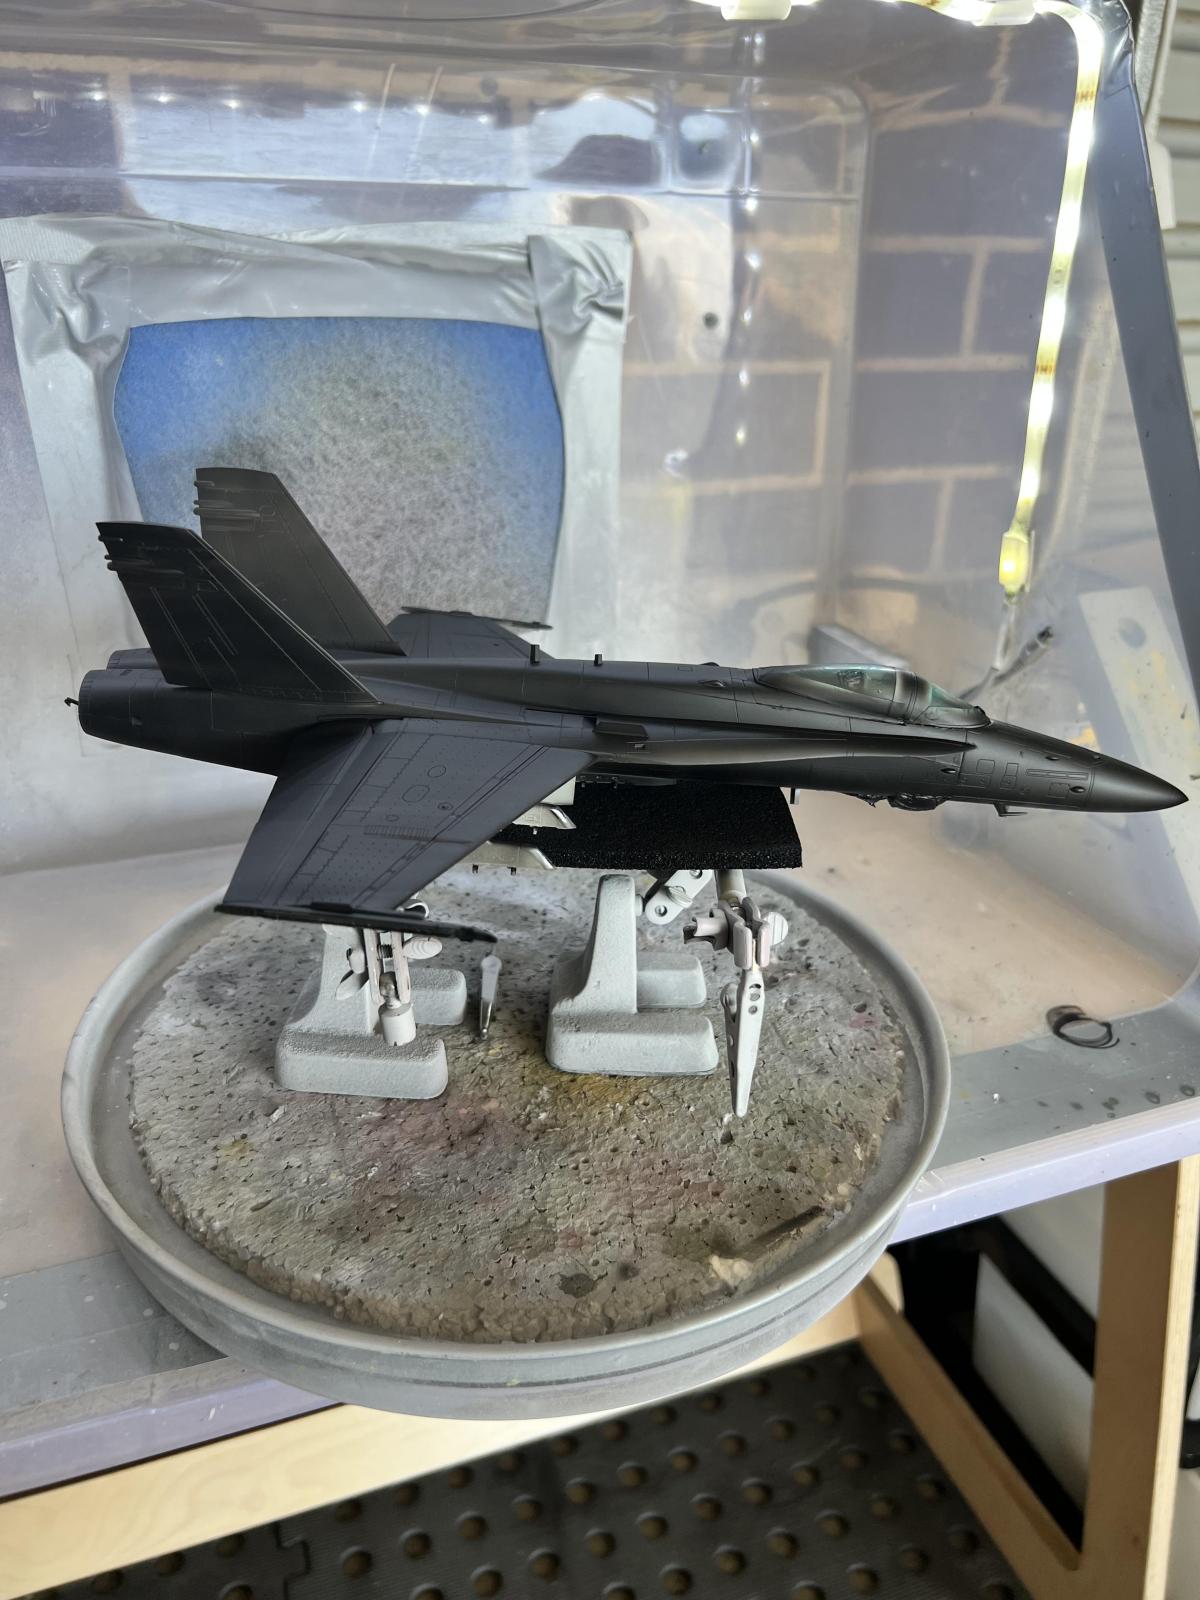
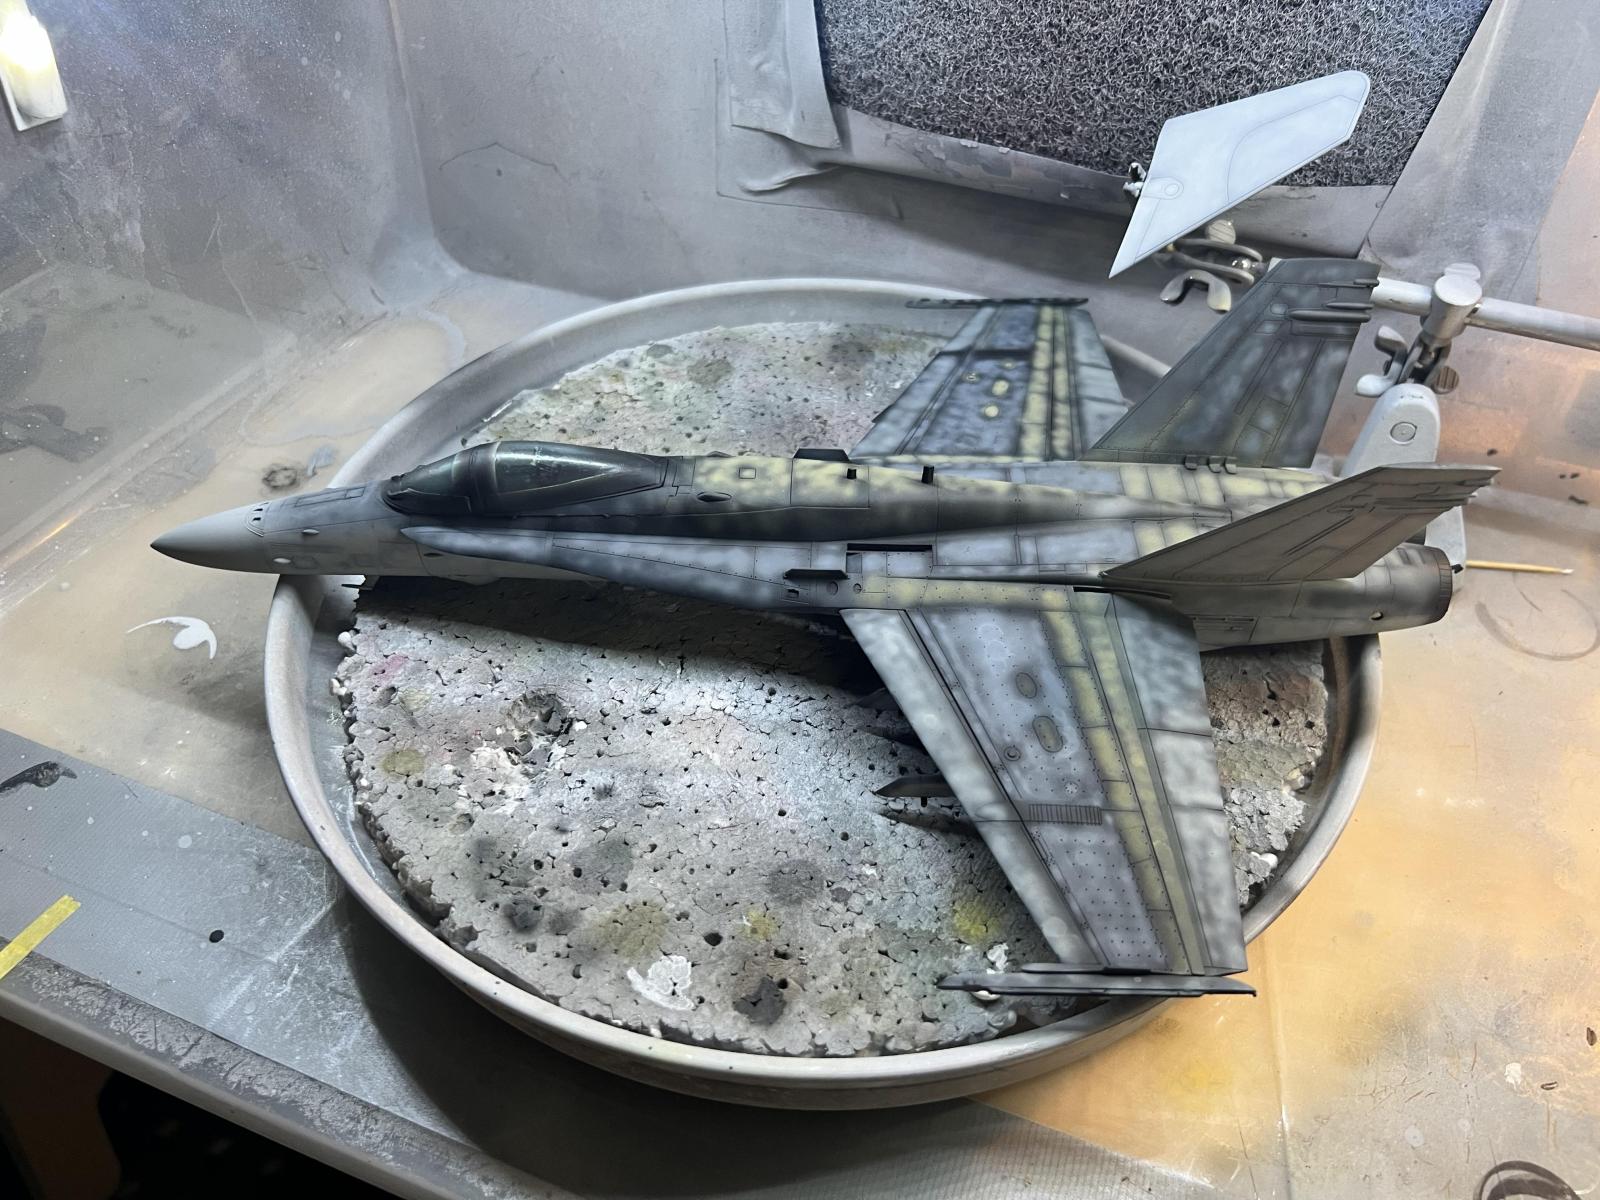
I then patterned the airframe in a marbling style paint job, using shades slightly lighter than the finishing surface colours (which I detail in later). For dirty areas, I pre shaded with Tamiya XF-49 Khaki again in a marbling pattern.
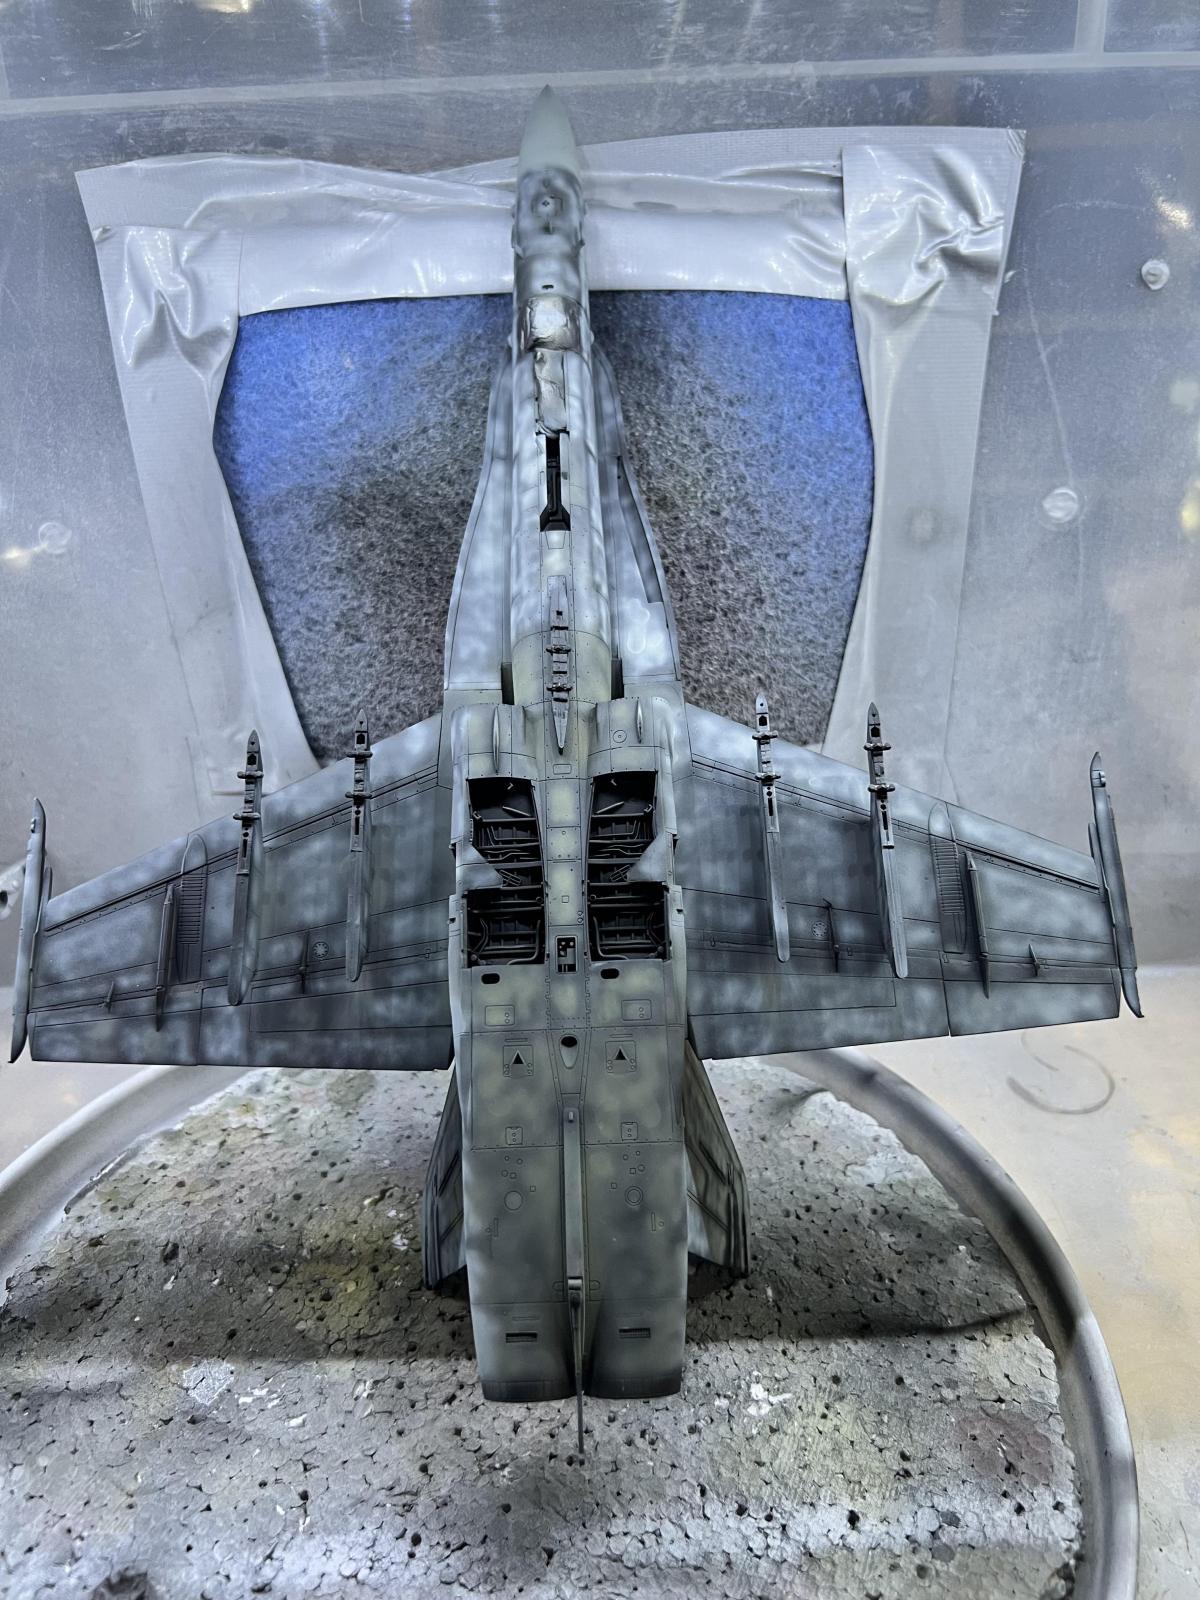
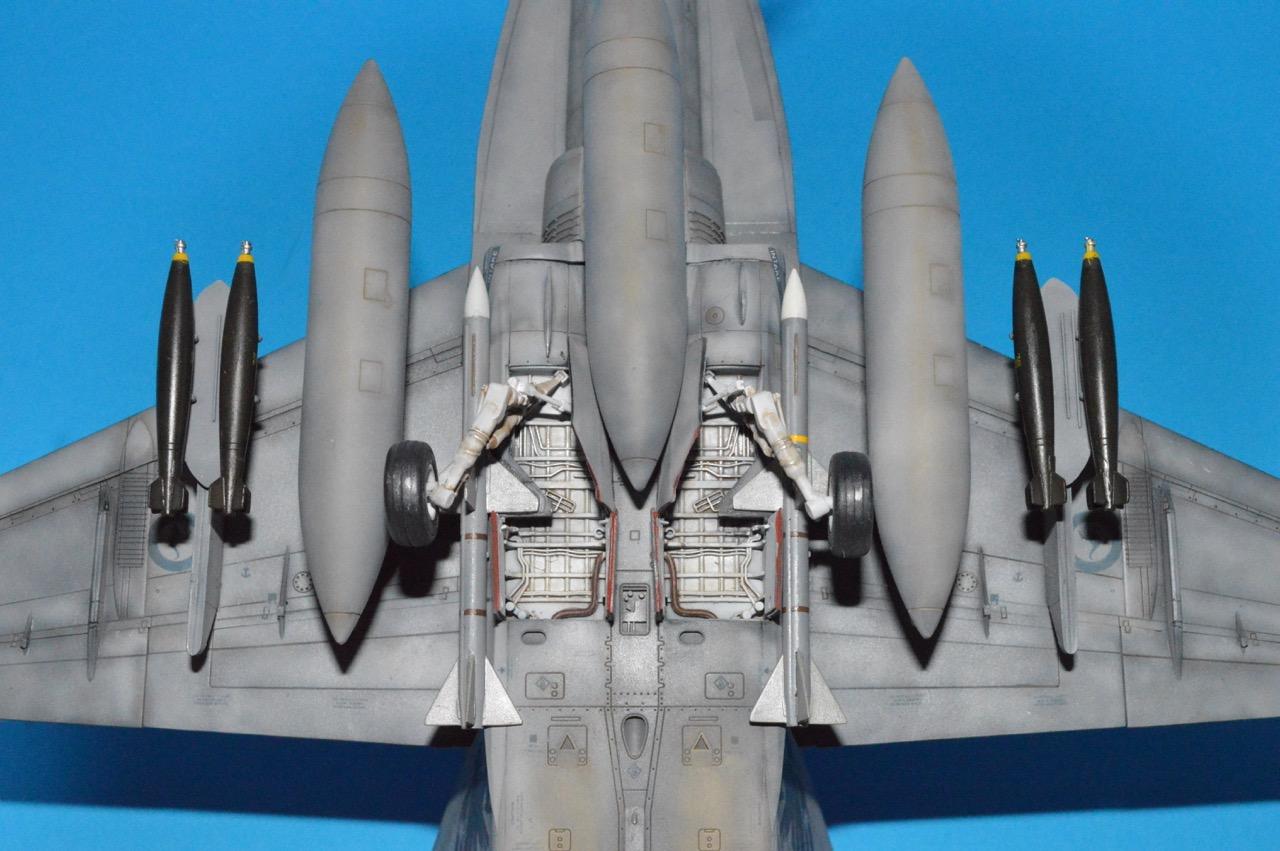
The landing gear bays were sprayed with Tamiya XF-2 flat white with some dry brushing in small areas with X-11 chrome. I added some conduit detail using XF-10 flat brown.
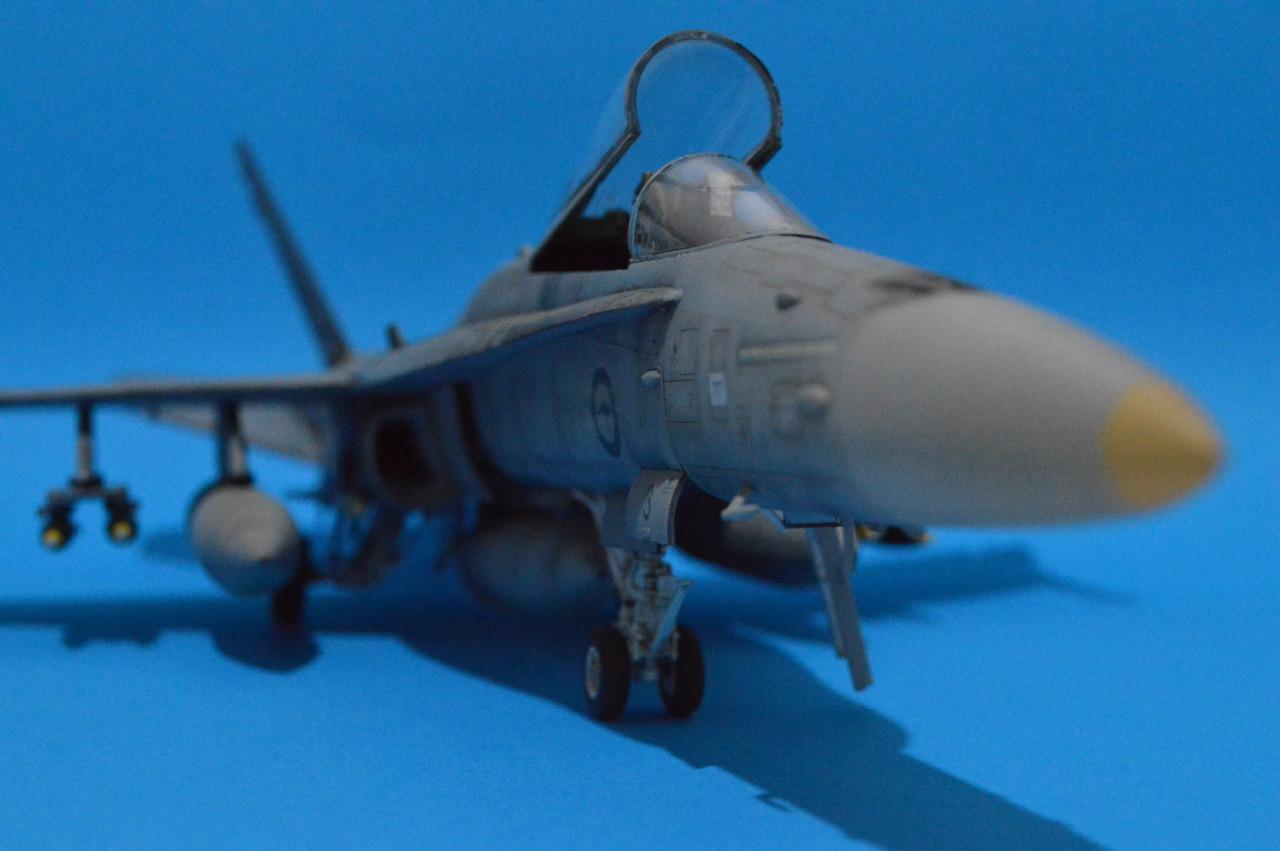
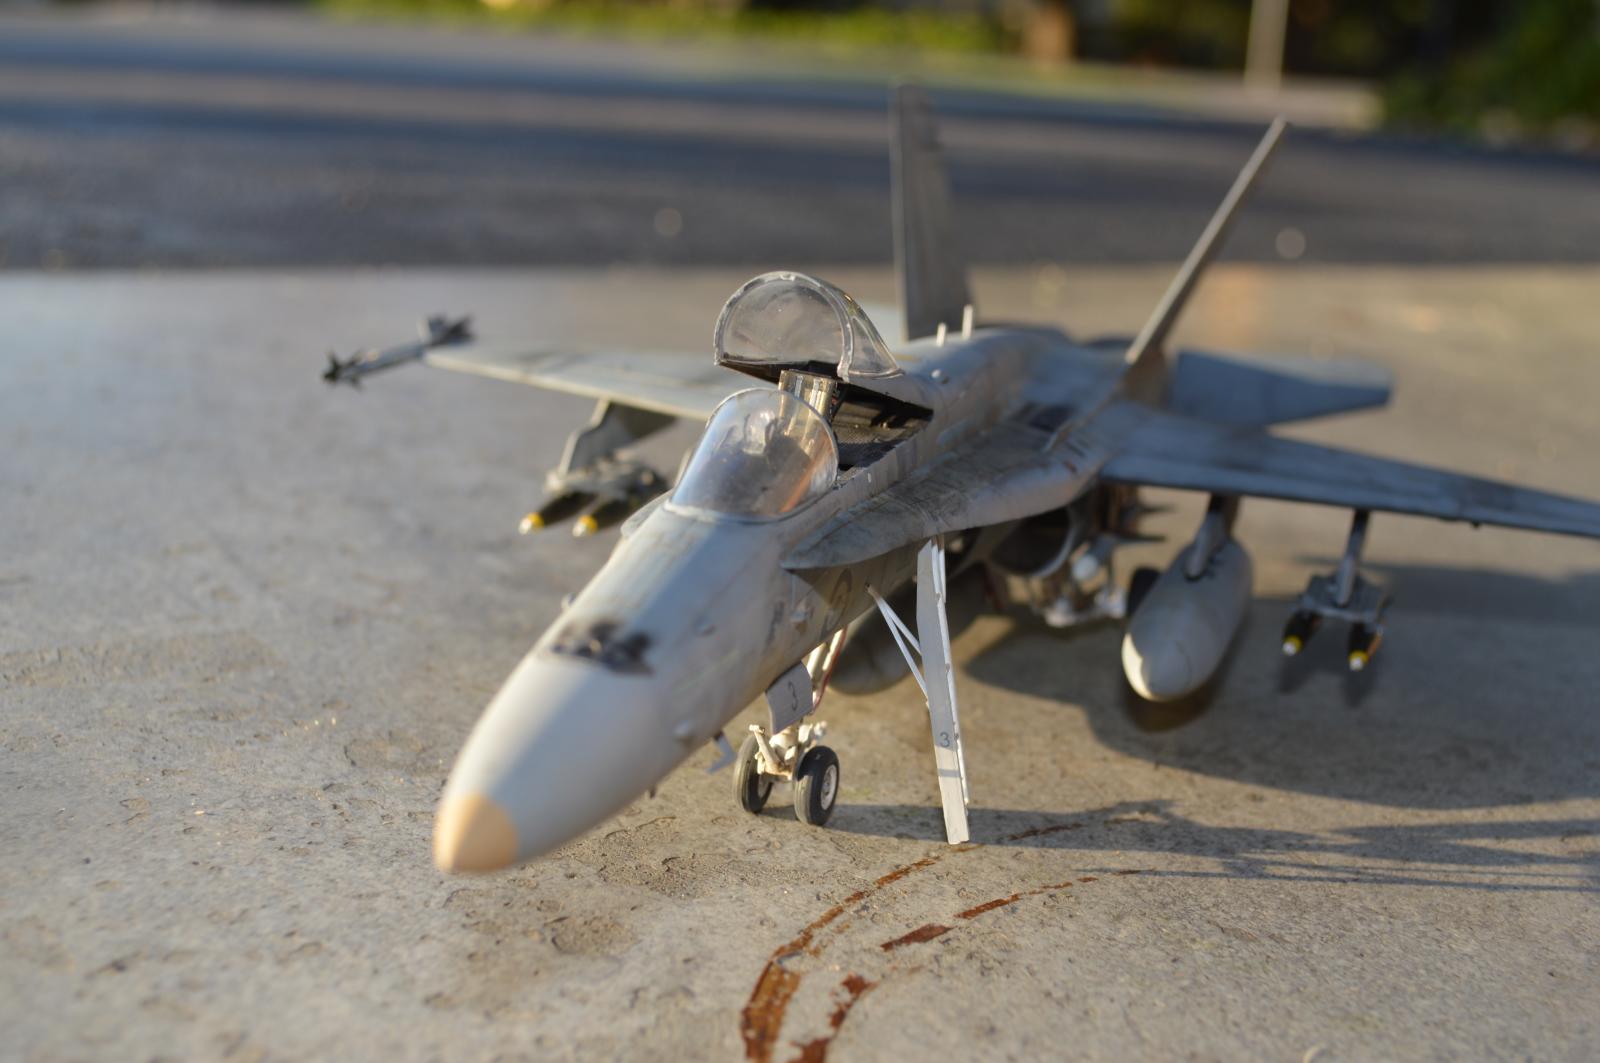
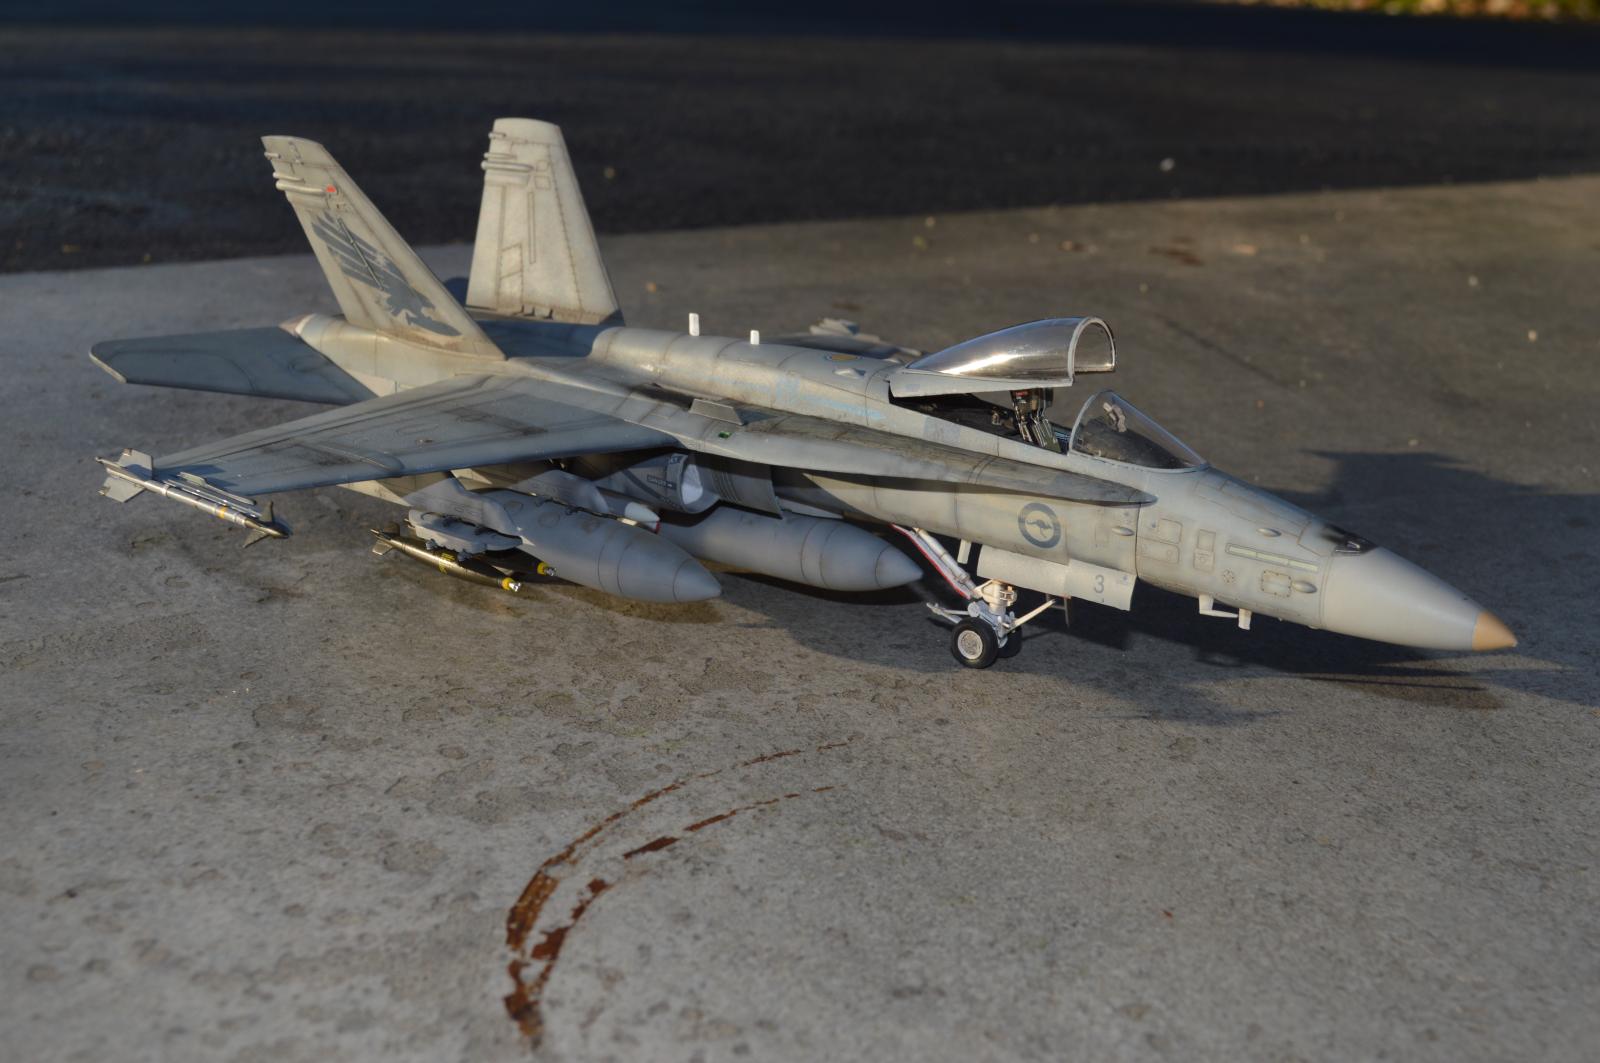
The nose cone area, I noticed on all photos that it always looked a shade lighter than the lower half of the aircraft colour. I don't know why, maybe some experience kicking in now, but rather than trying to create a lighter shade of grey, I decided to eliminate any marbling on the nose cone and just gave it a whole white pre coat. The effect in my eyes later on was spot on!
A lot of research was needed to determine the colours to be used on this aircraft, as it was clear from the photos, that the RAAF Hornet (or the classic Hornet), wasn't the same standard factory colours of the classic Hornet.
So here's what I found and used, and I feel that it is a very close match to the real thing.
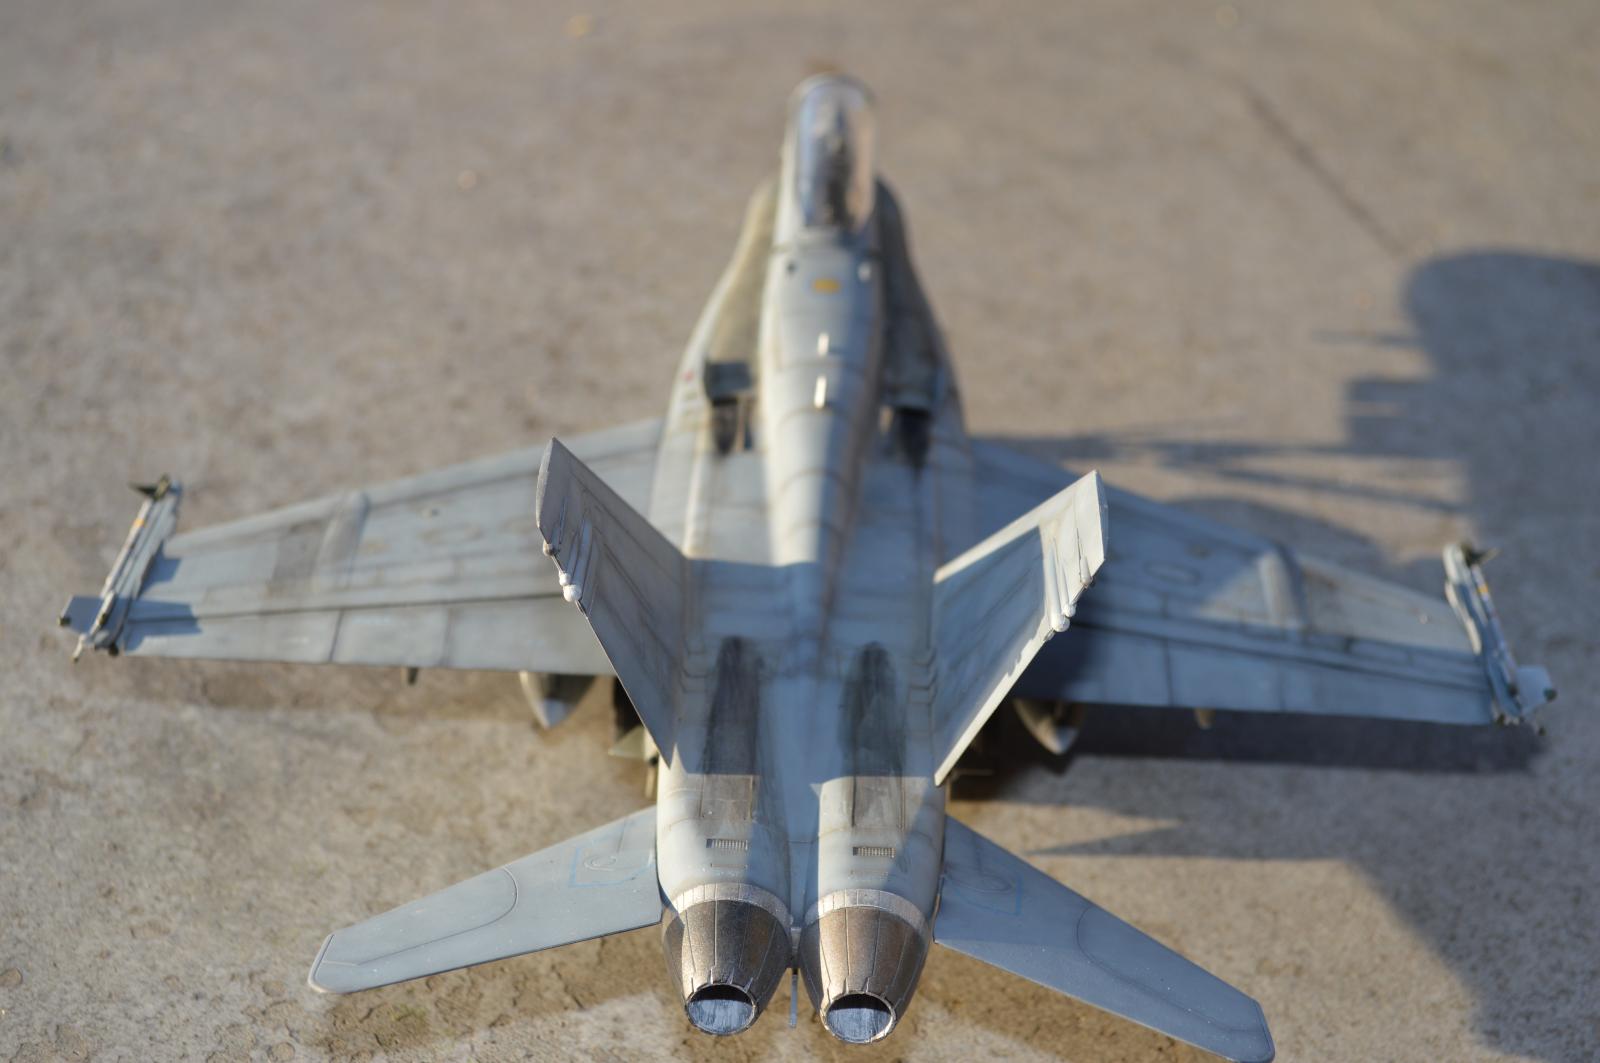
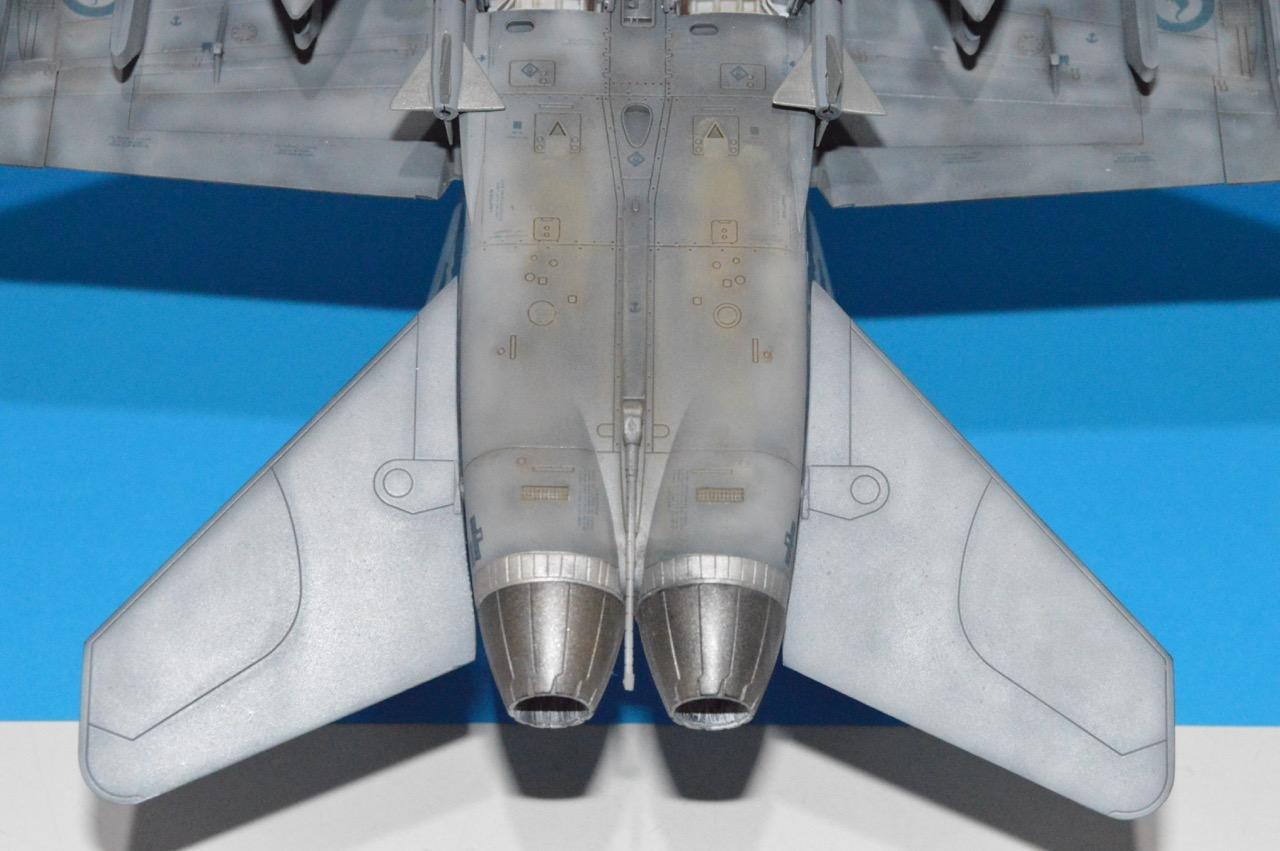
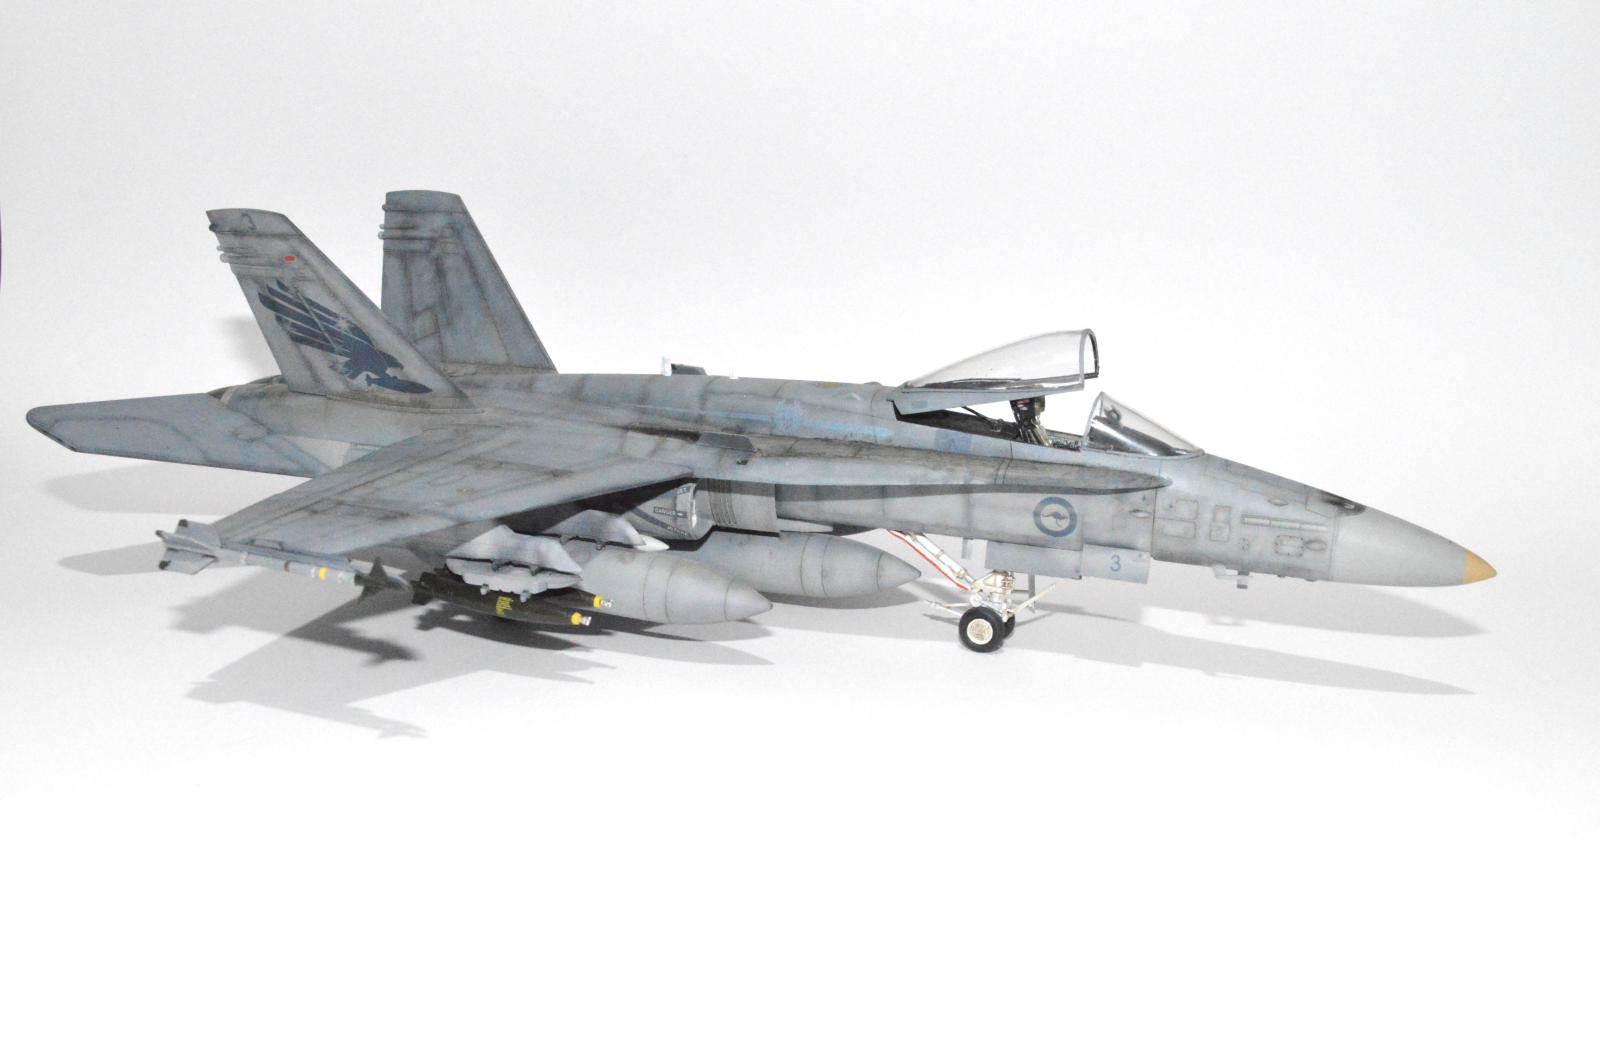
Top side of the aircraft is Medium Grey which is a blue grey shade. The colours used were ten parts XF-19 (Sky Grey) with 2 parts XF-18 (Medium Blue).
The bottom half of the aircraft (and the standard colour), was Light Ghost Grey (Light Compass Grey). The colours used here were ten parts XF-19 (Sky Grey) and one part XF-2 (flat white). This included the nose cone.
Tamiya doesn't offer a specific Radome Tan, so I played around with some colour suggestions on the web. I eventually settled on 3 parts XF-57 (Buff), 3 parts XF-59 (Desert Yellow) and 2 parts XF-2 (Flat White). I think it looked very good.
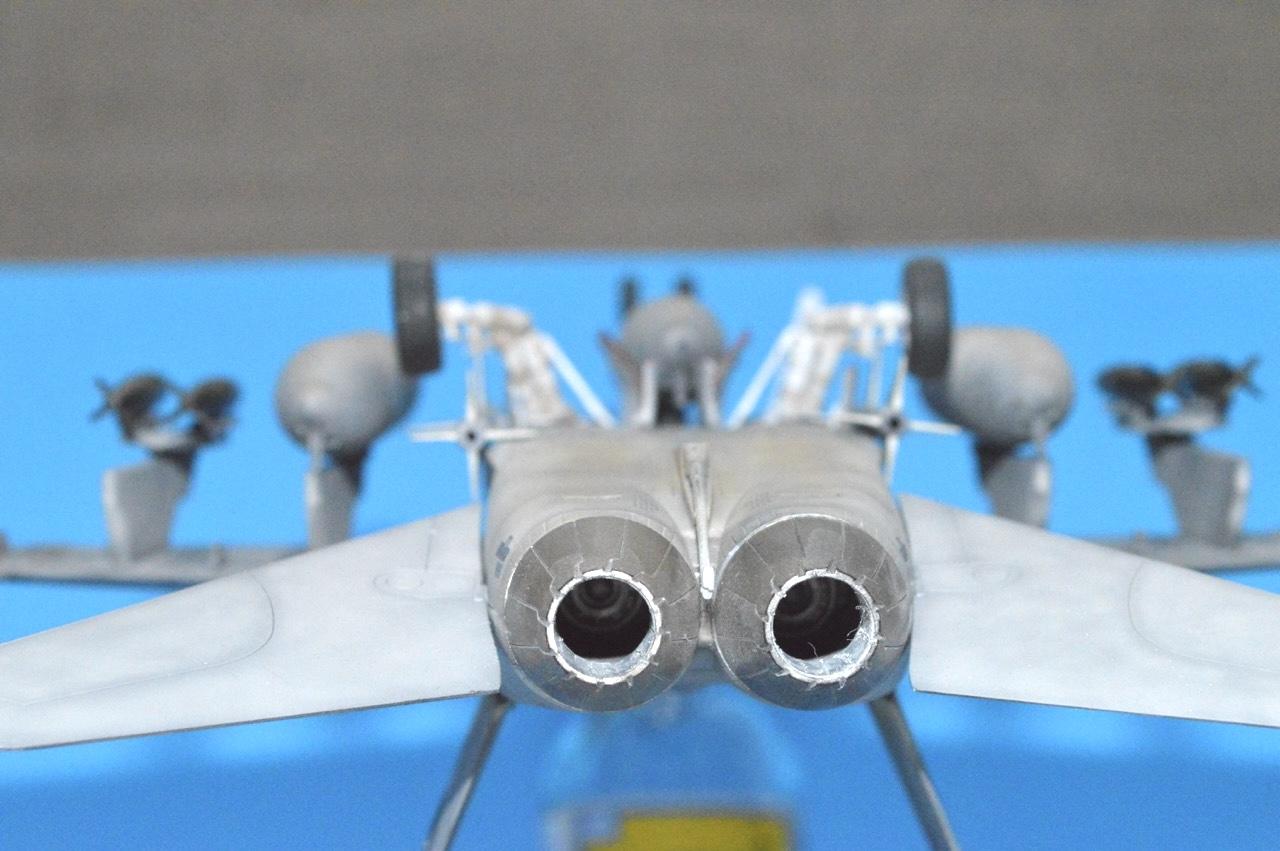
For the engine jet exhausts, I simply used X-10 (Gun Metal) and added a drop or two of XF-10 (brown). I forgot to note down my ratio's used but I think it was roughly 3 parts gun metal and one part brown. I dry brushed XF-2 white on the inside of the exhausts to create the look I could see in photos.
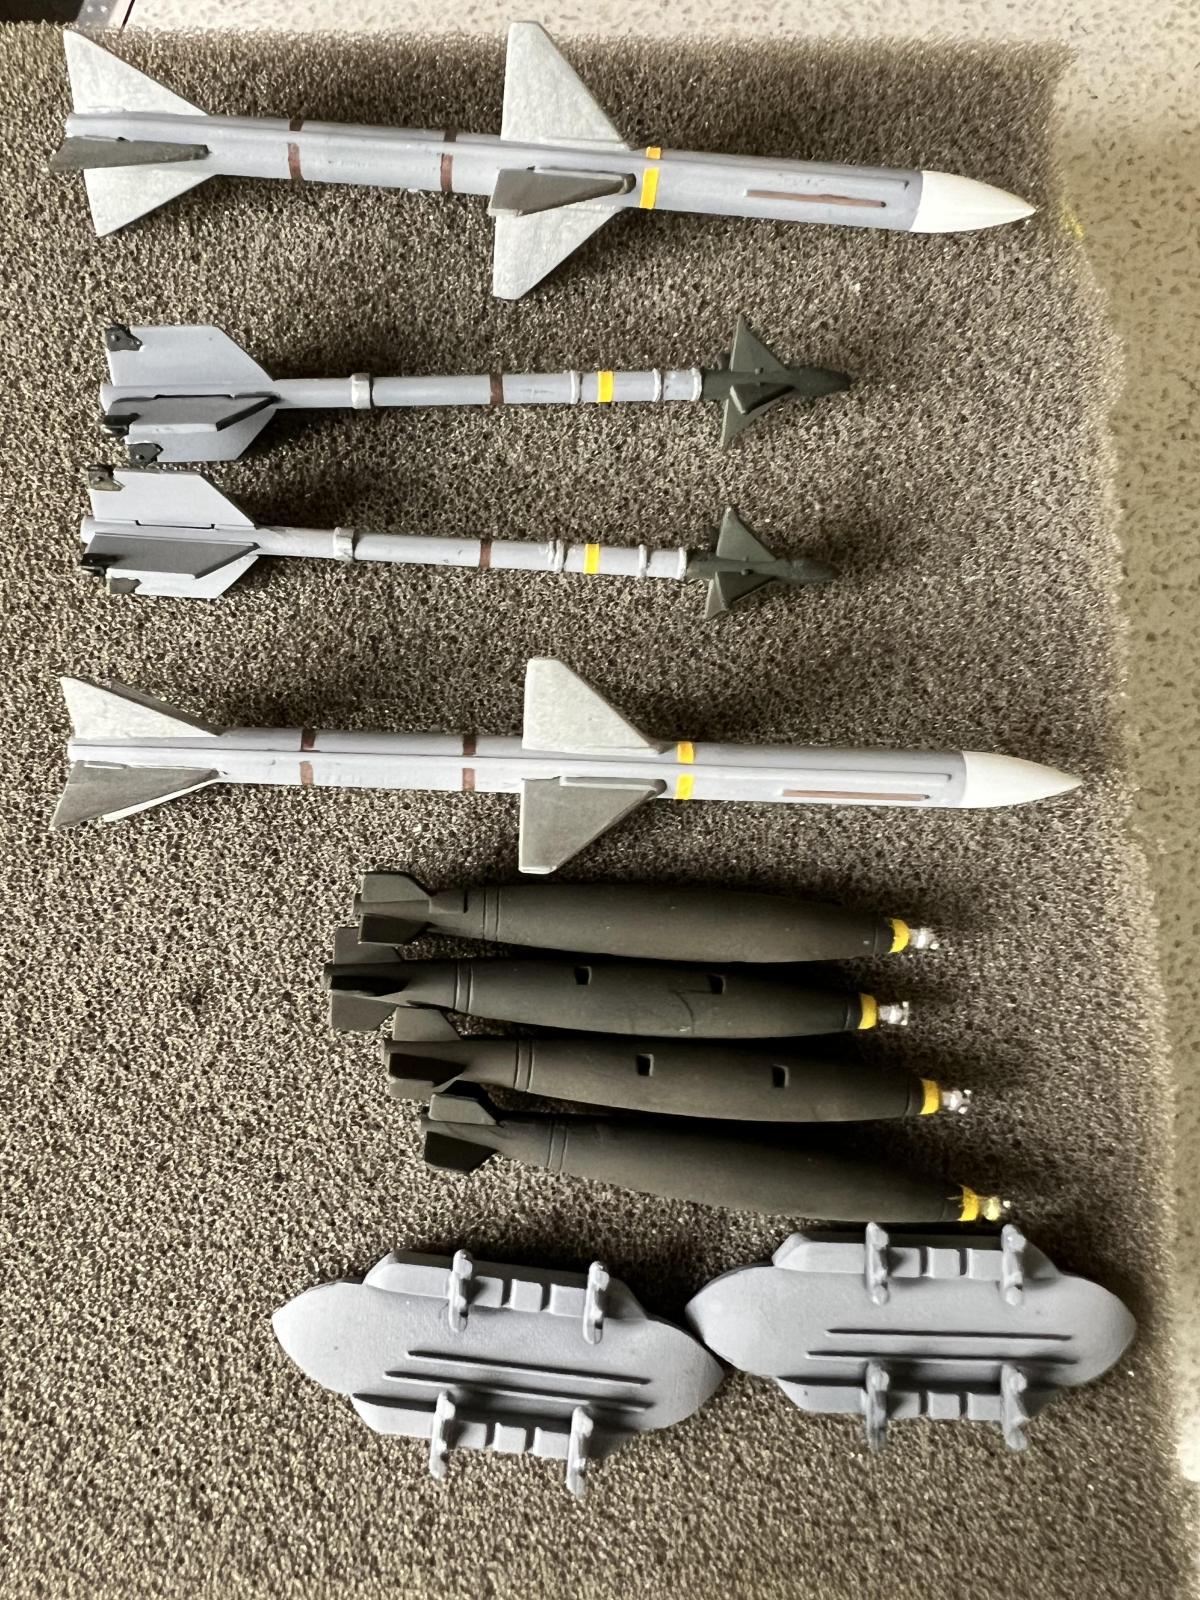
HobbyBoss showed that the missiles such as the Sidewinders and Sparrows were designated as white. I realised that this was correct during the 80's but later into the 90's and beyond, these weapons were generally painted in Light Ghost Grey, so I went with this scheme instead, also depicting the “live” armament of these weapons with the appropriate colour rings on the missiles (Yellow XF-3 and Brown XF-10).
The unguided bombs MK-82's were painted in Olive Drab XF-62 with Yellow bands (XF-3) and chromed tips (X-11).
The bear metal fins of the Sparrow's were replicated using a mix of 2 parts XF-16 (Flat Aluminium) and one part XF-22 (RLM Grey). Seemed to work well 😀
The nose cone of the Sidewinder's were two parts XF-27 (Black Green) one part XF-62 (Olive Drab). Again just playing with colours to try and match a photo reference 🙂
The model was finished with the decals from Dekl's which in the end I found were a little incorrect in the shading but, still better than decals that faced the wrong way 😀
After sealing all the decals in with a few coats of Tamiya Flat Clear to get rid of some silvering in the decals, I then gave the model another few coats of Tamiya Semi-Gloss Clear.
Then to weather the plane I mimicked the dirt and grime on the walkways by the canopy with some black oils, and blended it in with a brush, very lightly dipped in Turps (dry brushing).The same technique and oil was used on the top side of the wings and between the tail fins to create some subtle grime smears.
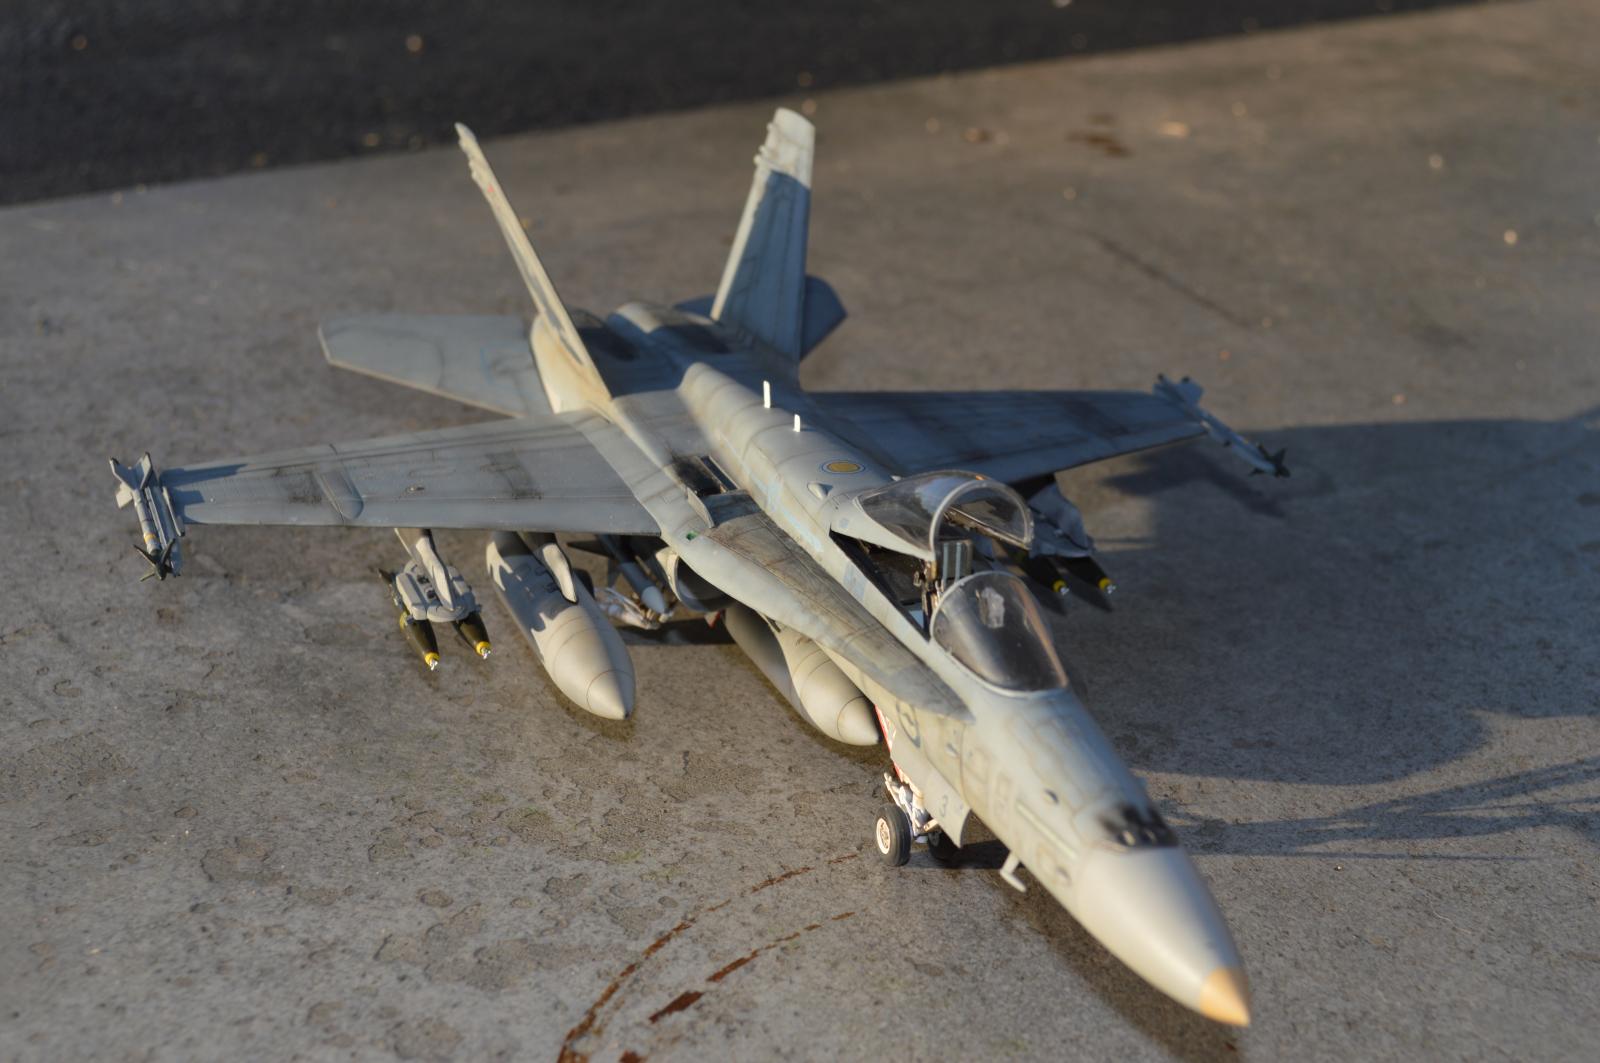
Along the side of the fuselage below the canopy, on the underside of the rear fuselage and on the underside of the external fuel tanks, I used a set of Tamiya Weathering Master (Set A - sand, light sand, mud). I kept this subtle 😀
For the nose guns, I mimicked the gun powder residue with heavily thinned XF-1 Flat Black 10:1.
So, there you have it - I hope you like the end result. Despite all the challenges, I think this model has turned out very well and I love it.


Nicely done!
Thanks David 🙂
Excellent Hornet to add to your collection, Scott! Looks like you built a really nice foundation with the black primer, mottling, panel line wash, and paintwork. Decals blend in nicely, the result turned out great! Love the Quinta stuff.
Thank you Joe 😀
Great work Scott, love the weathering and finish.
RAAF Hornets have always been painted with the same shades of grey, they are darker than the USN colours. Over time they fade and touch ups look darker which you have captured nicely. Also early on the RAAF replaced the Sidewinders with ASRAAMs during the first HUG (Hornet UpGrade) programs. It is a pity Hobby Boss (and Kinetic) does not provide the correct weapons for a RAAF jet in the RAAF boxing!
Great insights thank you Ray. And thank you for your feedback too 😀
A really great looking aircraft. It looks very realistically like a working line bird. I appreciate your color combination call outs !
Thank you Dan. I appreciate your feedback. Always happy to share paint codes, especially as in this kit, Hobby Boss didn’t really show any Tamiya codes because Tamiya don’t have a one paint colour code that other manufacturers do for certain colours such as the main airframe colours.
Really nice job and great result, Scott!
Amazing comeback: your first jet fighter model since childhood!
Love the painting and weathering.
Well done!
Hey Spiros. Thank you for your feedback my friend 😀
That is really an awesome build you shared, Scott!
Love the weathering and the detailed cockpit, amazing piece of work.
Thank you so much Alfred 🙂
Splendid work on this Hornet. Just wonderful to look at and study all the details.
Thak you Matt - I appreciate your comments very much 🙂
A wonderful result, Scott @scottiya
Building your first aircraft with these looks after such a long time clearly shows your skills.
Excellent paintwork and weathering.
Hi John and thank you for your kind words 🙂
Great paint job leading to a super result.
Thank you Tom - I appreciate that 🙂
G’day Scott (@scottiya),
This is a great build.
I built the same kit a few years ago. The main issue I had was that the canopy had a step between left and right that I had to deal with.
RAAF Classic Hornets were the A and B models with the Hornet UpGrade (HUG) program bringing the up to approximately C/D standard, including the AIM-120 AMRAAM.
One unique thing is the upgrade did was to add the AIM-132 ASRAAM, replacing the AIM-9 Sidewinder.
The mod also added the “bird slicer” IFF antenae above the nose, just in front of the canopy.
RAAF Hornets were painted FS 35273 Blue Grey upper surfaces (which your mix looks to have achieved) and FS 36375 Medium Grey undersides (the same as USN aircraft).
(Our Super Hornets are painted the standard USN scheme).
Technically, there are a few mods required to bring the kit up to full spec, but I won’t bore you with them. If you ever want to build another I can give you some tips on the mods required.
Regardless, your painting and weathering are very nicely done and capture the look of a well worn machine.
Liked!
G'day Michael,
Yeah, I kinda feel that this kit was very confused, and it confused me at times. The kit has the smart weapons in it, and I really wanted to use them, but I couldn't figure out exactly which pods were used with which weapons. There seemed to be so many different combos. And then when I did figure that out, I realised too late that the kit instructions had had me glue on the standard weapons/drop tank mount onto the belly - which for the smart pods wasn't applicable anyway.
So, to be safe I went with the MK82 bombs, the full complement of the drop tanks as well as the sidewinder and sparrow.
The kit was designated C, but am I right in saying it's more like an A, or is it a confused hash of both?
I'd love to look at your mods suggestions mate - always happy to improve on a future build of this model.
Thank you for your feedback also mate. I appreciate it 😀
You achieved a great-looking, nicely worn Hornet! Fantastic work, especially for a "first jet" in a long time!
Thank you Greg - I appreciate you checking it out and saying a few words mate 😀