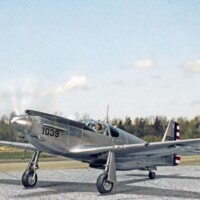
XP-72
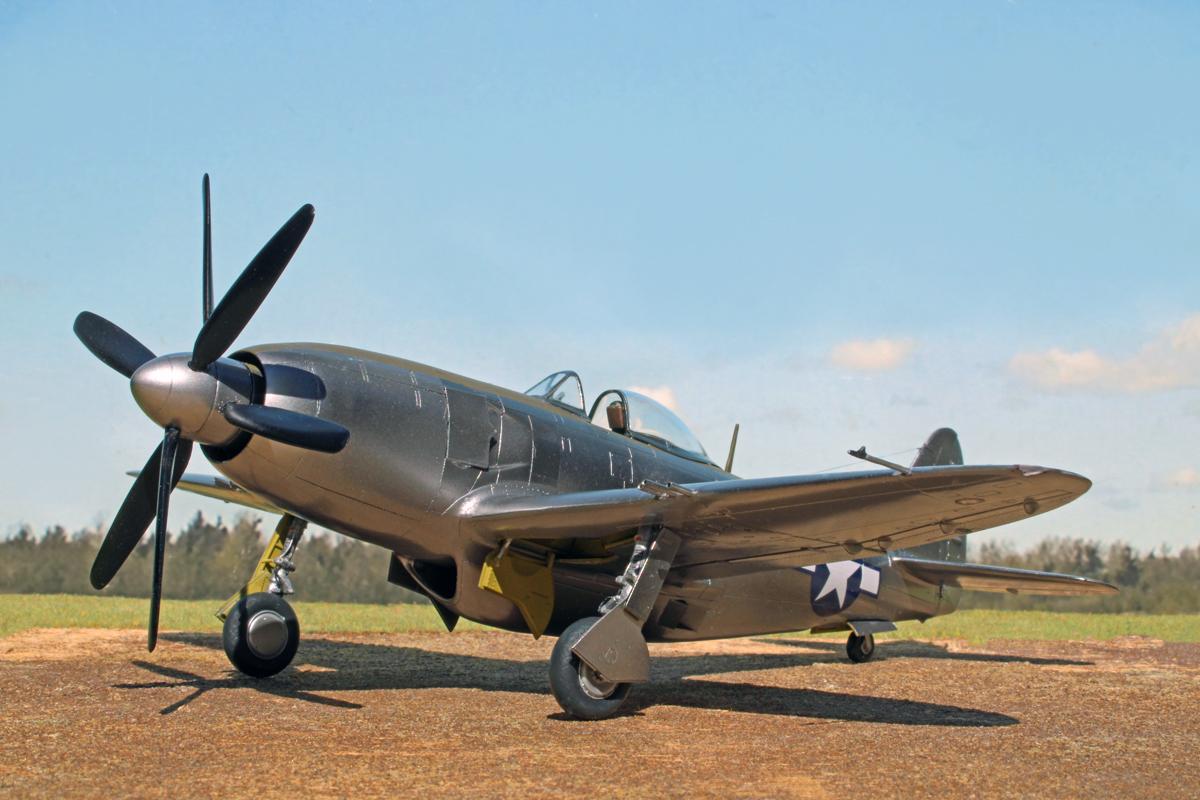
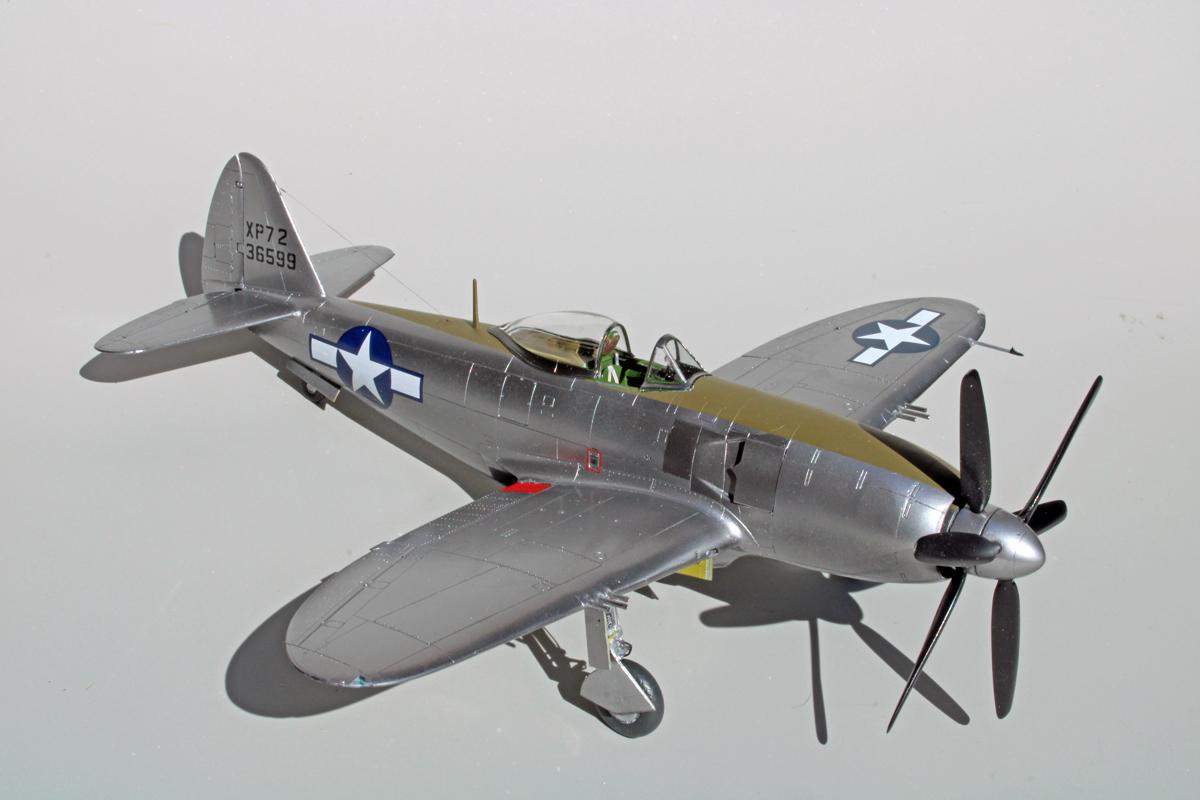
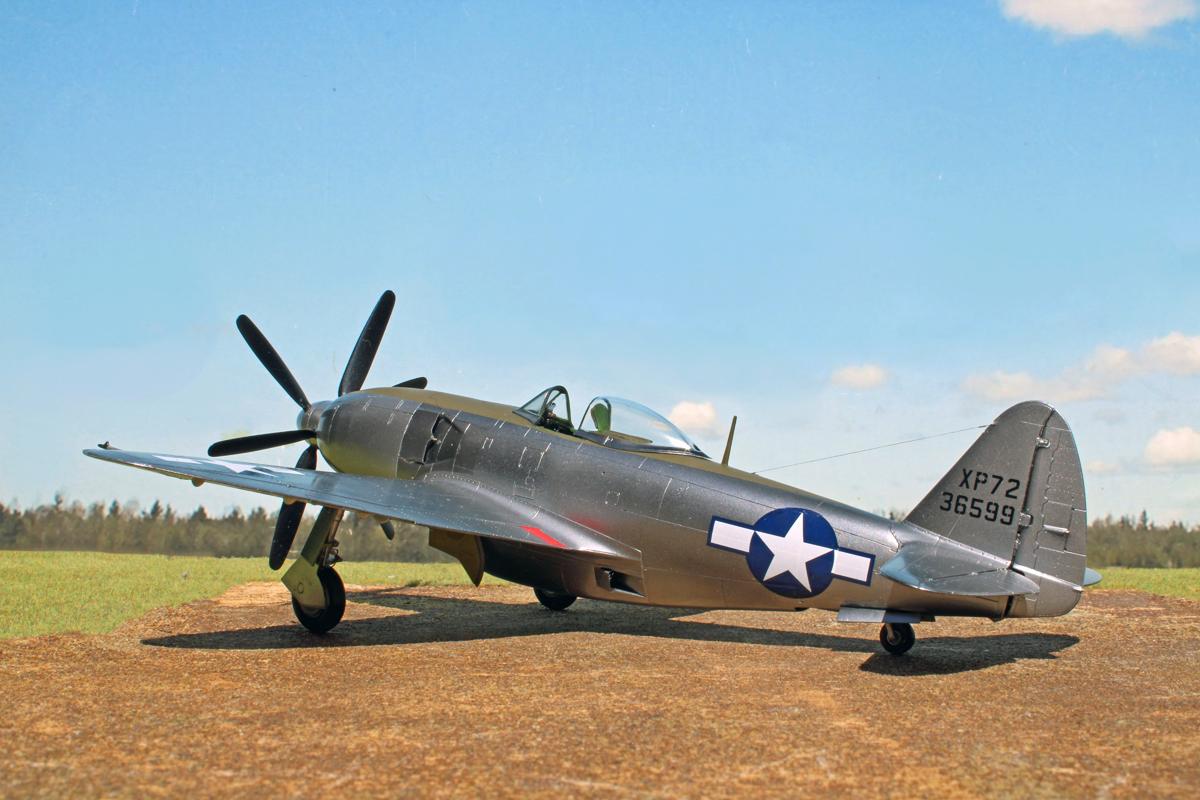
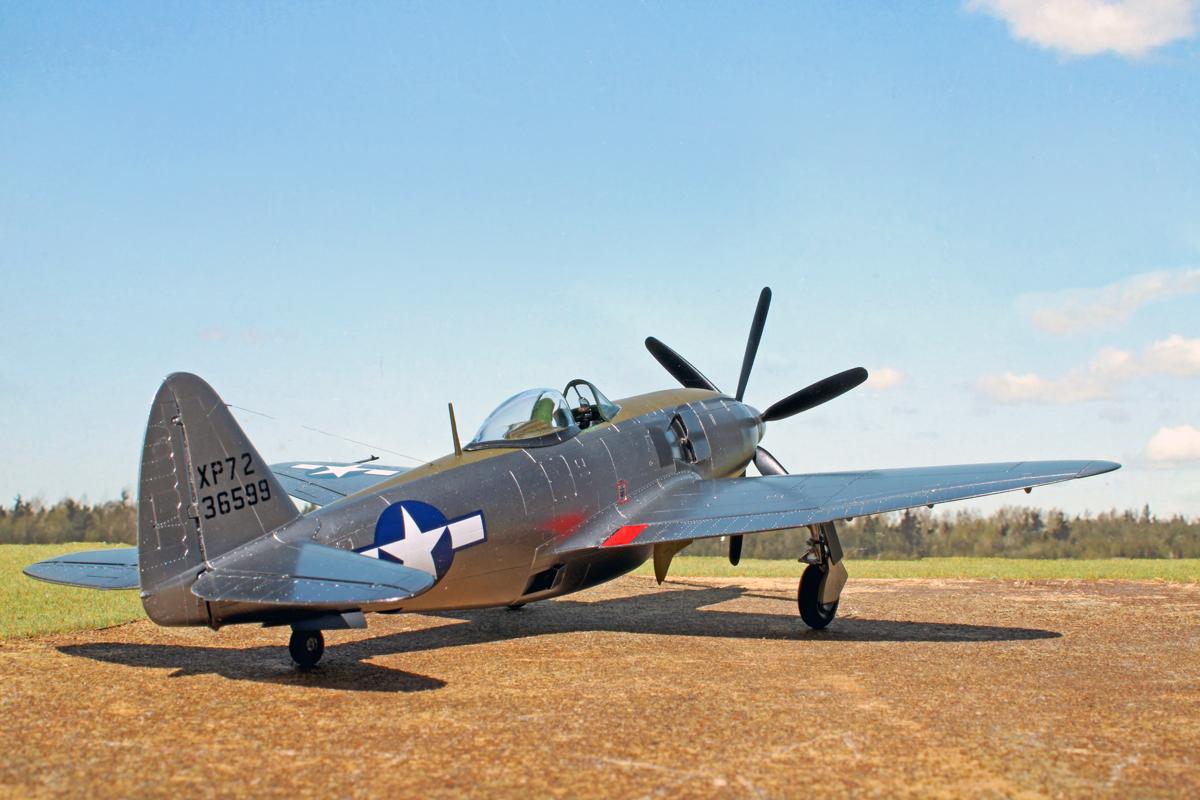
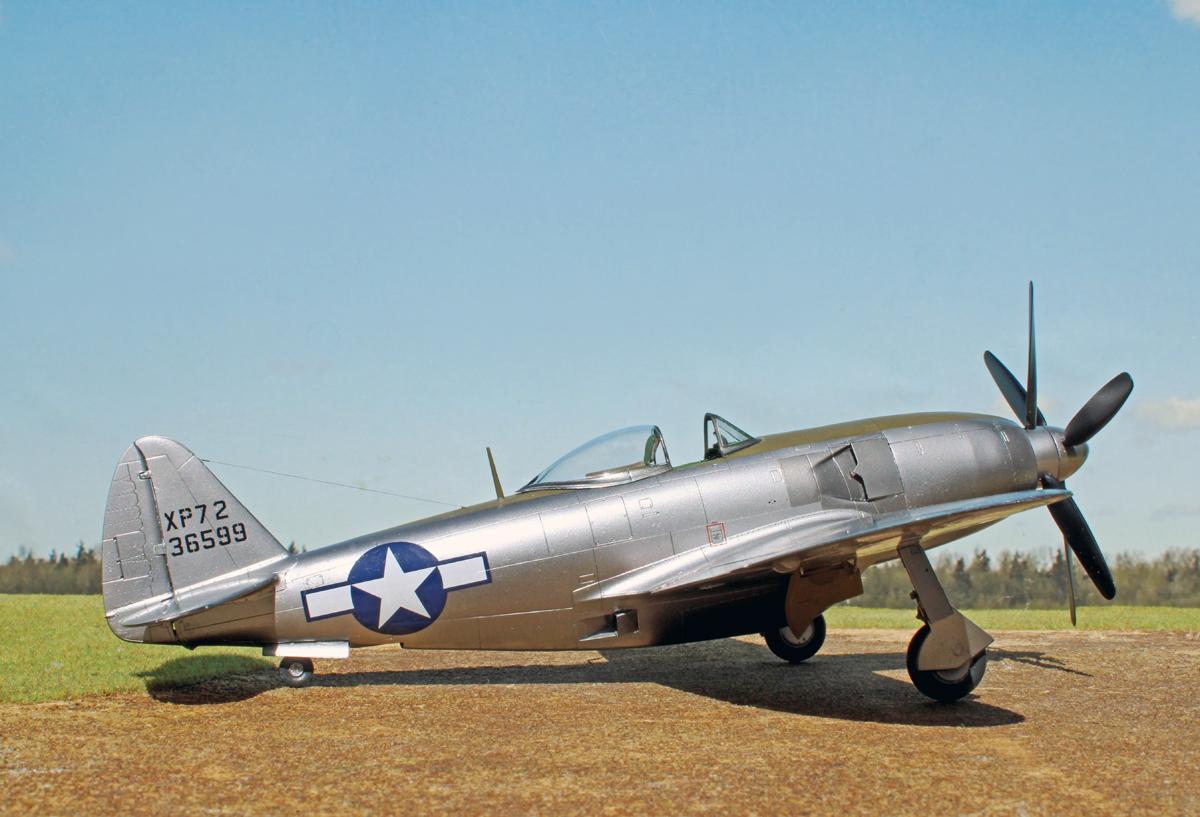
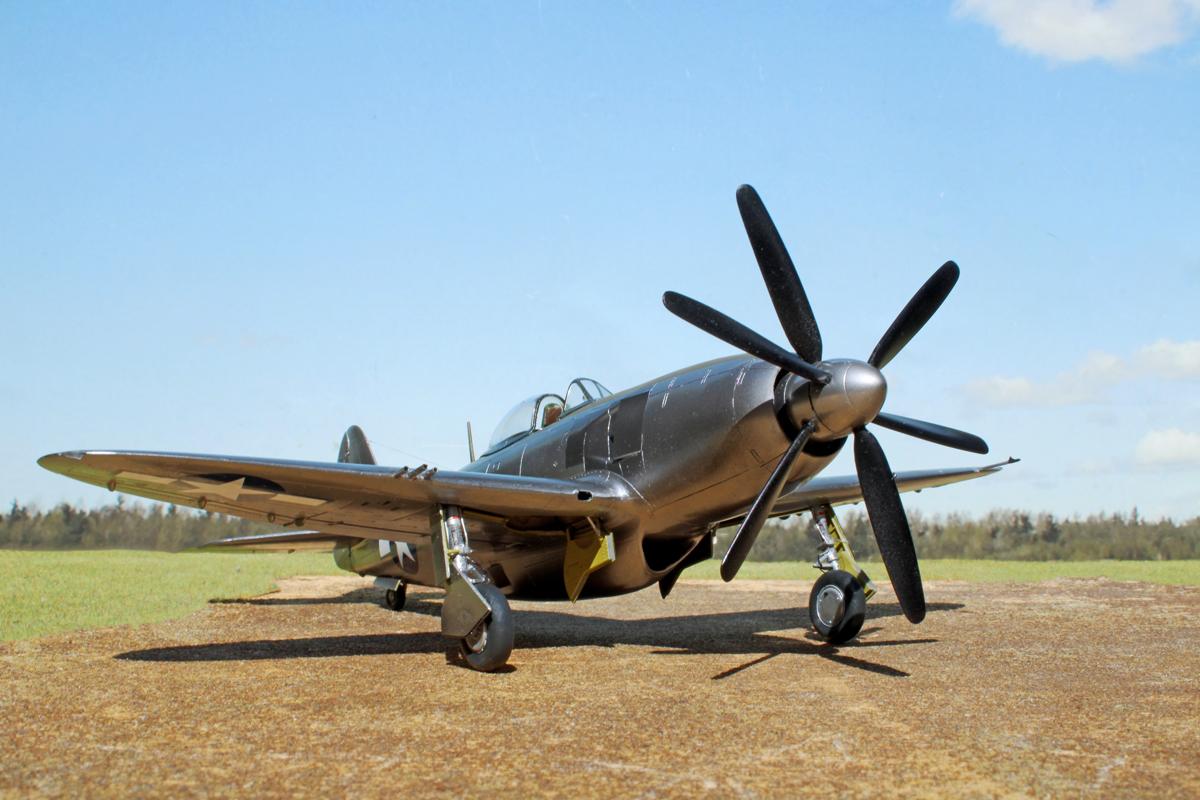
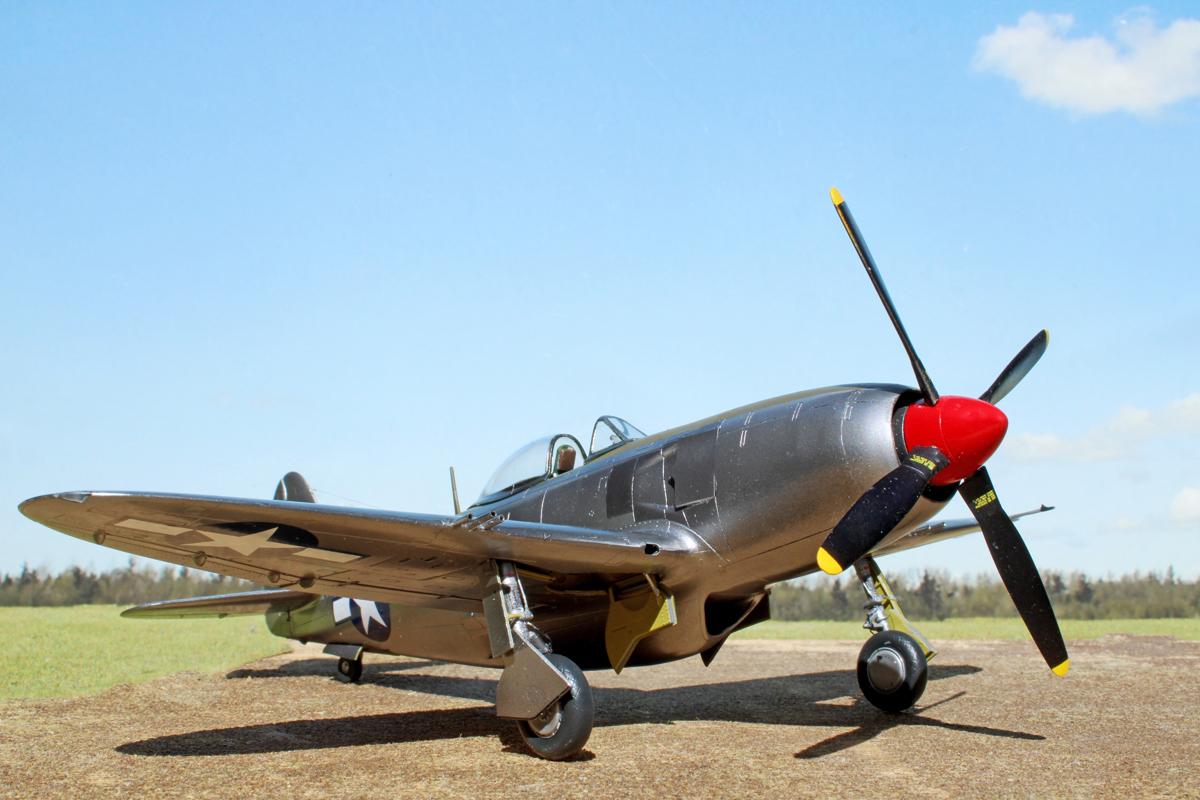
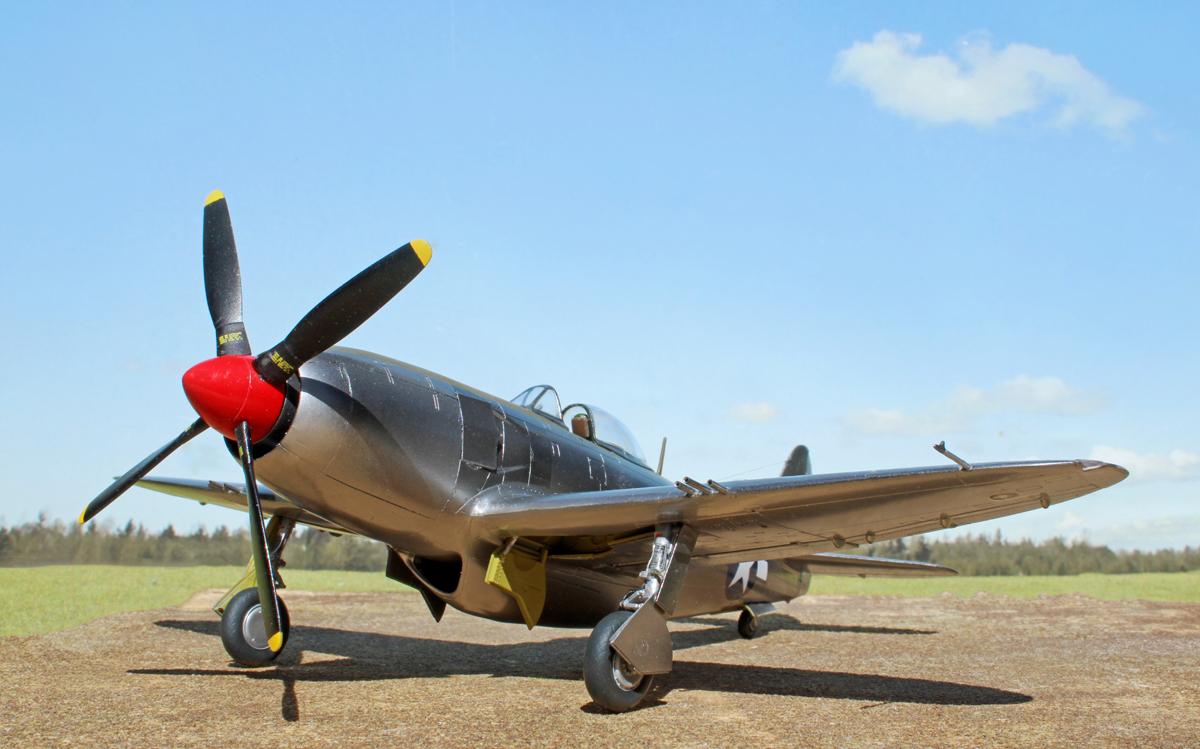
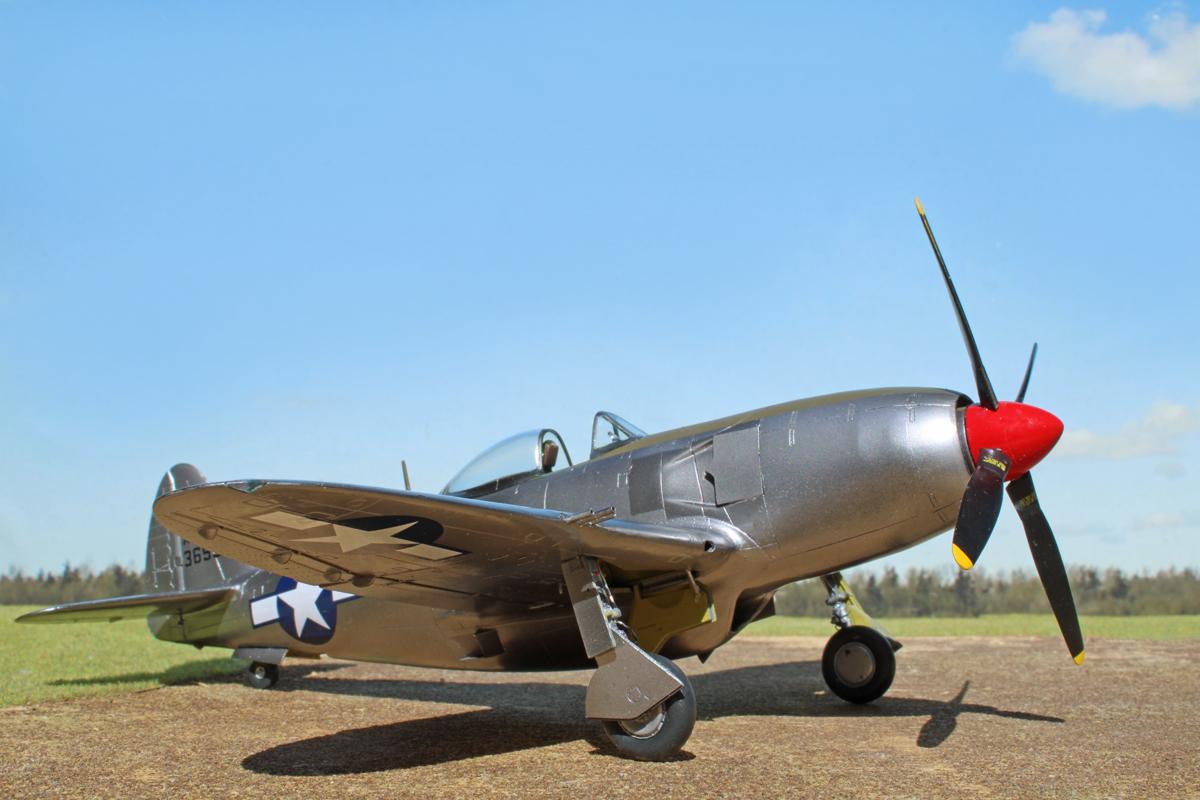
Here’s my build of the XP-72 using the 1:48 Halberd conversion kit with the Tamiya P-47D. An excellent conversion, the Halberd resin mates perfectly to the Tamiya kit. The XP-72 was the ultimate Thunderbolt, a P-47 extensively modified to accept the 28-cylinder Pratt & Whitney R-4360 engine. The modifications were extensive enough to re-designate the airplane XP-72.
For a history of this aircraft I refer you to Tom Cleaver’s excellent article on this forum.
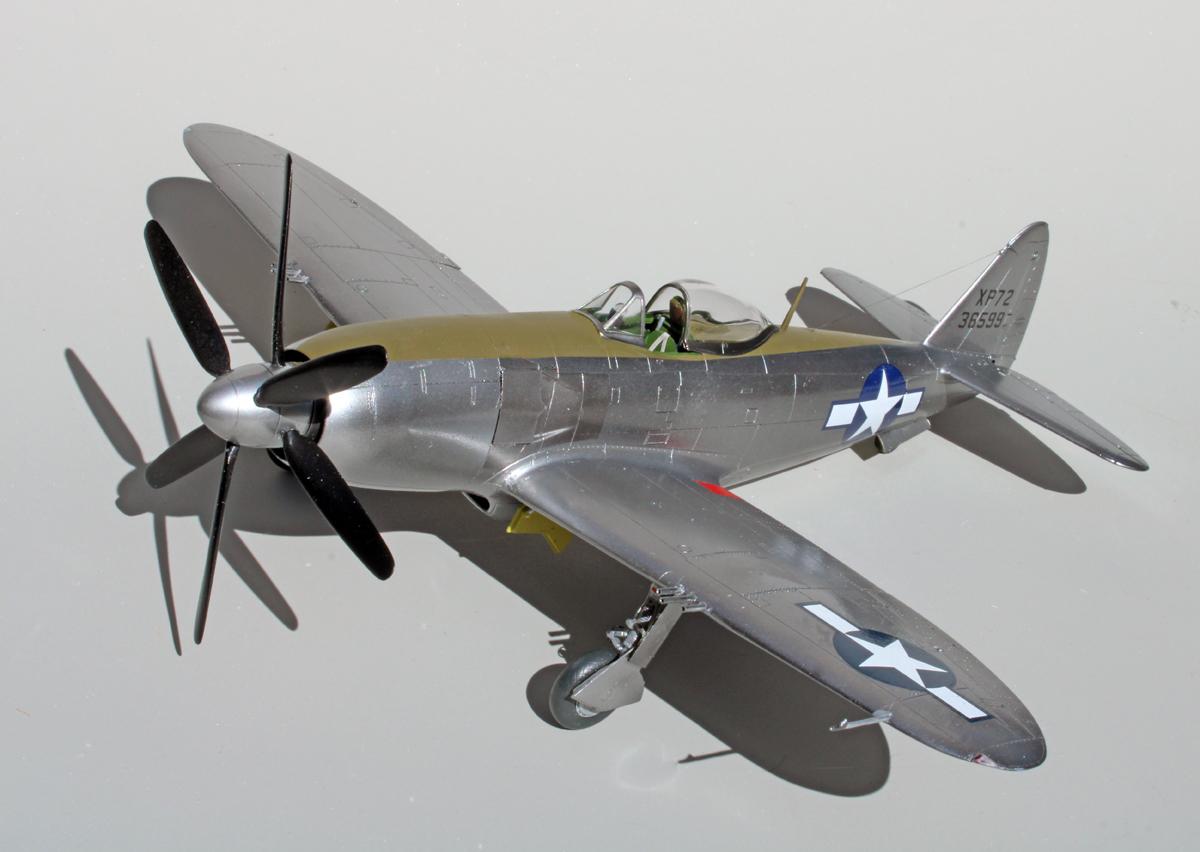
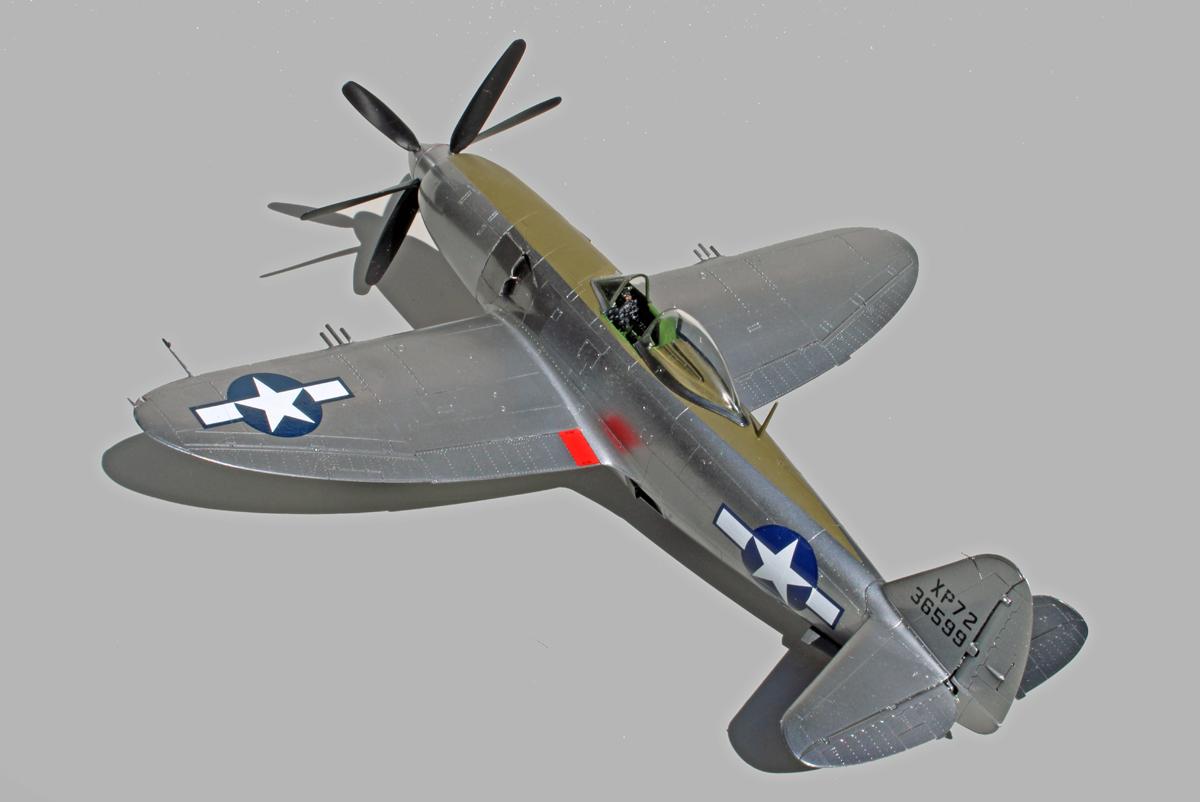
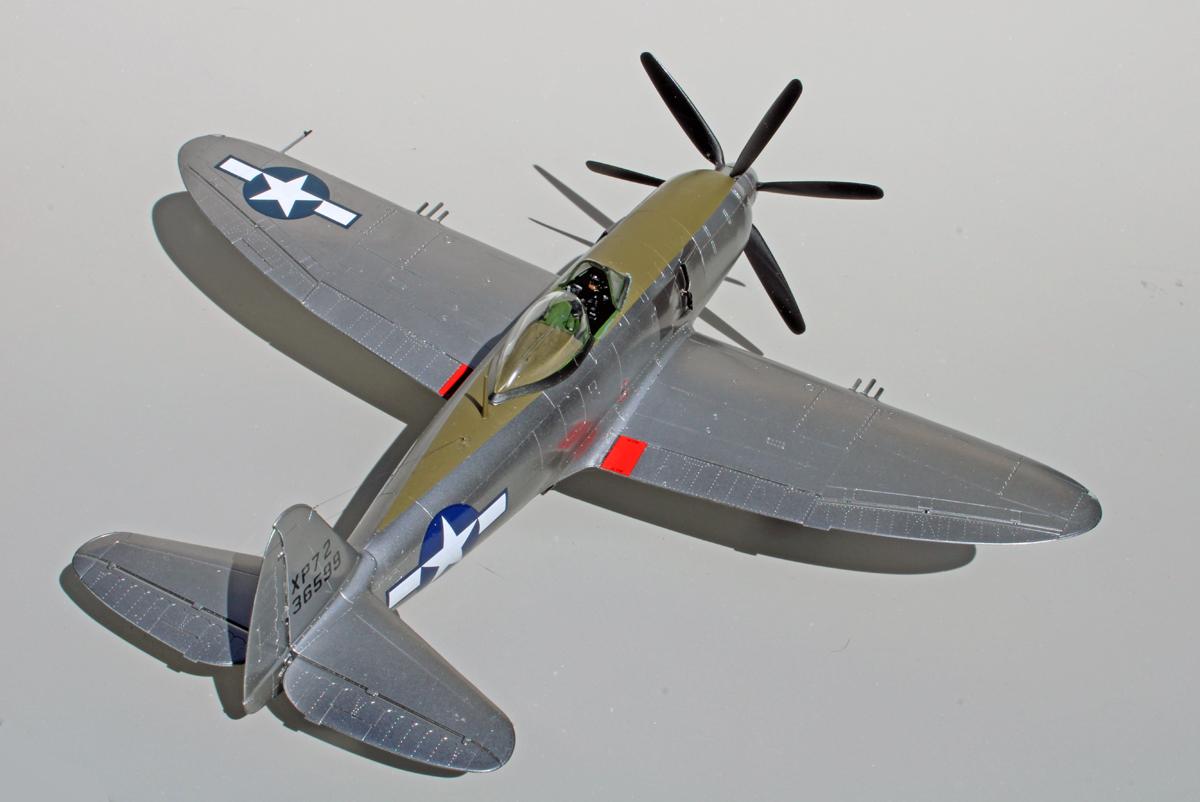
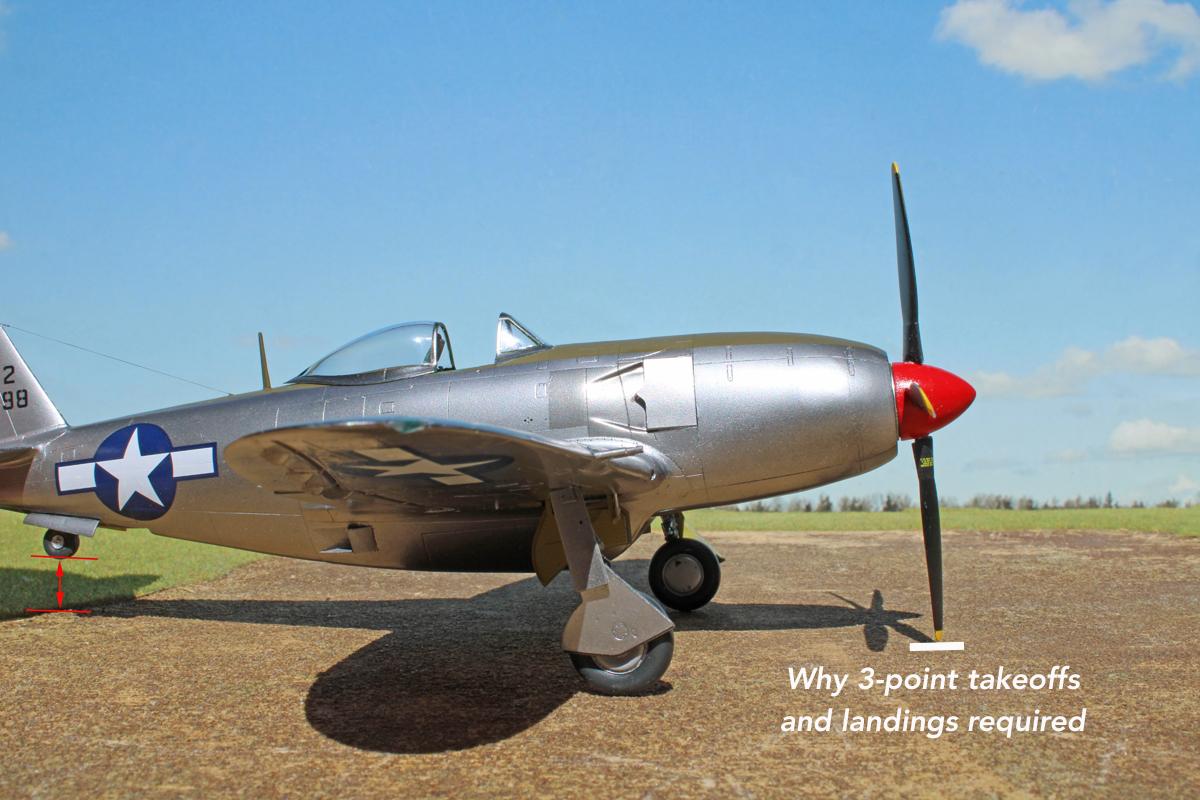
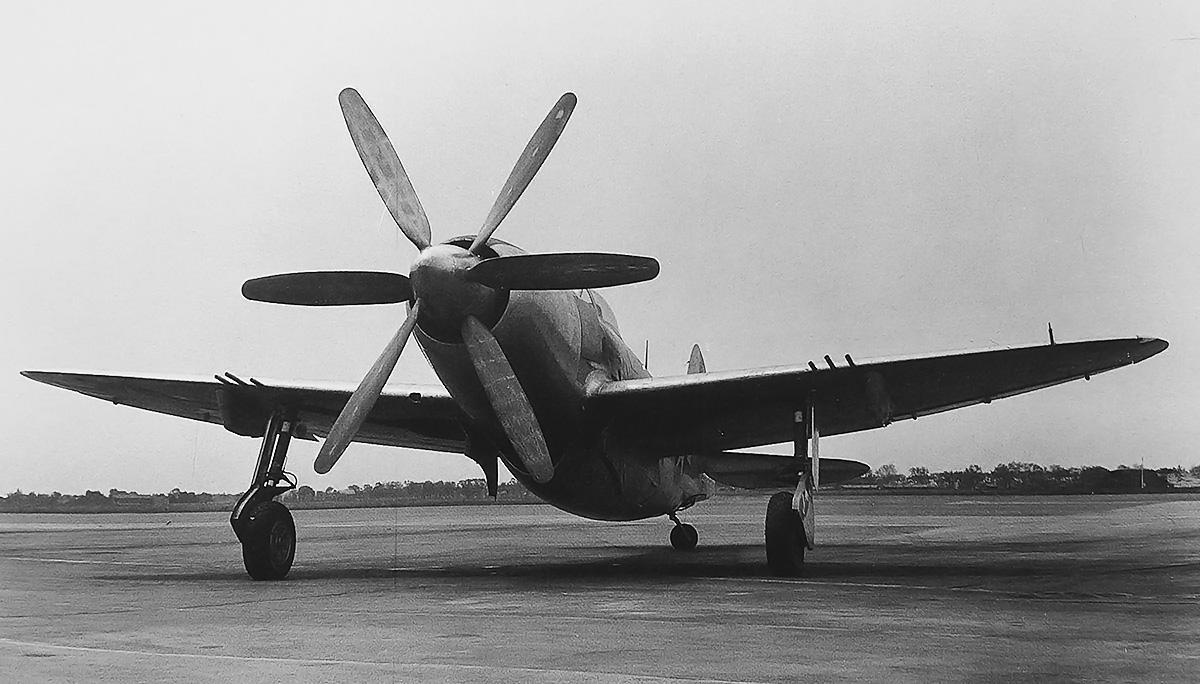
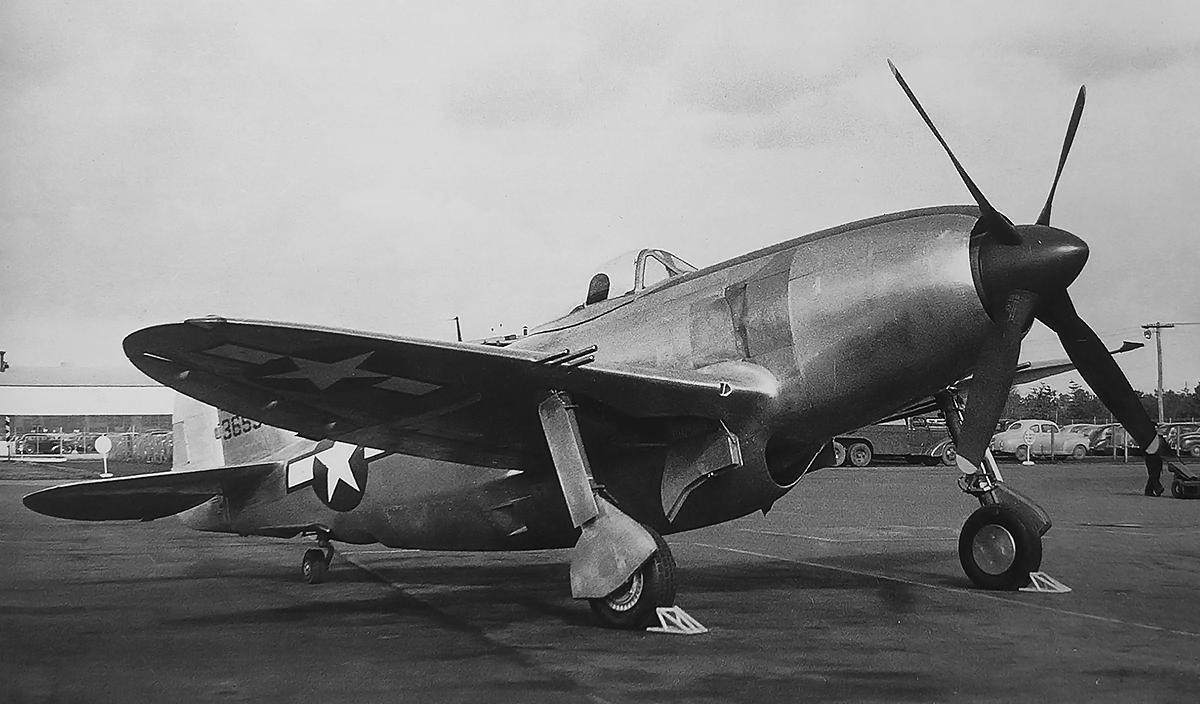
The kit comes with two propellers, one the huge Curtiss Electric 4-bladed prop for the first XP-72, 43-36598. It was probably the largest prop ever installed on a single engine fighter, with a diameter if 14’2” and only had a little over 5” of ground clearance, making 3-point takeoffs and landings necessary. The second test airplane, 43-36599 had an Aeroproducts 6-bladed contra-rotating prop with a 13”6” diameter, giving a little more ground clearance but still making 3-pointers necessary. The kit has decals for both serial numbers. The props fit into a receptacle on the nose with a close-tolerance press fit, no glue necessary. So, I built both props and can interchange them. The only other visible difference between the two airplanes is the serial number and the OD anti-glare paint on top of the fuselage. 43-36598 only had the anti-glare forward of the windscreen, while 43-36599 had the anti-glare paint extended on the aft fuselage behind the canopy. Also, the antenna wire was different. One thing that Halberd missed is the fact that the XP-72 main gear scissors were different from the P-47. On the XP-72 the scissors faced inward instead of forward and the gear doors had a different profile, apparently a holdover from the XP-47J. The only surgery required is the replacement of the Tamiya lower wing panel for the shell ejector chutes with a resin replacement, which fits perfectly. The XP-47J and the XP-72 only had 3 .50 calibre guns in each wing instead of the 4 guns on P-47s. You also need to plug the inboard gun hole in the leading edge panel. The kit instructions gives dimensions for the gun barrel lengths.
The only thing I added to the build were Eduard shoulder harness and belts and brake lines. I also repositioned the scissors and changed the outboard lower gear door profile. Paint is Alclad ll Duraluminum, Stainless Steel and Model Master OD. I painted both props black. The only photo I could find showing the front of the 6-bladed prop looks like some blades were black, other blades look like they had some work done, left unpainted. Also, the Tamiya national stars and bars are too large, as operational P-47s had enlarged insignia on the wings and cutouts for the intercooler doors on the fuselage. I found proper sized stars and bars in my decal dungeon.
Like the XP-47H, this Halberd conversion was a joy to work with. Now, if they would offer a XP-47J I’d be a happy camper.

Excellent result, pure joy to look at- congratulations to that beautiful model!
Excellent Chas, really outstanding!
Now that’s a huge propeller!
Beautiful piece of work, Chas.
A gem of a model, Chas!
Congratulations!
A perfect conversion, Chas @chasbunch
Really beautiful how the painting turned out.
Inspiring build, Chas.
Love it!
Great metalwork. Well done, Chas.
Beautiful work that built up to a very cool looking plane. The silver turned out good, I have terrible luck with that. I would really love to see that fly.
Great work, Chas. That model looks fantastic. You and I appear to be the only ones who got the memo on the landing gear. Your NMF is superb.
Nice work Chas 🙂
Superb work on this, Chas. It’s a great looking model.
Looks great!
These Halberd conversions really make a nice model, Chas (@chasbunch), of course your skill bringing the kit and resin together also play a big part in the success of this build. Well done.
Another beautiful conversion from your workshop. It looks really impressive.