Academy 1/700 USS Enterprise CV-6 "Modeler's Edition"
Kit: Academy 1/700 USS Enterprise CV-6 "Modeler's Edition"
EDIT 11/2021: Fixed the SBD wing issue by building new ones
History:
The USS Enterprise CV-6 was the seventh US Navy vessel of that name and the sixth US aircraft carrier. She was a Yorktown-class carrier commissioned in 1936 and was one of only three pre-war US carriers to survive World War II. She was the only US carrier involved in the defense of Pearl Harbor as well as the first US carrier to sustain casualties and destroy an enemy warship in the Pacific theatre. She was the most decorated US warship of WW2, earned the most battle stars out of any US warship in WW2 (20 total), participated in more major actions of war against the Japanese than any other US warship, and played a crucial role in the Battle of Midway turning the tide of the war. Between October 26 and December 5, 1942 she was the only operational US carrier giving way to the phrase "Enterprise vs Japan". During the war she sustained damage 13 times due to hits or near-misses by bombs or suicide planes and was wrongly declared sunk by the Japanese on three seperate occasions earning her the nickname "The Grey Ghost".
The kit:
Academy really did a pretty decent job of putting a good kit together for this ship at this scale. I had read that Tamiya's kit was off-scale and outdated and lacking so it was between Trumpeter's and Academy's newer kits for me. The photoetch and pre-cut masks of Academy's "Modeler's Edition" did it for me. It's pricier than Trumpeter's but in my opinion it's worth it. Truth be told I used hobbyshop gift certificates I won at a competition with my last carrier build so price wasn't a huge factor for me but it came at about $70 whereas Trumpeter's was about $55. All sprues except two are in a blueish gray. The lower hull, rudder, and propellers are molded in red. The optional stand is molded in black. The kit had virtually no flash and all ejector pin marks were located in places that would not be visible. It can be assembled with a full hull or waterline version. The lower hull snaps into place to allow one to change it out later if they want to. The deck is one piece with the exception of two elevators- the forward and aft elevators. The midship elevator is molded into place. The ship comes with as many guns (and types of guns) necessary to build the kit as she was April-July 1942. It comes with 32 x Oerlikon single 20mm machine guns, 8 x 5"/38cal dual-purpose guns, and 4 x quad 1.1"/75cal cannons. It comes with a decent array of aircraft (8 x TBD Devastators, 8 x SBD Dauntless, and 8 x F4F Wildcats) all molded in gray plastic along with decals for their markings. The aircraft lack any detail whatsoever and have thick pegs for landing gear and are molded with propellers on. The sprues form a 3D square around the propellers protecting them from breaking in the box which is a nice touch. The photoetch comes on a single, flat sheet. The masks come on a single sheet. The deck markings are decals which are pretty thick and can stand up to some abuse which is necessary to maneuver them into proper lines. If one wanted to do a quick and easy build of the USS Enterprise CV-6 that is decent enough to look at and won't break the bank or take up too much room, this may be it.
The build:
As I said, this kit makes a decent-enough CV-6 but I didn't want just decent. I wanted it to look like a 1/350 scale carrier at 1/700 so I knew I had some work to do.
The first issue was the fact that this kit only has the option to be built with all of the hangar bay doors closed. They are all molded closed. Because of this, all of the ejector pin marks are on the inside side of all hull pieces and there is little to no interior detail. There are some lines molded into the floor in case you decide to opt for either the forward or aft elevators to be in the "down" position, giving you a downward glimpse into the hangar bay. There are a couple of problems with this though as ejector pin marks are very visible in the elevator shaft walls and the bigger problem being that the entire forward elevator shaft is missing. The hangar bay floor only goes about 3/4 of the way forward, then there is a square piece that holds the deck up where the elevator shaft should be. Which is weird considering they give that elevator as an optional up-or-down. The hangar bay floor also has the midship and aft elevators' detail molded into it. Which is weird because the midship elevator is molded into the deck, not giving the option. Thus making the aft elevator the only real optional one. There are also no interior walls in the hangar bay. All of this means that to build this kit with the doors open, a MASSIVE amount of surgery and scratch-building has to occur. I was dead-set on open doors so I had alot of work ahead of me.
The first step was to cut the bay doors out. The 4 big bay doors are actually each comprised of 4 doors. I cut them out completely then used thin styrene to make up the dividers. Once the doors were open, you could see how awful the interior was so i proceeded to build it out. I cut out the forward elevator shaft and extended the bay floor foreard using styrene sheeting. I also built the walls of the forward shaft with styrene. When the elevators come down, they fit flush with the floor meaning theres a hole in the floor where they should fit. I cut all 3 out and used styrene sheet underneath to make the shaft floors. I built the interior walls out of styrene as well using the instructions of a 1/350 CV-6 as a blueprint. I shaved or filled/sanded all ejector pin marks and detailed the walls with spare parts from my spare parts box. I used styrene flat trusses on the ceiling and put a styrene I-beam across. I used styrene U-beams in the shafts to form the steel ralls.
The hull came with no plank detail so I used Tamiya masking tape and taped alternating planks and used those as stencils to etch the detail into the hull.
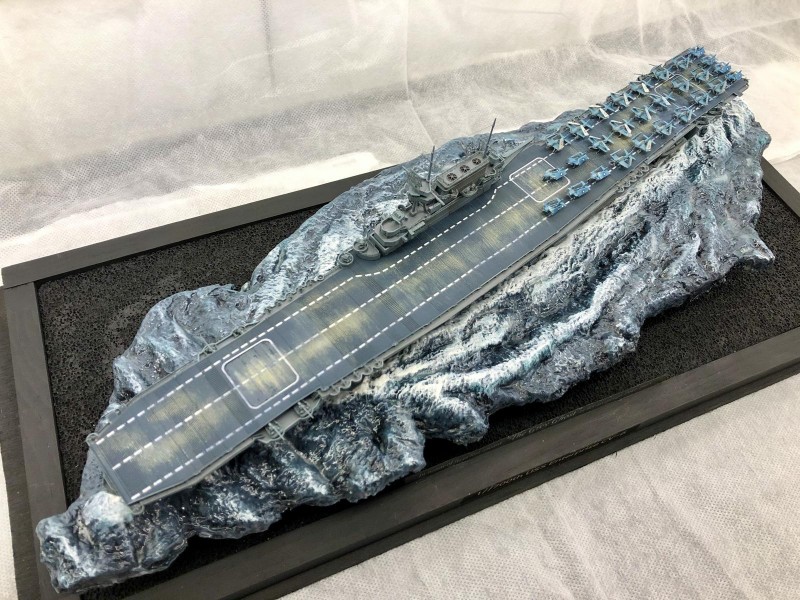
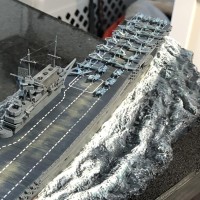
For the deck I first sprayed Tamiya Light Sand, then I sprayed mist coats of Tamiya Navy Blue. I lightly sanded the Navy Blue off using 1000 grit sandpaper to give the weathered effect of the exposed wooden deck. I then followed up using tan pastel powder. I decaled and used blue and tan pastel powders to weather the markings. I used Ammo mig .02mm medium-fine rigging for the arrestor cables.
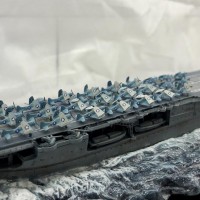
The one thing that was worse in the Academy kit than the Trumpeter was the aircraft. Academy's aircraft lack any detail, have huge pegs as landing gear, and are solid plastic. So I got Trumpeter F4F, SBD, and TBD sets. They have detail and are molded in clear plastic, making clear canopies possible. These require assembly as the lanfing gear and propellers are molded seperately. Assembling these tiny, clear aircraft always makes me feel like I'm going blind. But the result is worth it. I use liquid mask to mask the canopies and painted them Tamiya Light Gray on the bottom and Tamiya Intermediate Blue on top. The Trumpeter decals are really nice but there aren't enough to build all aircraft if you don't use the insignia with the red dot in the center. The red dot was discontinued on the Enterprise before summer 1942 so I opted to make up the rest using the decals from the kit for the standard aircraft. All aircraft I've seen in this scale come with the wings molded fully extended and these were no different so I had to do some surgery on all of them and fold their wings. The F4F-4 with it's folding wings had entered service by summer 1942 so I folded them as well. Had I built an earlier version, their wings would have remained extended. I built 42 of the Trumpeter aircraft and put 14 in the hangar bay. I should have had 54 but some got broken beyond repair when i accidentally dropped my cell phone on them while using the light to try and see what I was doing. (I REALLY need to use my headlamp instead). I painted 10 of the standard Academy aircraft in the same scheme and cut the landing gear, propellers, and wings off and hung them from the I-beam on the ceiling. I stacked the wings together and placed them in little racks I built in the hangar bay. I took one F4F, mangled one of it's wings and broke off it's corresponding landing gear and used bent wire for it's propeller. I set it by the forward large bay doors inside the hangar bay. I wanted it to look like a damaged fighter was being fixed.
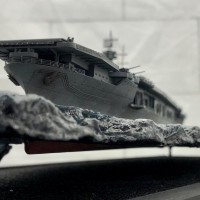
The superstructure goes together perfectly and had no major issues. Once I had the sub-assemblies built I painted the vertical surfaces Tamiya Ocean Gray-2 and the horizontal surfaces Tamiya Gunship Gray-2. I know that at this point CV-6 was painted in Measure 11. At this scale, Measure 11 doesn't look good. And having slight differences between vertical and horizontal surfaces adds slight variety and helps it not look flat, especially at this scale. I painted the lower hull Tamiya Dull Red. I blotted a white wash before gloss coating to simulate salt staining. After gloss coating I used a brown wash. I dull coated and used different colors of pastel powders to simulate rust and grime.
For the photoetched stairs and railings i cut them out and shaped the sections according to where they belonged. I set them standing up on double-sided tape and painted them. I then glued them in place. I lost two small lengths to the carpet monster but it's not very noticeable. I looked for like 30 minutes to no avail. Its never any use but I had to try! I also opted to build the photoetch radar instead of using the plastic one. The plastic one is literally just a flat, square piece of plastic with minimal detail that even a wash would have a hard time bringing out.
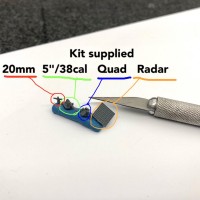
One thing I did not like at all about the kit was the quality of the guns. None of them are good but the 20mm Oerlikons are laughable at best. I replaced all of them with Blue Ridge Models 3D printed guns. The 5"/38cal dual-purpose guns come with metal barrels and photoetched railings. It was easiest to paint the guns while still on the plastic they were printed on, then cutting them off.
I finished the model off with Ammo mig .02mm medium-fine rigging line for all of the rigging. At this point I REALLY thought I was going blind!
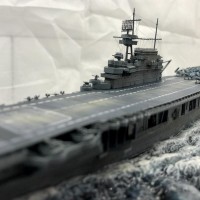
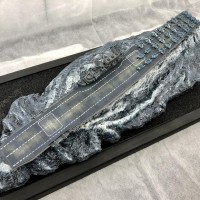
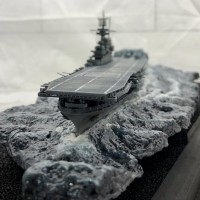
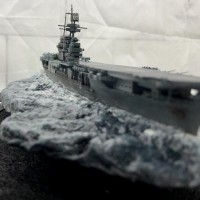
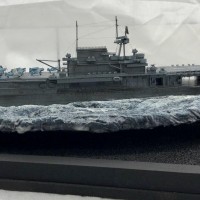
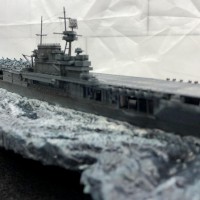
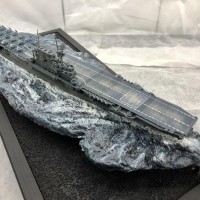
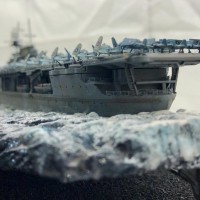
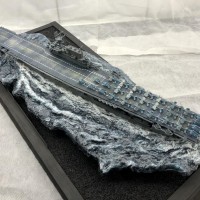
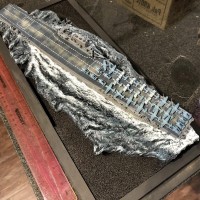
I love the look of waterline models displayed on water but I also love showing a full hull and the look of a ship displayed on a stand. So I mixed both of those. I built her in full hull then made a suspended water stand. I sculpted the stand out of styrofoam and covered it with mod podge and toilet paper. I then painted it and glossed it. I used acrylic gel medium to fill the gaps between the ship and base.
Final thoughts:
The kit itself is nice for a basic, decent-looking, small, affordable display. You can increase the detail by adding the photoetch. If you're okay with closed bay doors and not detailing much this could actually be a really quick build, probably a weekend build. Mine took about 6 months. I really don't like the kit aircraft or guns but for a simple, basic build they'll do the trick. If you're going for accuracy then this is the Enterprise of summer 1942. As far as my build goes, I wish I would have added lighting to the hangar bay because once I put the deck on, it got really dark obviously. If you shine a light in there you can see some of the detail but it's near impossible to get it to show in pictures.
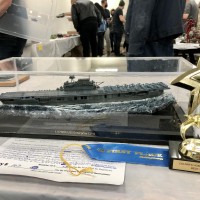
I really really enjoyed this build and am very happy with how it came out. It's my little tribute the the most highly decorated US warship of World War II and her crews.
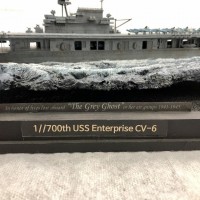
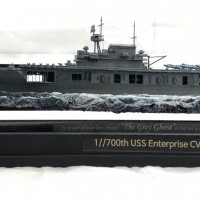
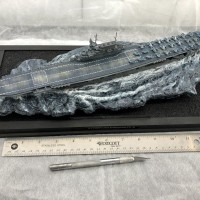
I've added a photo of the model with a ruler and an Xacto knife with a standard #11 blade for size reference. I've also added a photo of the kit-provided guns and radar with a #11 blade for size reference. This thing is pretty small and alot of the details are TINY. I am definitely investing in some magnifying glasses with a light!


Nicely done Jorge, both the model and the article!
Thank you!
Hello Jorge,
Thanks for the lengthy article. Always good to see this information displayed.
The model looks great.
You did put many hours into this diorama. Well, it was worth it.
Regards, Derek
Thank you. I tell my wife all the time that most people will have no idea how many hours and how much work goes into these but fellow modelers always understand!
First let me say that's a great job, I know how bad 1/700 kits can be vision wise. Great Ocean too. But hate to tell you this about the SBD's, they did not have folding wings.
You are absolutely correct and I was hoping no one would notice ?. I had folded the wings based off of some pictures i had mis-identified before I did enough research. I tried glueing one back together but it looked awful so I decided to leave them be and roll with it. We all make mistakes but it still looks cool. Good eye though
Beautifully done! A great looking Big E!
Thank you
Fantastic build, Jorge! And definitive article too.
All the best!
Thank you!
Nice work! I love waterline ships.
Thanks! Yeah its great to see them in "action"
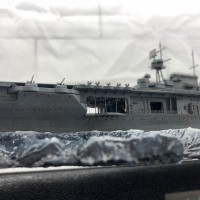
The shot from the bow near the water line is terrific! Great job on a tiny, tiny scale...
Thank you. These iphones are great at getting close up shots!
Great job, your ships are truly stunning.
Thank you very much