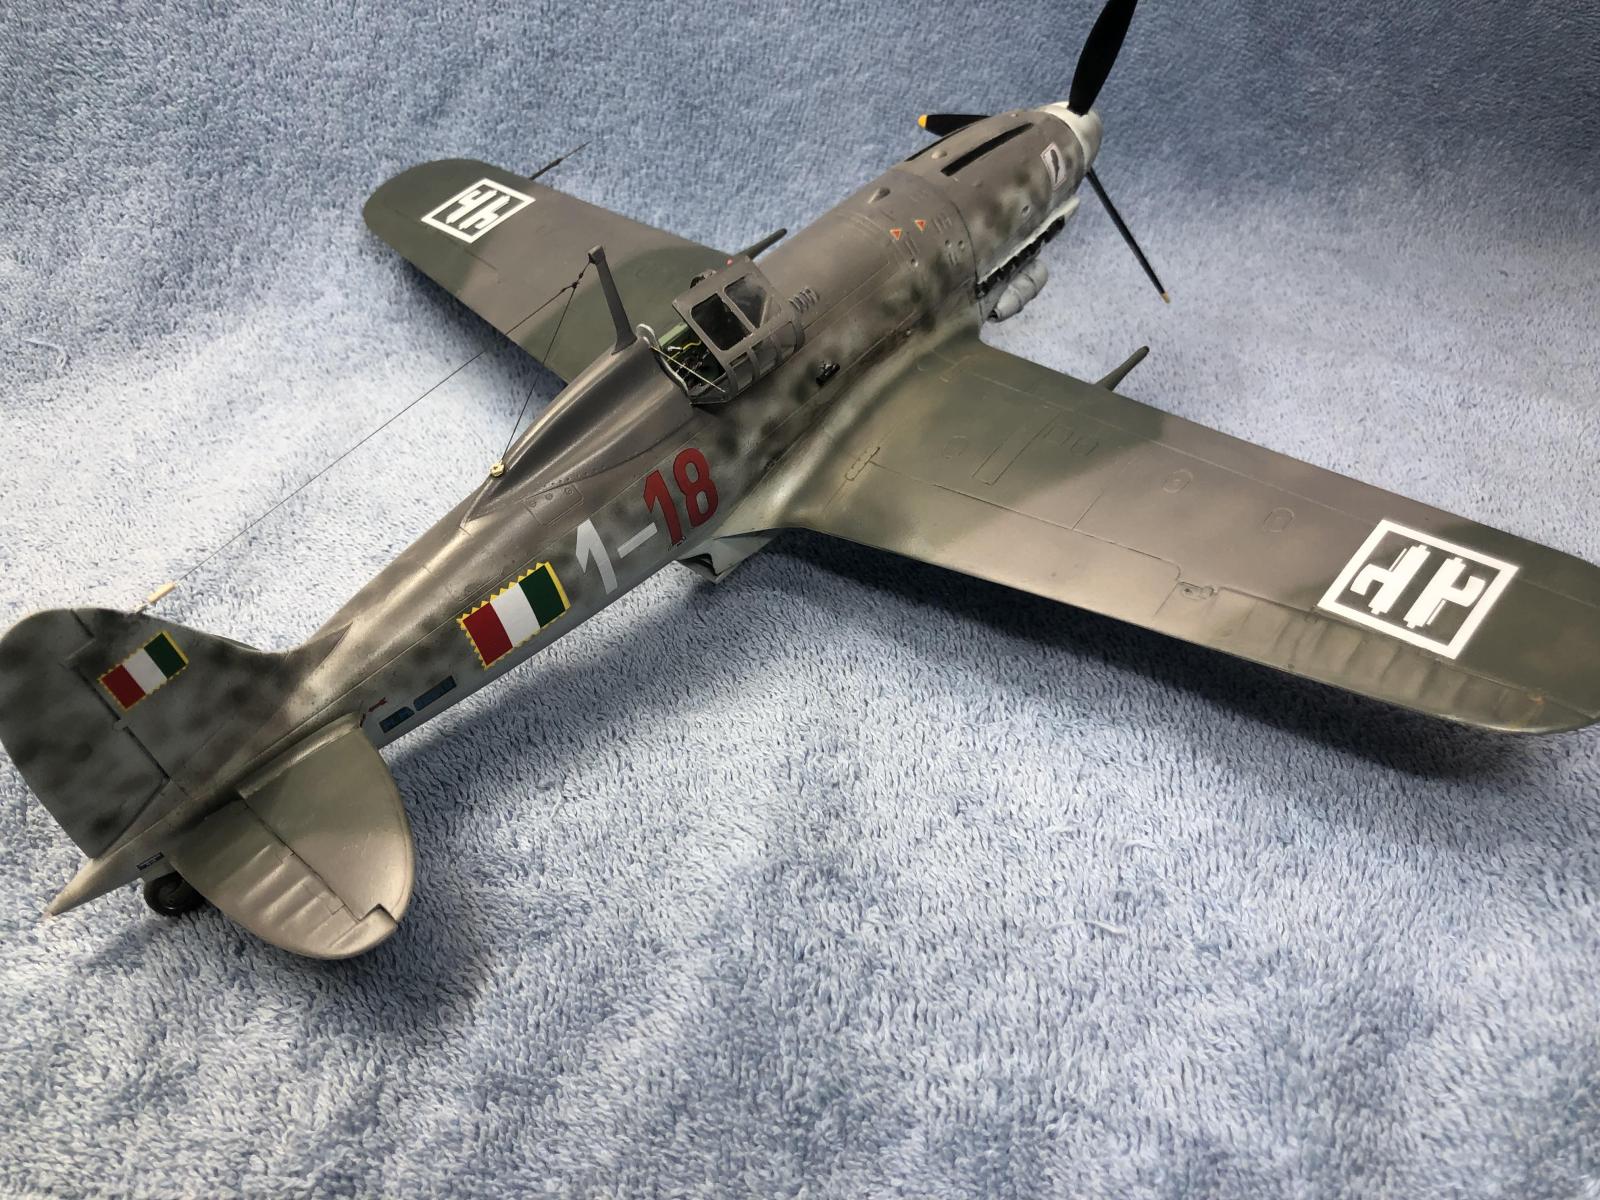
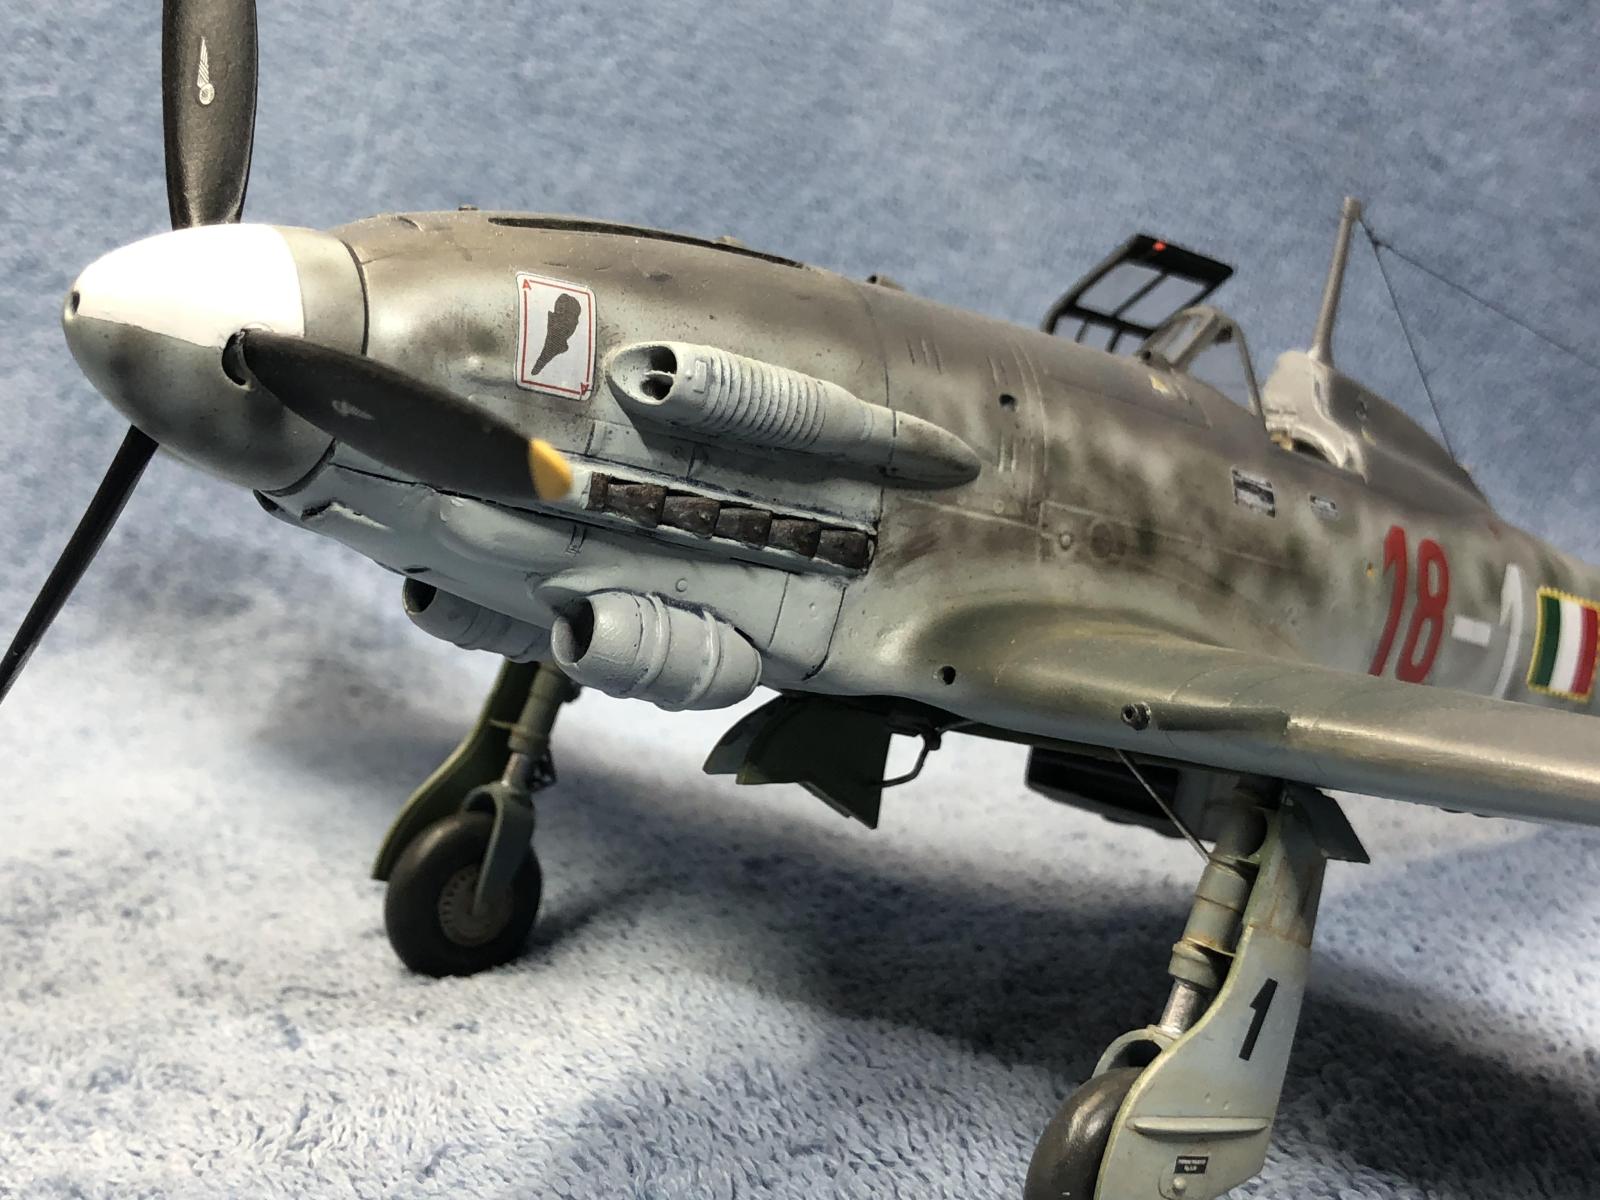
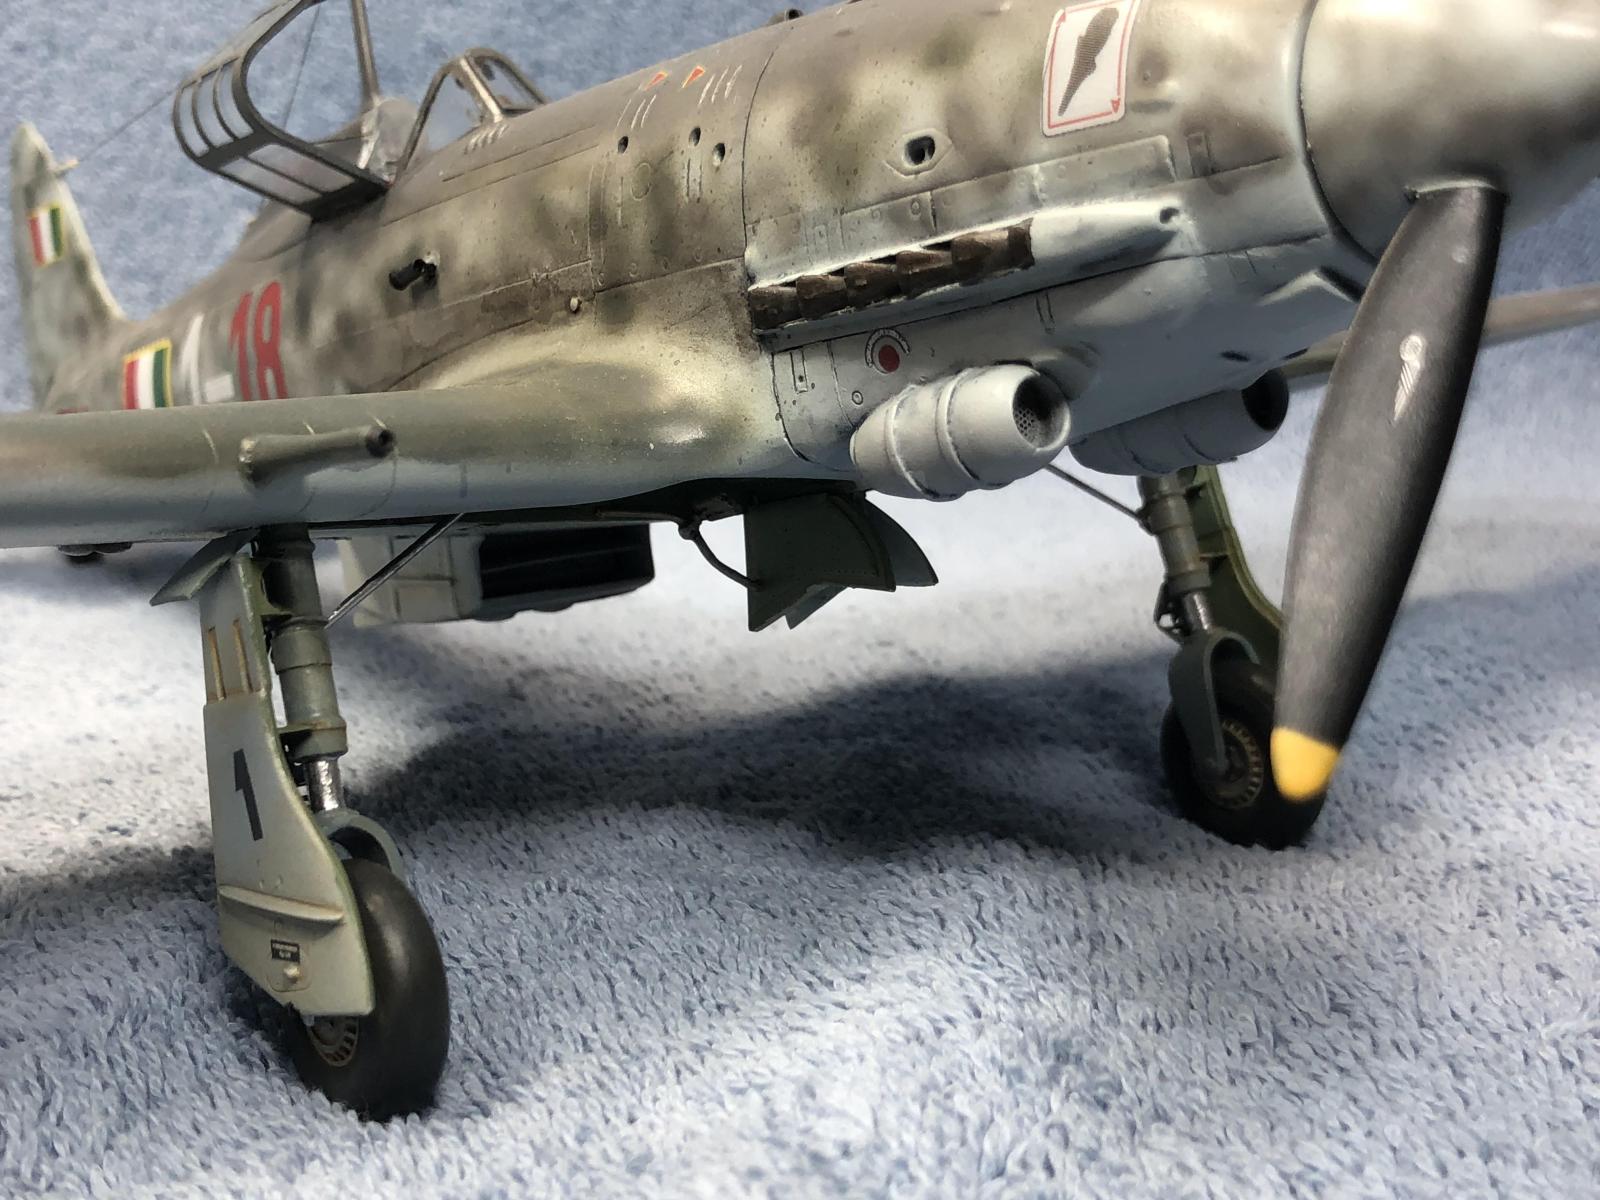
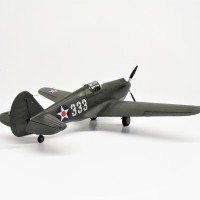
Macchi Mc205 Veltro
This is the PCM kit that was issued several years ago. I was working on the interior when the Italeri 202 was issued. I decided to build them together.
Compared to the Italeri kit, I found the surface details to be finer on the PCM kit overall.
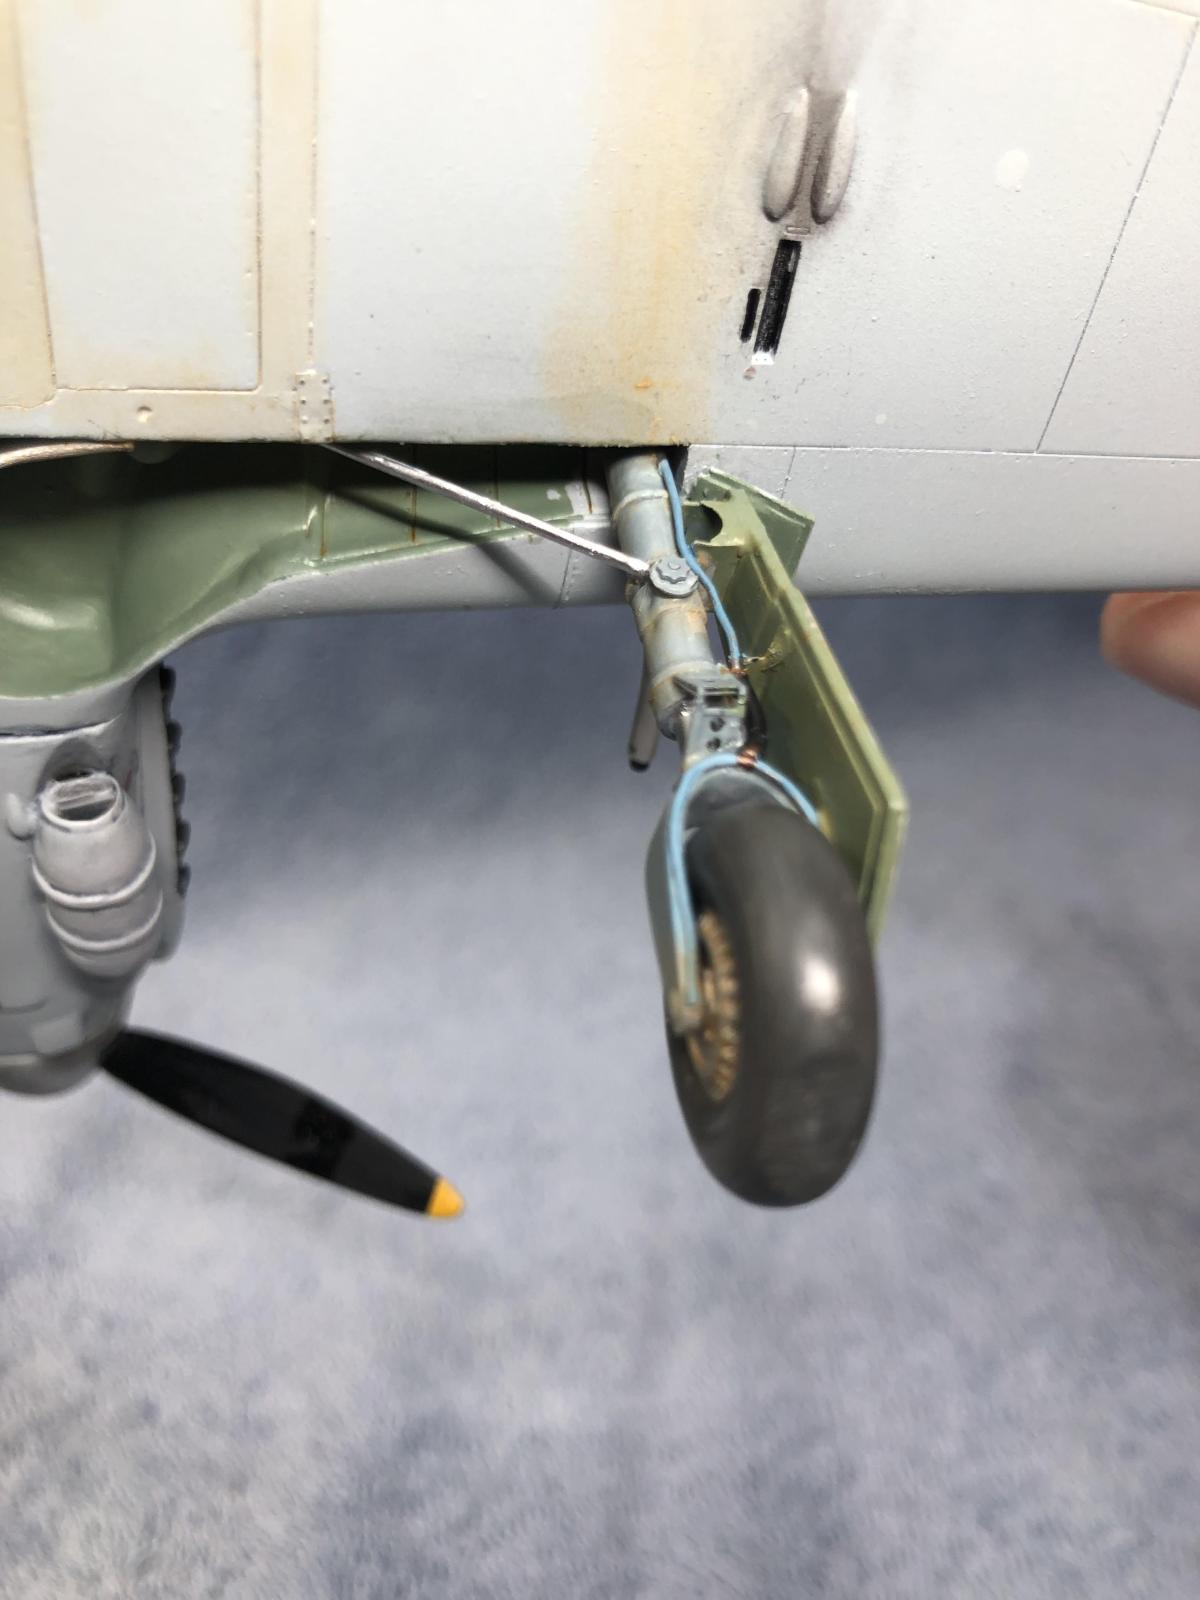
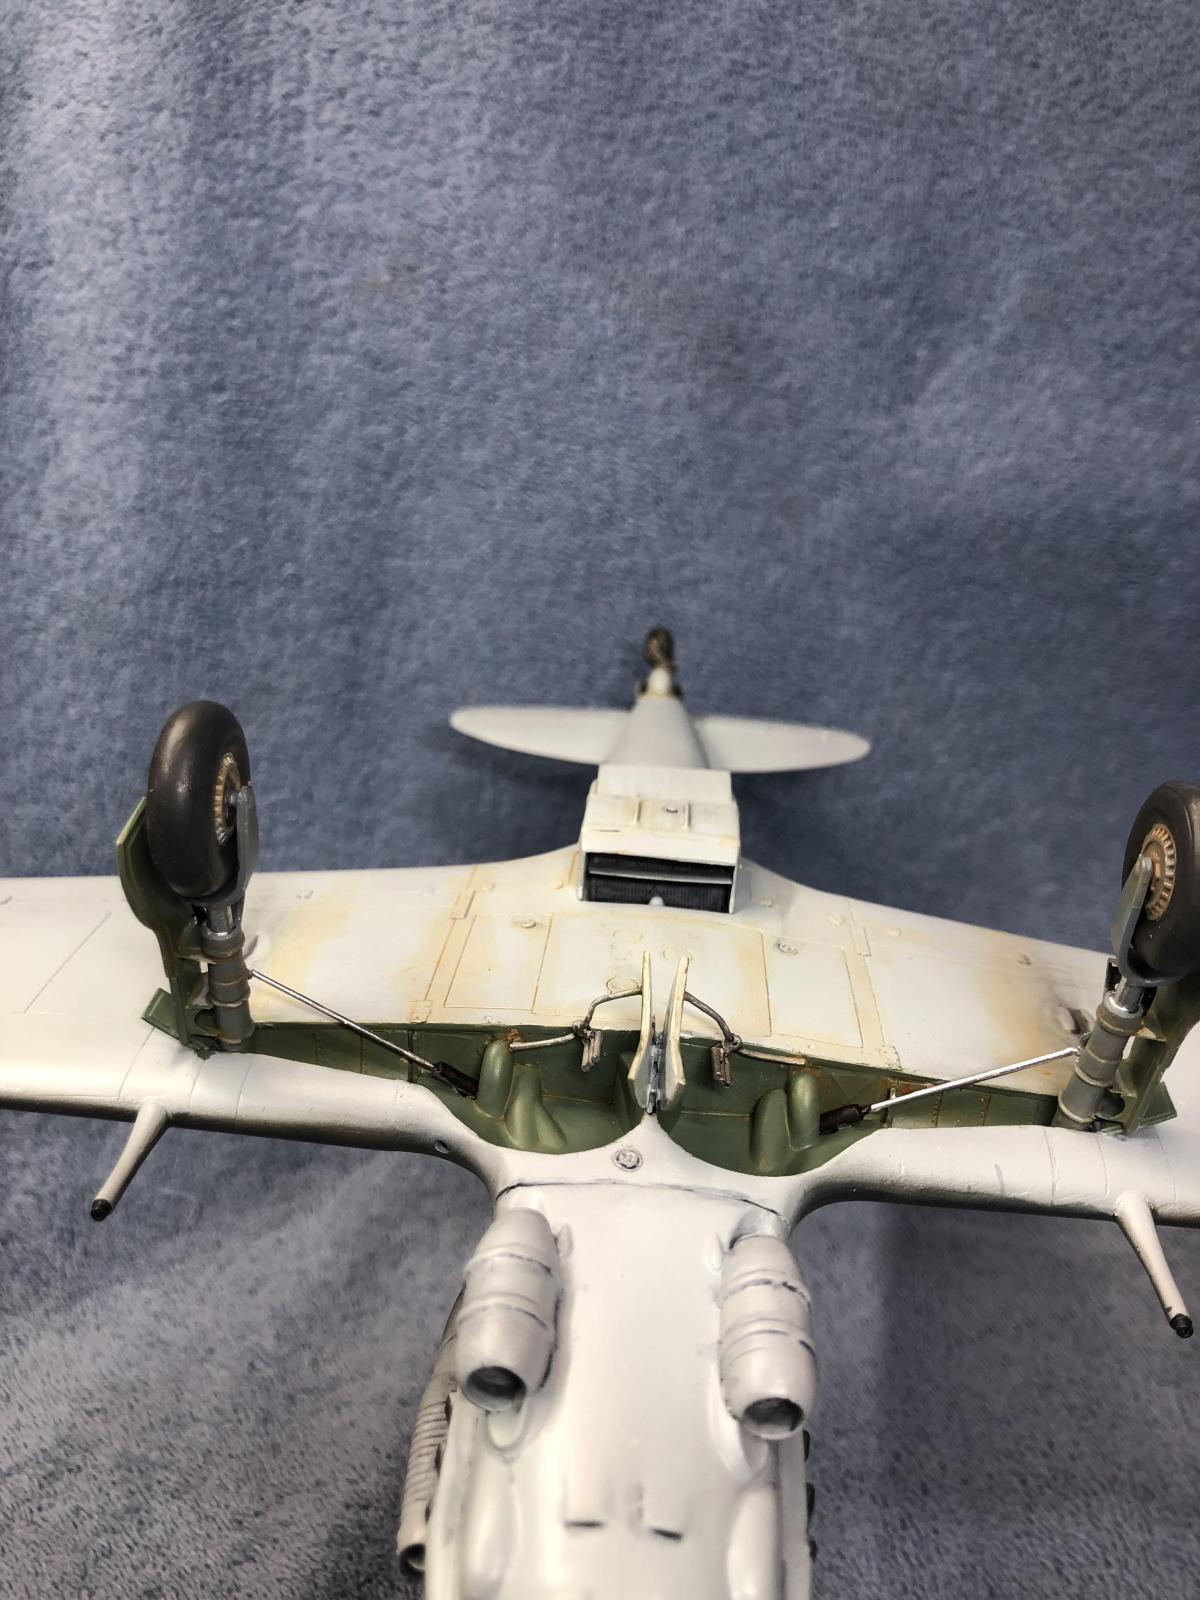
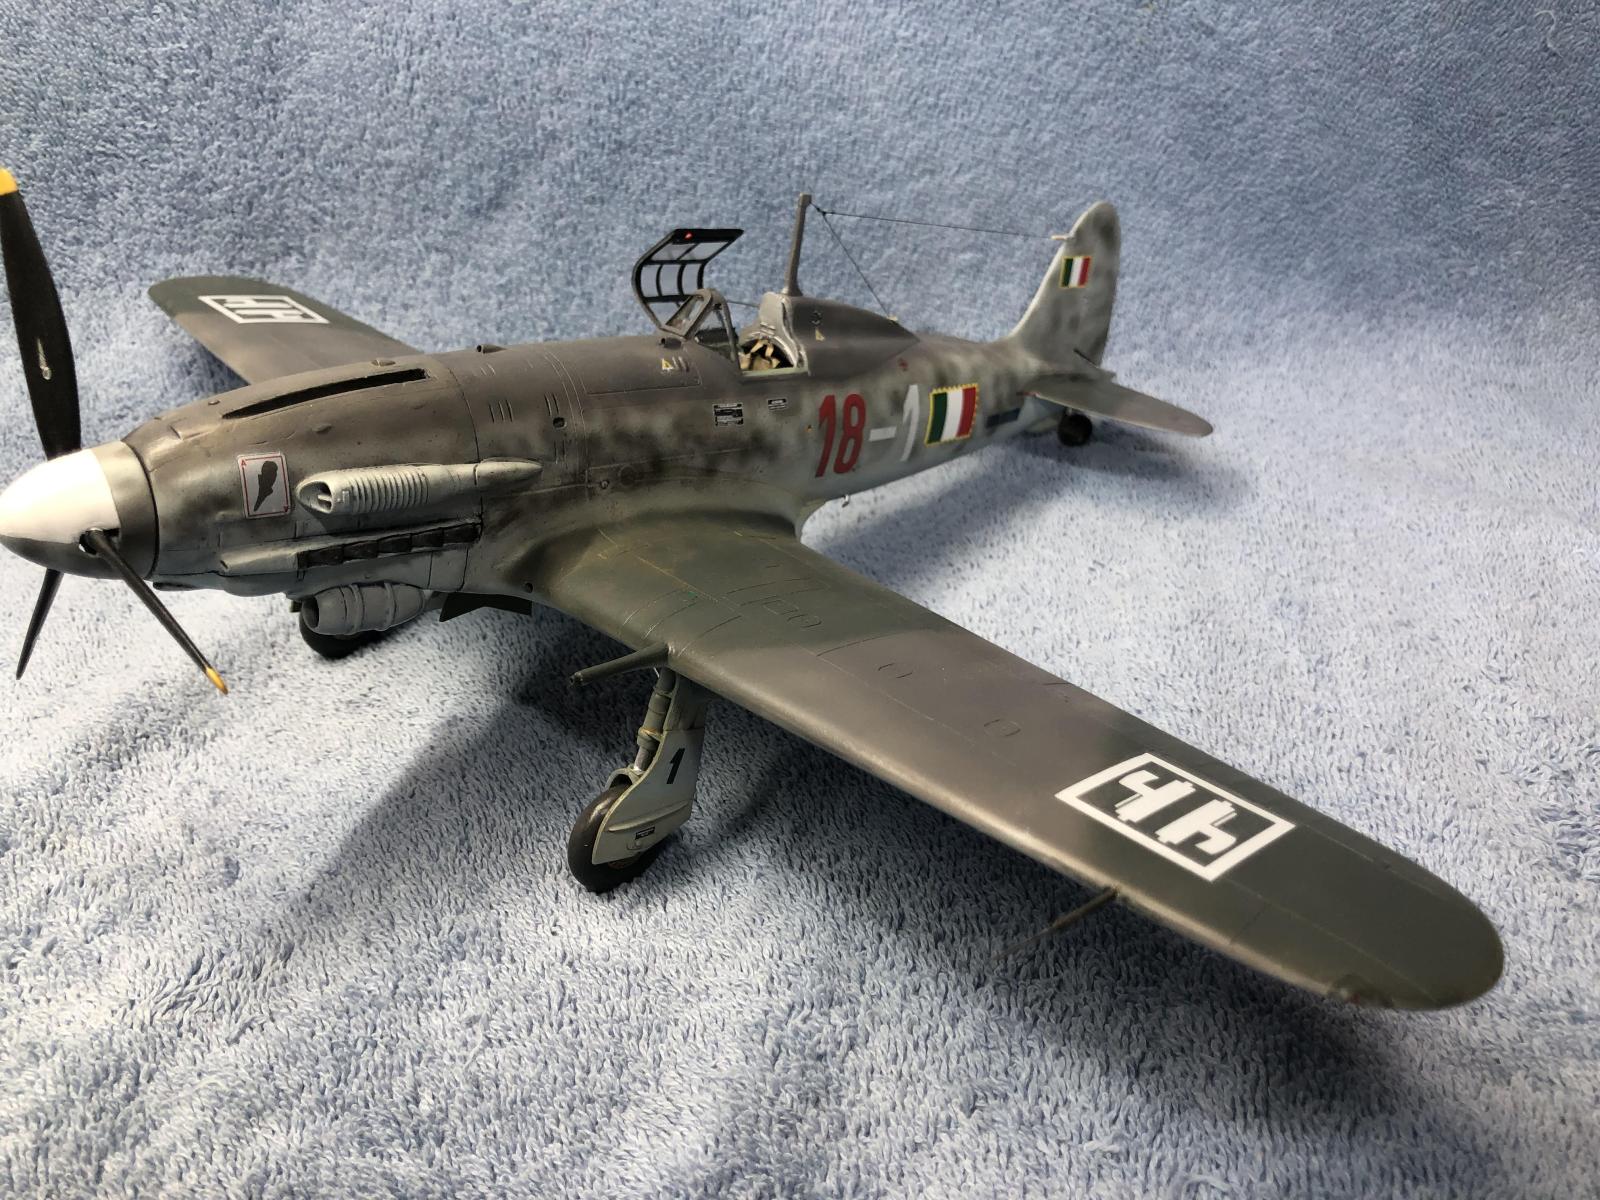
The wheel wells on both kits are somewhat similar with more details present in the Italeri kit. I was able to use the Italeri engine bay cover in the PCM to block this area- it was essentially a drop fit. This cover was used on later 202 and many 205's, but mechanics could remove for access ease. Details added to struts with brake lines.
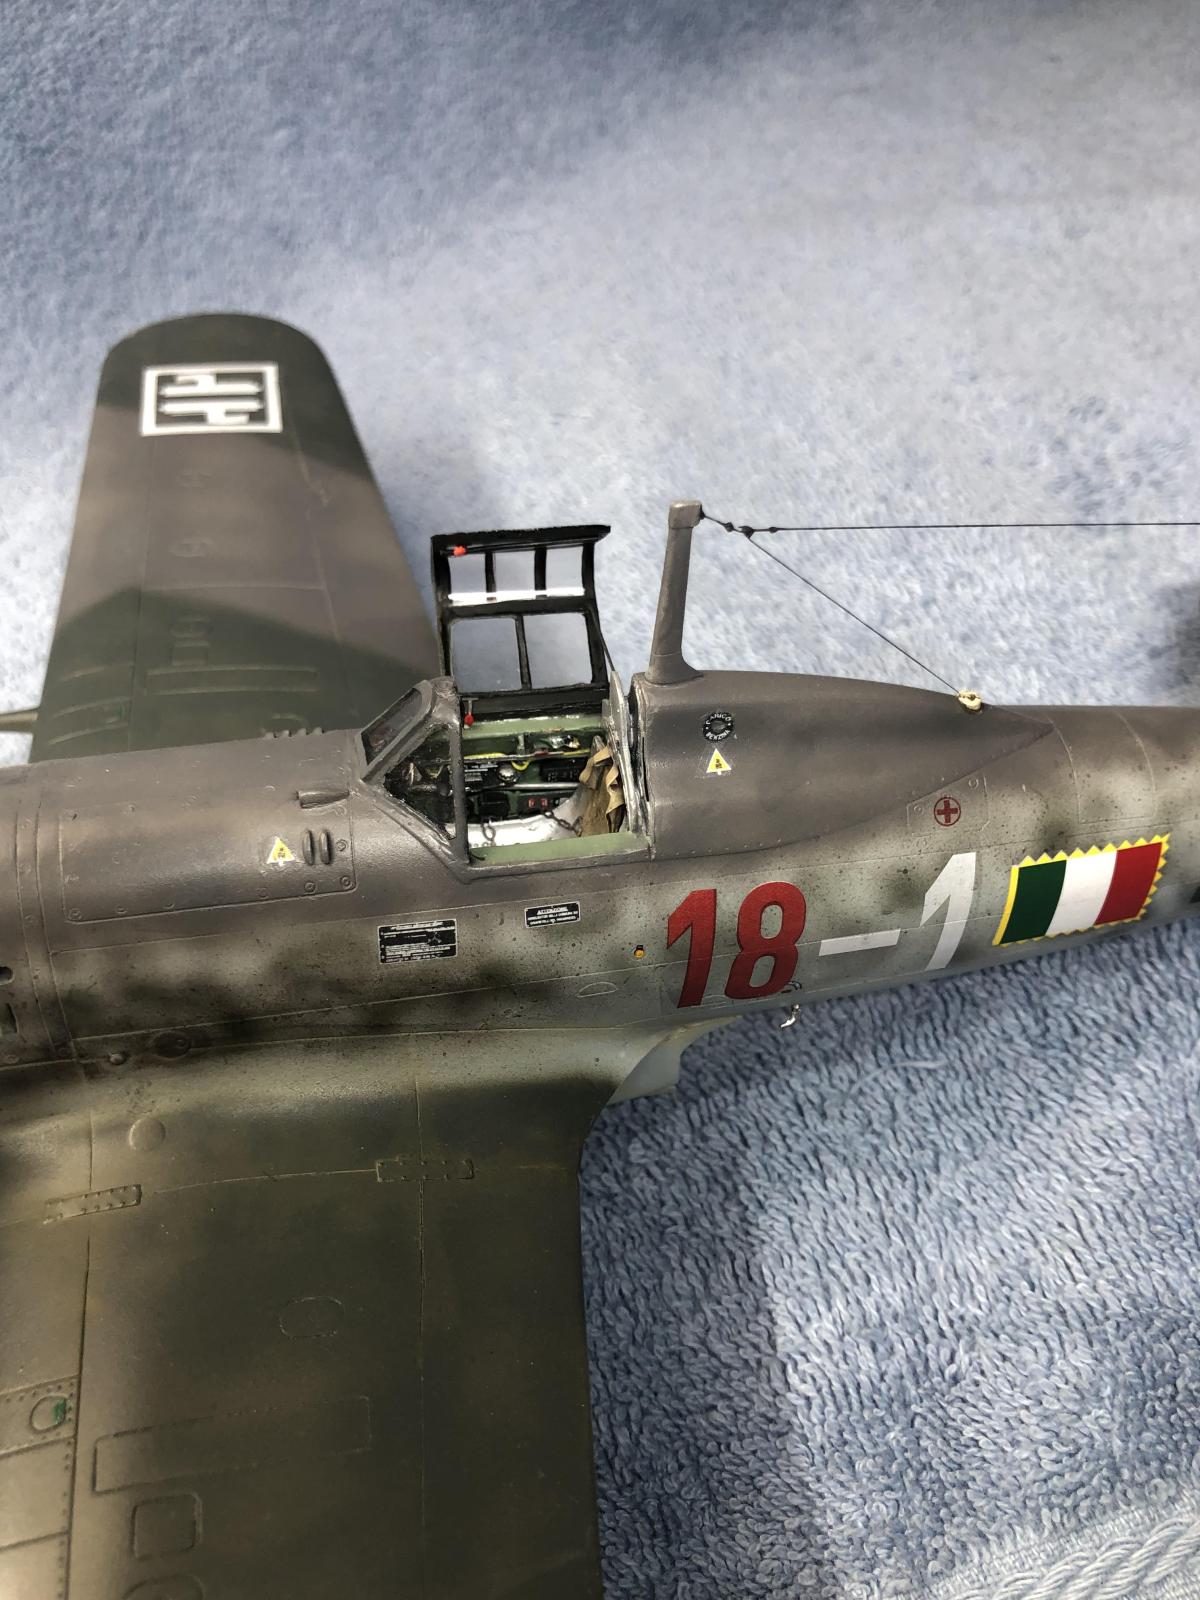
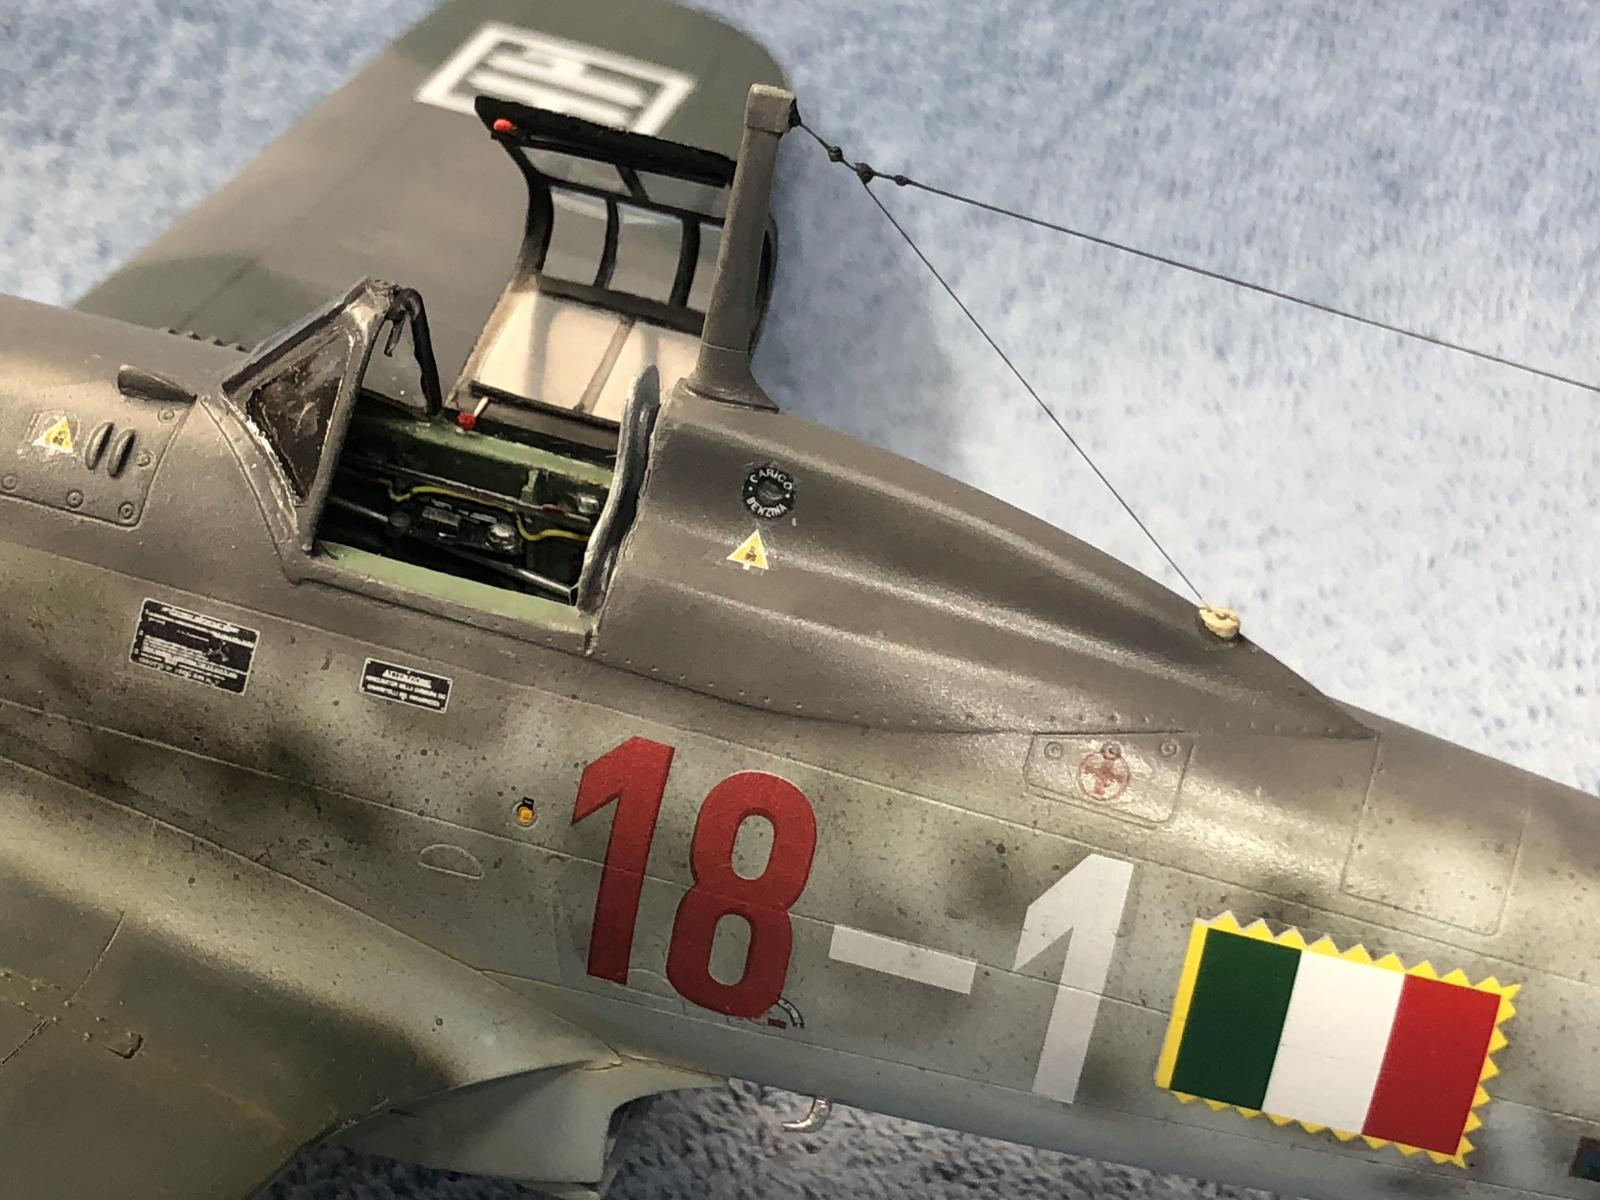
The cockpit is very well detailed. You have to be careful with the positioning of the sidewalls and add few additional details. I enjoyed working on the Italeri and the PCM interiors equally.
The spinner and front of the fuselage needed modifications to get them to match up in diameter.
Propeller was correct for the 205.
I sanded down the rear of the wing, ailerons, and elevators to thin them out.
Opened up various vent holes. The Venturi is on right side of fuselage. The Venturi on the 202 can be in this position for late builds- otherwise it was under the center of the lower wing on earlier ones.
I messed up the armored windscreen and had to use an early style canopy with a new armored center to the windscreen.
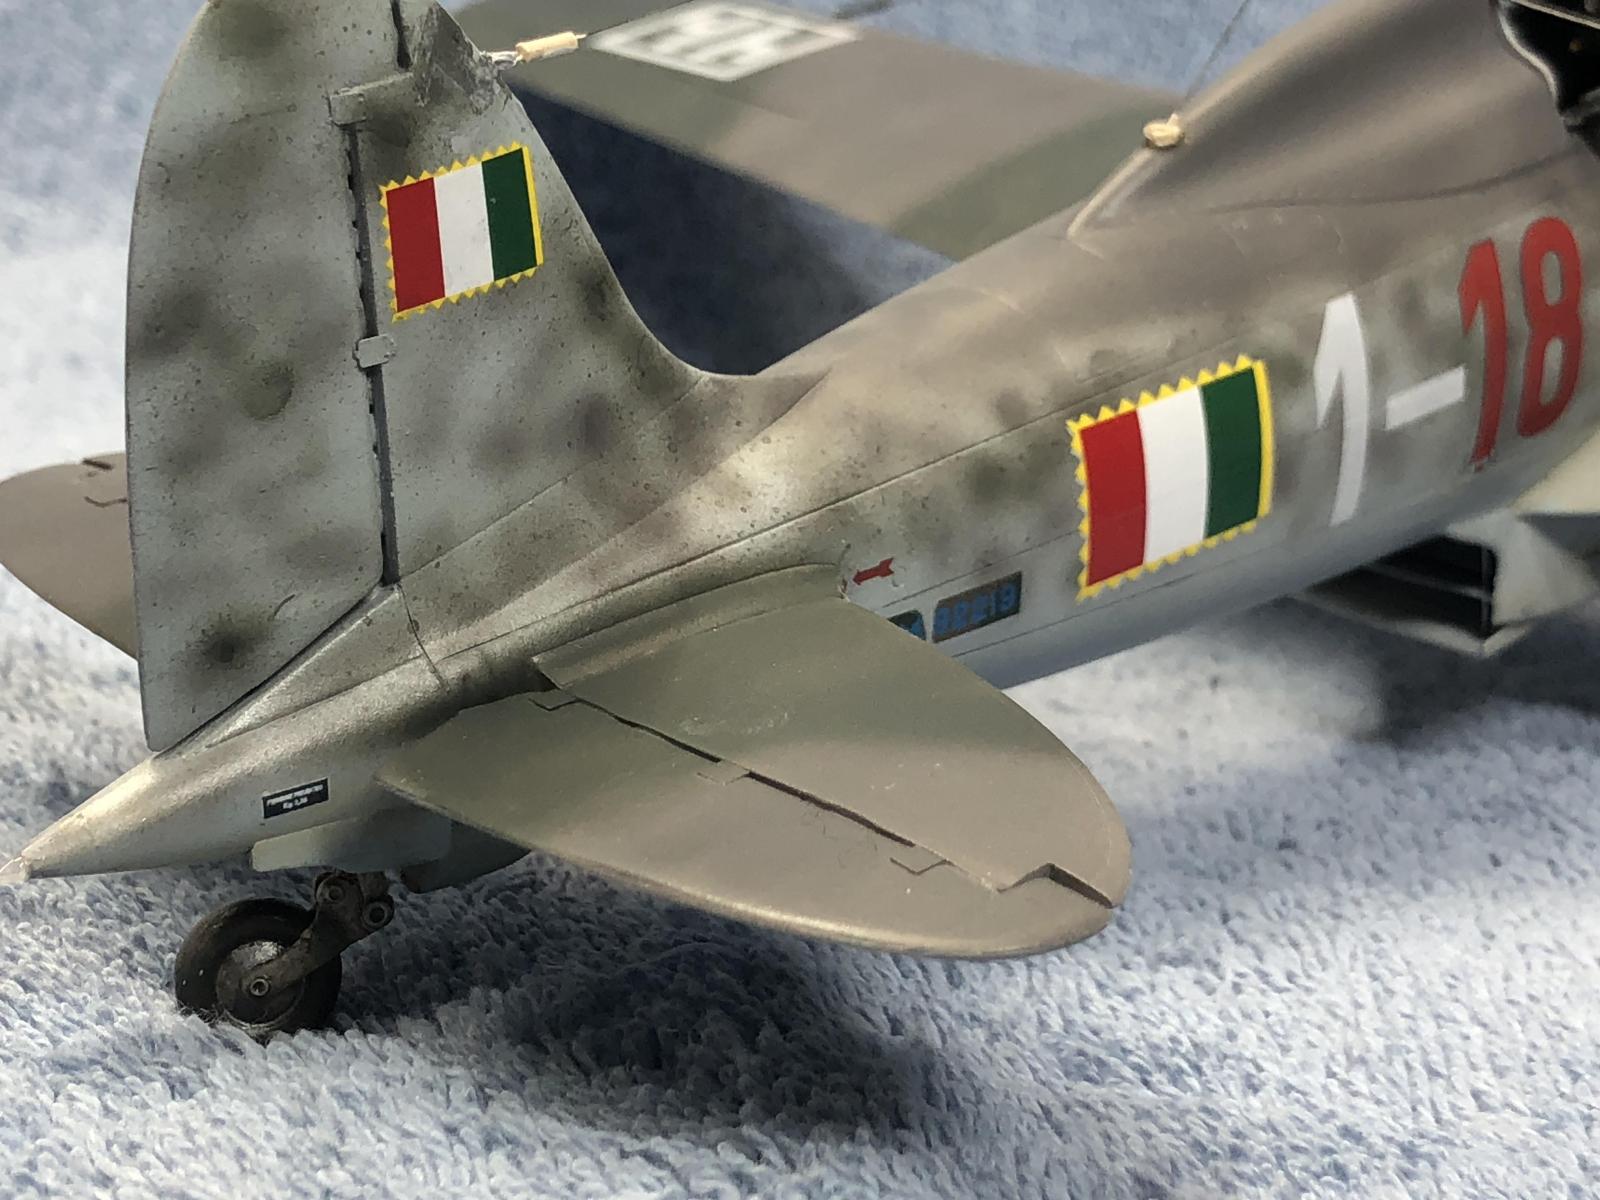
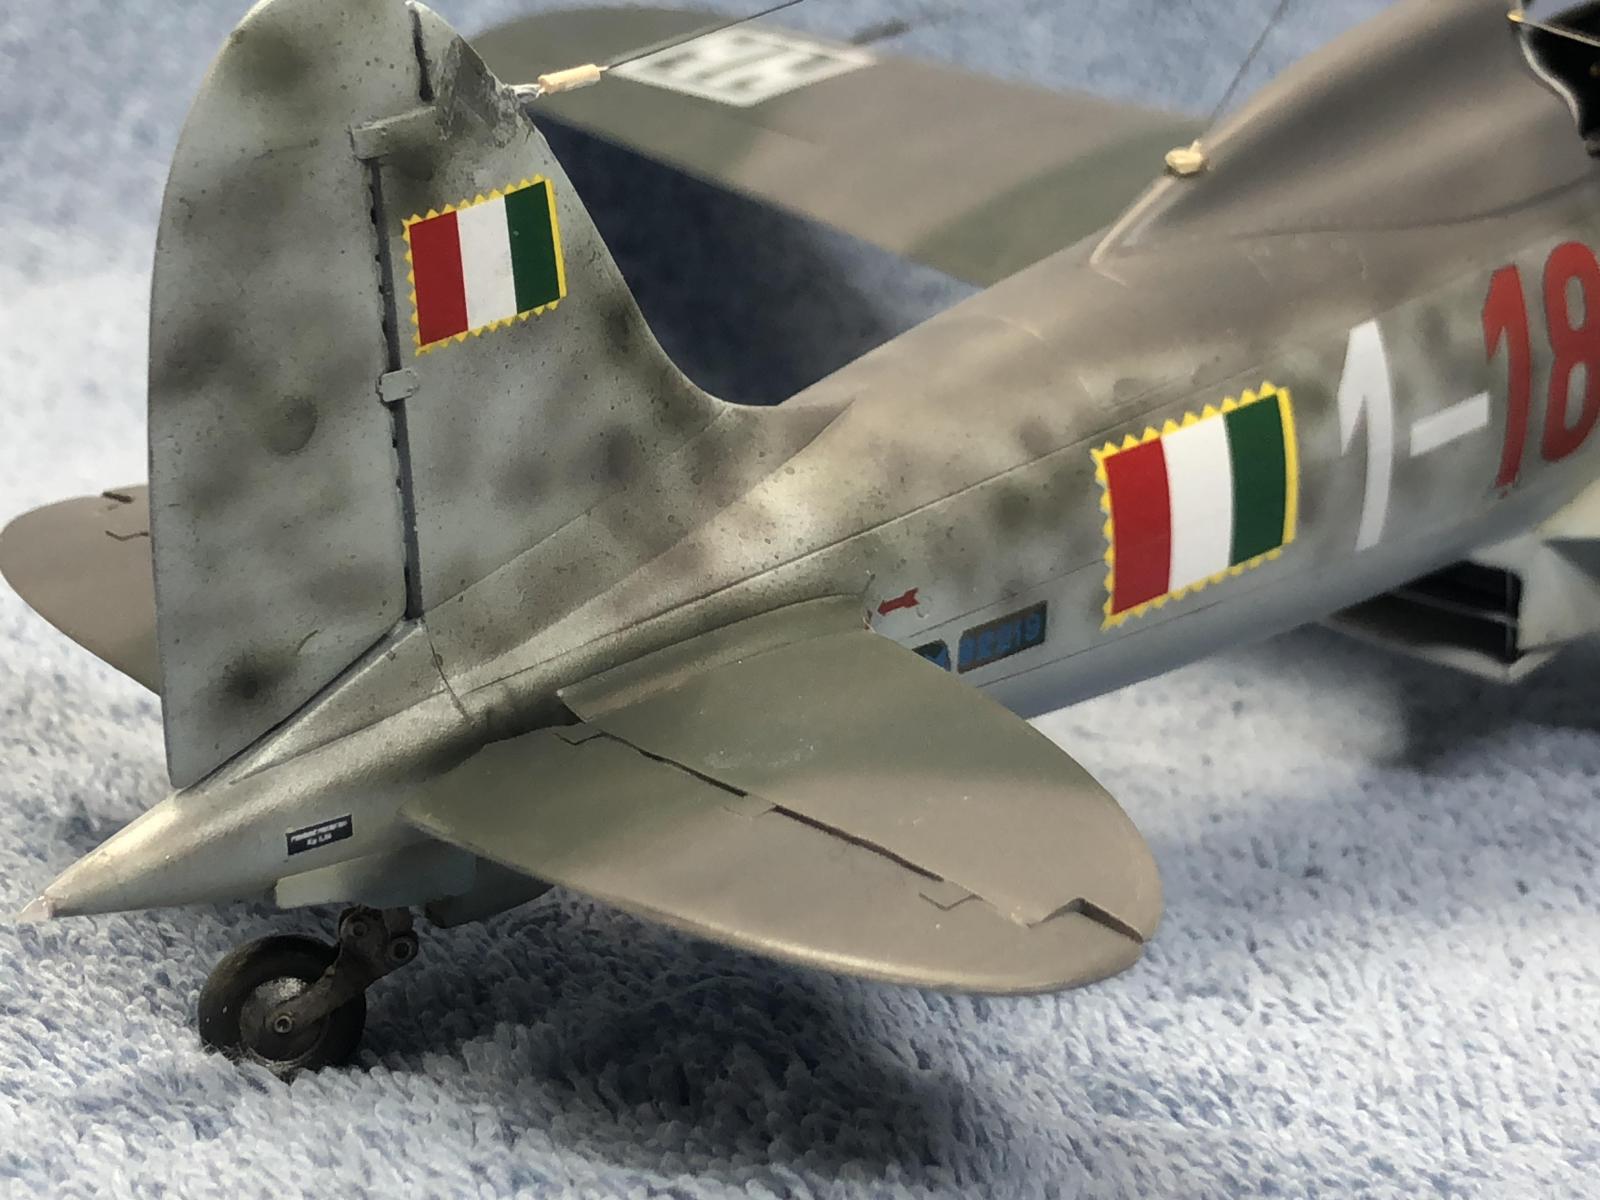
The plane is from the 1 squadriglia 1 gruppo of the ANR in 1944. This was the first Veltro painted in the new German dictated scheme of RLM74/75/76. It was flown by Adriano Visconti.
Paints used were AK, Mr Paint, Alclad, MM, and Tamiya. Decals are from PCM and Tauro.
Added antenna and metal pitot. Tires were flattened.

Another great Macchi, Steve. Well done.
Your 205 is as excellent as your 202, Steve!
Well done!
Very interesting comparison between the two.
Another great looking Italian one, Steve @jimmiesteve
Nice work on all those modifications.
Nice work and a solid result.
If I might offer a better way to thin the trailing edges of wings and such: do this before assembly of the unit, and sand down the trailing edge from the inside. That way you don't harm the surface detail.
Tom, thanks for the suggestion. I usually do it the way you suggest, but I thought the ribs on the ailerons were too prominent to the trailing edge. I tried this experiment this time. Results were not exactly to my liking.
Thanks for looking in.
It is a beautiful plane and the mottling is very impressive, Steve @jimmysteve. Lovely weathering with the dirt & rust around the wheels!
Sharp 205
Nice looking build Steve and the mottle finish looks spot on 🙂
Lovely job. I did a similar thing with a PCM and 20th Century Toys Macchi!
Great job and after building 3 PCM kits they are very challenging.
A good looking build also!