Heinkel He. 111 Revell-Monogram 1/48

Started by Colin Gomez · 25 · 1 year ago
  • Profile Photo
    Colin Gomez said 2 years ago:

    I actually started this build over in the IGAS / Luftwaffe GB but I am no longer a member of that group. If you want to see earlier stages, you can check there.
    https://imodeler.com/groups/imperial-german-air-service-luftwaffe-group-build-may-1st-1910-to-present-day/forum/topic/heinkell-he-111-1-48-revell-monogram/
    Anyway, here is the progress on the build after a long pause. I finished up the last sanding and polishing of the clear parts and proceeded with the masking, using the Eduard set. I did a bit of clean up on the seams, rescribed lost panel lines on the wings and fuselage and opened up the exit for the oil coolers just forward of the wheel bays. Revell has these sealed up, so I had to carve them out and scratch build a screen inside. Another last minute thing was the wing light, which I did with a bit of mirror foil, punched out in a circle. It almost light s up when the light hits it the right way.

    I finally got to painting this weekend. I had to spend quite a bit of time first masking the wheel wells with molded on doors.

    Masked clear parts were first sprayed Tamiya German Grey (the cockpit color) Undersides were sprayed two shades of flat black but mottling doesn't show up in photos. Mottling and pre-shade paneling on the uppersurfaces was done with Tamiya Flat White, German Gray and Flat Black. . That's it for now. Hope this is worth watching.

  • Profile Photo
    Walt said 2 years ago:

    Nice work on what really is a pretty decent kit, Colin, @coling. Having built the ICM Zwilling and the Monogram He 111. I think each kit has its definite advantages and drawbacks. I like what you are doing with this kit so far.

  • Profile Photo
    John vd Biggelaar said 2 years ago:

    Great preperation prior to applying the camouflage, Colin @coling
    Nice work on that mirror foil.

  • Profile Photo
    Spiros Pendedekas said 2 years ago:

    Great progress, my friend @coling!

  • Profile Photo
    Pedro L. Rocha said 2 years ago:

    Nice work Collin. Marbling effect for black is hard, but it can be done. Try white or yellow next time.
    Looking forward to see your progress

  • Profile Photo
    Colin Gomez said 2 years ago:

    Thanks, Walt@luftwaffe-birdman. The Revell-Monogram kit has a small parts count and fit is not the greatest for the clear parts but the shape and overall accuracy of the kit seem really good to me. I also like simplicity so I can build a bit of detail into it - as I did with the cockpit (Eduard plus scratchbuilding). The engraved panel lines are a plus as I dislike rescribing on other R-M kits. I hope I can do the subject justice but so far I am happy.

    Thanks, John@johnb. Doing the wing light was fun, although it was one little thing that put me off getting on with the kit for awhile. I will do a bit more marbling right before the stage that I do the first of the top camo colors but so far so good. I plan to use Gunze paints, which are quite transparent to let the pre-shade shine through.

    Thanks, Spiros@fiveten. Glad you like it. I think I have hit the right pair of models to see through to the end, by doing the He.111 and A-4 Skyhawk side by side.

    Thanks, Pedro @holzhamer. I will keep working on the black weathering. Some does show up in person but not in photos. I will try your advice as I continue to do touch-ups.

  • Profile Photo
    Colin Gomez said 1 year, 11 months ago:

    I finally got this masked and painted with the first topside color - RLM 71. Masking large surfaces is one of the most tedious experiences of modeling, IMHO. Still, I get frustrated with overspray when doing things freehand, so the work pays off.

    I am very pleased with how the pre-shade came through using the relatively thin Gunze H64. Gunze thinned with Tamiya thinner and acrylic retarder is a pleasure to use and doesn't clog my airbrush like most acrylics. It is hard to photograph the preshade effect, but I finally found that low natural light works best - pardon the cluttered fnal picture but it is the best I could do to show the effect achieved. Next will be RLM 70 from Model Master Acryl , old and all I have on hand but should be OK.

    That's it for now. Hope you like the results. Comments welcome.

  • Profile Photo
    John vd Biggelaar said 1 year, 11 months ago:

    Looking great, Colin @coling
    Very nice paintwork.

  • Profile Photo
    Pedro L. Rocha said 1 year, 11 months ago:

    I feel your pain about masking large surfaces Colin. Unfortunately doing a Luftwaffe splinter 70/71 or its variations is all about patience and some kabuki tape, since it’s hard edge splinter lines.
    Looking good so far, eager to see how it goes along

  • Profile Photo
    Spiros Pendedekas said 1 year, 11 months ago:

    Looking superb, my friend @coling!

  • Profile Photo
    George R Blair Jr said 1 year, 11 months ago:

    Looks great, Colin (@coling). All the pre-shading you did is really paying off now. Looking forward to the rest of the paint and the decals.

  • Profile Photo
    Colin Gomez said 1 year, 11 months ago:

    Thanks, John. As I said, Gunze is the best for smooth finish and transparency. I even find I can remove lint and hair that can blow on to the finish without damaging the surface much. Very helpful since there are cats around the house.

    Thanks, Pedro. At least masking splinter camo is easier than most other patterns because of the straight edges. The big job for me is getting the undersurfaces covered up and the HE.111 is a big airplane.

    Thanks, Spiros. Glad you like it.

    Thanks, George. Hopefully not long to wait. The harder work is done now.

  • Profile Photo
    Eric Berg said 1 year, 11 months ago:

    Looking real good here Colin @coling. This is one of Revell-Monogram's better older kits. It sure sucks up a lot of shelf space doesn't it?

  • Profile Photo
    Colin Gomez said 1 year, 11 months ago:

    Thanks, Eric. Yes, it's a big one. I normally keep my models in a side cabinet to keep off dust during completion. Have to keep this one out, because there is no space. When it is done, I will have a final display shelf but not before. I really like the kit for accuracy and simplicity of build, plus the really nice engraved panel lines. Hopefully the clear parts will still look good when the masks come off - lots of work to get them to fit smoothly.

  • Profile Photo
    Colin Gomez said 1 year, 8 months ago:

    I haven't posted anything on this build for a couple of months after a disappointing setback while painting. I finally got around to fixing it over the last couple of weeks so here is the illustrated story:

    Shortly after my last post, I carefully masked the entire model and did the RLM 70 Black Green segments with the MM Acryl paint I had on hand.
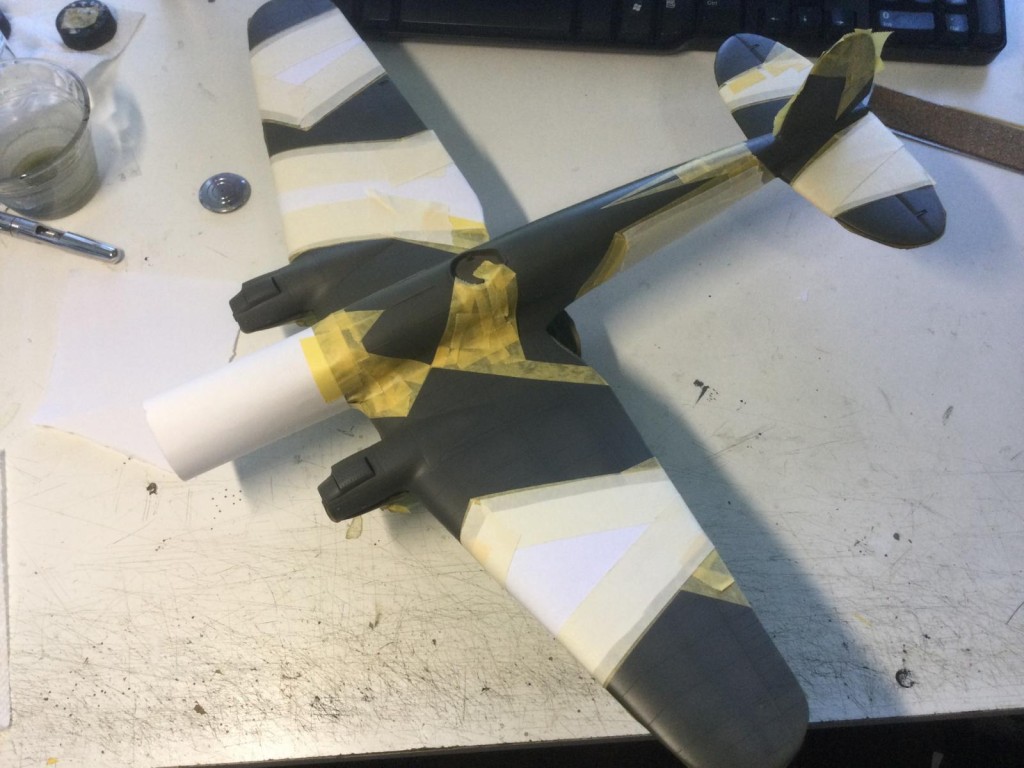
    While painting, I noticed the shade was odd - more grey than green and very low contrast with the Gunze 71 I had already applied. It was not until I had completely finished and removed all the masks (!) that I came to the conclusion that it was not an acceptable color and was barely visible next to the 71. Fixing it would require masking all over again and respraying, and I also had to wait for Gunze RLM 70, ordered from Taiwan on eBay. So, after the new paint arrived, I finally I got up the gumption to remask, partly using bits and pieces I have saved from the last time to avoid wasting Tamiya tape.
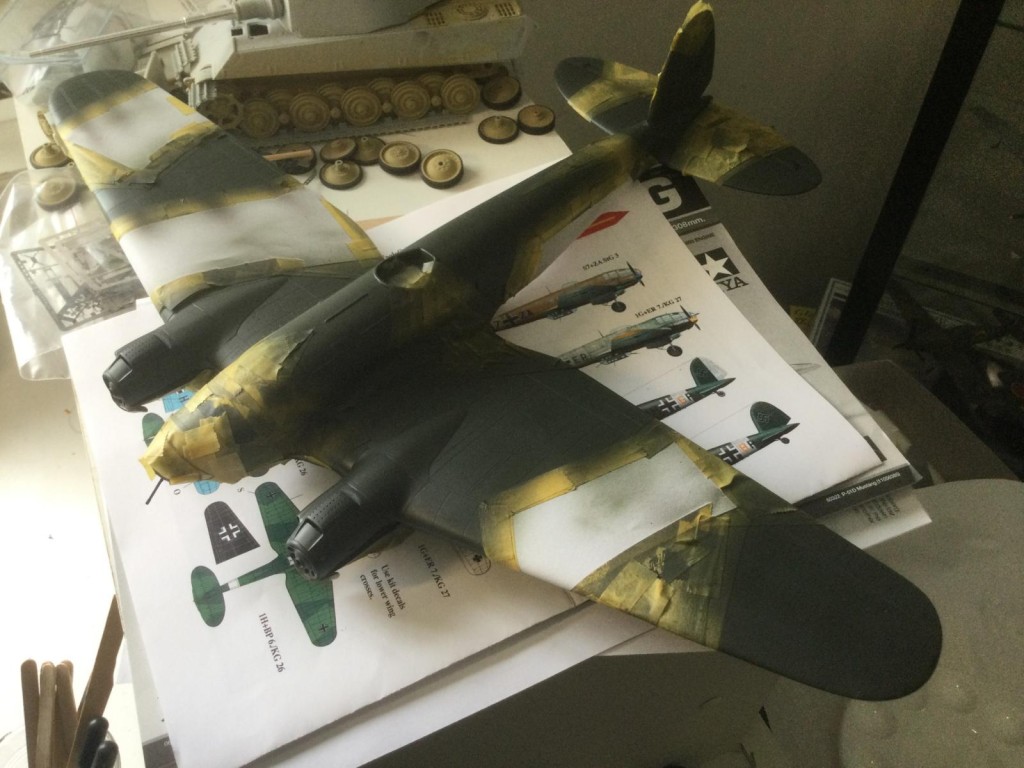
 The Gunze RLM 70 went on nice and thin and smooth and was the perfect color so the entire model was saved after all. One pic shows a bit of the original color next to the repaint, before I did touchups on the splinter. Othewise I chose not to photograph the ugly first effort overall.
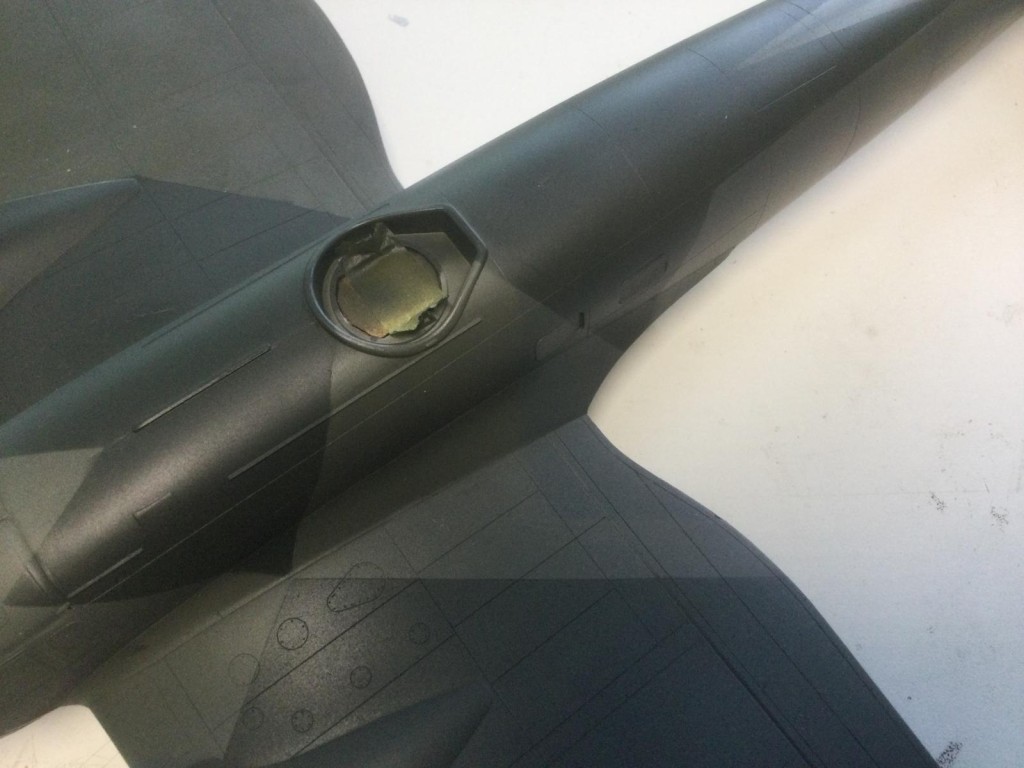
    With the main camo done, I masked off and sprayed the white fuselage stripe.

    More awkward and elaborate masking allowed me to spray the yellow panels under the cowlings.
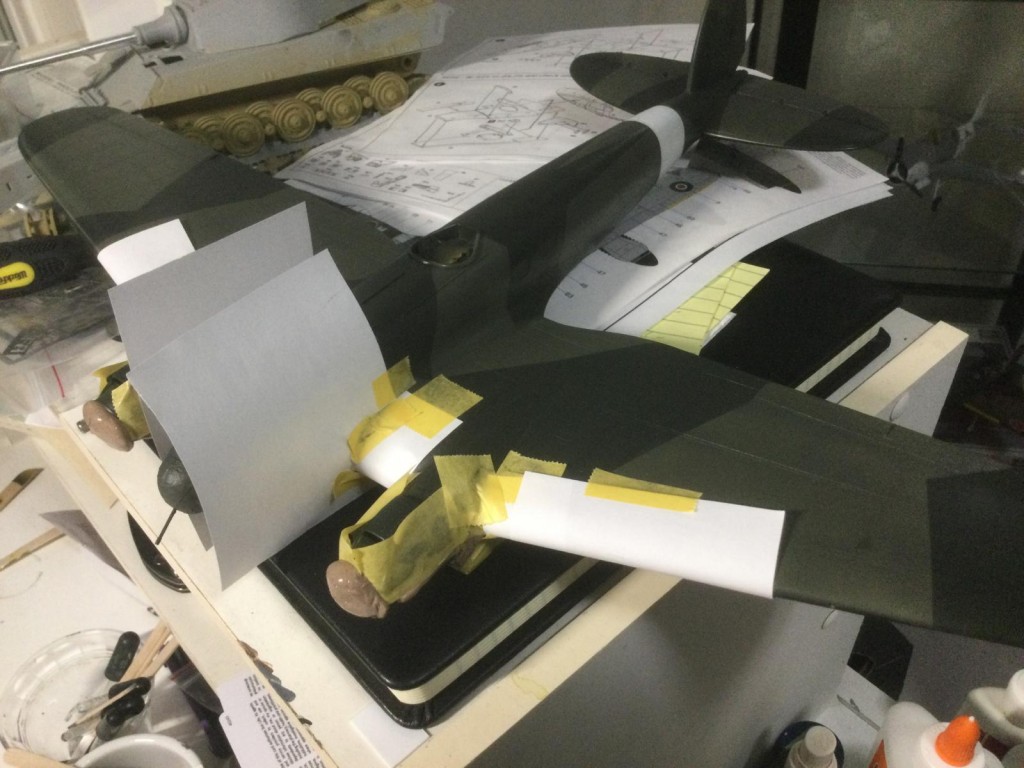
 
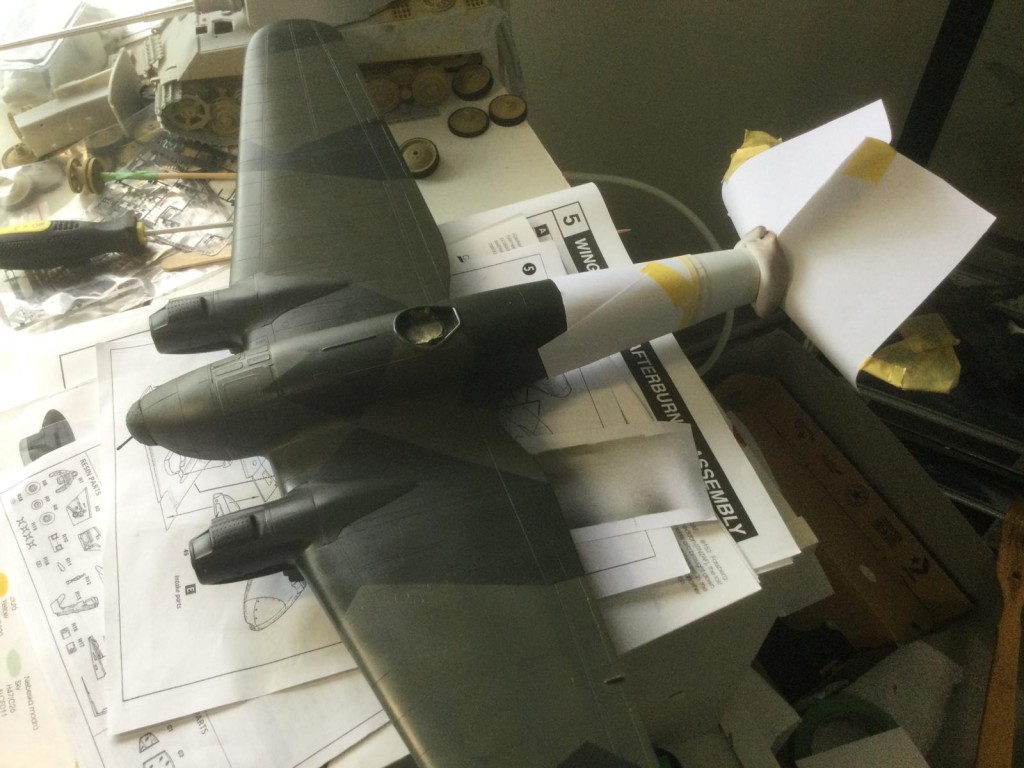
I had to use similar layers of masking to paint the prop spinners yellow but did not take pics of that process.The spinners are just partly inserted in the overall views that follow below. They have tabs to lock them in place when fully inserted (a weird idea from Monogram) so I am must partly test fitting them for now.

    After the camo was done, I moved on quickly to clear coat to leave a nice smooth decaling surface. I then applied an oil wash before decaling to bring out fine detail. The Eagle Cal decals went down very nicely. To my dismay, however, Eagle Productions did not supply the very large underwing crosses, instead recommending the use of the kit-supplied ones! These were terrible and splintered badly but I fixed them with careful brush painting, followed by gloss and flat coating. I thing they look pretty good after all.
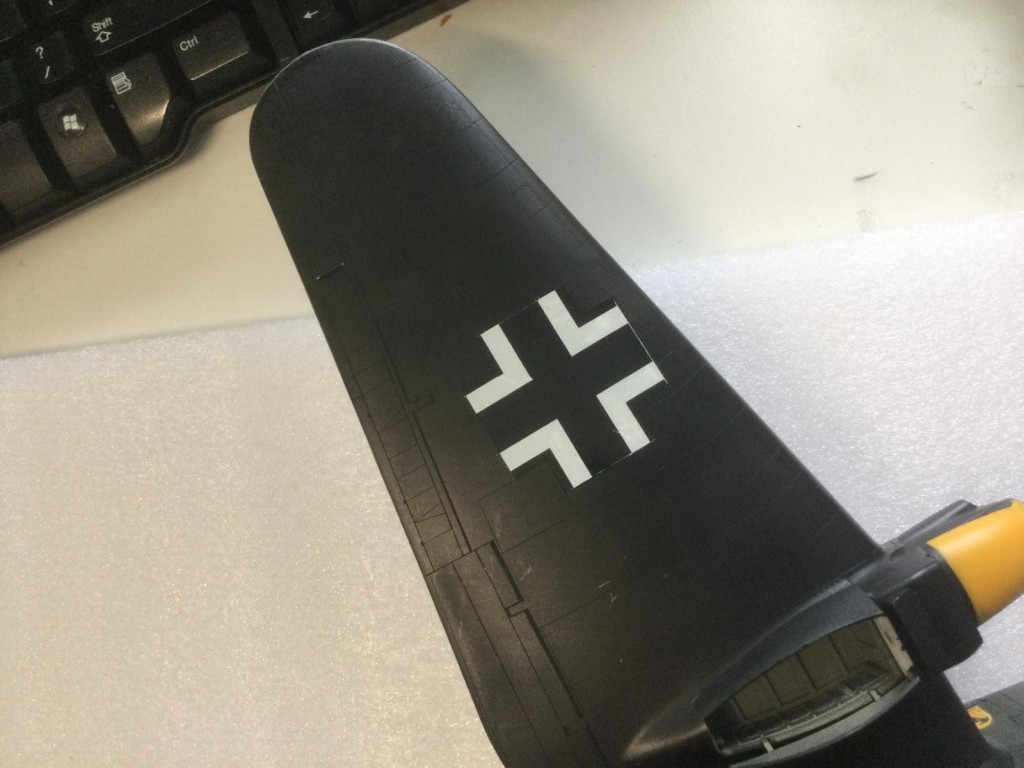
    . Here are the overall images with gloss coat, oil wash and decals applied:

    So the last pics for this posting are after I applied the MM Acryl Flat coat. I generally spray it thin so it comes out an eggshell semi gloss. I think, the Flat Coat also brings out the details of the pre-shading and oil wash quite well.

    So, next to work on will be the landing gear and lower gondola details. While I have the model flipped over, I will do the underwing exhaust stains. I will do he upper gunner's position last. I have a nice vac version for the transparency which I will need to paint with the mixed RLM 04 I have been using. BTW, the tub-like fitting for the seat and gun is a friction fit to just pop out to work on separately and pop back in again.

    It will be nice to finally get the masks off and push this over the finishing line. I am pretty happy with it so far.

    More soon.