Messerschmitt Bf109G-4 ”Don Pedro”, Eduard 1/48

Started by Erik Gjørup · 142 · 1 year ago · 1/48, Bf109, Bf109G4, Eduard, Romania
  • Profile Photo
    Erik Gjørup said 3 years, 11 months ago:

    Spiros (@fiveten) and John (@JohnB), it was indeed a nice little trick, so I reused it for the lower part too!

    Reusing the masks

    Having had such great success on the top of the wing, the masks were re-used

    I mounted them on the blue bottom of the wings


    A clamp was used to get a better fit due to the deflected aileron.

    And masks came off right away


    Not bad at all.

    While I were on a roll a few drops of red were loaded


    And the aft part of the rudder was painted. It will now be re-masked for blue to make the colorful rudder of this 109.

    Some mottling or masking for re-visiting the large areas of the fuselage overspray next? – tune in. Comments, as usual, are most welcome. Thanks for stopping by

  • Profile Photo
    Spiros Pendedekas said 3 years, 11 months ago:

    Nice masking and airbrushing, my friend @airbum!

  • Profile Photo
    Erik Gjørup said 3 years, 10 months ago:

    Thanks Spiros (@fiveten). Another post coming right up my friend.

  • Profile Photo
    Erik Gjørup said 3 years, 10 months ago:

    Freehand mottling

    Was it laziness? Or better?

    No matter what caused it the mottling was started today with some specks of 75


    The german markings were oversprayed too (OK – they were never there but I simulate some oversprayed balkenkreuze and swastikas

    While at it, I did smear some paint on one wing


    Luckily it was in an area that is 74, and I have to mottle with that color later. I used highly diluted Xtracolor for this job.

    Personally I am rather pleased with the result, but do feel free to comment

  • Profile Photo
    Spiros Pendedekas said 3 years, 10 months ago:

    Looks great, my friend @airbum!
    As usual, cannot wait for the decals!

  • Profile Photo
    Eric Berg said 3 years, 10 months ago:

    I'm a little late catching up with your build Erik and it sure is looking great. I have to ask, why do you install the gear prior to painting? Aren't you afraid of snapping one of them off? Or with that great toothpick idea does the gear down eliminate the need for figuring out some sort of painting jig?

  • Profile Photo
    Erik Gjørup said 3 years, 10 months ago:

    Thank you Spiros (@fiveten)

    Better late . . . Eric (@eb801). I installed the legs on the first Eduard 109 I built as far as I recall, and has dome so ever since. With a little caution (very little) you can just leave it on the desk. The real problem is with the high tailgear, and after trying to protect that one with various complicated contraptions, I ended up with the cocktailstick. And as you say, I do not use jigs for painting these 109's. The dilemma I face each time is wether to paint the gear and cover it or leave it and paint it last.
    After all, the planes have to stand on their own feet for the rest of their lives, so it has to be sturdy anyway. It is not all my builds that gets legs first - the two Zvezda 109's in progress does not have them yet. The Tamiya converted 109 has to be built with the gear installed before finishing the fuselage, but that one is super sturdy too!

  • Profile Photo
    Spiros Pendedekas said 3 years, 10 months ago:

    Adding the landing gear as late as possible (ie at VERY late stages - and even later!), is a must for me...

    ...I cannot imagine Vne (never exceed speed) unfinished airframes models tests by my two little monkeys,...errrrr...,...sorry..., ...sons, with the landing gear attached... 🙂 , my friends @airbum and @eb801...

  • Profile Photo
    John vd Biggelaar said 3 years, 10 months ago:

    My preference as well, to attach the landing gear, and other parts like antennas, as late as possible.
    For some reason I always seem to nock off those fragile parts.

  • Profile Photo
    Erik Gjørup said 3 years, 10 months ago:

    Spiros (@fiveten) my friend, happily the people in this house NOT working on the build shall be looking with their eyes, not their hands 😀
    John (@JohnB), while other parts will wait on these 109's the gear is actually very sturdy. AND I have seen in the latest Eduard computerdrawings of their next "109" (the Avia S-199) that they will make an arrangement not unlike the one Tamiya has chosen for their 109 - making it extremely sturdy.

    And with that, there will be another small update in a minute.

  • Profile Photo
    Erik Gjørup said 3 years, 10 months ago:

    Mottling finished

    Having struggled with airbrushing for a few days, this one finally got its mottle finished

    Enough has been said about the struggles I had with the airbrush, so suffice it to say that a long time in thinner and a good cleaning solved the problem.

    I also thinned the paint a lot, and all was well.


    And with this part of the process done, I think I may go for a smoothing layer of gloss clear before decaling.

    I suppose that will mean it will have to dry, then gloss clear, then dry and THEN decals, so it will be a bit before it resurfaces here. Stay tuned, and feel free to comment – thank you for stopping by.

  • Profile Photo
    Spiros Pendedekas said 3 years, 10 months ago:

    Love the mottling, my friend @airbum!
    Great airbrushing!

  • Profile Photo
    John vd Biggelaar said 3 years, 10 months ago:

    Compliments on the mottling, Erik.
    A sturdy hand is very helpfull to achieve this level.

  • Profile Photo
    Erik Gjørup said 2 years, 2 months ago:

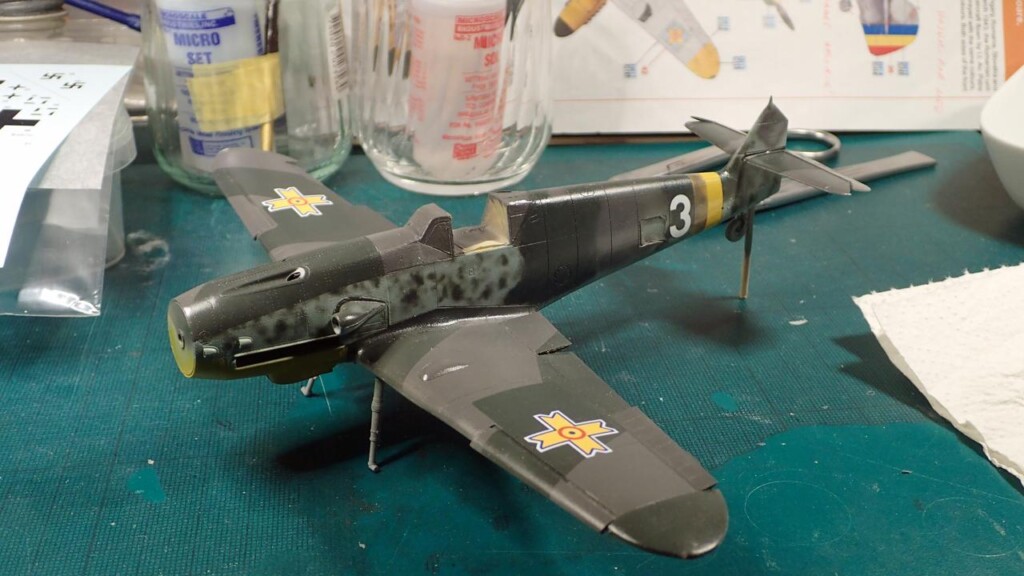
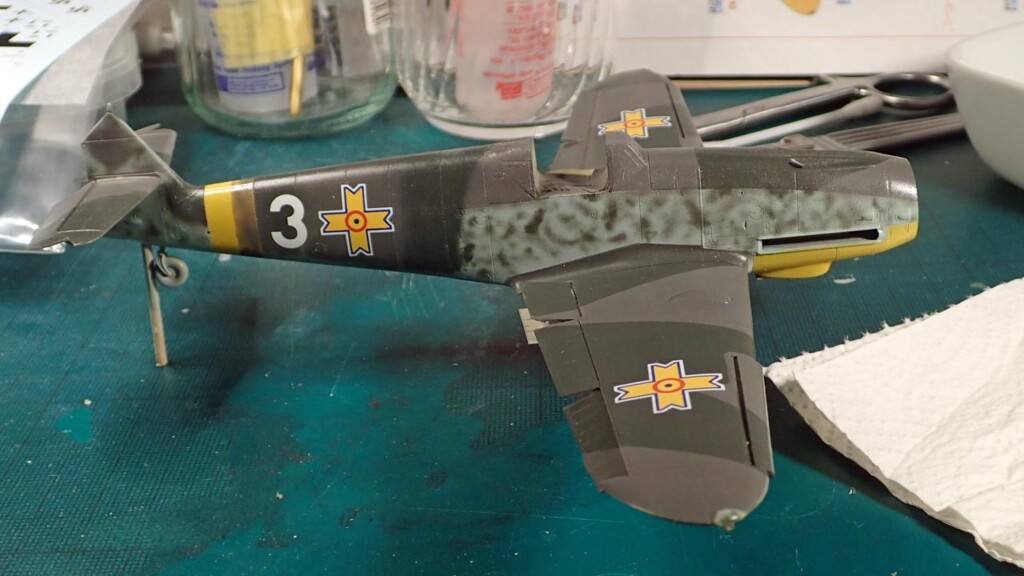
    Finally I dusted off a pair of long overdue 109’s, continuing where we left off last time, almost 2 years ago @fiveten, @johnb, @eb801, @gblair, @uscusn, @lgardner, @holzhamer, @dirtylittlefokker, @gkittinger and @jamesb. (as I had to re-read my entire log to see what had happened so far, I took the liberty to mention you all as you at some point had left a comment – hope it is OK with you folks?)

    Almost two years of drying time!

    I re-visited the build as it had been sitting in the paintshop for a looong time, and gave it some ’75 touch-up.

    The band around the rear were reduced with mottling and when that had dryed it was time for some decals.

    First decals added


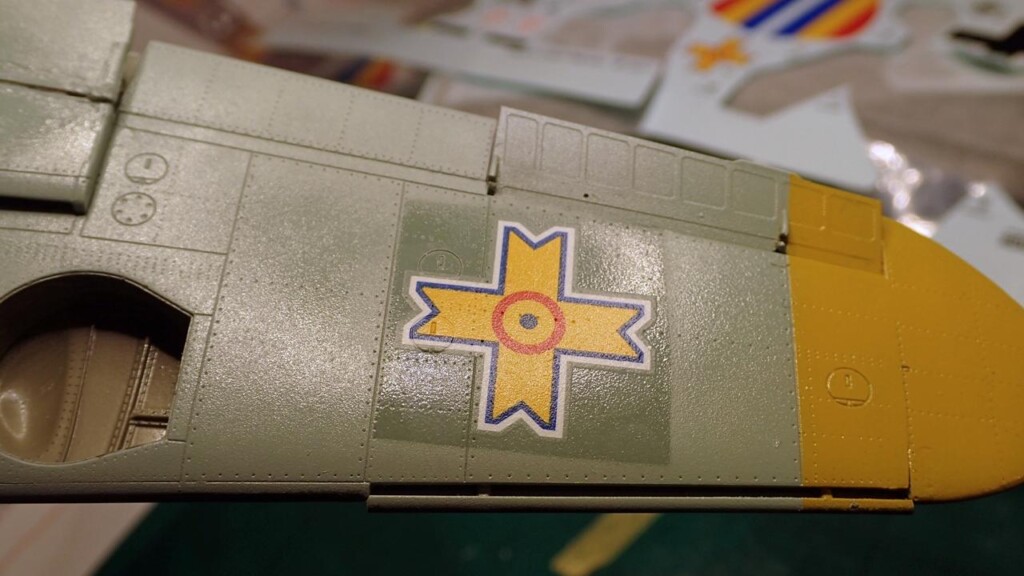
    I did add decals to the wing bottom first, and as it looked like it was OK, I decided to just go ahead and add decals.
    Some trouble with them as they did not fully sink in everywhere


    I will re-soak them in sol a few times and then probably run a cocktailstick over the offending parts.

    Hopefully I shall be able to make more progress before another 2 years passes? Tune in again later and check

  • Profile Photo
    John vd Biggelaar said 2 years, 2 months ago:

    Nice thoughts about the push back tail wheel position, Erik @airbum
    The decals did settle indeed real nice. Looks perfect like this.