First of the Vero Beach Projects- The Tamiya F4F-4 Wildcat (1/48th Scale)
I'm not sure what i can say about the Tamiya F4F that hasn't already been said by others. It marked Tamiya's return (in a BIG way) to the 48th scale aircraft segment, it filled a ginormous gap in WWII Naval Aviation subjects (and spelled the beginning of a slew of releases from that era), and for the most part, it's a Hoot to build! I'd characterize the kit as being only ever so slightly more fiddly than Tamiya's Spitfire I.
it's a shame that Tamiya didn't develop their F4F into a full line of Wildcats to include the F4F-3, FM-2, and the French/ British export versions. On the other hand, if you're a kit manufacturer, you need to make what sells.
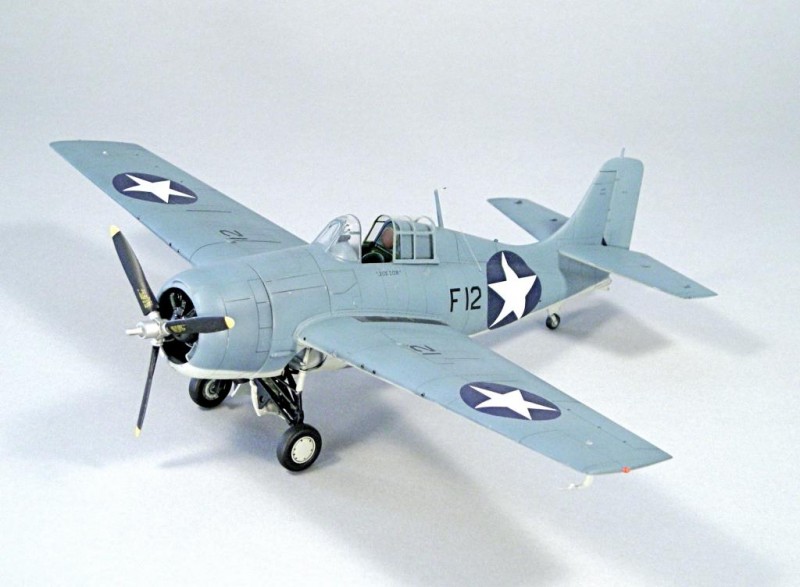
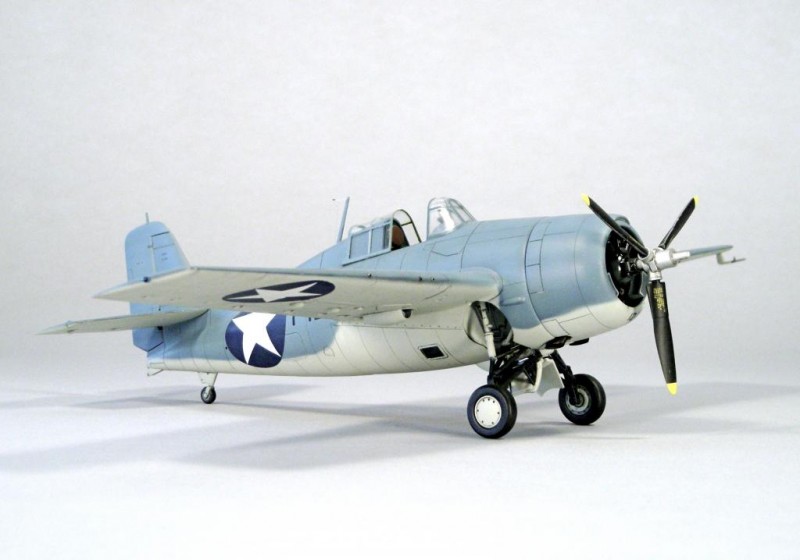
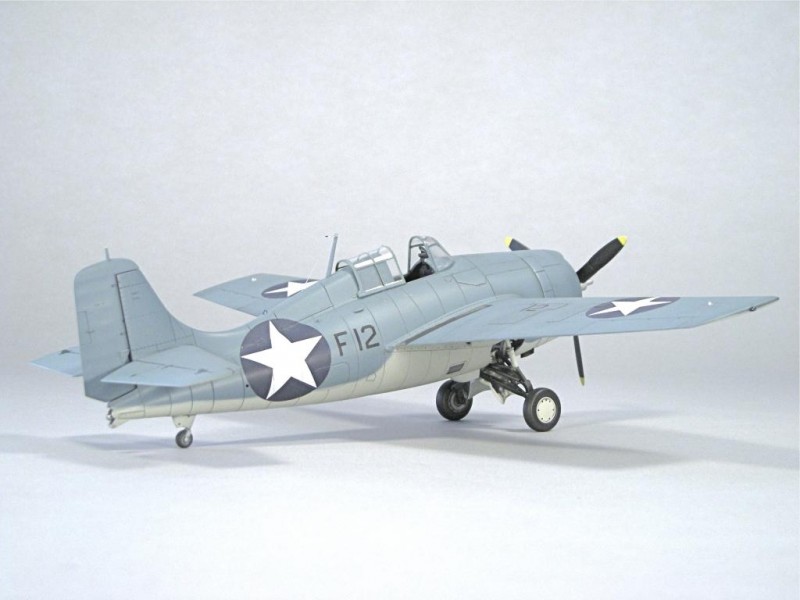
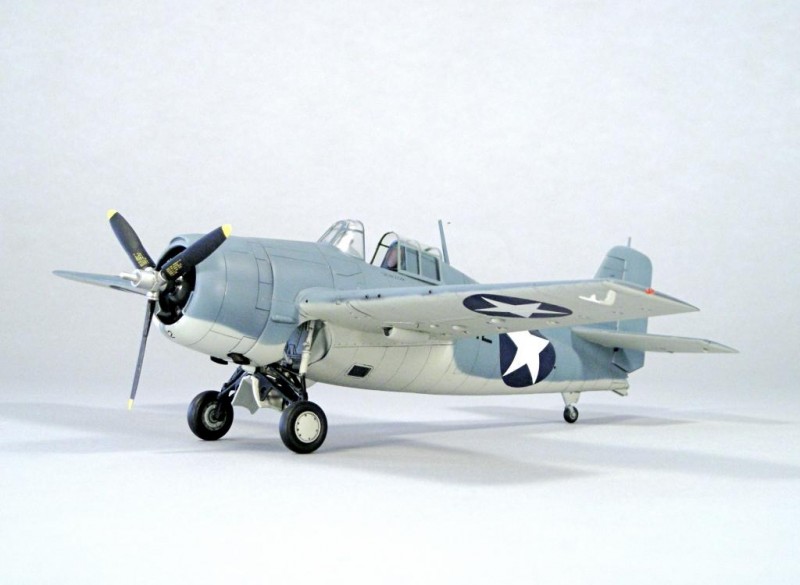
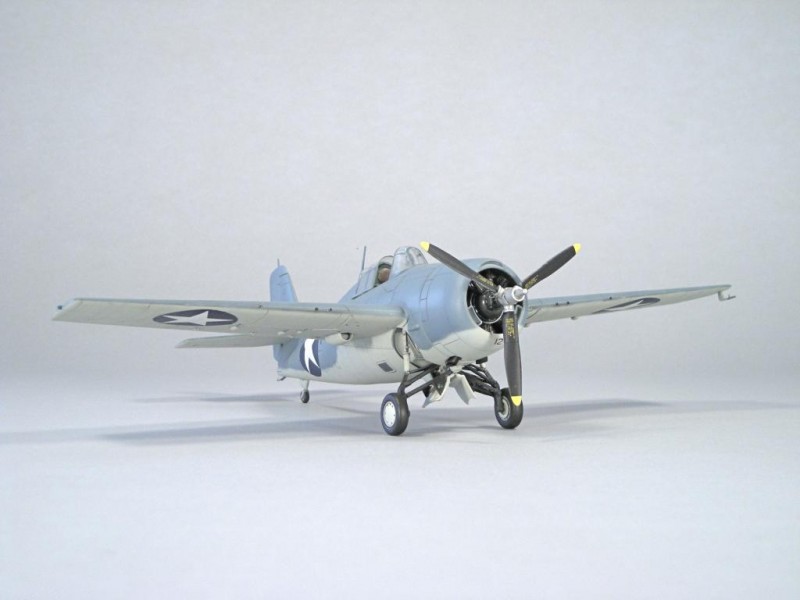
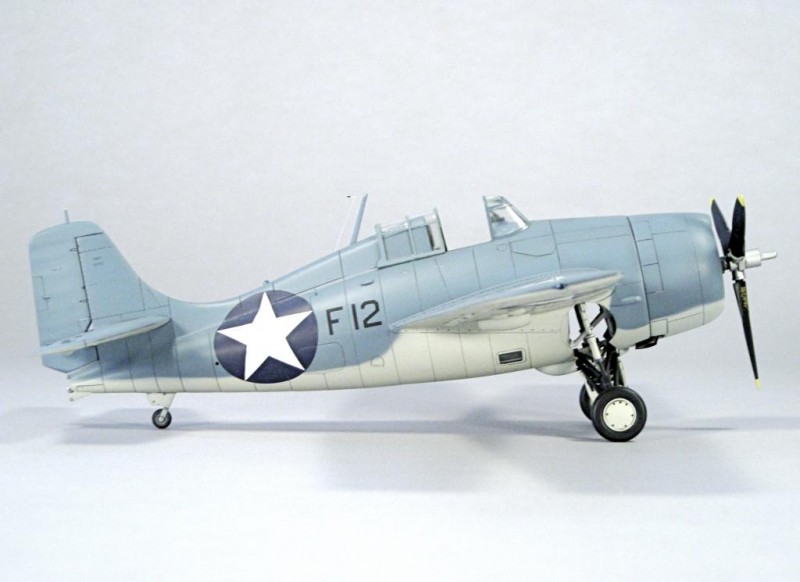
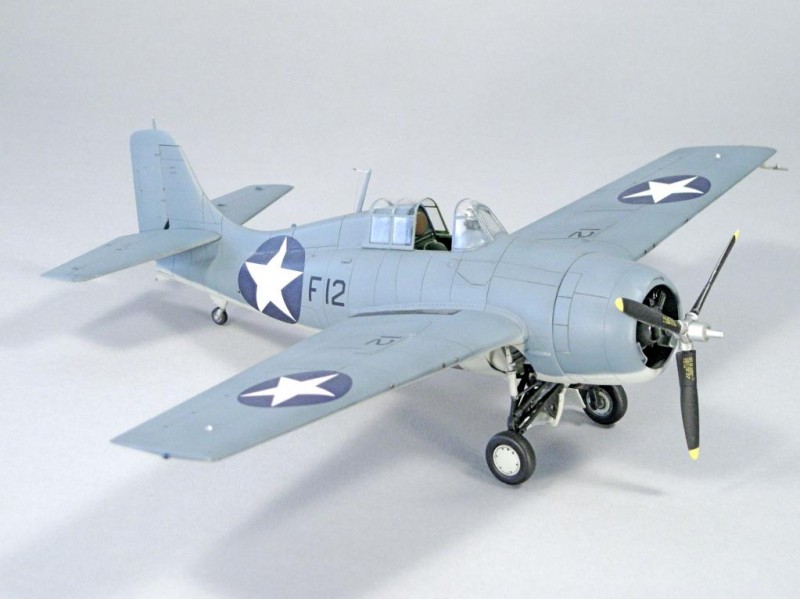
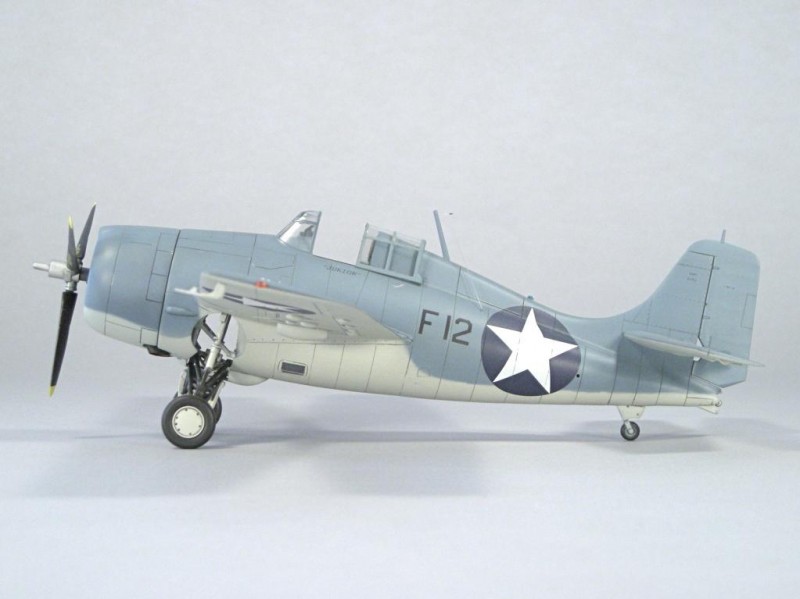
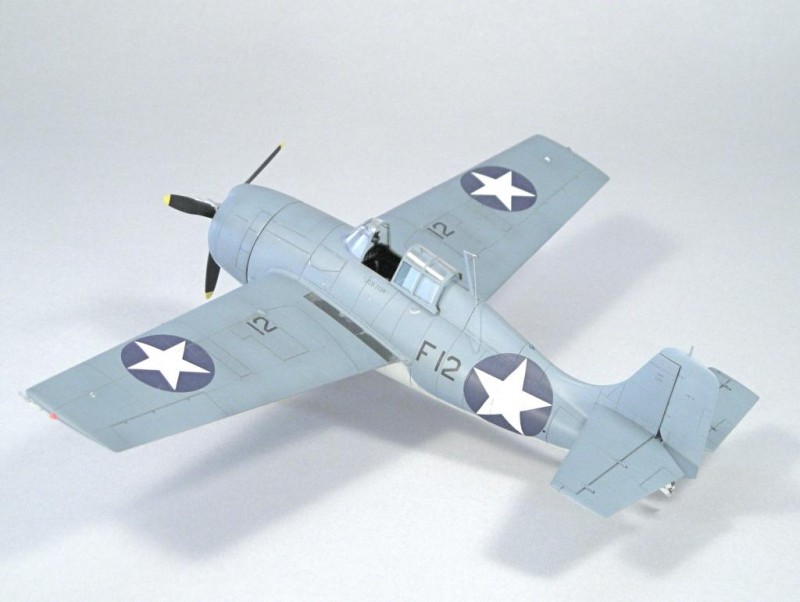
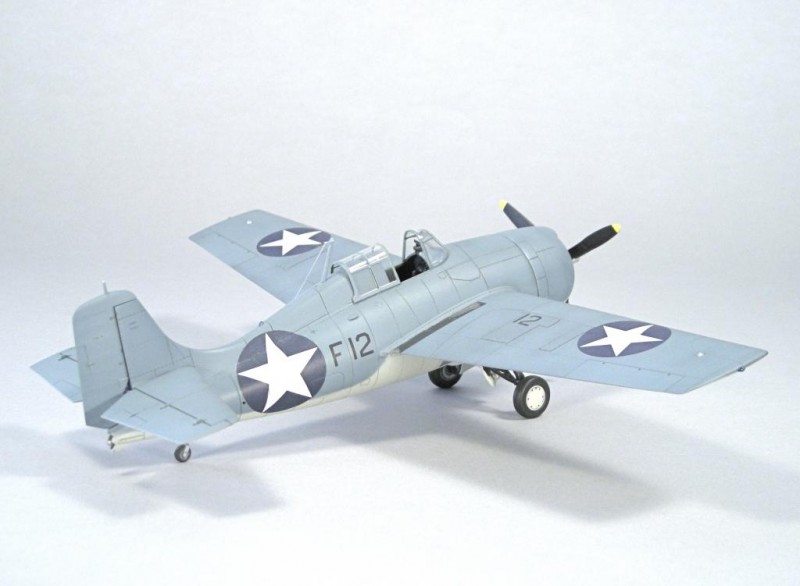
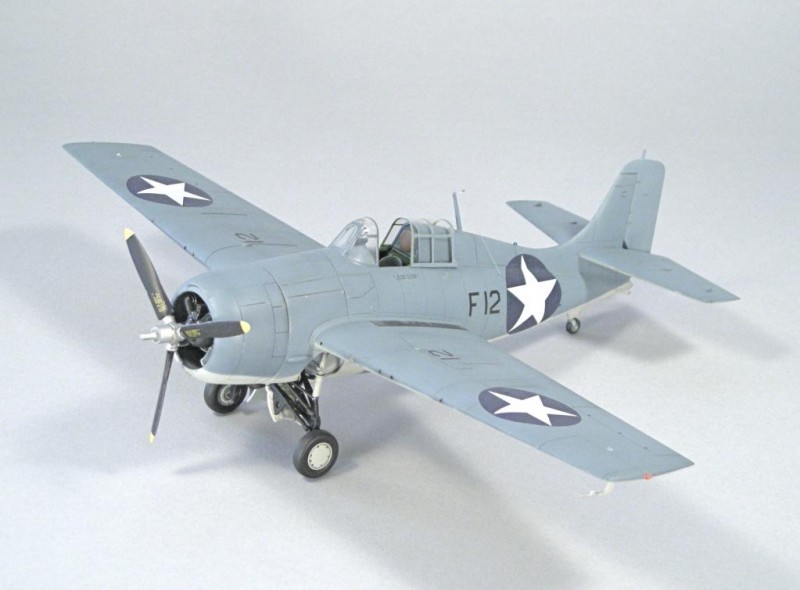
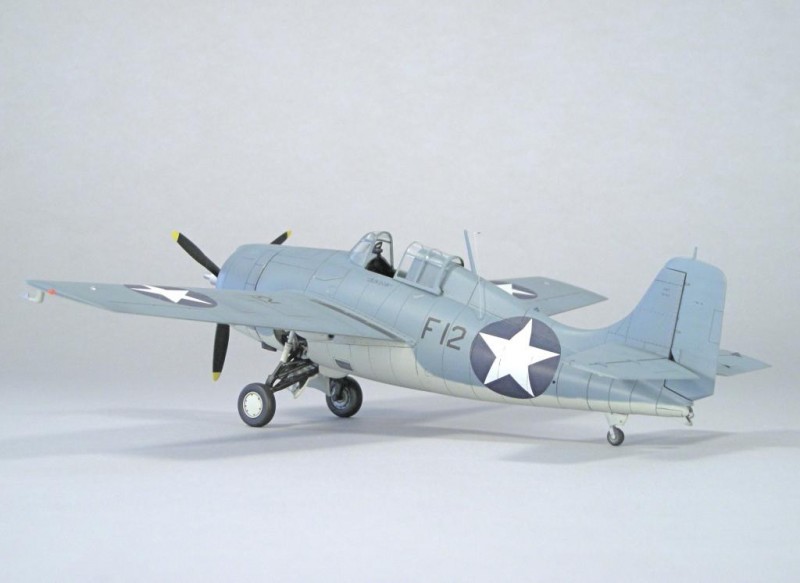
This model was my first serious effort at a 48th scale WWII subject, and it kind of started an infatuation with Pacific War, Carrier-Based subjects. I was flight instructing at the time in Florida and this was the first of 5 48th scale projects i started. The aircraft in question depicts James J. "Pug" Sutherland's "JUNIOR" right before scoring the first US kill of the Solomons campaign, but more significantly the epic duel Pug fought with Saburo Sakai. A fight which came very close to a draw. At the time i had not read Lundstrom's "The First Team", so i was not armed with a lot of info on Sutherland's Wildcat.
I remember first reading about that epic battle when i was in grade school. Not sure which book it was in- might have been "WWII in the Air", but i remember it was from Sakai's perspective. I also remember the old Revell "Dogfight Double" release featuring the 72nd scale F4F (which was considered good for its time) pitted against a generic overall green A6M Zero-Sen.
The kit was modified by using a Falcon Vacuform canopy; i added machine gun barrels from hypo needle tubing, nested inside sleeves made from Evergreen tube and installed in the wing (Thank You, Geoff Coughlin!). i also used the last of my PREMIERE injection molded aircraft navigation lights for this build. Finally, i tried making the antenna wire from stretched clear sprue. At the time, i recall it was a pretty cool innovation (credit goes to Bill Bosworth at Accurate Miniatures for suggesting this).
I sanded off the raised rivets on the airframe. Not so much because they were inaccurate or out of scale, but i found that a wash applied over them makes them appear too large and obtrusive. if i were building a pre-war silver painted aircraft i would try to leave those on, since those planes were well maintained and kept clean.
Topside colour was Model Master ANA Blue Gray straight from the bottle. Undersides were originally Model Master Light Gull Gray, but it appeared too dark a contrast with the blue gray, so i overpainted it with Model Master Light Aircraft Gray. It didn't give me as much of a colour shift when i put the gloss coat of Future over the model.
Decals came from an AeroMaster sheet.
I have another Wildcat, modified to FM-1 Standards waiting in the wings. I'm just looking for the right paint scheme. Have some ideas, but nothing so far that really leaps out at me.
For anyone contemplating a collection of WWII Navy Carrier based subjects, i'd suggest taking on the Tamiya Wildcat first, followed by the Hasegawa F6F Hellcat and SBD. Once those are done, you're ready to take on the Tamiya Corsair, after that the Accurate Miniatures Avenger, follow up with the Great Wall Hobby TBD, and saving the worst for last, the Special Hobby F2A-3 Buffalo.
Now, if only i could find the motivation to finish my Hasegawa Dauntless...
Hope you likee. Thanks for shopping!

David,
Love the F4F, love Tamiya's kit of the Wildcat, one of my favorite models of ALL time, (Hobby Boss is pretty good too) and love the job you did building a model that really represents Grumman's scrappy little fighter very well. Excellent job!
Thanks Fred! The Wildcat has a special place in my heart; not sure why. Of course, i also have childhood memories of the 32nd scale Revell kit. Have it in my stash but never finished one.
It is indeed a nice kit. The rivets on it are actually very accurate, if you have ever been around a 1:1 Wildcat.
Nice work on this one. You're inspiring me to show what else can be done with this kit using nothing but aftermarket decals.
Thanks Tom!
Thinking about doing an FM-1 from a training squadron, but i had to plug the outer machine gun holes and re-scribe some gun belt access doors, so it doesn't make the cut in terms of "Out of Box". Perhaps later i will do a Wildcat from Operation LANDCRAB or an early three-tone "Norfolk Scheme" version.
How do you go about depicting each photo as the "headliner"...does it require text between each one as you've done? Usually, the first frame you select is the "teaser" and all subsequent files are shown below the heading as thumbnails. What obvious method of presentation am I missing..?
Craig, i refer you to Marek's post below. i can't for the life of me explain why it did what it did.
Yep as a matter of fact computer-savvy me tried this the other night too and couldn't get it. Do fill us in if you don't mind...
Great 'Cat too...
Hi David, having built one myself a while back I can agree with everything you've written. It's a great kit, and it's a really good build by your good self. And yes, how do you manage to put the text under each photo?
Ah ha found it! Follow this link & it'll show you how folks!
http://imodeler.com/about/arranging-the-images-within-text/
The Tamiya Wildcat kind of fills in the gap that Accurate Miniatures left after having gone under. Had the company survived they would have done one. In my humble opinion Hobby Boss took a close look at Tamiya Wildcat and ran with it with all of the variations of little Grumman and is making a bundle. It's too bad that Tamiya didn't do the same.
David, that build of yours is straight forward and elegant in its simple paint scheme. How did you get such a fine soft line between the Blue Gray and the Light Gray under sides? Did you do it with a airbrush free hand or use the silly putty method? Cut some paper masks/frisket paper to form a pattern? Inquiring minds need to know.
Stephen, i can tell you the first iteration was done freehand (Badger 200 Single action) and i didn't like it one bit. No Siree!
I went back and cut a "shape" from a piece of wide masking tape, and just inside the edge i laid down a piece of string (i don't think it was thread, which i use on 72nd scale) set back maybe 1/8 inch from the edge. Mind you there was extra masking put on to protect against overspray but that's how i did it. Depending on what you use, string or thread adjusts the height that the mask is held off the surface. You need to be careful to point the airbrush at the right angle, but that comes with experience.
One of the things i like about painting Corsairs is that the separation between colours is rather tatty; easily within the capabilities of my dual-action Iwata.
As for Accurate Miniatures, as one person said it best- they turned out a great product for their niche, but went from a flawed business model. Thankfully the molds weren't lost at sea or in a warehouse fire or some silliness like that. Had market demand been greater (and maybe if they were more close-lipped about forthcoming releases- witness the Beaufighter), perhaps they would still be in business but there's no denying they were the cutting edge for a brief, shining moment.