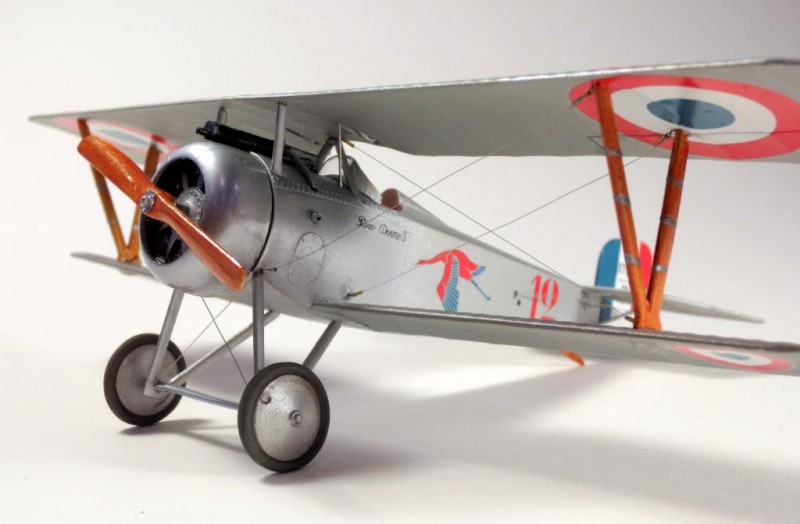
Eduard 1/48 Nieuport 17 and rigging explanation
Ok... I primarily build 1/48 scale WW2 aircraft, but every once in a while I want to branch out. I was introduced to models way back in the stone age when my father would build the Aurora WW1 kits, paint them in oils (he was a dabbling artist), and hang them from my bedroom ceiling. So somewhere in me there is some dormant WW1 aircraft interest!
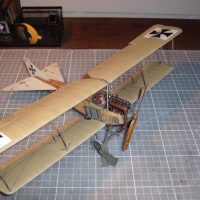
Anyway, like many others, I had been a bit intimidated by rigging the things. After poring over countless articles demonstrating the various methods of rigging, i decided to just plunge in and give it a go. I build this model a few years ago, and it was my first 'real' attempt to rig something. I will add here that the Eduard WW1 kits are really great fun to work with - crisp moldings, good fit, and nice details. But boy are these guys small. Much like the real aircraft, these kits are delicate. I chose the Nieuport as it seemed like a simple rigging job. Turned out it was!
I won't describe the building of the kit here, but will go into my rigging method. I was pleasantly surprised by how well it worked, and hopefully that will inspire others to take the plunge. The method I used was a result of lots of internet browsing, and is in no way an original invention of mine!
I started by drilling out the appropriate rigging mounting holes at various spots on the wings and fuselage. Eduard has provided little bumps or holes in these areas, making it quite easy to get them in the right spots. Just drill partially into the wings (not all the way through!). You can drill all the way through any fuselage points.
Eyelets were fashioned using soft wire (I think I got it by stripping an old phone cord). I cut a small length of wire (about 1 ½ or 2”), and looped it around a #60 drill bit I had in a pin vise. Any sort of drill bit, stiff wire, pin, etc will do for this. Then just twist the wire ends by hand, 15 or 20 times. The result should be a loop (formed by the wire wrapped around the drill bit) with a ‘tail' of braided wire. Slide the piece off the drill bit and repeat. Repeat for about twice as many as you think you will need, as you will lose several (trust me on this one). After your little assembly line is complete, trim off the braided ends until you have just enough length that they will fit in the holes you previously drilled in the wings and fuselage. The idea here is that only the loop (or the loop and a small amount of the ‘tail') will be exposed when you insert these into the various rigging points.
I did not begin rigging until the model was fully assembled and painted (other than mounting the top wing). There are many different ways aircraft were rigged, so depending on the mounting type you may not need eyelets at every mounting point. In any case, where you are going to have the eyelets, now is the time to insert them. I dipped the braided end of each loop in a small puddle of superglue, then inserted it into the previously-drilled holes. I oriented the holes perpendicular to the airflow (so if you are looking straight at the model from head-on, you can see the holes).
Once the eyelets set up, the real fun can begin. I used nylon invisible thread for my rigging. For the turnbuckles there is a neat little product I discovered via another modeler called polyimide tubing – it is hollow, thin-walled tubing made of a vinyl/plastic type of material. This material is much easier to cut compared to the metal tubing I know a lot of modelers use. I bought it on Amazon, and I believe it is actually sold by Small Parts Store. There are many sizes available, and I just ordered a bunch of different ones to have a selection at hand. Unfortunately, I can't remember which actual size I used for this project. They were pretty cheap, so grab a few and see which ones work for you. I cut small lengths of the tubing that will simulate my turnbuckles. Again, the exact measurement isn't needed, just be sure they are relatively uniform. I think mine are around ¼” long. And again, cut more than you will need!
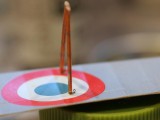
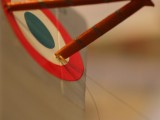
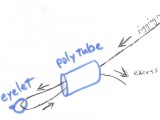
Cut a piece of the nylon thread about twice as long as each rigging run – you will need the extra for maneuvering - it will be trimmed at the end. Slide one of the poly tubes over an end (I hold the thread in one hand and use tweezers to hold the tube and slide it on), then insert that end of the thread through one of the mounted eyelets. Now feed the end that you just put through the eyelet back up into the bit of tubing. Once the thread has been put back through the tube, slowly slide the tubing up against the eyelet and put a drop of thin superglue into the tubing on the side away from the eyelet. It will run down into the tube. Once this has fully set, trim the excess with a pair of snippers, small scissors or a scalpel blade. So the sequence is: one end of the thread goes through the tubing, through the eyelet, then comes back through the tubing locking itself into the eyelet in the process.
For the wing rigging (remember the top wing is not yet mounted), I attached the threads to the upper wing first.
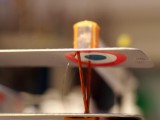
Now after all this has dried, I attached the top wing. You should at this point have a lot of threads hanging down from that wing. After letting the top wing dry solidly (at least a few days), it's time to repeat the process and attach the other end of the rigging. Again, slip a poly tube on the ‘free' end of the thread, feed this end through the appropriate eyelet, and then feed that end back through the poly tubing. Using tweezers, slide the tubing all the way down to the eyelet, hold the tube in place and gently pull the loose end of the thread to tighten up the run. It will stay roughly in place. Apply a drop of thin superglue to the top of the tubing and allow it to run down inside. Now pull the loose end a bit to keep it tight while the superglue dries. It's a small amount you are applying, so it won't take long to dry. Once you are sure it is dry, snip off the excess and you are done with your first run. Just repeat for the other lines and voila! The nylon thread is pretty strong, so any bumps will certainly not cause damage.
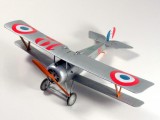
This Ni 17 was a simple project to test my rigging ability as it really doesn't have too many runs. I was pleasantly surprised with how it came out. I hope I was able to explain my method somewhat coherently, and would be happy to try and clarify anything I can.
I also did a small amount of wood grain on the prop and struts – basically sprayed the pieces with a tan acrylic paint, then dry brushed some medium brown oils on them to create the grain. After the oils dried I sprayed Tamiya clear yellow and clear orange (mixed 50/50) to replicate the varnish.
Have I gone on and rigged a Be2 or anything that actually requires some REAL skill? Of course not! But it's a step in the right direction. Now back to something from WW2 with no rigging. By the way, that polyimide tubing also works great to simulate antenna tensioners – and I'm sure you can find many more uses.
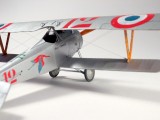
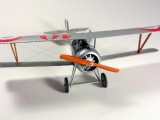
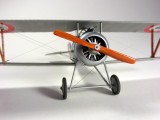
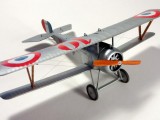


Hi Paul, a very nice one. And a good advice about rigging, much superior
to my stretched sprues. Like your " wood" , again, very nice
Bernd
Nice job on the rigging Paul. Your method is exactly the same as mine, with the exception of the polyamide tubing. I use the plastic tube that is used for lollypops. Once the candy portion is removed, I hold the lollypop stick over a candle and stretch it like sprue. I can vary the thickness this way and always have a tube. I have heard of others using the plastic tubing from Q-tips (cotton buds) but this has never worked for me as the Q-tip tubing is too thin and it just melts.
Hi Bernd - thanks. I find stretched sprue works great for antenna wires and such, but when you need lots of wires all of uniform length, my sprue streching skills are lacking! The nylon thread works great and is very uniform in diameter.
Hi Seamus - yes, I have given the Qtip thing a try too, but couldn't get it to work right for me. The only downside on the poly is that it is quite pliable - and thus you don't get perfect circular cross section. That's not a problem for simulating turnbuckles or tensioning springs, but for other uses it might not be the best.
Here is a link to the tubing on Amazon:
Excellent tutorial, Paul...I will most likely NOT, however, avail myself of your valuable experience. If I ever DO build anything with two wings, it certainly won't have (or have as little as possible) wire rigging. Outstanding build, sir.
Thanks Craig! try it, you might be surprised how darn easy it is. In the meantime, Eduard does a very nice Fokker DVII and equally nice Fokker DR.1 - no rigging required there other than two lines on the landing gear struts! appreciate the kind words.
Thanks Paul for this post. I always have liked WWI aircraft, but the rigging is the one part that really worried me. Have read other "How To" articles but found yours to be to the point and a method that I feel I could try. Thanks.
Hi Alan - glad it will be of some help. I wrote it up as I really had done a lot of reading about various techniques, and most were methods I didn't think I could make work. If I can fumble my way through it, I'm sure you can too! One thing I forgot to mention - be sure to alternate sides when finishing up the rigging - tightening them all down on one side can put things a little out of kilter otherwise. Good luck and let me know if I can give you any more details - I'll be happy to try.
Lovely build Paul, and a really great tutorial on rigging.
Very handy as I am the same as Craig when it comes to 2 wings or more.
Well done mate and thank you.
Thank you for your kind words Simon. I was in the same boat re those biplanes until I just decided to plow in and give it a try. I honestly surprised myself at how simple it all worked. I don't know if I could do justice to the twin flying wires on the RFC planes, but at least now I'm not as overwhelmed by the process as I was. By the way, if you ever want to do a beautiful biplane kit, check out the Fine Molds Ki-10 Perry. The thing fits like any Tamiya kit I have every built, and if you pick up the photoetch rigging set, that part of it goes easily as well. I haven't done a ton of biplanes, but that one was really a fun kit.
The pleasure is ours, the good lady picked up a couple of Tiger Moths recently and have joined the build list next.
There are no holes drilled so it will follow that it is going to be fun.
Thanks for the info Paul & the close-ups to go with it. This is one of the things that stopped me on my Wingnuts Albatros. Maybe it's time to get it out again.
The model itself looks great too. Nice work on the wood.
Hooray for you Paul. The model looks awesome and your rigging is superb. Super guidance on your rigging process...clear and concise. This old man is still shy of rigging...have 5 or 6 bi-wingerss, haven't the rigging gonies.
Nice clean build, WWI types always a visual treat.
Very nice Nieuport!
Best regards, Vlad.
Thanks for posting this, Paul, even though I don't build aircraft I found your write up very interesting indeed. I really enjoyed looking at your great photographs as well.
Thanks very much for all the nice comments guys - glad some found it of use
Paul,
Superb build. I have always like the little Nieuport 17 and your build just makes me like it all the more. I have this kit and have looked at it many times to build it. Each time I have returned it to the shelf. Your build may inspire me to finally do it. If I do I hope I can do as well as you have done.