Wingnut Wings Albatros B.II
Hi... hope you're all well, guys... :-).
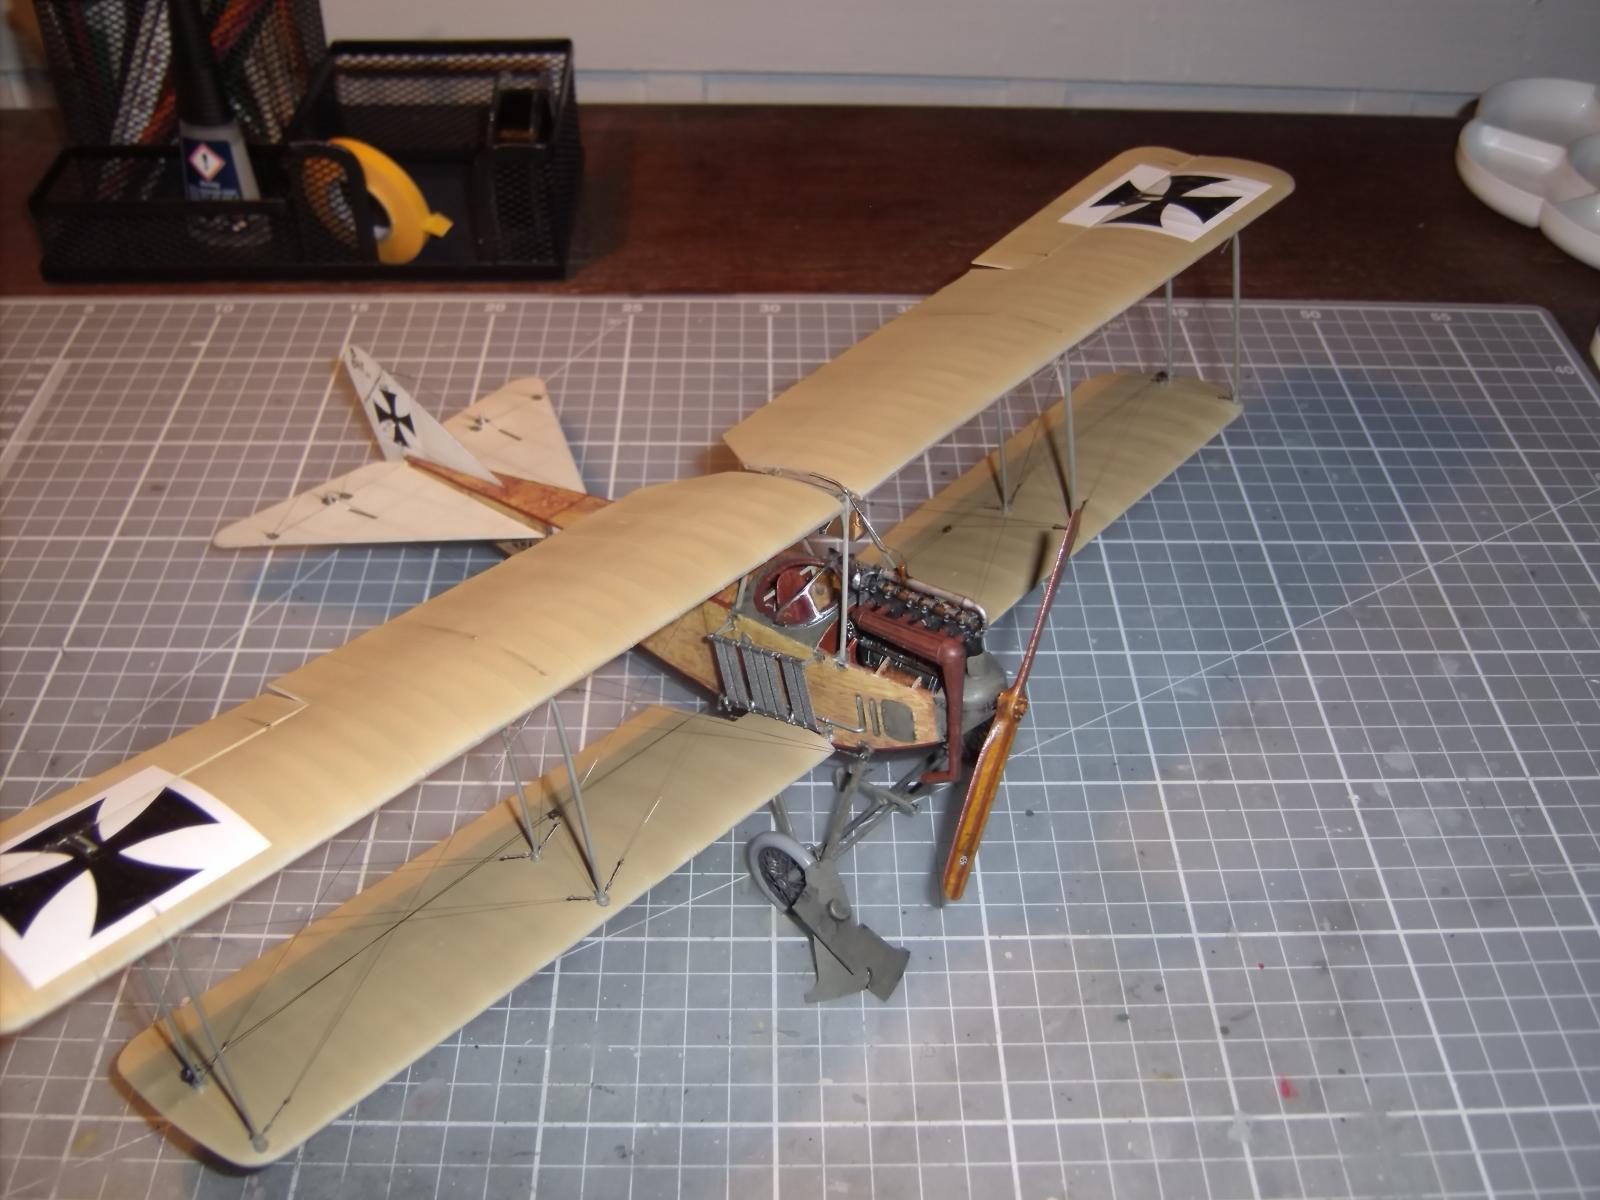
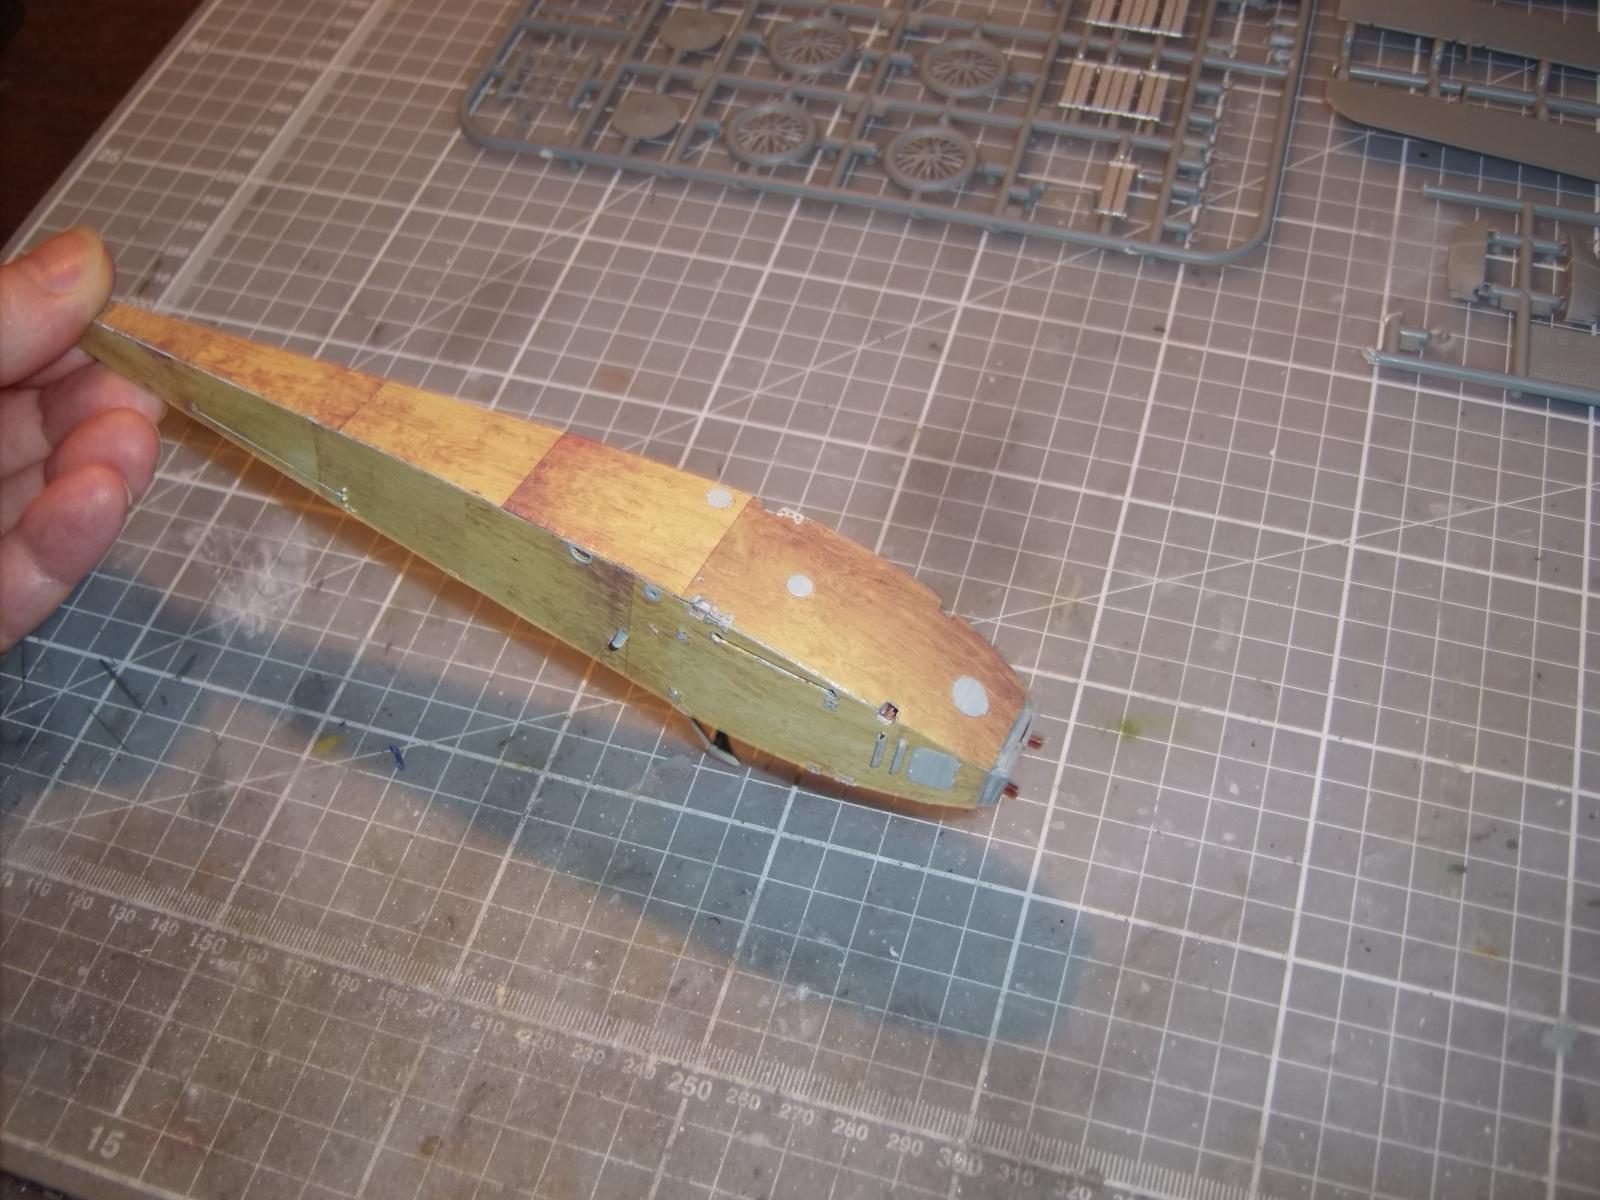
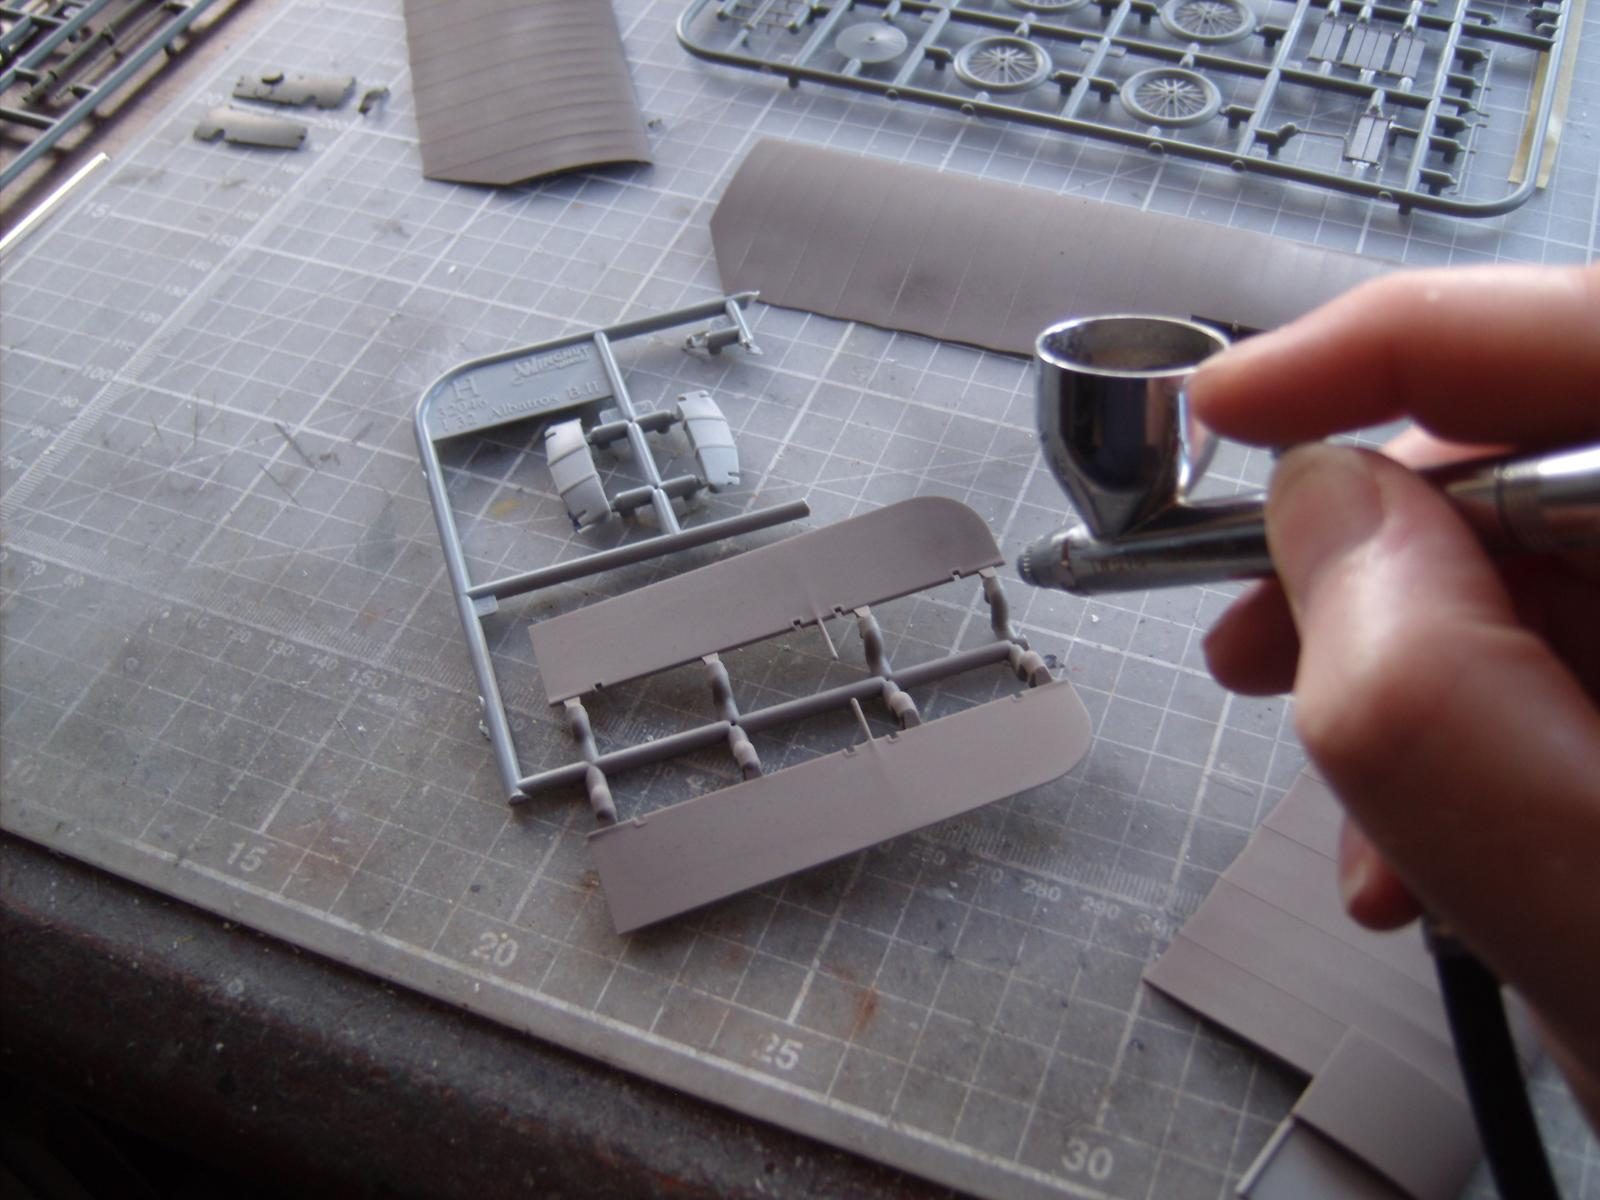
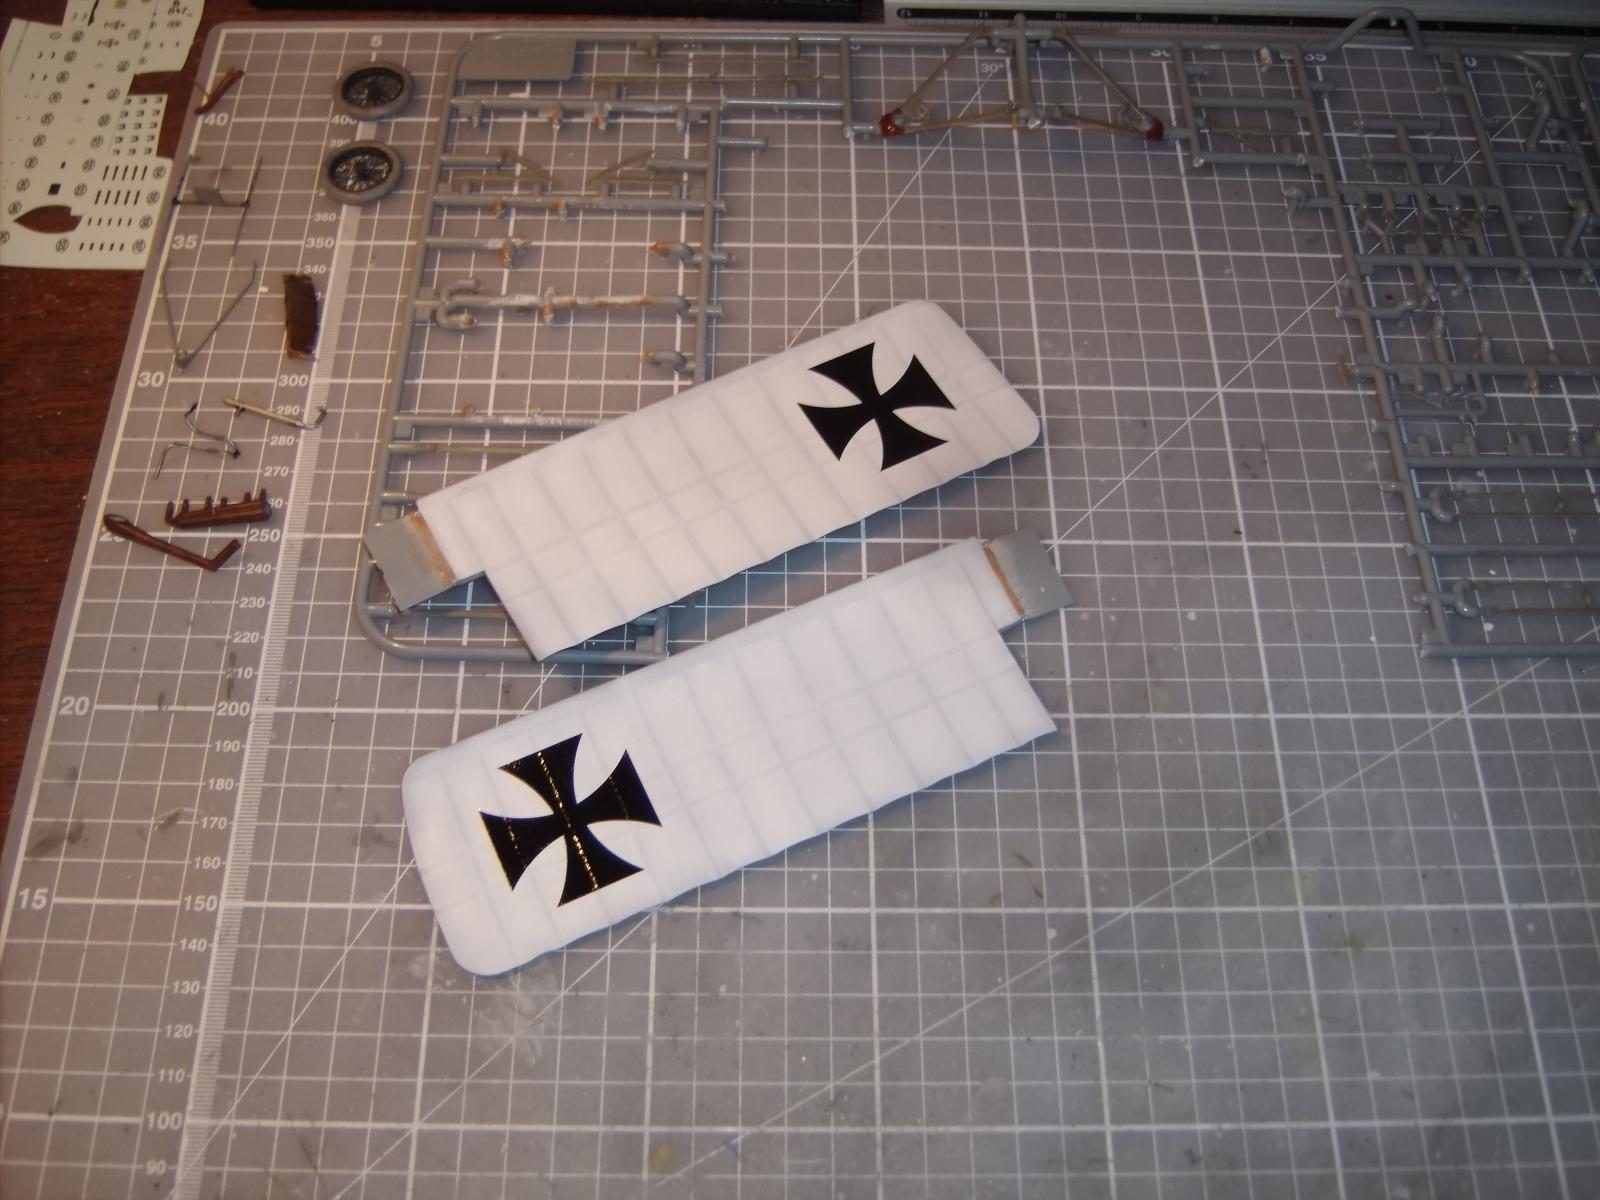
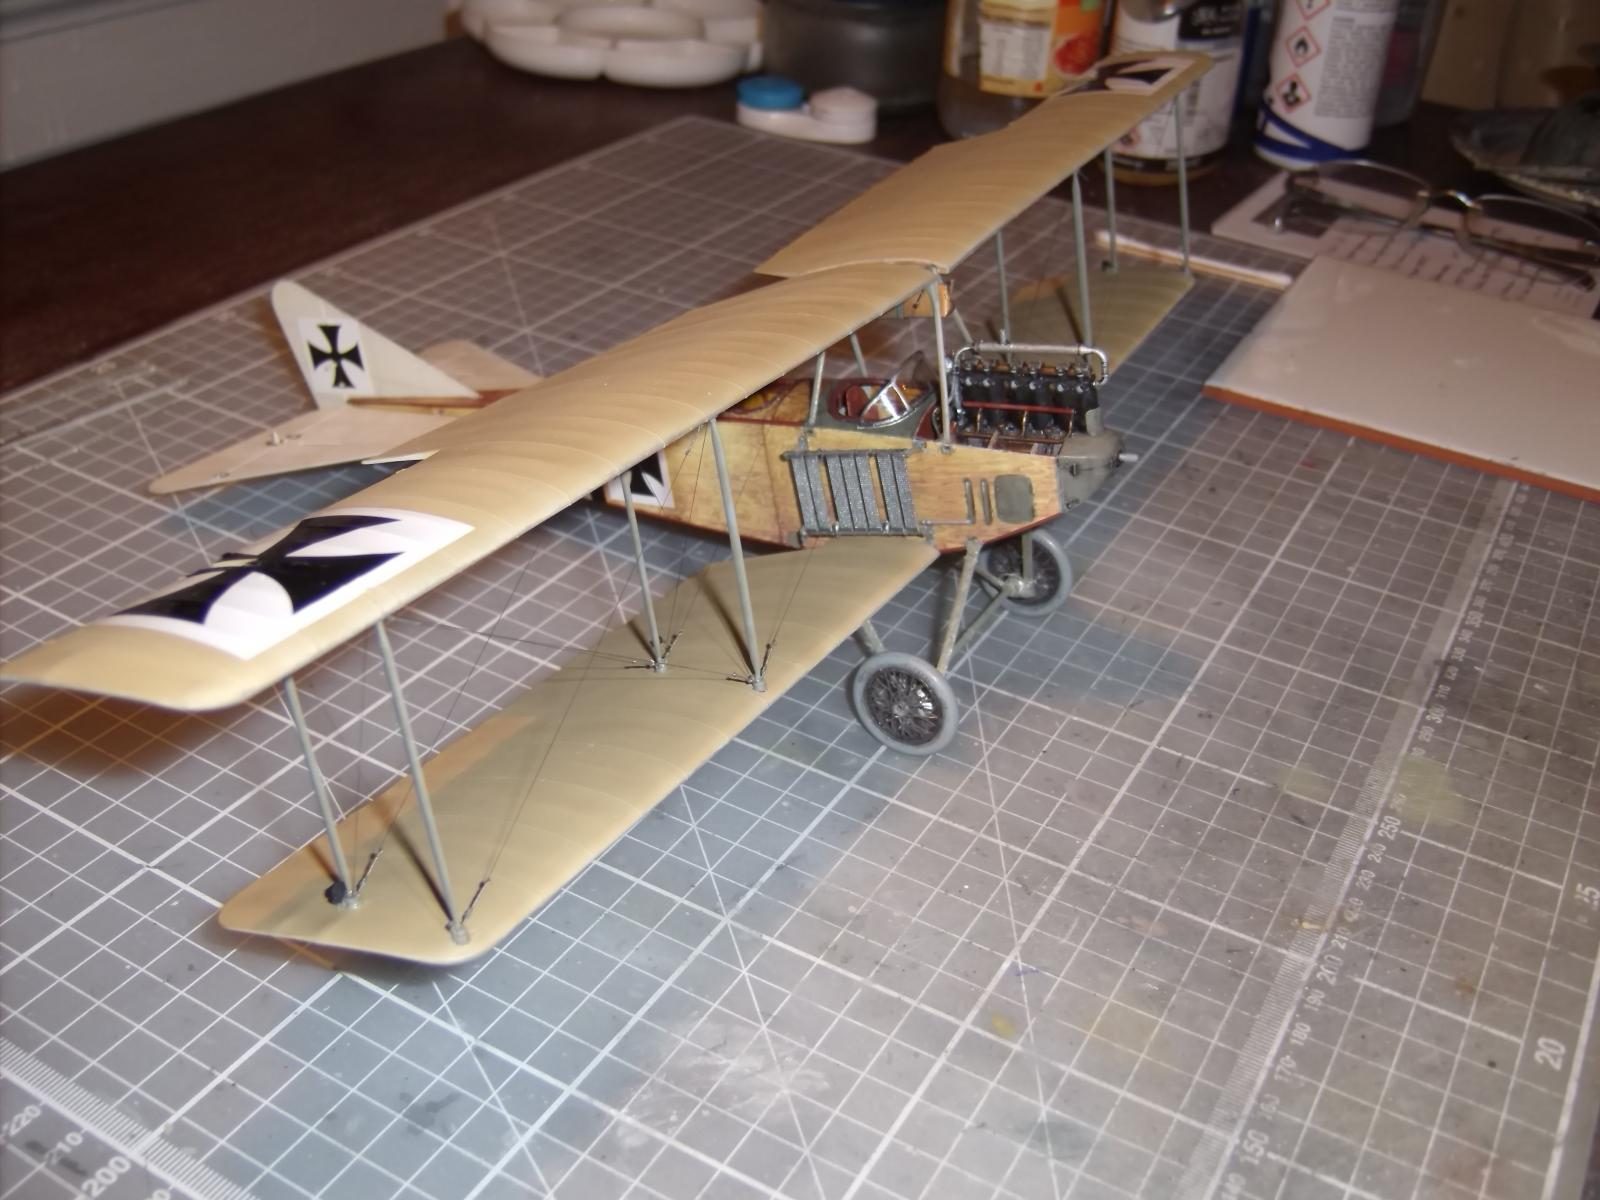
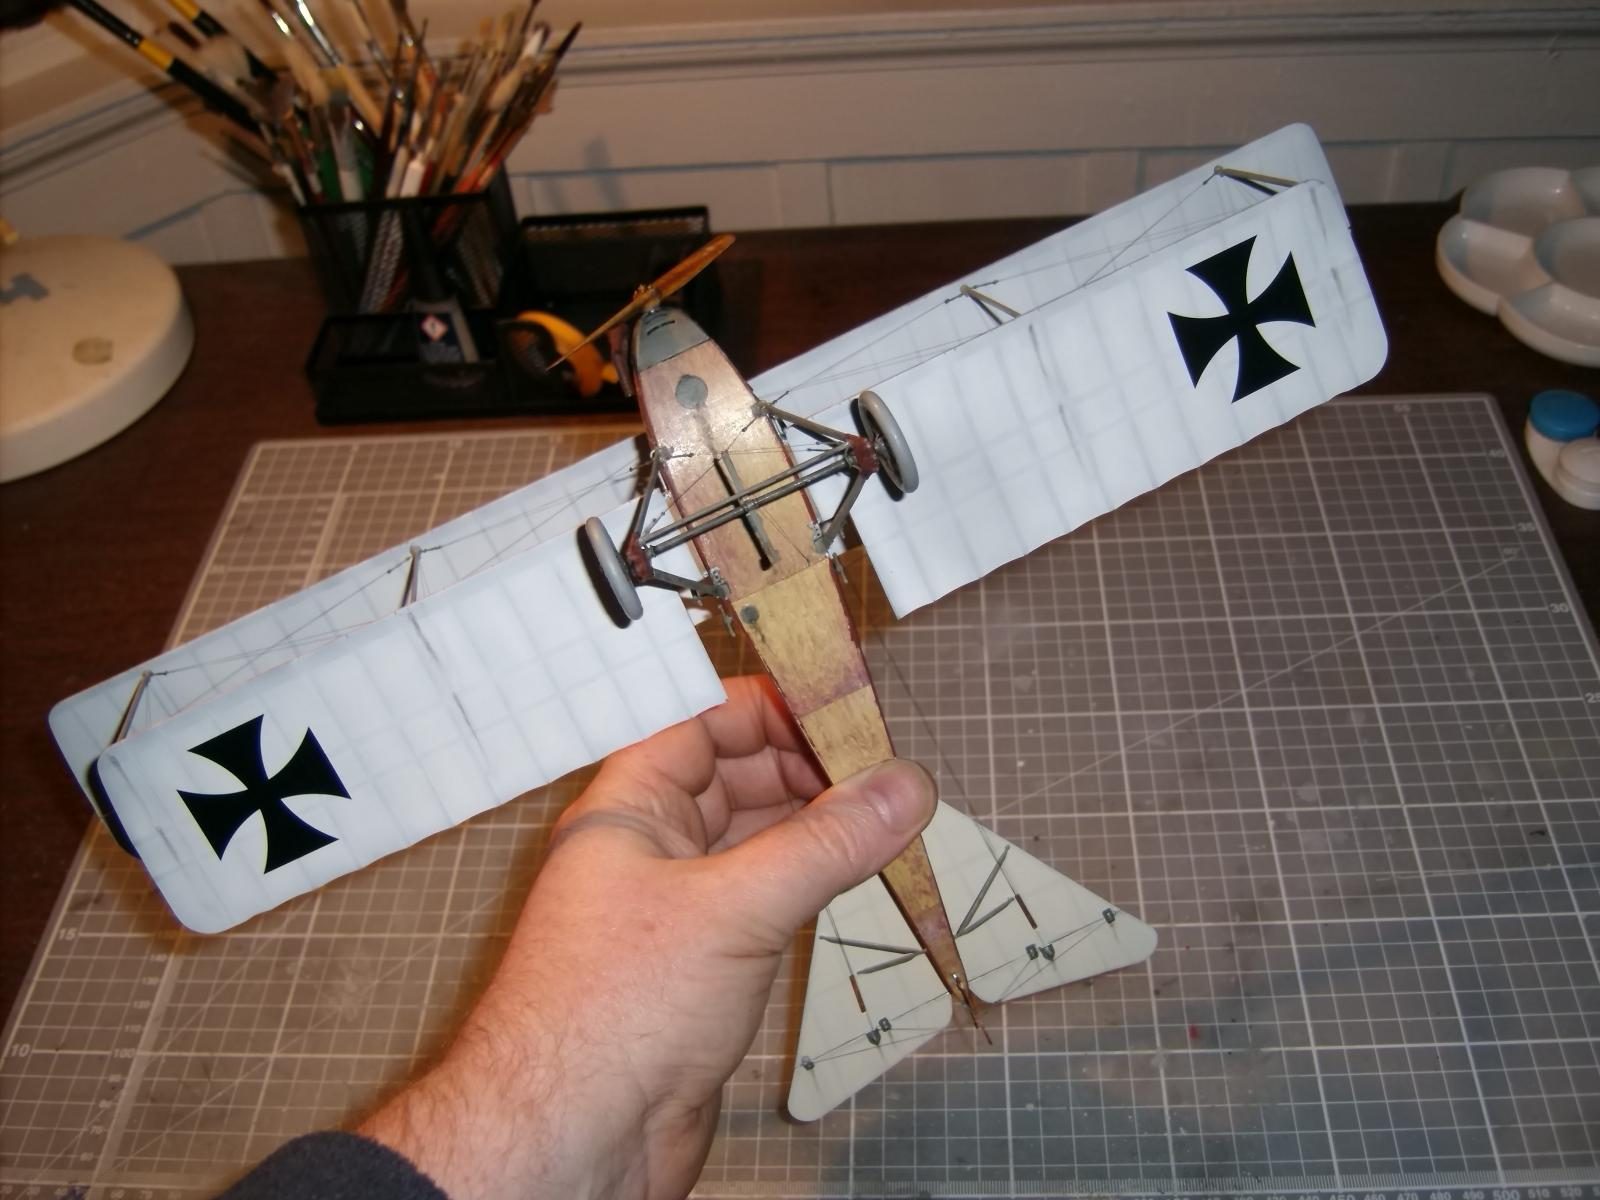
My next offering is quite a challenging and delicate kit, but certainly an eye-catcher once complete. For some time I've wanted to do a 'wood effect' finish and try to replicate the linen-covered wings and tailplane. As this is my first attempt at such a scheme, I wouldn't say I've hit the mark entirely but I am very happy with the outcome. The scheme was a combination of enamel paints, complimented by oil paints along the way. I was taken by the change of linen shades on the wings and tail and the kit-provided wood effect fuselage transfers. The 'bicycle' style spoked wheels give a somewhat precarious presentation to the kit, and do require some degree of patience. I had to rework them twice and not without significant damage to one set of spokes, but managed to salvage most of that situation and avoid using the plastic replacement offerings, which are good, but the delicacy of the spokes inevitably suffers when working with plastic as opposed to the photo-etched alternatives.
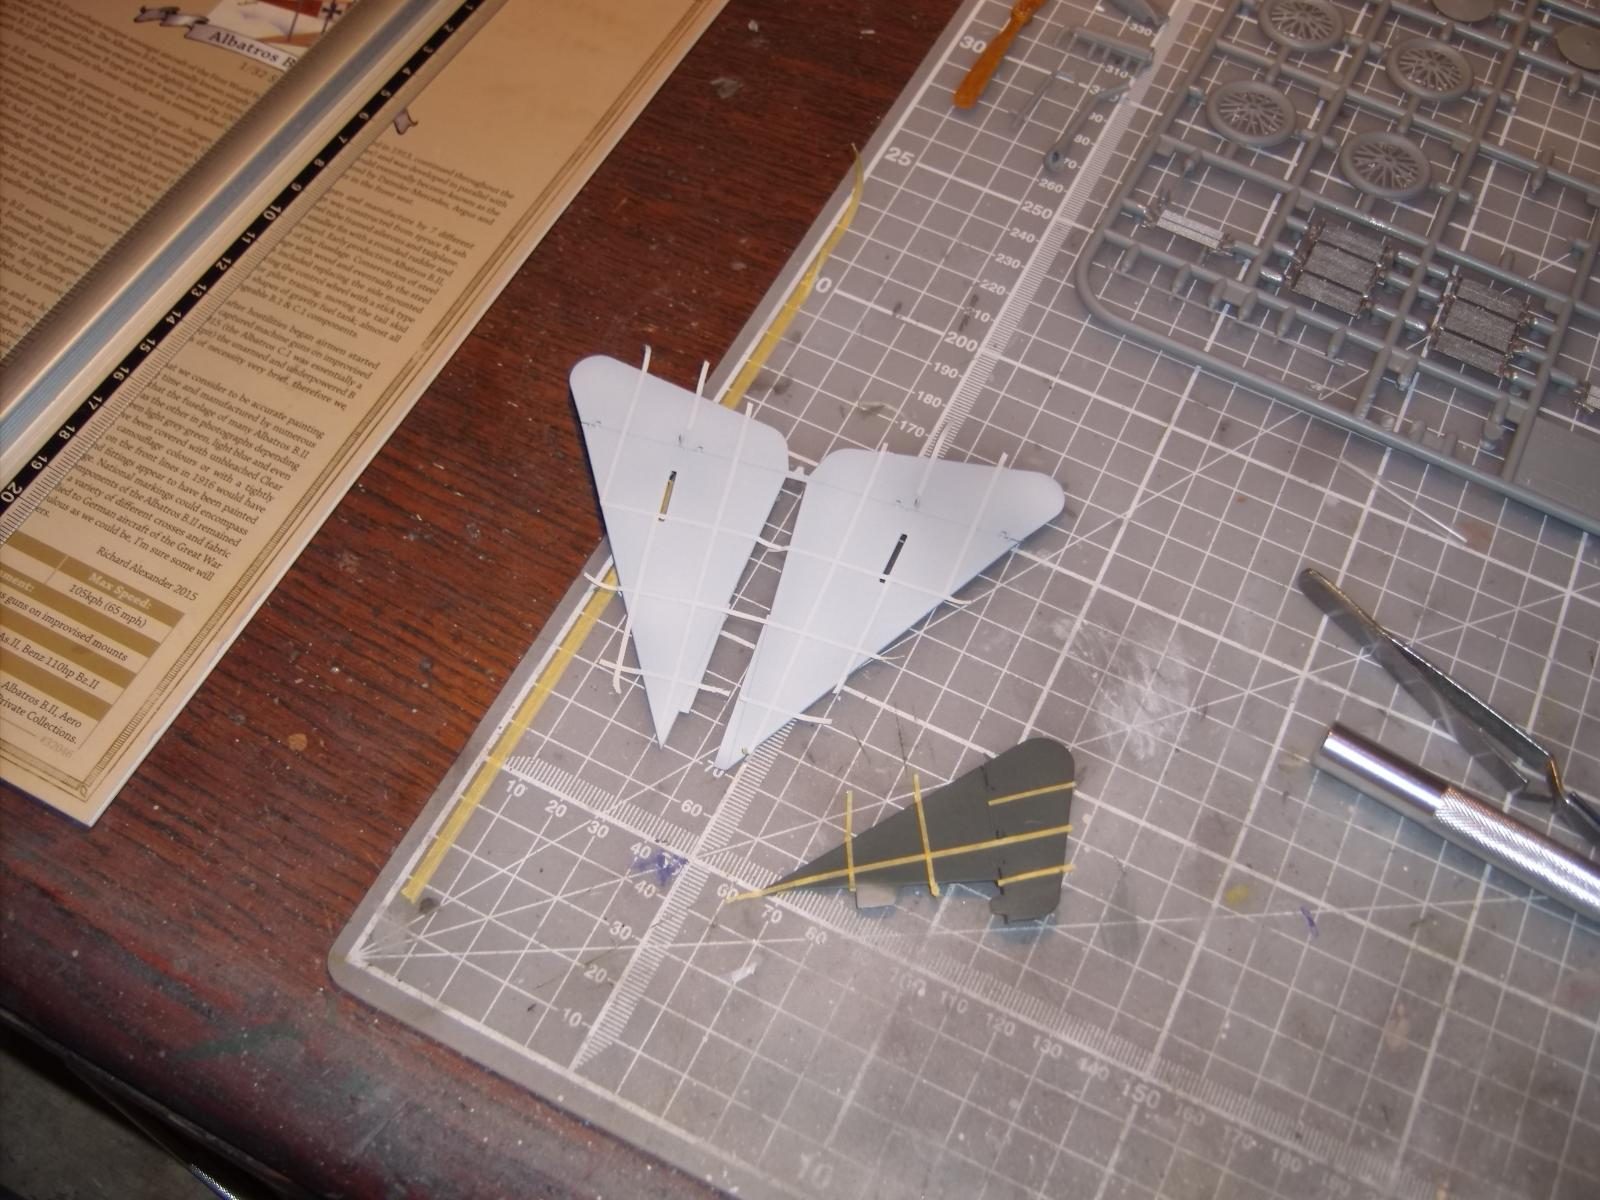
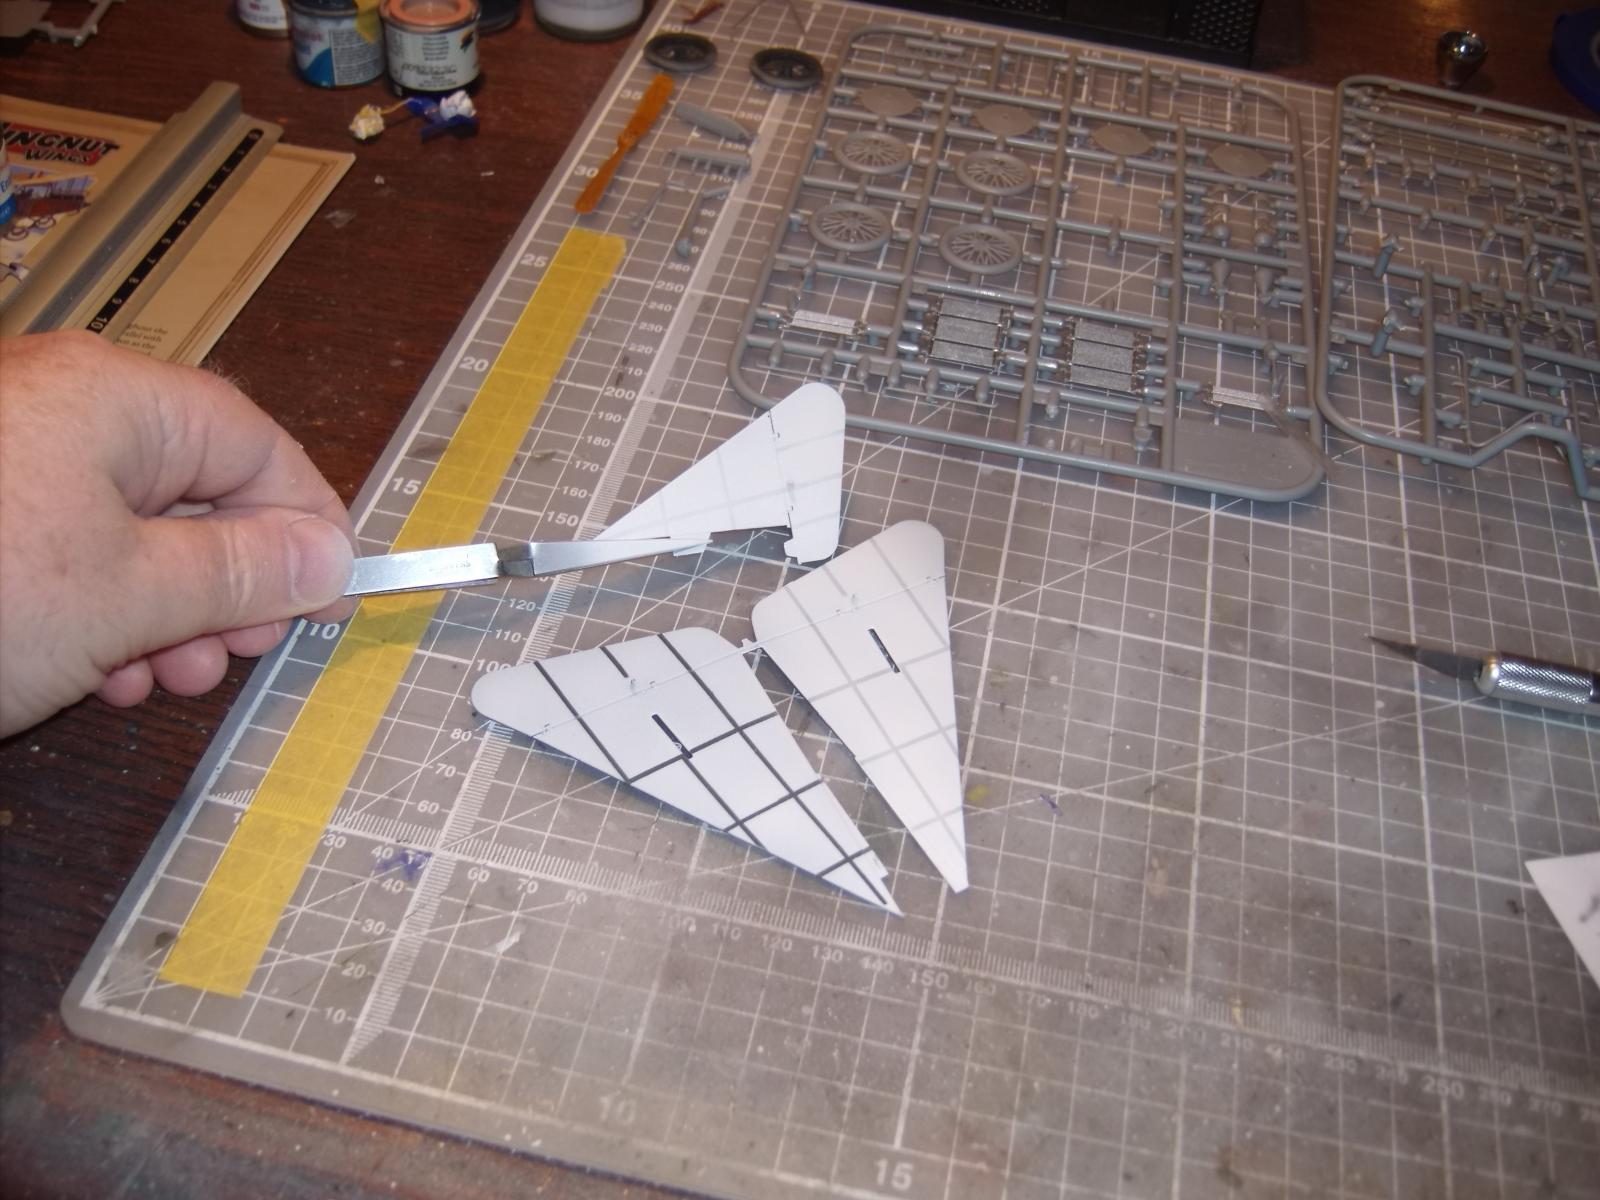
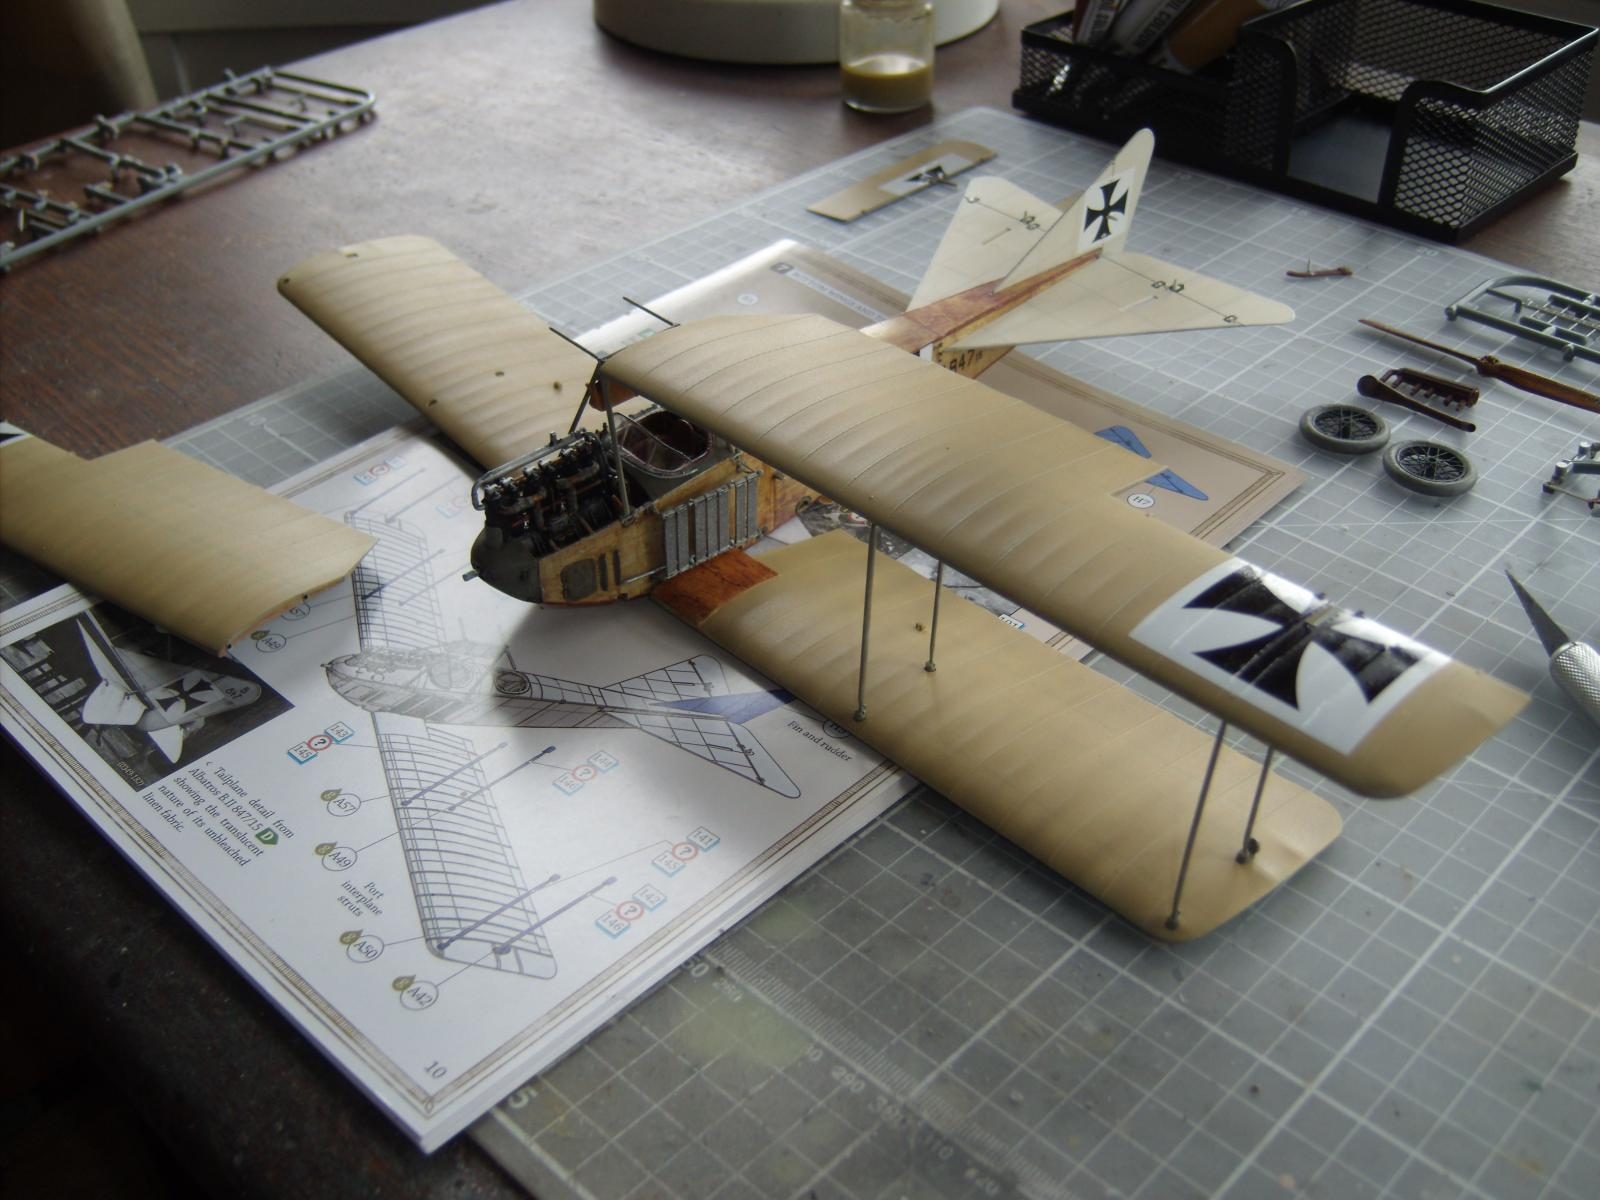
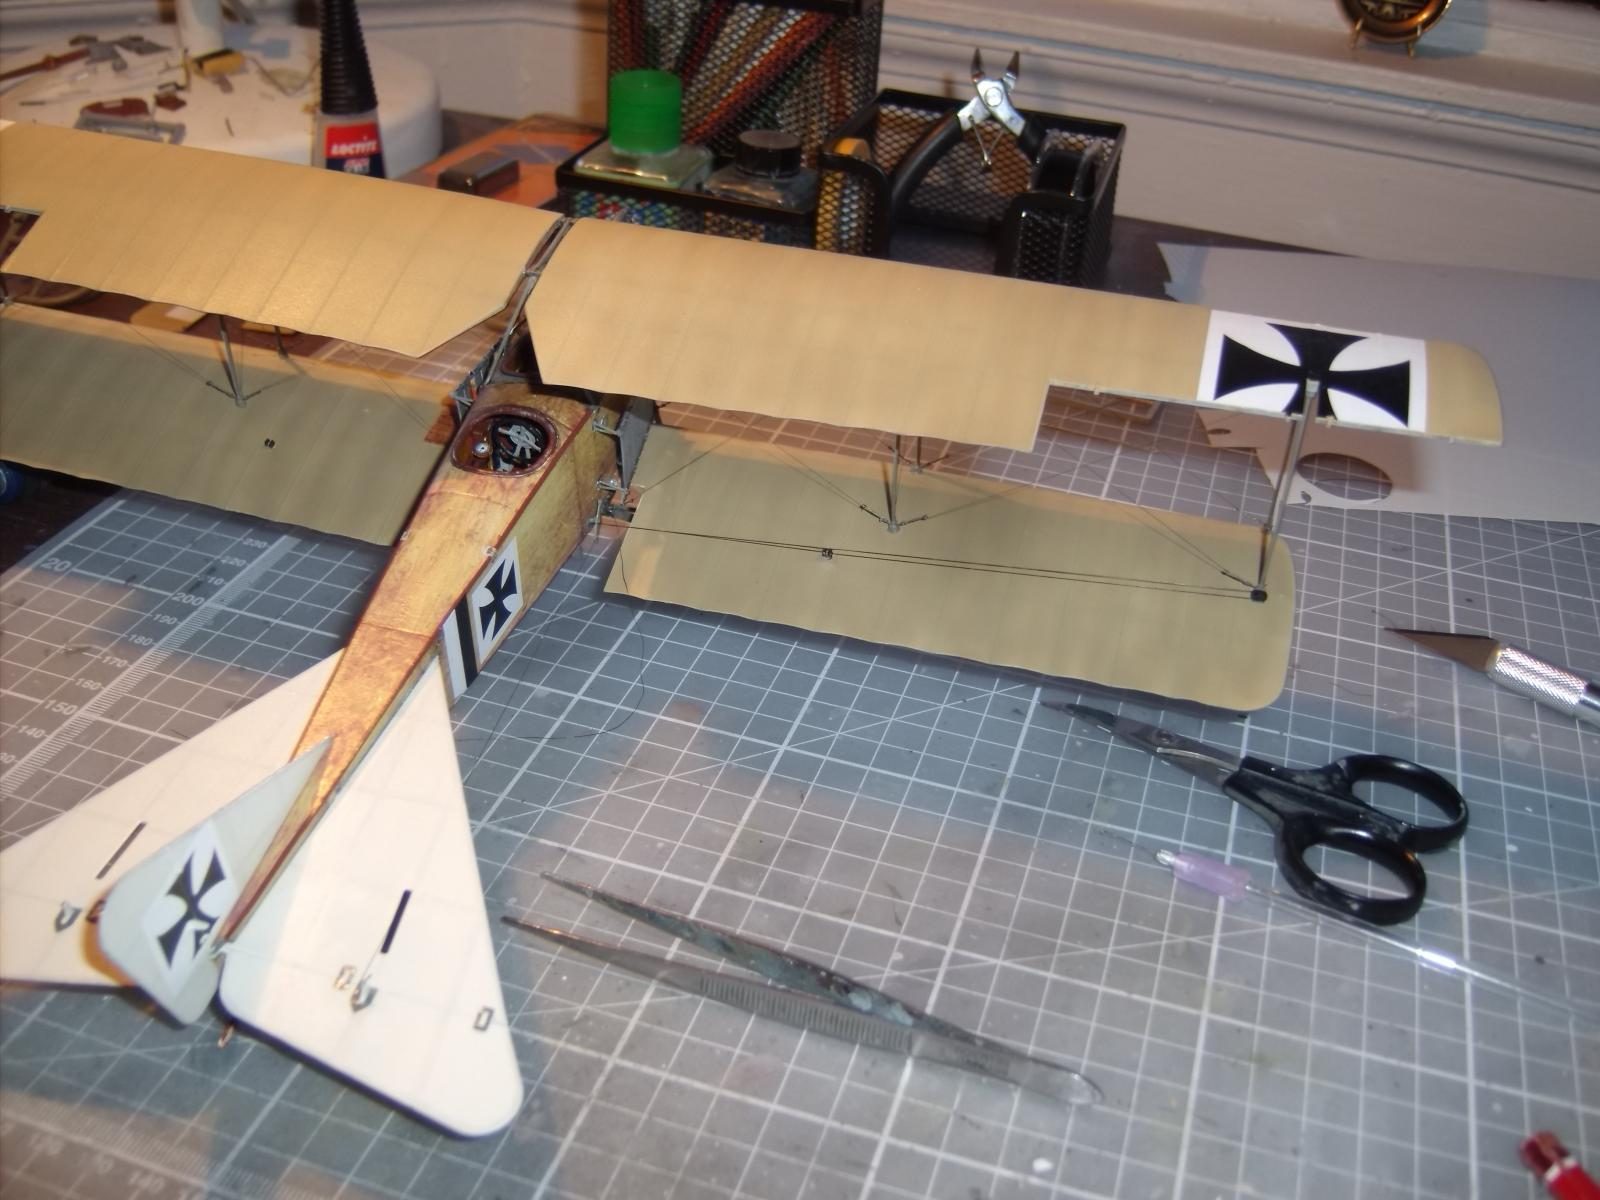
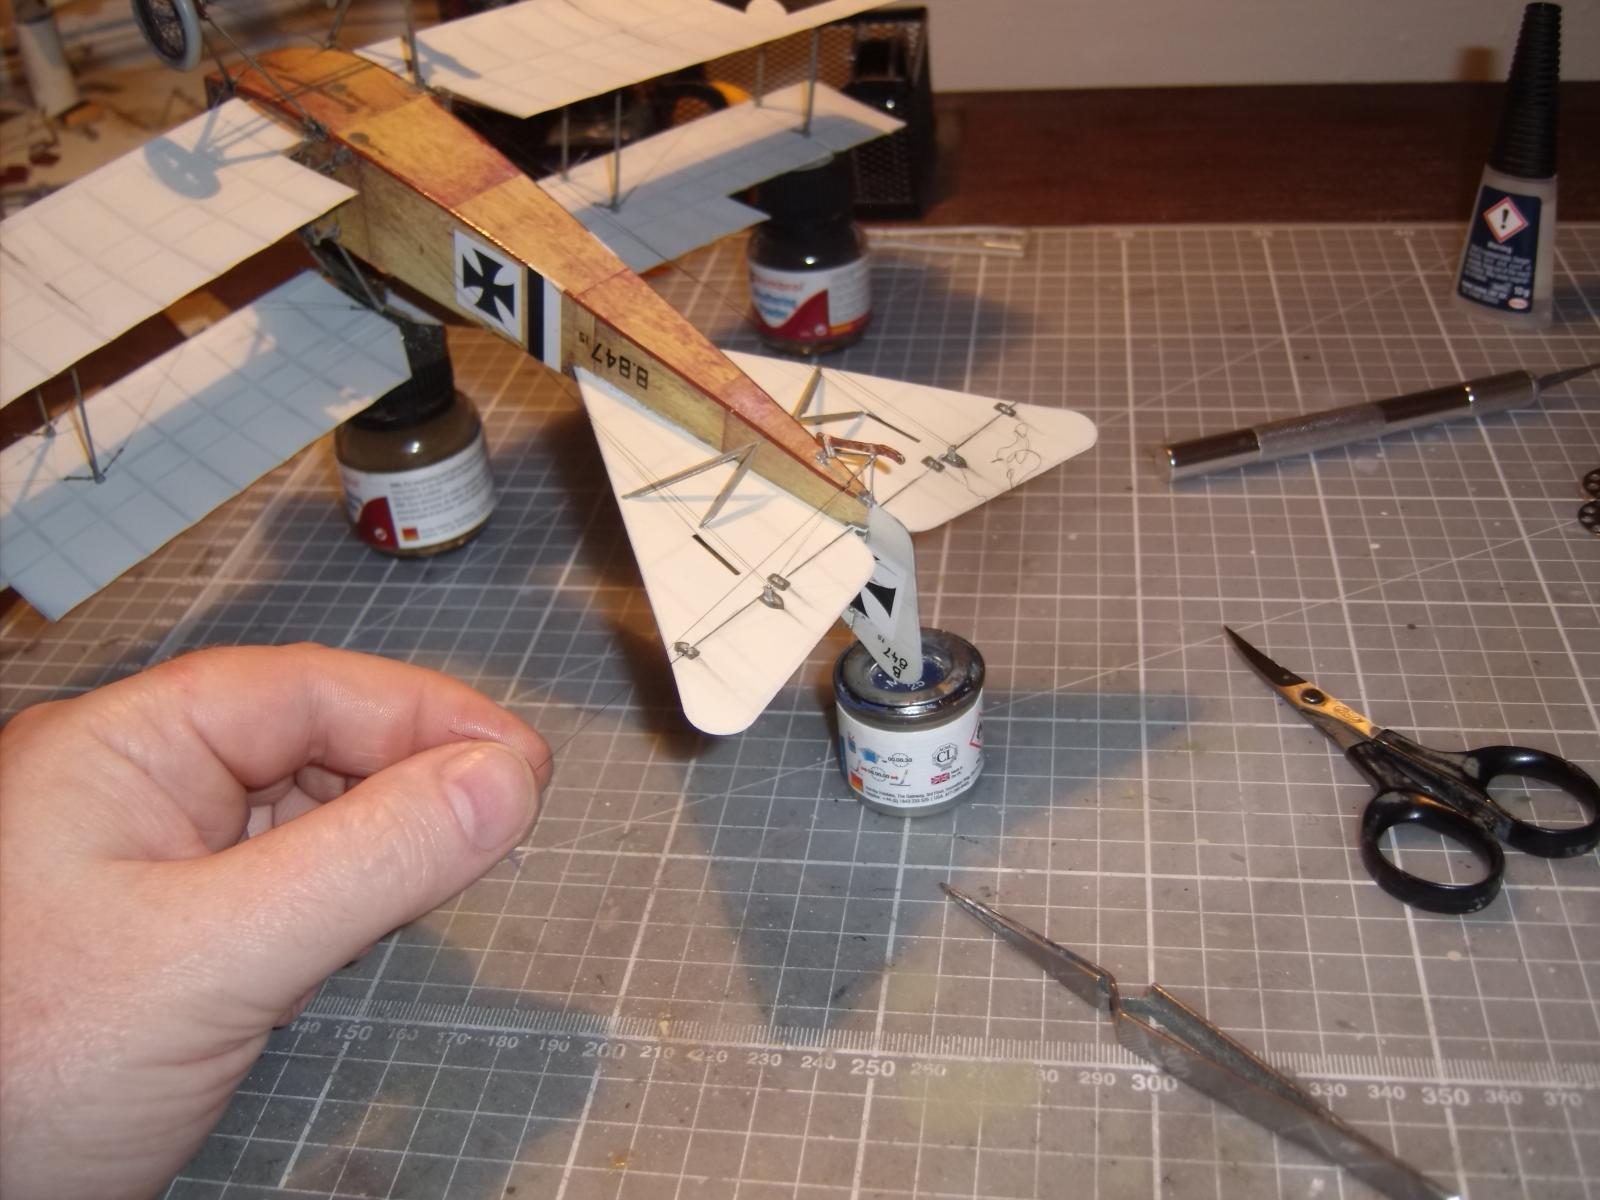
Rigging was a challenge, especially passing lengths of thread into the fuselage actuator arms, which connected the ailerons via a pulley-style mechanism at the rear of the outer, rear strut, which was then carried across the top of the lower wing via a fairlead; thereafter, the upper and lower tips of the actuator had additional cables reaching back to the elevator horns. The tailplanes are rigged to the fin on the uppersurfaces, and to the tailplane strut's support arms on the underside.
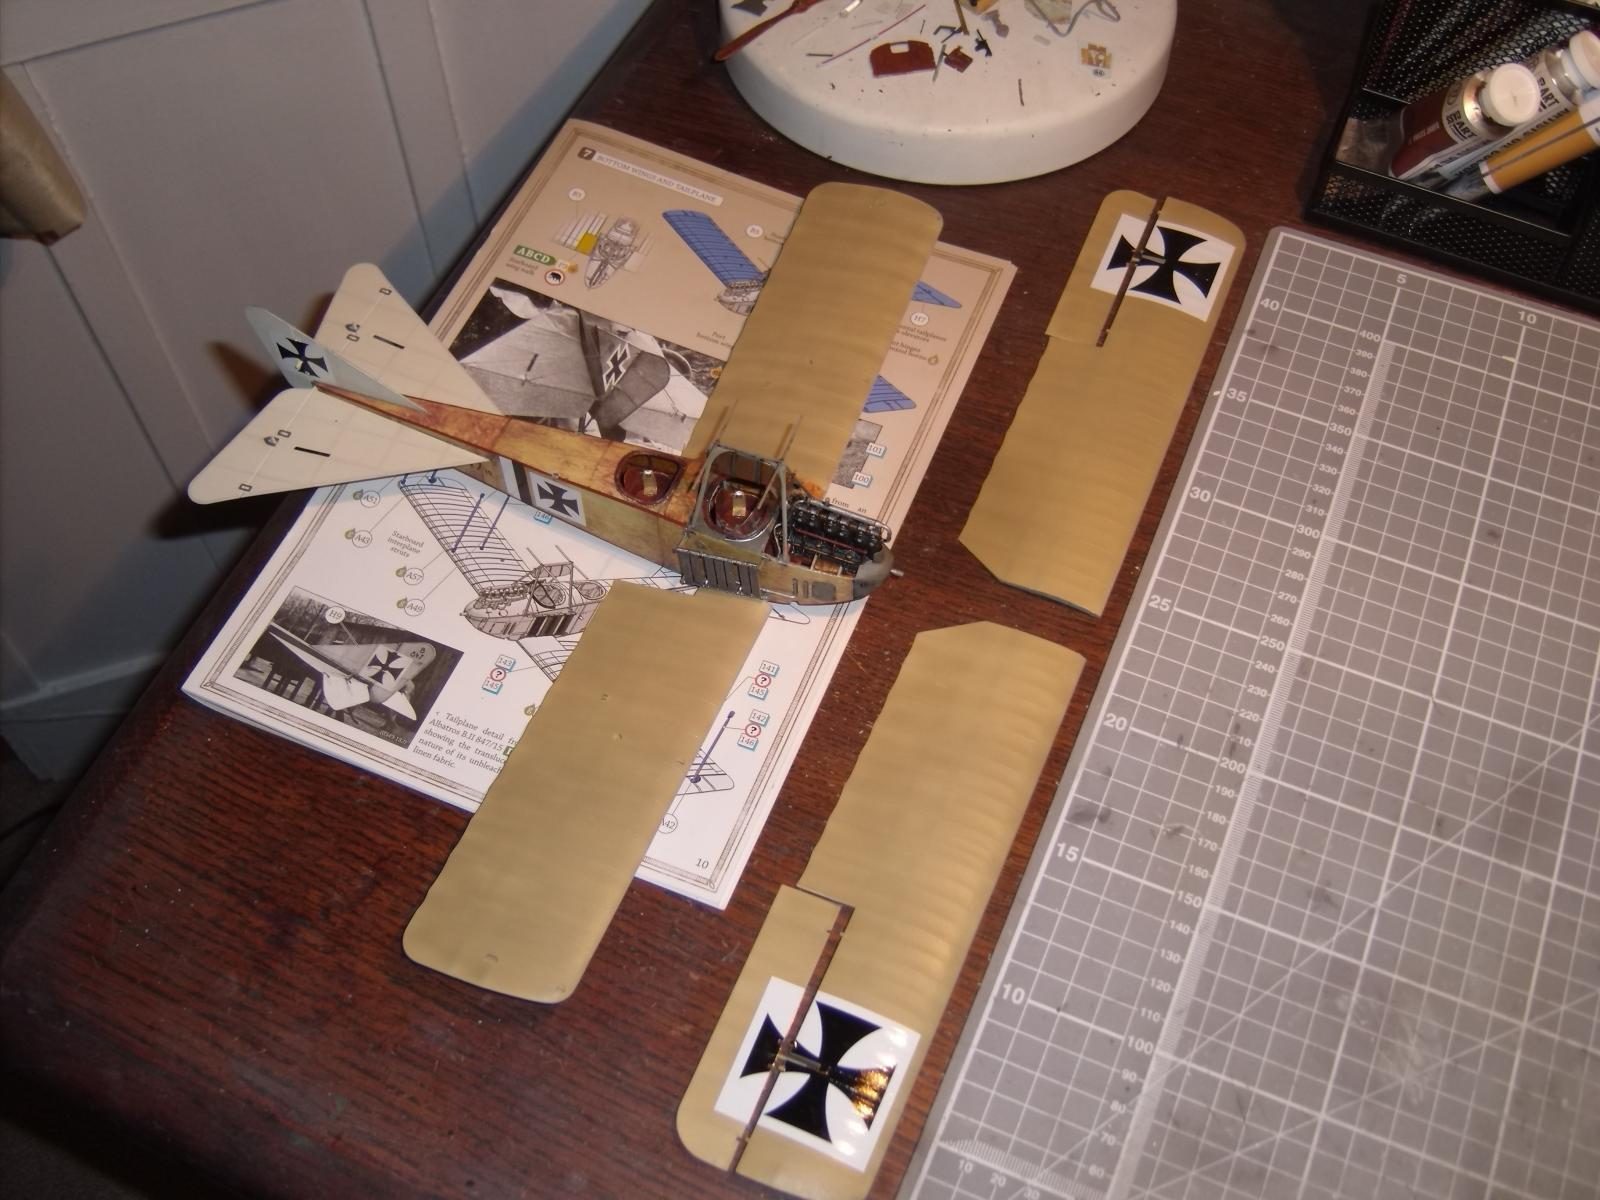
The openings on the top of the lower wing for the struts to fit into are engineered specific to the strut you're attaching, so there is limited scope for the misplacement of a struts into the wrong position; the 'X' rigging between front and back struts should be easy, but much as though I wanted it to be so, I found it is much better to do that work after the top wings is fitted; the eyelets are premoulded at the top and bottom of the struts, so no turnbuckles required here. I did try to do this rigging ahead of fitting the top wing, but realised that it wasn't going to create sufficient tension; better to do it afterwards when you can more easily judge the length of thread in order to create the correct tension. Other rigging for the struts was straightforward although the undercarriage legs have to be in place to complete the wing rigging. It should be noted that there was significant dihedral on the Albatros' wings and the top wing had a gap where they 'meet' on the central strut framework; two very thin arms atop this framework slide into the corresponding holes at the end of each wing, then the wing is lowered onto the struts. It appears quite steady and sturdy when sitting on the desk, but creaks signficantly when it has to be turned upside down, so be sure to use superglue to fasten the struts and no rapid movement when turning the model to work on the undersides.
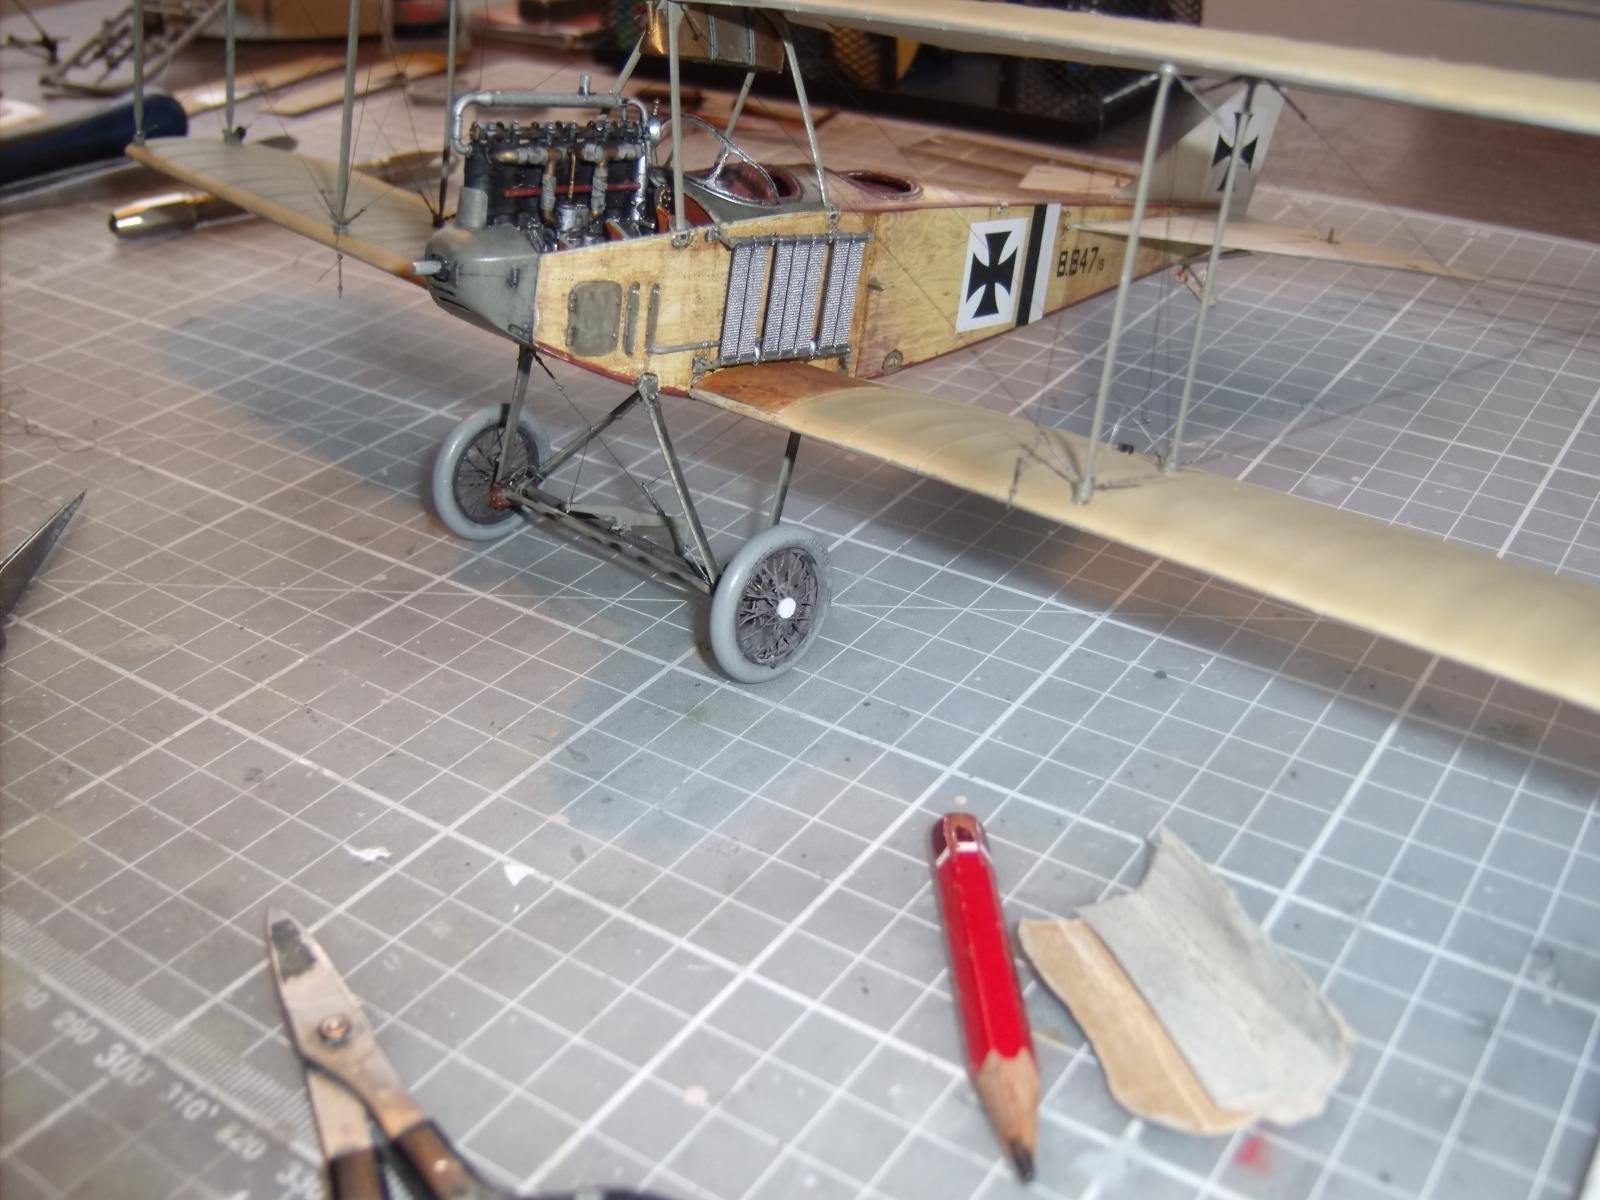
The brake arm on the horizontal undercarriage support arm needs thinning as the arch to fit it onto the arm is a bit neat and it otherwise shuffles about of its own volition into awkward positions. As the rigging on the rear arm of the brake goes forward to meet the junction of the 'X' rigging for the undercarriage legs, great care has to be exercised as it's a little cramped for space; the cable at the front of the brake reaches backward on the diagonal to the fuselage connection point, which only exacerbates the fiddly nature of the job further.
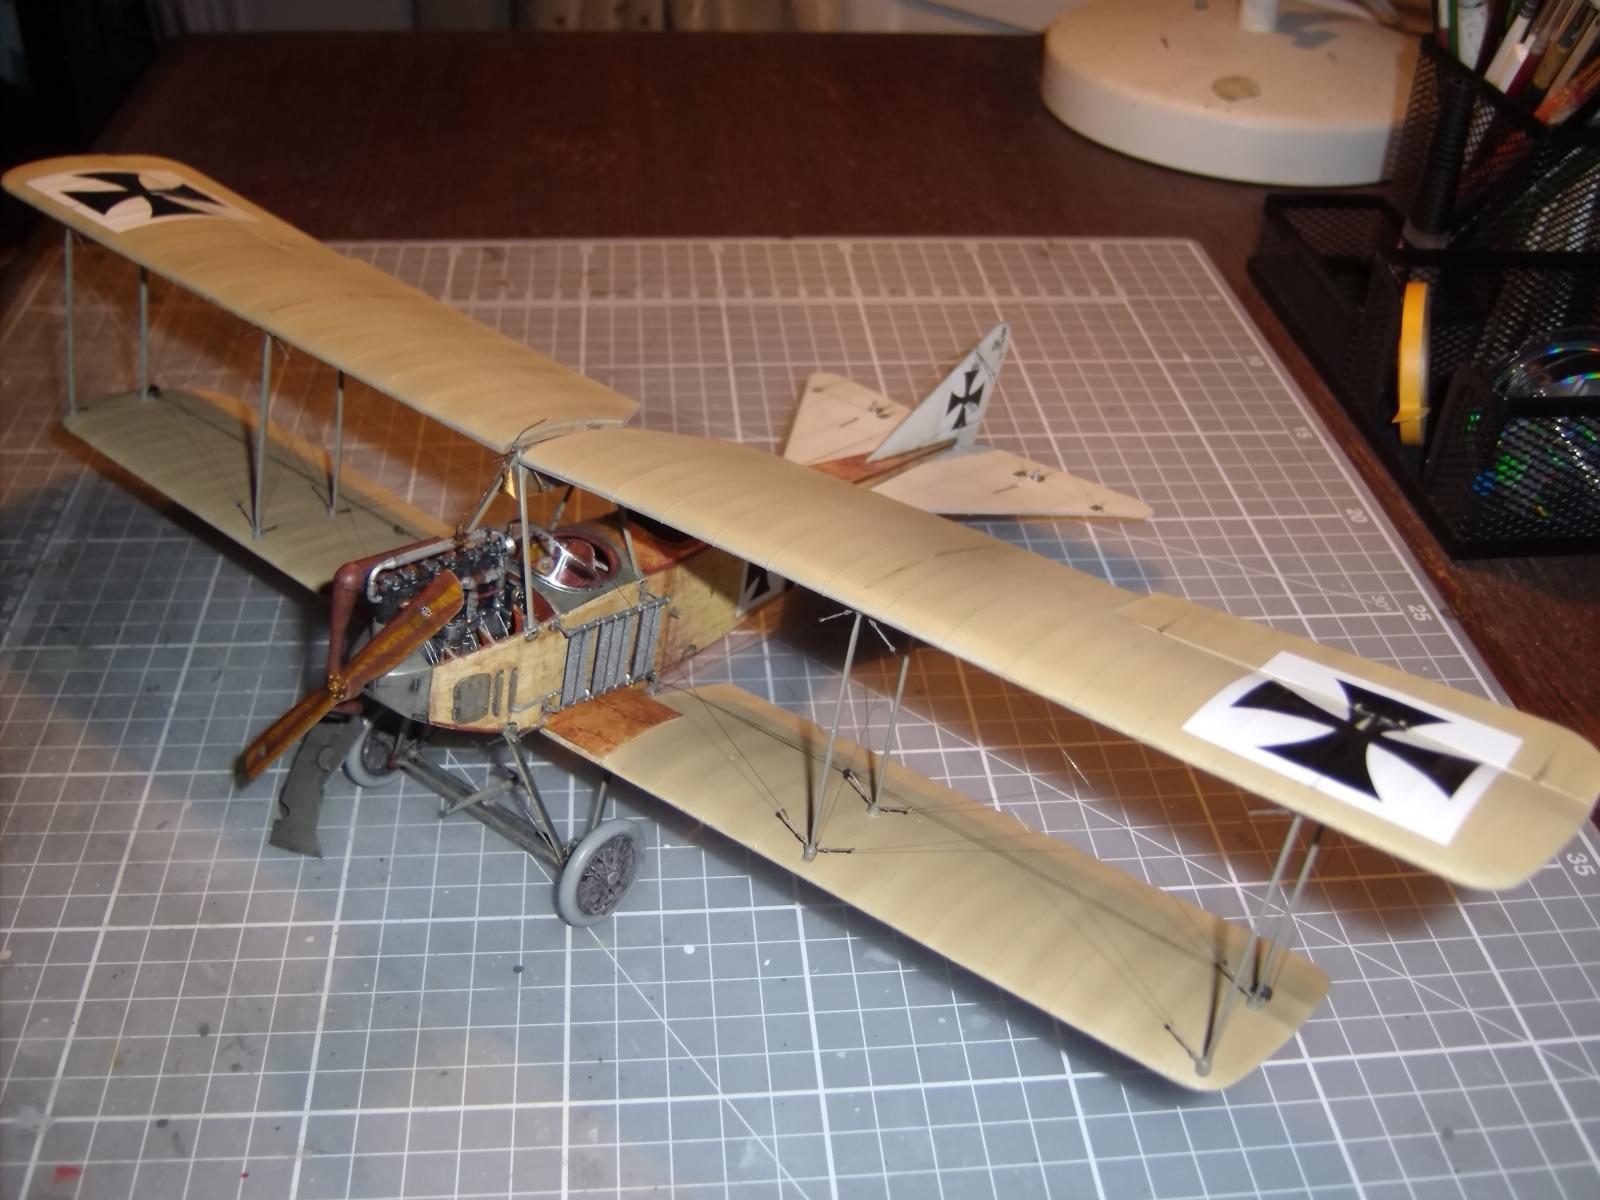
The undercarriage legs look great, but on attaching them, the entire airframe lurched hideously to the left, with the lower wing tip almost touching the top of my desk; the forward left-side leg was buckling inwards - slightly, but noticeably - and I tried to resolve the issues by inserting thin lengths of fuse wire into the top of the struts and in turn, into the fuselage connection points, but it didn't improve the situation. Ultimately, I ordered Scale Aircraft Conversions' replacement whilte metal undercarriage legs online and when attached, they solved the problem at the first time of asking.
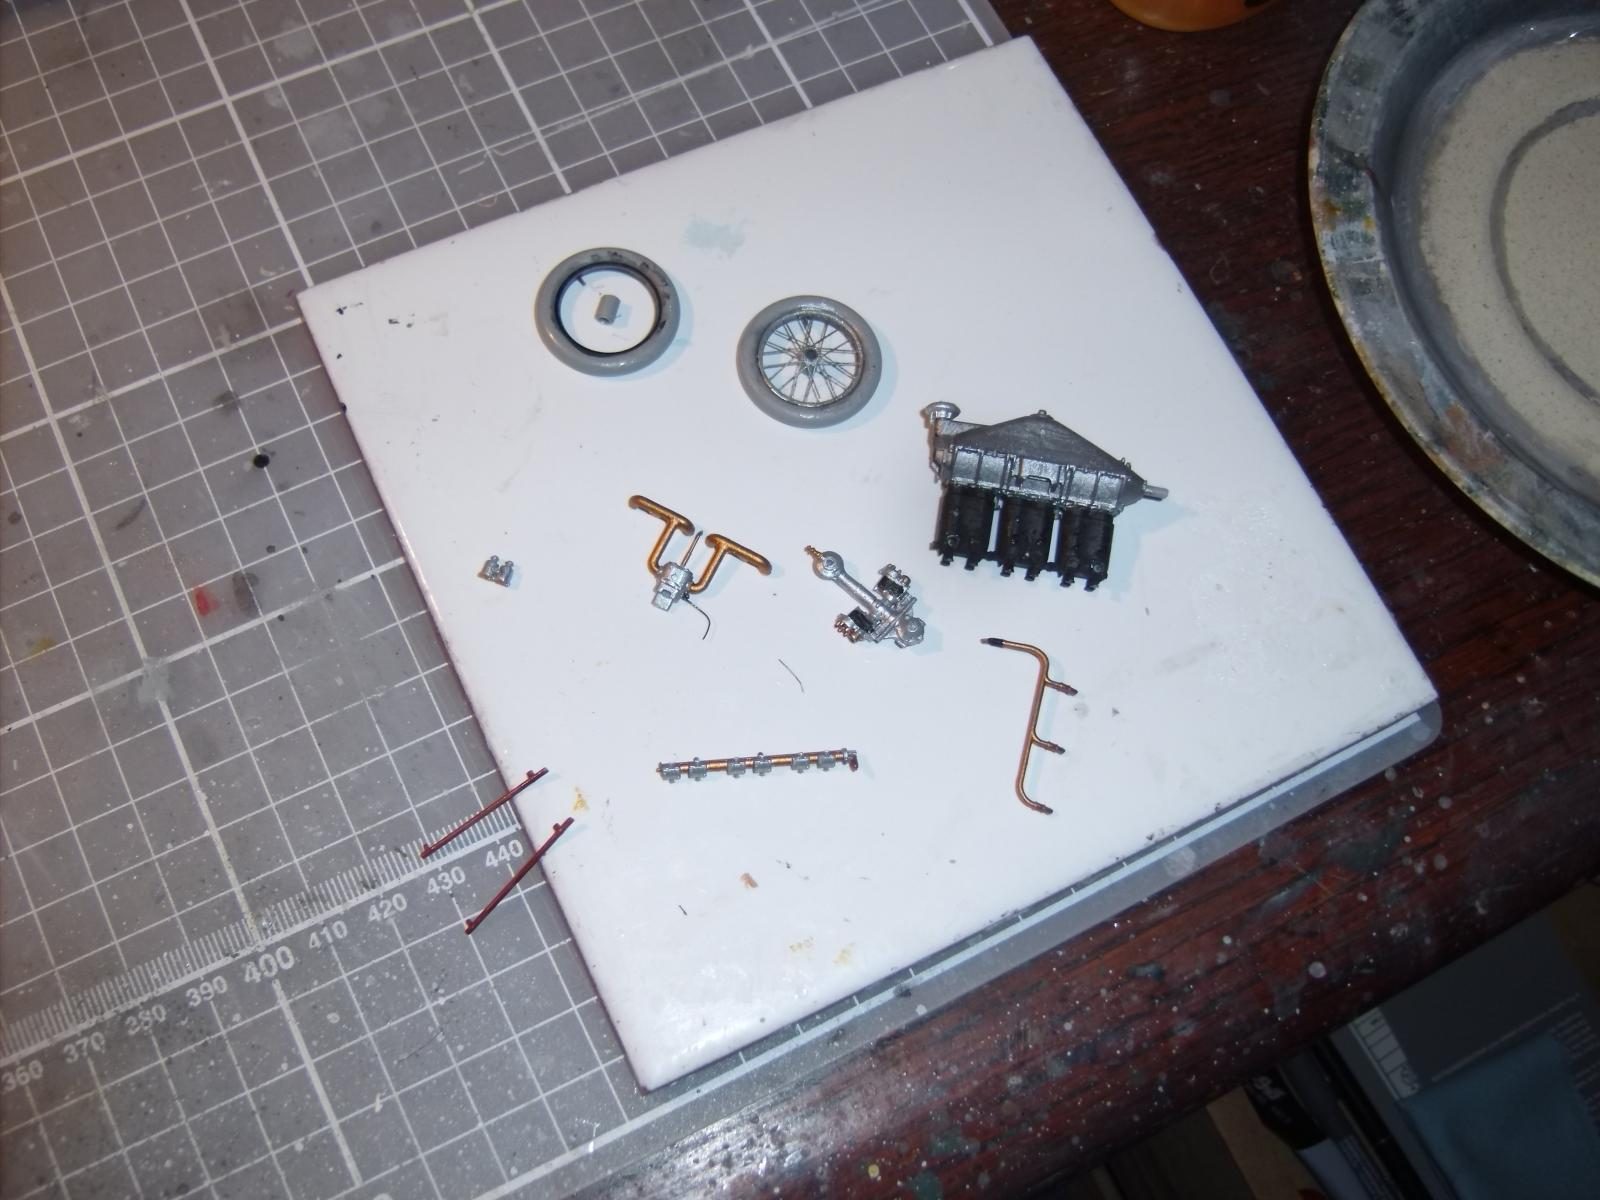
The wheels look great, but the small cylinder between the spokes which attaches to the horizontal support arm needs widening. After assembly, I got the wheels on to test the fit, but only one came off smoothly. The other was extremely reluctant to part company with the arm and had to be forcibly hauled off! The impact on the delicate brass spokes was dreadful - 'vernichtet' (destroyed/crushed/annihilated) - would easily all apply as the best description in German - 'kaputt' is a tad too polite! After some very delicate salvage work, I got the damaged wheel back on track and the still-visible signs of damage are subtlely positioned to the rear, largely out of view. I engineered two small cylinder caps to cover the slight shortage of the arm in the cylinders. The replacement tail skid was also used from the SAC offering as well.
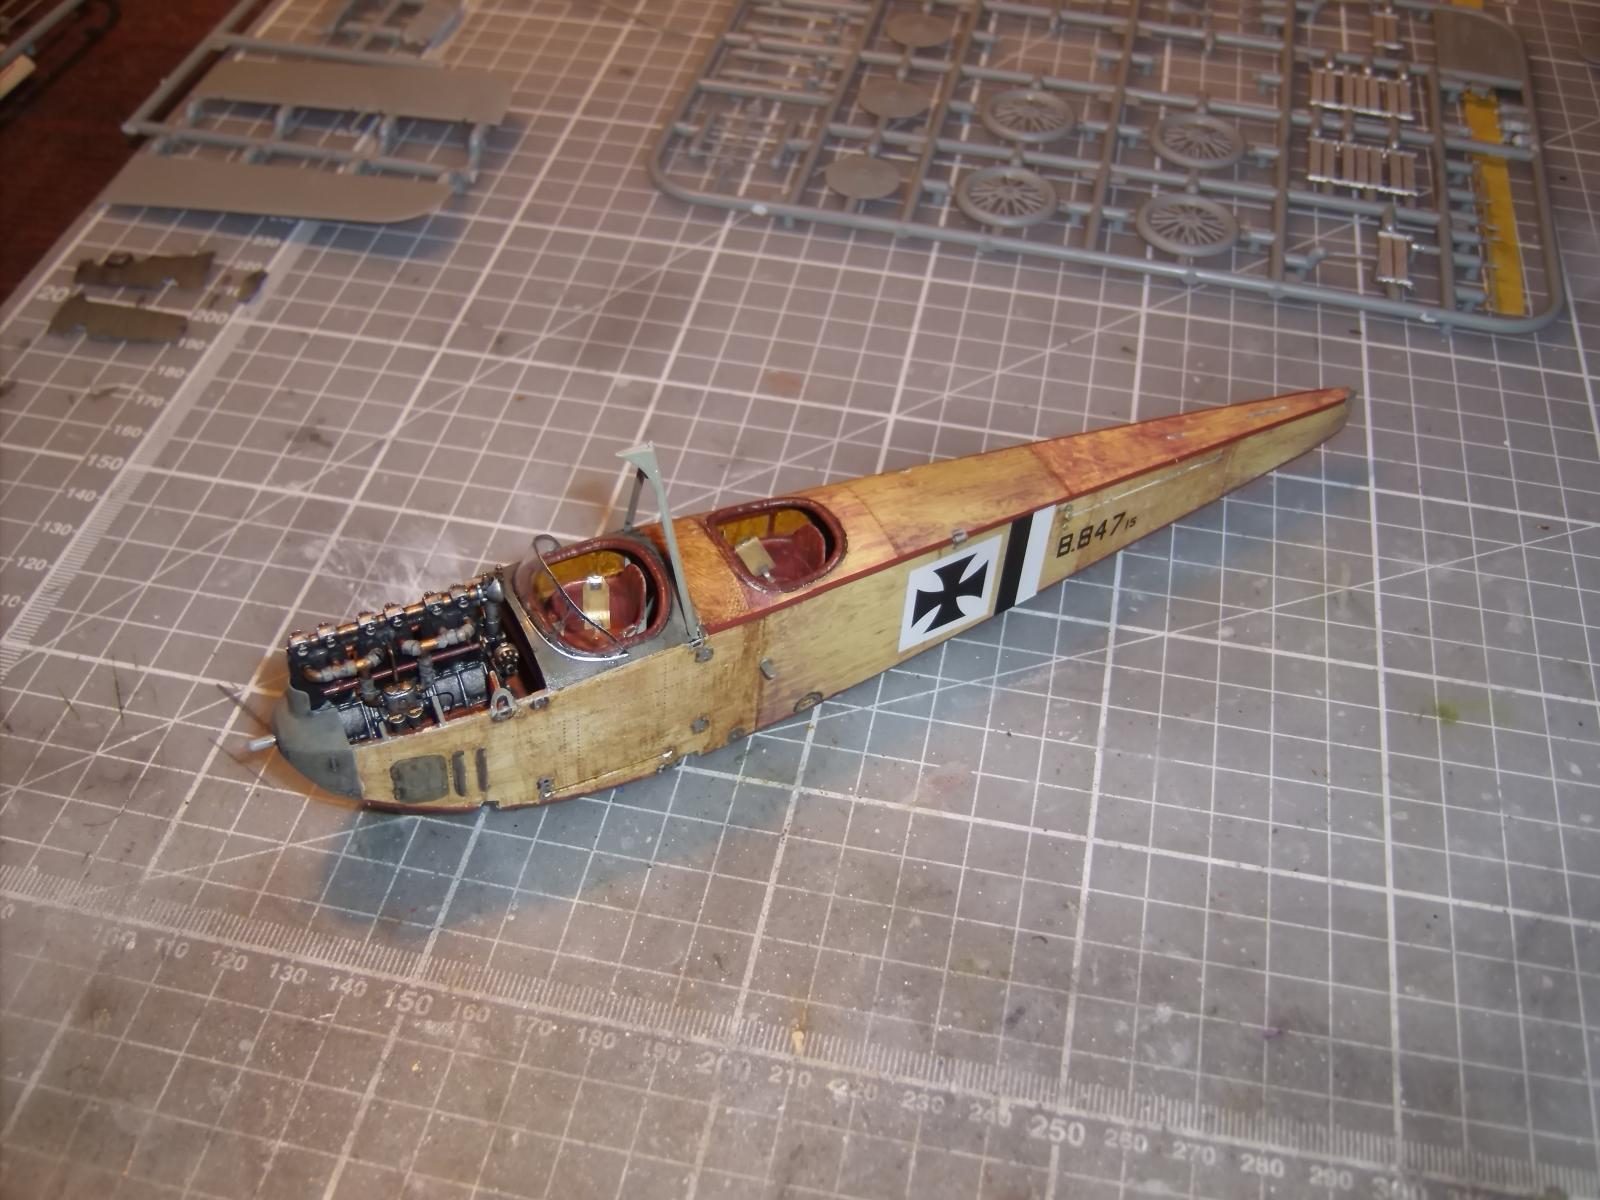
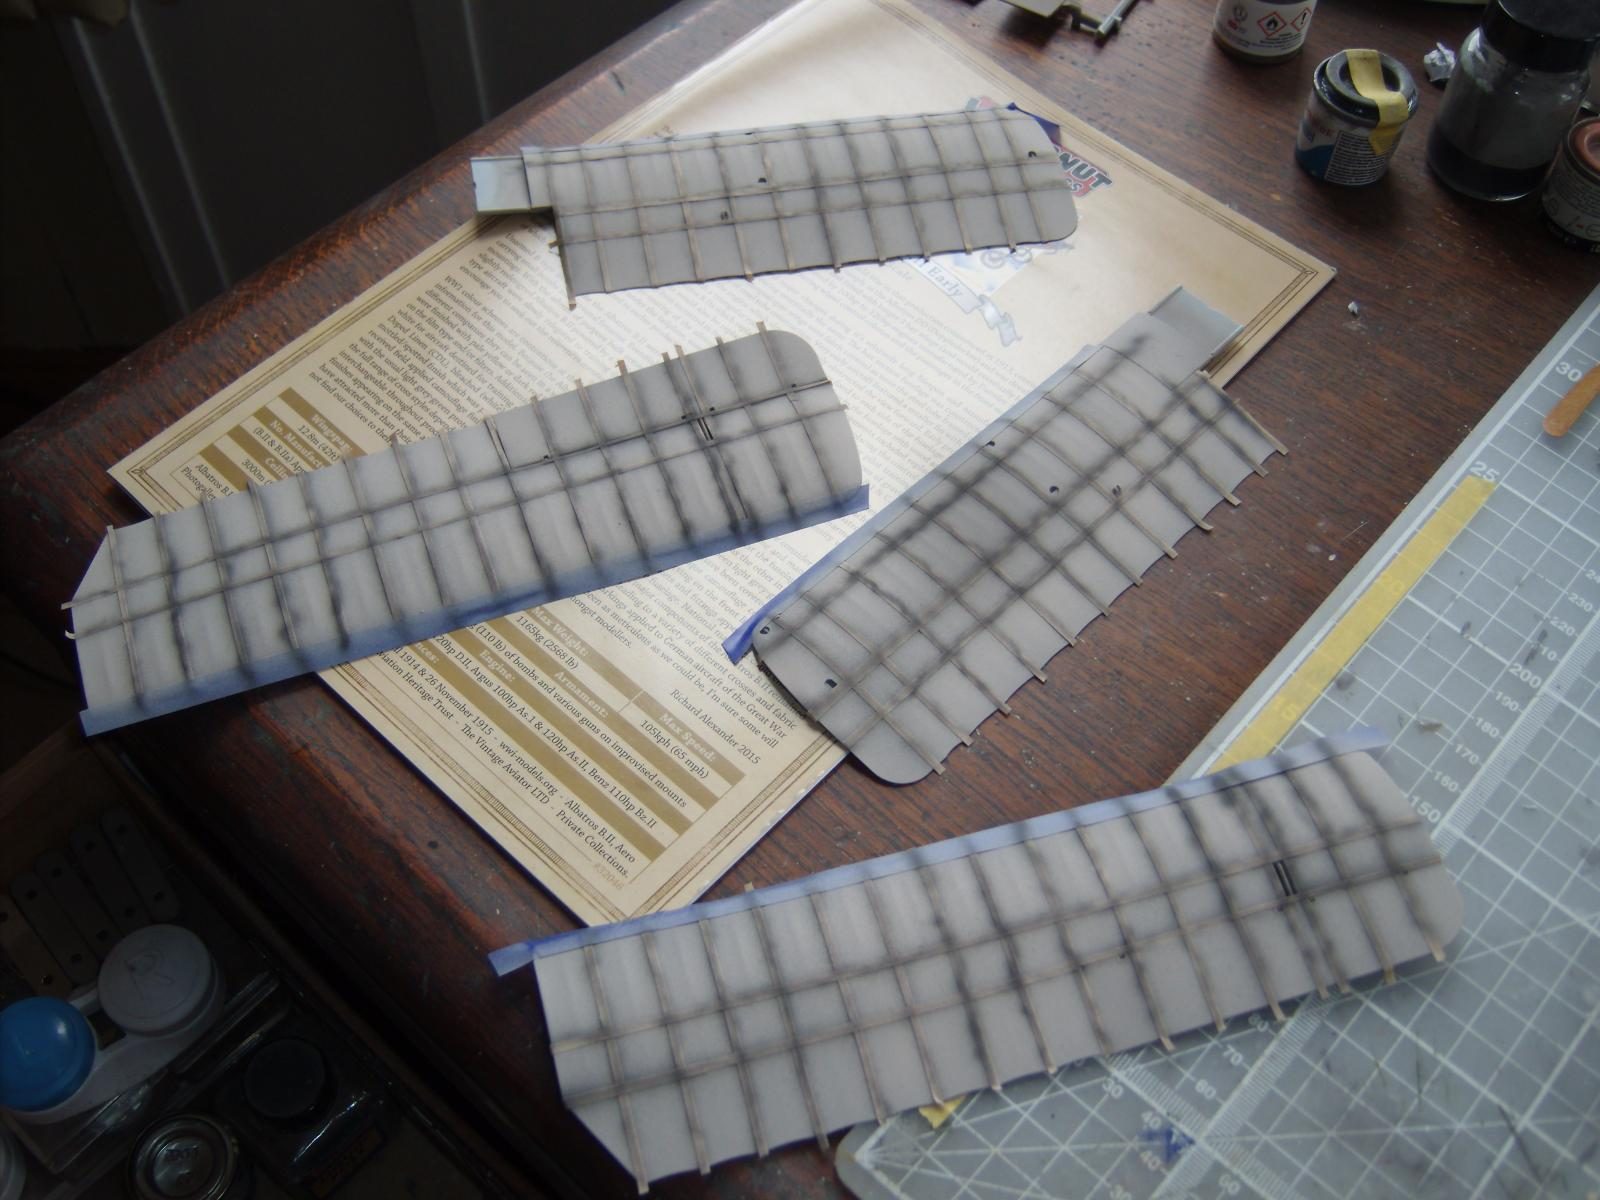
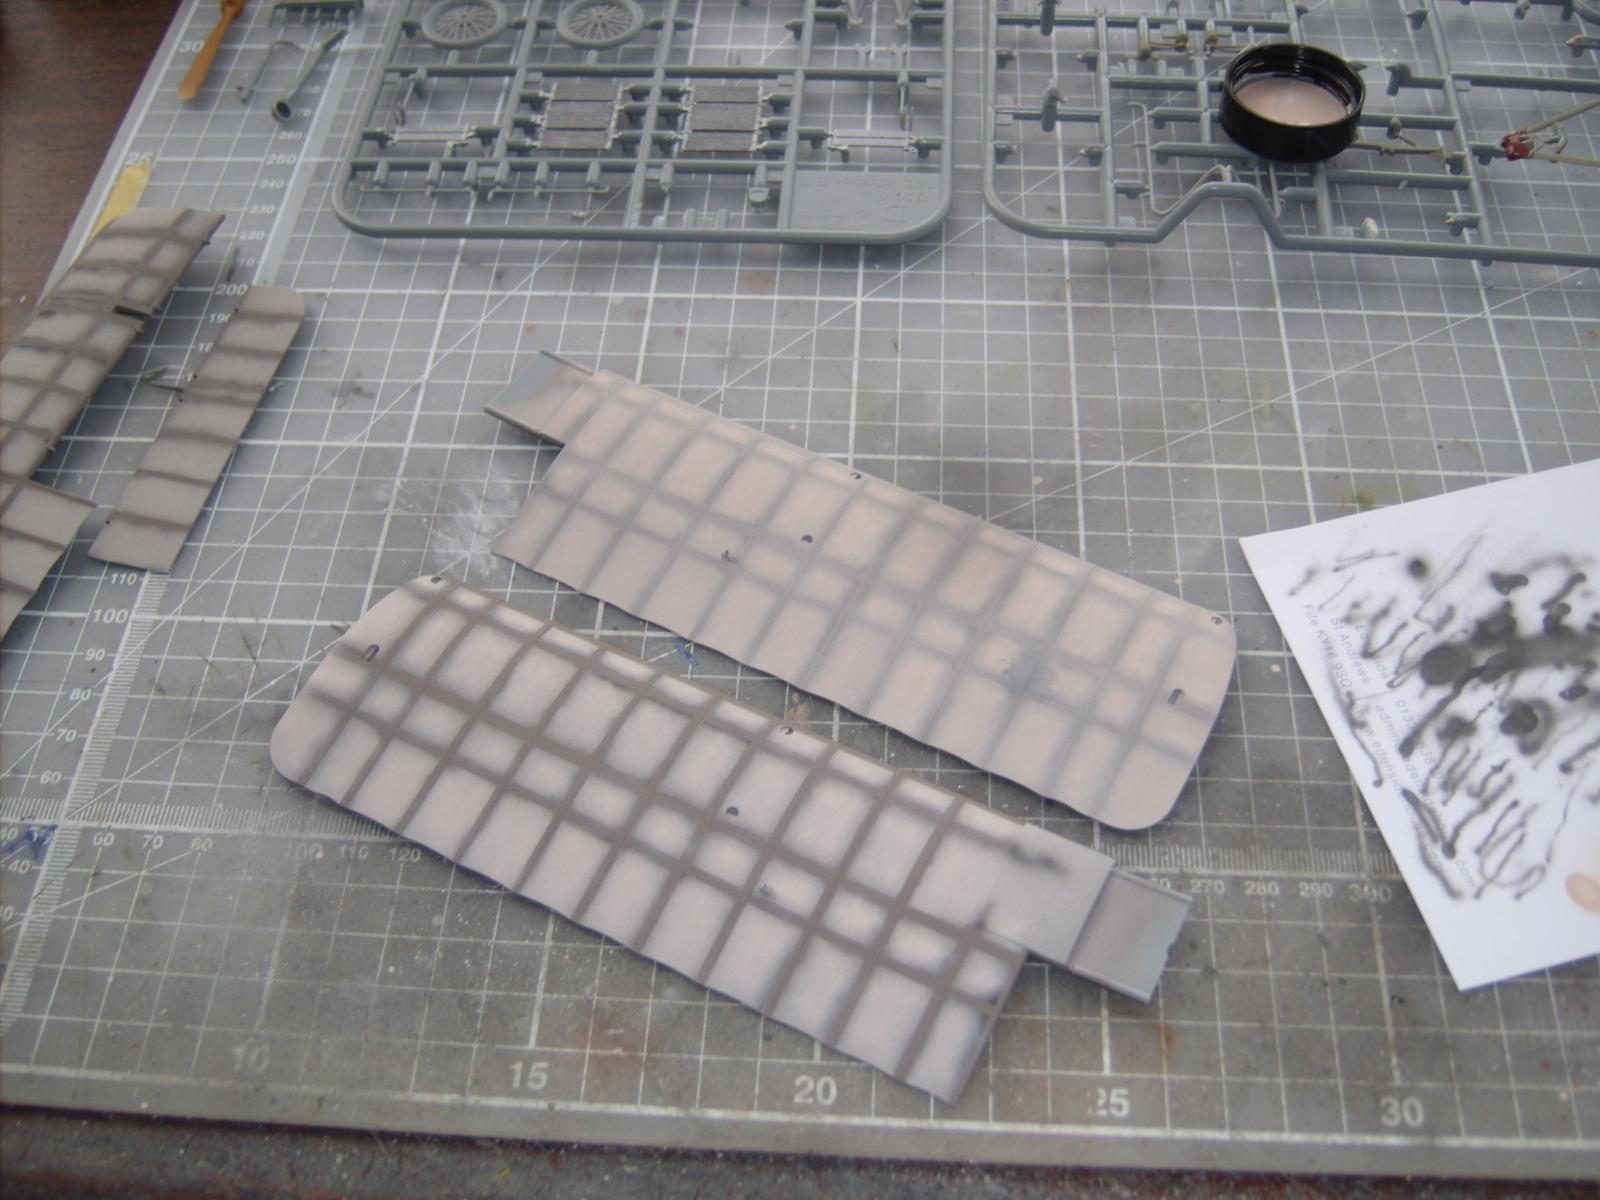
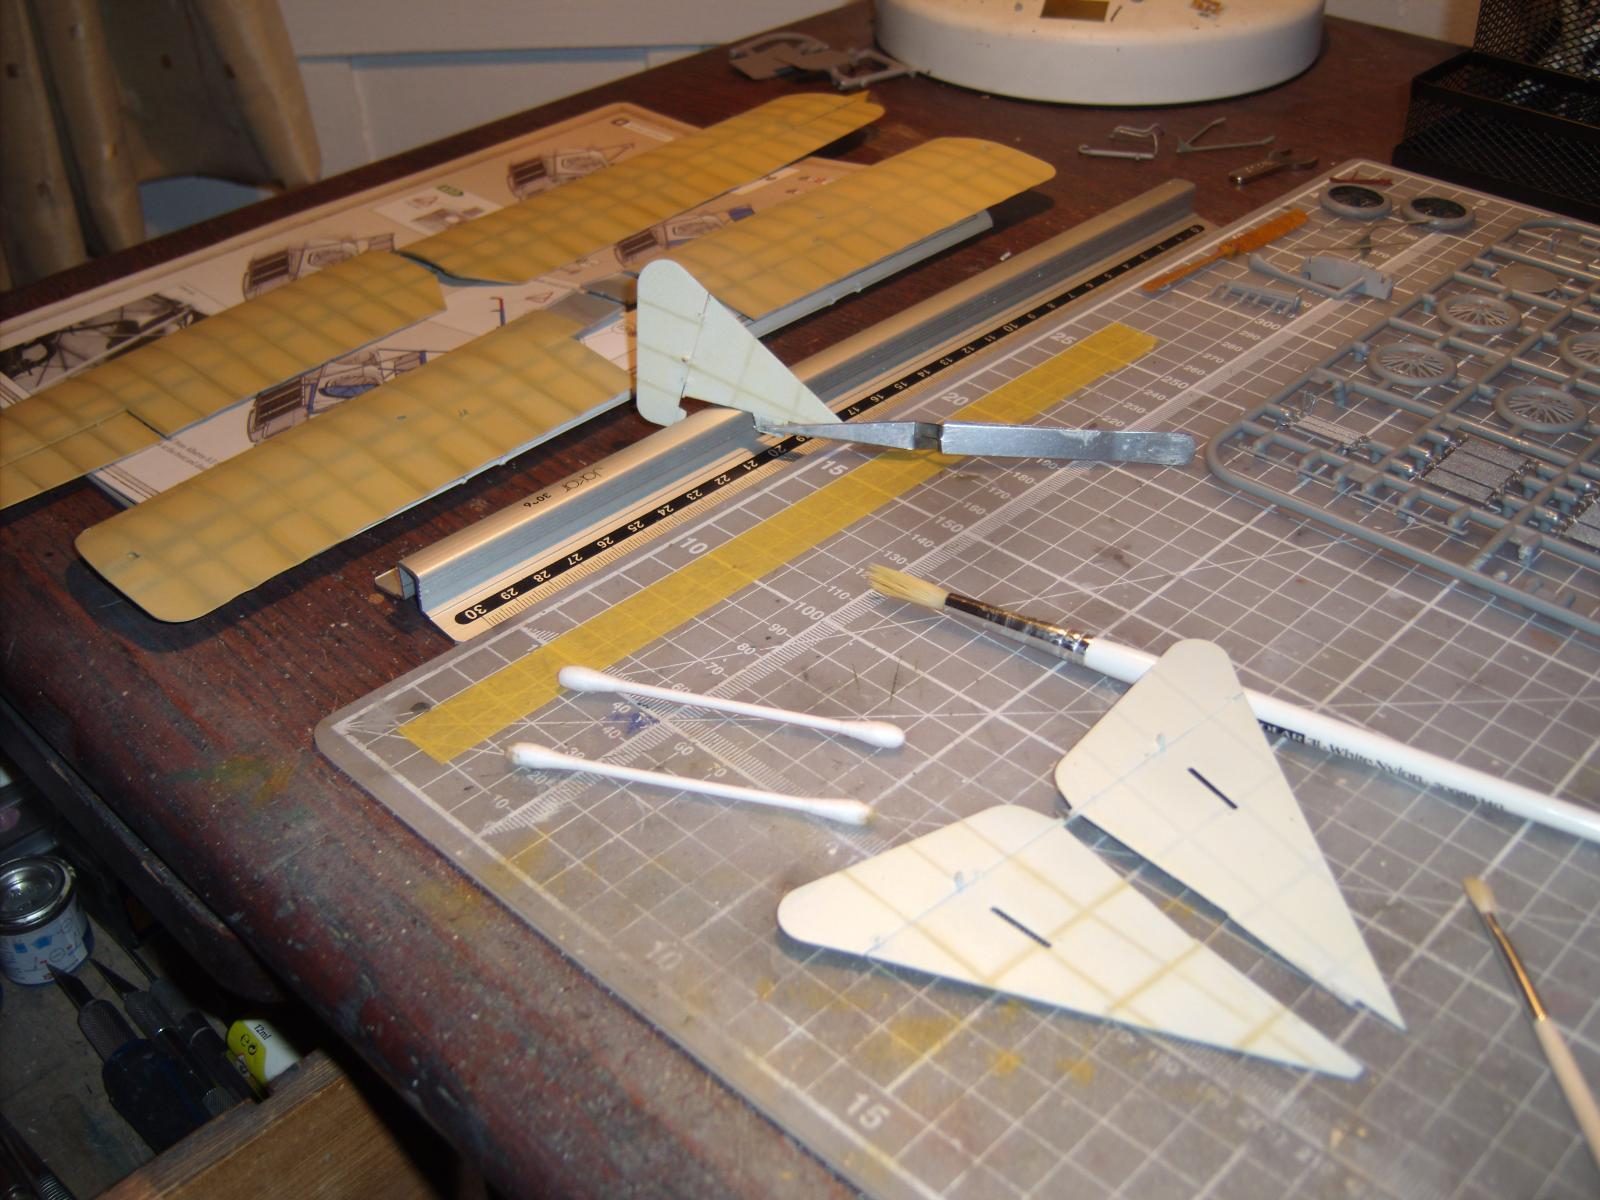
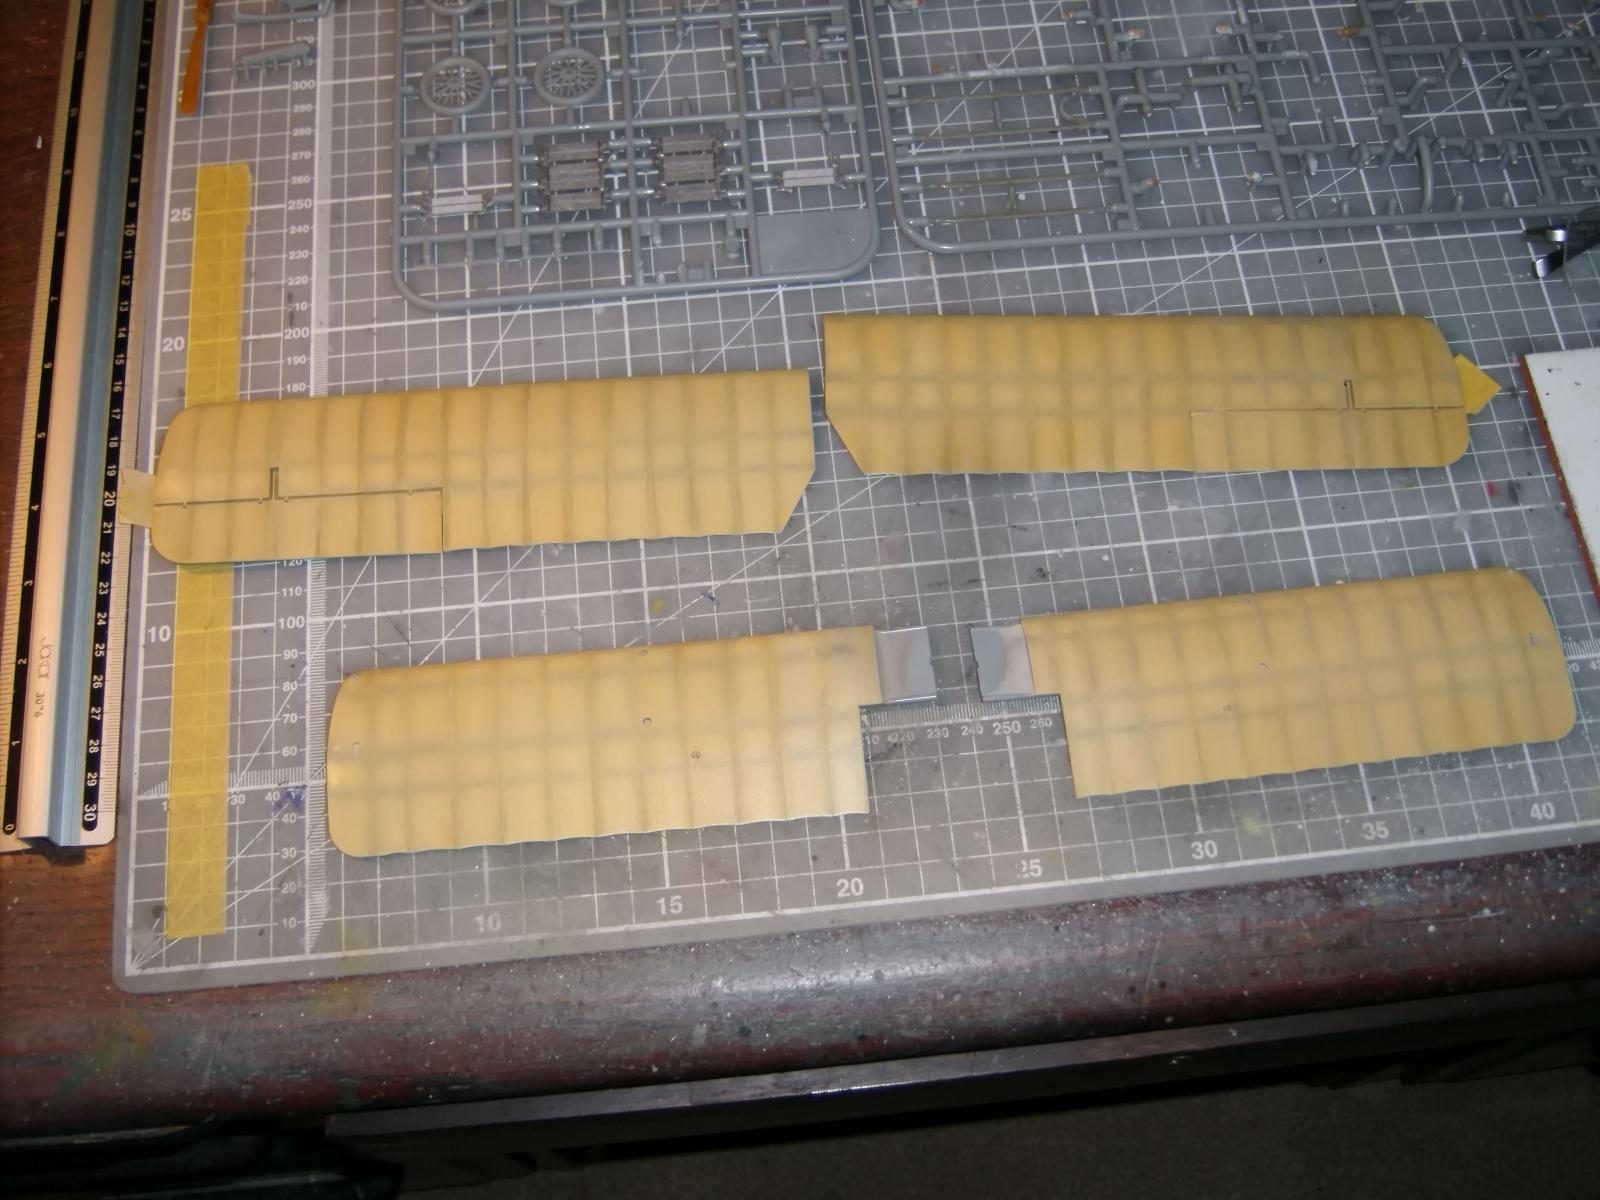
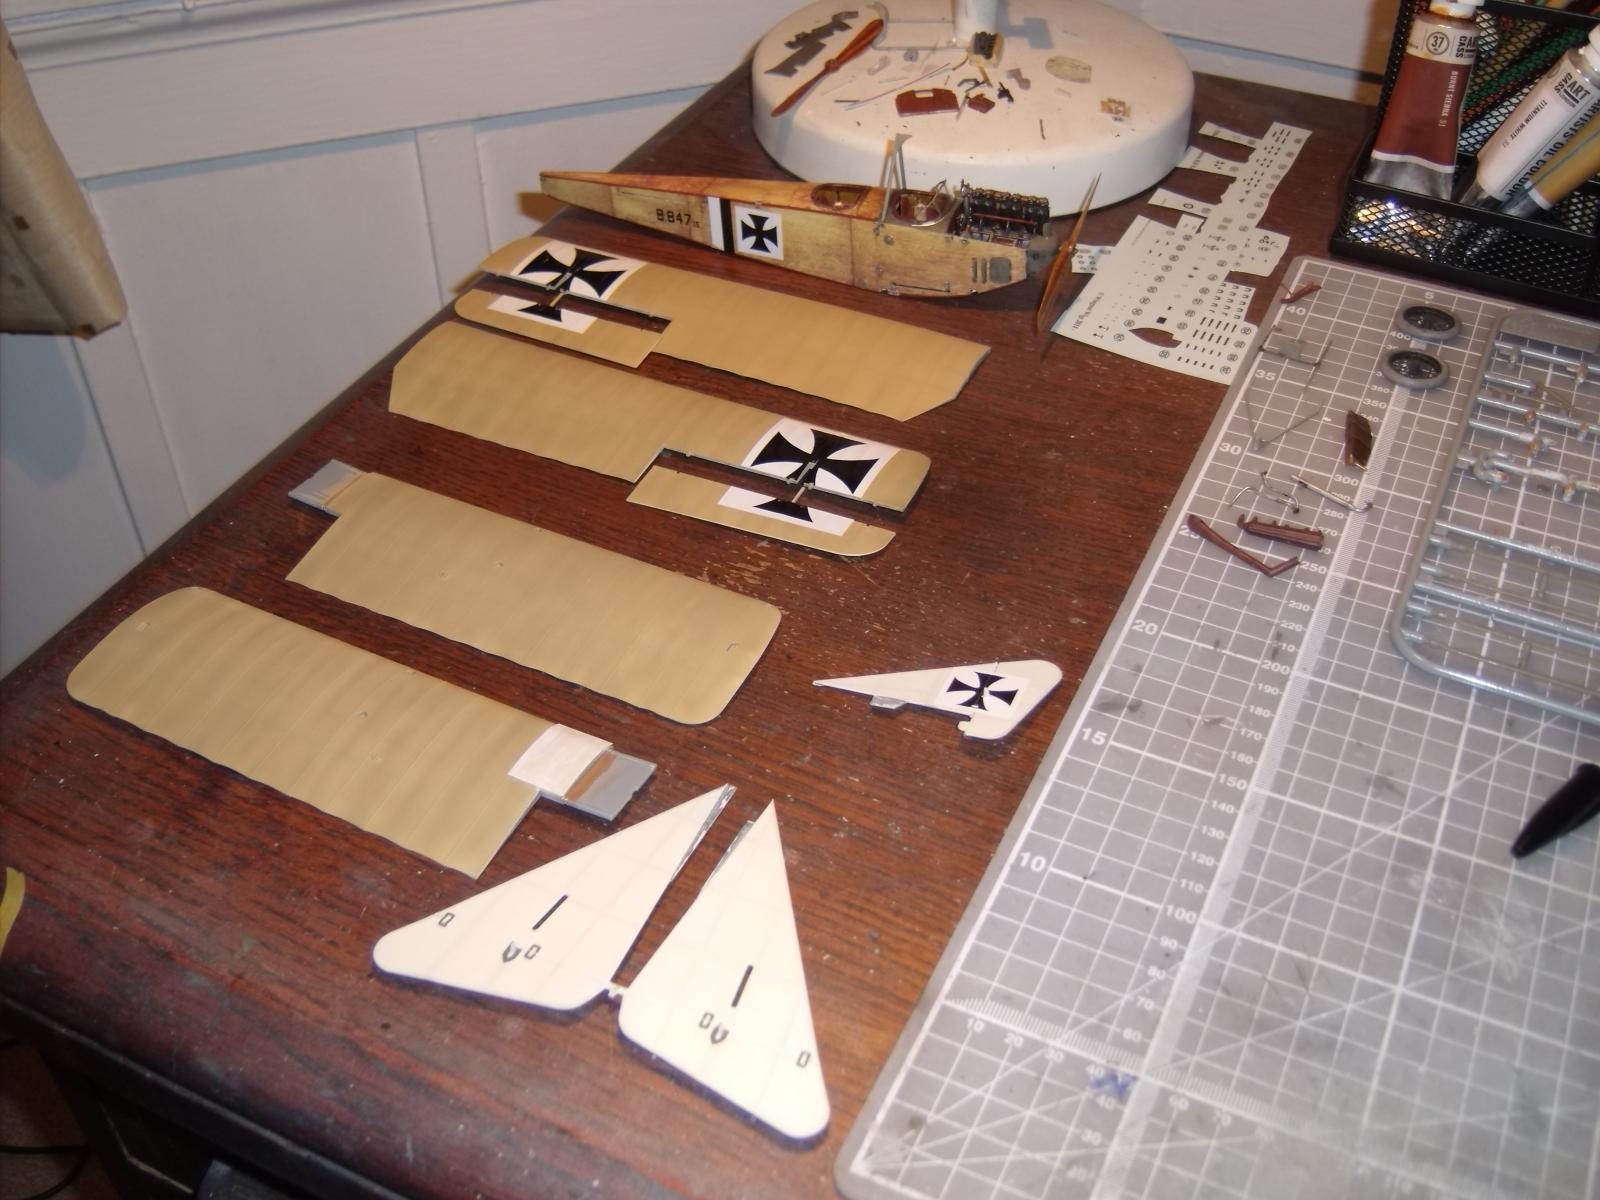
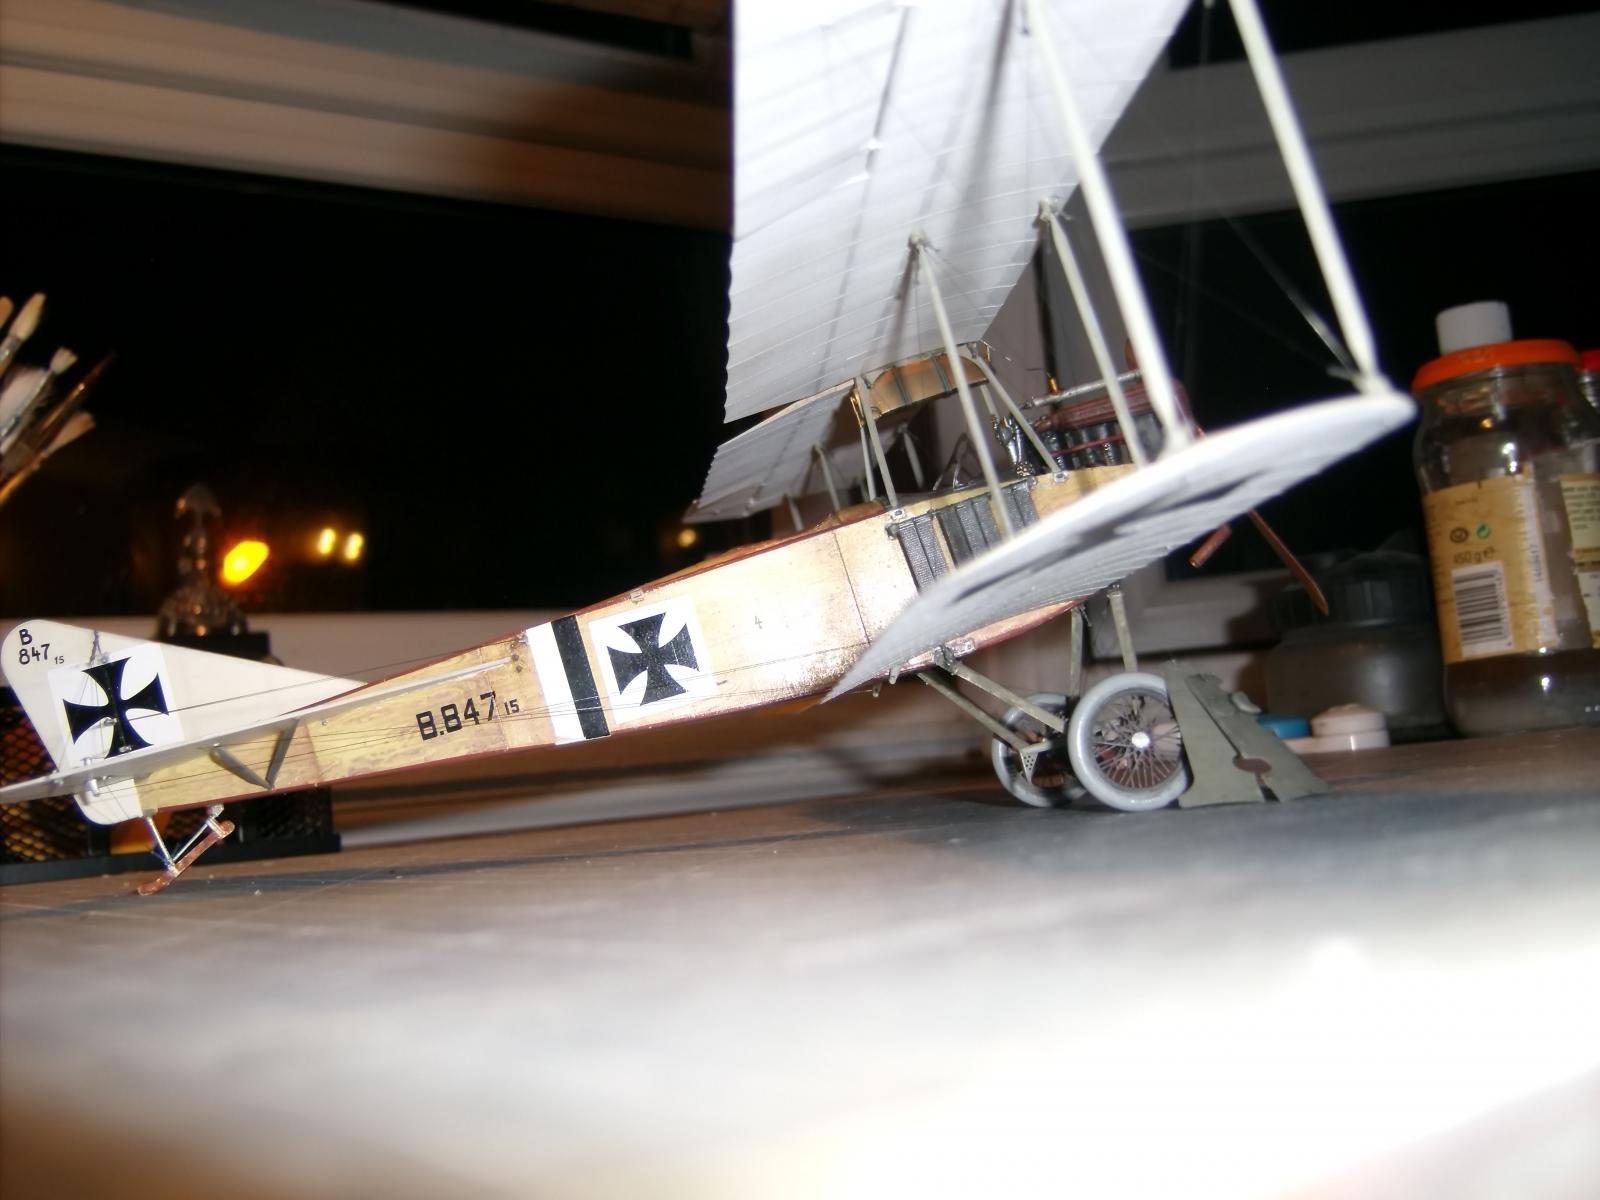
The construction and painting of the fuselage was fine; the wood-effect transfers for the interior pieces were, admittedly, poor and ill-fitting but the exterior transfers were superb. All fitted perfectly and the 'cut-outs' to accommodate various panels and louvres were spot on. The wings and tailplane were firstly spray-painted in a dark colour, then thin strips of Tamiya tape added to mark out the frames under the linen, then painted in their respective shades. The horizontal tail, and fin and rudder, were all painted using enamels with a very small touch of oil paint to soften the stark appearance of the frame lines. Several coats of enamels were thereafter applied to soften the frame lines, to infer the frames ghosting through the linen slightly. The lower wing surfaces were a more off-white shade and the upper wings a medium shade of tan. The frames were the most difficult to soften and disguise on the upper wing surfaces and I tried to use a combination of sprayed enamels and brush-applied oil paints, buffed up with a soft brush to carefully thin and spread the oils; a final flurry of a fractionally darker tan shade between the frame lines brought things up quite nicely, for a first attempt. A little staining from homemade blackwash on the control surface hinges and a few other locations added a little extra detail. Uncharacteristically, the elevators and rudder are moulded as part of the tail assemblies and I deemed it a little imprudent to try and remove and re-attach them as they are very nice, but very delicate and thinner than wafer-thin.
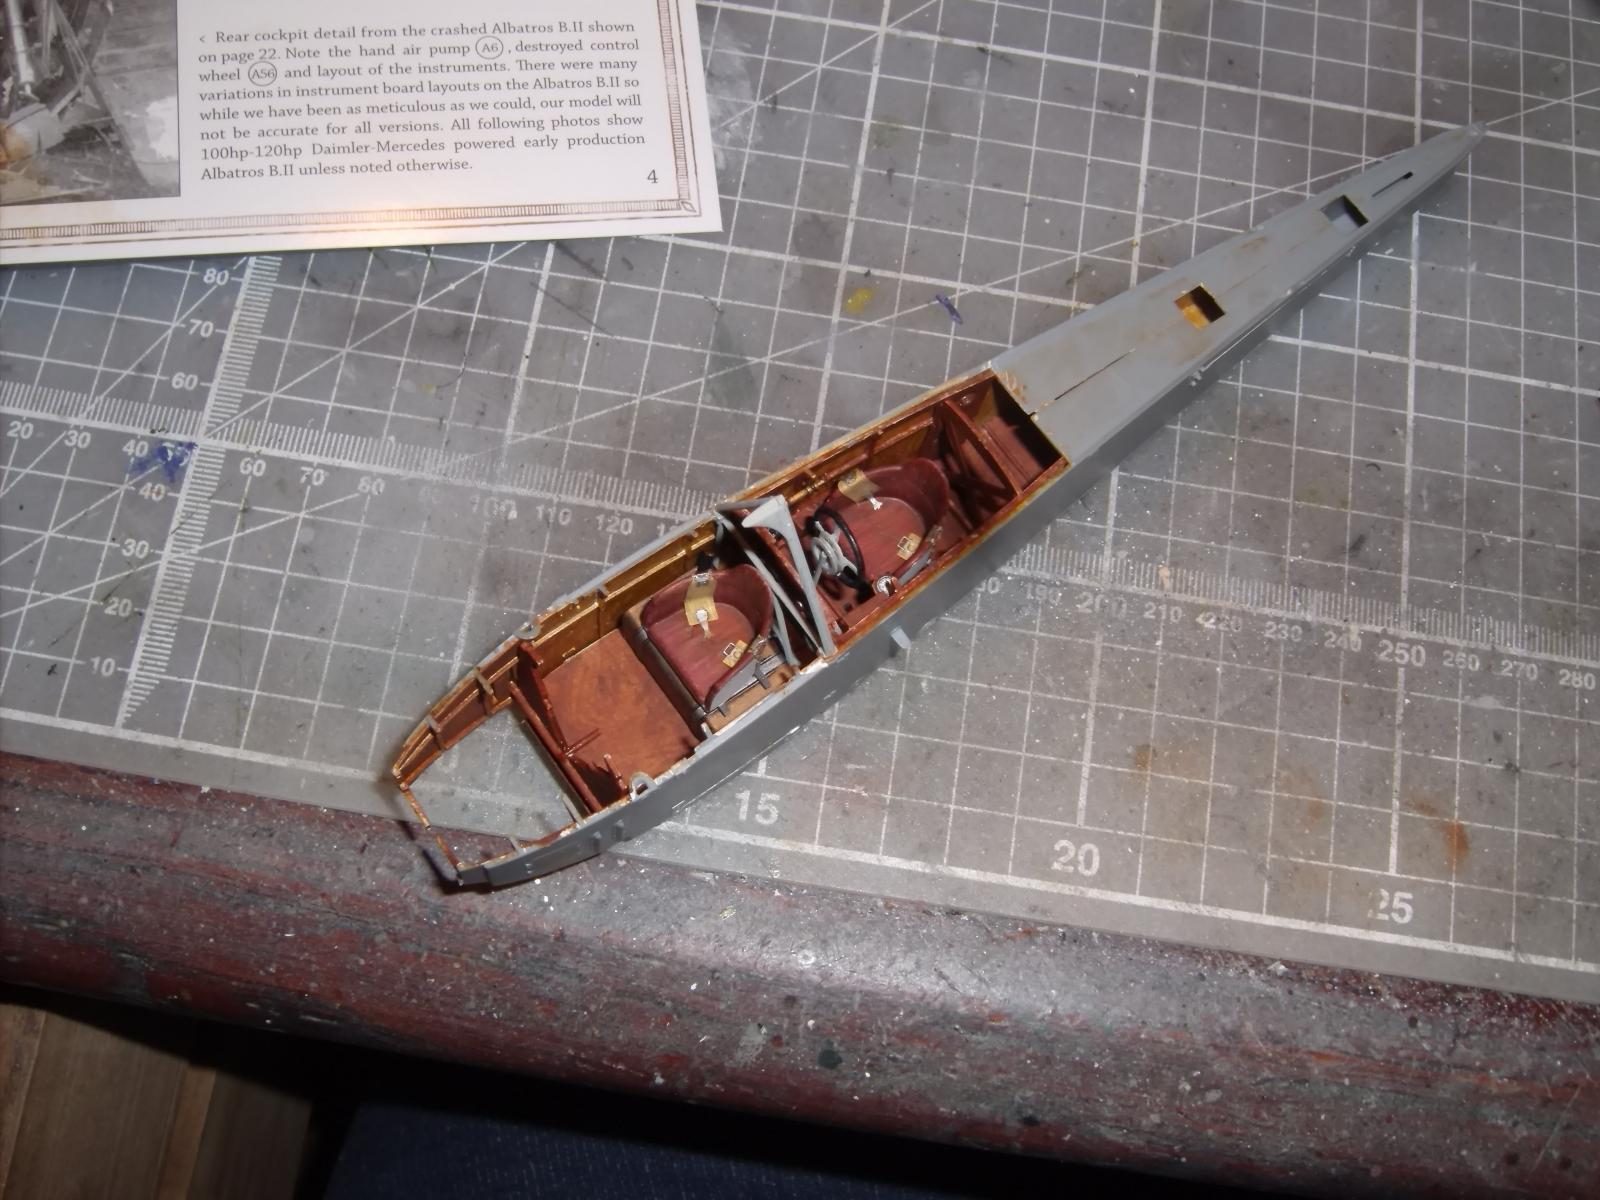
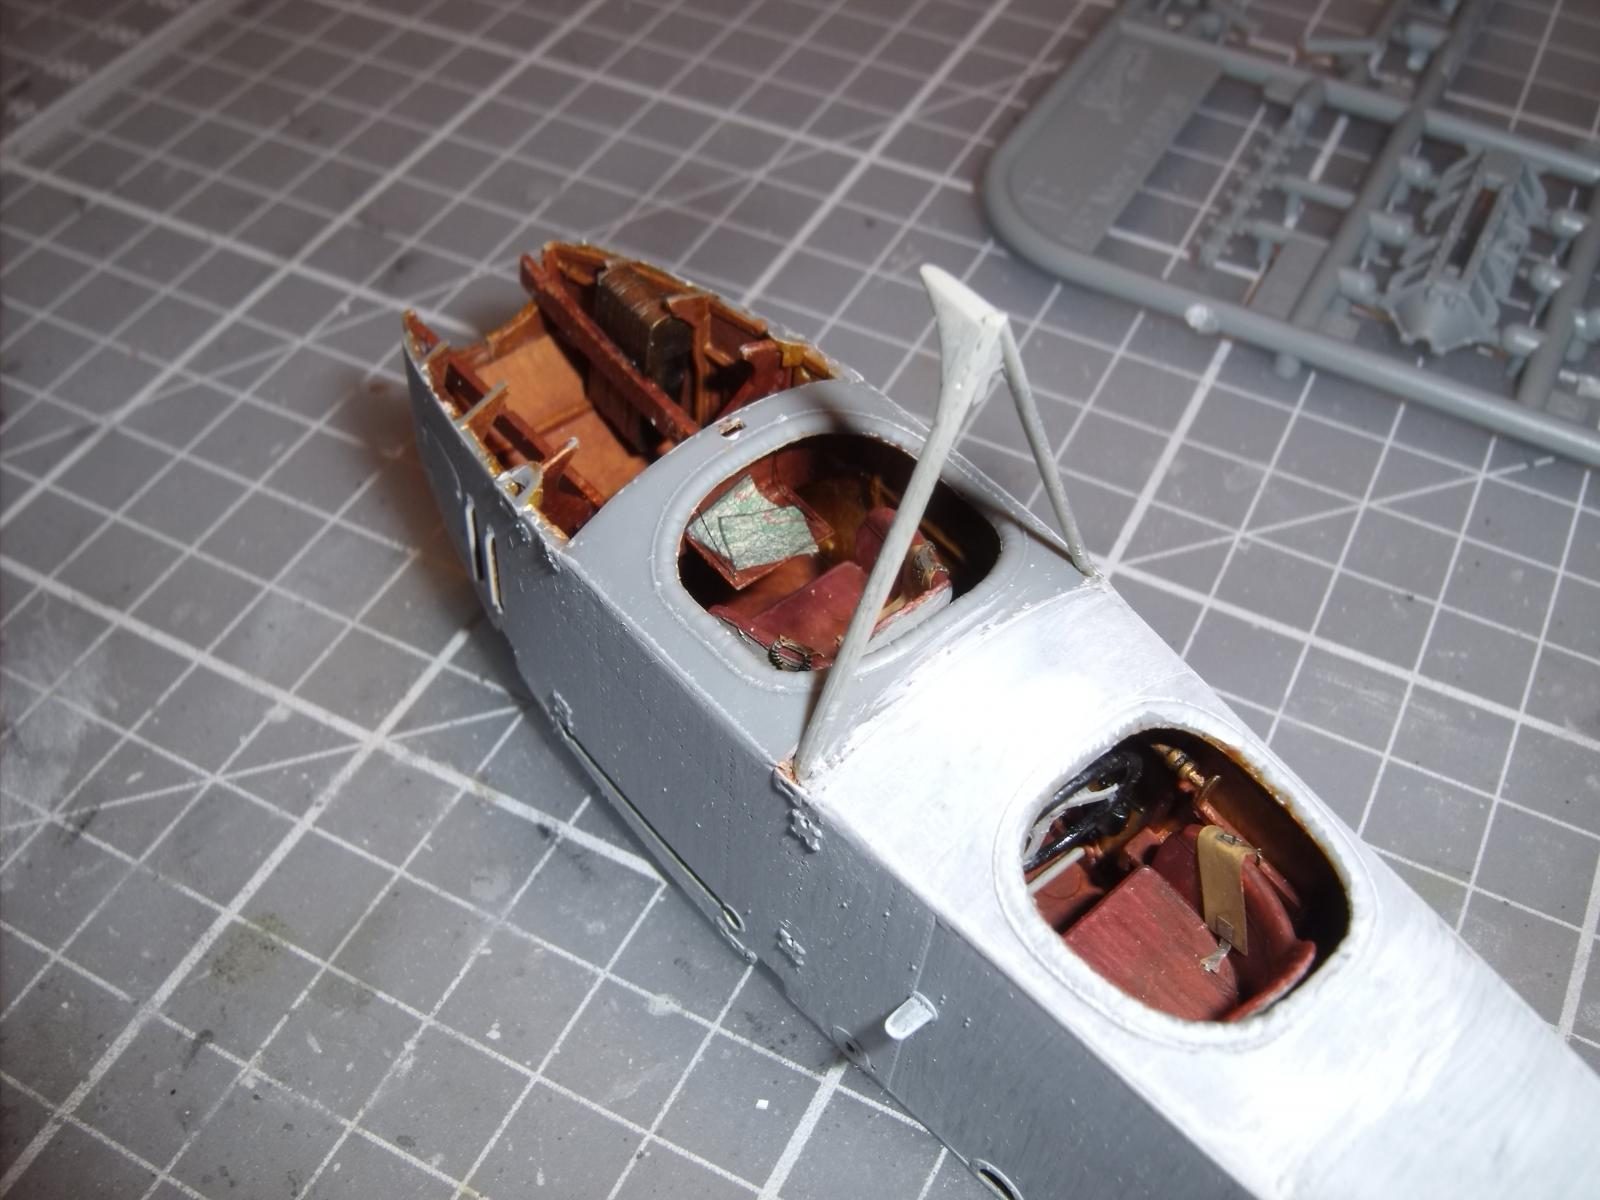
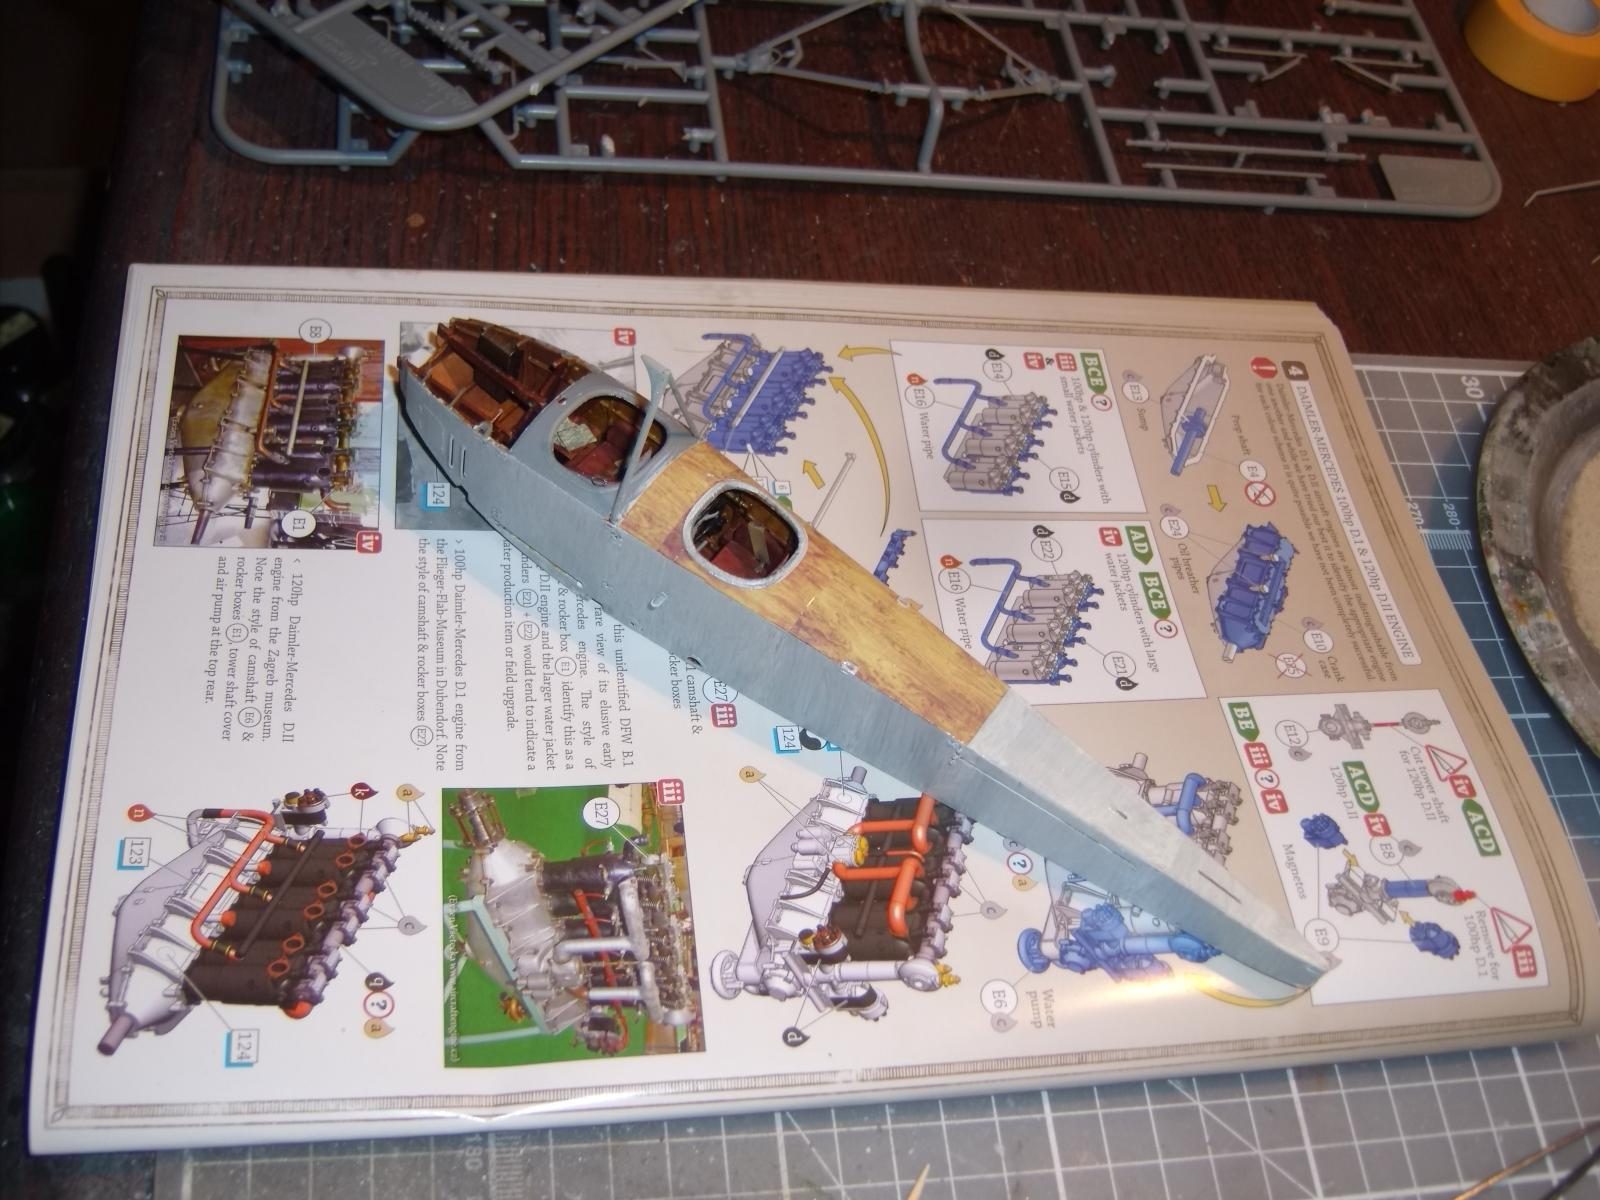
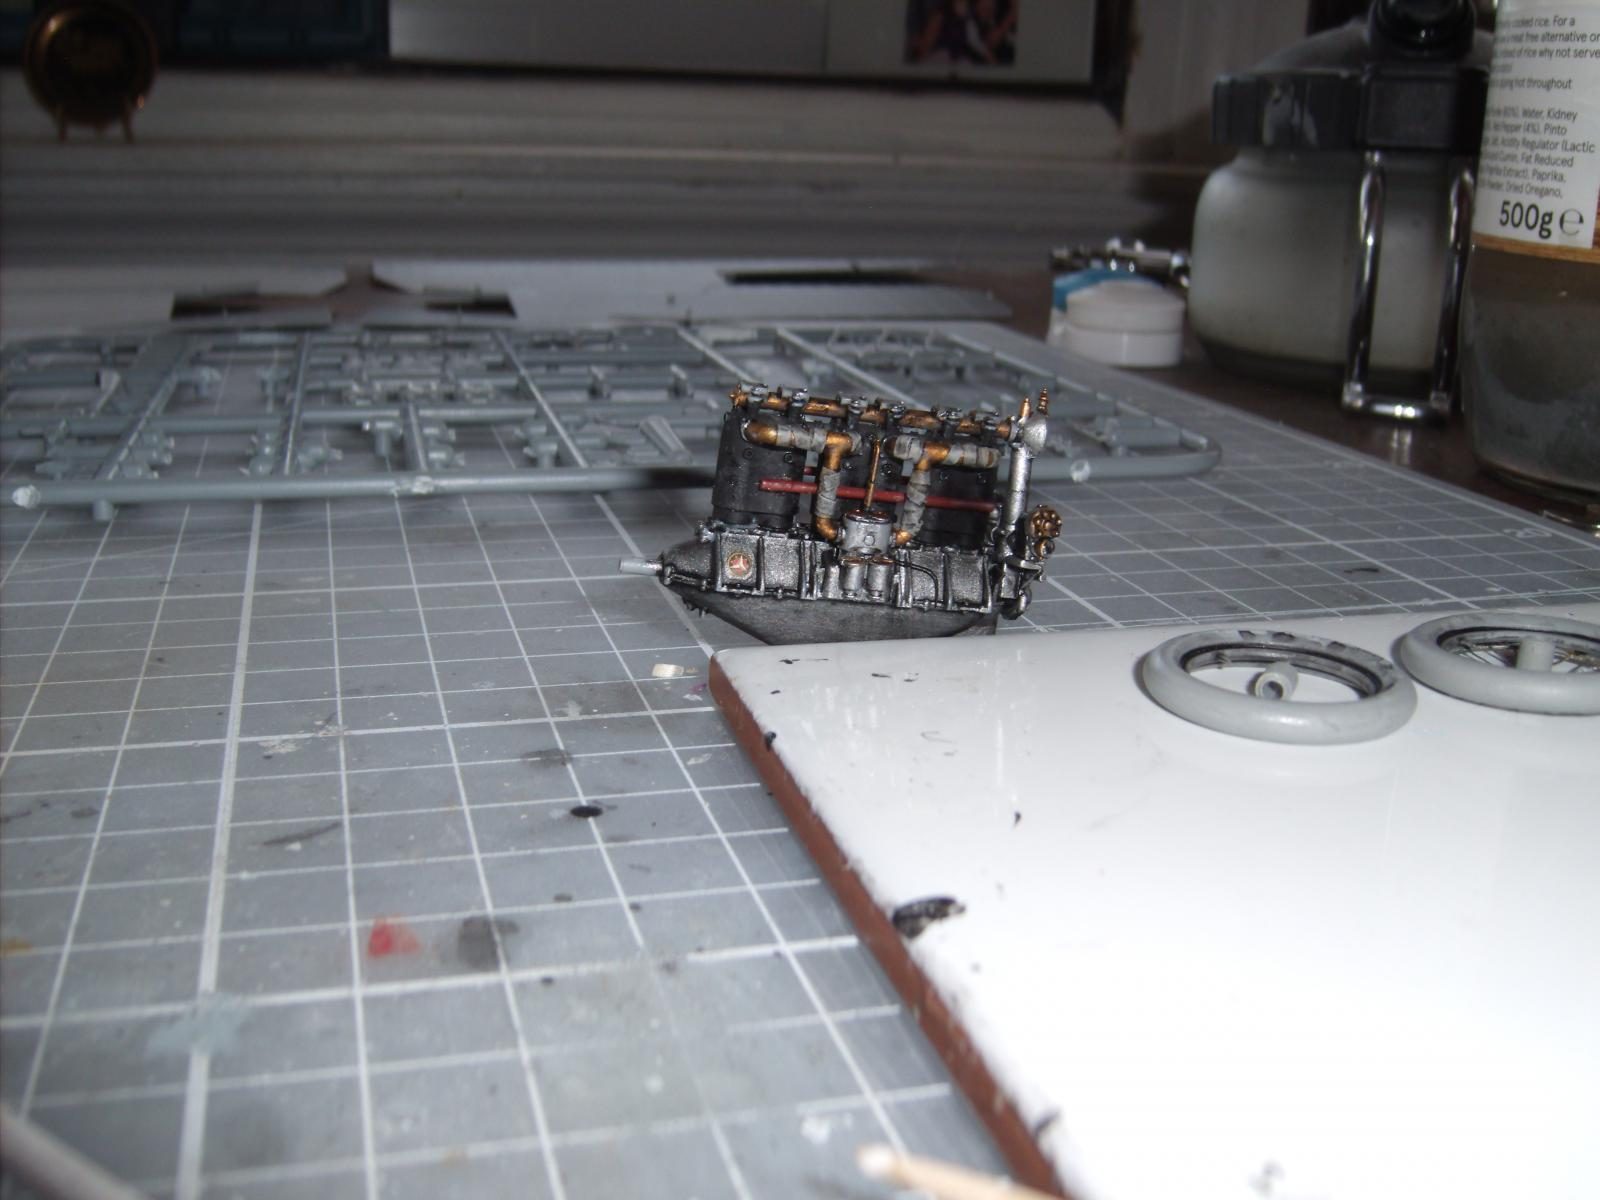
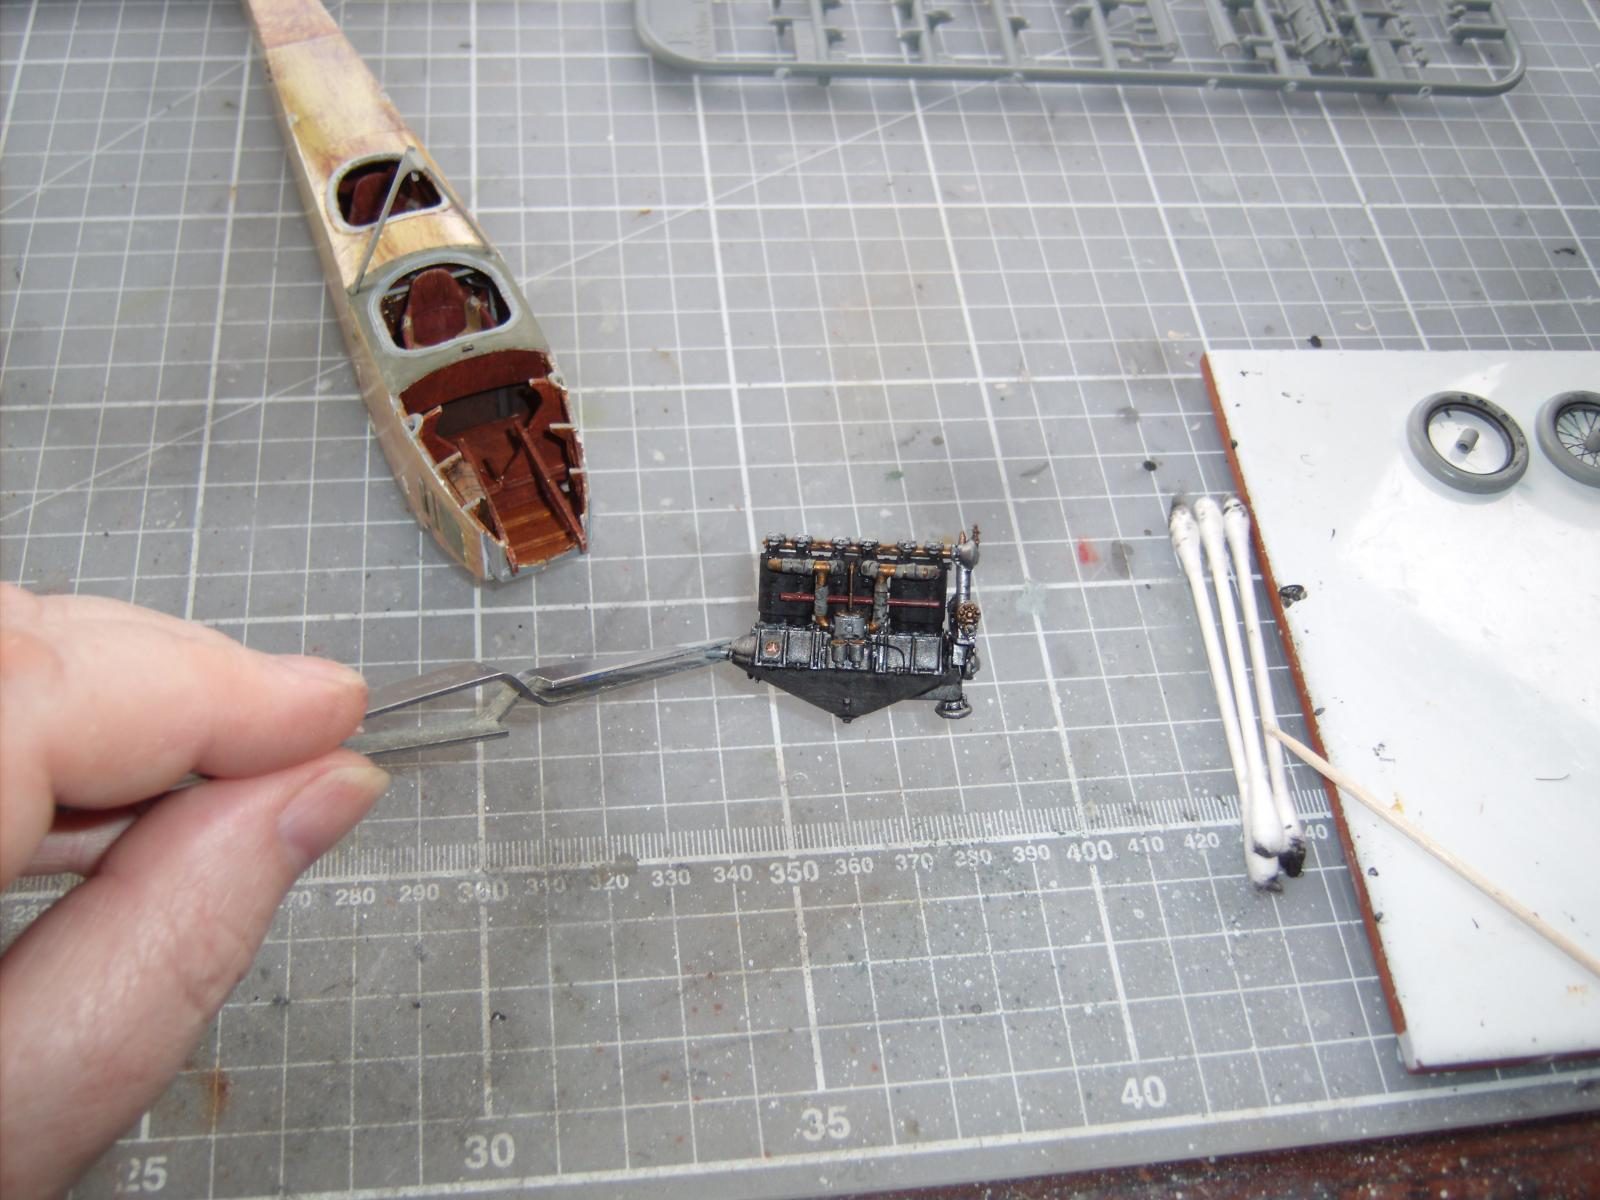
The detail in both cockpits is good; in this aircraft, the pilot sat behind the observer, who had a drop-down panel to lay out his maps of the area the mission was being flown over; the maps are provided in the transfer sheet and are very smart. The rather large windshield is wonderfully clear, and the engine detail is first class, as we have come to appreciate on WnW kits.
All in all, a very pleasant build with a few hurdles thrown in, but rarely does a kit come without any hiccups; seven weeks exactly from start to finish. The instruction booklet suggests the aircraft may have been on the strength of Armee Abteilung Gaede in 1915. Some additional information on that unit can be found here: https://en.wikipedia.org/wiki/Armee-Abteilung_B.
I hope you like the kit, and thanks for looking in.
Regards,
Paul


This is really nice, you've done some excellent work here and gotten a super result. "Liked."
I just wish WMW hadn't gone "obscure German two-seater" happy and Great-Big-Models-of- airplanes-of-limited-interest-in-expensive-kits-crazy, that "we're making because we can." They might still be around with a Nieuport line, a SPAD line, a Strutter, maybe some other British 2 seaters, etc.
From what I gathered, WNW itself was a hobby of its owner. But I agree with your assessment.
"Liked" as well, what a fantastic result, Paul.
Great finish on painting and detailing.
Beautiful work! I'm always been intimidating for WWI subjects. I have, however a precious Wingnut Wings kit waiting to be build. One day...
Tom/John/Jorge, thanks, guys... I appreciate the comments.
Ah, Tom... I understand where you're coming from, but I like obscure German, large scale and limited run/limited interest, and have increasingly fluctuating intolerance of kits of mass-interest, sorry... but thank you again for your kind words on this completed kit.
Regards,
Paul
Truly amazing work, Paul!
Seven weeks is a short time for all this spectacular work.
I cannot stop looking at it.
Congratulations!
Nice work, Paul. I can’t imagine how fragile that is. I built a Formaplane (?) vac Albatross B.II in 1/72 many years ago and it was a spindly affair with probably 1/20 the weight.
Well done Paul, all of your efforts paid off on this one. I'm certain it wont be your last WWI subject
Paul, @paulh
This is another masterpiece, and I am very impressed with your Albatros, especially the painting techniques you have demonstrated for us. These obscure planes are some of the most fragile looking yet amazingly beautiful in a strange way. The men who flew in them were remarkable to say the very least.
I have another hobby where I scratch build 1/6 scale WW1 balsa wood flying RC aircraft. I have not done anything in this field for several years now, but the Albatros B.II is one of the planes I have always dreamt about building and someday (hopefully) flying.
My love for these early machines stems from a visit to the office of a man who was a friend of my Dad's. Behind his desk he had a scale balsa wood model of an Etrich "Taube". I was fascinated with how nice it looked, and since it had a wooden structure that was covered with tissue paper, it looked extremely realistic. The rigging was spot on too, just as the rigging is on your magnificent flying machine... 🙂
Dad told his friend that I also built balsa wood models. When my dad's friend asked me if I wanted to get a better look at his model, he handed it to me. I was amazed at how something so elegant and fragile could be replicated.
With your build, I feel the same way.
Thank you for sharing this beauty with us. I pressed the "liked" button too. If we still had the model of the month contest here on Imodeler, yours would be a serious contender for the title.
Gents, thanks to all of you for your comments; as Louis says, it's not the last you'll see, but you may have to wait a while for the next one... ;-).
Regards,
Paul
🙂 ... Greetings ... 🙂 :
This is a complete joy to watch Paul.
Very nice work and a very impressive finish.
The viewer can see and feel the fun you had building this, nice clean work.
Thank you for sharing these images.
De4ever...
Thank you for your comments. It was a challenging build but yes, a lot of fun to build. I'm glad you like the end result... ;-).
Regards,
Paul
Beautiful work - I'm amazed at what you guys do with WWI stuff - the rigging and wood finishes, etc. Amazing.
Thanks, Greg... ;-).
Regards,
Paul