Building Eduard’s 48th Scale Fw-190D-9 ProfitPACK
I will have to admit up front that I am not a German aircraft expert, but I did manage to talk myself into building one of my favorite aircraft. I was really interested in this Eduard offering and was curious to see how it compared to the Tamiya kit. By now you have probably read a few reviews on this kit and are aware of some of the glitches other modelers have discovered, so I decided to do just a straight out of the box build without any additional after market products or additional cutting out of flaps etc.
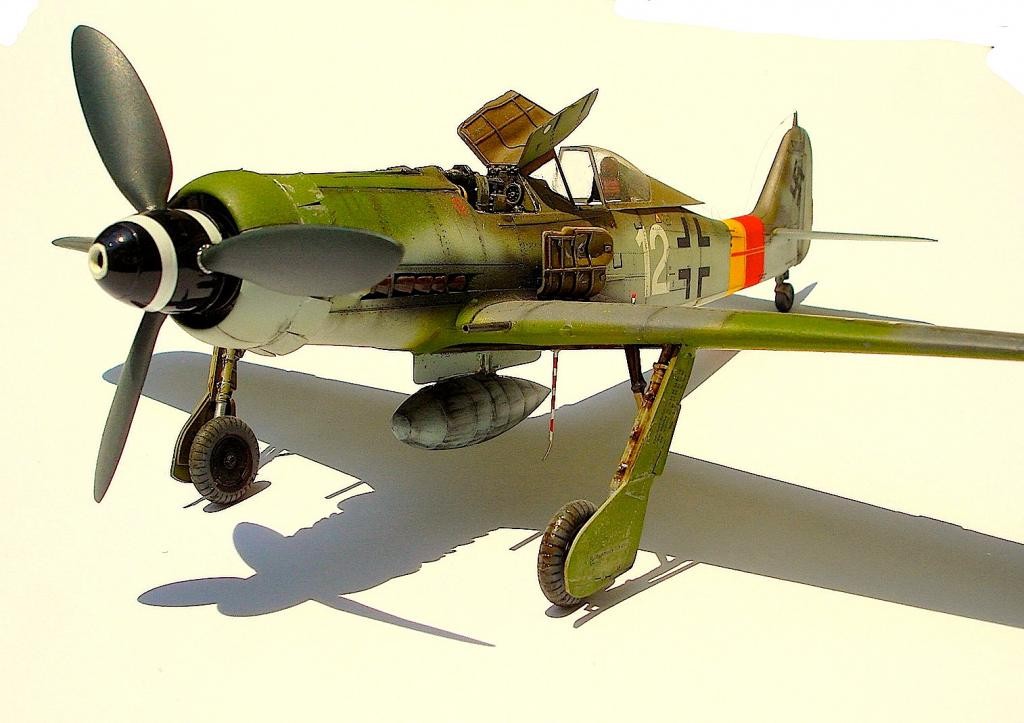
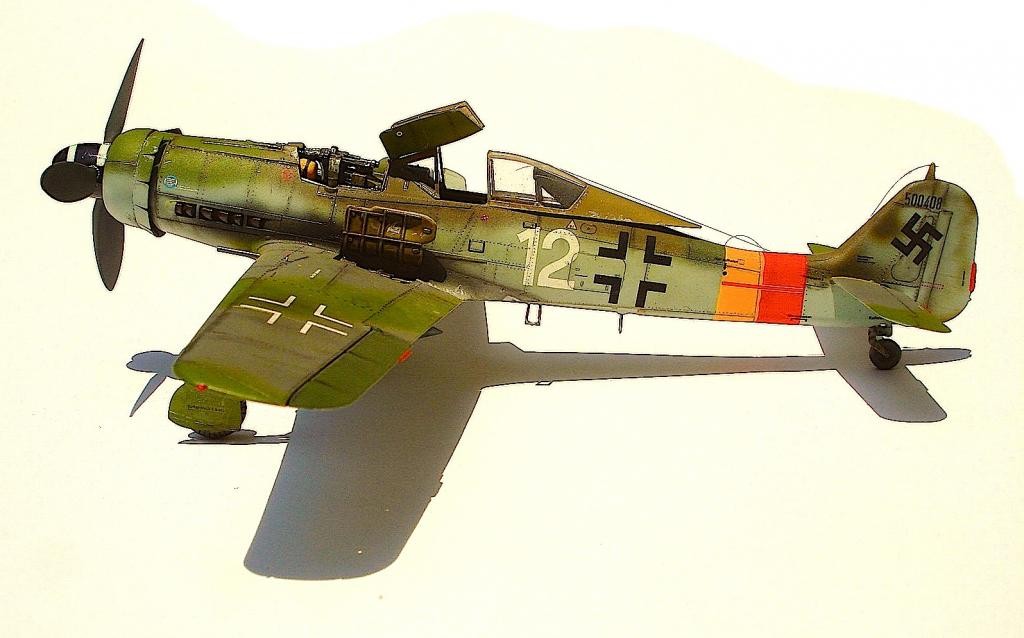
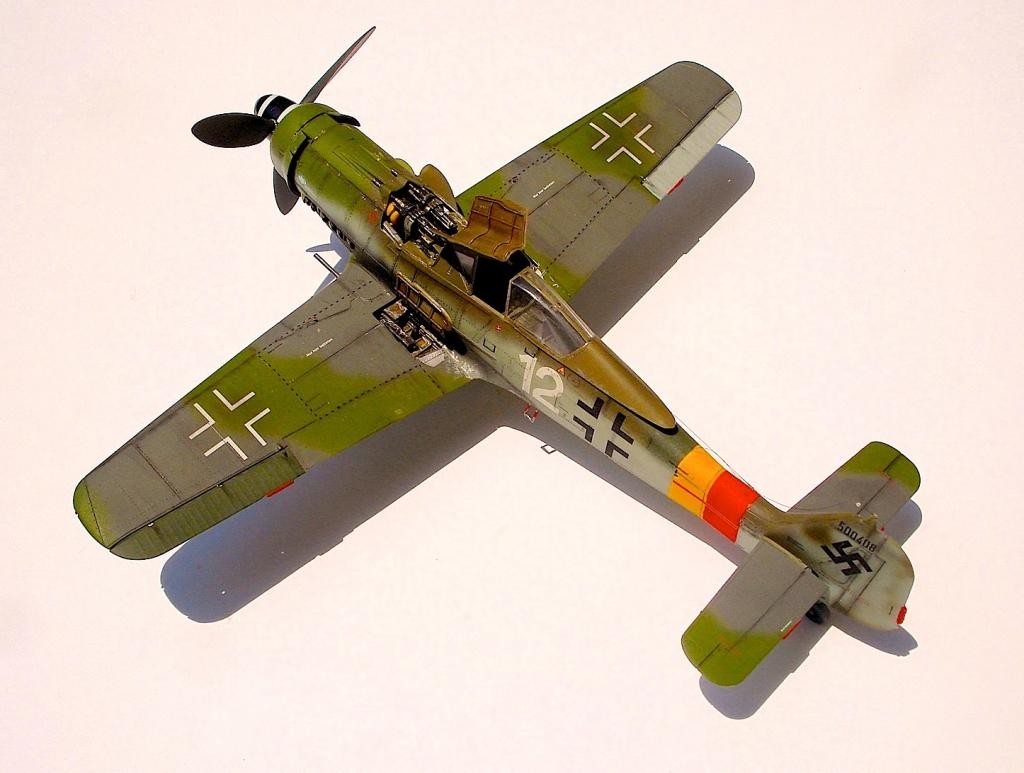
The first order of business is deciding which scheme I wanted to do. There are six schemes offered, so I had a variety of colors and camouflages to consider. I chose the scheme used by 5./JG 301 which was discovered by U.S. forces near Bad Langensalza Germany in May of 1945. Part of the reason for my choice of this scheme was based on the fact that it used eleven different colors. Another nice thing about this kit is the sixteen-page booklet complete with beautiful full color four-view profiles.
Starting with the cockpit, I had to decide whether to use the plastic parts or the PE parts. I suppose I decided to get creative and blend them both using the best of both. Eduard does include their colored PE parts, which I really like, though I don't know how they do it. I was able to construct the cockpit complete with paint, decals and weathering as a sub-assembly, and then set it aside for later.
The fuselage construction is the next step, and I had to decide whether I are going to button things up, or show the cowl and wing root gun compartments open. I chose open. The next sub-assembly in my opinion is possibly the most interesting parts of the kit. This assembly covers the firewall, the cowl guns and all that detail you can see when looking into the wheel wells. Because of the number of parts in this assembly, I chose to use liquid glue so the parts would remain flexible longer and alignment issues would be easier to correct due to the slower cure time. This step will require some dry fitting into the fuselage to insure a good fit.
I recently started to change my construction methods, and began to paint my major parts while still on the runners. I have found this to make painting and decaling a lot easier, and also greatly reduces the masking, resulting in a great savings in time.
This next step is where I hold my breath as the cockpit and the front sub-assembly is captured inside the fuselage. There are not real alignment pins on the fuselage parts, and the structure is a bit flimsy, so great care was needed when gluing the fuselage halves to minimize seam problems. Again, I found liquid glue gives me some wiggle room to insure I have a clean fit, and allows me to flood the seam so when squeezed, it forms a nice welded joint. Now I do a bit of seam touch up and airbrush the required colors including the exhaust stains, and the whole assembly is set-aside for the time being.
Eduard left the exhaust shroud off the right side for some reason, so I made one from sheet styrene, which is an easy fix. I also broke off the wing canons by accident, so I replaced them with some brass tubing.
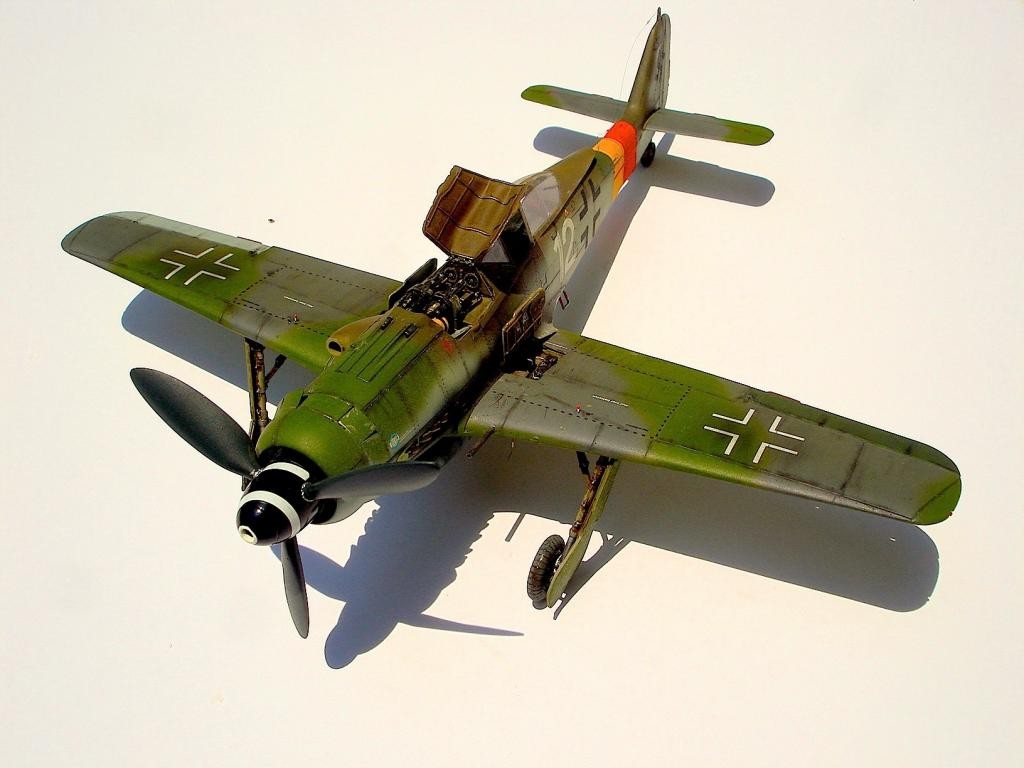
I decided to add the landing gear indicators to the wings because it is an easy addition.
The next step is the wing assembly, and here is where I got into a little trouble. As usual, it was not the fault of the kit but rather my carelessness when positioning the main wing spar. This placement is critical, as it effects the alignment of the main gear wheel well detail, the landing gear placement and the fit of the wing assembly into the fuselage where it mates with the firewall. Well you can't call yourself a modeler if you can't fix your own mistakes. So a little grinding was necessary on the ammo chutes on the firewall to get things to fit. Fortunately, this is not really visible, so I did manage to dodge a bullet.
Once again I held my breath fitting the wing assembly to the fuselage hoping for a good fit at the wing root. I got my wish and had absolutely no problems and required no filler, just leaving a bit of touching up on the leading edges. Getting the ailerons to fit correctly took a bit of juggling, but it finally worked out OK. The landing gear came next and care must be taken to insure the proper angles, as this is a distinctive look for this aircraft. The wheels look a little thin to me, but I'm no expert so I left them alone. You get a choice of tire tread or smooth, so I chose tread.
I had a choice of canopies depending on which scheme I have chose. Eduard provides a nice mask making painting the canopy nice and easy. If you intend to add the antenna wire you will need to drill a small hole in the canopy as none is provided. I added the gun cover doors and the other antennas at this time. I decided to use the centerline belly tank and found the instruction drawings not very clear as to how the tank attached to the pylon, so I sort of winged it. Once the model assembled, painted and decals applied, I like to add a little wear and tear to indicate that this aircraft has seen some use. I accomplish this with pastel powders and a silver pencil
I really enjoyed building this kit. I was pleasantly surprised that it fit as well as any of the top line kits, and I did not miss having to deal with a complete engine assembly as in the other Eduard FW 190 kits. I also liked not having to add any after market kits to get more detail into the model. I wish the manufacturers would include brake lines in their kits however. If you like the FW 190D-9, I highly recommend this kit.
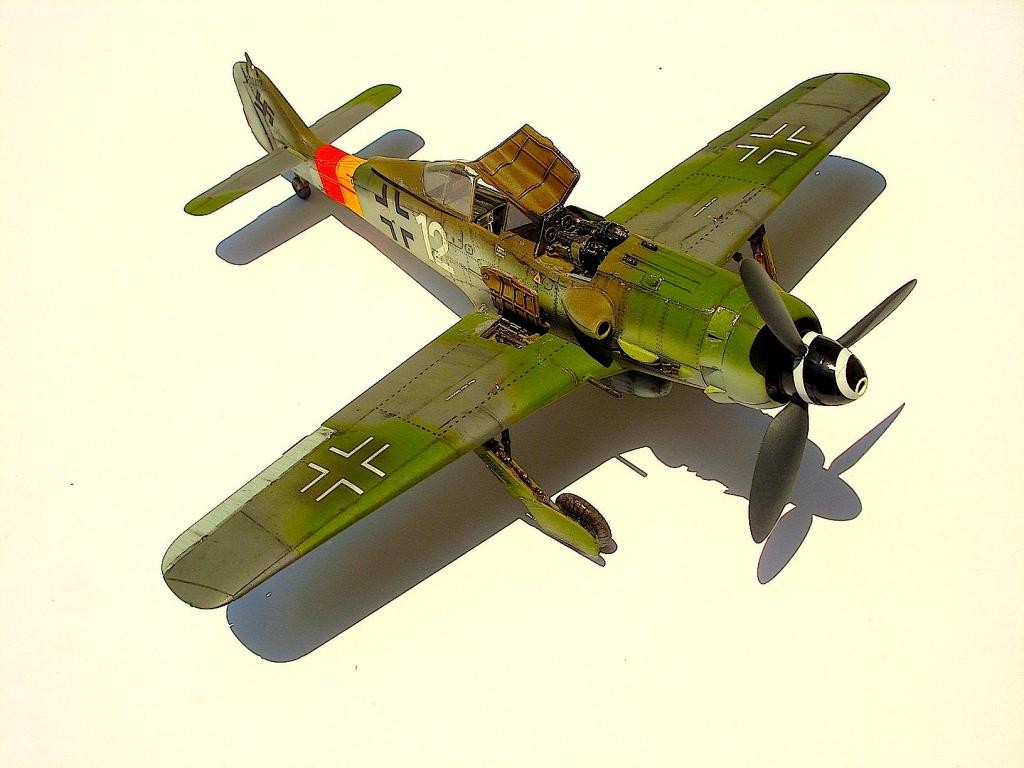

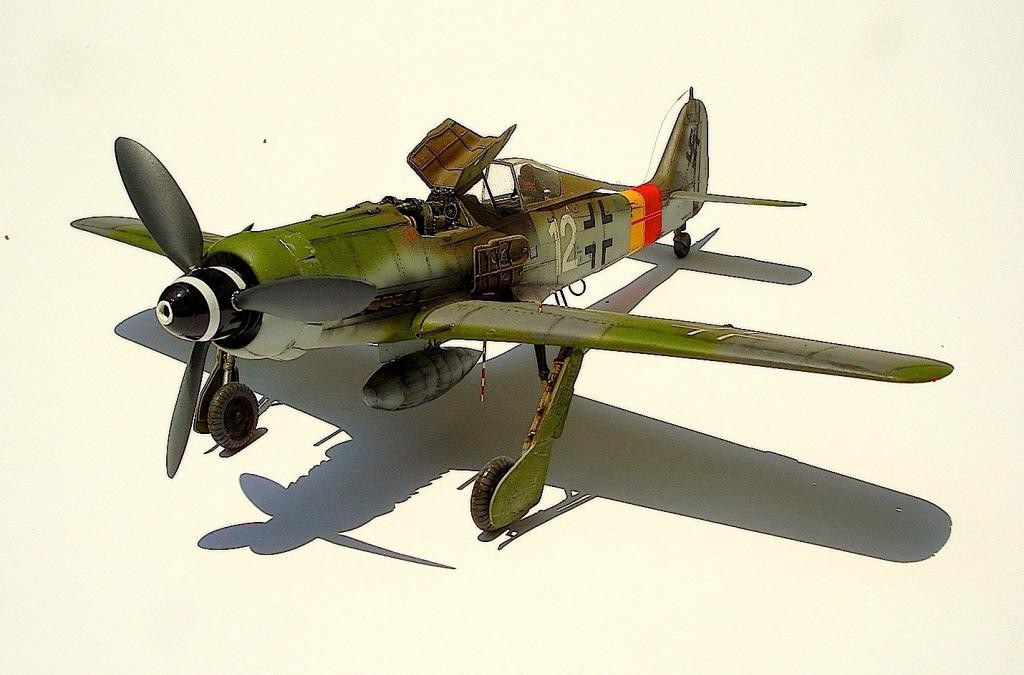


You made the smart move when you elected to display everything open, as that is the way Eduard designed the kit. You7 get an opportunity to "live in interesting times" if you choose to close things up, since nothing really fits all that well.
Very nice result on this.
Nicely done, Jack...and those photos are fantastic - (that 'headline' pic looks like a painting)...how'd ya do it?
Nothing special…..just a SONY Cyber-shot digital point 'n shoot.
Jack, beautifully done! Tom got it right, trying to close up them "optional" panels will make you crazy and old before your time, as the sage remarked.
Excellent work ,great detail.
Jack, simply beautiful !, you've picked a very attractive scheme and pulled off a really nice build.
🙂 ... Greetings ... 🙂 :
Nice work Jack ! She really stands out. The photography work is very well done, looks crisp and clean.
Very eye catching Jack. Some impressive detail and weathering.
Beautiful work, Jack. From you I expect nothing less! The photos are interesting-they look-to me-like water color renderings, and really caught my eye.
Good job all round, Jack, just the right amount of information on the build and the photographs are great as well.
MAGNIFICENT!
Great-looking 190! Nicely finished and weathered.
Fantastic ! Great work, Jack
Good to see a model built to its strengths ...with the open compartments and canopy. Natural Florida sun light seems to bring out the best in the kit with the photos. Two thumbs up, Jack on the oil streaks on the drop tank. The streaks conform to the direction of the slip stream and on the seams of the tank. Which make for a more realistic representation .
Lovely build Jack, well done mate.
Great pics too.
Good work and great photography! You did a great job on the wear and tear.
Just found this, Jack. Don't know how I missed it, but this is a lovely Dora. Simply brilliant work.