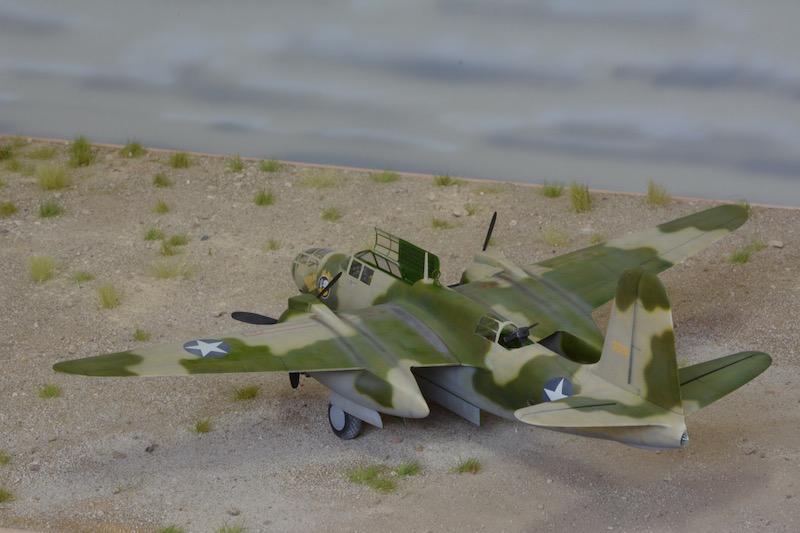
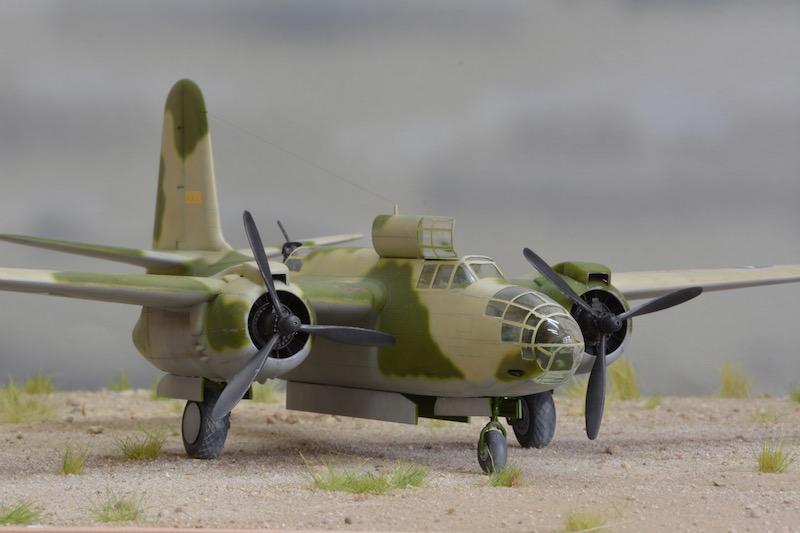
Douglas A-20 in 1:48 from Italeri

The Douglas 20, sometimes called ”Boston”, sometimes called ”Havoc” is a bit of an unsung hero.
This, and its kool looks, were the main reasons I wanted to build a model of it.
It served in the French, the British, the Soviet and the US Air Forces. It served in a variety of roles and it was very much a pilots aircraft. Light, robust and easy to handle.
The fact that there is only one kit of the A-20 in 1:48, the old Italeri, previously AMT kit, is proof enough of how forgotten this excellent aircraft is.
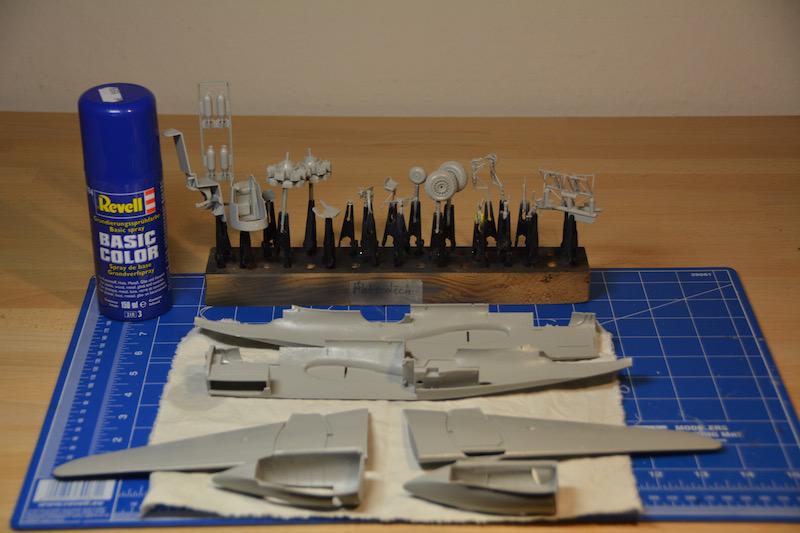
The quality of the kit isn't much to get excited about, but that suited me just fine, since I just wanted to build something fast out of the box, as a change from my latest ambitious ship builds.
I also took the opportunity to try Revells primer, which turned out to work well enough.
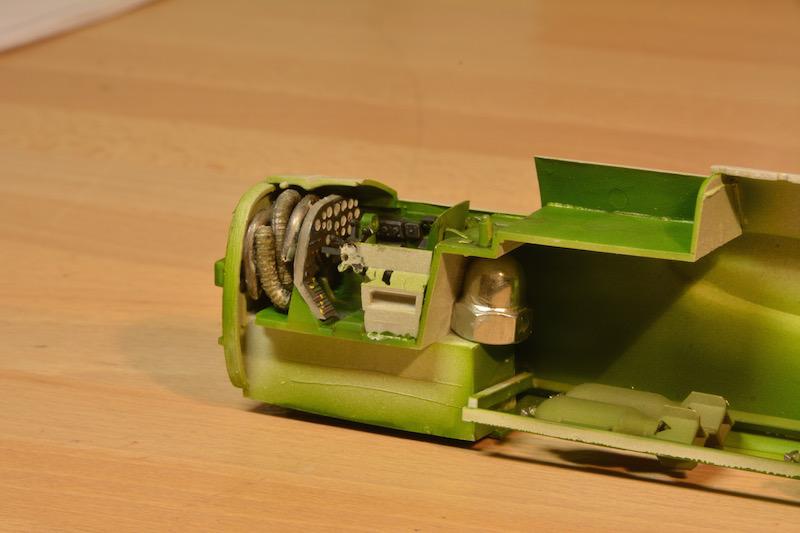
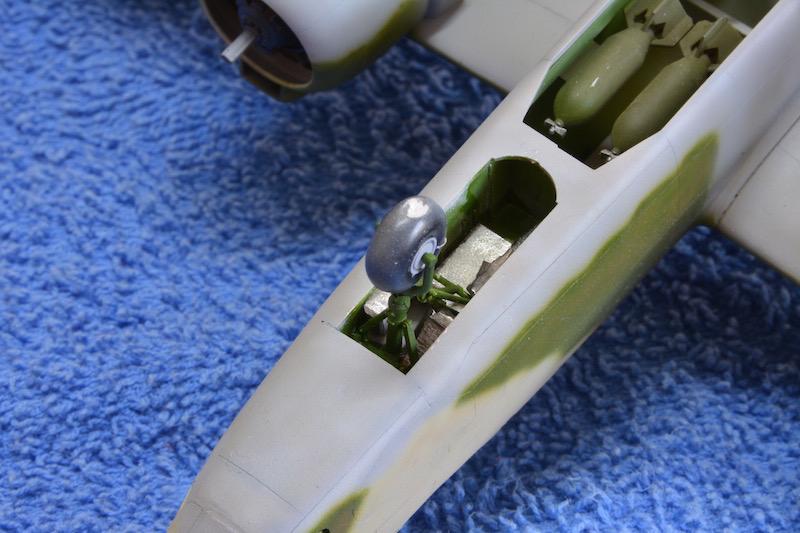
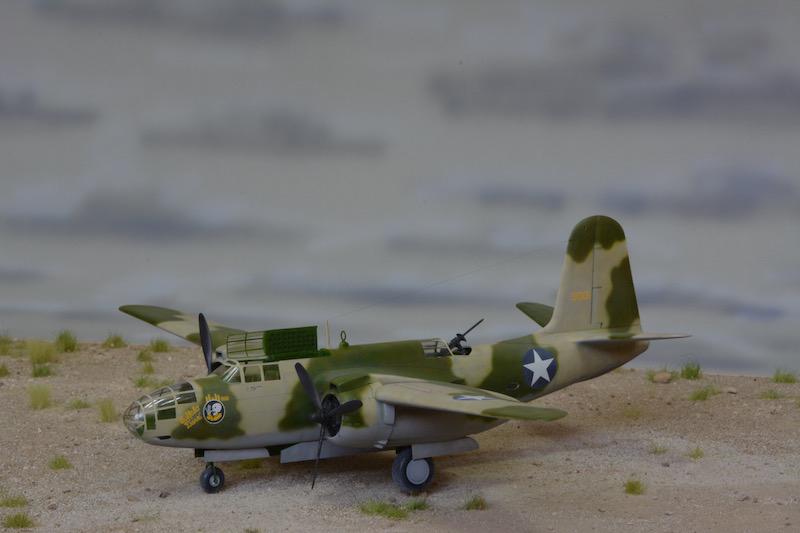
I raced through the build, taking care not to get bogged down into cockpit detailing and such. Because of the glazed nose, it wasn't too easy to find space for weights, to make her sit on her nose wheel.
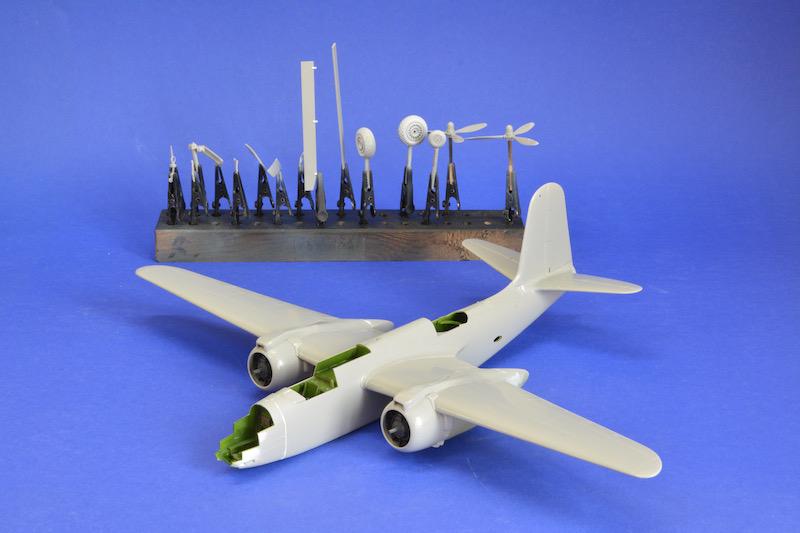
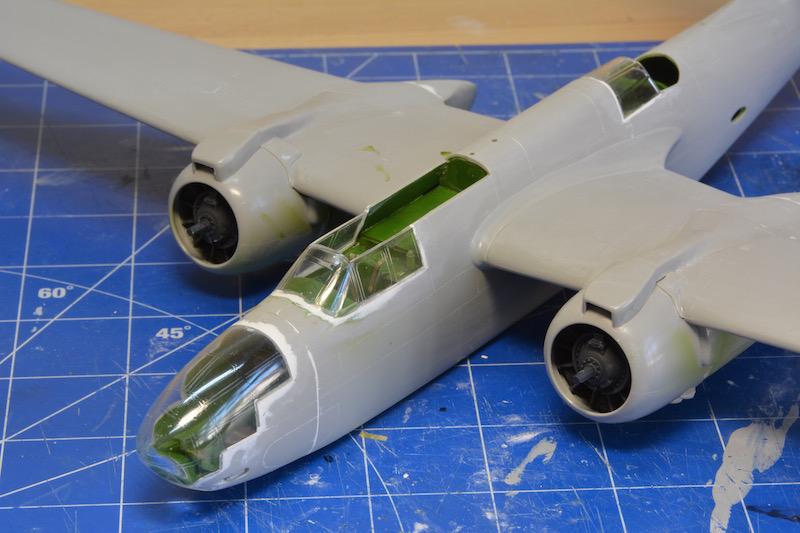
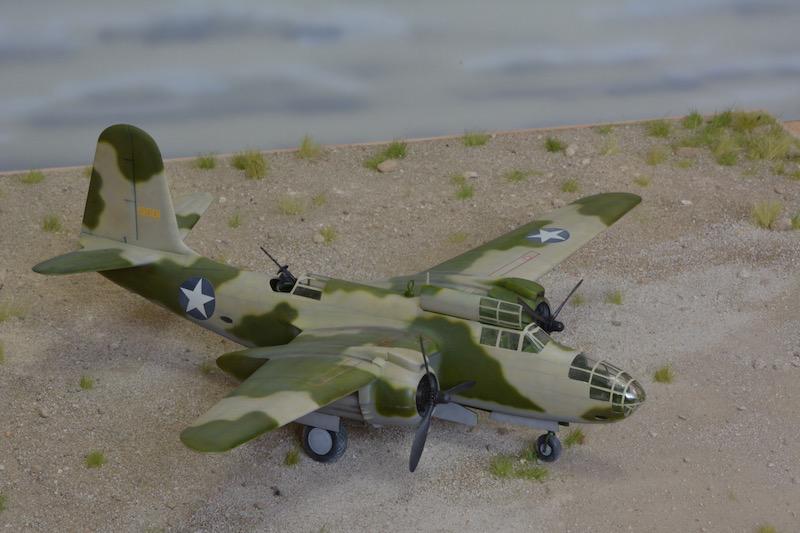
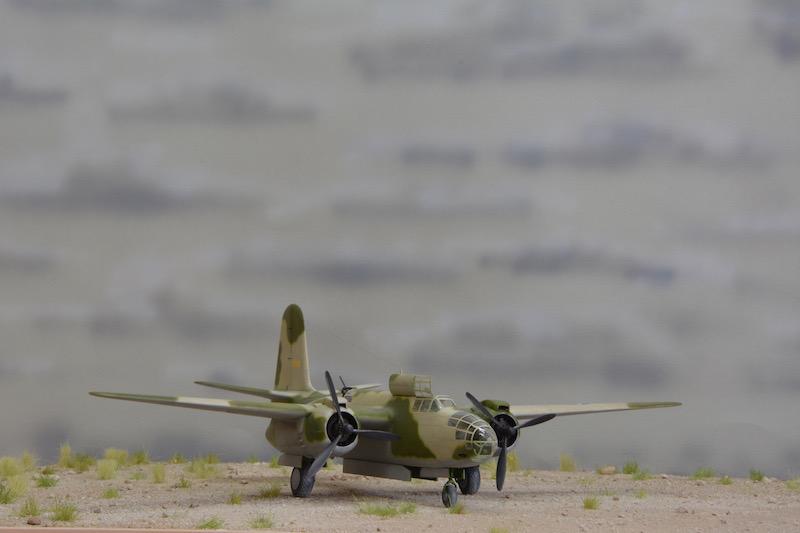
The fuselage halves fit together well enough and the fuselage to wing joints didn't pose any major problems either. The nose part required quite a bit of filling and sanding though and so did the fitting or the clear parts.
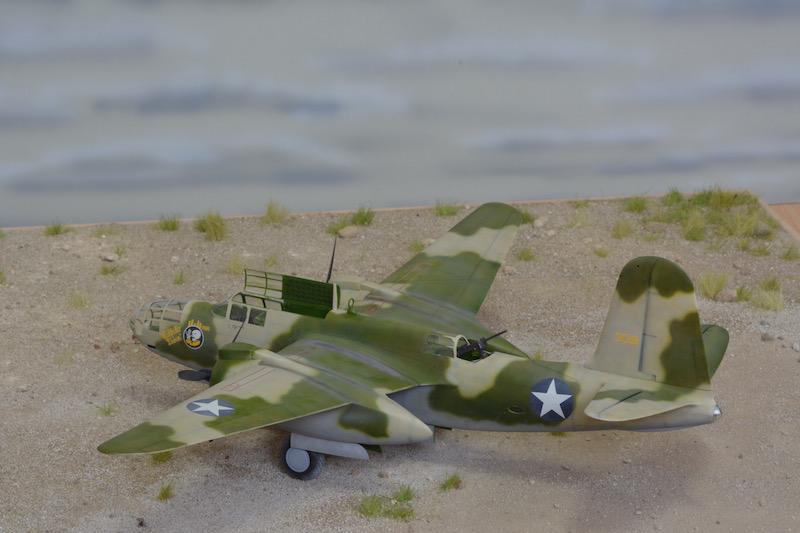
Masking the clear parts was another challenge. It' a thing that aircraft builders typically get very good at, but it's only the second time I've done it. I had no illusions of doing a very good job of it, but I was pleasantly surprised when I removed the masks.
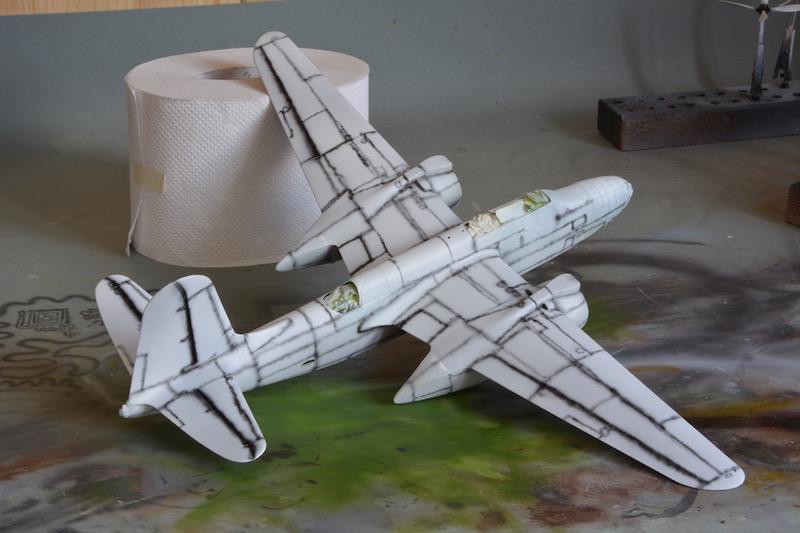
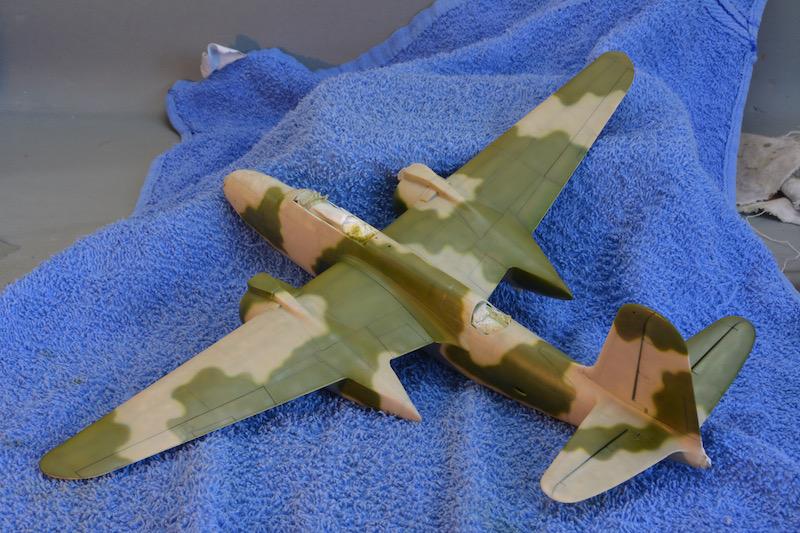
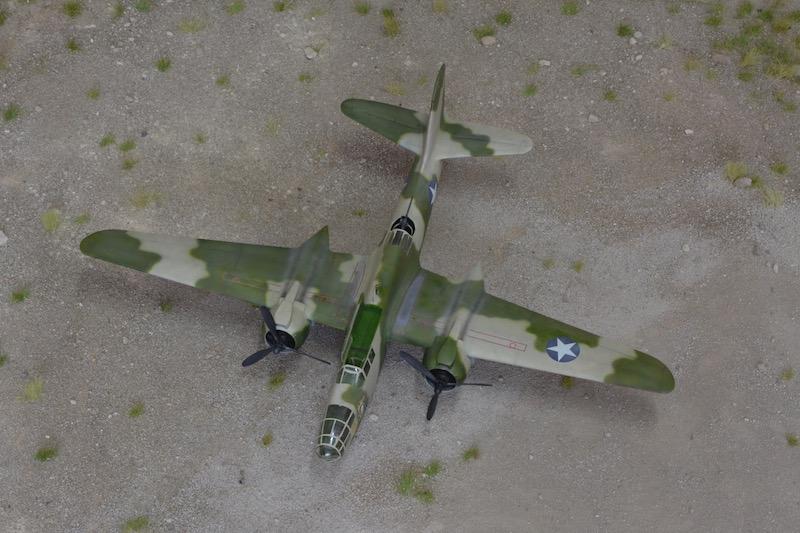
The really fun part of the build was painting the bleached desert cammo. I started with the traditional preshading and then worked my way forward with layer upon layer half transparent coats of the three basic colours.
The decals weren't very easy to work with. Please don't look too closely at them.
When I fitted the landing gear, it turned out that the weights I had put into the nose and the forward parts of the engine nacelles were insufficient. I had to fill the nose wheel landing shaft with weigts, before she would sit properly on the nose wheel.
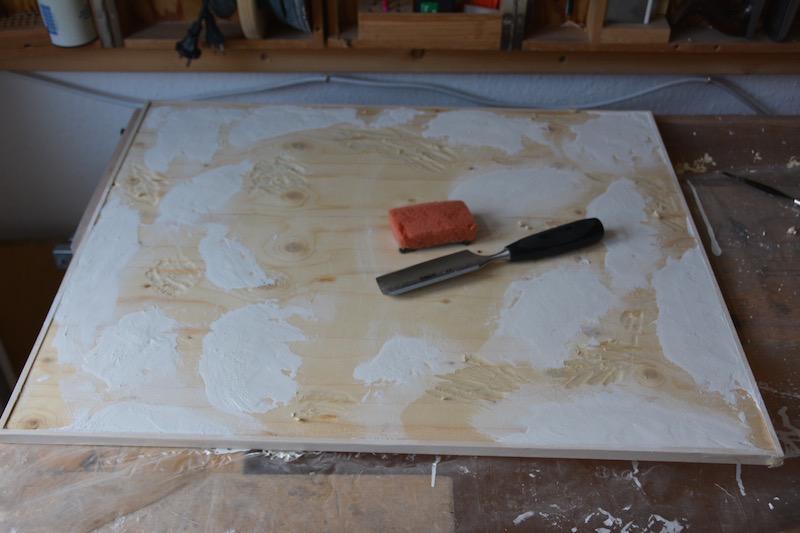
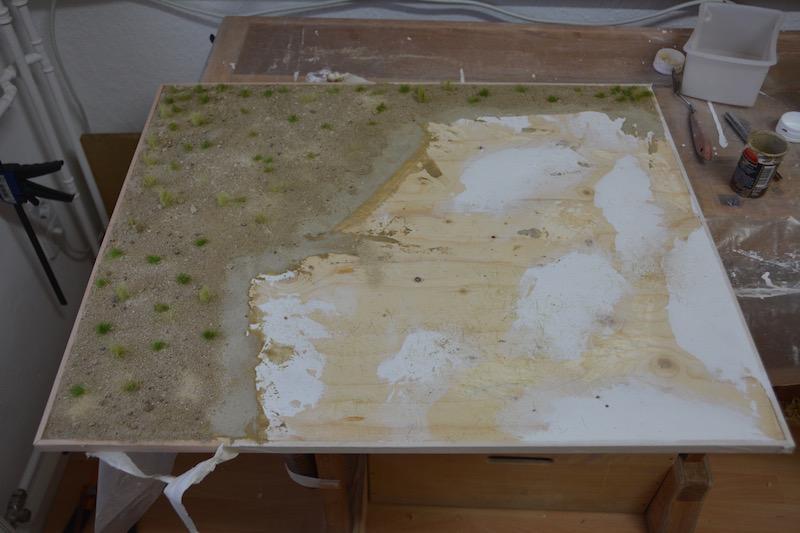
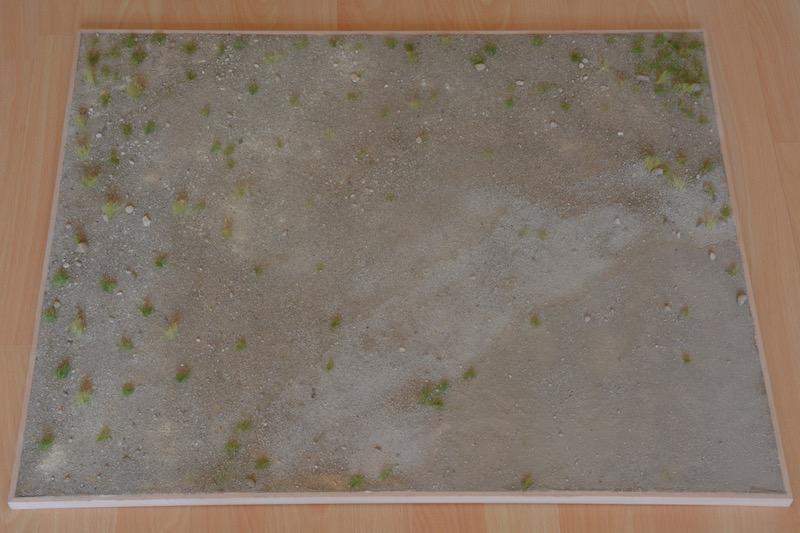
Building the base plate was fun little project. I started by making some very low ”hills” and ”valleys” with wall putty and a carving chisel, to give some life to the large flat surface. Then I went out and stole some Berlin Sand at a construction site, mixed it with white glue and some light brown Vallejo paint and started spreading it out. I spread some more sand and a little pigment over it and planted some tufts of grass into the mix.
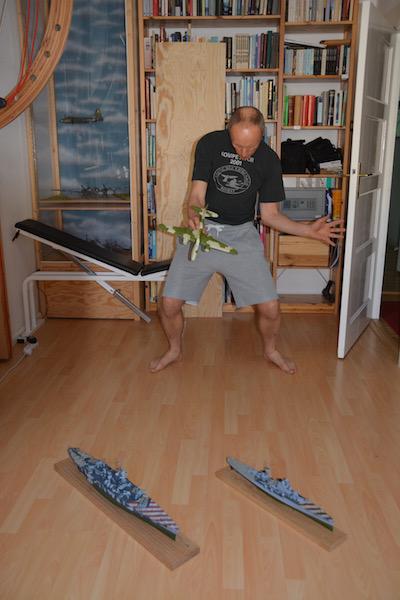
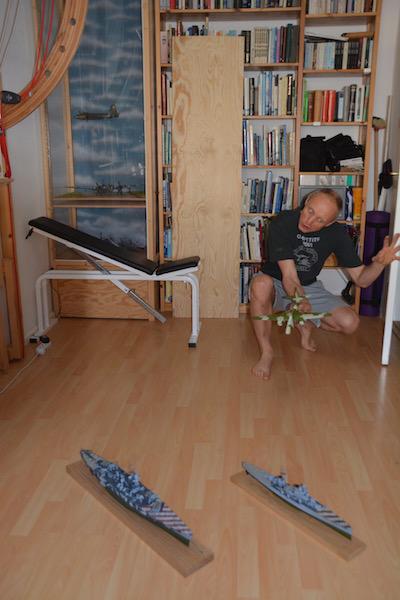
During the painting process I found some unique, previously unpublished pictures of the US 12th Air Force attacking the Italian Navy in Genua 1942.
Thanks Jürgen, for giving me the kit.


Nice work, Ulf. I especially like the work around the clear areas, which could not have been easy, but really paid off. Great looking model.
Nice build, nice base, Did you sink the ships?
No. I forgot to install the bombsight on the model, so the bombs missed.
Next time.
Very nice build and presentation, Ulf...I like the last few pics - 🙂
By the way, if you can get your hands on some #8 bird shot used in shotgun shells, they make a good alternative for nose weights. They're small enough (and heavy enough), to find their way into the smallest recesses and are an excellent source for those pesky builds that don't have viable areas regarding placement of counter-balance locations.
Thanks for the tip, Craig,
Nice job. You can never have too any Bostons. 🙂
Just as long as you had fun building it, Ulf, that's all that matters. I like the job that you did on it anyway.
Nice job on the A-20 Ulf, one of my favorite AC to model. I've used Terry Dean weights in mine to keep the nose down. They work great.
Very nice! The A-20 in my collection was one of my earliest builds, so rudimentary finish. I've wanted to build another now that my skills have matured a bit, and really like the scheme you used. I hadn't seen that on an A-20 before, and am now more motivated to add another to the display cabinet!
🙂 ... Greetings ... 🙂 :
Good work on that A-20 Ulf.
Ulf ... the problems one finds in a kit, in my view is a big +. It makes for more time in the project and is a very good opportunity to put at work skills already at hand or better yet ... new ones. Besides, you enjoyed the model and your time ( as seen ), good for you. That is what modeling is about ... FUN ... 🙂 .
like
It's nice to see you modelling something other than ships, just goes to show that an expert modeller can turn their hands and skill to virtually any subject.
I meant to add that I enjoyed reading your write-up almost as much as viewing the model, just the right amount of information.
Ulf, those photos of you attacking the ships just made my day! Zoom! Takatakataka! Kaboom!
Enough already with this serious modeling!
Great work on the Havoc, you don't hear much about her, but she was there throughout the war, and did the job.
What did you use for the tufts of grass effect on the base?
Thank's Bernard. Yes, modelling often gets way too serious. It's very important to keep our child within alive and kicking.
The grass is just model railroaders grass. I bought a couple of packs of different colours and mixed them to get away from that monochrome impression.
Thanks, Ulf! I like the tufted effect, rather than the "carpet" of grass that lawns make us think is the way things actually are. Nope! Not on improvised airfields, it would take too much time, when the show is going to move shortly, closer to the front.
Nice A-20! A man after my own heart, I just strafed the cat with a 1/48 Firefly!
John, way to go! Kitty is gonna get you, count on it! Watch it coming down the stairs...
Beautiful A-20. I like the base, very natural.
I like what you did with the filler around the nose glazing and the cockpit. It really helps makes the kit look the part. The painting is superb. Ulf, have you considered using natural lighting with a out door back round to show more of the details and your painting expertise?
Two thumbs up on the A-20
Thanks for the compliments Stephen.
I try to photograph my models in natural daylight when the conditions are favourable. Also, I recently installed daylight coloured lighting in my workshop. I believe the pictures here are taken in mixed lighting, daylight and lamps, in my workshop.
In this case however, I deliberately avoided close up pictures. They would have shown all the corners I cut, to finish the model quickly.
Very nicely done, Ulf. You're right - the A-20 was a workhorse, but didn't receive much notice. It was truly an "unsung hero." I enjoyed your narrative (write-up) including the base. Thanks for sharing.
Beautiful A-20 and the base! ...But those last 3 photos are just GREAT!