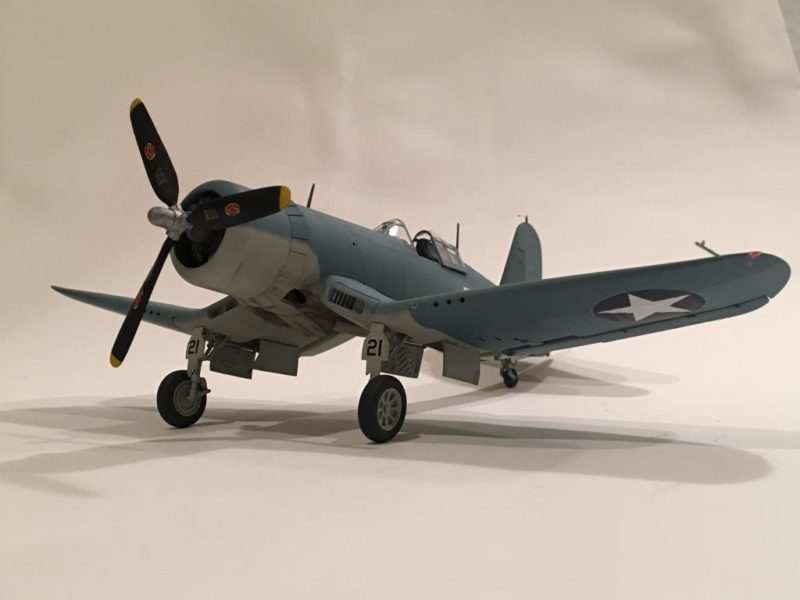
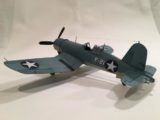
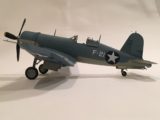
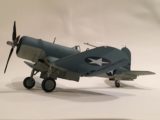
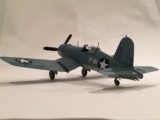
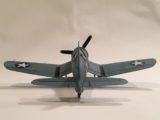
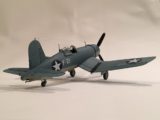
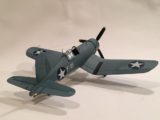
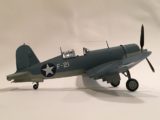
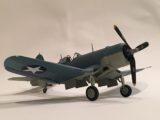
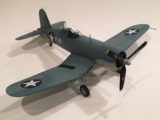
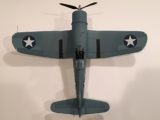
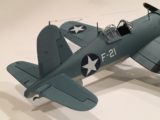
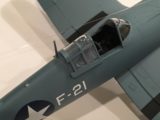
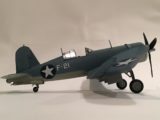
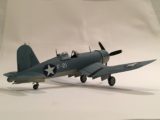
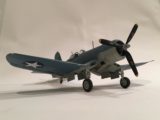
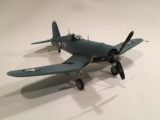
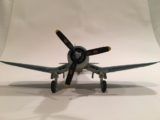
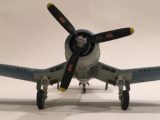
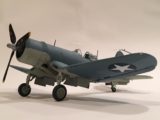
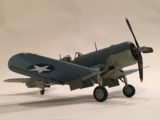
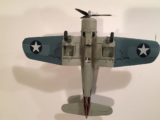
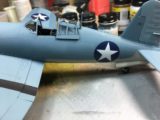
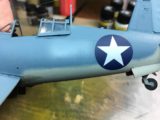
(Revised) 1/48 Hobby Boss F4U-1 “Early” Corsair, Great Lakes recovery Bureau Number 02465 “F-21”
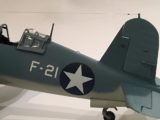
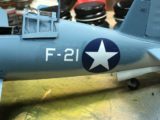
Tonight I revised the article on my latest build, a Hobby Boss F4U-1 "early", which is hot off the work bench. The revision is due in part by observations and information from our fellow Imodeler members, namely my friends and fellow "Corsair buffs" Chuck Villanueva and Jim Sullivan. I also reworded how the article was written and posted some new photos showing the plane with the fuselage markings "F-21" in white, where they were black in my original posting... Photos of the repainting / replacement of the fuselage markings have also been included and are towards the end of the photos.
In addition, I re worked the antennae lead in cable wire using clear stretched sprue. By following these suggestions, I ended up with a more accurate model which is exactly what I was after.
Thanks guys !
This Hobby Boss kit is one of the three early F4U's that I was building at the same time. These Corsairs were part of my very first post here on Imodeler. I still have the two Tamiya kits to finish. (They don't have too much more to go and they should be done). Please stay tuned for updates on them...
The real Corsair "F-21" was completed by Vought on February 18, 1943. This plane was bureau number 02465. It was the 312th Corsair produced out of 584 "Birdcage" variants, making it one of the very early versions. This plane was accepted by the Navy on March 26, 1943 and was the 333rd Corsair accepted by the US Navy.
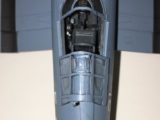
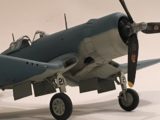
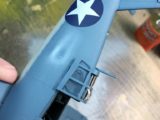
As an early build, it had several features that were changed later on during the production run. If you look close, you will see that this plane does not have a head rest for the pilot. It also has a short tail wheel strut and full circumference cowling cooling flaps. Later they secured the top 3 flaps since these early ones normally leaked oil on the wind screen. (Even later still, Vought changed over to a mechanical / cable linkage to operate the flaps to alleviate the oil leaking.) There is also no stall wedge present on the leading edge of the wing. There would have been a life raft present under the rear fuselage deck just behind the canopy. This one has a larger pneumatic tail wheel, and so on...
F4U-1 Bureau Number 02465 was assigned to the USS Wolverine, used as an advanced training plane for new pilots. These new pilots had to make a series of aircraft carrier take offs and landings to qualify. It crashed into Lake Michigan on one of these flights, on June 12, 1943.
The pilot on this flight was Ensign Carl Herald Johnson. He survived this crash and was rescued. But sadly his life was cut short 5 1/2 months later. He was on another training flight, this time over Hawaii, while flying a F6F Hellcat. He had a mid air collision with another F6F and was killed on November 25th, 1943.
The real "F-21" is currently being restored at the Pensacola Naval Air Museum.
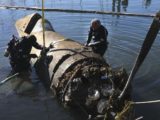
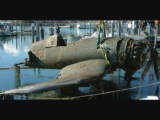
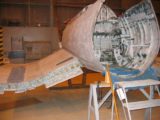
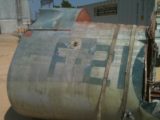
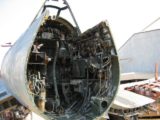
This is my take on how this early "Dash -1 Birdcage" Corsair may possibly have looked shortly before it's crash into Lake Michigan. I included photos showing the plane after it had been raised from Lake Michigan.
Many people don't realize this, but the very early build Corsairs had under wing mounted bomb racks. The racks held 100 pound bombs. They were present from the very first builds up until the 575th Vought Corsair built. The first 1247 Goodyear produced Corsairs had them too. That means this Corsair that I have modeled should have had the bomb racks when it rolled off the assembly line on February 18th, 1943.
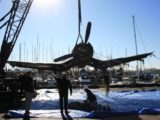
However, my understanding is that these racks were removable. If you look at the very last picture I posted, that shows the plane from the front as it was being lifted to dry land, you don't see the bomb racks present. This means that either they were ripped off during the impact with the water, or they simply were not present on the plane at the time of the crash... So I left them off my plane.
I found out some of this information from various books in my Corsair library. The rest came from the internet, including the last few photos showing the plane as it was being lifted ashore. One of the latest books I used that contains a wealth of information is the first in a two part series by Dana Bell, called "Aircraft Pictorial #7, F4U-1 Corsair Volume 1". I highly recommend this book if you're diehard F4U fan like me.
This plane, like many others during it's time had a short life... about 3 1/2 months to be exact. This is why I didn't go crazy with weathering the finish. I kept things simple and only added exhaust stains. I also sprayed a lighter "Blue Gray" color where the fabric covering was present on the real plane. These areas were doped and not painted with enamels. Because of this, the colors didn't quite match on the real planes. I mixed up Salmon color and sprayed it inside the rear tail wheel area of the fuselage, and ahead of the main wing spar where the landing gear strut goes. I also used RLM 70 to duplicate the "Dull Dark Green" found throughout the cockpit. You can see traces of these colors in the photos I provided of the real plane after it was recovered. Model Master enamels were used throughout the build.
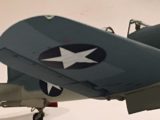
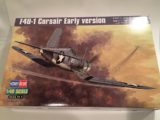
This is the Hobby Boss kit number 80381. The decals used are a combination of the kit decals, "Yellow Wings" decal sheet #48-024 "USN 1932-42 Standard 12" Numbers and Squadron Designators in White", and my spares box for the #21 decals located on the main landing gear front doors.
The HB Corsair goes together nicely, and has separate control surfaces, but there are a few spots to look out for during construction.
The engine exhaust pipes are one area that is complicated . They are copied like the real ones, but they look a little small in diameter to me. They are a little tricky to assemble. Even so, they look really nice once installed. The engine is a small kit in itself and looks very convincing. I'm sure that you could really go to town super detailing it if you wanted too.
There were a few small areas on the under side of the wing tips and top center of the fuselage seam that required a little filler. I used CA glue on mine. It didn't take much and could have been due to my construction.
The tail wheel assembly is very nice looking, but it also has a lot of small parts. Take your time with this assembly. You will have a nice looking bent wing bird once your done. I think there were a little over 200 parts in this one.
It's a nice kit, and I bought a few more since I liked how this one went together for me. I plan on doing an early FAA Corsair I since this one has full circumference cooling flaps like the early FAA birds did.
The Tamiya Corsair kit fits better and is easier to build. This HB Corsair is more detailed, and has a higher parts count. There are several small differences noticeable if you place the two kits side by side. These areas are mainly with the cowling diameter opening, positioning of the engine and main wheels. Plus the HB Corsair has the wide bladed "Combat" propeller that was used a little later on and was often retro fitted in the field on many earlier F4U's.
In the long run I'm very happy how this one turned out. I built it out of the box and only added stretched clear sprue and an antennae cable.
As always, comments are encouraged. Enjoy !


Very nice tribute
Thanks George. I'm glad you liked the story.
Beautiful work, Louis...really nice job. Entertaining backstory as well.
Thanks Craig. I appreciate the compliments.
Well done Louis, I can see how the question in what color the side numbers are. The RH side out of the lake are white, but later on a view on the LH side are black, interesting.
I found that very interesting as well. The only thing that I could think of is that this plane "May" have been painted just the opposite of the directive. The white lettering may have been applied over the black. The white could have then been mostly washed away when the aircraft was cleaned after it was raised from the deep. This is the only logical explanation I can come up with. Stranger things have happened I'm sure. I appreciate the compliment my friend.
Hey Chuck. I just replaced the black lettering with white on the markings located on the sides of the fuselage. I think this makes more sense now. Thanks again bud.
Excellent work, you did good, sometimes after a project is completed we leave it as it is even when we are made aware of an error or misinformation on a particular marking. Sometimes when we or lets say I, end up ruining it. You nailed it
Thanks again for the input. I was worried that I would mess it up when I was spraying over the black markings. I was lucky that it came out as nice as it did. I appreciate the compliments friend.
Beautiful Corsair, Louis !
The two tone camo scheme looks great on a F4U.
Well done !
Thank you Bernd. I have always liked the Corsair. It's my favorite aircraft of all time. There are a lot of color and marking choices as far as painting schemes to choose from. I'm glad you liked the article my friend.
Louis, you are not only a talent in modelling but also your articles a always a very good read.
You should write books !
Thanks Bernd. I'm glad you enjoyed the changes with the article. Ironically as a kid when I was in school I didn't care too much about writing. Now I enjoy it. Funny how life changes things around sometimes.
I like the subtle paint-fading, very convincing. I think the arguments regarding detail colouring will go on for ever!
Thanks George. I tried to duplicate the fading by adding a small amount of white into the base color until it looked good to me. Then I was hoping that it dried in the same shade... Luckily this plane has been well documented by others who have been kind enough to post these photos on line. I did a lot of research trying to find pictures of this plane and then made an educated guess as to how it may have looked. I agree the color debate will probably never end, but this one is close enough for me.
Someday I plan on making a trip to the Museum and will hopefully get to see this plane in person. That's on my "bucket list". Thanks again for the compliments.
Awesome build! I have always liked the Corsair, I think it is one of the most beautiful planes built. It was the first airplane model I built when I was a kid. It goes without saying that that build was no where near the quality of yours. 🙂 Great work!
Thank you Darren. I appreciate the compliments. The F4U is my favorite plane.
My first model was a Revell 1/32 P-40 in "Flying Tiger" markings. My first model doesn't exist anymore, and it wasn't something nice to look at. I didn't paint anything, and broke the parts off the trees instead of cutting them away. Gaps ? Who cares about gaps... Lets build this thing so we can play with it pretending to be a pilot.
Thanks again and welcome aboard.
Really nice Louis,good article as well.
I'm happy that you enjoyed the model and article Tom. Thanks for the compliments my friend.
Great looking Corsair - one of my favorite subjects as well. Nicely done finish in this one!
Thanks buddy. I really didn't want to go too far with weathering the finish on this one because the real plane only lasted 3 1/2 months after it was built. Sounds like we have similar tastes in aircraft! Thanks again friend for the compliments.
Nicely done Louis, I think you nailed it. Let me add my voice to those who have expressed a special appreciation of the Corsair. It's my all-time favorite too. As for the fuselage lettering I think white is correct. To me the side that appears somewhat black results from the original blue-gray paint that was preserved under the white lettering. All that remained of the white are the few visible streaks that were not washed off or faded out.
Thanks Jim for the input. That's a very good possibility that the lettering was white. Now you have me thinking that the markings were never repainted in black since the plane was lost mid year. The directive may not have came down through proper channels from the Navy, or the ground crews may not have had time to repaint the markings in black. Hmmmmmm, now I'll go see if I have "F-21" in white... Thanks again friend.
Guess what? The decal dungeon came to the rescue. I'll be changing the colors of the markings on the fuselage side to white as you suggested. Thanks again for the input !
An excellent build, How bout a companion build as it came out of the water.
You know that's an excellent idea, but I think it's way out of my league to even attempt something that complicated. Thanks again buddy for the compliments and the idea. Maybe your post will inspire someone with greater skills than I.
It would make for a great diorama for sure.
Thanks again everyone for the comments. I just re worded the story line to make it flow a little easier and hopefully make it a better read for you. I also changed out a lot of the pictures to show the new "White F-21" markings and more correct antenna lead in cable. I really appreciate the help with making this a more accurate depiction of the real plane, which is exactly what I was after.
Thanks again, and I hope you enjoy the "New" article and photos.
Louis
Looks like the revisit paid off nicely.
Thanks Rob.
Hello Louis,
In the first place many thanks for the history that accompanied this F-4U.
The model two tone camouflage looks splendid.
Regards,
Dirk The Netherlands.
I'm very happy to hear that you enjoyed the article as well as the model. I try to make them both interesting when I can. Thanks for the compliments too Sir ! Take care my friend.
Louis
For years modelers where painting the wheel wells on early model Corsairs with a salmon colored primer on their kits. Naming books and authors who based their theory on the memory of retired Vought employees watching completed aircraft leave the factory. Then Bureau Number 02465 “F-21” gets raised up out of the lake and puts that theory to wrest. One could still speculate that some of the first machines...well we now know from F-21 on the wheel wells are white.
Nice build and history lesson Louis.
Thanks Steve. Over the years, (and before the internet) I have built many F4U's and some of them were built with interior green wheel wells. Now I have learned that this is wrong on "some" of my planes. Eventually I may go back and revisit them as I have this one with the marking change from black to white. I think we are fortunate that discoveries such as this early Corsair are great for our hobby. My hat's off to those who were kind enough to post their findings online as well. I used a lot of reference photos when I built this one. I wanted to build the most accurate Corsair for my collection to date. In the end I'm very pleased with how it came out. Thanks again for the compliments and I'm happy to hear you enjoyed the article as well.
I looked at your build articles a little while ago and I really like the B-25. I had a distant relative who was a top turret gunner in a B-25 and he flew with the 345th Bomb Group over Italy, which is the same unit as your "Solid Jackson" plane. Unfortunately he was shot down and didn't survive the crash. His plane took a direct hit from an 88 MM and burned all the way down. There were no survivors in the crew. Some day I plan on building a few B-25's that he actually flew in. There are several decal sheets out from the B-25's on Corsica. He flew several missions in "Stuff" and the "Blonde Beauty", both of which have decal sheets available now.
Thank you, for taking the time to look at that kit. I've learned (like you) that many crews where not really assigned to one plane.But, rather where given what ever was available for the mission i.e. it was serviceable and it working order . I've seen folks model Joseph's Heller bomber but, really these guy's flew on several missions in one particular plane and then jump over to several other aircraft. The folks who where assigned to the a/c where the ground crew and mechanics. The Monogram kit is reasonable starting point with typical monogram issues. I'm big fan of the B-25 I haven't met a Monogram kit I didn't like. The kit is a big enough canvas for that now art too.
that's "nose art". My editors fat fingers did it again.
That Corsair look great. I recently bought one hobbyboss F4U-1 BIRDCAGE...do you have any tips or areas to be beware?
Regards