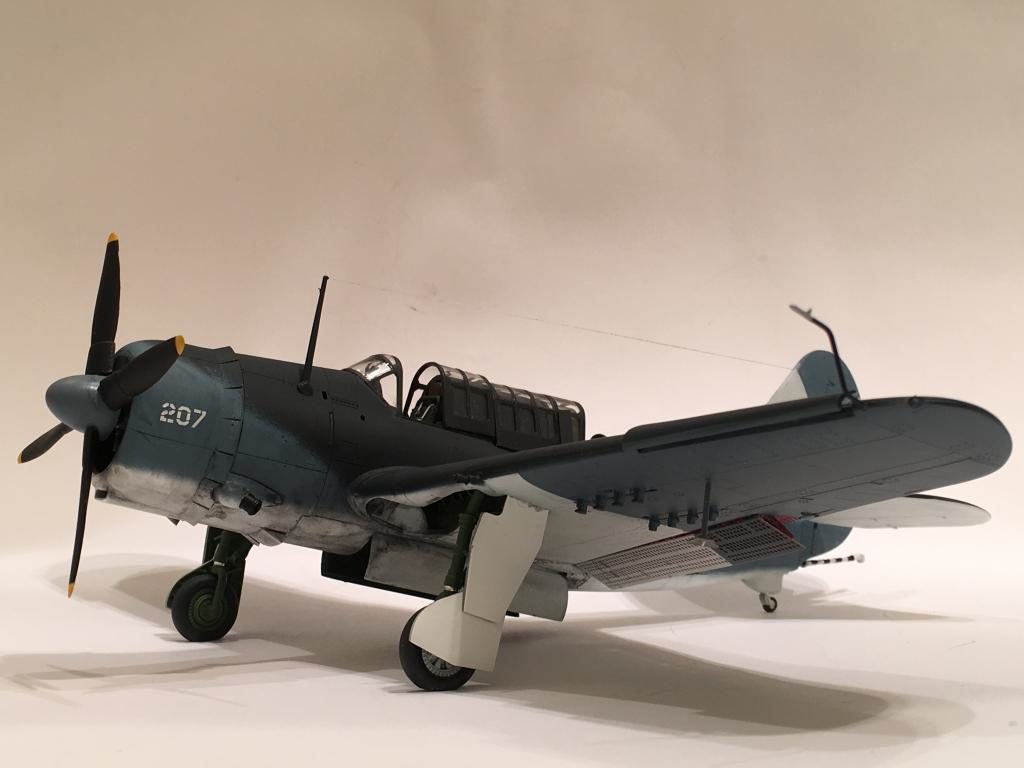
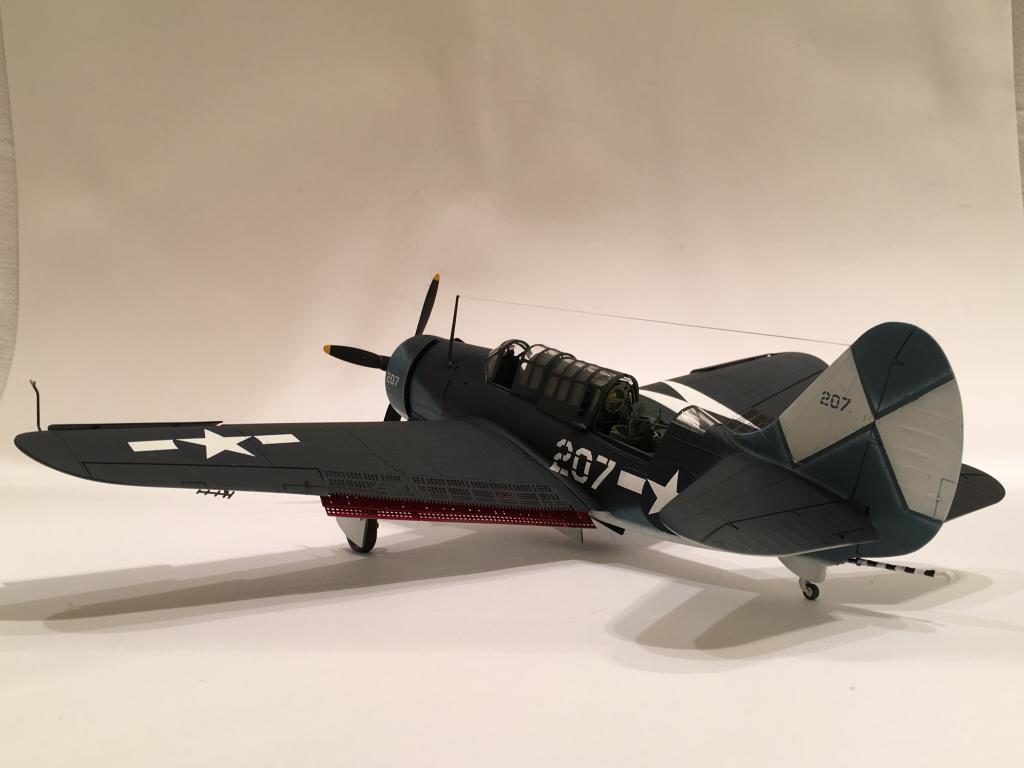
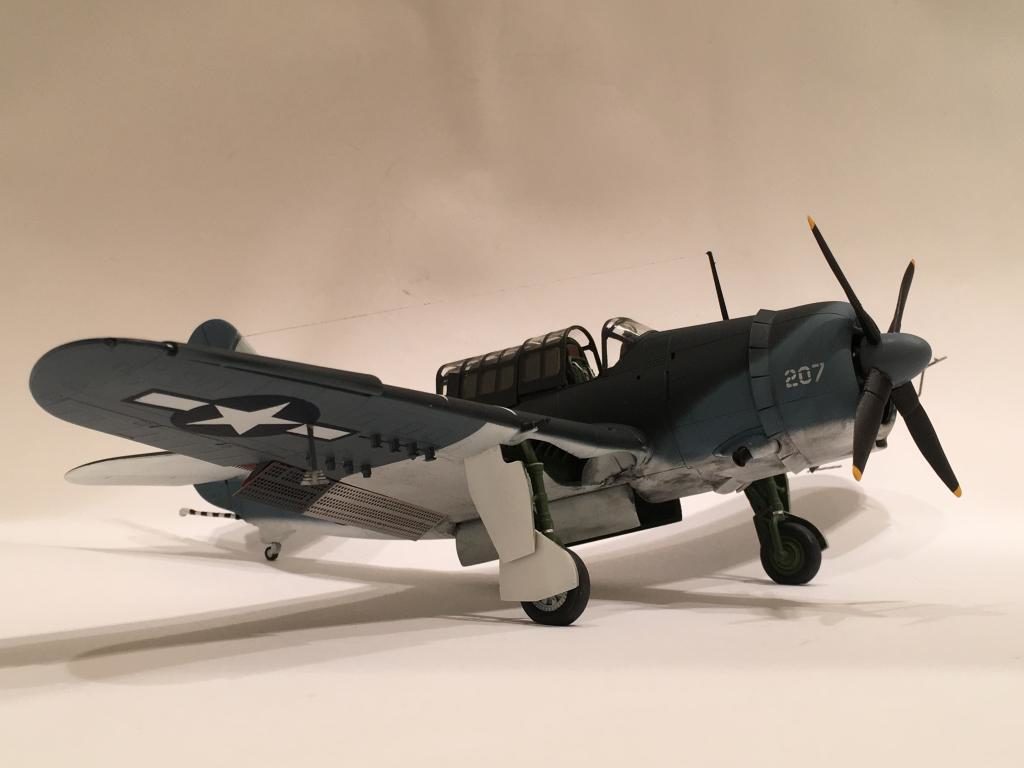
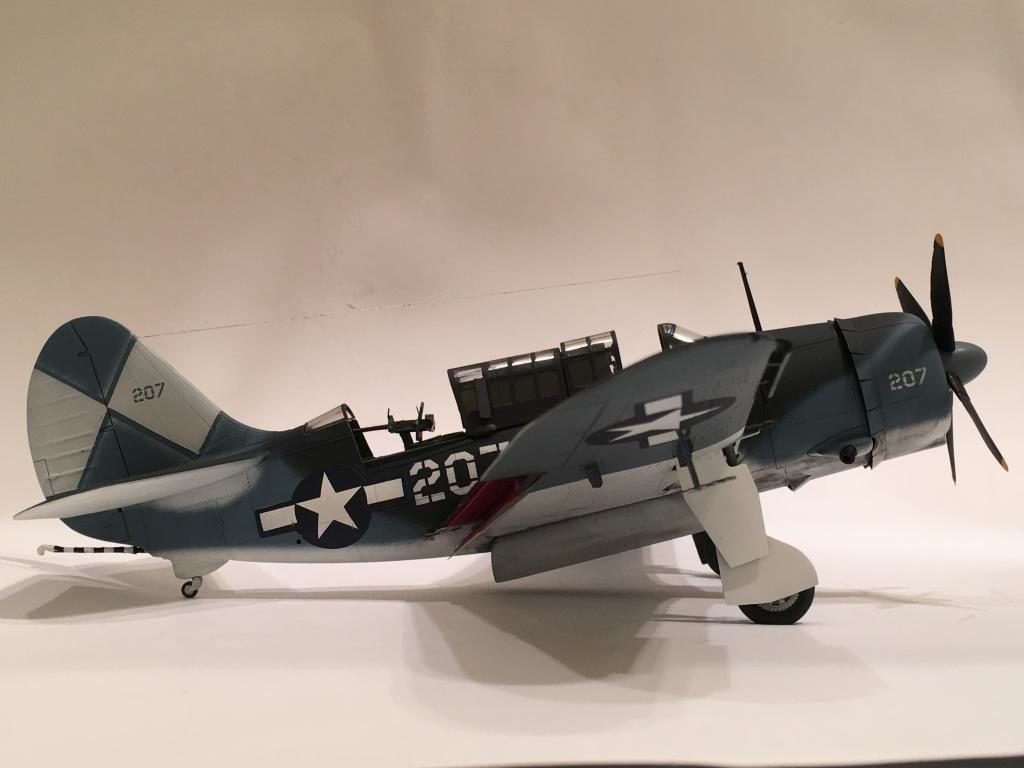
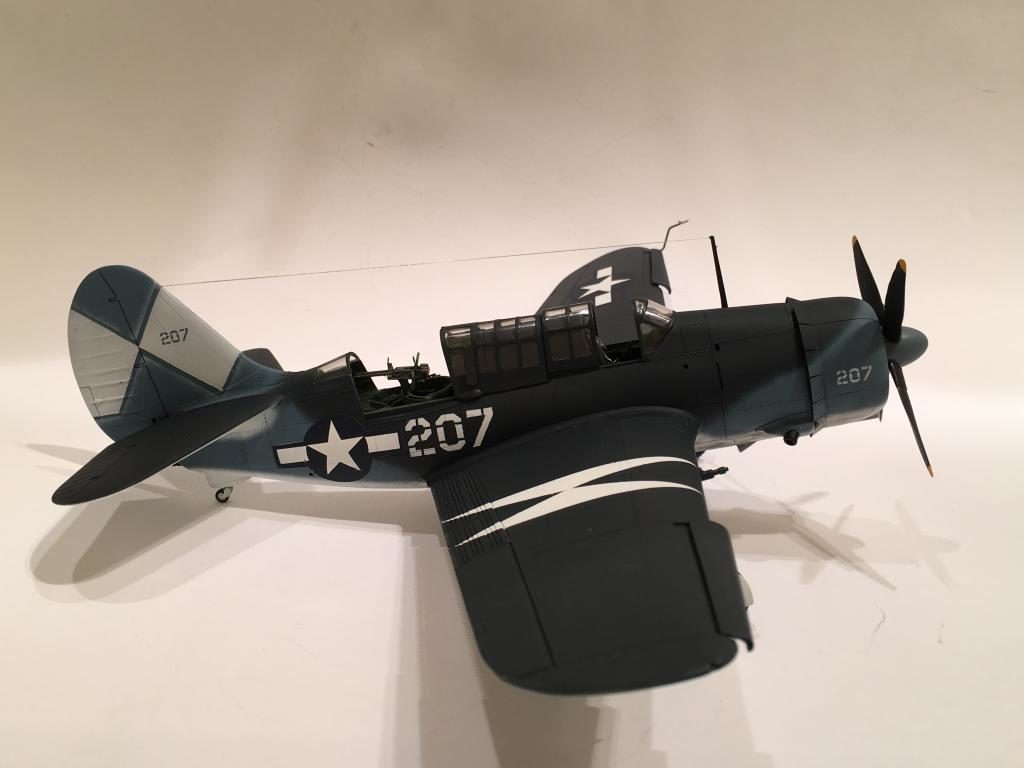
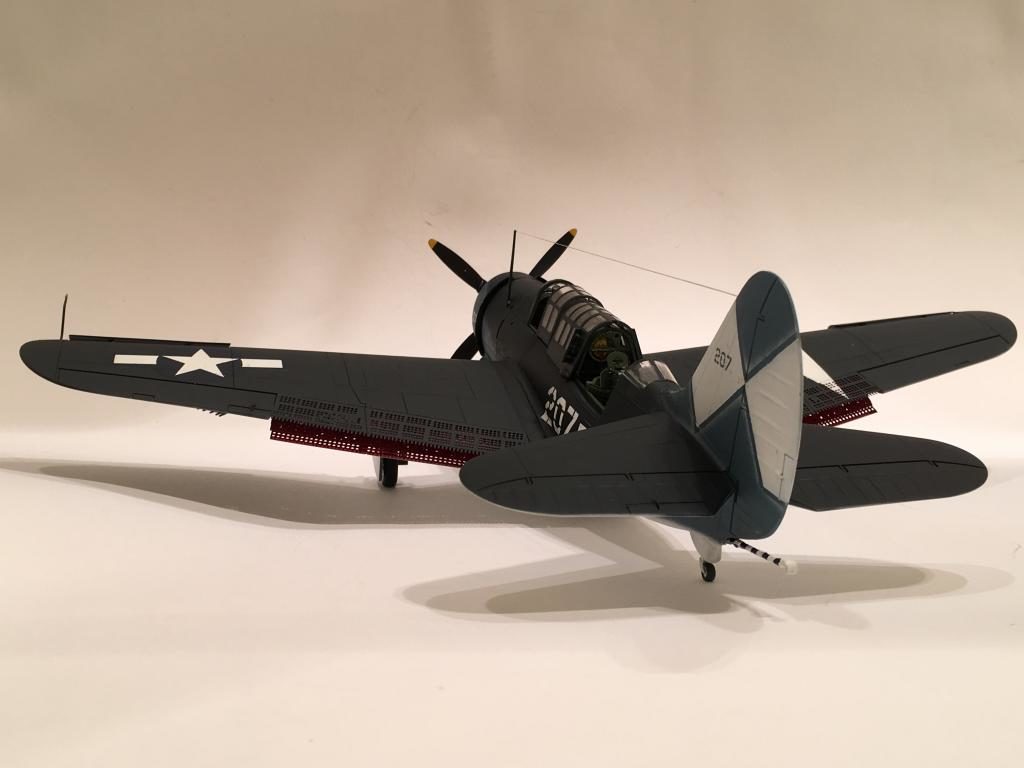
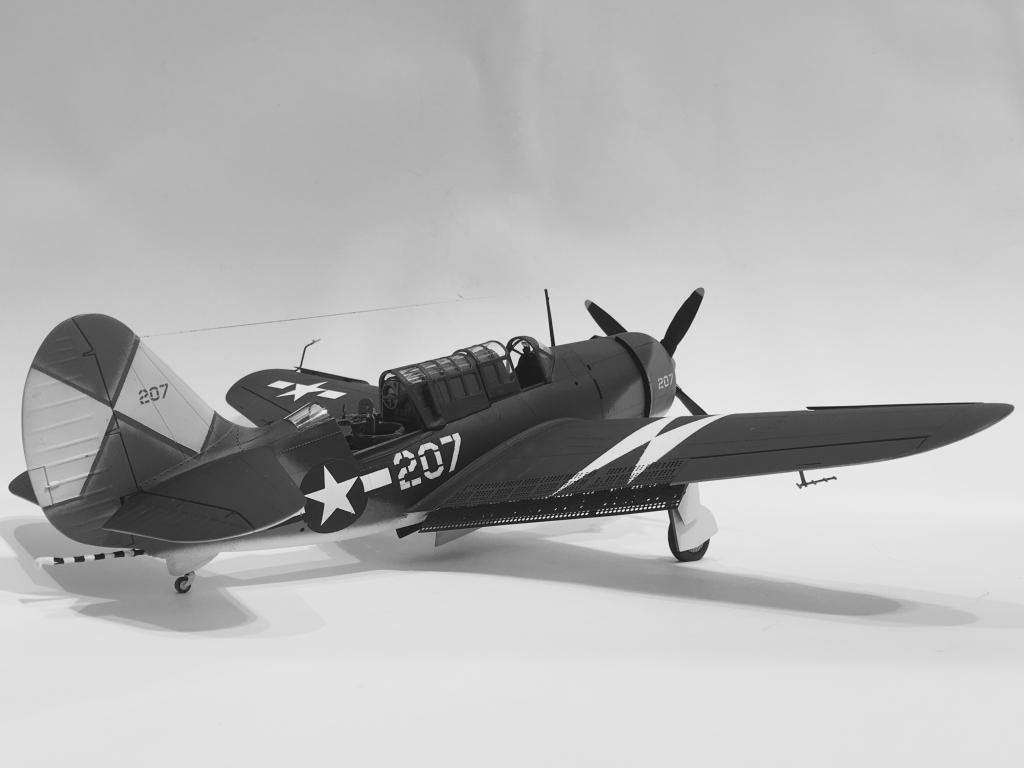
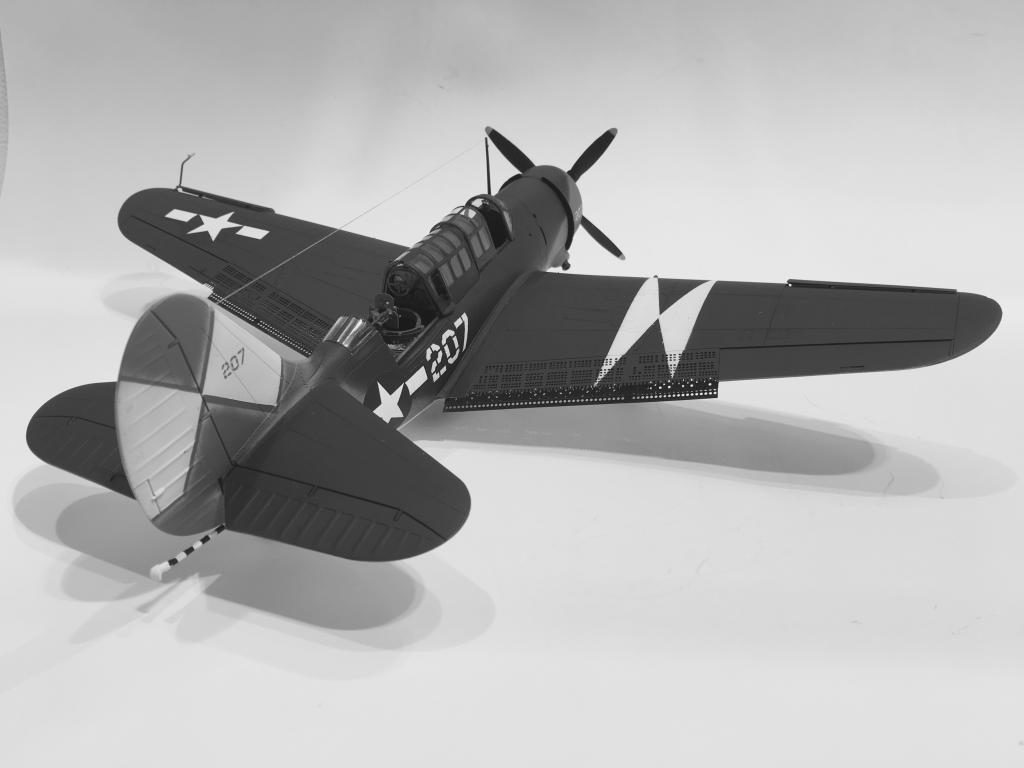
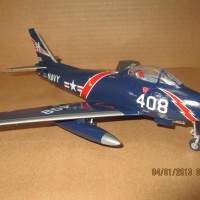
1/48 Pro Modeler SB2C-4 Curtiss Helldiver VB-83, USS Essex, April 1945
This one is hot off the work bench. It's number two for the year, but I started it last year. I literally just finished it less than an hour or so ago...
I have been posting updates with the build progress here on Imodeler. I would like to thank those who responded during the process.
Check it out if you get the chance. Thanks in advance !
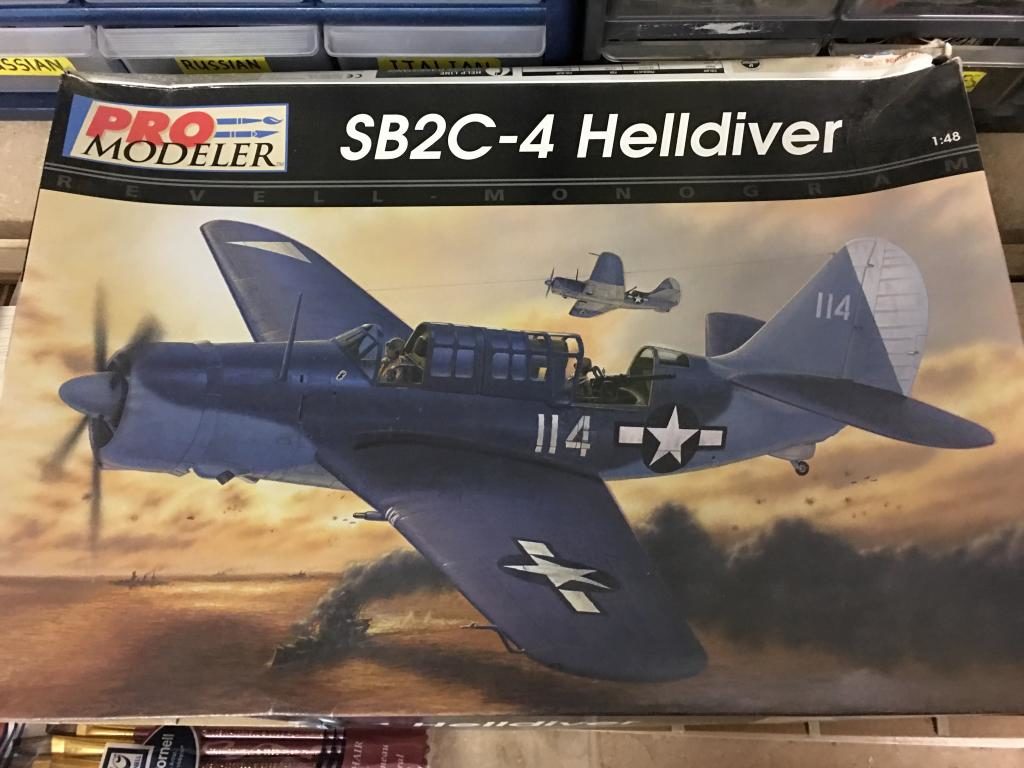
This kit has been on my shelf of doom for years. I don't know why, but I never got around to building it. It really is a nice kit.
Before I started the project I did a lot of online research for building tips, etc.
That's when I ran across a very informative article that was written by Tom Cleaver. He suggested gluing the wings onto the fuselage before gluing the fuselage halves together. I followed his advice and there were no gaps to worry about at the wing to fuselage joint. Thanks Tom !
Much has been written about the SB2C. One airman that flew in these planes during WW2 was quoted as saying this about the plane: "It has one more hydraulic fitting, and three less engines than a B-17 ! ". The plane wasn't very well received by air crews at first. It had a lot of very bad nick names... You can guess what two words start off with "SB". Now add in the words "Second Class" to the SB words. It was sometimes called the "Beast", etc. You get the idea...
I had the opportunity to meet and become friends with two WW2 SB2C pilots about 10 years ago or so. One pilot started out in SBD Dauntless dive bombers, and wasn't too ecstatic with the Curtiss plane after flying the Douglas plane. One good thing he liked about the SB2C was the 20 MM wing cannons. He told me that he used them to line up his plane during the dive bombing run. He would fire the cannons and watch the arc of the tracers. If the tracer rounds were going in straight, so was he, as he put it. He was the father of one of my wife's co-workers at the US Post Office. He was kind enough to share with me a huge stack of original WW2 B & W photos that he took during his Naval career as a pilot during the War. I have quite a nice collection of pictures of Dauntless and Helldiver photos now thanks to him. (I've never seen any of them on line). His flying career ended when he crashed his SB2C and his gunner was killed. He never flew again after that. He was a very humble quiet man.
The other pilot I met participated in the attack on the Japanese Battleship "Yamato". This Helldiver "Driver" told me that the last time he saw the Yamato it was smoking badly and listing... as he was heading home with a few holes in his plane. He also told me that he was younger than former fellow Naval Aviator President George H. W. Bush by two weeks, thus making him the youngest Naval Aviator... I haven't verified it, but I don't think it's a false statement. He still flies a biplane today to the best of my knowledge.
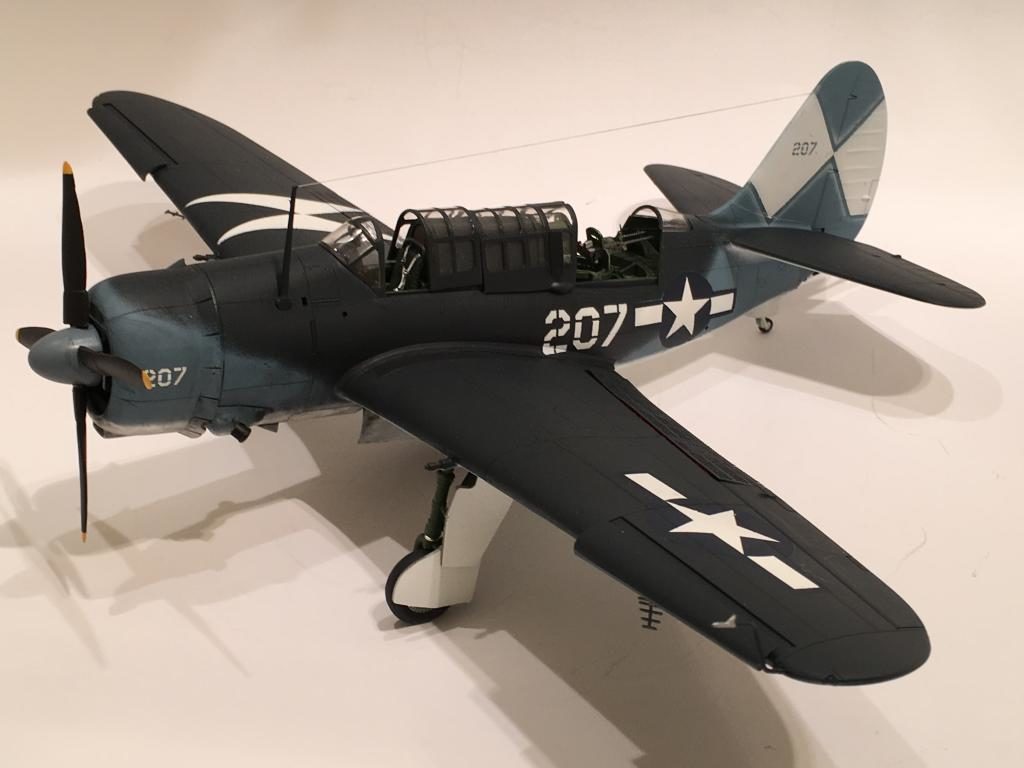
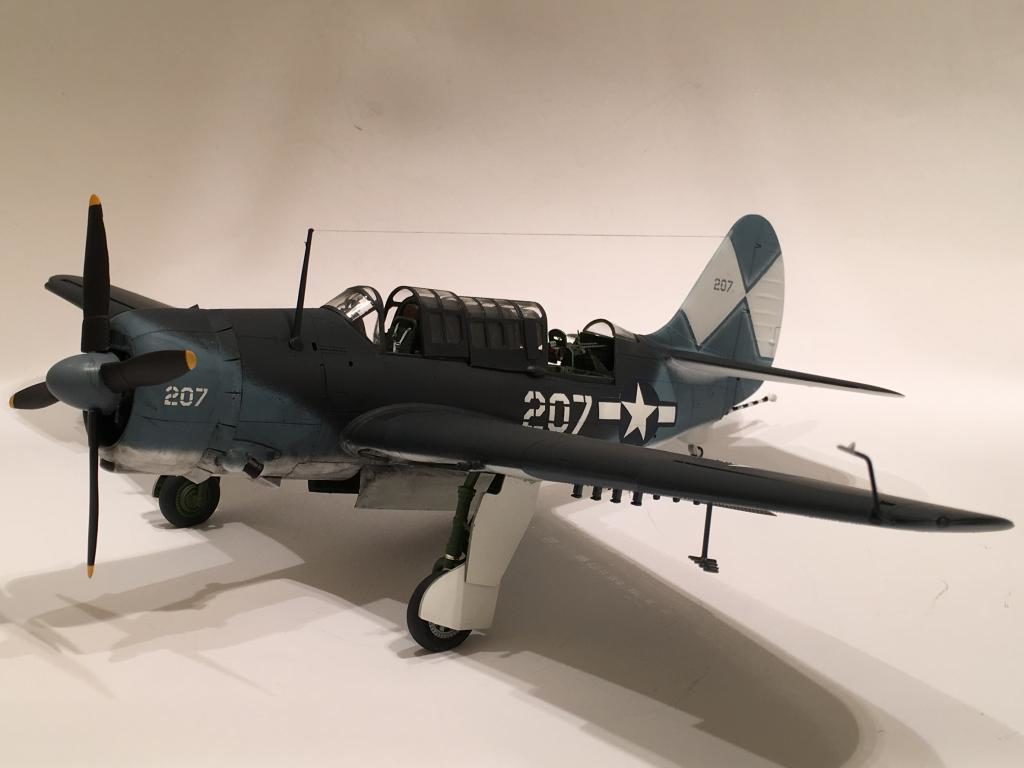
Since this kit was so old, and the kit decals had yellowed considerably, I decided that I wouldn't even try to use the original decals. So I found a masking set that was appropriate. This was my first time using spray masks. They really saved me a lot of time with the canopy.
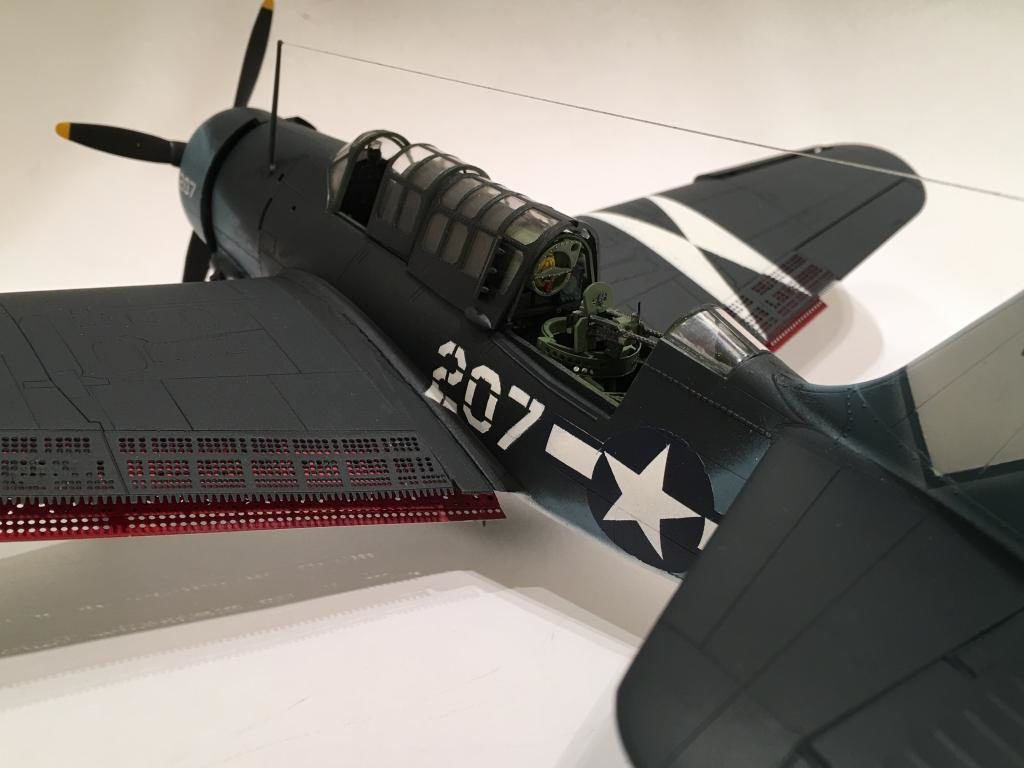
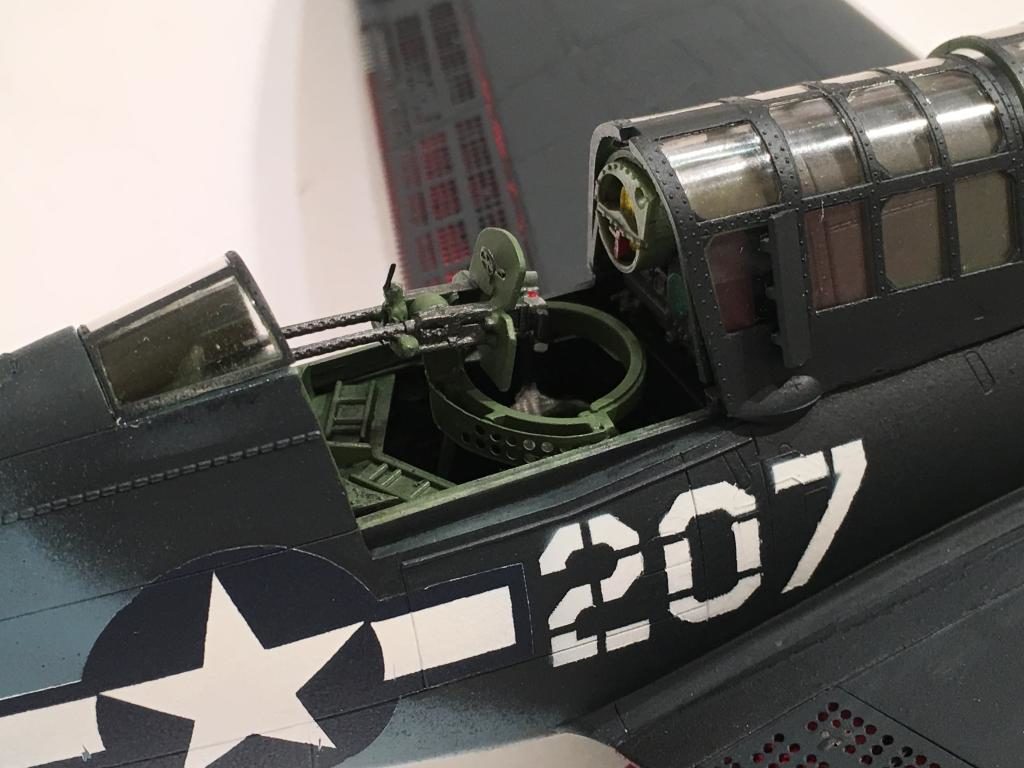
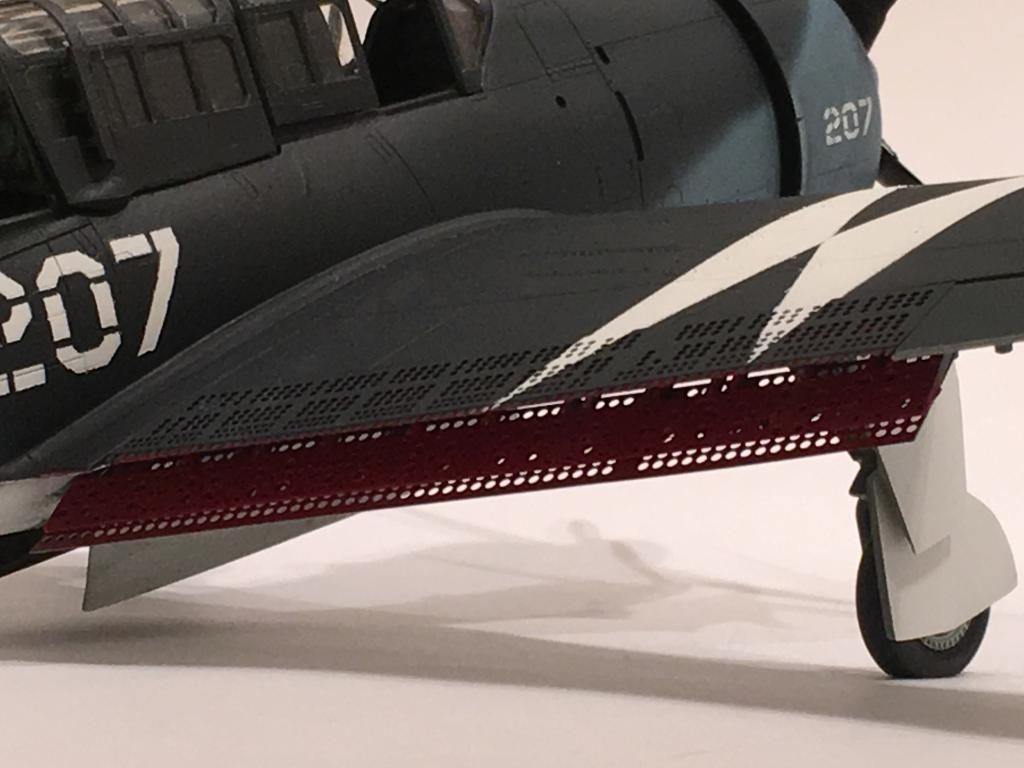
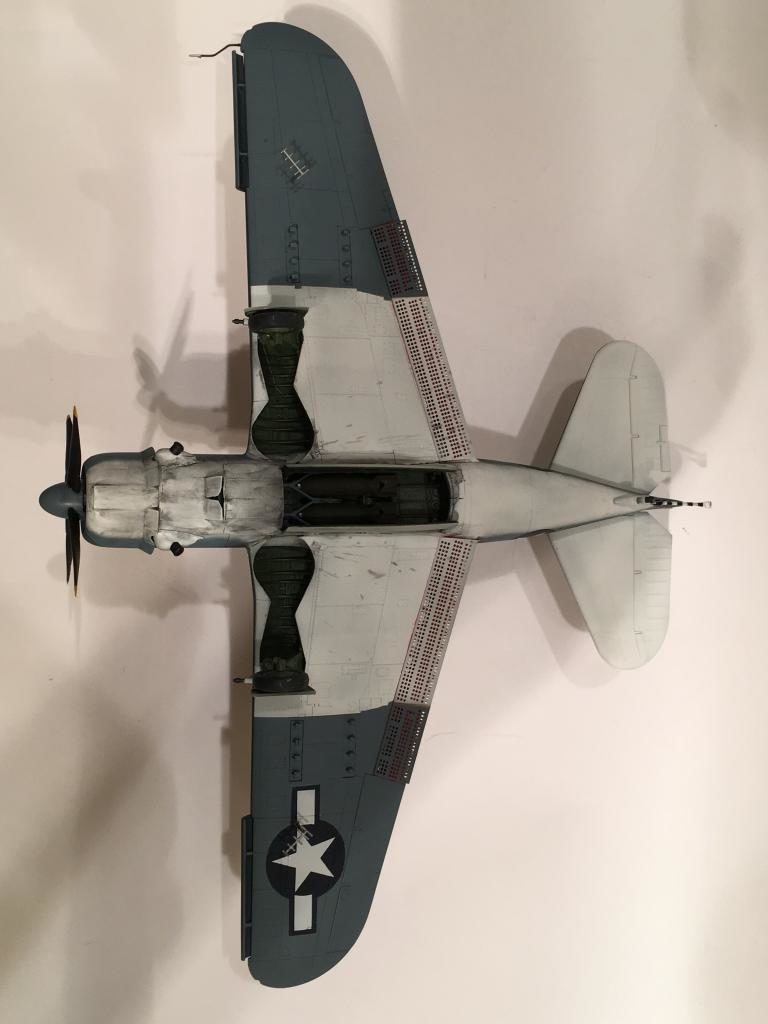
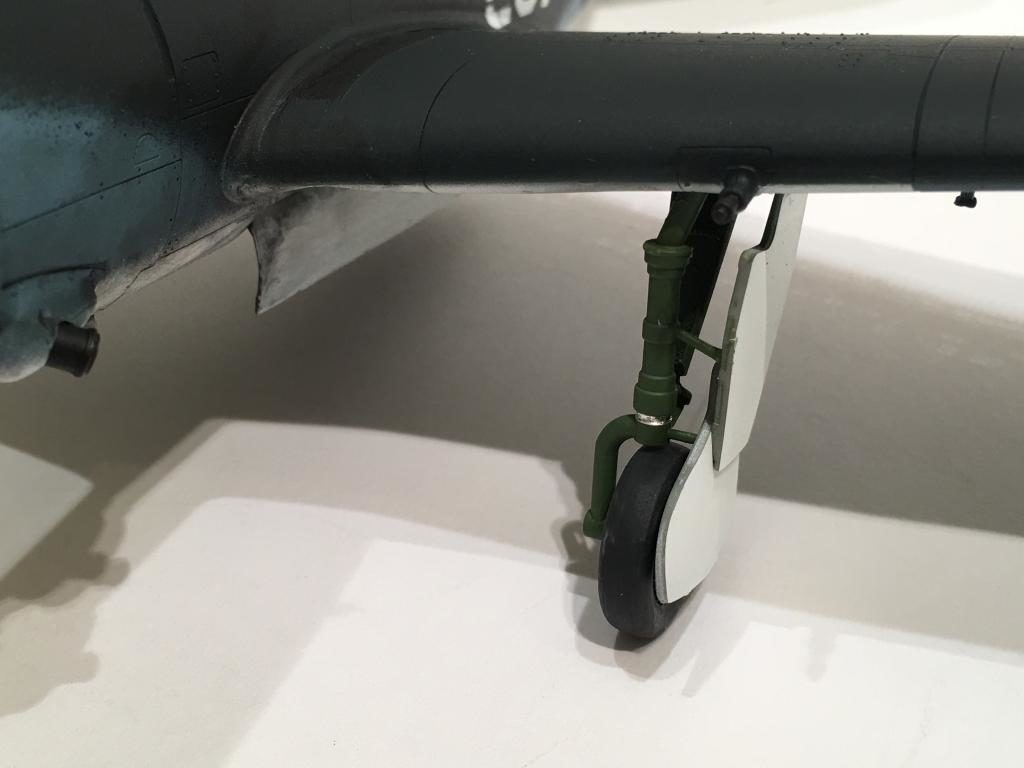
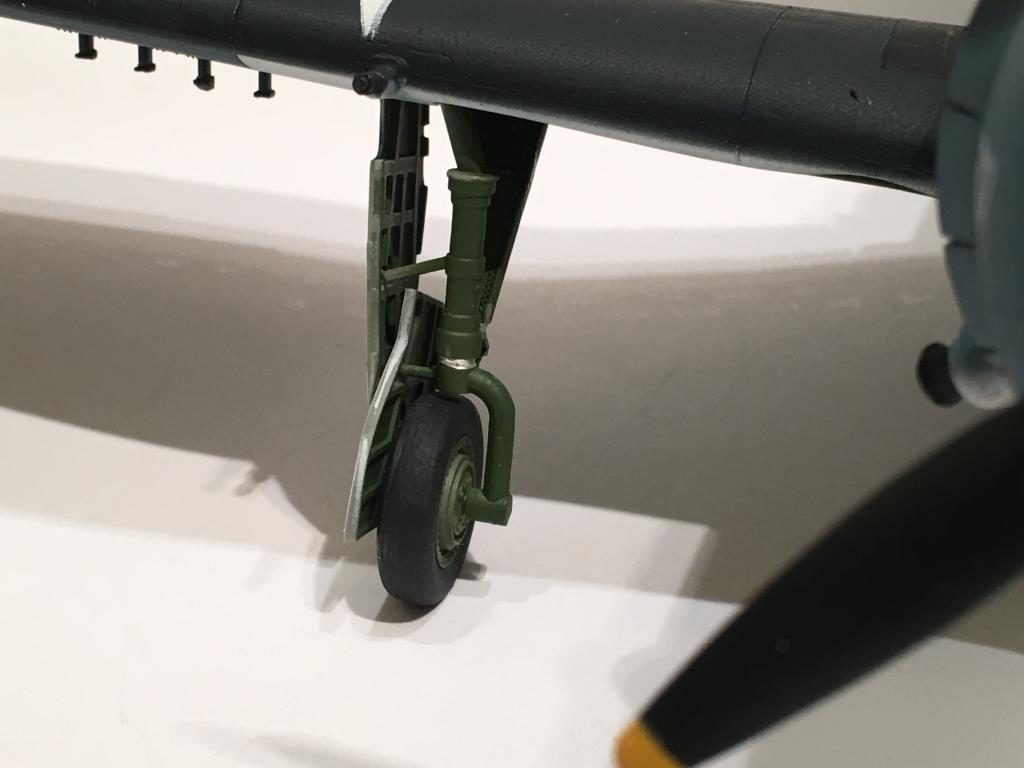
I decided early on that I would drop the flaps, since they are such a prominent feature on this plane. I also drilled out ALL of the tiny holes... I used "Ultra Bright Chrome" bare metal foil on the landing gear oleo struts, and cloth medical tape for the rear seat belt. I wish that I had thought of this idea earlier so that the front seat belts would match. Ooops.
There is a lot more information on the build process over on the build thread.
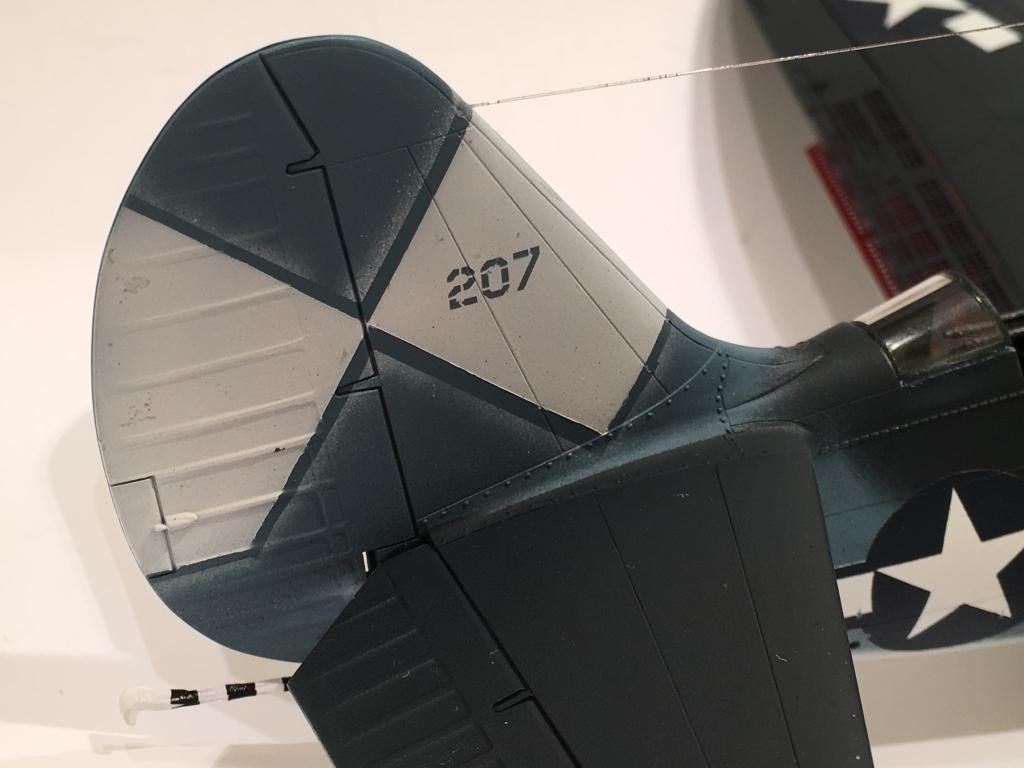
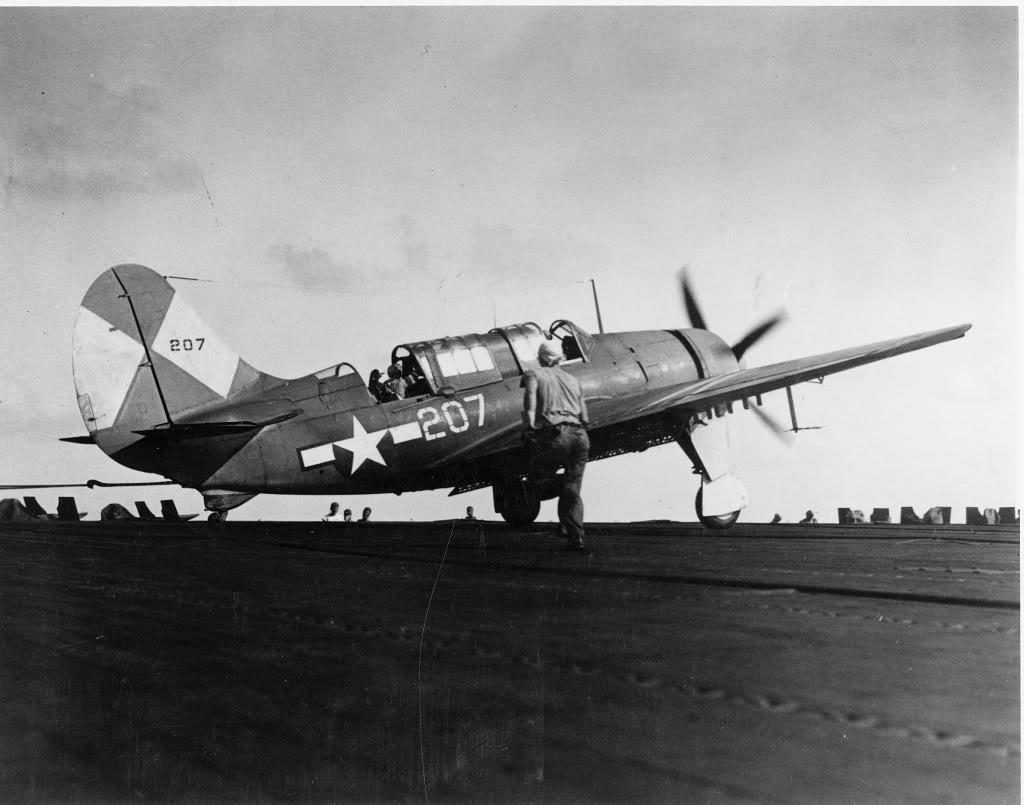
Several of the last pictures I included show the original VB-83 plane from the USS Essex that I modeled mine after. I also added a few pictures near the end that I edited to make them look more like the black and white original pictures.
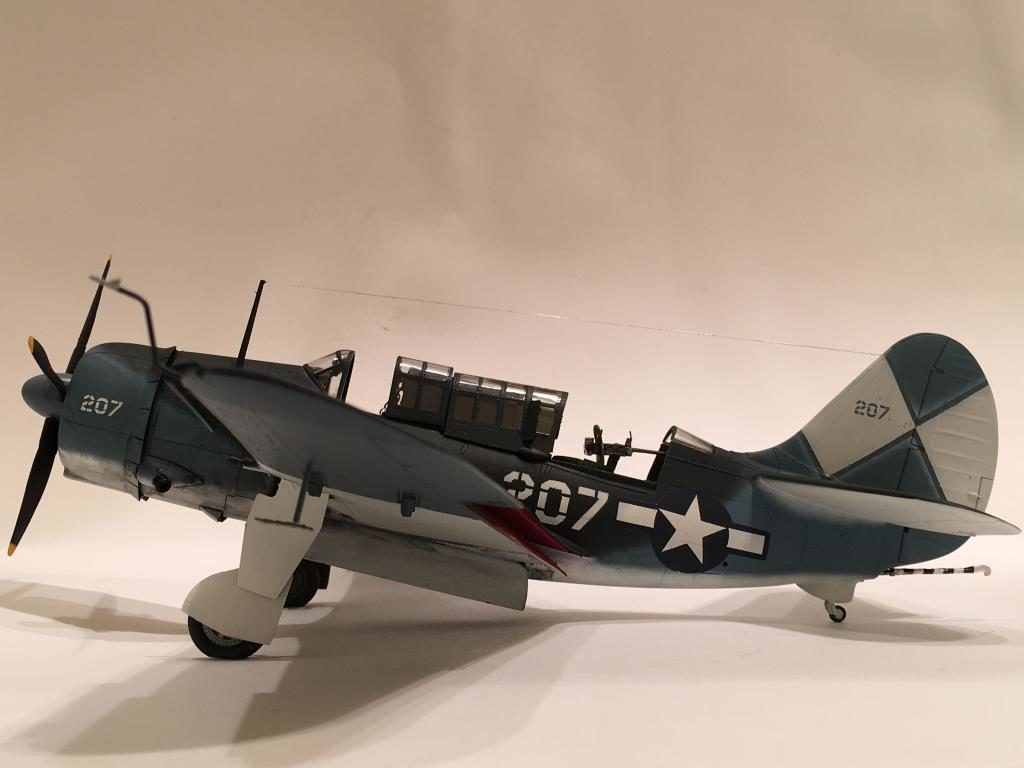
This plane doesn't appear to be too beat up. Because of this, I didn't weather the model too much. Basically all I did was add some oil stains and streaks. One thing I did notice was the overspray on the real plane by the Geodetic Markings on the rudder / fin assembly. I tried to replicate this look with my model. I also tried to place the markings in the exact location as per the real one. I think I got it pretty close... Check out the Yagi antenna and how it aligns with the lower starboard wing insignia. Close enough for me.
Overall it was a very enjoyable build.
As usual, comment are encouraged. Thanks again.


Nice build!
Thanks PK ! I'm glad you liked it my friend.
Wonderfully built and finished, Louis...much, much better than the two I did.
Thanks Craig. I appreciate the compliments. I have looked at some of your articles posted on here. You build some great models ! I wouldn't claim that mine are any better than yours. Thanks again buddy.
Very nice.
Thanks Paul !
I've got the same yesterday, a second-hand kit ! Thank you for story and explanations !
I'm glad you enjoyed the article on this build. I try to add a personal touch by including information on the men who flew these planes. Thanks again!
Build your plane. It's a great model. You will be pleased with the end results.
Beautiful!
Thanks my friend.
Beautiful model, excellent presentation of photos.
Thank you Dmitry.
Once again excellent build Louis, great story and background on your research. I started one of these and it was fun to build. But I never finished it. Long story, I did get another one that I will build, probably won't get to it this year however, you never know. Well done, Fly Navy.
Thanks buddy. For me the research is part of the fun. It allows me to try and replicate a more realistic model.
The facts about the planes and men who flew them are a big bonus for me. I'm an avid history buff, mainly from the American Revolution War to modern times, with a special focus on Aviation. I have two more of these to build. I have wing fold kits for both but I'm probably going to only use one of them. I want to build one in the Gull Gray / White Atlantic theme and another one in overall Gloss Sea Blue. I really think that the Helldiver would look great in these color schemes. Go for it and get cranking on yours. I would build another one soon but I want to finish up all of the remaining projects I have started first.
I also need to get going on the Imodeler award kit I recently received. It's the new 1/48 Airfix Bolton Paul Defiant.
This one and the new Tamiya Ki-61 Hien are going to be top priority for me.
Thanks again buddy.
Go Army !
Just teasing you since I'm an Army vet.
Louis I have a Pro-Modeler box that looks exactly like yours.,even slightly crushed as well. That's a nice looking beast and thanks for the info about mounting the wings first, good tip.
Your welcome buddy. I can't take credit for the building tip about gluing the wings on first. That credit needs to go to Tom Cleaver. You're absolutely correct about the model boxes. They are flimsy at best. Mine ended up like this after I stacked a few model boxes on top of it. I built mine because I was afraid that the plastic inside may have warped due to the box condition. Luckily for me the plastic was just fine inside. Go for it and build yours. I would consider a closer inspection of the kit decals. Mine had turned yellow.
This is a more complex looking model than I expected to see, but I only know about the type generally. You've created some very nice touches here. I think it's fair to say the detailing and finishes are the high points of the presentation. Nice!
Thanks for the compliments my friend !
This is a fairly complex build. They packed a lot of details into this kit. I really don't see the need for any resin bits for this one. The kit parts are very well represented. I do wish that there were photo etch flaps in the other re-boxed versions of this model. The numerous perforated holes in the flap surfaces are very prominent and are better represented by photo etch parts. Thanks again for the compliments.
Another first rate build sir! Love the back round info, brings life to the build.
Thanks Bob. I'm happy to see that you enjoyed the read as well as the pictures of the plane. I try to keep my articles interesting with a few bits of information about the subject. Thanks again buddy.
Nice work on this and I am glad to have helped.
GHW Bush's claim to be "youngest Naval aviator" was always "youngest naval aviator in combat at the time."
Thanks for the compliments. Your build articles were spot on. It was very easy to ensure a nice wing fit using your instructions. The only place that I needed to add any filler was along the top of the fuselage spine between the front cockpit and rear seat. This gap was probably due my own doing.
I didn't know about the "in combat at the time " part with President GHW Bush. Good point. Thanks again friend for everything. I don't think that this one would have turned out as nicely without the assistance of your article. Take care.
A nice and concise build Louis. With the weathering down to a minimum, and some nice detailing, she turned out well.
Thanks Simon.
🙂 ... Greetings ... 🙂 :
A very nice and sharp looking build Louis.
The HELLDIVER is one of my favorites, I have a few of the MONOGRAM models still in my moving storage bins and a few still in their unopened box.
This one makes me want to get them out but they are better off in storage.
Thanks #3 ! I really appreciate the compliments. One of the main reasons I built this one was the overall condition of the box. I was afraid that the plastic would twist if I left it in the original kit boxing, considering the horrible condition the box was in. Now I'm glad I did it. It's my first SB2C kit under my belt other than the original early 1960's vintage Monogram kit that I built as a kid. I really liked to play with the old original Monogram Avenger, Helldiver, and Dauntless kits way back then. They had all of the cool stuff. Bombs dropped, propeller turned, wheels retracted, you name it... But they were not very accurate though.
Hey, who wanted accuracy when you could bomb the cat! My favorite story concerns the 1/40 Revell AD-6, which had cogs and things internally so that you could deploy the dive brakes, drop the BIG bomb underneath on centerline, slide the canopy back. The wings folded (manually) and the landing gear retracted.
A friend had one, and it all worked.
One day his Mother was dusting, and the plane flung itself to death!
The Monogram A-6 that shot the bomb out the back was
appealed to me, but I never got one. Just as well, I suppose. Twang! WHAT WAS THAT! Nothing, Mom.
Those were the days...
I always enjoy a nicely, well build "Beast". I really like your touch of overspray on the tail markings. Good work here Louis !
Thanks Terry for the kind words.
The overspray was something I noticed in the pictures of the real plane after studying them for a while. At first I didn't catch this. It took quite a few attempts to get the look I wanted. I still think it may be a little overdone, but if it were any smaller I might not have been able to see it !
Excellent build of this fine kit. Well done !
Thanks Bernd.
Lots of very well deserved comments. I looked back on your past builds and I think this one is up there with the best. I think it looks gutsy and realistic. Brilliant and inspiring - at a time when my time is thin on the ground it makes me want to get building again! Very much looking forward to number 3 for 2017!
Thanks for the encouragement my friend. I just finished looking at your builds too. I'm surprised that I missed the resin biplane. Both are fantastic! I really like planes from the "Yellow Wings" era and you hardly ever see a Martlet built. Both are fine examples. I have never built a resin kit. I have used resin bits but never assembled a complete resin model.
Go for it and build something. You're going to be glad you did.
Number 3 will probably be the AM TBF Avenger or my AMT A-20 Havoc. I've been working on both recently.
Hello Louis,
Enjoyed your article and the finished model.
It looks superb.
Would it be possible to make a page on this site whit some pictures that you got from the WW2 Aviators.
It is always good to see the pictures that are not published yet.
Regards, Dirk/The Netherlands.
Hello Dirk.
I'm pleased that you have enjoyed the article and the plane.
I have been thinking about posting some of the pictures that were shared with me. I have some good stuff in the stack of a B-18 Bolo, and numerous in flight pictures of SBD's and Helldiver's.
Thanks again for the compliments my friend.
Louis, she turned out beautifully, though not an adjective I'd associate with the "Beast". I actually saw a flying(!) -5 at an airshow once, and it looked like its built of bridge girders. I was impressed.
Nice job on the markings overspray, just like the real thing. It ain't always pretty in the combat zone, or regulation.
Thanks Bernard. I have yet to see a Beast in flight. I've seen a lot of different War Birds in the air but never one of these monsters. I'll bet it was a sight (and sound) !
I know on our tanks when I was in the Army, when it came time for painting vehicles, we did it several different ways depending on which unit I was in during the time.
Sometimes we had a NCO with a book and chalk. He would go around and mark the outlines of the camouflage patterns and label the color inside the boundaries.
Other times the chalk lines would be drawn on and not labeled. Yet at other places / times the book wasn't used and the lines were free hand drawn !
Then when it came time for painting these areas were sometimes brushed on, where most of the time it was sprayed. There were even occasions where the chalk lines were not followed, and the "painter" just did his own thing...
Thanks for the compliment bud...
Another great build Louis. Love the markings as well!
Thanks for the compliments Greg. This was my first time using spray masks. I really like the look of painted on markings instead of decals. No silvering to worry about. On the down side, you have to watch how heavy you spray the paint on while using the masks. The paint can bleed under the mask making a big mess... Ask me how I found out... Thanks again buddy !
Great work, as always, Louis, I've really enjoyed reading this posting, and your finished model if well worth a look!
Thanks for the compliments my friend ! I really appreciate that.
When Dad flew "the Beast" he mentioned the nicknames you talk about. Rather colorful! One thing I found interesting is that when he saw the painting guide for the old Monogram 1/48 kit he built, he said that on the SB2Cs that he flew, the underside off-white was painted on the under side of the folding outer wing sections which is UN-like every other reference to them I've seen. Other than the USS Independence (escort, or "jeep" carrier) I don't know what ships he flew from or the units he was in. Your plane is such a joy to see, Pardner! I love the attention to detail you show - including the vertical stabilizer paint overspray. It's also great that there are so many good photos of #207 out there for you to use as reference. Great job! It's a pleasure to see your work, Louis. I wish I knew what you've forgotten! LoL! Us old DATs & CDAT have to stick together.
Wow ! Your Dad flew these ? Very cool ! These veterans call tell you some really neat bits of information from their personal experiences. It would be very cool to find out more about your Dad's military history. I've tried with my Dad, but his records were lost in the St. Louis fire. All I have are his second and fourth DD-214, and a few pictures... very few.
I agree with you. Us "Old" Tankers need to stick together... Now where did I leave the keys for the travel lock ?
Thanks buddy.
Louis, I just caught this build. Honestly, it's one of my favorites of yours. Simply amazing and makes me drool to imagine and hope I might be able to build like this someday. Just gorgeous paint scheme and execution. As bad a rep as the Helldiver had, I love the thing.
Thanks David... Honestly it's one of my favorites too... The paint work and problems with paint adhesion on the photo etch dive brakes about drove me crazy though... But it looks great in the display case now sitting next to the others...