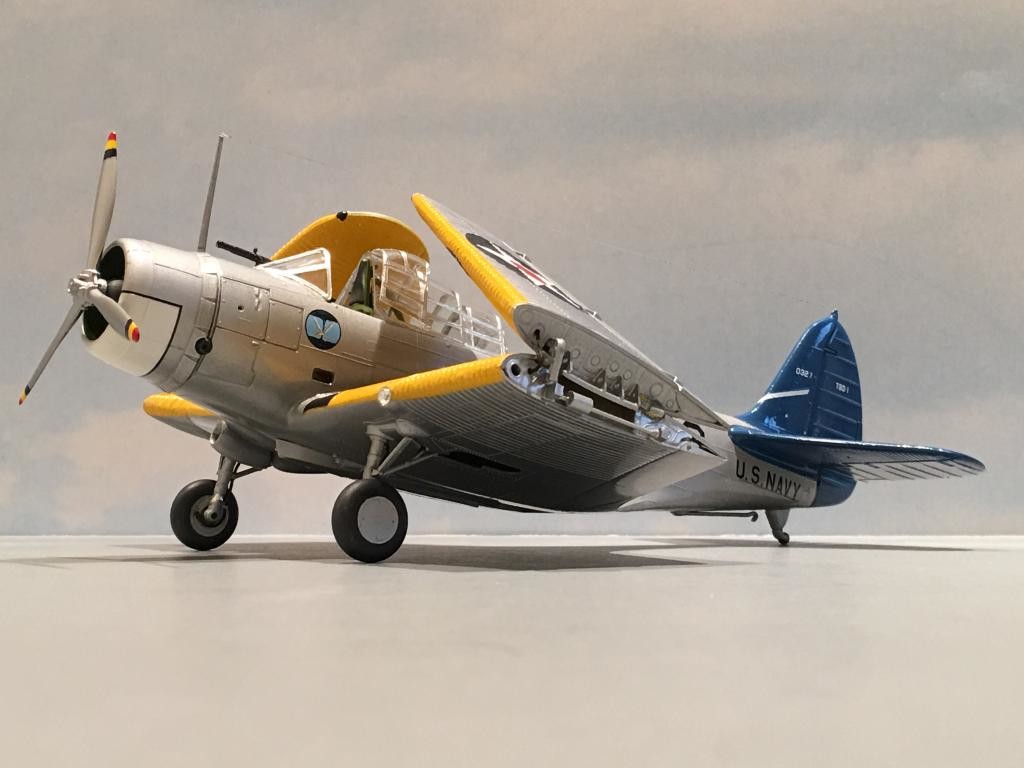
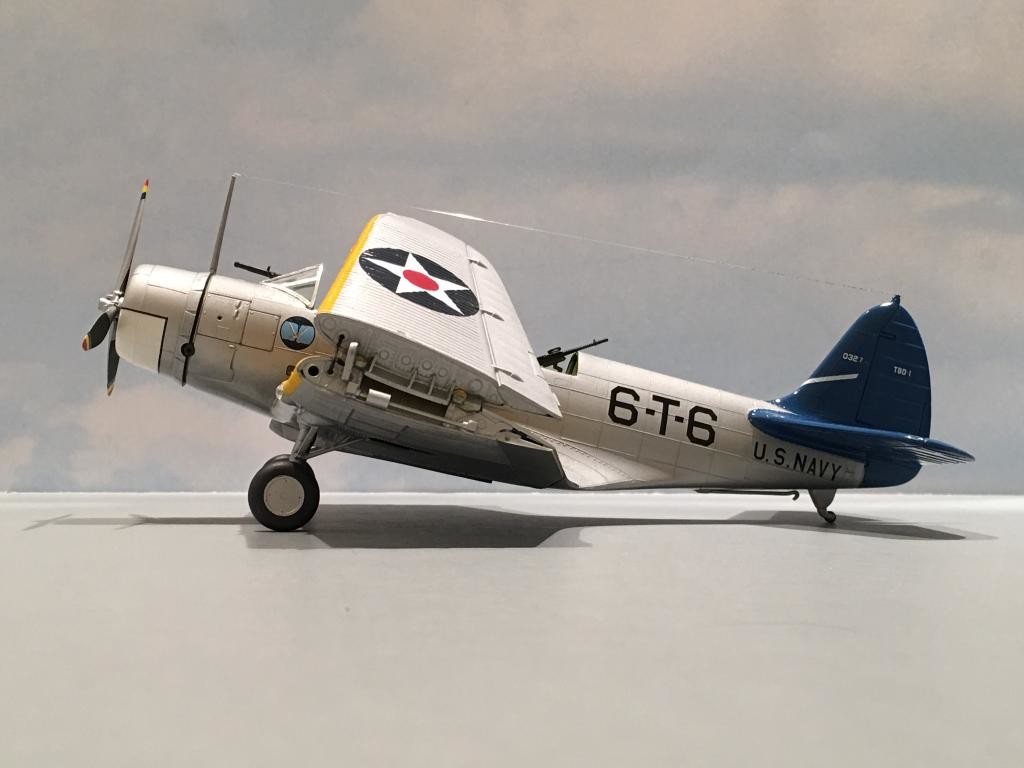
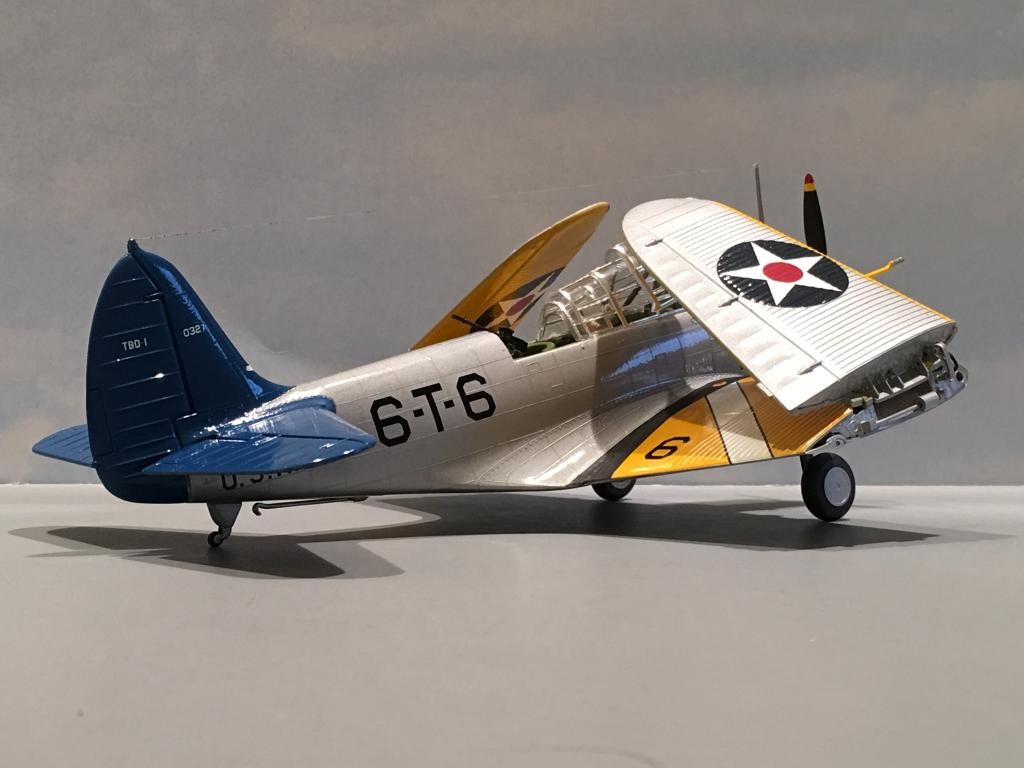
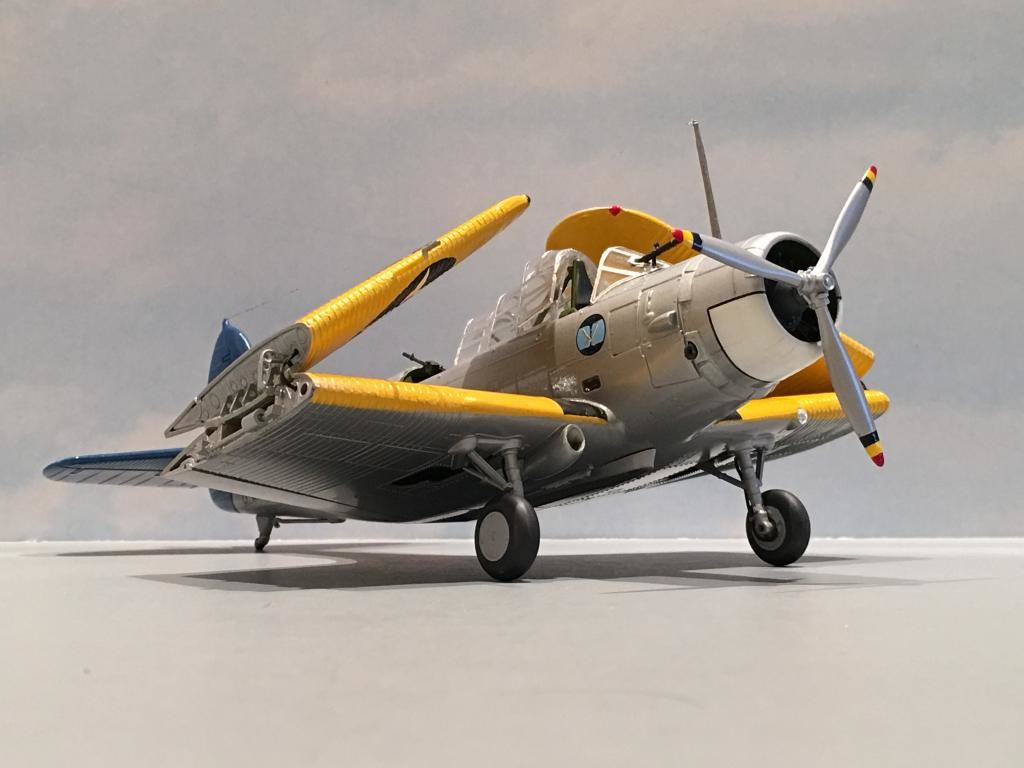
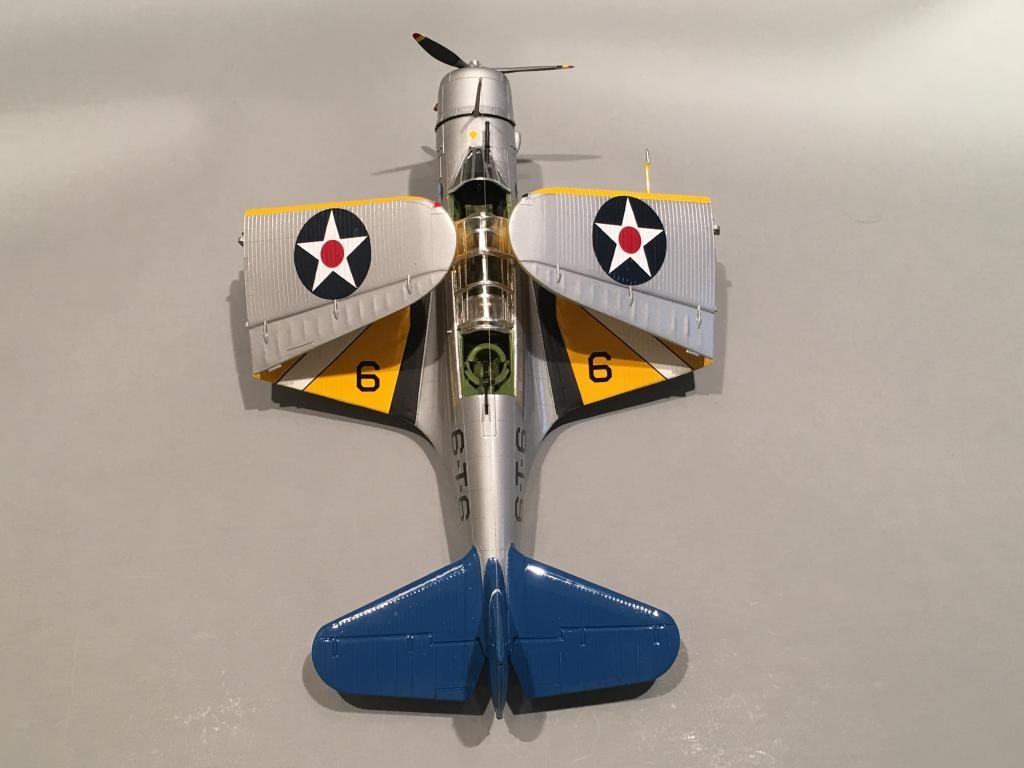
1/48 Monogram Douglas TBD Devastator, USS Enterprise, 04 June 1942
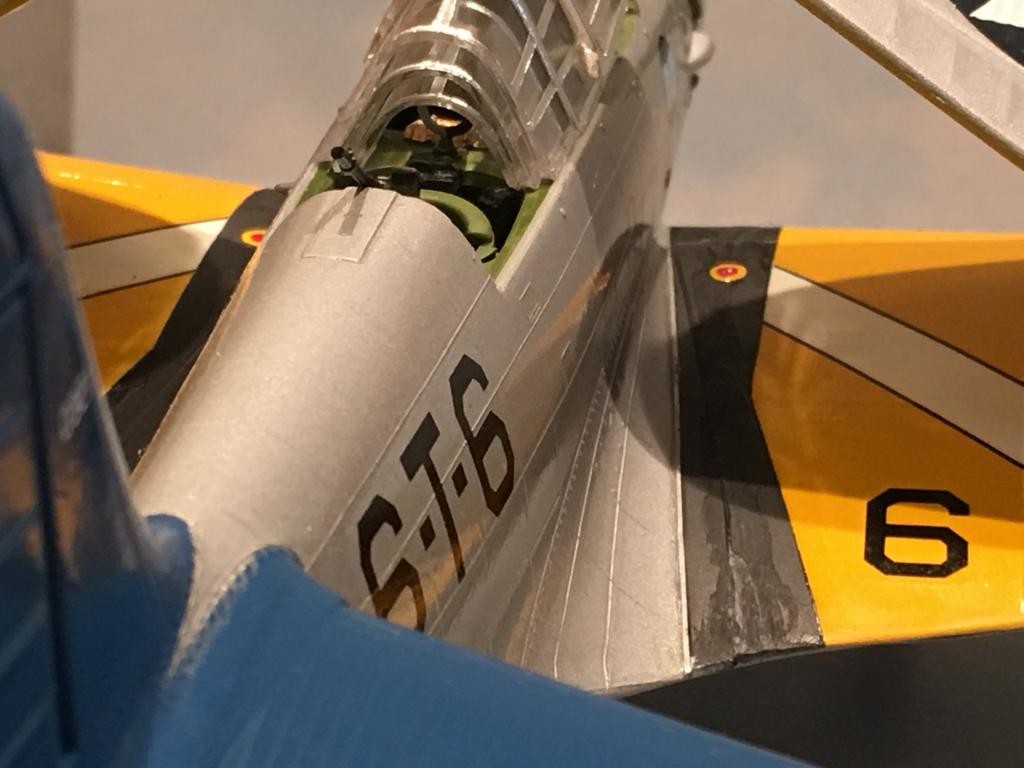
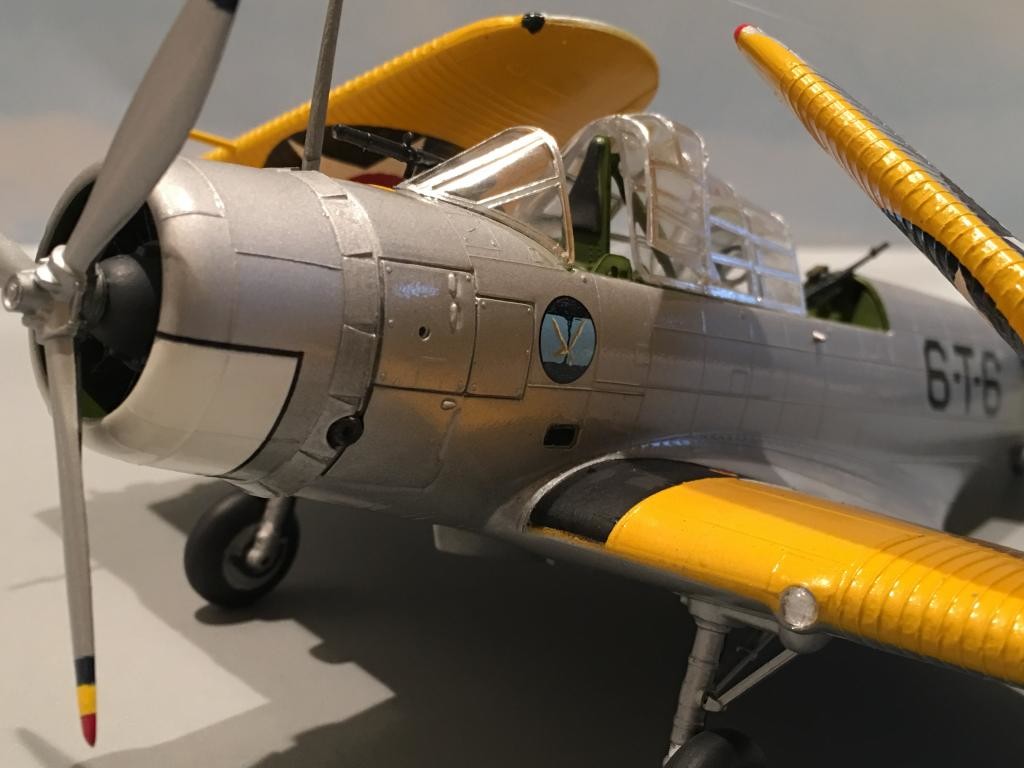
This is the picture that inspired the markings for my build, which was part of the recent Midway Group build. This plane has interior green paint inside the cockpit. More on that in a few...

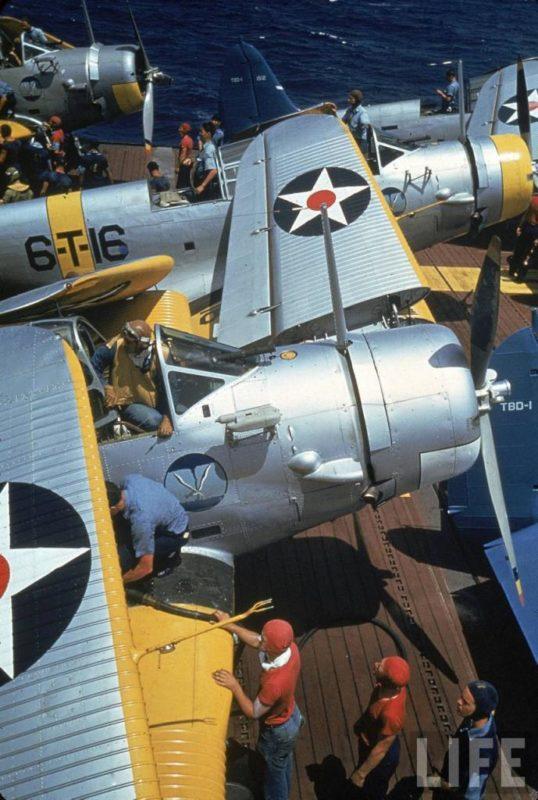
There were a series of color photographs taken for the "LIFE" magazine in 1940. You can tell by the lower half of the cowling (by it having white markings), that the plane in the foreground of this second photo below is also "6-T-6" which served on the USS Enterprise. If you look closely at this picture, you can see the interior green here too.
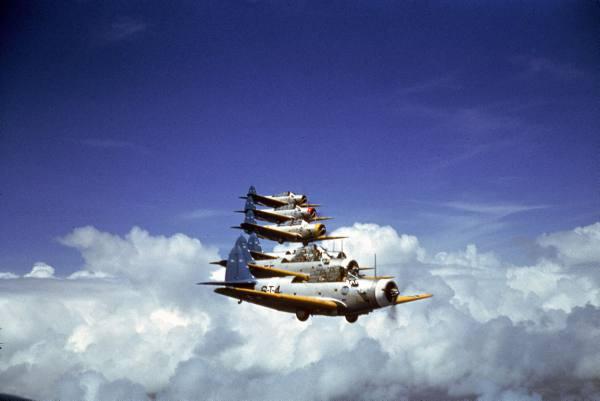
I believe these photos below were taken near Hawaii. "6-T-6" is in the right hand middle of this picture.

and "6-T-6" may be the third plane up from the bottom of the echelon formation. It is mostly hidden by the second plane, which appears to be "6-T-5" per the colors used.
The reason I chose this plane was simple. I had painted the interior of the model "Interior Green" and I wanted to build a "Yellow Wings" plane. (plus I found these really cool original color photos to use as a reference).
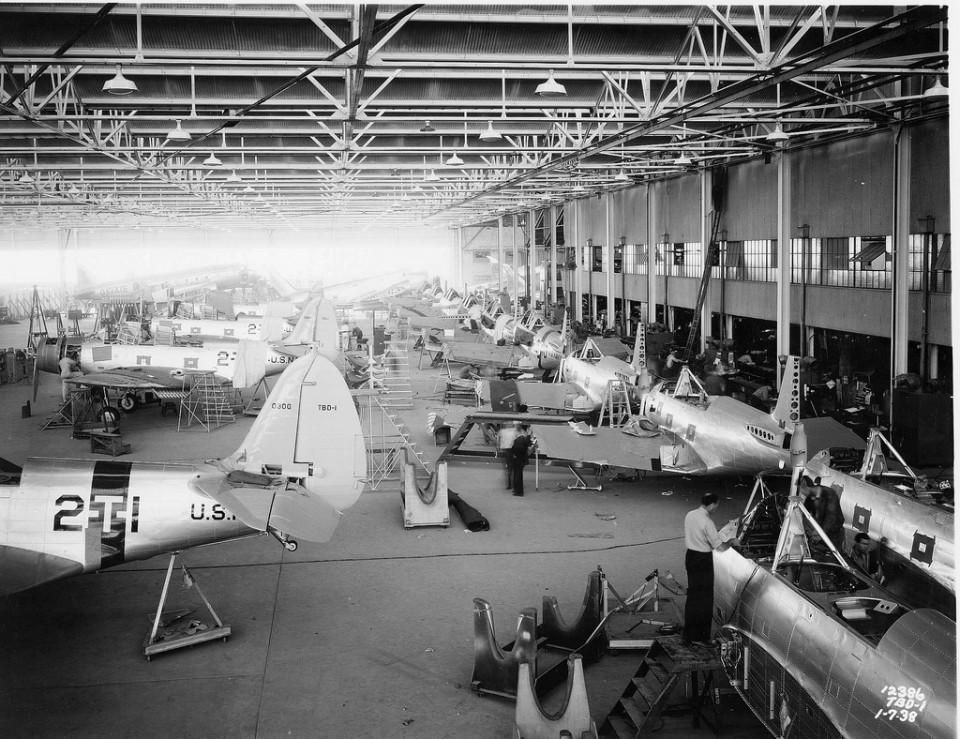
Most of the Devastators flying during the Yellow Wings period still retained their aluminum colored interiors. That's how they were delivered by Douglas when new. In fact, most of the early build TBD's were delivered with full Squadron markings applied from the factory ! The interiors were painted in various shades of green (or possibly even black) during Depot Overhauls later. This was done because there were complaints of sunlight reflecting from the interiors that caused glare that affected the flight crews. I believe these complaints were initially filed by crew members from VT-2 onboard the Saratoga.
Some of the planes shown here in this factory assembly line photo below are destined to serve with VT-2. This picture is dated January 7th, 1938.
During the "Yellow Wings" era as it has been referred to, the US Navy had a methodical set of markings that were specific for each plane in a section. The section leader had a full colored cowling and fuselage band, the "number two" slot had the upper half of the cowling painted in their assigned color, and the "number three" had the lower section painted.
In addition to this, there were colors assigned. Red, White, Blue, Black, Yellow, and Green, were used for specific planes. The color "White" was used for the number #4, #5 and #6 planes.
This is why "6-T-6" has a White colored paint on the lower half of the cowling.
If you look close at the plane in the back ground of the second photo, it is number 16. Yellow #16 happens to be a section leader's plane. That's why there's a yellow stripe behind the "T" and the entire cowling is painted yellow. The remaining planes in this section were #17 and #18.
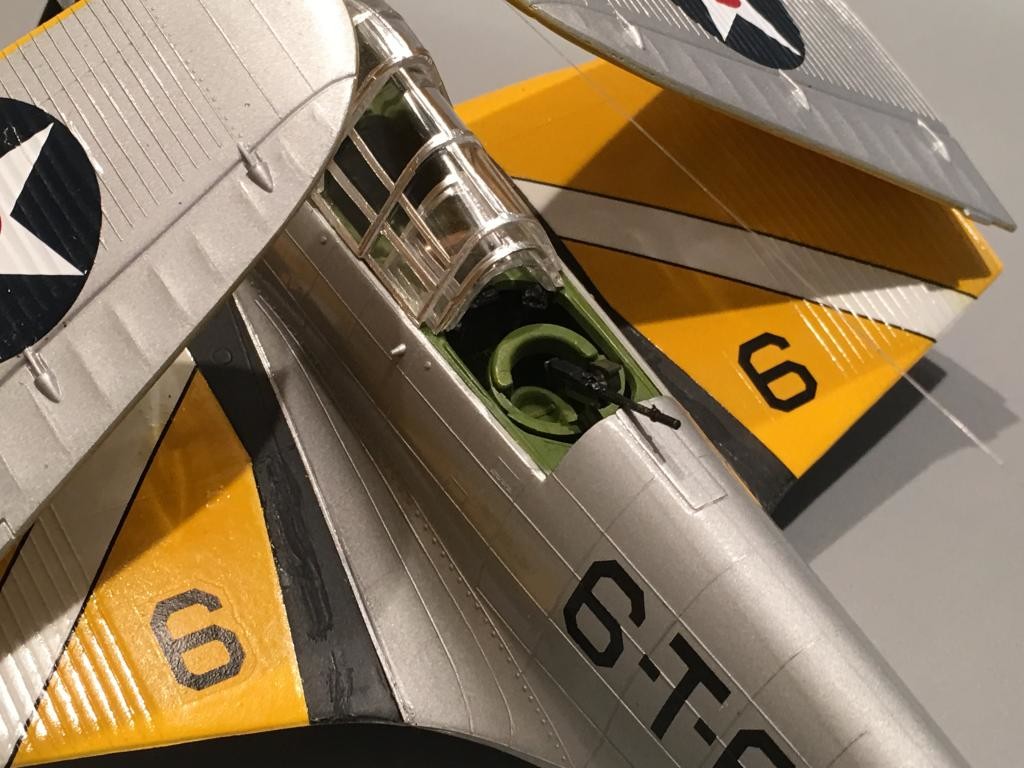
The first number six (6) on the sides of the fuselage denotes VF-6, which flew from the Enterprise. The "T" is for the Torpedo Squadron, VT-6, and the last number denotes which plane it is in the section.
It really sounds a little more complicated than it actually is... Here a picture would really explain things easier.
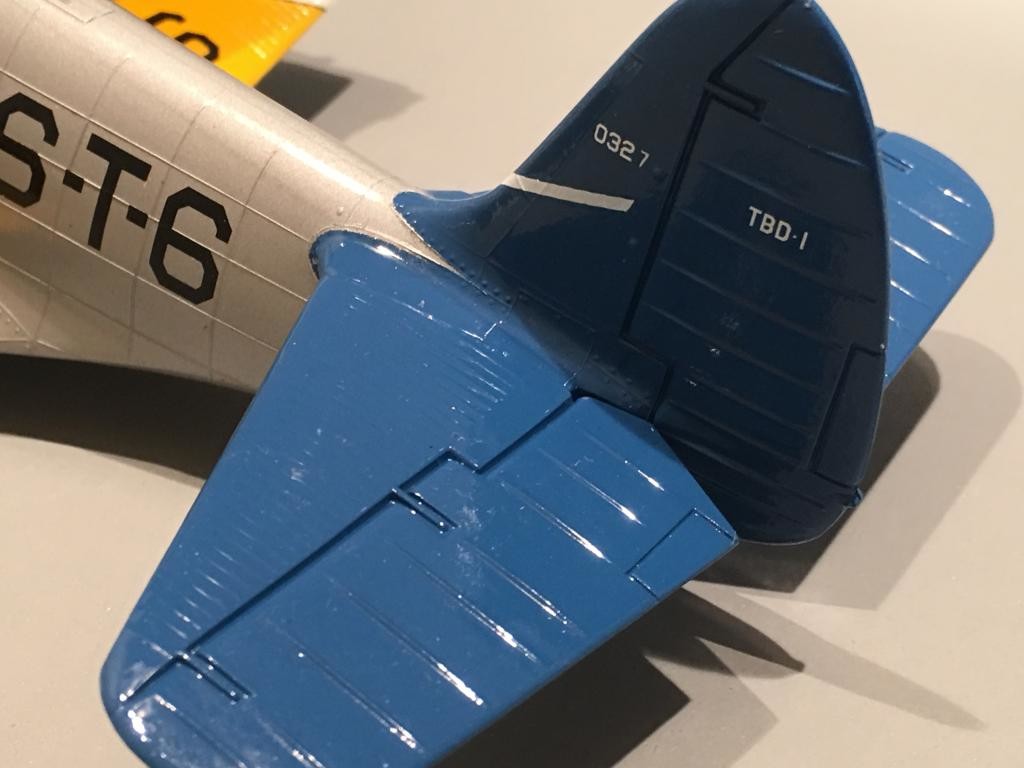
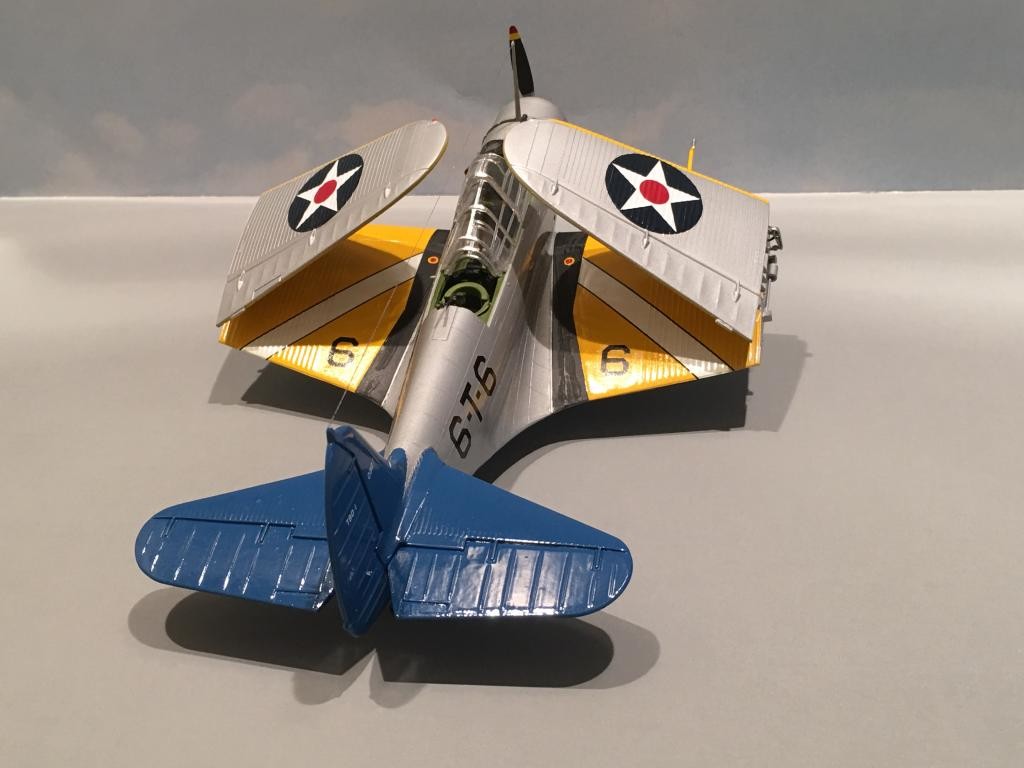
This particular plane, Bureau Number 0327, was lost in combat 75 years ago today, while flying from the USS Enterprise as "T-14". The plane was by now painted in the Blue Gray over Light Gray color scheme, as the more colorful Yellow Wings Era had been stopped as War clouds loomed on the horizon.
Both crew members, Ensign Brock and ARM3C Blundell were "Killed in Action" on that fateful day.
I actually started building this plane by accident. I was spraying some "Interior Green" on another build and didn't want to waste what I had mixed up in my air brush. So I looked over at the stash pile and my eyes fell on the Devastator.
Here's a link to the build log:
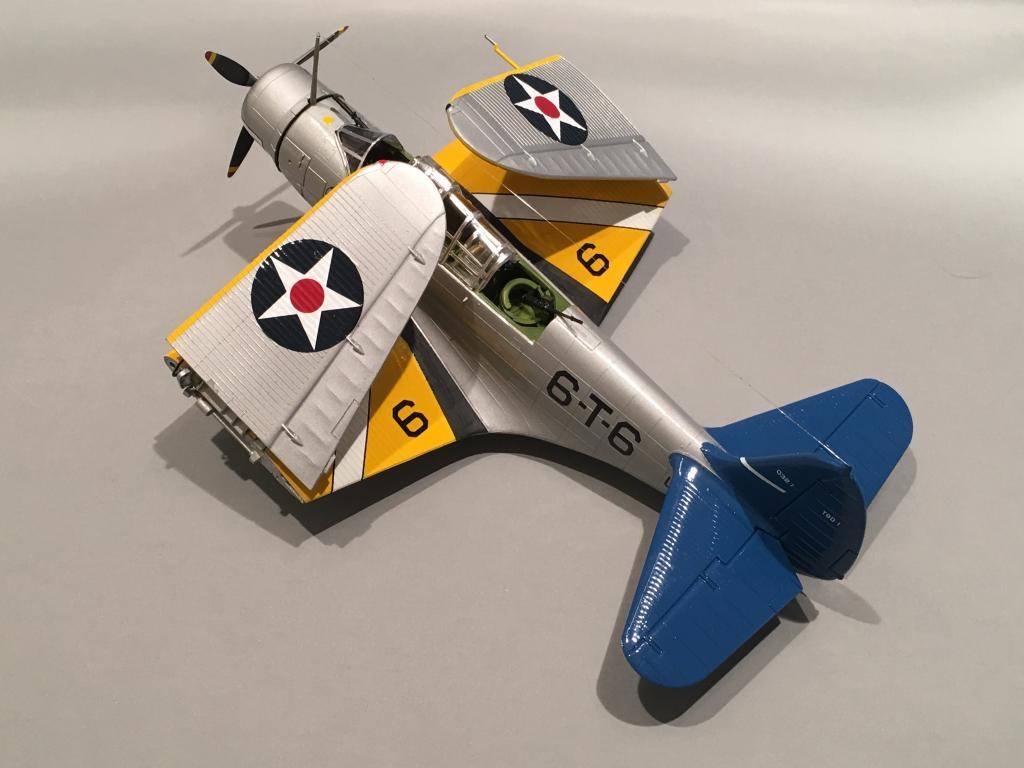
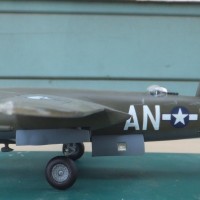
My Devastator was an original 1974 boxing. These kits can still be found online and build up into a pretty nice looking TBD.
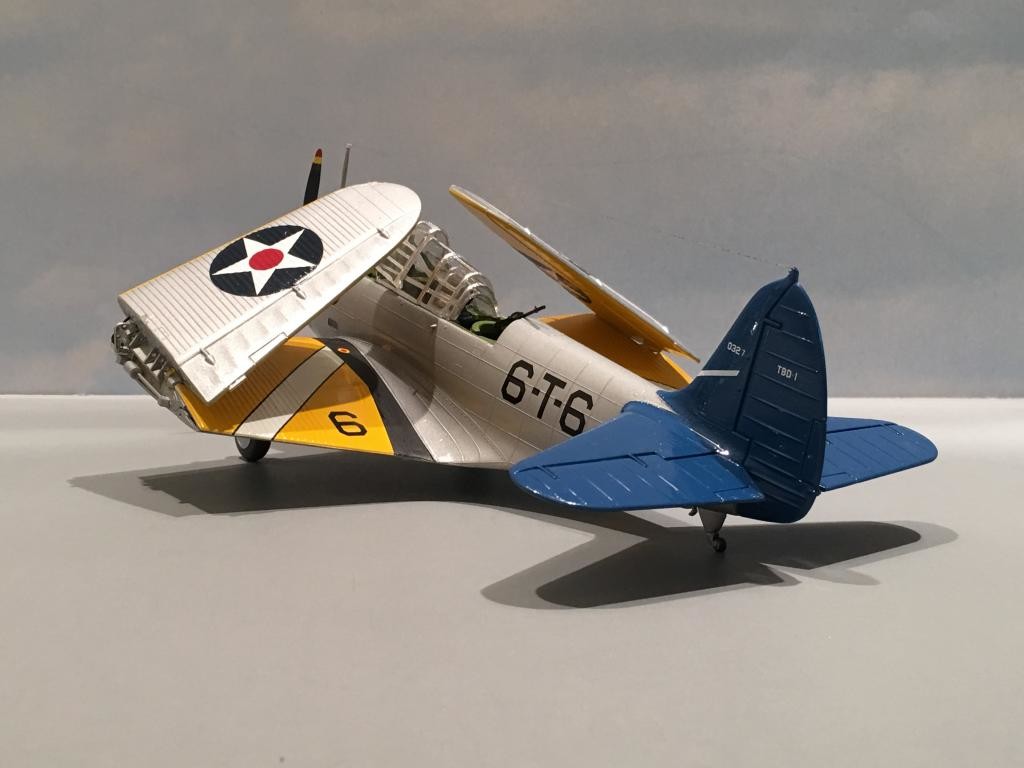
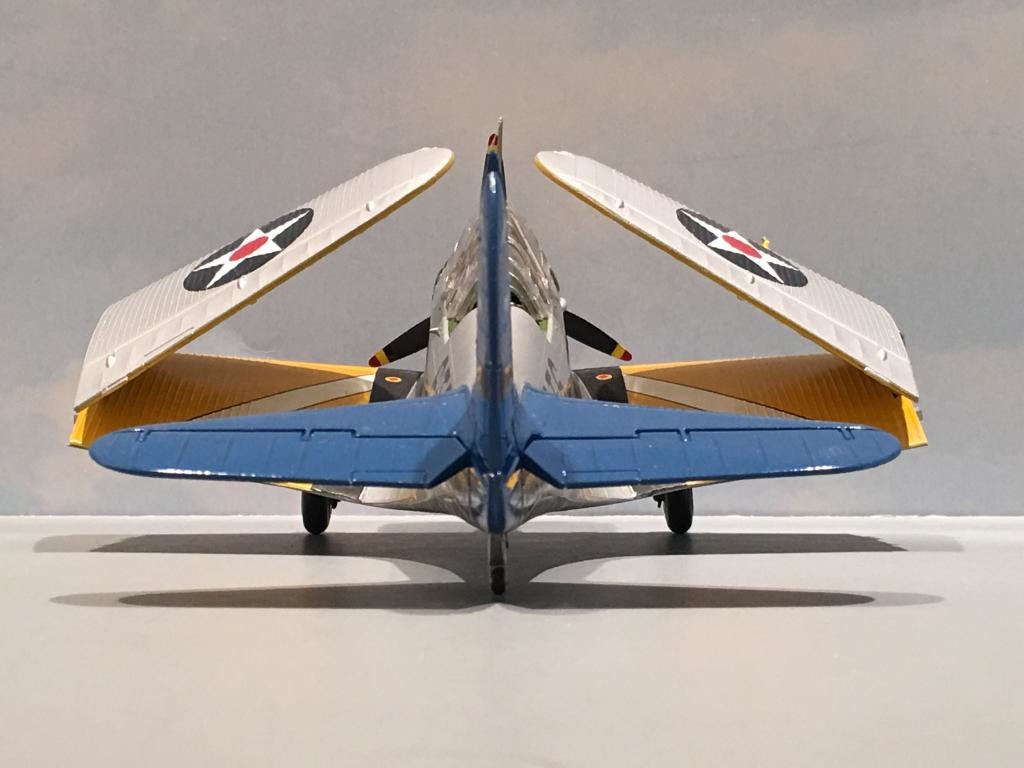
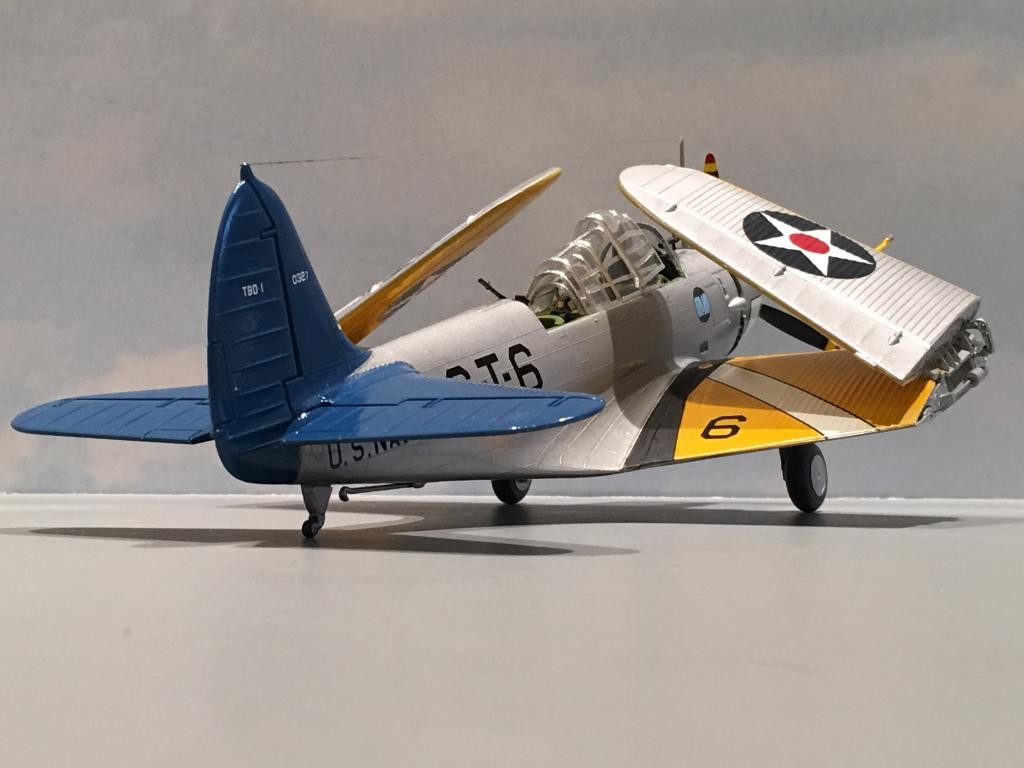
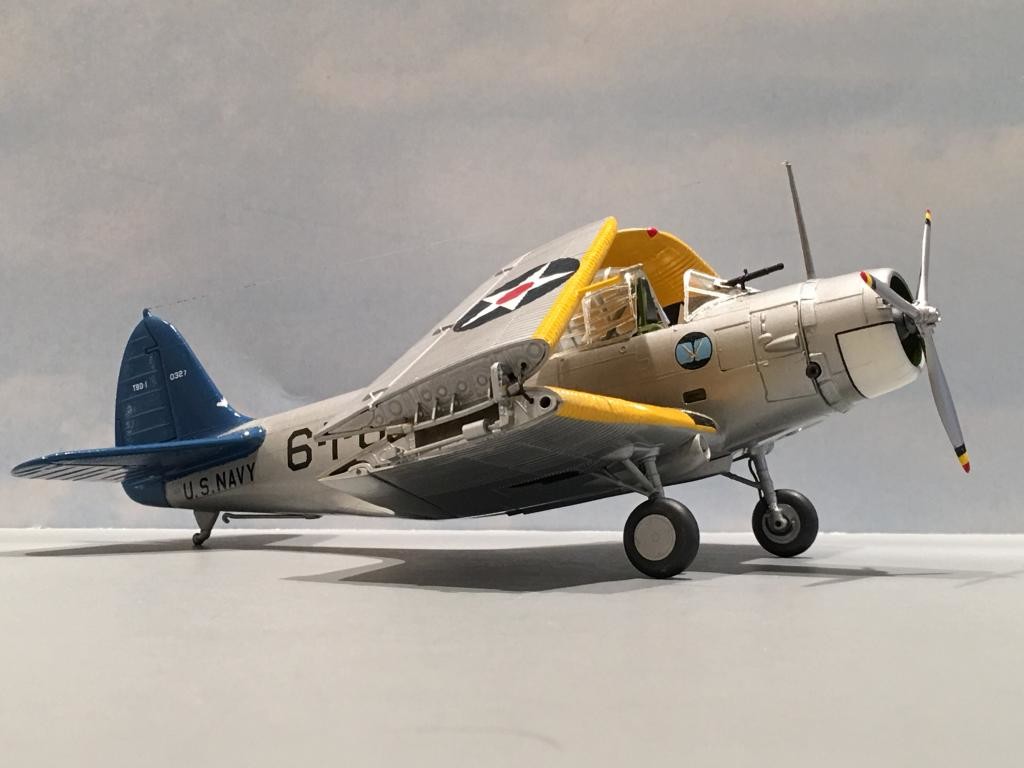
I did add some details to the wing fold areas, as these places are highly visible.

Other than that, it's pretty much right out of the box.
A combination of "Yellow Wings" and various later released TBD kit decals were used for the build. I didn't even want to try any of the "1974 vintage" decals that came in the kit...
Overall I had a good time building this one, and it went together fairly quick. There were some fit problems on the lower nose by the bomb bay doors. Check out the build thread to see.
I think it's a fitting tribute to the men who lost their lives later in this plane during the Battle of Midway. Who could have known when these original color photos were taken for "LIFE" magazine, that this exact plane would be lost in combat, along with it's crew not even two years later?
The Devastators suffered serious losses on this date in history, 75 years ago.
As usual, comments are encouraged. Thanks for looking.


Beautiful TBD great painting and detailing
Tom
Thank you my friend ! 🙂
Nice job Louis, good article as well.
I'm glad you enjoyed this one buddy. I hope it wasn't too confusing with the color designator descriptions. I'll see if I can find a photo or a chart to help it out some...
Beautiful labor of love. Your background info is always impressive.
Sorry buddy, my reply was accidentally posted just below Craig's response...
...and the hits just keep on comin', my friend...stunning presentation!
Thanks for the compliments Craig. I have one more to go for tonight... Dick Best's SBD. I'm glad you enjoyed this article and build.
It really was a labor of love Robert. I remember building this exact kit as a kid, but I used the kit decals from the Saratoga back then. Later on I gave it a "make over" and it was Blue Gray over Light Gray with Midway markings ironically... I enjoy doing the research for my builds almost as much as I enjoy building a plane. Thanks again my friend.
Louis. favorite of mine since I saw the photos, years ago. Friend of mine cut them out, put them in his scrapbook. By then, I had the kit. Superscale had a sheet, as well, early on.
Some of the Yellow Wings decals have an explaination drawing sheet with the decals laying out the section numbers and colors, as do the Squadron books on Navy colors.
Beautiful work on this one, I'd figured they used some interior green, once the glare from the unpainted or laquered interiors was noticed. I'd ony noticed the green fairly recently. Too focused on them pretty schemes.
Once I did some research on the Bureau numbers, and found that this actual plane was lost at Midway, I knew that just had to build it... The Yellow Wings era is one of my favorites too.
Thank you for the compliments buddy...
Another very nice one, Louis.
Thank you Tom !
Wonderful!
Thanks Rob !
Professional work Louis,sure you have not found a way to shrink the real aircraft looks the real deal to me masterful work you only need to build the Enterprise to sit your aircraft on for display,you may only want to build the deck 1/48 may be to big for the entire ship,As a young boy my older sister went out with a sailor from the Enterprise way back in about 1964 it docked in Sydney,and the sailor took us on a personal tour of the ship no security in those days, think this was the second one,they built could be wrong it was such a long time ago,do remember how big it was.Cheers fine work.
Thanks for the kind words my friend. I have been thinking about building a small section of a carrier deck to photograph some of my planes on...
Years ago I went onboard the battleship USS Alabama and was impressed with the sheer size of it... and it's not nearly as big as the USS New Jersey or USS Missouri was. The Enterprise was even bigger that that... I can only imagine what it must have been like to come on board a Carrier.
Thanks again buddy...
Another hit Louis - just love these yellow wings and you've turned this old kit out beautifully - lovely metal and gloss work - keep at it mate!
This one has to be my favorite "Yellow Wings" build that I have done so far to date. The colors just really look good together. The kit needed some filler work, but nothing that anyone couldn't handle. I like the old Monogram kits.
Thanks for the compliments my friend...
Love it! I've got two Devastators in the stash, and one of them will be yellow-wing bird for sure! There are not too many interwar aircraft I like in pre-war colors, but this is one of them. Great job on the execution.
I have a several of them left in my build pile too. I want to do one or possibly two more in Yellow Wings paint. I was thinking about a "Tex Hill" plane and possibly something with a red tail... The Yellow Wing Era is one of my favorites. Hard to paint, but man they look nice when done.
Thanks again Greg... Take care my friend.
Hi Louis,
What a beautiful color scheme. Very sharply finished. TOPPER.
Regards, Dirk / The Netherlands
Hello Louis, What a great job. I had some catching up to do, and have read your complete built report of this Devastator. I like the details you've added along the way, and specialy the challenge of the bomb bay doors. Also the yellow paint makes this a very attractive aircraft. Yellow is for sure not the easiest colour to apply but you've managed well. Thanks for sharing the additional information on the real aircraft too.
I really appreciate the compliments my friend. I'm also very pleased to see that you liked the article as well. Thank you for taking the time to read the build report as well. I just noticed that your last posting on the build thread didn't show up.
The bomb bay doors were "interesting" to say the least. I have found out that yellow is much easier to paint if it has a white base coat of paint to start out with. It seems to help the color with getting rid of transparency and makes it a little more bright as well. I like to include information on the real subjects if I can find it.
Thanks again my friend !
Beautiful Louis.
Thank you Rick.
I really like this one
Thanks George.
Great job, amazing detail. Thanks for the heads up on the control panel, I had to remove the joy stick like you said, panel went in like a charm.