Midway Group Build – VMSB-241 SBD-2
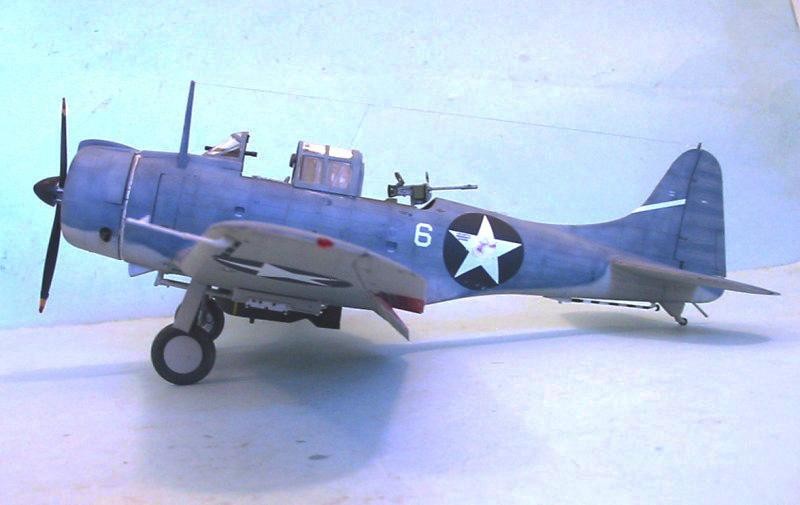
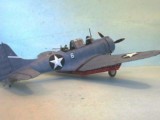
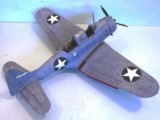
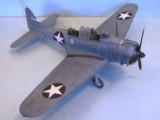
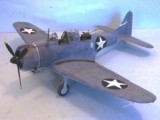
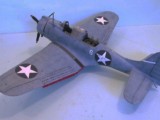
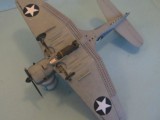
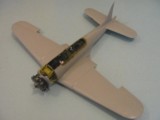
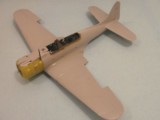
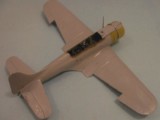
Too busy working with the editors on the upcoming "Pacific Thunder" (out in August, you can pre-order on Amazon now) to build anything new for the group build but here's my Trumpeter SBD-2 from VMSB-241 built a few years back, with a complete description of how it was done.
SBD-2 BuNo 2106:
SBD-2 BuNo 2106, the sixth of 87 SBD-2s delivered to the U.S. Navy in 1940-41, was initially assigned to Bombing Two (VB-2) aboard the U.S.S. Lexington (CV-2) in 1941. She participated in the Army-Navy War Games in Louisiana in the fall of 1941 that set the stage for American participation in the coming war, where she sustained engine damage. Thus, 2106 was left behind at Ford Island on December 5, 1941, when Lexington sailed to reinforce Wake Island with Marine aircraft. 2106 survived the Japanese attack on Pearl Harbor on December 7, 1941, rejoining VB-2 on December 12 when Lexington returned from her unsuccessful reinforcement mission.
BuNo 2106 took part in the raids carried out by Lexington in February and March, 1942, including the strike against the new Japanese bases at Lae and Salamaua, New Guinea, on March 10, 1942, a mission that saw the carrier aircraft launched southeast of New Guinea and climbing over the Owen-Stanley mountain range to make their surprise attack. Lt.(j.g.) Mark Twain Whittier, pilot of 2106, was awarded the Navy Cross for his actions on this mission.
Lexington returned to Pearl Harbor at the end of March, and BuNo 2106 was again off-loaded, this time being sent to the Pearl Harbor aircraft pool for reassignment. Lexington sailed in late April to meet her fate at the Battle of the Coral Sea, where VB-2 lost all but five of their SBDs when the ship was lost.
Back at Pearl Harbor in early May, BuNo 2106 joined the 18 SBD-2s recently turned in by Bombing Six (VB-6) from the Enterprise when that unit equipped with new SBD-3s. The aircraft were given quick overhauls by the Fleet Replacement Unit, then loaded aboard the aircraft transport Kitty Hawk on May 26, 1942, headed for Midway. VMSB-241 received the SBD-2s when they were offloaded four days later, but the squadron would only have five days to familiarize themselves with the new airplanes before being launched against the invading Japanese fleet on the morning of June 4, 1942.
The Battle of Midway began with the first sighting of the enemy main force at 0525 on June 4. Radar on Midway picked up the incoming Japanese raid at 0555, and by 0605 VMSB-241's SBD-2s and SB2U-3s were airborne to avoid being hit by the incoming Japanese. The dive-bombers were divided into two groups, with 16 SBD-2s under Major Henderson and 11 SB2U-3s under Major Norris, both proceeding in company to attack the carriers "180 miles out, bearing 320 degrees, enemy course 135 degrees, speed 20 knots." At the same time, six TBF Avengers of Torpedo Eight and four U.S.A.A.F. B-26 Marauders armed with torpedoes were sent off.
The faster TBFs and B-26s arrived at the target first at 0710. Without fighter cover, five of the six TBFs and two of the four B-26s were shot down, while the survivors inflicted no damage on the enemy, though the Japanese were impressed by the obvious determination of the Americans, none of whom turned away from their attacks despite the heavy opposition.
Henderson's SBDs became separated from Norris' SB2Us when the formation was intercepted halfway to the target by the Japanese CAP. Proceeding on toward the enemy fleet, the SBD-2s arrived over Hiryu shortly before 0800, at 8,000 feet. As Henderson organized the formation for a glide-bombing attack, the defending Zeros struck.
Henderson's Dauntless caught fire as he entered his dive toward the Japanese carrier, and he was never seen again. Eight of the 16 SBDs were shot down by the Zeros or the fleet's anti-aircraft fire, while the others - including BuNo 2106, which was being flown by 1st Lt. Daniel Iverson Jr., with PFC Wallace Reid as his radioman-gunner - were badly damaged. Both Iverson and Reid were wounded, but carried out their attack, while BuNo 2106 collected between 210-259 bullet holes from the Zeros and the ships below. Iverson managed to stagger back to a crash landing at Midway, and the battle was over for SBD-2 BuNo 2106. Iverson was awarded the Navy Cross and Reid the Distinguished Flying Cross for their efforts on this mission.
Postwar analysis of Japanese records show that, at 0810, hits were scored on two of the carriers, Akagi and Soryu, but that damage was quickly brought under control. Thus, VMSB-241's Dauntlesses did hit the enemy. While the efforts of the Marines on June 4 may seem to have been in vain, the truth is that they gave quite a contribution to the ultimate American victory that day.
Shortly before VMSB-241 made their strike, Japanese commander Admiral Chuichi Nagumo had received word from a scout of American ships spotted northeast of Midway. He decided to strike the Americans, and the strike aircraft aboard his four carriers were in the process of being armed with armor-piercing bombs and torpedoes. When news was received from the leader of the Midway strike of how the defending Marine fighters at Midway had mauled the Kates and Vals of the Japanese strike - with the Japanese not knowing that the Marines had lost so many of their own that they could not have organized an effective defense had there been a second strike - coupled with the attacks by the torpedo bombers and the Marine dive bombers, Nagumo changed his mind and decided to mount a second strike against Midway to neutralize the base. Halfway through the reload to high-explosive bombs, the scout from the Chikuma radioed they had sighted an American aircraft carrier.
This news changed everything. Nagumo and his staff wasted additional time as they argued over how an American carrier could have escaped Pearl Harbor - which wasn't how they had planned the battle - but Coral Sea had taught that in a carrier battle, making the first strike against an enemy carrier was crucial. Nagumo ordered a third reload.
The crews were so tired by this point that they left the bombs and torpedoes on deck in the hangars next to the fully-fueled aircraft. Halfway through the operation, the TBDs from Torpedo Three, Torpedo Six and Torpedo Eight found the fleet and made their desperate attack, drawing the combat air patrol down to the sea's surface and slowing the reload of the strike aircraft. The Devastators were eliminated without inflicting damage and the reload was completed. The Japanese carriers turned into the wind to commence their launch.
At that moment, the SBDs of Bombing Six and Scouting Six from the Enterprise, and Bombing Three and Scouting Five from the Yorktown, found their targets. Ten minutes later, Akagi, Kaga, and Soryu were on fire and heading for the bottom, carrying the cream of Japanese naval aviation with them. With that strike, the U.S. Navy won the most important naval victory since Trafalgar. Had Nagumo not been confused by the determination of the “unsuccessful” Marine dive bomber strike from Midway, he could have launched his strike aircraft nearly an hour earlier, and the outcome of history would have been different.
The next day, VMSB-241 found the Japanese battle cruisers “Mikuma” and “Mogami.” The dive bombers sank “Mikuma”and so badly damaged “Mogami” it would be two years before the ship was ready again for combat.
Following the battle, Admiral Nimitz recognized the Marines' role in the Battle of Midway as follows: "Please accept my sympathy for the losses sustained by your gallant aviation personnel based at Midway. Their sacrifice was not in vain. When the great emergency came, they were ready. They met, unflinchingly, the attack of vastly superior numbers and made the attack ineffective. They struck the first blow at the enemy carriers. They were the spearhead of our great victory. They have written a new and shining page in the annals of the Marine Corps."
In August 1942, BuNo 2106 and the other SBD-2s were shipped back to Pearl Harbor, then on to the west coast, where they were completely overhauled for use in training. BuNo 2106 was sent to the Carrier Qualification Training Unit at NAS Glenview, Illinois, where pilots used her to learn to land on the training carrier Wolverine in Lake Michigan. On June 11, 1943, 2nd Lt. Donald A. Douglas, Jr. USMCR, stalled out on approach to landing and spun into the lake. Lt. Douglas survived, but BuNo 2106 settled to the bottom in 170 feet of water, where she remained until her recovery in October 1993.
BuNo 2106 is currently on display at the National Museum of Naval Aviation at Pensacola, Florida. She is one of four aircraft still in existence known to have been present at the attack on Pearl Harbor, and the only survivor of those aircraft that flew at the Battle of Midway. While she is the only surviving SBD-2 on dry land, the wrecks of five others - BuNos 2111, 2117, 2183 (all Midway veterans) and one unidentified - are still in Lake Michigan, where they could be recovered since there is no corrosion in cold fresh water.
CONSTRUCTION
Yes, there are a lot of parts in this kit, but nothing presents a problem, everything fits, and the only big deal is the focus needed to put in the time necessary to do the assembly. That said, taking one's time with the detailed sub-assemblies will result in a really good-looking model.
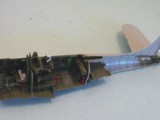
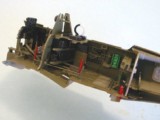
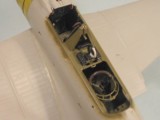
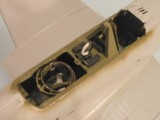
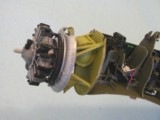
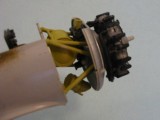
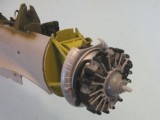
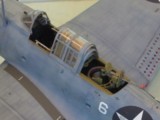
I began by pre-painting all the parts for the cockpit and engine compartments. This involved painting all the cockpit parts with Xtracrylix Interior Green. The Trumpeter color call-outs for small details seemed incorrect, so I used the color photographs of a Dauntless cockpit in the Detail and Scale book as my guide. The interior of the engine cowling and the engine mounts were painted with Tamiya “Yellow Green” which is Yellow Zinc Chromate.
After the cylinder block was assembled, the engine was painted with Model Master Aluminum and Magnesium for the cylinders and details, with everything given a wash of Tamiya “Smoke” to bring up detail.
Trumpeter provides a clear plastic instrument panel with “glass” over the instrument positions. This is incredibly difficult to paint around successfully, so I reamed out all the holes with a #11 Xacto blade, then painted the panel Semi-Gloss Black and used the film “instrument face sandwich” as is traditional with other Trumpeter releases. This looked much better than anything I could have achieved painting around that clear area over the instruments, and I recommend you do the same. It takes about 10 minutes and is not difficult.
The kit provides the second control stick for the back seater as a separate piece installed in its stowage on the fuselage side. The stick is also molded onto the main control stick part, and needs to be cut off. Ream out a hole there in the base, and you will have the rear cockpit looking right. The gunner's control stick was never installed in position unless it was needed in an emergency (I have never read of any back seater actually using it). Do not worry about the lack of instrument faces for the small instrument panel in the back seat - once it's installed and the fuselage is assembled, you can't see it well enough to be concerned anyway.
Once everything was painted and detailed, assembly of the cockpit and the engine compartment presented no problems, since everything fits and the instructions are clear about what to do. The final result is a detailed cockpit that will meet the detail requirements of anyone - any resin cockpit is merely going to be money spent for the welfare of aftermarket manufacturers, since it will not noticeably contribute to the overall look, at least not in any way that makes sense in a cost-benefit analysis. Save your money for aftermarket materials here to buy the Yellow Wings decals for this kit.
I made the mistake of putting in the “floor” part behind the rear bulkhead of the cockpit in the rear fuselage. Even if you decide to open up the baggage compartment, this isn't going to be that visible, and getting it to fit into its tabs on the opposite fuselage half during assembly is far more trouble than it's worth and is the likely cause of my need to use Mr. Surfacer 500 on the centerline seam of the aft fuselage, which was the only place I had to use that product on the entire model. Leave that part out as not being worth the hassle.
Painting the engine mounts in the engine compartment is a waste of time since you won't see any of it once you assemble the cowling in the closed position. These parts are useful for a modeler who intends to open a panel there and detail the accessories compartment, which would look nice in a diorama. Be sure to follow the instructions and use the SBD-1/2 upper cowling intake, which is on a separate special sprue. The kit also has the SBD-3/4 cowling intake on the standard sprues (which will allow those who can't wait to do an early SBD-3 with the kit since that intake is the major visual difference between the SBD-1/2 and the SBD-3).
The wing sub-assembly goes together easily. There is a gap when you attach the wing to the fuselage along the upper joint of wing to fuselage. I applied extra Tenax in that area and pressed first one wing up against the fuselage till that area filled, then the other in turn. Doing this, there was no need for any other gap-filler here. The elevators and horizontal stabilizers went on with no problem. If you want to pose the elevators drooped, be certain to cut the control stick to pose it right. There was a spring lock in the Dauntless controls that centered them, so posing everything in the neutral position is actually the right way to do it.
Painting:
I had the benefit from 1997 to 2001 of being friends with the greatest SBD pilot of all, the late Dick Best, former commander of VB-6 from November 1941 to the Battle of Midway. Dick was one of the few veteran pilots I've ever met who could converse in detail about the markings and paint of his airplanes, due to the fact that - as commanding officer - he paid attention to the state of paint on the airplanes while at sea for corrosion control. Once I discovered that, I questioned him in detail about the look of both the SBD-2s VB-6 flew until May 1942 and the SBD-3s they had at Midway. While I was doing an airplane that served with VB-2, it served under similar conditions to the VB-6 SBD-2s, so I followed those notes from Dick in deciding how to paint this model.
The Navy discovered when Enterprise and Lexington made their forays into the South Pacific in February and March 1942 that the blue-grey camouflage paint was very susceptible to tropical sun-fading and to corrosion in the salt air environment, so it faded out and became quite dull very quickly. Thus, BuNo 2106 would have been heavily sun-faded from its service in VB-2 by the time it got sent on to the Marines at Midway.
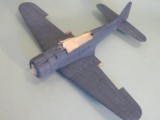
I started by doing a very thorough pre-shading of the model, going over all panel lines and many of the various rivet lines with airbrushed flat black. At this point, the model looked like a zebra. I then painted the lower surfaces of the model with Xtracrylix Light Gull Grey, which I lightened with white to get a subtle multi-hue tone.
The Detail and Scale book for the Dauntless has a great color photo of a heavily sun-faded SBD-3 on the cover, and I used that as both my guide and goal for the look I was going for.
Greg Cooper, who is a fantastic model painter, described a few years ago his methods for getting a sun-faded finish for a Japanese Navy airplane, and I adapted his methodology to aging and fading the Blue-Grey paint on this model.
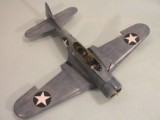
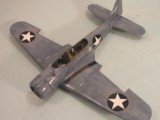
I began by applying Gunze-Sangyo H-42 “Blue Grey” over the whole upper surfaces. This is a darker color almost as dark as Intermediate Blue, but with more grey. When this was done, I used Xtracrylix “Dark Blue Grey,” which is lighter and greyer than the Gunze-Sangyo color, applying it over each space between the rivets, thus emphasizing both panel lines and rivet lines with the darker color around the lighter one. When done, the model looked like it had blue-grey polka-dots at this point. I then added in some Xtracrylix “Light Aircraft Grey” and thinned the paint in the cup another 10 percent, then went over the entire model, “blotching” the surface. I applied this more heavily over the fabric-covered control surfaces, which fade differently than the metal parts of the airplane. I then added in a bit more grey and more thinner and went over the model again, emphasizing this wash on the upper wings, tail and fuselage. I then added in Xtracrylix White and more thinner (the paint was about 70 percent thinner at this point) and went over the upper surfaces with more blotching. I made certain to leave dark areas of the overpainted stripes on the rudder. The result is that there is no distinct area that is any one color tone, as you look through the thinned upper coats down to the darker areas. With the intermittent blotching, the color is nowhere the same, and is subtly faded.
Both VB-2 and VB-6 applied the oversized, full-chord 72-inch national markings on the wings, with 45-inch national markings on the fuselage. Dick told me that after the airplanes from VB-6 were taken to the Fleet Replacement Unit he saw them a few days later without any national markings on the wings. This was because the oversize national markings had been overpainted. To get the right look here, when I had the sun-fading to the point it looked closely like the photograph on the Detail and Scale book, I then applied circles of Gunze-Sangyo darker Blue Grey in the positions where these insignias would have been. I then blotched Xtracrylix Dark Blue Grey over that to leave the darker color visible slightly, as would have been the case with the darker blue national insignia being overpainted.
Markings:
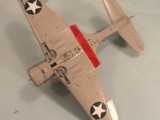
With the painting done, I was ready to proceed with the markings. The kit decals are worthless, so just toss them and get the Yellow Wings Decals for the SBD - the national insignias are not the proper proportions, and it is incorrect to have “overpainted” red centers on all six insignias; additionally, everything is just not the right colors. Yellow Wings provides several sheets with all the various-sized national markings and tail stripes, which will enable you to do any SBD-2 at any time in its career (as well as any SBD-3). Since the SBD-2s had wing insignia that had been overpainted and then re-applied in the new smaller diameter markings without the red center, I used the 50-inch national insignia decals without red centers from Yellow Wings sheet 32-026 for the wing insignia. Because the fuselage markings were left on the airplane with the red centers overpainted, I used the 45-inch national markings with red centers from the same sheet for the fuselage insignia. When these had set, I painted out the red center, then when that paint was dry, I lightly sanded over the paint so the red center would come through a bit.
The rest of the markings for BuNo 2106 at Midway came from the Yellow Wings sheet 32-001 “Midway Madness,” which will allow you to do BuNo 2106 at any point in her career from beginning to end. I used the kit decals for the stenciling (by the time most of you get to this point with your model, Yellow Wings will have their full stenciling decal sheet available, which will be far superior and I recommend it already). The “B” and the hyphen of “B-6" need to be overpainted with the dark color of Blue Grey, which I did with the paint thinned so that the overpainted letters can be seen through it.
I gave the model a coat of Xtracrylix Satin Varnish, then Xtracrylix Flat Varnish, to tone down the gloss decaling surface. Because these airplanes were exposed to sun and salt water, the paint was dead flat. I accomplished this with repeated coats of Testor's Dullcote. To get the finish right, you need to apply a coat, then wait for it to dry, and look for the areas that are not “flattened down” and paint them over. There is nothing more distracting (and it is very common among many models I have seen) than to see “holidays” in the flat finish where the less-than-flat finishes show through. Just because you gave the model what you think is a thorough coat of the final flat finish does not mean you have accomplished your goal. You need to hold the model up to the light and turn it back and forth and look very intently to find these “holidays” - they're as relentless as returning seam lines. I ended up doing four passes with the flat varnish to get a uniform surface finish.
I did not “ding” the airplane to get bare metal patches. For one thing, when airplanes are at sea, the crews go over them daily to find any dings and overpaint them, because aluminum corrodes like mad in a saltwater environment, so you're just not going to find those “dings” on naval aircraft aboard ship. These SBD-2s had additionally been put through a fast refit and cleaned up at Ford Island before being sent on to Midway, so any dings would have been covered over, and the grime washed off. On June 4, 1942, these airplanes may have had worn and faded paint, but they were not dinged and grimy - they hadn't been there long enough for any of that wear and tear to happen.
Trumpeter - like Accurate Miniatures - has made the flap controls so that the upper flaps will be raised without modification. This is incorrect for an airplane not in an actual dive. I flattened the actuators for the upper flaps so they could be attached in the down position. The lower flaps were all lowered. As a “by-the-way,” photographs show SBDs with the inner surface of the center wing and fuselage in both a color tone consistent with the undersurface color, and a darker tone which could be red. So while all the flaps should be red on their interior surfaces, you can either paint that center section light grey or red (as I did) and unless there is photographic evidence to the contrary for the specific airplane you are doing, no one could prove you wrong either way. I went with all red just to add more color to the model.
I used the Tamiya weathering system to apply some “light sand” on the rubber tires, as they would have looked on Midway, taxying over dirt and coral surfaces. The prop tips might have been a bit weathered from flying off the coral strip at Midway, but these airplanes had only flown from the field a very few times before June 4, so I left the prop alone as concerned “sandblasting” the tips.
Trumpeter's canopies are designed to pose open. However, if you just stack them, they will end up with the top one not quite touching the edge of the cockpit sill. This was also a problem with the Accurate Miniatures kit. I took all the inner canopy parts and sanded down their lower edges so that I could stack everything on the flat workbench surface with the upper canopy touching correctly. This is only a very little bit of work here, but the final result is important so that you don't have the canopies looking “stacked” but rather looking like they have been slid back on top of and underneath each other.
Nicely done, TC...good job.
Thanks for sharing this with us Tom. This is another gem...
Beautiful build all I can say is WOW
Tom
Tom, great build, great history to go with it, as usual. Quite a career for an airplane, unbelievable it survived all that. The taxpayers got their moneys worth out of her!
A great build Tom!
Another great build, Tom! I especially enjoy reading everything you write about each model. The weathered look of the plane is about perfect! Not too heavy, but obviously there.
Another excellent build Tom. I'm working on 2106 in 1/48 painted in its Yellow Wing factory delivery scheme.
Rick, I think Yellow wings has a decal sheet in 48th for it.
Stunning work and a great narrative of how you achieved the look. Very helpful, thanks.
Great article Tom with a great tutorial on how you managed to "Fade" the upper surfaces of the kit. Model looks great.