1:16 Sopwith Camel F.1 – Fuselage
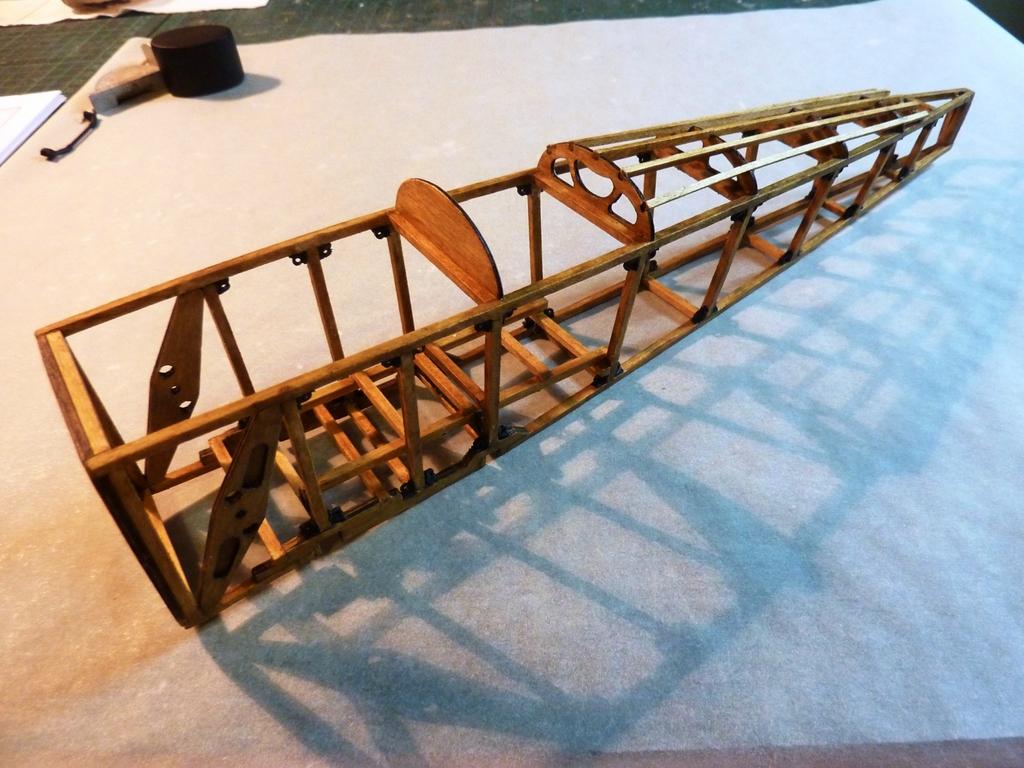
Arguably the most difficult and complex part of the build to date, the fuselage is now complete, with the exception of the cockpit coaming, which is added at a later stage.
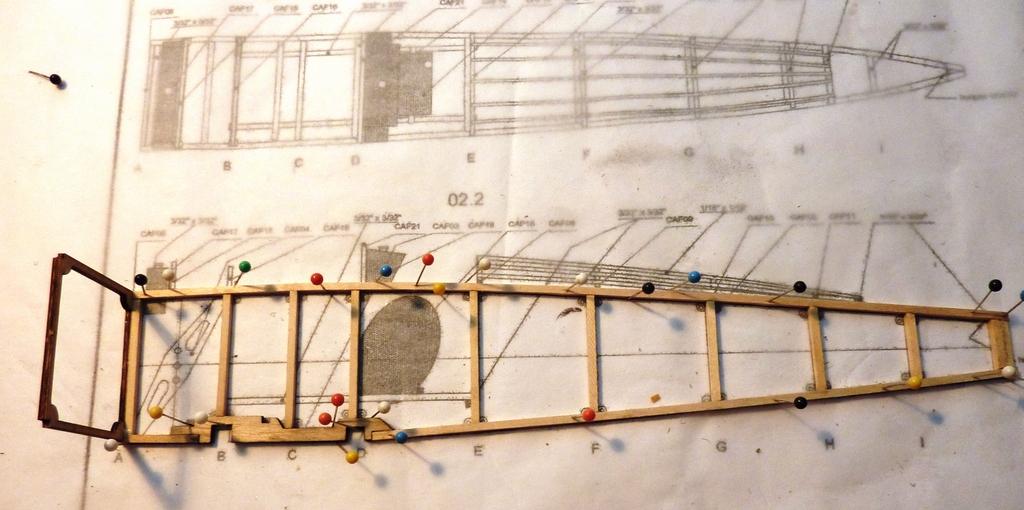
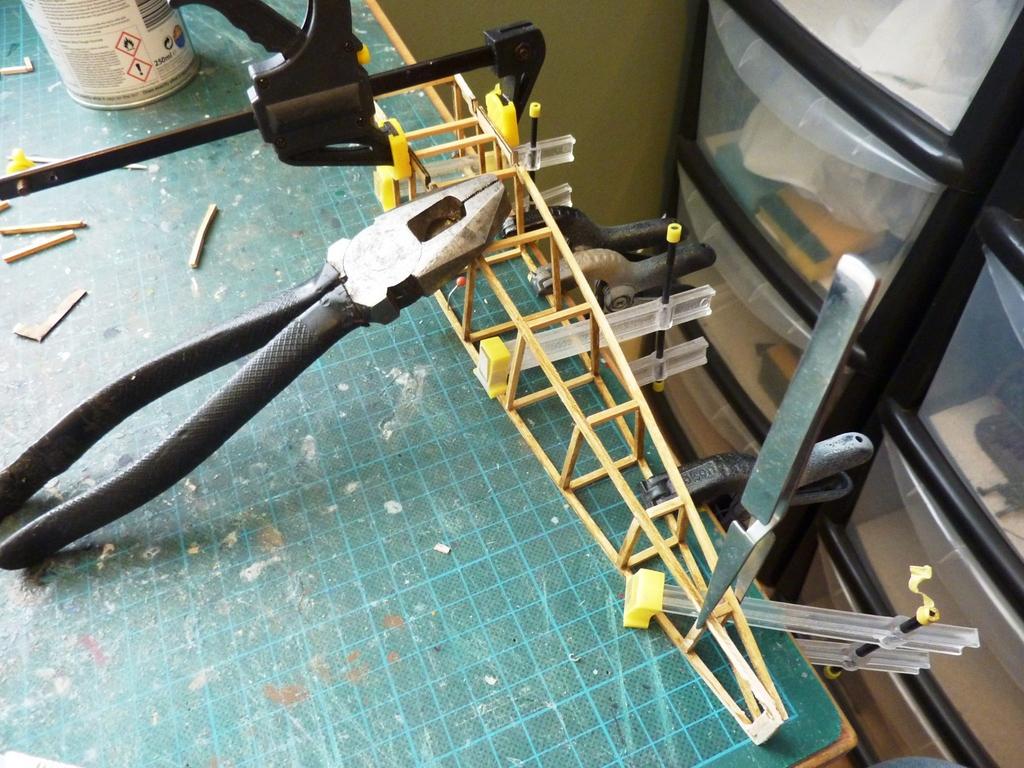
As with the wings, the structure was built up directly over the plans, although there are a number of build-jigs available to follow on a separate plan sheet. With the longerons measured, cut and attached to the vertical members, the horizontal members are added to create the familiar box shape.

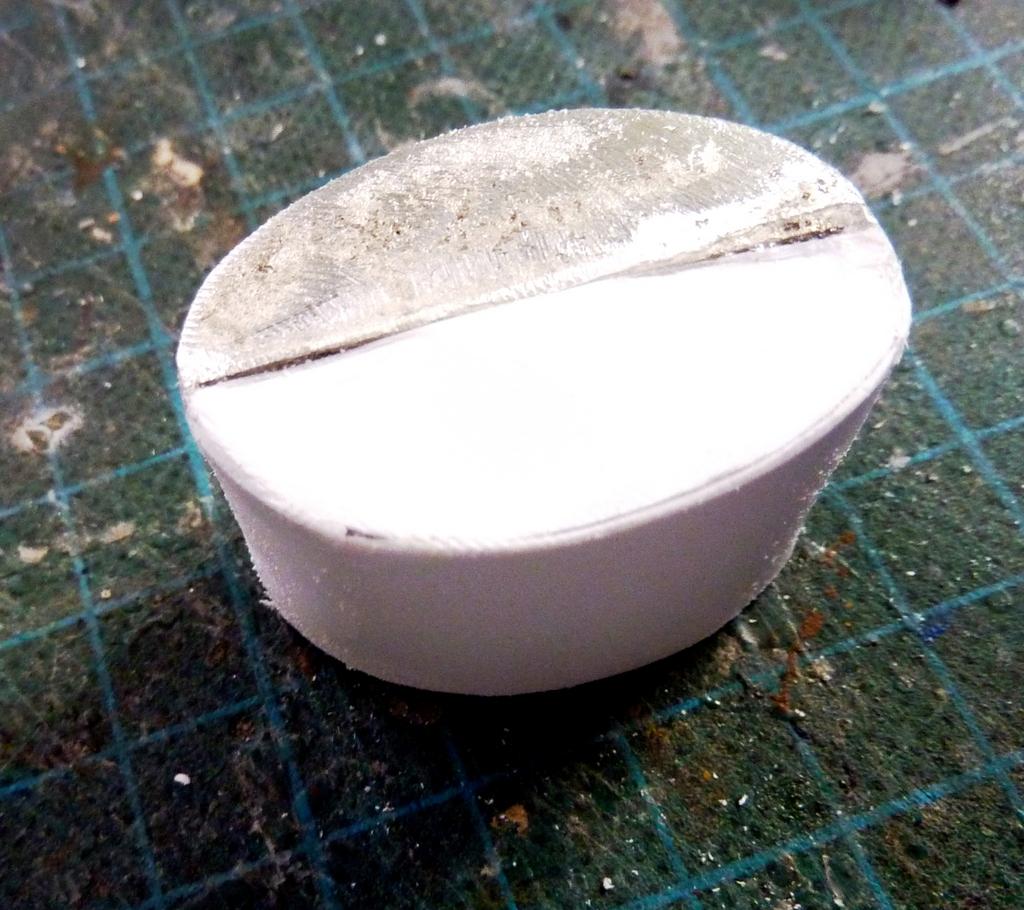
The main fuel tank is in two identical halves, again in white metal, and both halves confusingly identified as Part 18. I say confusingly, as it clearly foxed someone packing the parts: I only had the one half, but it can't be said that I failed to receive Part 18...
I used plasticard to create the missing half, which worked OK.
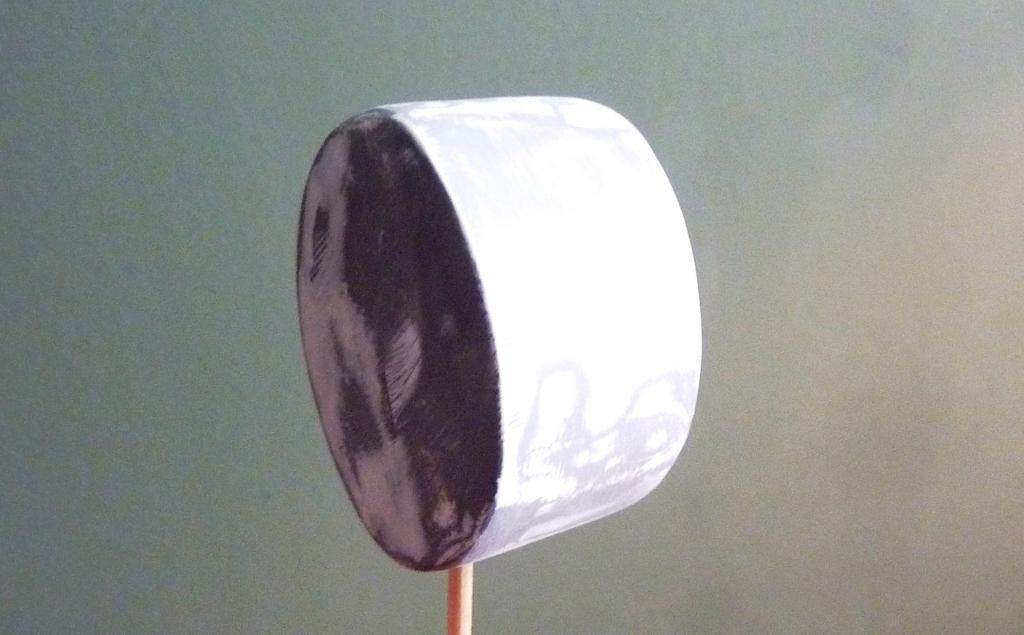
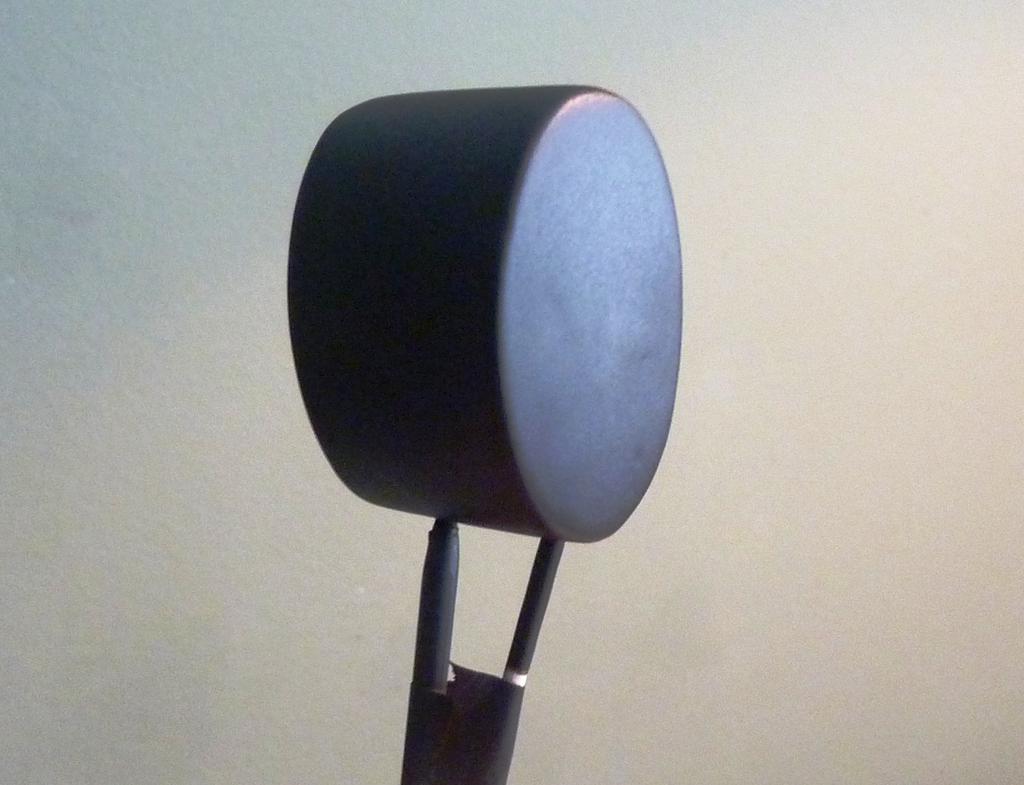
The back of the engine area, again all in white metal, was filed and shaped into a reasonable facsimile of the actual sections, and installed section by section. The only addition I've made is a firewall from plasticard, primed and sprayed with MM Anodine Grey.

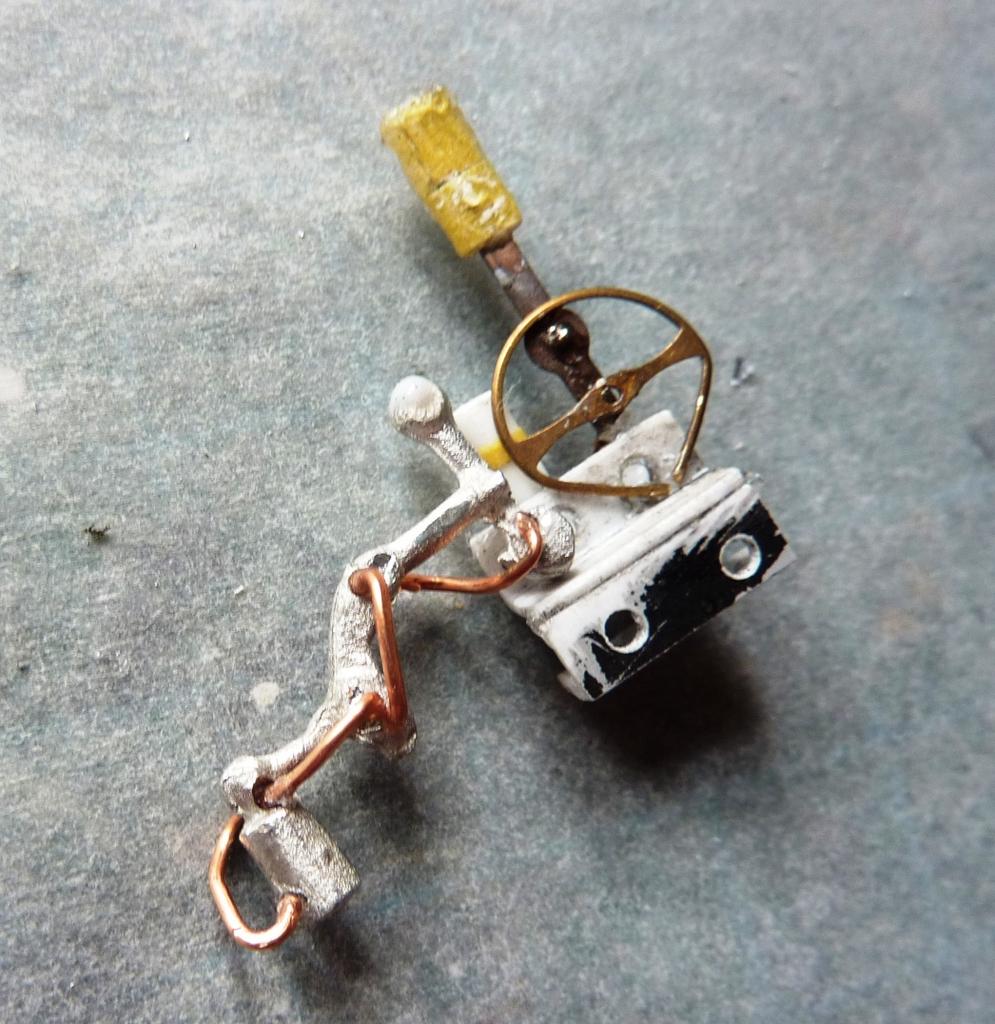
Same issue with the throttle controls as with the main fuel tank - half of it missing - so I scratched what was required. It looks a little rough here, but it painted up nicely.
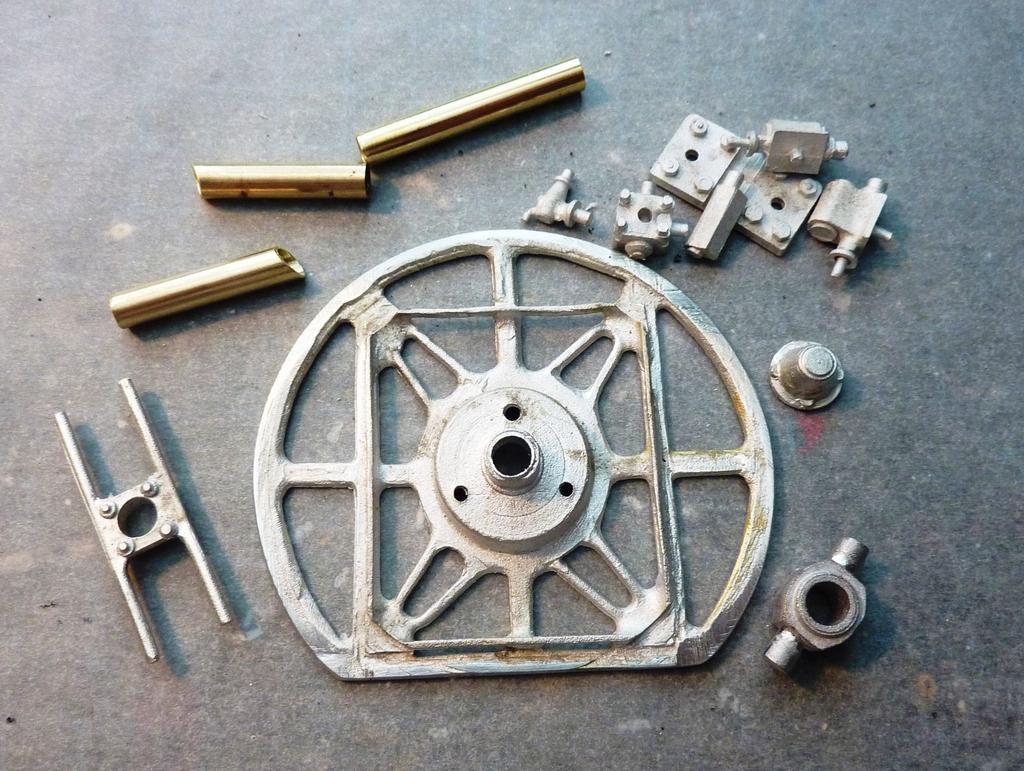
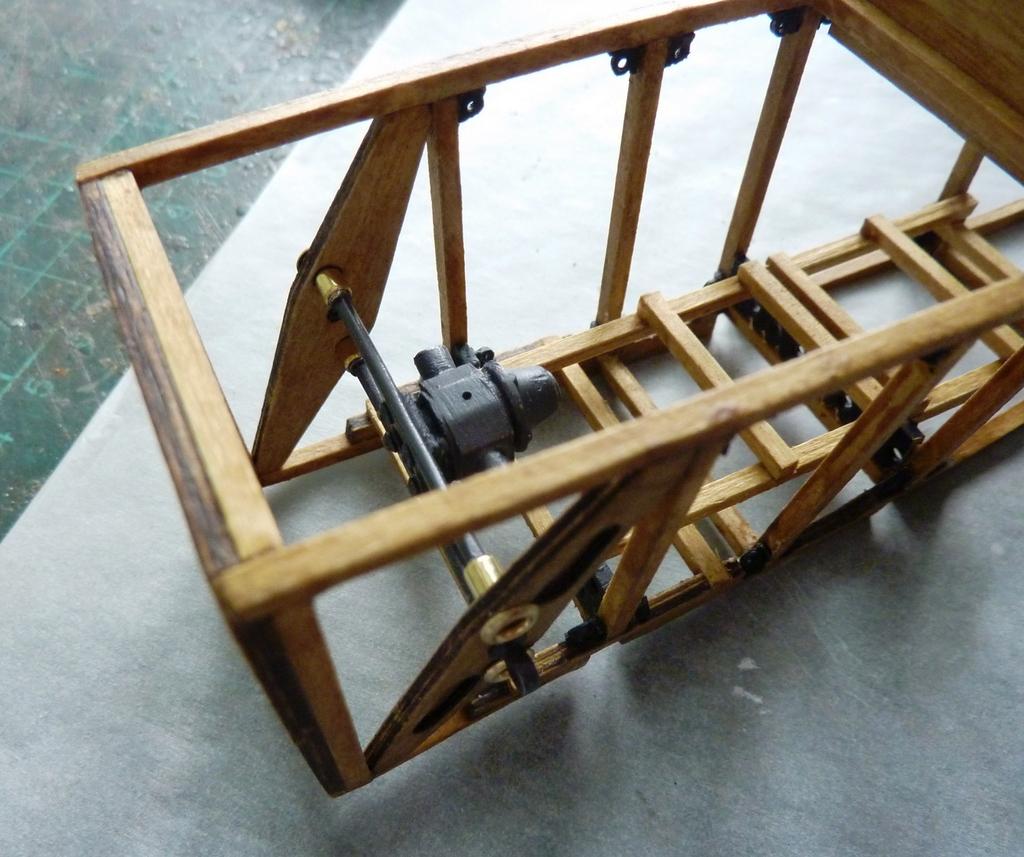
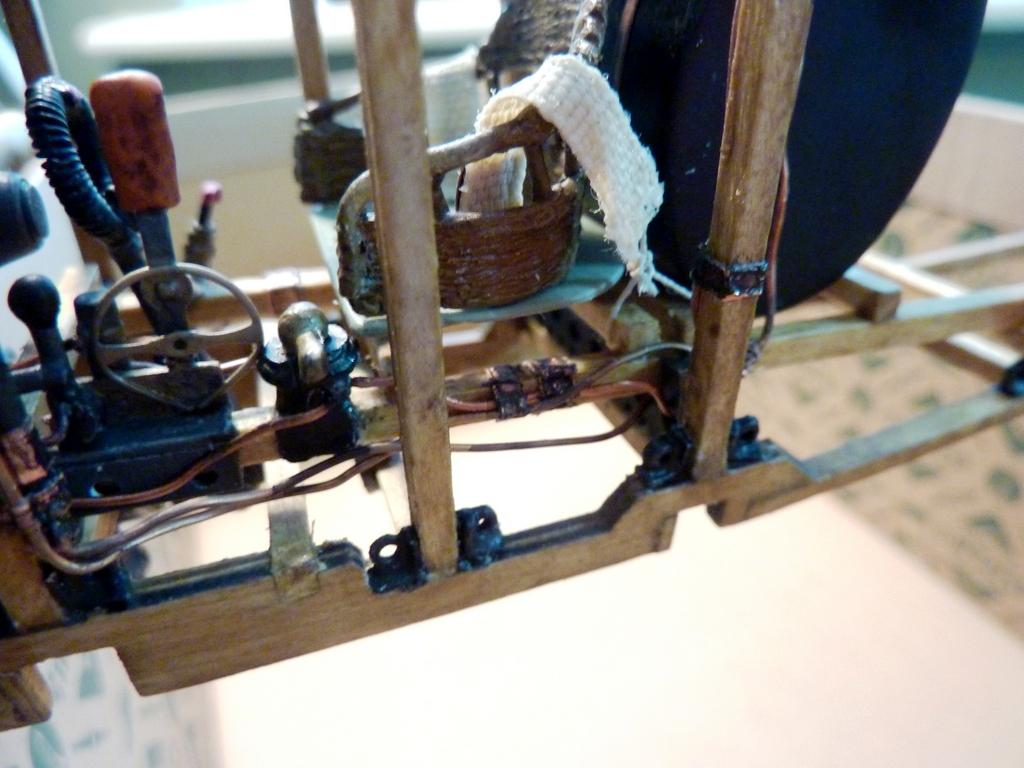
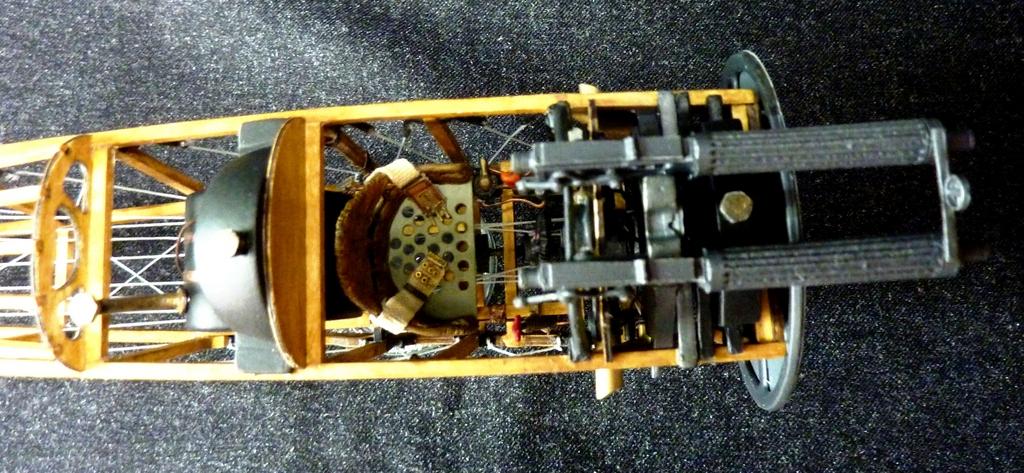
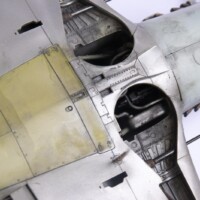
Here are the main engine sections, main and reserve fuel tanks and oil tanks in place.The instrument panel is basic. The dial surrounds are white metal and not exactly refined in appearance, and the dial faces are paper - no decals here!
I also have installed piping using copper wire in various places, as per the plan.


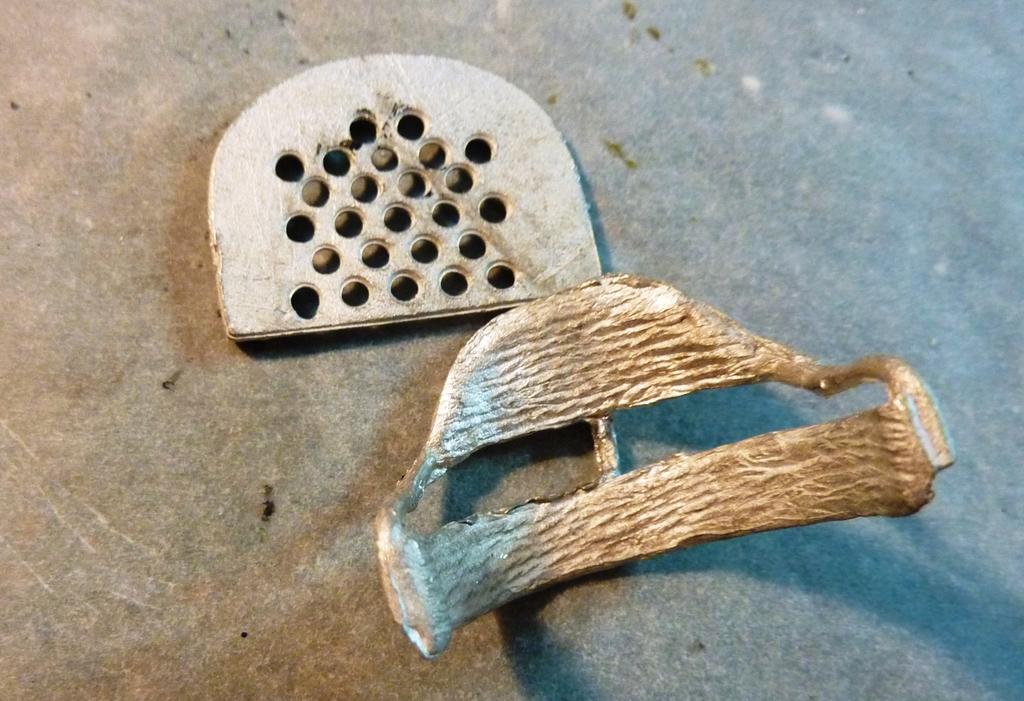
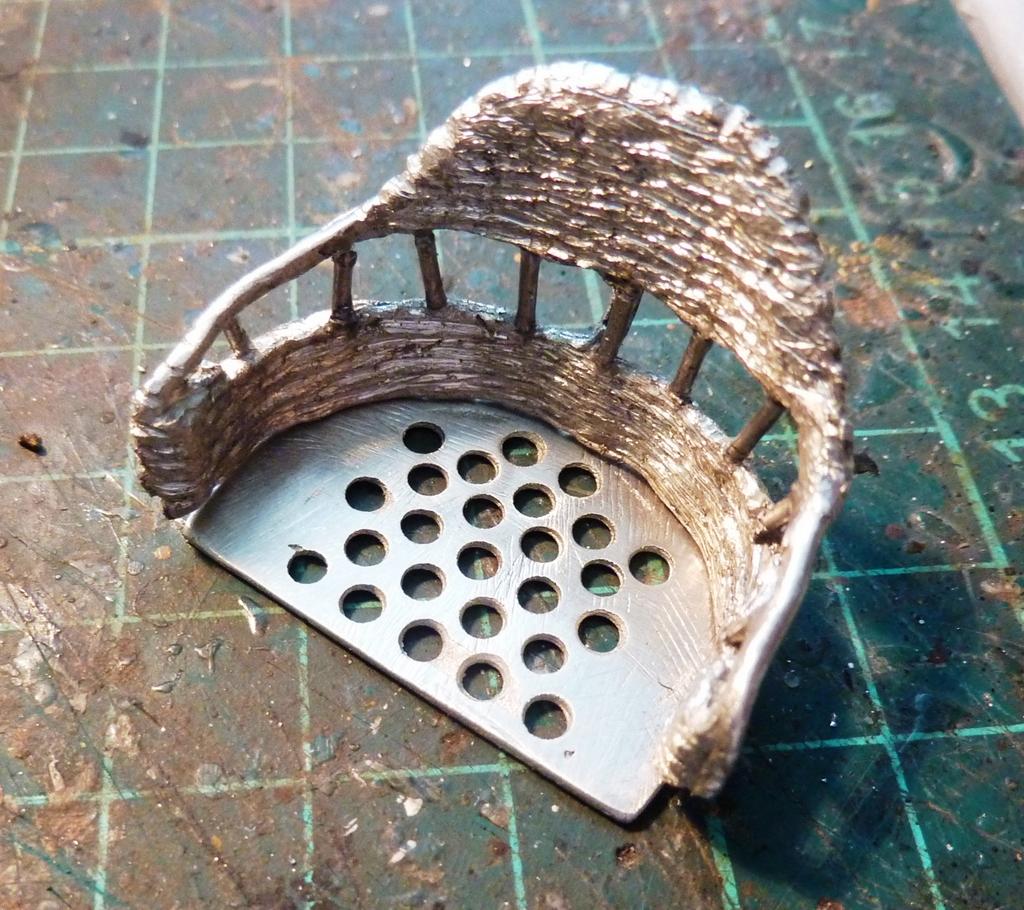
The seat, both the wicker-effect back and the seat itself, are two lumps of white metal. I had thought of scratch-building a wicker seat using copper wire, etc., but then decided that when it was in place very little of it could in fact be seen. I used needle files to dig out more detail in the seat back, and filed the flat base until it was about 3mm in thickness. With careful painting I decided it was fine.

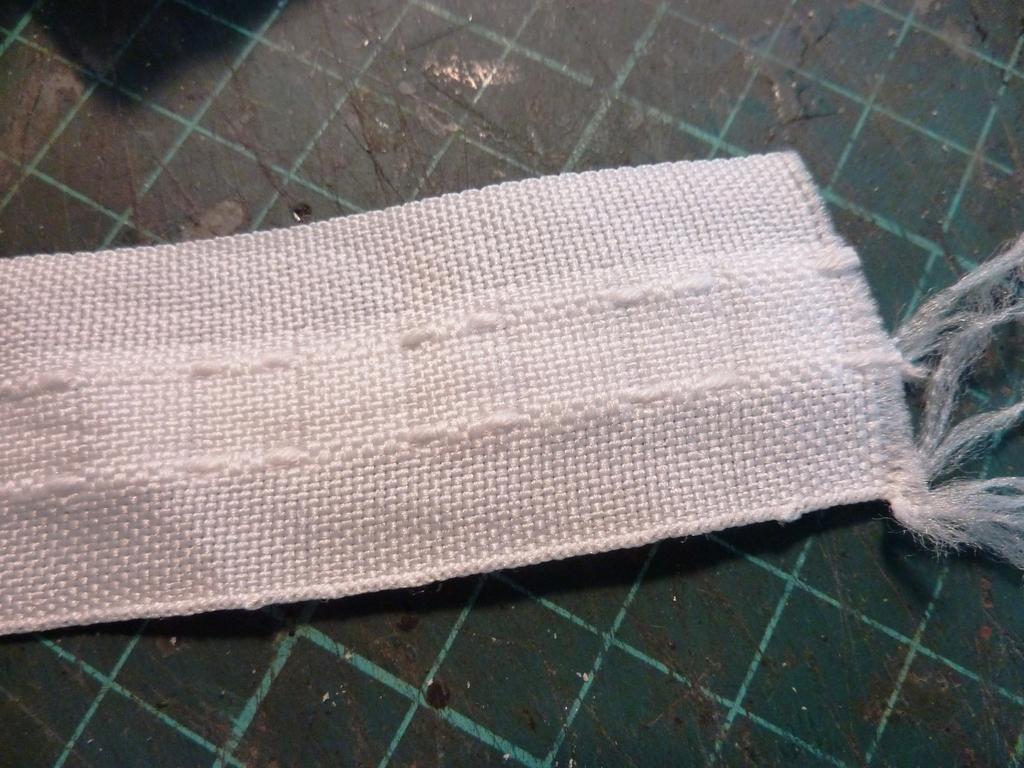
No seat belts of course, so I used a piece of curtain 'header tape', which is basically a finely woven cotton. The strips were brushed with a weak mix of white glue/water/Vallejo Brown Sand, both for colour and to help stop the edges fraying. I added a few stray bits of etch from spares, and the belts were tied off to the timbers beneath the seat, just as on the real aircraft. Fiddly work, but they look the part.

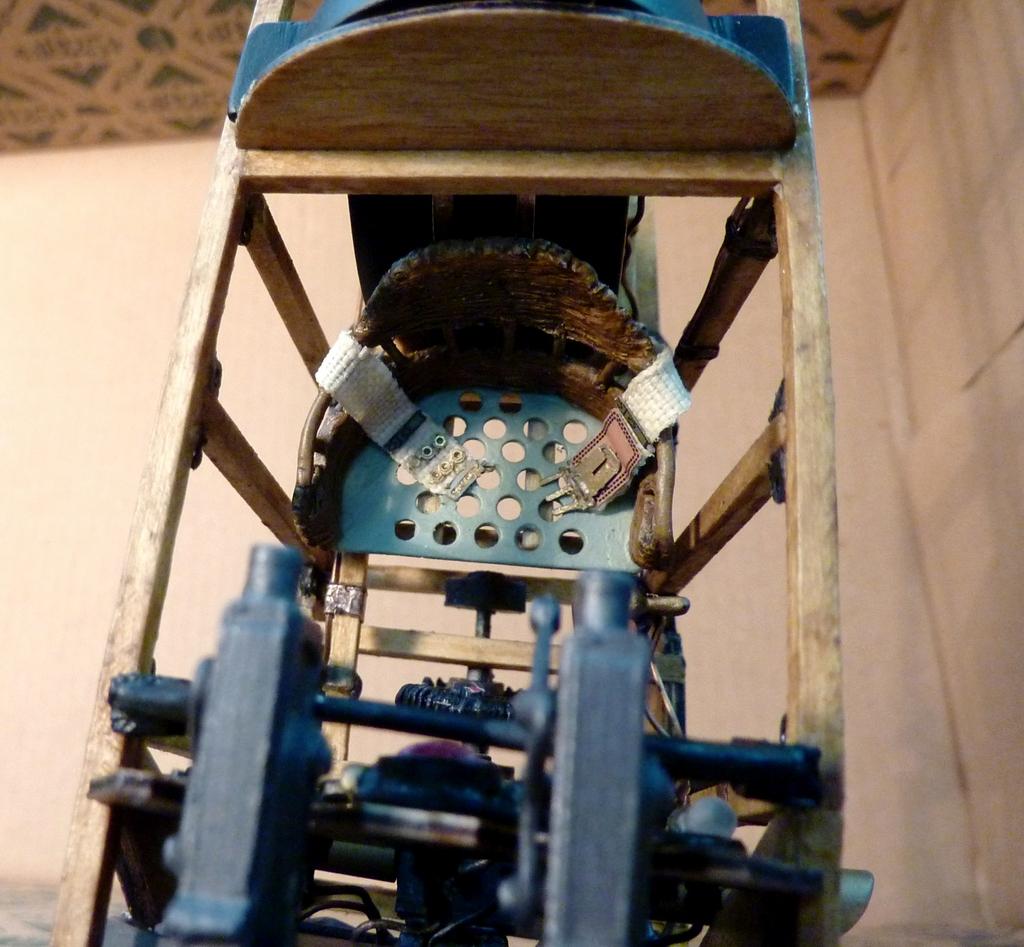
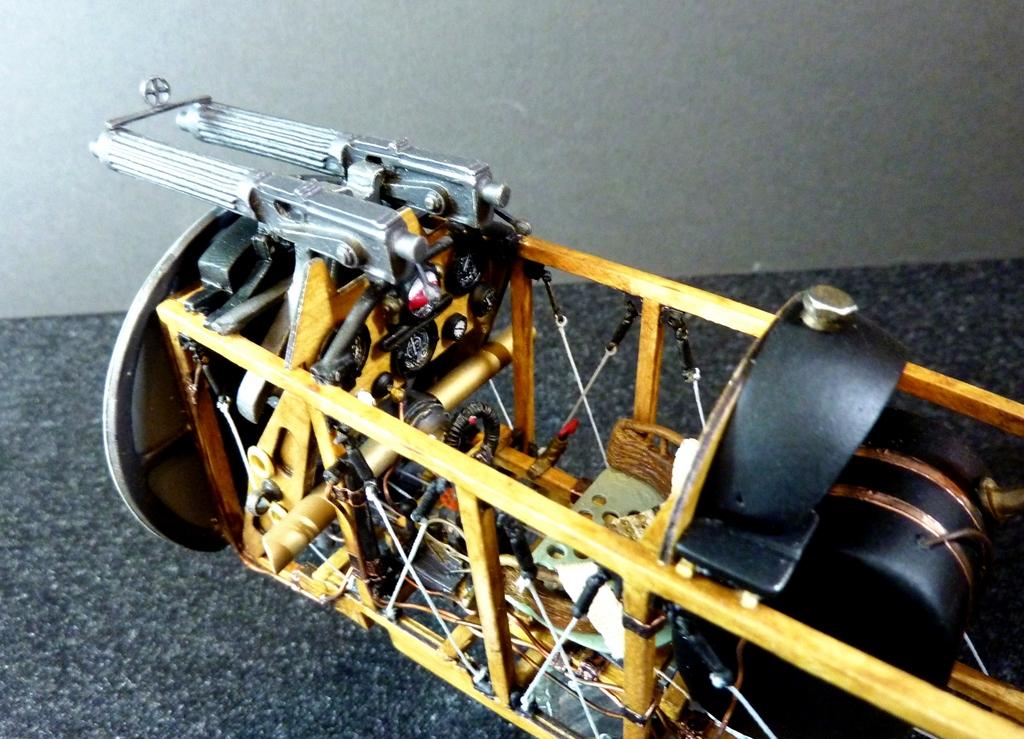
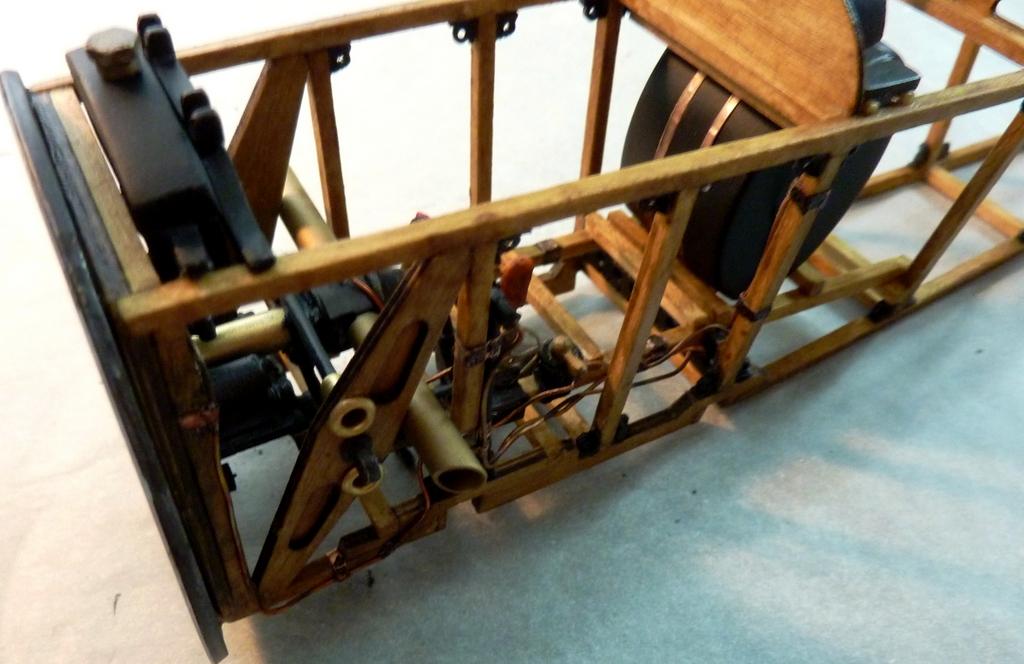
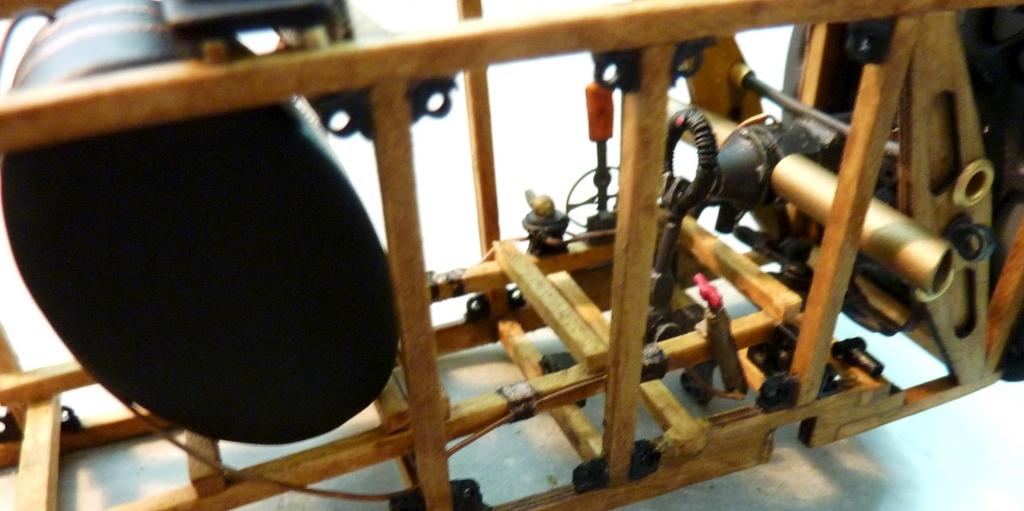
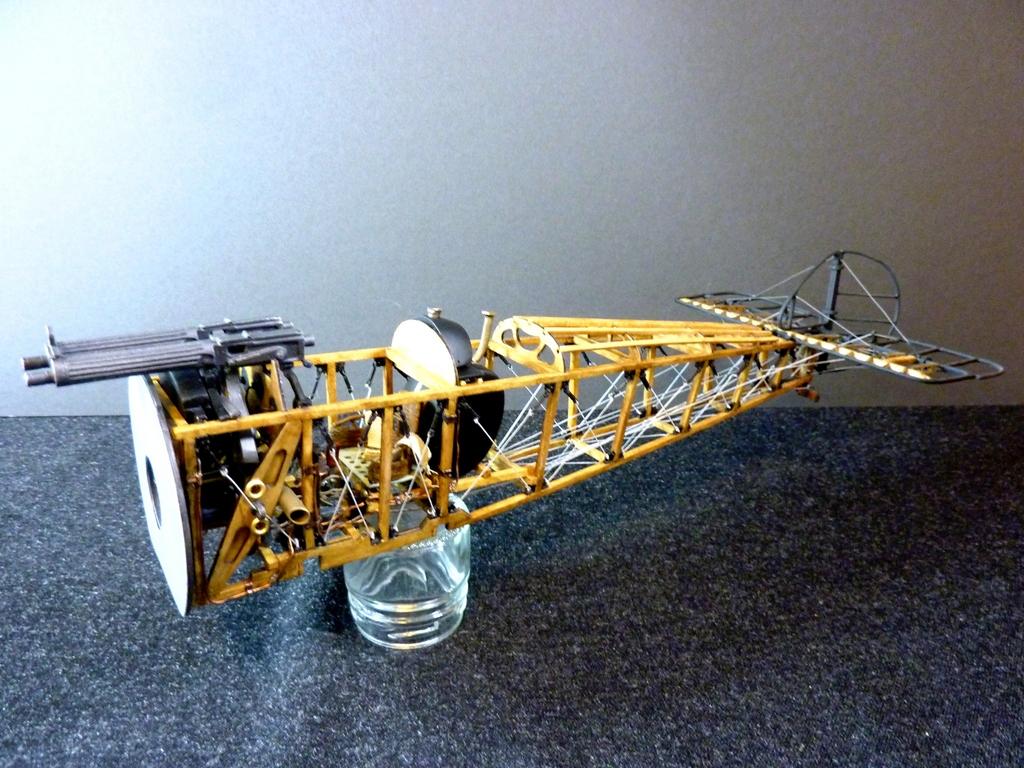
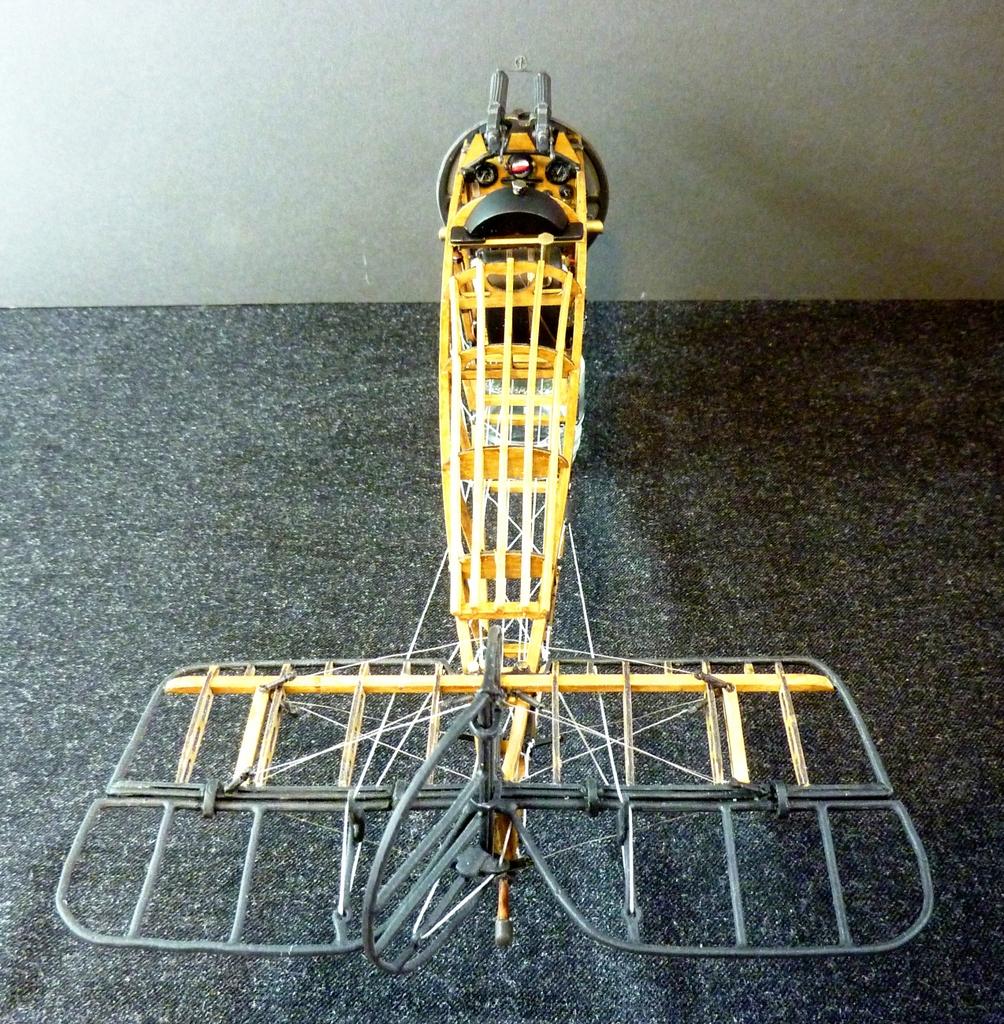
Here, the remaining back sections have been added: gun mounts, ammo feed/chutes, and the twin Vickers, the muzzle cones having been hollowed out with fine files.

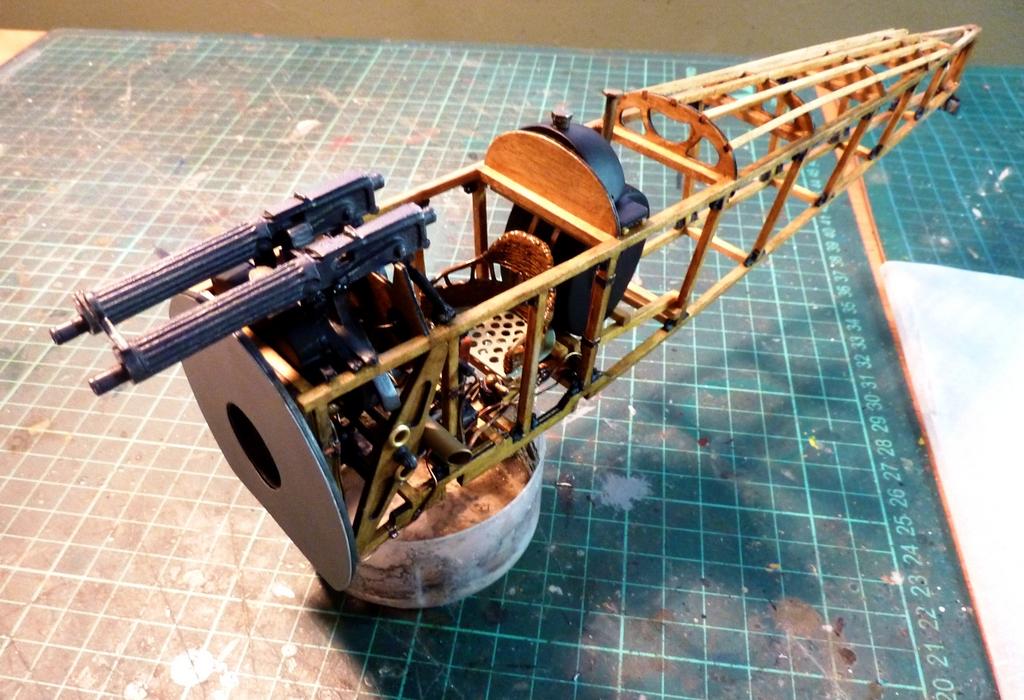
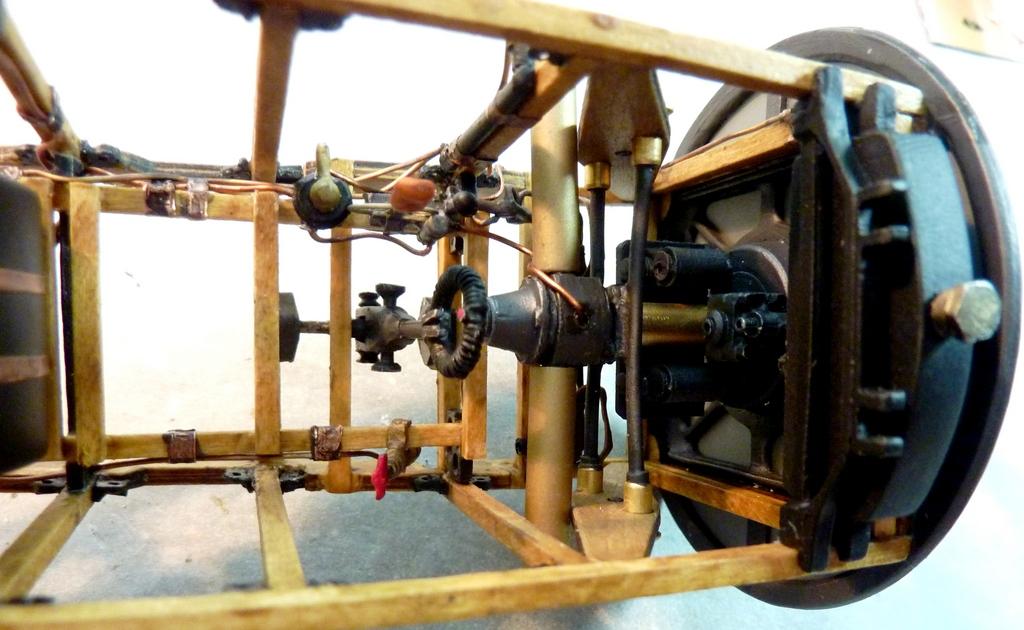
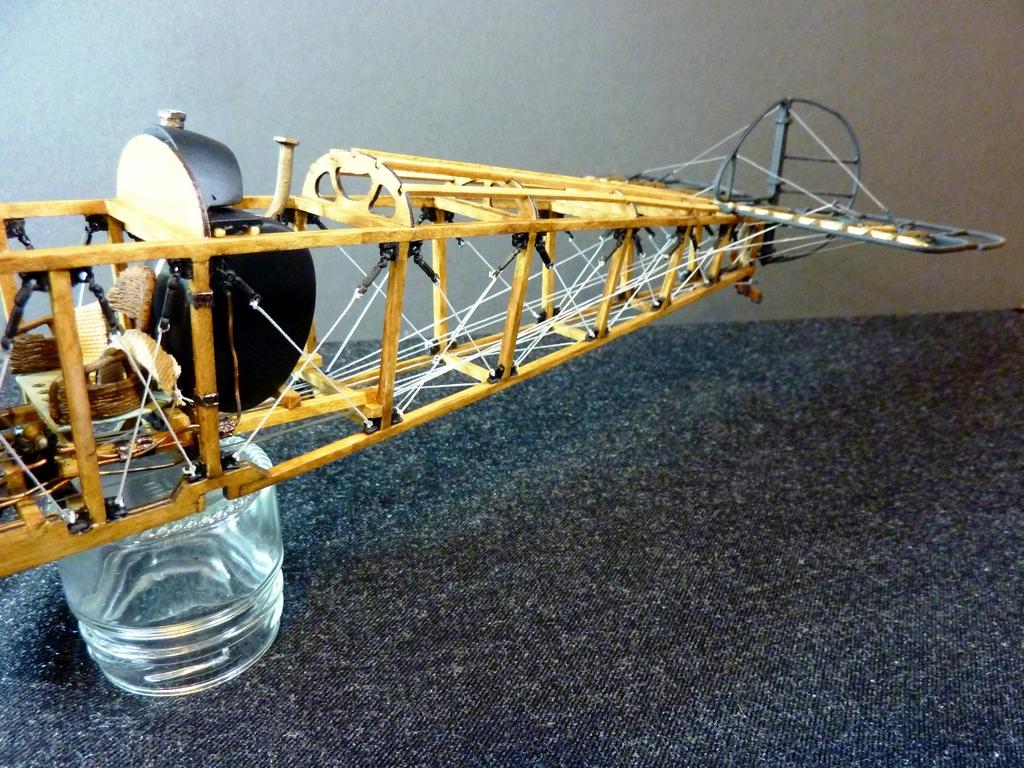
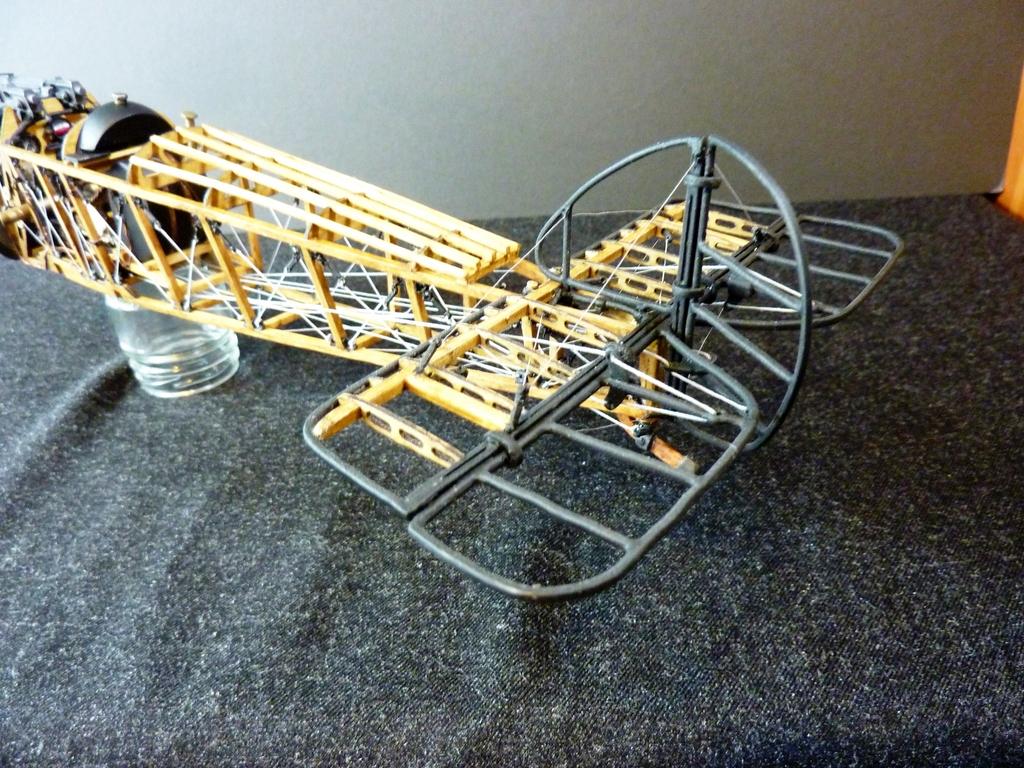
Next, the control cables from the stick and rudder bar, together with the ventral cross rigging and the cross rigging down the sides. You can see too the empannage is now in place, with all its individual support rigging.The bungee cord and tail skid are also in view.
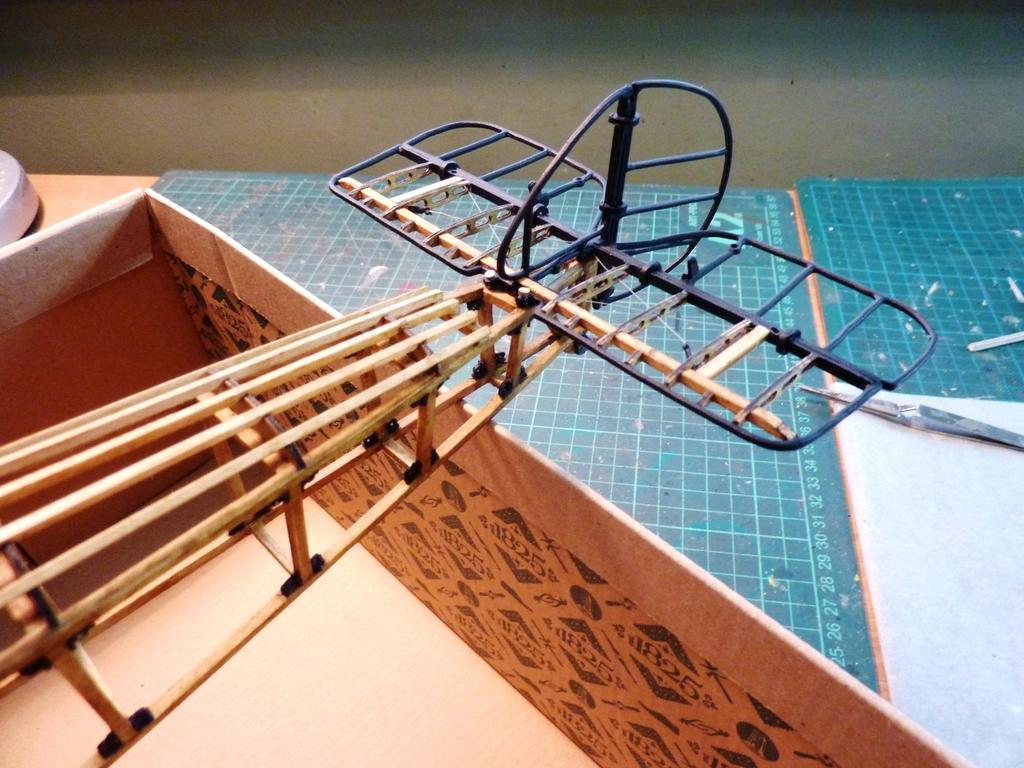

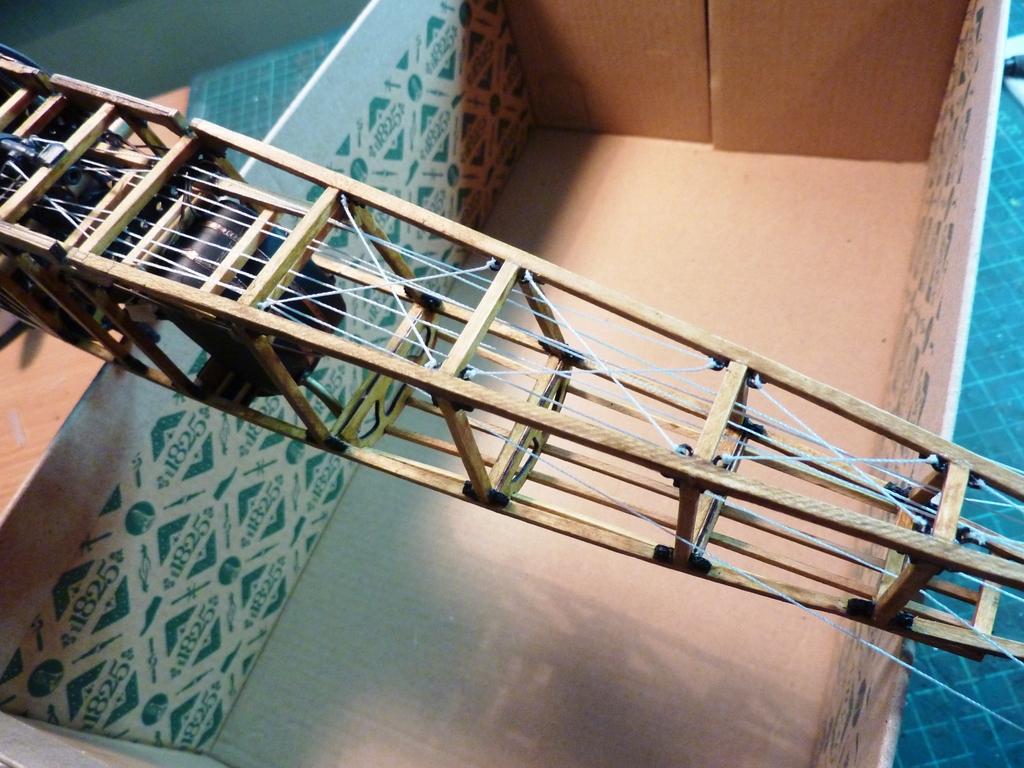

The following photos show the completed section from various angles.


Rob! I'm amazed, following this thread with interest!
Thanks. I posted the builds of the wings previously if you wanted to have a look. Similar process as here.
Amazing, beautiful detail! Your build is certainly museum-worthy. I wouldn't be surprised if you told us that the control surfaces actually work!
I remember a previous post but I forget the kit/plans maker. I shall look at your previous build to see. This is an incredibly accurate & beautiful build. I suspect that you will feel like perhaps some of the original builders of the real planes did - that it would be a real shame to hide all that wonderful work under an outer skin!
Bravo!
They can be set up to move, but not of interest to me; the control surface interfaces are actually quite fragile. If something broke or otherwise gave-way I don't think I could get back in to repair it.
First, those huge sailing ships with all that rigging and such - now this. I fear you'll soon be ready for the "rubber modeling room", my friend. Spectacular craftsmanship, sir. I'm in awe.
Are we having fun yet?
Despite the shortcomings of missing parts forcing you to use your creative modelling skills, this is turning out to be a great build. It'll look spectacular when it's finished. Like all your other fans, I'll keep on top of this thread to see how it all comes together. It's looking fantastic!
Paul
Cheers, Paul.
Wow an awesome job, both documentation and execution
Congratulations
WOW Rob, very very nice indeed.
This is shaping up to be something special! The level of detail is outstanding!
Thanks, Richard. I should also have mentioned that the instruments are wired up but with everything adjcecent a little squashed-in they're difficult to photograph.
You can see actually down the back. Very impressive! Will this thing actually fly?! It definitely looks like it could!
No, not an RC version, just the skeleton as seen here.
You attention to detail is amazing. I would never attempt this, but I'm happy for you to continue blazing the trail, much to my enjoyment! Excellent work!
Great detail Rob.
🙂 ... Greetings ... 🙂 :
I am amazed and at awe at such work Rob. Just looking at the pictures one can tell that you are truly enjoying this project.
Very nice work. I will follow this build with great joy.
Thank you for sharing this Rob.
Wow !
Except for the scale its like your building a real Sopwith Camel!
Looking excellent Rob and a great save on the fuel tank.
Cheers, Robert.
Rob this is another museum quality model in the making. Can't wait to see this one once it's finished!
This is really fantastic. Kudos for you.
Worthy of a museum, sir!
Excellent is a word that comes to mind when I see this. You're moving right along. I like it Rob... looks great my friend.